

Page 1
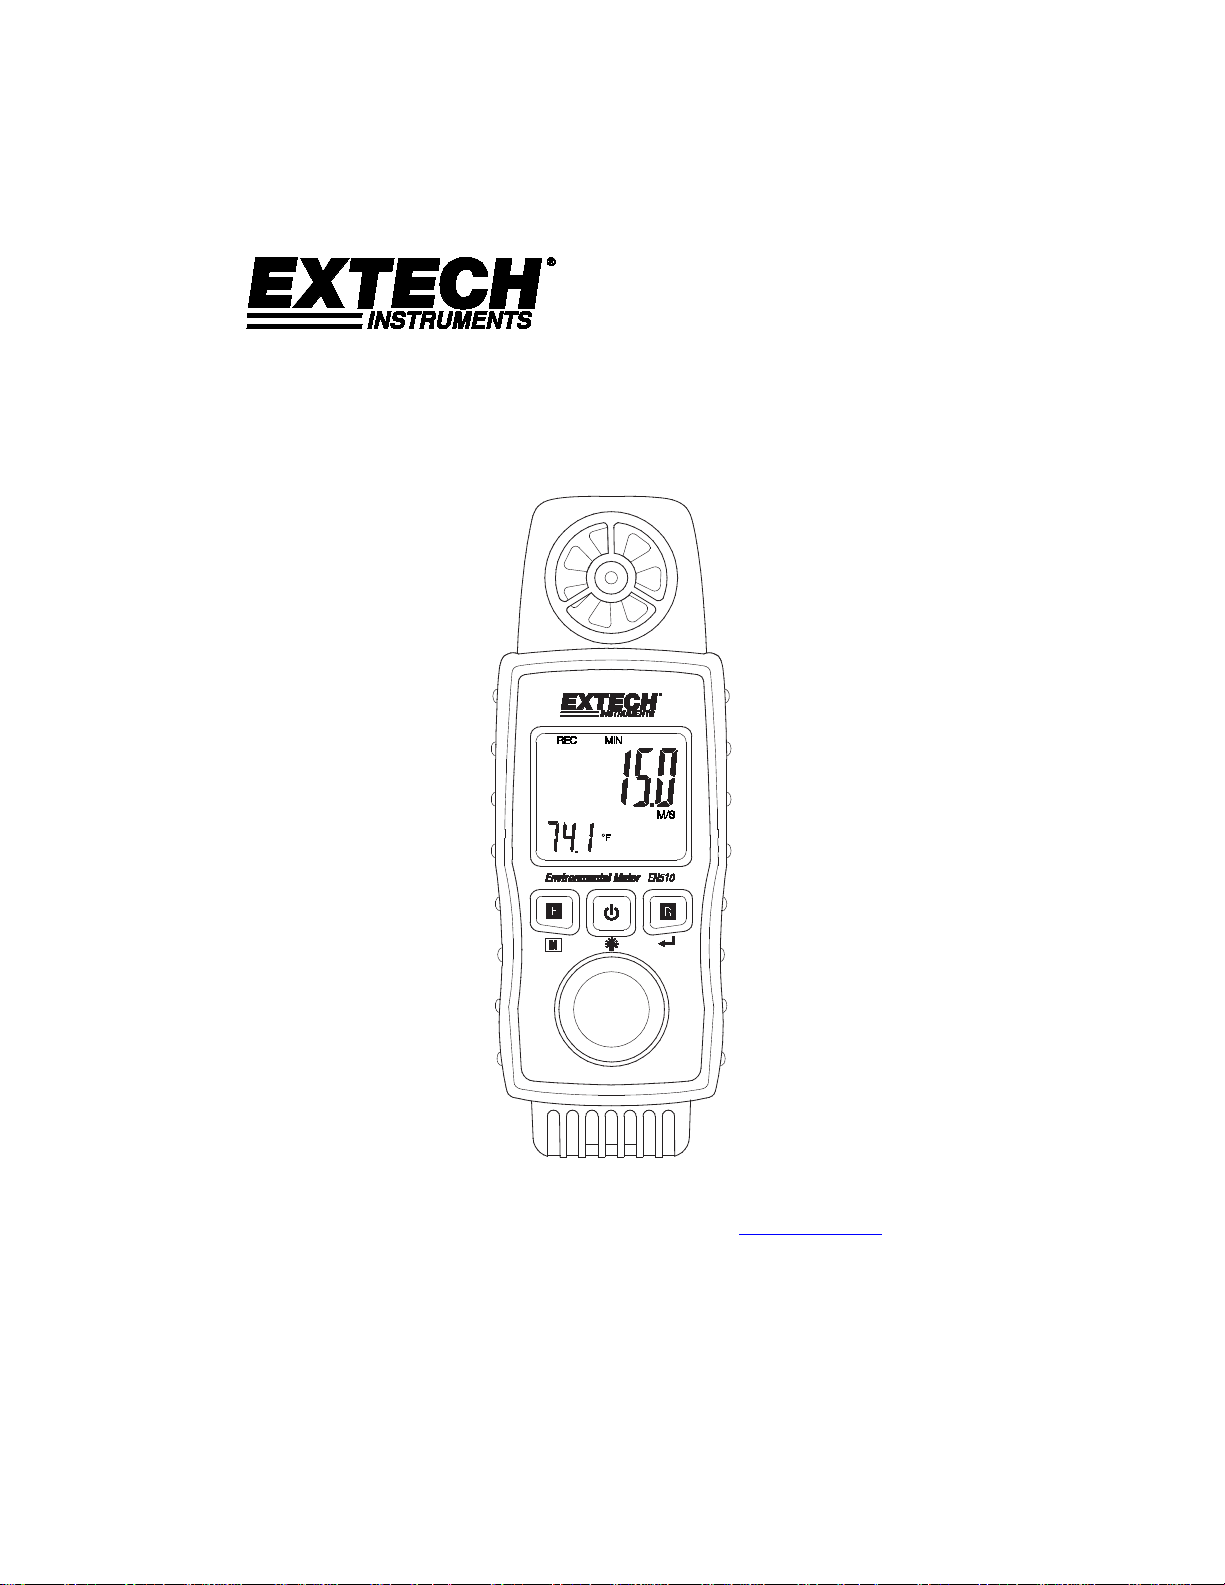
ENVIRONMENTAL METER
Model EN510
USER MANUAL
Additional User Manual Translations available at
Find Quality Products Online at: sales@GlobalTestSupply.com
www.GlobalTestSupply.com
Page 2

2
Introduction
Thank you for selecting the Extech EN510 Environmental Meter. This instrument measures Air
Velocity with Air temperature, Air Flow (volume), Light, Relative Humidity % with Air
temperature, Dew Point temperature, Web bulb temperature, Type K temperature (external
probe), Heat Index temperature, and Wind Chill temperature. The backlit LCD includes primary
and secondary displays plus a variety of intuitive status indicators. This device is shipped fully
tested and calibrated and, with proper use, will provide years of reliable service. Please visit our
website (
Product Updates, Product Registration, and Customer Support.
) to check for the latest version and translations of this User Manual,
Features
• Professional environmental meter with programming menu for user-customization
• Selectable units of measure
• Air velocity with air temperature readings
• Air Flow (Volume) measurements in CFM (ft
• Light measurements in Foot candle and LUX units
• Environmental measurements: Relative humidity % with air temperature, Dew point
temperature, Wet bulb temperature, Wind chill temperature, Heat Index temperature, and
Type K temperature (with external probe connected)
• Low-friction ball bearing mounted vane wheel for high accuracy low air velocity
measurements
3
) and CMM (m3) units
• Built-in barometric sensor for precise atmosphere and altitude monitoring
• MAX-MIN Recording
• Display Hold freezes displayed reading for convenience
• Compact, light-weight, easy-to-use, ergonomic design with lanyard
• Backlit LCD automatically reverses orientation to match selected sensor mode
Safety
• Please read the entire User Manual and Quick Start before operating this device.
• Use the meter only as specified and do not attempt to service or open the meter housing.
• Do not allow children to handle the meter.
• Keep hands away from the internal relative humidity sensor (bottom of meter) when taking
environmental measurements.
EN510-en-GB_V1.0 8/17
Find Quality Products Online at: sales@GlobalTestSupply.com
www.GlobalTestSupply.com
Page 3
3
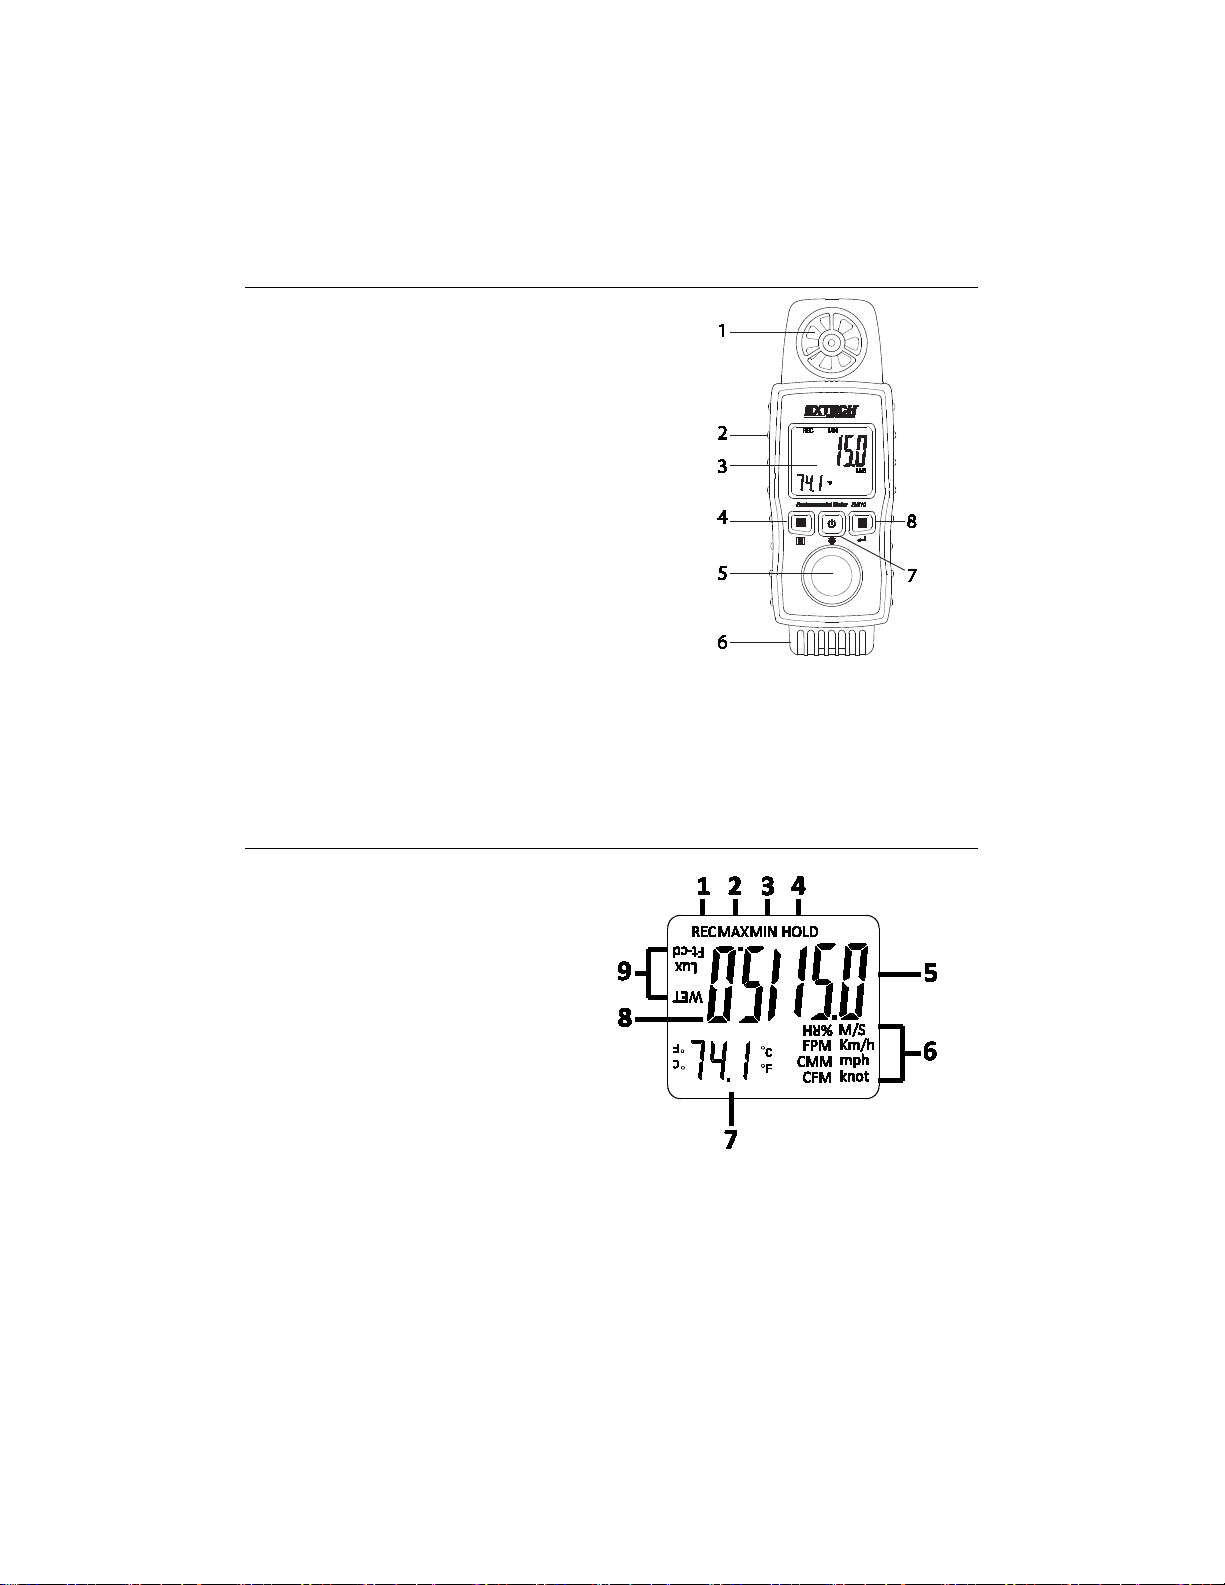
Meter Description
1. Air Velocity Vane
2. Type K Thermocouple Input
3. LCD Display
4. Display Hold / Mode Button
5. Light Sensor
6. Humidity/Temperature sensors
7. Power/Backlight button
8. MAX-MIN Record/Enter Button
Lanyard not pictured. Battery compartment and tripod mount on rear of meter
LCD Description
1. MAX/MIN Record icon
2. MAX Display
3. MIN Display
4. Display Hold
5. Primary Display
6. Units of Measure
7. Temperature Display
8. Reverse Orientation Display
9. Units of Measure (for reverse display)
EN510-en-GB_V1.0 8/17
Find Quality Products Online at: sales@GlobalTestSupply.com
www.GlobalTestSupply.com
Page 4

4
Meter Functions
Meter Power
• Three (3) 1.5V ‘AAA’ batteries power the meter. The battery compartment is located on the
rear of the meter secured by one flat head screw.
• Short press the power button to switch the meter ON. The meter will begin displaying
readings for the mode selected.
• Long press the power button to power OFF the meter.
Auto Power OFF (APO)
In order to conserve battery life, the meter will automatically switch off after approximately 10
minutes of inactivity. Note that APO does not function while the meter is in the MAX-MIN
Recording mode (short press the R button to access the MAX-MIN Recording mode).
Selecting the Operating Mode
Long press the M (Mode) button to scroll through the list of functions. When the desired mode
is displayed, release the button. See display icons with brief descriptions below:
• An Anemometer (Air Velocity plus Air temperature)
• AirFL Air flow (Volume) in CFM and CMM units
• CHiLL Wind chill temperature
• rH Relative Humidity in % and Air temperature
• dP Dew point temperature
• _Et Wet bulb temperature
• HEAt Heat index temperature
• LigHt Light intensity measurements
• tYPE Type K thermocouple temperature (must attach thermocouple to meter)
Changing the Units of Measure
1. Press and hold the R button until the word ‘Unit’ appears.
2. Now short press the power button to change the units for the selected measurement
mode.
3. Short press
(temperature, for example). Short press the power button to change the secondary
function units, if applicable, and then short press
4. See units list below:
Air Velocity units M/S, km/h, mph, knot, FPM
Air Flow units CFM (ft
Temperature units
Light units Foot-candles, LUX
to save the selection and move to the secondary function, if applicable
to save.
3
) and CMM (m3)
o
C, oF (for air, wind chill, dew point, wet bulb, heat index, and Type K)
EN510-en-GB_V1.0 8/17
Find Quality Products Online at: sales@GlobalTestSupply.com
www.GlobalTestSupply.com
Page 5

5
Reversible Backlight LCD
The LCD display automatically reverses its presentation orientation depending on measurement
mode. This is to match the display orientation with the selected sensor mode (light, air velocity,
or environmental measurements such as Wet bulb temperature).
The LCD is equipped with backlighting for easier viewing, especially in dimly lit areas. With the
meter powered ON, short press the power button to turn ON the backlight. The backlight will
power OFF after several seconds.
Display Hold
Short press the H (Hold) button to freeze and unfreeze the displayed reading. The Display Hold
mode is not operational when using the MAX-MIN Recording mode.
MAX-MIN Record Mode
In this mode, the meter records the maximum and minimum readings over time.
• Short press the R (Record) button to start recording MAX/MIN readings.
• Now use short presses of the R button to toggle MAX and MIN reading displays.
• Short press the H button to reset MAX and MIN memories.
• Press and hold the R button to exit the Recording mode.
Measurement Modes
Air Velocity with Air temperature
• With the meter ON, press and hold the M (Mode) button until ‘An’ is displayed; then release
the button.
• Hold the measurement vane in the air stream (in either direction).
• View the air velocity and air temperature readings on the LCD.
Light Measurements
• Press and hold the M button until ‘LigHt’ is displayed; then release.
• Hold the meter so that the source of light fully encompasses the light sensor dome.
• View the light reading on the LCD (light readings are displayed in reverse orientation).
Type K/Wind chill/Relative Humidity/Dew point/Wet bulb/Heat index
Measurements
• Press and hold the M button until the desired function is displayed:
• CHiLL Wind chill; rH Relative Humidity (with air temperature); dP Dew point; _Et Wet bulb;
HEAt Heat index; tYPE Type K thermocouple temperature (attach thermocouple to meter)
• Place the meter or type K probe in the measurement area and view the readings on the LCD.
EN510-en-GB_V1.0 8/17
Find Quality Products Online at: sales@GlobalTestSupply.com
www.GlobalTestSupply.com
Page 6

6
Air Flow (CFM, CMM) Volume Measurements
Width (W)
Height (H)
Area (A) = Width (W) x Height (H)
Radius (r)
• Press and hold the M button until ‘AirFl’ appears.
• Enter the duct area (in square feet or meters) by short pressing M and long pressing R until
‘m-2’ (m2) or ‘f-2’ (ft2) appears. Short press the power button to increase or H to decrease
the area; Long press the power or H button to scroll quickly. See area equations below.
• Short press to save.
• Remember to convert inches, centimeters, or other unit to square feet or square meters
before entering the area; otherwise, the air flow readings will not be correct.
• Place the vane in the air duct and read the air flow reading in CFM (ft
the LCD.
Area equation for rectangular or square ducts
Area equation for circular ducts
Area (A) = π x r
Where π = 3.14 and r2 = radius x radius
2
3
) or CMM (m3) units on
Cubic equations
CFM (ft
CMM (m
3
/min) = Air Velocity (ft/min) x Area (ft2)
3
/min) = Air Velocity (m/s) x Area (m2) x 60
EN510-en-GB_V1.0 8/17
Find Quality Products Online at: sales@GlobalTestSupply.com
www.GlobalTestSupply.com
Page 7

7
Maintenance
Battery Replacement
When the low battery icon appears on the display please replace the batteries as described
below.
1. Remove power from the meter.
2. Remove the flat head screw that secures the battery compartment at the back of the
meter.
3. Open the battery compartment and replace the three (3) 1.5V ‘AAA’ batteries observing
correct polarity. Re-assemble the meter before use.
Safety: Please dispose of batteries responsibly; never dispose of batteries in a fire, batteries may
explode or leak. If the meter is not to be used for 60 days or more, remove the batteries and store
separately.
Never dispose of used batteries or rechargeable batteries in household waste.
As consumers, users are legally required to take used batteries to appropriate
collection sites, the retail store where the batteries were purchased, or wherever
batteries are sold.
Disposal: Do not dispose of this instrument in household waste. The user is obligated
to take end-of-life devices to a designated collection point for the disposal of electrical
and electronic equipment.
Cleaning and Storage
Periodically wipe the case with a damp cloth and mild detergent; do not use abrasives or
solvents. Do not allow moisture to come in contact with any of the sensors.
EN510-en-GB_V1.0 8/17
Find Quality Products Online at: sales@GlobalTestSupply.com
www.GlobalTestSupply.com
Page 8

8
Specifications
General
Display Backlit LCD 3.0 x 3.5 cm (1.18 x 1.38”)
Air Velocity Sensor Low friction ball bearing vane
Light sensor Cosine/color-corrected photo-diode
Air Temperature sensor PT1K ohm RTD (internal sensor)
Relative Humidity sensor Capacitance sensor
Measurements Air Velocity with Air Temperature, Relative Humidity with Air
Tripod mount On rear of meter
Operating Humidity 80% RH Max
Operating Temperature 0 to 50°C (32 to 122°F)
Over Limit Display “- - - -“
Power Supply 3 x 1.5V AAA batteries
Power Consumption Approximately 5mA DC
Weight 160g (5.6oz)
Dimensions (HxWxD) 153x 58x 25mm (6.0 x 2.3 x 1.0 inch)
Air Velocity plus Air Temperature
Units Range Resolution Accuracy
ft/min (FPM) 80 to 3937 1
m/s 0.4 to 20.0 0.1
km/h 1.4 to 72.0 0.1
MPH 0.9 to 44.7 0.1
knots 0.8 to 38.8 0.1
°C 0 to 50 0.1° ±1.2°C
°F 32 to 122 0.1° ±2.5°F
Ft/min and FPM: feet per minute MPH: miles per hour
m/s: meters per second knots: nautical miles per hour
km/h: kilometers per hour
Temperature, Light, Air Flow, Dew Point, Wet Bulb, Wind Chill, Heat
Index, and Type K Temperature (requires external thermocouple)
±3% F.S.
EN510-en-GB_V1.0 8/17
Find Quality Products Online at: sales@GlobalTestSupply.com
www.GlobalTestSupply.com
Page 9

9
Relative Humidity plus Air Temperature
%RH 10 to 95 0.1 ±(4%RH) @ < 70%RH
±(4%rdg +1.2%RH) @ > 70%RH
°C 0 to 50 0.1 ±1.2°C
°F 32 to 122 0.1 ±2.5°F
Light (automatic ranging)
Lux
Ft-cd
Air Flow
CMM (m3) 0.024 to 36000 0.001 / 0.01 / 0.1 / 1
CFM (ft3) 0.847 to 1271300
Dew Point Temperature
Unit Range Resolution Accuracy
°C -25.3 to 49.0 0.1
°F -13.5 to 120.0 0.1
Wet Bulb Temperature
°C -5.4 to 49.0 0.1
°F 22.2 to 120 0.1
Heat Index
°C 0 to 100.0 0.1 ±2.0°C
°F 32 to 212 0.1 ±3.6°F
Exposure to direct sunlight can increase heat index readings by 8oC (14oF)
Type K Thermometer
°C
°F
Accuracy is stated for meter only. Additional error is introduced by the external Type K probe.
0 to 2,200 1
1,800 to 20,000 10
0 to 204.0 0.1
170 to 1,860 1
0.001 / 0.01 / 0.1 / 1 / 10(x10) / 100(x100)
-50.0 to 1300.0
-50.1 to -100.0
-58.0 to 2372.0
-58.1 to -148.0
0.1
0.1
±(5%rdg + 8dgts)
Calculated from temperature and
humidity readings
Calculated from temperature and
humidity readings
±(0.4% + 0.5°C)
±(0.4% + 1°C)
±(0.4% + 1°F)
±(0.4% + 1.8°F)
EN510-en-GB_V1.0 8/17
Find Quality Products Online at: sales@GlobalTestSupply.com
www.GlobalTestSupply.com
Page 10

10
Wind Chill
°C -9.4 to 44.2 0.1° ±2.0 °C
°F 15.0 to 112.0 0.1° ±3.6 °F
Wind chill value is displayed only when the temperature is < 15oC (59oF) and air velocity is > 1.4 m/s
Unit of Measure Conversion Table
m/s ft/min knots km/h MPH
1 m/s 1 196.87 1.944 3.6 2.24
1 ft/min 0.00508 1 0.00987 0.01829 0.01138
1 knot 0.5144 101.27 1 1.8519 1.1523
1 km/h 0.2778 54.69 0.54 1 0.6222
1 MPH 0.4464 87.89 0.8679 1.6071 1
All rights reserved including the right of reproduction in whole or in part in any form
Copyright © 2017 FLIR Systems, Inc.
ISO-9001 Certified
EN510-en-GB_V1.0 8/17
Find Quality Products Online at: sales@GlobalTestSupply.com
www.GlobalTestSupply.com
 Loading...