

Page 1
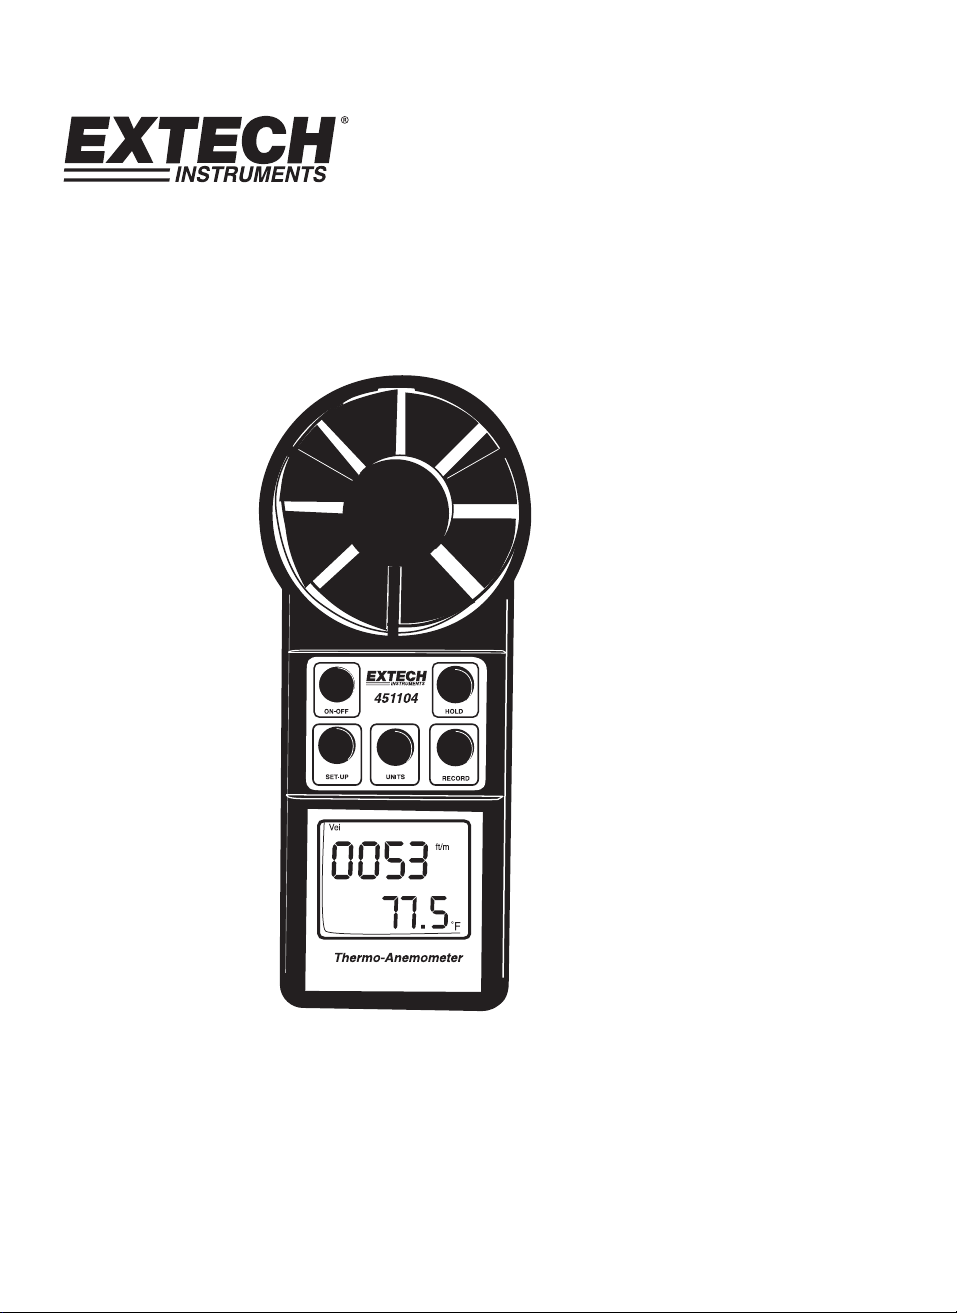
User's Guide
Digital Vane Thermo-Anemometer
Model 451104
Page 2
Warranty
EXTECH INSTRUMENTS CORPORATION warrants this instrument to be free of defects
in parts and workmanship for one year from date of shipment (a six month limited
warranty applies on sensors and cables). If it should become necessary to return the
instrument for service during or beyond the warranty period, contact the Customer
Service Department at (781) 890-7440 ext. 210 for authorization or visit our website at
www.extech.com for contact information. A Return Authorization (RA) number must be
issued before any product is returned to Extech. The sender is responsible for shipping
charges, freight, insurance and proper packaging to prevent damage in transit. This
warranty does not apply to defects resulting from action of the user such as misuse,
improper wiring, operation outside of specification, improper maintenance or repair, or
unauthorized modification. Extech specifically disclaims any implied warranties or
merchantability or fitness for a specific purpose and will not be liable for any direct,
indirect, incidental or consequential damages. Extech's total liability is limited to repair or
replacement of the product. The warranty set forth above is inclusive and no other
warranty, whether written or oral, is expressed or implied.
Introduction
Congratulations on your purchase of the Extech 451104 Vane Thermo-Anemometer.
This device measures air velocity and temperature, displaying both simultaneously. The
measurement vane is built into the meter for ease of use.
This meter stores the highest (MAX), lowest (MIN), and average (AVG) readings for easy
recall. The built-in RS-232 PC Interface jack can be used to capture readings on a PC as
they are taken using the optional Model 407752 interface kit. This meter is shipped fully
tested and calibrated and, with proper use, will provide years of reliable service
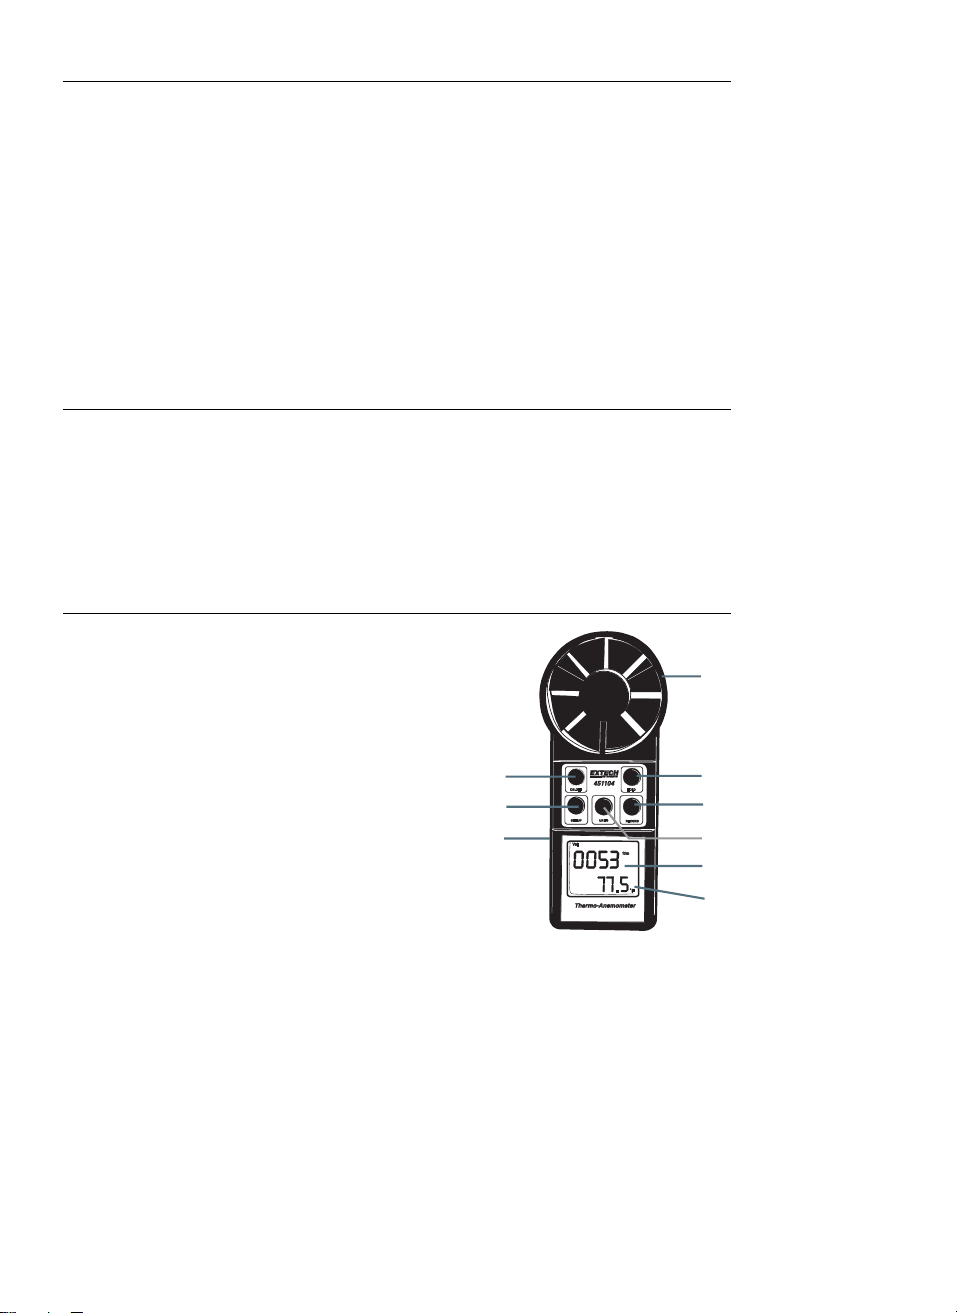
Meter Description
1. Air velocity sensor with built-in Temperature
sensor
2. Data Hold button
1
3. Min/Max/Avg Record button
4. Unit of measure button
5. ON-OFF power button
6. Set-up key (used for programming as described
in this manual)
7. LCD air velocity display
8. LCD temperature display
9. RS-232 PC port
Note that the battery compartment is located on the back of the meter
5
6
9
2
3
4
7
8
Model 451104 V2.0V 10/06 2
Page 3

Operation
Meter Power
1. This meter is powered by one 9V battery. To replace or install the battery, refer to the
section ‘Battery Replacement’.
2. Press the ON-OFF button to turn the meter on. If the meter does not switch on, check
the battery.
3. When the meter switches on it runs through a 2-second self-test. When the self-test is
finished, the VEL display icon will appear in the upper left hand corner of the LCD. VEL
is the Air Velocity indicator. When it appears, the meter is ready for use.
Air Velocity Measurements
1. Turn the meter on and hold the measurement vane in the path of the air stream.
2. Read the Air Velocity and Temperature measurements on the LCD display. Air Velocity
readings are displayed in the center of the LCD while the Temperature reading is
shown on the bottom right of the LCD.
Data Hold
In cases where it is difficult to see the LCD display while taking a measurement, the meter
can freeze the measurement on the LCD for later viewing.
1. At any time during a measurement, press the HOLD button to freeze the reading. The
‘Hold’ display icon will switch on to alert the user that the meter is in the HOLD mode.
2. To exit this mode, press the HOLD button again (the ‘Hold’ display icon will switch off).
Selecting the units of measure
o
The meter can be used in either the feet per minute /
o
C mode. In the ft/m mode, the available air velocity units are ft/min (feet per minute),
/
mil/h (miles per hour) and knots (nautical miles per hour). Use the UNIT button to change
the unit of measure. In the m/s mode, the available air velocity units are m/s (meters per
second), km/h (kilometers per hour) and knots (nautical miles per hour). To change from
one mode to the other, follow these steps:
1. With the meter off, press and hold the SETUP button.
2. Press and release the ON button and at the second beep release the SETUP button.
3. The LCD will indicate Air Velocity units and temperature units.
4. Press the HOLD button to set the units to meters per second (m/s) and
SETUP button to set the units to feet per minute (ft/m) and
5. Press the RECORD button and an ‘S’ will appear.
6. Press the HOLD button to save the setting.
7. ‘1200’ or ‘2400’ will appear on the LCD. This is the RS-232 PC Interface baud rate.
8. Press the HOLD button to set the baud rate to 1200 or the SETUP button to select a
2400 baud rate.
9. Press the RECORD button and an ‘S’ will appear.
10. Press the HOLD button to save the setting and return to the normal operating mode.
F mode or the meters per second
o
o
F).
C. Press the
Model 451104 V2.0V 10/06 3
Page 4

Minimum, Maximum, and Average Record / Recall
This meter can be placed in the RECORD mode and keep track of the highest (MAX),
lowest (MIN), and average (AVG) readings. The MIN, MAX, and AVG readings can be
viewed at any time at the press of a button. To use these features, follow these steps:
1. Press the RECORD mode until a beep is heard
2. The REC display indicator will appear. The meter is now keeping track of the highest,
lowest, and average readings
3. Now use the RECORD button to move between the four displays listed below:
• MAX mode: The MAX display mode shows the highest reading encountered since
the meter was placed in the RECORD mode. In this mode the MAX and REC
indicators will be on the LCD.
• MIN mode: The MIN display mode shows the lowest reading encountered since
the meter was placed in the RECORD mode. In this mode the MIN and REC
indicators will be on the LCD.
• AVG MODE: Th e AVG display mode shows a running average of the readings. In
this mode the AVG and REC indicators will be on the LCD.
• REC only mode: In this mode the meter is still tracking the MIN, MAX, and AVG
readings but only displaying the current readings. In this mode, only the REC
display icon will be on.
4. To exit the RECORD mode press and hold the RECORD button until two beeps are
heard. When the meter has successfully exited the RECORD mode, the MIN, MAX,
AVG, and REC indicators will be off.
5. Note that the RECORD mode time limit is two (2) hours.
Automatic Power OFF
The meter has an Auto-Power OFF feature that preserves battery life by automatically
turning the meter off after 20 minutes. Warning tones are sounded immediately before the
meter switches off. When the meter is in the RECORD mode (explained in the MIN-MAXAVG RECORD/RECALL section) the Auto Power OFF feature is disabled. To disable the
Auto-Power OFF feature without having to access the RECORD/RECALL mode, follow the
procedure below:
1. Turn the meter OFF
2. Press and hold
3. Release the ON key while continuing to press the HOLD key
4. A letter ‘n’ will appear on the LCD
5. Release the HOLD key
6. The meter’s Auto-Power OFF feature has now been disabled. Keep in mind that the
next time the meter is used, the Auto-Power OFF feature will be enabled.
the ON-OFF and HOLD keys simultaneously
Model 451104 V2.0V 10/06 4
Page 5

PC Interface
The meter is equipped with an RS-232c PC interface jack (3.5mm phono) for connection to
a PC. The cable to connect the meter to the PC is included in the optional 407752 data
acquisition kit. The kit includes Windows
in a text file and display real-time measurements in a series of selectable formats. For
more information or specific operating instructions, refer to the User Guide included with
the 407752 kit or contact Extech Instruments.
TM
software that allows the user to store readings
Battery Replacement
The meter is powered by one 9V Battery. If the
display does not switch on when the ON-OFF
button is pressed, replace the battery using the
procedure below.
1. Remove the Phillips head screw at the rear of
the meter (refer to diagram)
2. Open the battery compartment by removing
the compartment cover
3. Unsnap the old battery from the red and black
wire connectors
4. Snap in the new battery and carefully dress
the red and black wires so that they do not
crimp or rest in the hinges of the compartment
cover
5. Close the compartment cover
6. Tighten the Phillips head screw to secure the
compartment
Model 451104 V2.0V 10/06 5
Page 6

Specifications
General Specifications
Display Dual LCD display: 0 to 9999 digits for Air Velocity and 0 to
1999 digits for Temperature readings
Operating Temperature 14 °F to 122 °F (-10 °C to 50 °C)
Operating Humidity 80% Relative Humidity (maximum)
Meter Power 9V battery
Battery life 100 hours of continuous use
Auto Power OFF Meter turns off after 20 minutes automatically
Weight 1.5 lb (680g)
Meter Dimensions 7.20 x 2.99 x 1.77” (183 x 76 x 45 mm)
Sensor Vane Diameter 2.9” (70mm)
Accessories 9V battery and hard carry case
Range Specifications
Range Resolution Accuracy (% Full Scale)
80 - 5900 ft/min 1
0.40 – 30.00 m/sec 0.01
0.9 – 68.0 mph
0.8 – 58.0 knots
0.1
± 3%
1.4 – 108.0 km/hr
-10.0 to 50.0 oC ± 1Co
14.0 to 122.0 oF
0.1
o
± 2F
o
Model 451104 V2.0V 10/06 6
Page 7

Calibration and Repair Services
Extech offers repair and calibration services for the products we sell. Extech also provides
NIST certification for most products. Call the Customer Service Department for information
on calibration services available for this product. Extech recommends that annual
calibrations be performed to verify meter performance and accuracy.
All rights reserved including the right of reproduction in whole or in part in any form.
Technical support: Extension 200; E-mail: support@extech.com
Repair & Returns: Extension 210; E-mail: repair@extech.com
Product specifications subject to change without notice
For the latest version of this User’s Guide, Software updates, and other
up-to-the-minute product information, visit our website: www.extech.com
Copyright © 2003 Extech Instruments Corporation
Support line (781) 890-7440
Model 451104 V2.0V 10/06 7
 Loading...