

Page 1
99 Washington Street
Melrose, MA 02176
Phone 781-665-1400
Toll Free 1-800-517-8431
User’s Guide
Models 475040 and 475044
Visit us at www.TestEquipmentDepot.com
Back to the Extech 475040 Product Page
13
Digital Force Gauge
10
15
1
FORCE GAUGE
3
2
8
475040
4
5
6
7
11
12
14
9
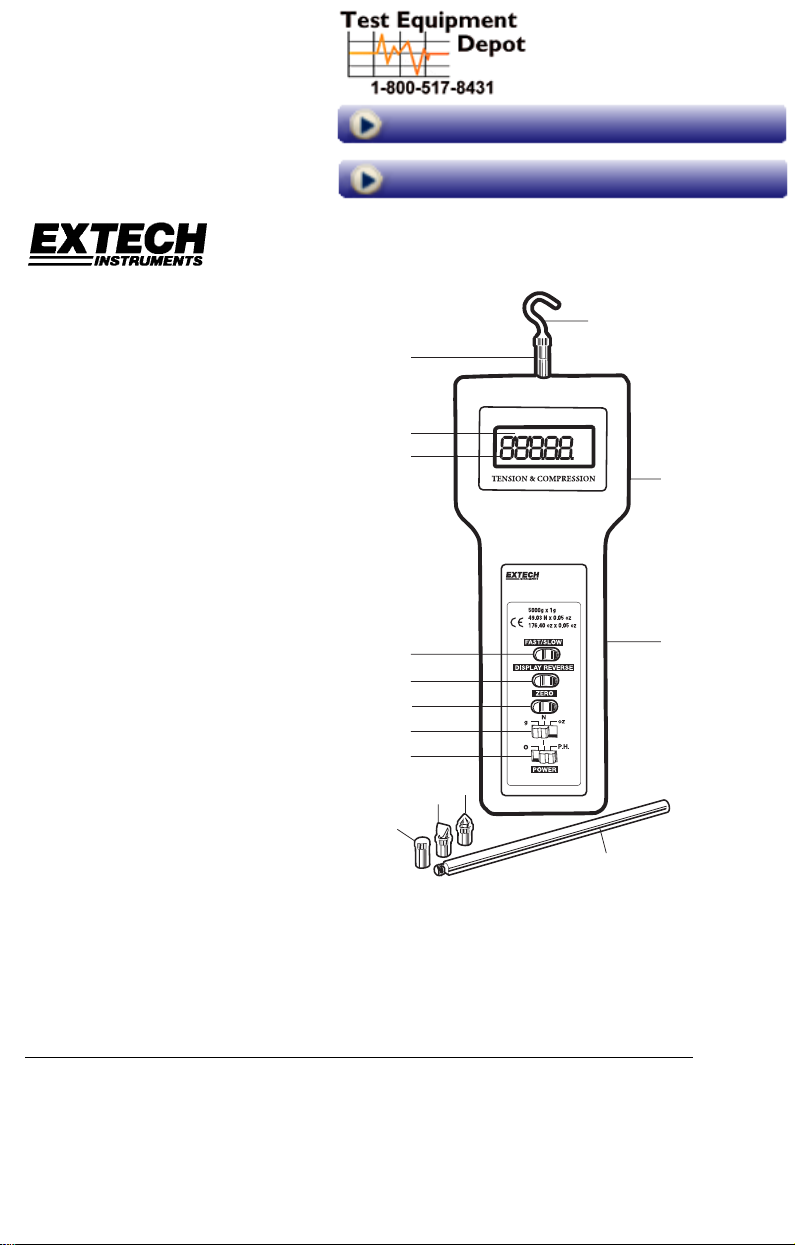
1. Universal sensing head
2. LCD Display
3. Fast response indicator
4. FAST / SLOW response selection
5. LCD reverse display button
6. Zero/Tare button
7. Units select switch
8. Mounting Holes (on rear)
9. Battery compartment cover (on rear)
10. Flat Head adapter
11. Cone adapter
12. Chisel adapter
13. Hook adapter
14. 5” (120mm) extension rod
15. OFF/ON/PEAK HOLD button
Introduction
Congratulations on your purchase of Extech’s Digital Force Gauge. This professional meter,
with proper care, will provide years of safe reliable service. Measure Tension or Compression
(Push or Pull) to 5kg (475040) or 20kg (475044), reversible display indicates readings in
grams, ounces, or newtons. This meter offers Peak Hold and a Zero function.
Test Equipment Depot - 800.517.8431 - 99 Washington Street Melrose, MA 02176
FAX 781.665.0780 - TestEquipmentDepot.com
Page 2
Specifications
A
475044 475040
Range 44 lbs, 20kg,196 Newtons 176oz, 5000g, 49 Newtons
Accuracy (23oC) ±(0.5%rdg + 2 digits) ± (0.4%rdg + 1 digit)
Resolution 0.01lbs, 0.01kg, 0.05 Newtons 0.05oz, 1g, 0.01 Newtons
Overload Capacity 30kg 10kg
Circuit Custom LSI microprocessor circuit
Zero adjust Button for Peak Hold and normal display zero
Display 5 digits, 0.4” (10 mm) LCD display
Update Rate Fast mode 0.2 secs; Slow mode 0.6 secs.
Overrange Indicator Displays “--------“
Zero Control Maximum capacity
Full Scale Deflection 2.00mm
Transducer type Load cell
Peak Hold Freezes Max reading on display
Operating Temperature 0 °C to 50 °C (32 °F to 122 °F).
Operating RH Max. 80% RH.
Power Supply 6x 1.5V AA (UM-3) size battery or DC 9V adapter (not included)
Weight 1.2 lbs/551g
Size 8.9 x 3.3 x 1.5” (227 x 83 x 39 mm)
Mounting Holes Located on rear of gauge for optional test stand
Accessories Tension adapter (hook), compression adapters (flat, cone, and
chisel), 5" extension rod, 6 x 1.5V AA batteries, case
Operation
Preparation for Measurement
1. The 475044 or 474040 automatically determines TENSION or COMPRESSION
(Push or Pull) force during use. Compression displays as a negative value and
Tension displays as a positive value.
2. Select units of measure (grams/kilograms, ounces/pounds, or newtons) via the
units select button.
3. Attach the desired adapter (tension – hook; compression.- flat, cone or chisel head)
to the Universal Sensing Head.
4. Select FAST or SLOW response. The FAST setting permits the capture of fast
measurement changes and the SLOW setting provides an averaged reading
display.
5. Zero the display before each measurement via the Zero button.
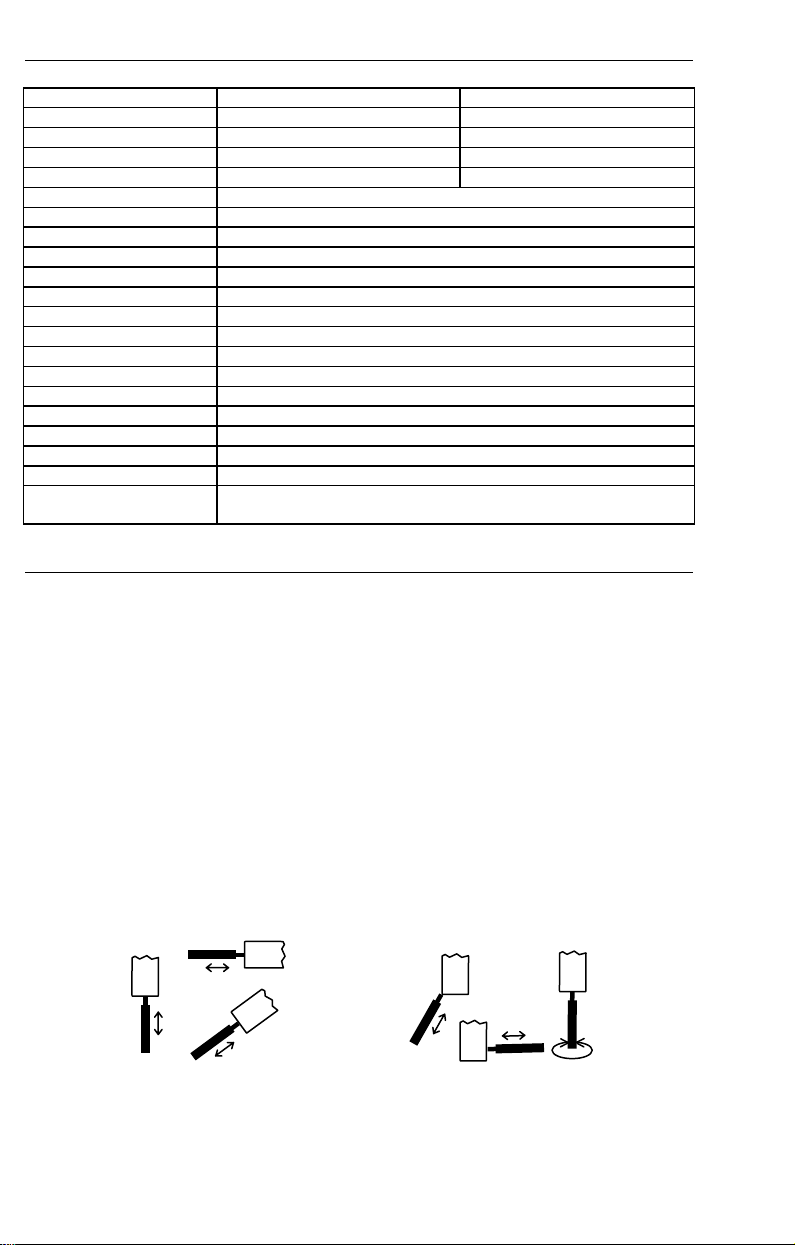
Note: The sensing head with adapter must be in line with the object being measured.
Avoid rotating the sensing head. Refer to the figure below.
Figure 1 ─ Correct and Incorrect Angles of Measurement
cceptable
2
Not Acceptable
475040 and 475044 Ver. 1.9 12/04
Page 3

Normal Measurement Mode
1. Slide the POWER switch to the ON position. Reverse the LCD display if desired via
the Reverse key.
2. Zero the meter before each measurement.
3. Touch the adapter to the object being measured in a straight line. Refer to Fig.1.
4. Begin measurement by applying force (Push or Pull). Read the LCD display.
5. After completing the measurement, the display will indicate "0.00" if the position
and angle of the Force Gauge have not changed.
6. If the position or angle of the Force Gauge changes during a measurement, the
display may show one of the following:
a) The display overranges because the initial force of the transducer decreases
due to a change in the position or angle of the Gauge after measurement.
b) The display indicates any value such as "12", "25", etc. This occurs because
the initial force of the transducer increases due to a change in the position or
angle of the Gauge after measurement.
Note: Be sure to press "ZERO" before taking any new measurements.
Peak Load Measurement
1. Slide the POWER switch to the PEAK position...
2. Touch the adapter to the object being measured in a straight line, refer to Fig. 1.
3. Zero the meter before each measurement.
4. Begin measurement by applying force (pull or push). The LCD will display the peak
value, which is the highest reading encountered.
5. After completing the measurement, the display will hold the peak load value if the
position and angle of the Force Gauge have not changed.
6. After completing the measurement, the display will overrange if the position or
angle of the Force Gauge has changed. This occurs because the initial force of the
transducer decreases due to a change in the position or angle of the Gauge after
measurement.
Note: Be sure to press "ZERO" before taking any new measurements.
Fast/Slow selection
Press the FAST/SLOW key to select the desired display update rate. The “((•))” symbol will
appear in the display when FAST is selected.
Mounting
For best results, mount the Digital Force Gauge to a test stand (optionally available, contact
Extech for details). Mounting holes are provided on the rear of the meter.
Maintenance
Battery Replacement
The low battery indication appears as a "LO" on the display when battery voltage is less than
6.8V. To replace the battery:
1. Remove the two screws from the battery compartment cover.
2. Lift off the battery cover.
3. Replace with 6x 1.5V AA (UM-3) batteries. Observe polarity carefully.
4. Replace compartment cover and screws.
3
Test Equipment Depot - 800.517.8431 - 99 Washington Street Melrose, MA 02176
FAX 781.665.0780 - TestEquipmentDepot.com
475040 and 475044 Ver. 1.9 12/04
 Loading...