

Page 1

EX-6001 4-Port USB2.0 to Ethernet
Adapter (USB over IP)
Installation Guide
1. Introduction
Thank you for purchasing this 4-Port USB2.0 USB Server (hereinafter
referred to as “The USB Server”). It provides an ideal solution to use USB
devices over Internet instantly. With its Client Software, the network
users can use the rem ote USB devices over lo cal a network or Internet
as if they were connected directly to your local PC.
The USB Server supports High speed USB devices li ke Printers, scanners,
digital cameras and USB Flash drives over the network. It is ideal for
home office, small office or industrial appl ications that access the USB
devices remotely.
Features:
9 Provides 4 USB2.0 Host Ports over Ethernet or IP
9 Allows Working With Remote USB Devices as with Local Ones
9 Supports High Speed/Full Speed USB2.0 Peripherals
9 Supports USB Screw Lock Mechanism Enhances the Reliability
9 IEEE 802.3 10/100Mbps, Auto Cross-over Ethernet Port
9 DC Jack and Terminal Blocks for DC +7~24V DC Power Input
9 Supports Windows XP, 2003, and Vista
2. Connector Layout
+5VDC Power
Input DC Jack
RJ45 LAN
Connector
Status LEDs
+7~24V DC Power
Input Terminal Blocks
4 USB2.0 Downstream
Type-A Connectors
1
Page 2

4-Port USB2.0 to Ethernet Adapter (USB Server)
z
DC Jack and Terminal Blocks Power Connectors: A 7V~24V DC
Power is required for this product. Power is supplied from either the
DC Jack or the Terminal Blocks, but not both at the same time.
z
RJ45 Ethernet Connector: 10/100Mbps Ethernet port. It supports
auto cross-over feature. You can use the same cable to connect
to either a Hub/Switch or a host computer.
z
LED Indicators: There are 4 LAN LEDs on the rear panel. They are
described as the following table:
LED Name Color LED Function
100M
Act
Conn
FDX
Green Steady on: Ethernet Speed = 100Mbps
Off: Ethernet Speed = 10Mbps
Green Blinking: Transferring Ethernet Data
Off: No Data Transferring on Ethernet
Green Blinking: When the unit is loading firmware
Steady On: The firmware load completed
and ready to connect Ethernet
Green When On, indicates the Ethernet Operates
in the Full Duplex Mode
3. Hardware Installation
1. Use static electricity discharge precautions.
Remove possible static discharge potenti al from any objects that
the Adapter may come in contact with before installation. This
can be accomplished by touching a bare metal chassis rai l after
you have turned off the power.
2. Attached the DC power source: there are 2 connectors can be
added the power to the unit. One is the DC Jack (by the AC /DC
Adapter) and the other is the 2-pin terminal bl ocks.
3. Connecting LAN cable: Use a standard straight-through Ethernet
cable to connect to a Hub or Switch. If you connect the USB
Server to your computer’s Ethernet port instead, you don’t need
to change to a cross-over type cable since the A dapter provi des
auto cross-over feature.
4. Connect the USB Server’s USB ports to your USB devices.
2
Page 3

4-Port USB2.0 to Ethernet Adapter (USB Server)
Typical Connection Diagram:
Client PC1
USB Printer
Router/Hub
USB
Camera
Client PC2 Client PC3
WAN/DSL
(to Internet)
USB Server
USB DVD
4. Software Installation
The USB Server comes with user friendly client software which maps USB
devices connected to the USB server onto the local host machi ne. To
access the USB devices on the USB Server, each Client PC should instal l
this utility. We call it USB IP Admin Software Utility.
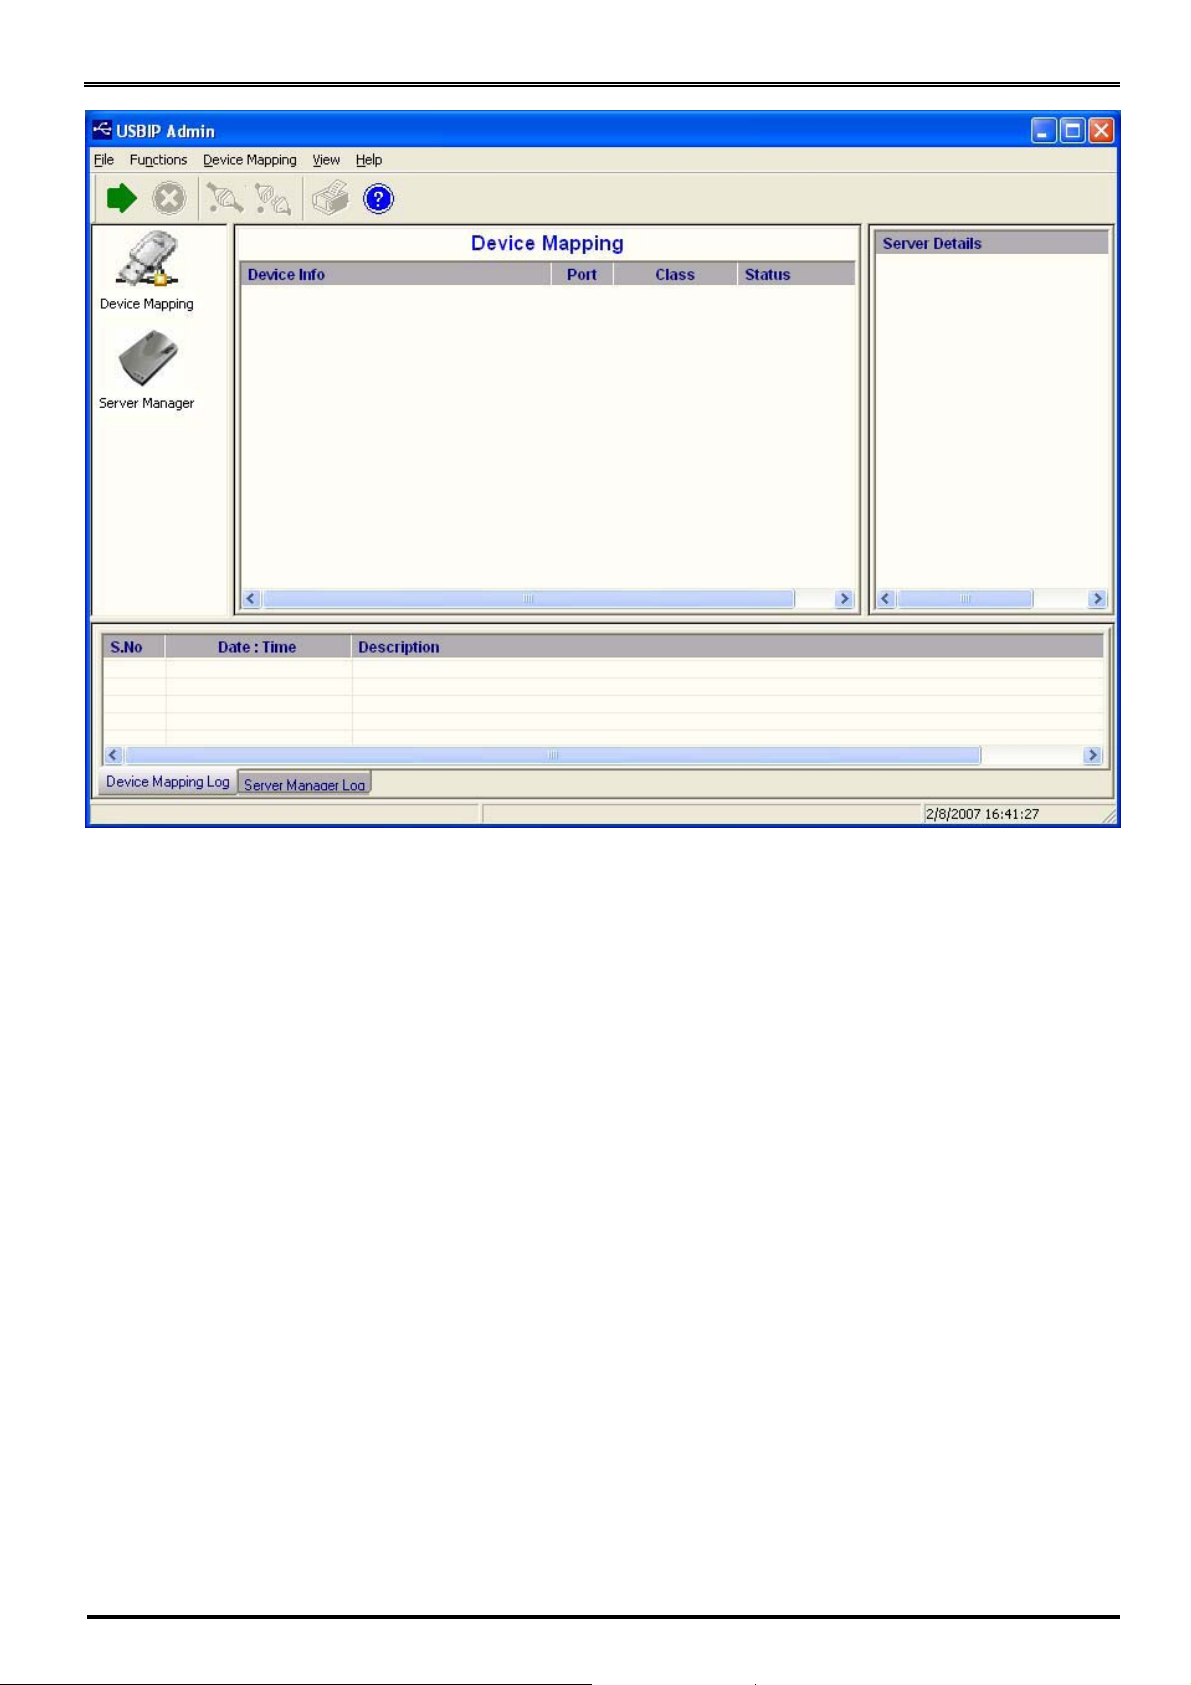
This GUI Utility provides Device Mapping functionality for a user to
connect and disconnect various devices found on the network. It also
includes a Server Manager that lists and prov ides option to configure
various setting on the USB server remotely.
The Utility was shipped in a Install Shiel d in the following folder on the
driver CD:
3
Page 4

4-Port USB2.0 to Ethernet Adapter (USB Server)
To Install the Install Shi eld, please go to the above fol der, double click
the setup program in the folder, follow the instruction of the instal ler to
complete the installation.
As soon as the utility is i nstalled this application will be pl aced in the
system tray as shown in the figure below.
USBIP Admin tool
Double click the icon on the system tray to view and run the Utili ty in
the Full screen mode on your client PC.
For the more detail about how to use this Utili ty, pl ease refer to the P DF
manual file in the same folder on the driver CD.
Note: Due to the limitation of the USB bus emulation drivers
over IP, NOT all USB Devices were supported. The newest support
list was included in the manual PDF file of USB IP Admin Software
Utility on the driver CD.
4
Page 5

EX-6001
USB Server Windows Client Utility
Installation Guide
Version 1.0
1
Page 6

USB Server Windows Client Utility
TABLE OF CONTENTS
1. Introduction ....................................................................................................................... 3
2. Windows utility ................................................................................................................... 4
2.1 Virtual USB-IP Driver Software ...................................................................................................................... 4
2.2 Device Mapping .......................................................................................................................................... 5
2.3 Server Manager ........................................................................................................................................... 8
2.4 Printer Auto-Connect ................................................................................................................................. 16
3. USB-IP Web Server ........................................................................................................... 18
3.1 Web-Interface overview ........................................................................................................................... 18
3.2 Home Page ................................................................................................................................................ 18
3.3 Network Page............................................................................................................................................. 19
3.4 Status Page ................................................................................................................................................. 21
3.5 Upgrade page. .......................................................................................................................................... 22
4. Additional Information ................................................................................................... 25
4.1 Wireless USB Server .................................................................................................................................... 25
5. USB Server Device Interoperability List .......................................................................... 26
2
Page 7

USB Server Windows Client Utility
1. Introduction
USB-IP application enables the virtualization of USB devices over LAN (Local Area Network) as
if they are connected local to your PC. By this implementation, USB devices connected to
USB Server can be made available to remote Clients over LAN.
Key Features of the USB-IP application are
z Allows USB Devices to be used and shared by client PC's over LAN.
z Supports wide variety of USB devices.
z Compatible with bulk, interrupt and isochronous type USB devices.
z Supports both Ethernet and WiFi networks.
z Supports printing to USB printer from both Wired and Wireless Interface.
z Supports printer auto-reconnect while sharing the printer to different Client PC's.
z Supports auto sharing of USB devices.
z Supports USB device safe removal.
z User-Friendly Application interface.
3
Page 8

USB Server Windows Client Utility
2. Windows utility
USBIP Admin utility Setup is an Install Shield based application, which can be used for
installing, uninstalling and upgrading the USBI Client S/W. Please run the self-explanatory
Install shield application to install the USBIP Admin Utility.
Admin utility application enables the USB devices virtualization along with USB Server
Firmware loaded onto USB Server. Any USB device connected to the USB Server can be
made available over the Network, for different Windows hosts to use the device. USB Server
supports monopoly type connection i.e USB device connected to the USB Server can be
accessed by one host at a time. Other Windows host can access this USB device, once first
host relinquishes the connection. Different Windows hosts can access different USB devices
connected to the USB Server.
Eg : If USB Pen Drive, USB Audio device, USB 1.1 Web Cam & USB DVD Rom drive are
connected to the USB Server. Then PC1 can access Pen Drive, PC2 can access Audio device,
PC3 can access Web Cam & PC4 can access DVD ROM drive.
Pen Drive can be accessed by PC2 or PC3 or PC4, once PC1 relinquishes the connection.
In-case of Printers, USB Server application’s Auto Reconnect feature enables multiple
Windows hosts to use the Printer simultaneously.
The USB Server & all the Windows Hosts need to be connected to same LAN & under same IP
subnet for above.
2.1 Virtual USB-IP Driver Software
This contains a Virtual Bus Enumerator driver & Virtual Bus driver. These drivers will help in
virtualizing the USB devices attached on the USB-Server.
Virtual Bus driver takes the USB traffic from the USB Client drivers on Windows Host and passes
it to the USB-Server which is sitting remotely on the network.
As soon as the utility is installed this application will be placed in the system tray as shown in
the figure below.
USBIP Admin tool
Double click the icon on the system tray to view the Full screen mode of the PC client
application as shown below.
4
Page 9
USB Server Windows Client Utility
The application has four panels, which are docked in the application.
1. Main window: This displays all the Device server and the USB Devices connected on
them
2. Function Panel: This panel enables to switch between the Device Mapping and Server
Manager Application.
3. Server/Device Details Panel: This displays the more information of the server and the
device selected on the main window.
4. Log panel: Any event on the USB server creates a log in the Log panel. This helps in
continuous monitoring of USB device servers on the network.
The USBIP Admin Utility has two main functionalities built in
z Device Mapping
z Server Manager
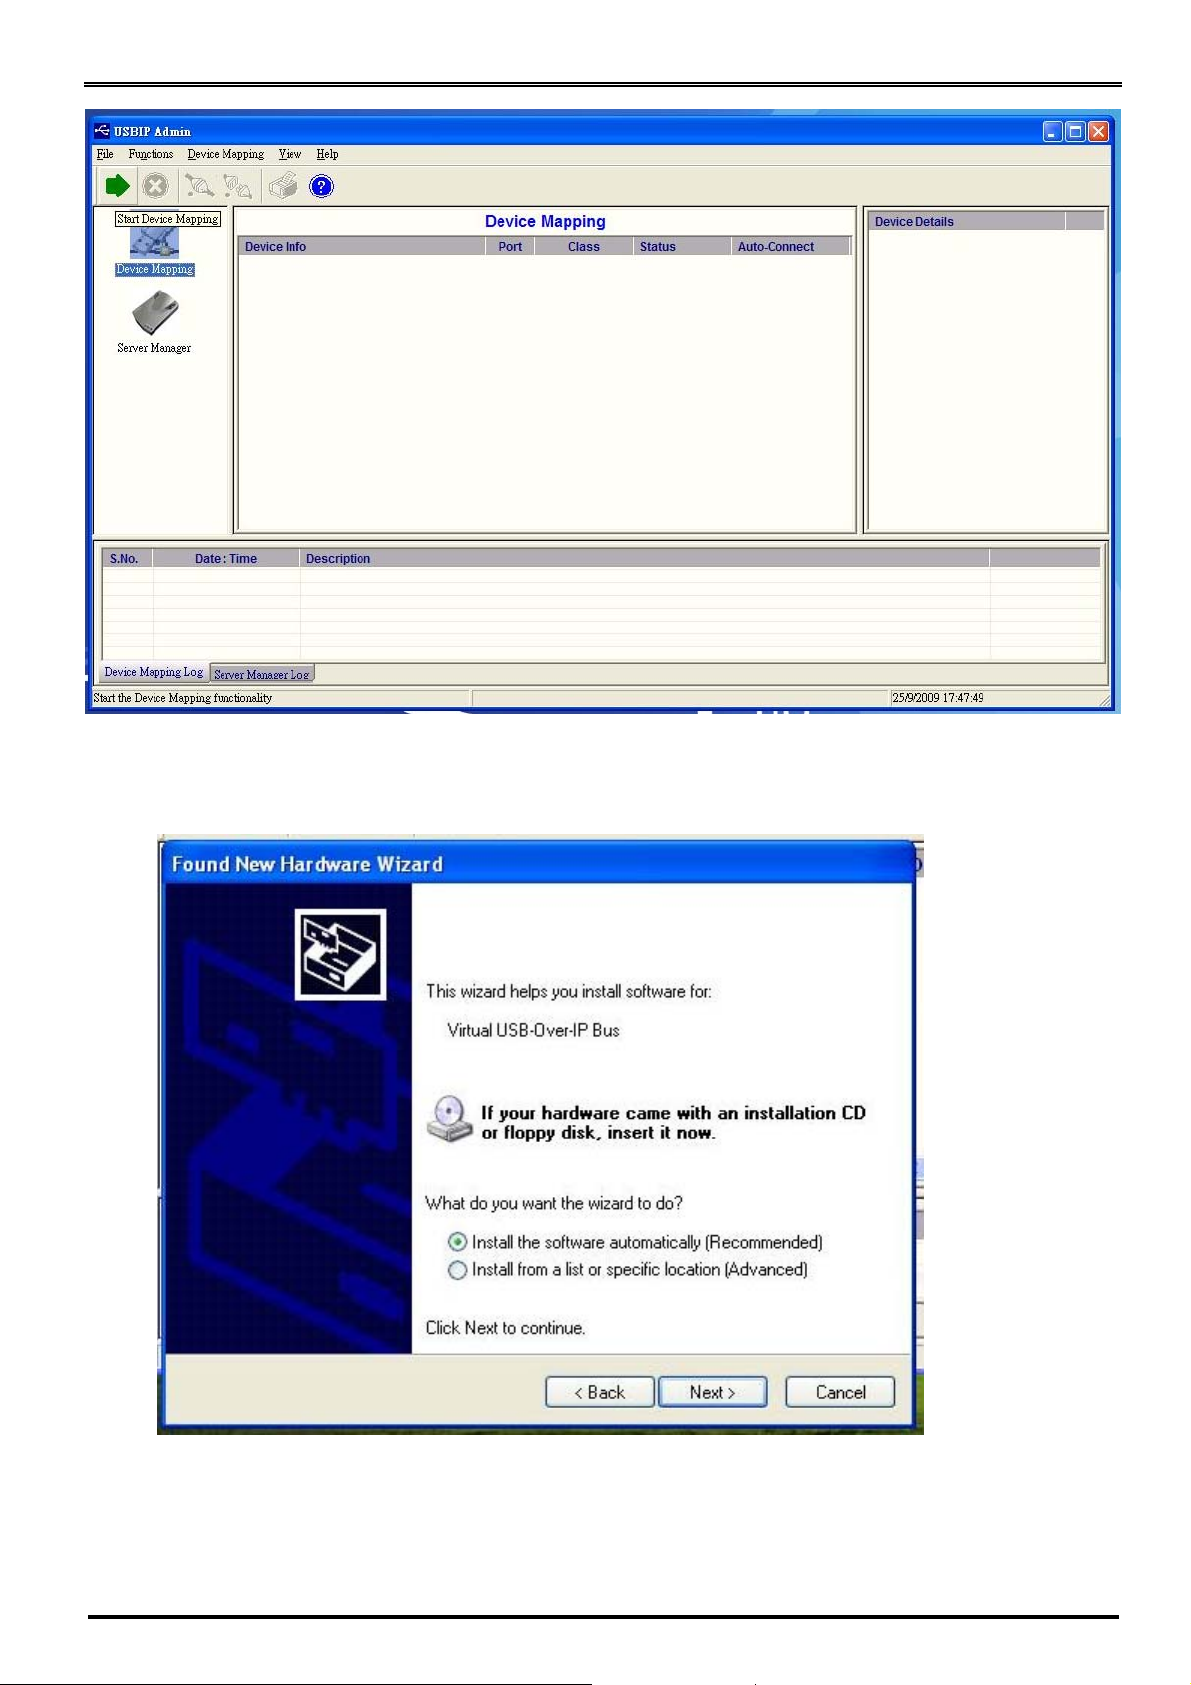
2.2 Device Mapping
Device Mapping enables virtualization of all USB Devices connected to the USB Server on to
your PC, over LAN.
Click on the Green Arrow Button in the Admin utility to start the device mapping, which will
automatically start the ‘Found New Hardware’ wizard to install the Virtual USB driver.
5
Page 10
USB Server Windows Client Utility
Continue the Add New Hardware wizard to install the Virtual USB driver for the USBIP Admin
utility.
Make sure “Search for a suitable driver for my device (recommended)” is selected. Click on
Next and the Operating System automatically searches for the driver until the Virtual USB
over IP driver is installed.
Make sure that you click on “Continue anyway” if a Windows dialog pops up about the
Digital Signature as shown below.
6
Page 11

USB Server Windows Client Utility
Power on the USB Server and connect an Ethernet cable from the USB Server’s Ethernet port
to your Local Area Network.
The USBIP Windows Admin utility is capable enough to identify the USB Server’s based USB
Servers by it’s IP address on the network. As soon as the USB Server’s box is detected with a
specific IP address the Windows automatically invokes a Found New Hardware Wizard to
install the drivers for the USB server box. Continue the Installation to see the USB Server and
the USB devices connected in the Admin utility as shown below.
NOTE: For proper enumeration of device, disable the Firewall option on the Windows PC.
7
Page 12

USB Server Windows Client Utility
In the Device mapping window, all the USB devices connected are shown as a tree under
the USB Server. Right click on any device and click on “Connect” to virtualize that USB
device onto your PC as shown below.
2.3 Server Manager
Server manager enables the Administrator to configure USB Server on the network.
8
Page 13

USB Server Windows Client Utility
The Server Manger also has an option to search for the USB servers on the Network.
Right Click on Server Manager Main window and Click on “Search server”, as shown below.
The same can be done by selecting “Search Servers” from “Server Menu”.
If you cannot find the USB server with “Search Servers”, then Right Click on Server Manager
Main window and Click on “Search by MAC ID”, as shown below.
9
Page 14

USB Server Windows Client Utility
It pops up the ‘Searching for Servers’ dialog and list all the USB Server devices on the
Network as shown below
The USB Device Server search is password protected and should be unlocked in order to
configure the selected device.
On selecting ‘Un-Lock’ the password dialog pops up as shown below. Key in the password in
the ‘Password’ dialog. The default password for the USB IP Server is “moschip”
10
Page 15

USB Server Windows Client Utility
If the Authentication is successful a ‘Unlock OK’ dialog appears.
Now the Device server can be configured for various settings as given below.
a). Server Configuration
Server Manager has an option to change Server Configuration settings through USBIP Admin
Utility.
To open server configuration window right click on the USB Server displayed on the Server
Manager Main window and select “Server Configuration” option as shown below..
It pops up Server Configuration window as shown below.
11
Page 16

USB Server Windows Client Utility
Basic Settings Page
The Basic Settings page allows you to specify a server name .Check the modify box and
enter server name as shown below.
IP Settings Page:
The IP Settings page allows you to modify USB Server box IP Address as shown below.
The Default IP Address is 192.168.3.22
12
Page 17

USB Server Windows Client Utility
To modify the IP Address of the USB Server box, check the ‘Modify’ box and Select IP
Configuration (Select IP configuration Static/DHCP from IP Configuration drop-down box) as
shown below.
After Selecting IP Configuration key in the IP Address of the USB Server box in the IP Address
field followed by proper Subnet Mask & Gate Way as shown below.
After entering IP address, Subnet Mask & Gate Way then click on “save” button. Then USBIP
Admin shows progress bar for some time and after it pops up a message box as shown
below.
13
Page 18

USB Server Windows Client Utility
Note: Every board in the network is identified by its IP address. The utility treats each IP
address as unique device. Even if the IP address of the box is modified it treats the same box
as a different device and will pop up a Found New Hardware Wizard.
Continue the Found New Hardware Wizard to install the Virtual USB-over-IP bus driver.
Now the USB Server box appears with changed IP Address under USBIP Admin utility.
Password:
The Password Settings page allows you to change or Enable/Disable password of the USB
Server box. The Password settings page will be as shown below.
Check the Modify box to Enable or Disable password option to the USB Server box.
b). Upgrade Firmware
The USB Server Firmware can be upgraded remotely using the Firmware upgrade option.
Select the USB server on the Server manager. Right Click on the server and Select Upgrade
Firmware option to upgrade the firmware.
14
Page 19

USB Server Windows Client Utility
Select the upgrade file by clicking on the Browse option in the “Select File” dialog as shown
below.
A upgrade.tar.bz2 file is required to upgrade the firmware. The upgrade .tar file can be
downloaded from MosChip website.
Click on “Transfer” to upgrade the firmware. A firmware upgrade status is displayed which
automatically relinquishes once the transfer is completed.
As soon as the transfer is completed, the USB Server box automatically restarts to apply the
upgraded firmware settings.
15
Page 20

USB Server Windows Client Utility
c). Restore factory defaults
Right click on the USB Server under Server Manager Window and select the Restore Factory
Defaults function to obtain Default settings as shown below.
Then USBIP Admin Utility pops up a window asking for to continue or not. If we select Ok
button it will get default settings.
2.4 Printer Auto-Connect
USB Admin Utility enables Printers be shared between multiple clients making it a
bidirectional Print Server.
In order to share the printer between multiple clients, user may need to connect the printer
at least once to install the driver for the Printer.
Once the printer is enumerated disconnect the Printer form the Device Mapping Window,
Select the Printer Auto Reconnect button
Auto-Connect Window.
on the Menu bar to open the Printer
16
Page 21

USB Server Windows Client Utility
Select the Printer which was connected and Click on “Save” and close the Window.
Once the Printer is configured for Auto-Connect mode, It remains free as long as the Printer is
connected and becomes “Busy” only when a user prints to the printer connected.
Multiple User print jobs will be executed on a time sharing basis.
17
Page 22

USB Server Windows Client Utility
3. USB-IP Web Server
It is an administrative web interface for this USB-IP application. A web server running on the
USB Server allows administrator to view and change some of the key configuration of the USB
Server box.
3.1 Web-Interface overview
The USB-IP web-server is an administrative web interface for the USB-IP application. Ordinary
users can easily administrate it. The web interface has four configuration pages and a home
page.
The home page displays the current network settings, Server name and Firmware version.
From the “Network” page you can easily change the settings of the both wired and wireless
Interfaces. For the wired interface you can configure the Static IP manually or set the box to
automatically obtain an IP address by setting to the Dynamic (DHCP) mode.
Through “Status” tab you can view the USB devices, which are connected to the USB Server,
the product and vendor ID of the device, the IP Address of the host and also the Status of
the devices.
The Upgrade tag allows you to upgrade the firmware.
3.2 Home Page
The USB-IP Web Server can be accessed by typing the IP address of the server in the URL of
the browser, which will displays the default home page of the Server. Default IP address is
192.168.3.22, for USB Server application & the USB Server will have this IP address when USB
Server Firmware is loaded on to it.
http://192.168.3.22:8080
18
Page 23

USB Server Windows Client Utility
On password prompt please give ‘admin’ as user name and ‘moschip’ as password. This will
bring the home page. If there is no prompt for password please ensure ‘proxy settings’ are
disabled in the Windows PC Browser software (Eg. Internet Explorer).
1. Home Page contains the information about current network settings, it displays.
a). Server Summary:
z Serial Number
z Server Name
z Server Model
z FW-Version
b). Network Summary:
z MAC id
z Server IP
z Subnet
z Gateway
z IP-Conf
2. It also shows a welcome greeting and the number of connected users.
3.3 Network Page
The “Network” tab allows you to configure both wired as well as wireless interfaces. The
default page is of wired interface and it appears as shown below.
19
Page 24

USB Server Windows Client Utility
For the wired interface you can configure the Static IP, Subnet Mask, and Gateway manually
or set the box to automatically obtain an IP address by setting to the Dynamic (DHCP)
mode.
If the user selects the Network Interface type as “Wi-Fi” the browser shows the Wireless
configuration web page as shown below.
Select the Server IP Type, and select Static in order to change the IP address, Subnet mask
and Default Gateway of the Box. If the choice is made as “Dynamic (DHCP)”, the box will
automatically try to get an IP Address from the wireless router available.
In the Wireless configuration the application can also list the Wifi access points available in
the network in the Wi-Fi Router Name. If you choose “Any” in the dropdown menu, the Box
tries to get access to the box with more signals strength.
If the choice has to be made to connect to a specific Wireless Router or access point
choose “Select” radio button and select the Wireless router in the dropdown menu.
If the network is security enabled, then select the Encryption as On and select the key type
as either ASCII* or Hex* and key in the pass phrase in the Key value box and click on
Connect to connect to Wi-Fi network.
Note *: Setting up of Hex or ASCII key is mostly Wireless Router dependent
20
Page 25

USB Server Windows Client Utility
3.4 Status Page
The status page displays the current status of the USB devices attached.
a). Thread Status:
Thread
Session
Host
Action
b). Service Status:
Service
Status
Control
c). Device Status:
Vendor Id
Product Id
Class Id
Peer-ip address
Status
This status page is updated automatically every 10 seconds and it shows the device
connected to USB Server.
The Device Status table shows the Vendor Id, Product Id, Class, Peer-IP and the Status of the
Device connected. The Peer-IP is the IP Address of the computer on which the device is
currently accessed. Whenever any Device is Busy the Status of that device changes to
“BUSY” and whenever it is not being used it changes to “FREE” as shown below.
21
Page 26

3.5 Upgrade page.
The Upgrade page allows you to upgrade the firmware.
USB Server Windows Client Utility
Select the file to be upgraded by click on the Browse option on the Upgrade page as shown
below.
22
Page 27

USB Server Windows Client Utility
A upgrade.tar.bz2 file is required to upgrade the firmware. The upgrade .tar file can be
downloaded from MosChip website.
Click on “upgrade” to upgrade the firmware
23
Page 28

USB Server Windows Client Utility
A file successfully uploaded message is displayed and the webpage also indicates that the
USB server box is restarting to apply the upgraded firmware settings.
24
Page 29

USB Server Windows Client Utility
4. Additional Information
4.1 Wireless USB Server
USB Server Firmware supports Wired & Wireless interfaces. PCI to 802.11g adapters can be
used on PCI Interface of MCS8140 Combo EVB in this regard. Allnet PCI to 802.11g adapter
(based on Prisam Chipset) & Buffello PCI to 802..11g adapter based (Broadcom BCM
4306KFB chipset) used to confirm Wireless functionality at MosChip.
PCI based 802.11g adapters used on MCS8140 Combo EVB acts as WiFi extenders & WiFi
Hosts on the wireless network connect to MCS8140 through external 802.11g router.
25
Page 30

5. USB Server Device Interoperability List
USB Device
Class
ISOC - IN
Type of
Device
Webca
m
Maker Model USB Speed Remarks
Logitech Quickcam Messenger USB 1.1
USB Server Windows Client Utility
Working
ISOC - OUT
HID
Quickcam Easy USB 1.1
Quickcam Go USB 1.1
Quickcam Pro 3000 USB 1.1
Quickcam Pro 4000 USB 1.1
LifeCam VX-1000 USB 1.1
LifeCam VX-3000 USB 1.1
Frontech e-CAM USB 1.1
Creative Vista Plus Webcam USB 1.1
Quantum QHMPL 500lm_8lm USB 1.1
Speaker Sony C-Media chipset based USB
Speakers
Logitech V10 Notebook Speakers USB 1.1
Microsoft LifeChat LX-3000 Stereo
Headset
TurtleBeach C-Media based USB Sound
Card dongle
Keyboar
d
Mouse Microsoft Microsoft Basic Mouse USB 1.1
Joystick Microsoft Joystick USB 1.1
Acer USB 1.1
Apple MAC MAC Extended keyboard USB 1.1
Microsoft Microsoft comfort curve
keyboard
Microsoft Internet Pro Keyboard USB 1.1
Apple Apple Optical Mouse USB 1.1
Apple Mouse USB 1.1
Logitech Optical Mouse USB 1.1
Sun 3 button Scroll Mouse USB 1.1
Dell Optical Mouse USB 1.1
IBM Optical Mouse USB 1.1
USB 1.1
USB 1.1
-
USB 1.1
Working
Working
Working
Working
Working
Working
Working
Working
Working
Working
Working
Working
Working
Working
Working
Working
Working
Working
Working
Working
Working
Working
Working
Working
Working
26
Page 31

USB Server Windows Client Utility
USB Server Device Interoperability List cont…
USB Device
Class
Bulk
Type of
Device
Mass
Storage
Devices
Make Model USB Speed Remarks
Transcend 1GB USB 2.0
2GB JF V30 USB 2.0
Toshiba
Transmemory
Apple IPod shuffle- 1 GB USB 2.0
Apple IPod – 30 GB USB 2.0
Kingston DataTraveler - DTI/1GB USB 2.0
Kingston DataTraveler Mini Fun
-DTMFP/2GB
SanDisk SanDisk Cruzer M icro 1GB USB 2.0
Western Digital
(Ext HDD)
WD600 U017 - 60GB GO USB 2.0
USB 2.0
USB 2.0
Working
Working
Working
Working
Working
Working
Working
Working
Working
Printer Class
WDXMS1600 - 160GB (SATA to
USB Initio controller)
WDXMS800 - 80GB USB 2.0
ViPower VP-2528 Pocket Drive USB 2.0
Zippys USB to IDE drive (40GB) USB 2.0
Phillips-IDE to USB SPD5200CC/96S - IDE to USB
Prolific Chipset
CoolGear-SATA to
USB
MTC IDE -USB
External enclosure
Initio IDE to USB
Device
DVD
ROM
Drive
Printers HP Photosmart C6188 All-In-One -
NEC NEC DVD ROM USB 2.0
Brother MFC7420 -
SATA to USB JMicron JM20339
Chipset
IDE to USB Prolific Chipset USB 2.0
Model: ST940815A (Initio
INIC-1530L chipset)
Photosmart C3100 All-In-One -
Deskjet F380 All-In-One -
Business Inkjet 1200 -
Deskjet 3940 -
Deskjet D2360 -
Deskjet 3740 -
Deskjet 3745 -
Deskjet 840C -
Laserjet 1200 -
Laserjet 1020 -
USB 2.0
USB 2.0
USB 2.0
USB 2.0
Working
Working
Working
Working
Working
Working
Working
Working
Working
Working
Working
Working
Working
Working
Working
Working
Working
Working
Working
Working
Working
Scanner
Scanner
s
HL-2040 -
Dell AIO 946 -
EPSON EPL-6200L -
Stylus C87 Plus -
Stylus C58 Plus -
LX-300 +II -
WeP Bloom Laser 1600 -
Bloom Laser 800 DX -
Canon iP1700 -
Canon Canon MP160 MFP -
Samsung ML 1210 -
HP Scanjet 4470C -
Scanjet 1300C -
27
Working
Working
Working
Working
Working
Working
Working
Working
Working
Working
Working
Working
Working
Page 32

USB Server Device Interoperability List cont…
USB Device
Class
Serial/Parall
el Class
Type of Device Maker Model USB
USB to IO Devices MosChip MCS7840 - USB to 4 Serial USB 2.0
Prolific PL2303 USB 1.1
FTDI USB to 4 Serial USB 1.1
IrDA MosChip MCS7780 USB 1.1
USB Server Windows Client Utility
Speed
MCS7820 - USB to 2 Serial USB 2.0
MCS7720 - USB to 2 Serial USB 1.1
Remarks
Working
Working
Working
Working
Working
Working
Network
Adaptors
MCS7784 USB 1.1
USB to Ethernet MosChip M CS7830 USB 2.0
TV Tuner Diamond
Multimedia
USB Wireless Dongle Belkin USB wireless 802.11g
Skype Phone USB Audio Device USB 1.1
YAP Phone USB Audio Device USB 1.1
PVR660 USB 2.0
USB 1.1
Adapter
Working
Working
Working
Working
Working
Working
28
 Loading...