


MEGAPIXEL NETWORK IP CAMERA FOR OUTDOOR USE
ART. NO. AK-3509
Thank you for your purchasing our product!
IMPORTER & DISTRIBUTOR:
GLOBAL EXPORT – IMPORT LTD.
H-1151 BUDAPEST SZEKELY E. U. 11.
http://www.global-export-import.eu
Megapixel Full HD IR Network Camera
User Manual
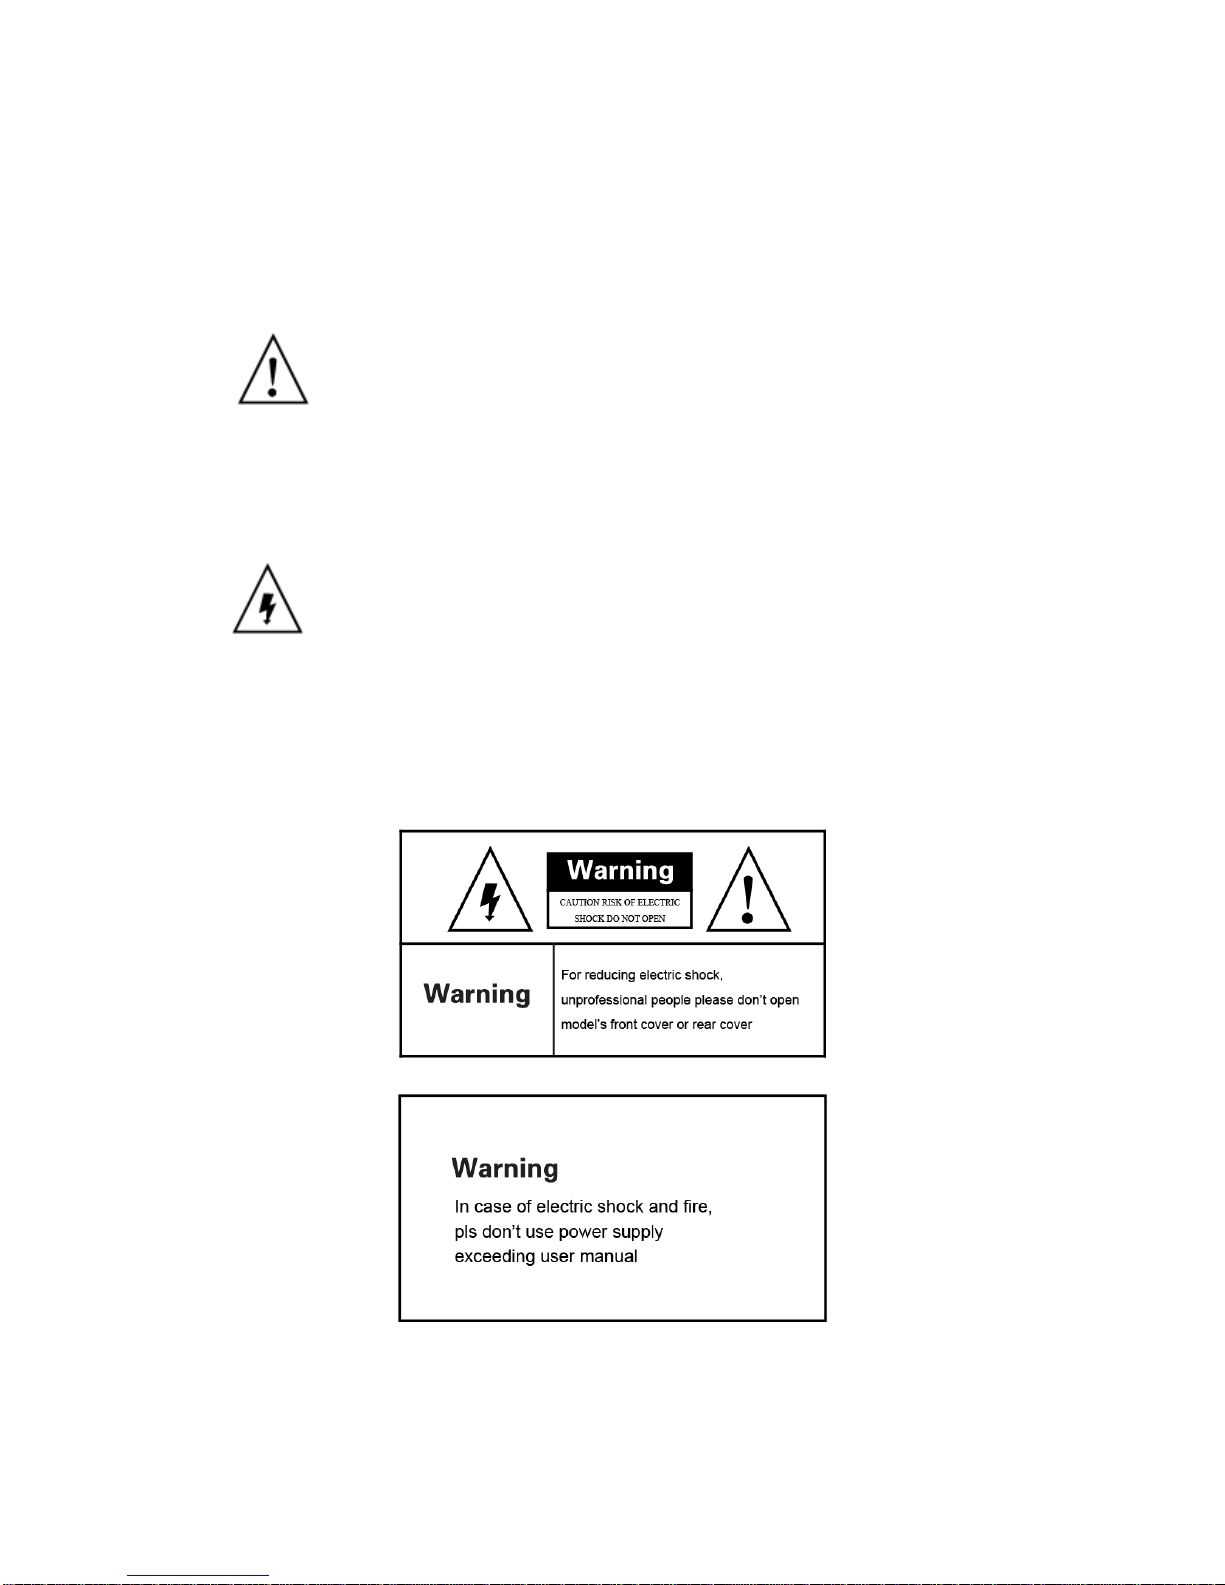
Warning
In case of fire or lightning, pls don’t put product in damp and raining place, operate or maintain
according to the user manual.
Be careful when you see attachment with a Dangerous Voltage which will cause serious
voltage accident.
Notice:
1. Ensure your equity, pls read the user manual carefully before you use the product
2. Pls contact eligible people if you need install and maintain the product
3. Input voltage of this model is DC 12V
4. Working Environment: temperature of -10°C~+60°C, relative humidity
under 85%
5. Pls don’t exceed the user manual’s standard range of temperature, humidity
and voltage.
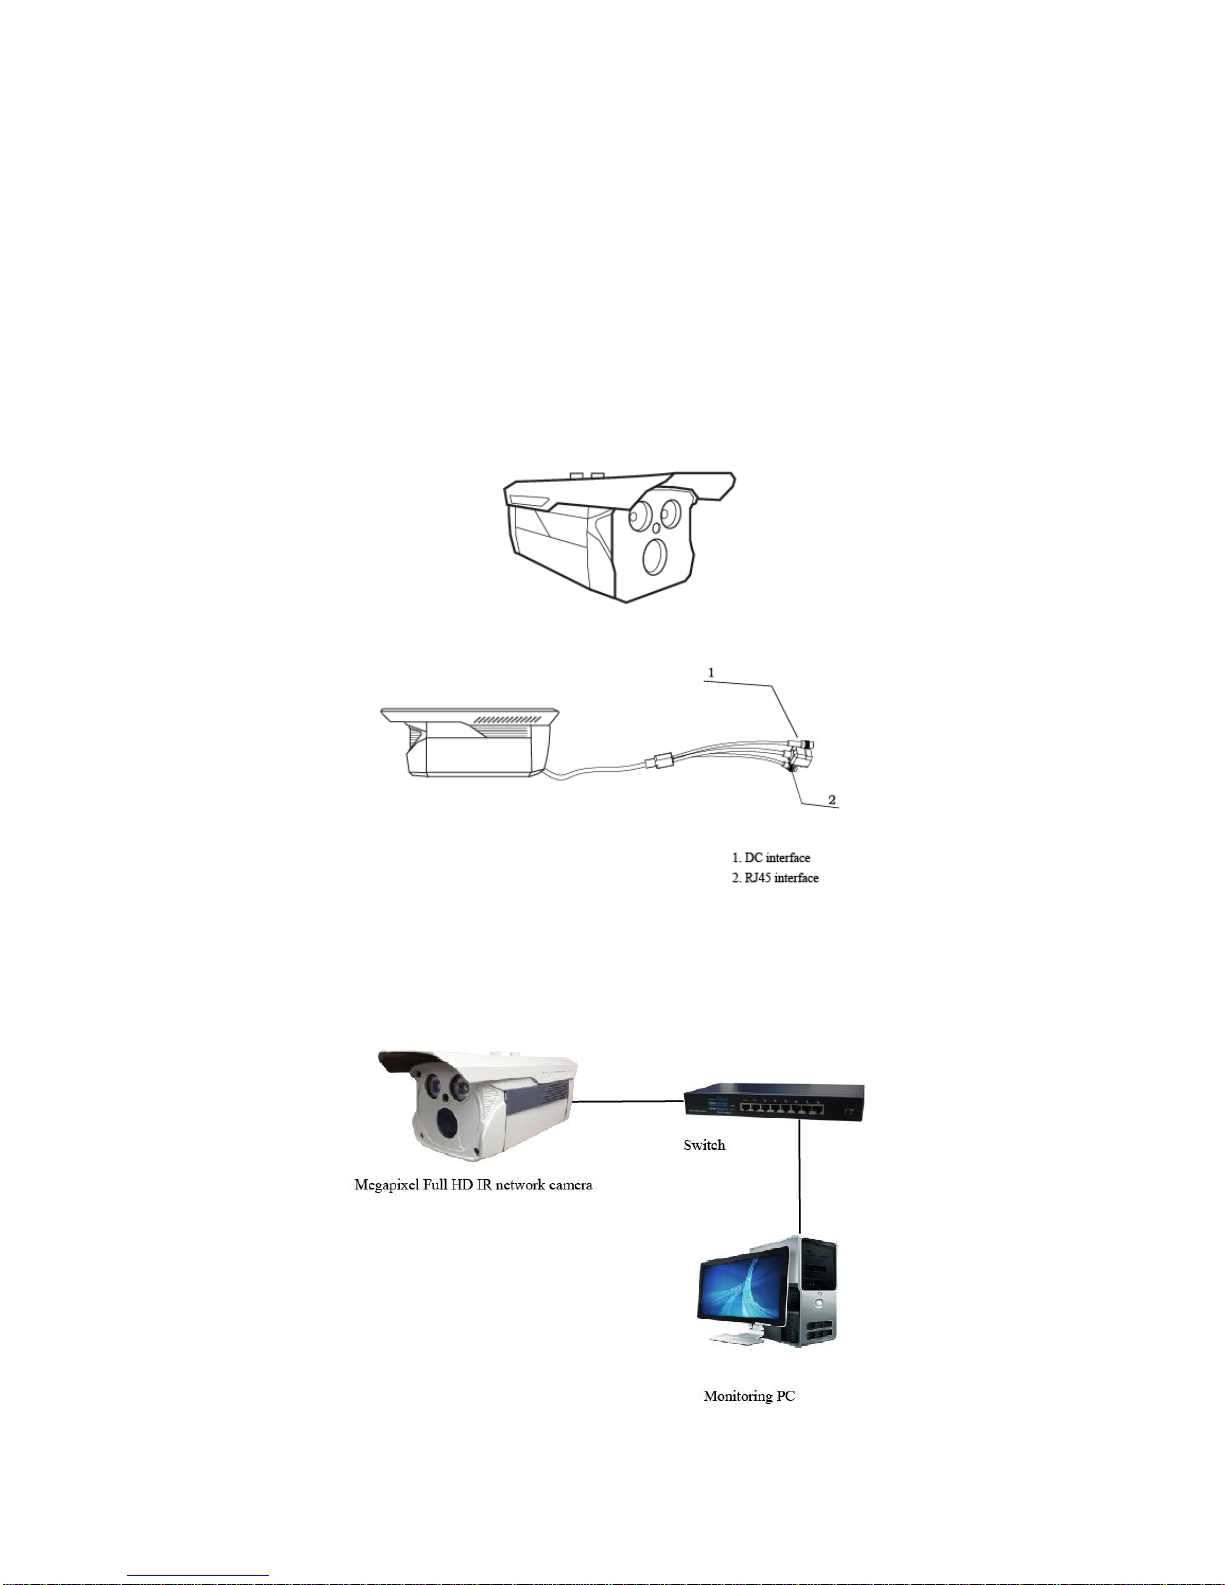
Product structure illustration
External power supply and camera hardware connection
Connect 12V 1A power supply with power interface, plug network wire, wait for about 2
minutes, machine start-up successful.
Setting instruction when camera connect with PC
Setting instruction when camera connect with PC
IE view: Enter camera’s IP address in IE’s address bar, install control, then you can view image
Preview in IPC client: Install client software, click “settings” in software GUI, choose
megapixels HD camera, click “search” button in “nexwork setting”, software will automatically
search the cameras in Intranet, and show the cameras’ IP address in “searched IP cameras”,
double click the IP address, it will automatically append IP to the form of “connected IP
camera”, without appending cameras, the GUI can’t preview image, click enter, log out preview
UI, camera image will be showed on GUI in 3-5 seconds.
PS: If there is no image, pls disconnect the firewall in system control panel
Camera’s default IP: 192.168.1.88. User name:
admin Password:(No password)
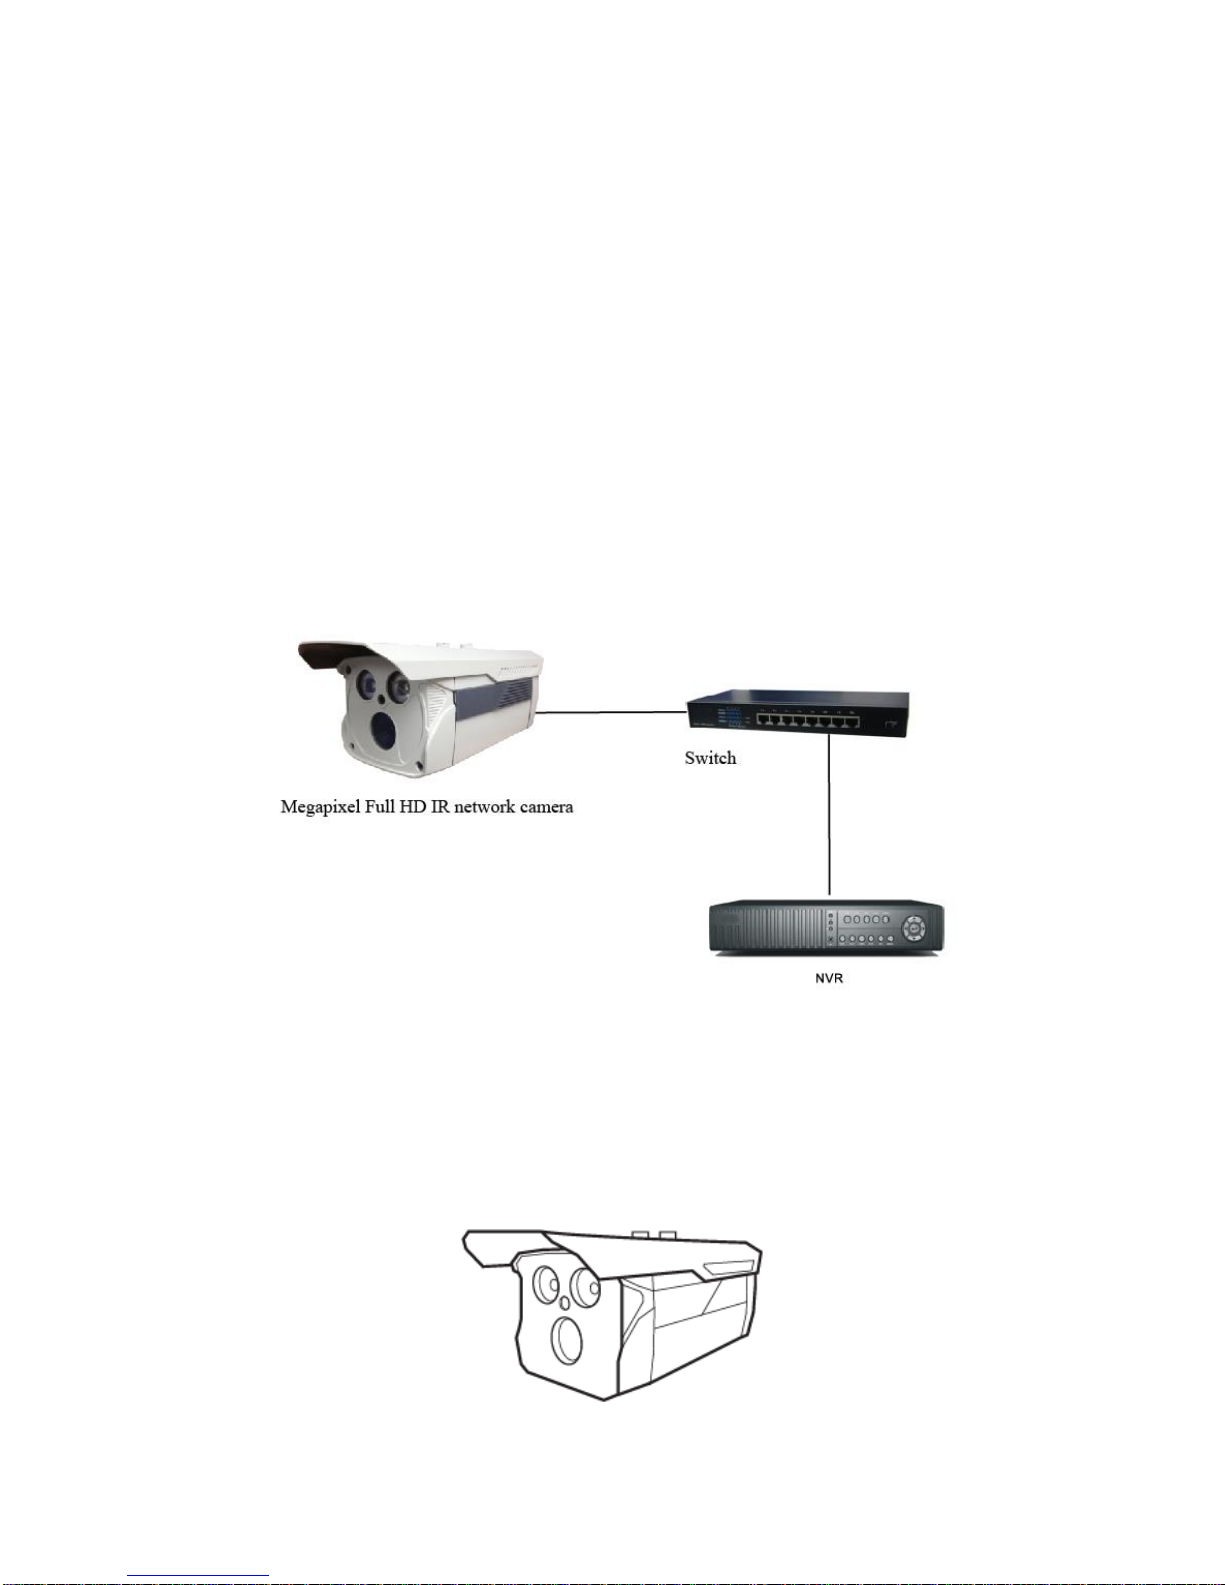
Setting of camera connect with NVR illustration
Camera connect with NVR
Click “parameter setting” button in NVR software GUI, enter IPC setting UI, click “search”
button, system will automatically search cameras in intranet and show the cameras’ IP
address in the form, double click the IP address, it will automatically append IP to the form of
“connected IP camera”, without appending cameras, the GUI can’t preview image, click enter,
camera image will be showed on GUI.
Product Features
720P
Sensor
1.3 megapixel CMOS
Video compression
H.264
IR range
10m - 50m
Dual stream
1280x720(25fps)/432x240(25fps)PAL
1280x720(30fps)/432x240(30fps)PAL
Lens
3.6mm、4.2mm、6mm、8mm、12mm
Min illumination
0.1Lu/F1.2(color)、0 Lux with IR
Day&Night
IR cut filter with auto switch
Frame Rate
1- 25 FPS(FPS); 1-30 FPS ( NTSC)
Bit Rate
500kbit/s~3 Mbit/s
Protocols
TCP、OUP、IP、HTTP、FTP、SMTP、DHCP、DNS、ARP、ICMP、
POP3、NTP
Communication Interface
RJ45 10M/100M self-adaptive Ethemet
Power supply
DC 12V 1A
Record mode
NVR 、IP dient software
Power consumption
Max 6W
Operating Conditions
-20 ~ +60 摄氏度
Operating humidity
10 ~ 85%
Product Size
Client software user manual
1.the introduction
1.1 the introduction
1.2 system requirements
Operating system:over window 2000
CPU:Inter Pentium 4 2.4G or higher
Memory:512M or more
Monitor : support 1024*768 and the higher resolution
Card : support directdraw to accelerate and opening.
1.3 convention
In order to the simplify describe in this manual ,will describe as following .
client software called software
DVR DVS called equipment
"Click" means to click the left mouse button
"double click"means to double click the left mouse button
"Right click" means to click the right mouse button
2. software running
2.1 Running and login
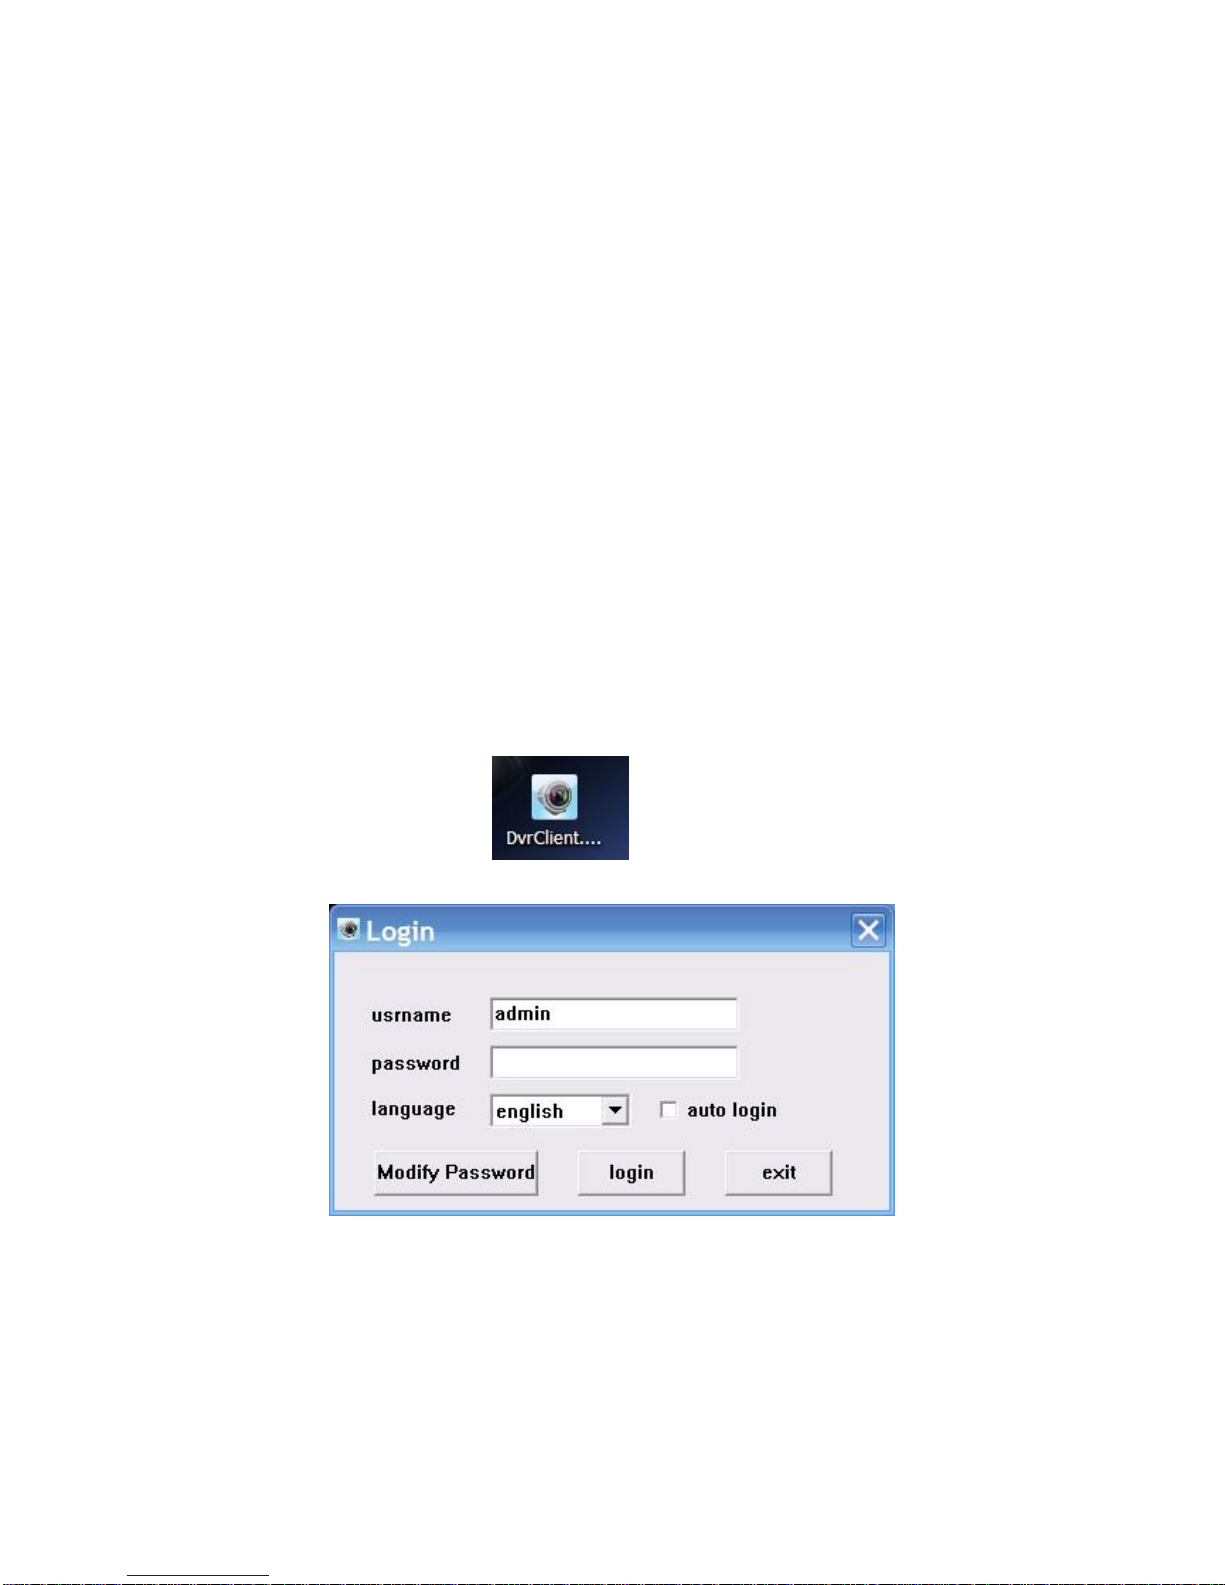
2.11 Double-click The shortcut to run the software。
2.12 Login
Choose the user name ,enter the password clink to enter the program. you can choose
“automatically login,” so it will not appear on the window next time.
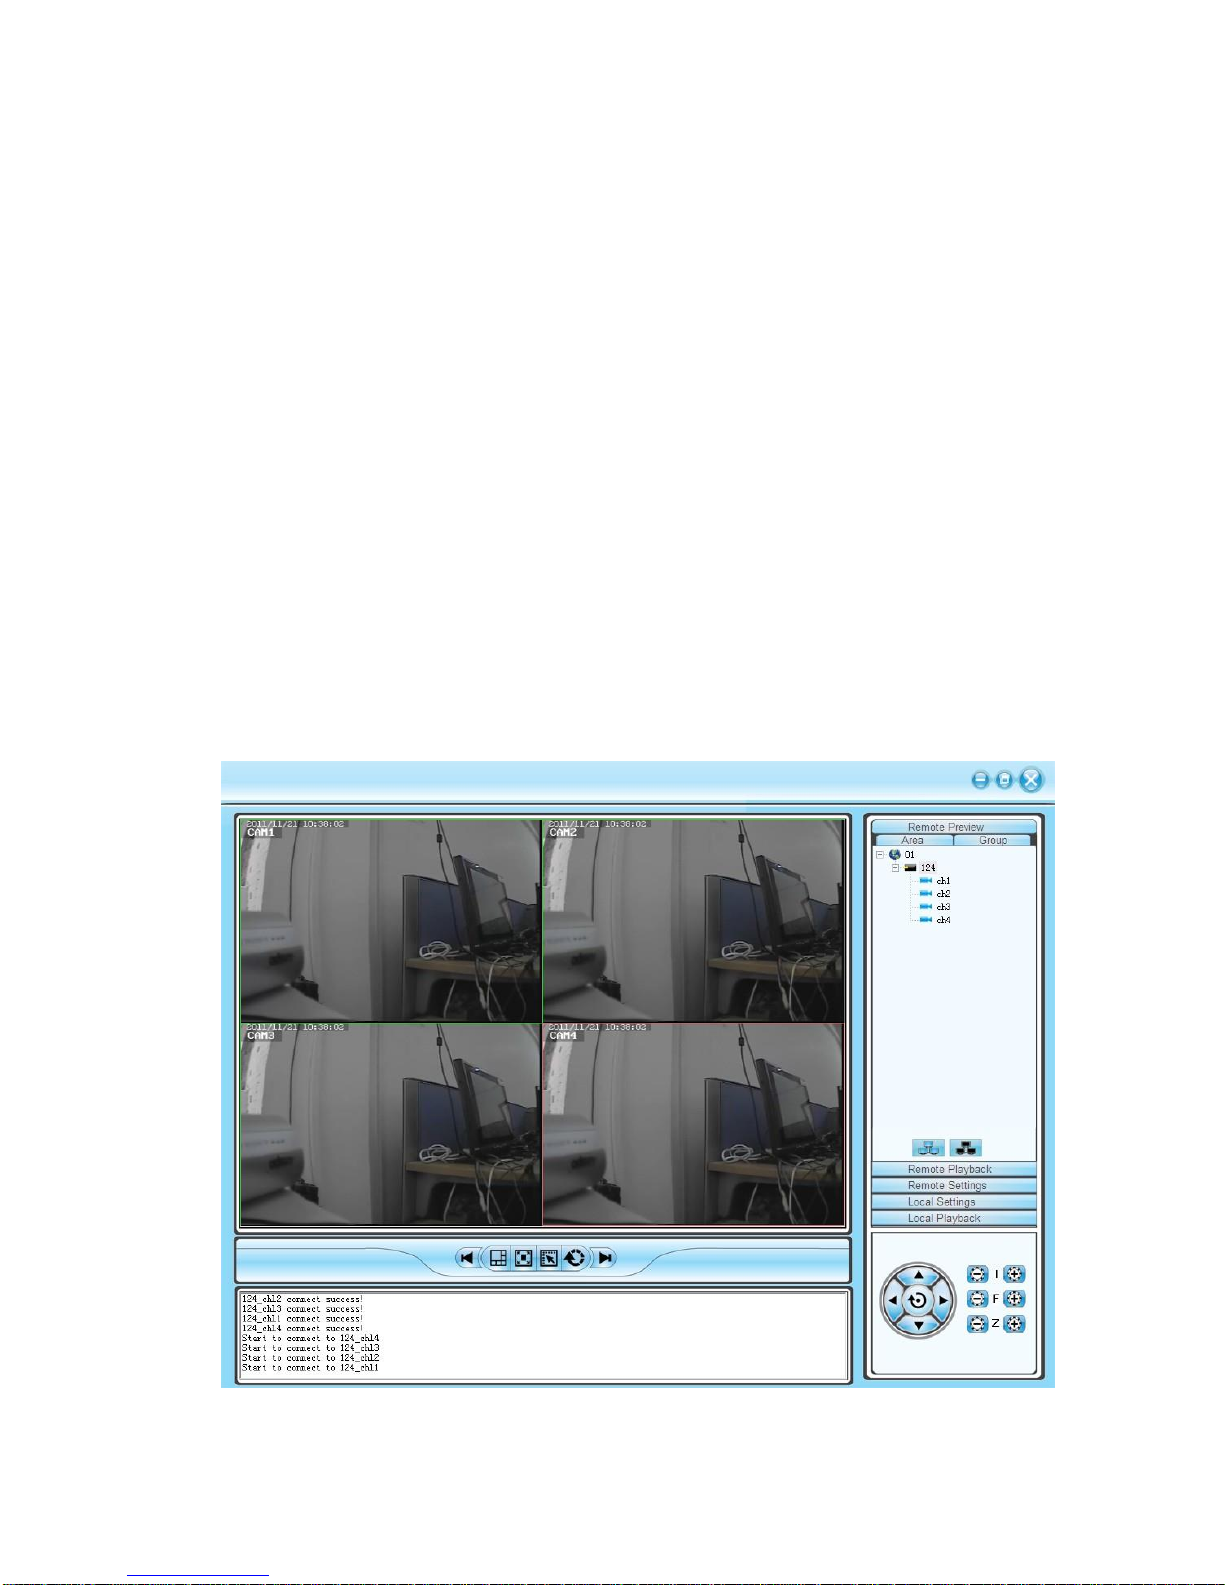
2.2 introduction of the Software interface

introduction of the Software interface
1) system and the button bar
Interface can be locked, minimize the window to the taskbar, close program operation。
2 )Tab bar
Contain the function of the different software models
Remote preview :Real-time preview on the device
Remote playback :Local video playback and remote playback
Remote settings: Configuration setup
Local settings: user management,device management,system setup
3) device tree
Show each equipment and to add management group
4 )Preview Display Window
Real-time preview of the device channel
5 )PTZ control window
For PTZ control, adjust the picture
6 )Preview Control Bar
Preview control to stop, drawings, switching screen modes, full screen, rotation, etc.
3.Equipment Management
Before using the software to operate, need to add and configure the device operation. Click
the tab bar "Configure" tab to enter configuration mode
1
2 3 4
5
6
Click on the left navigation bar set- "Device Manager" item to enter the device management
interface.
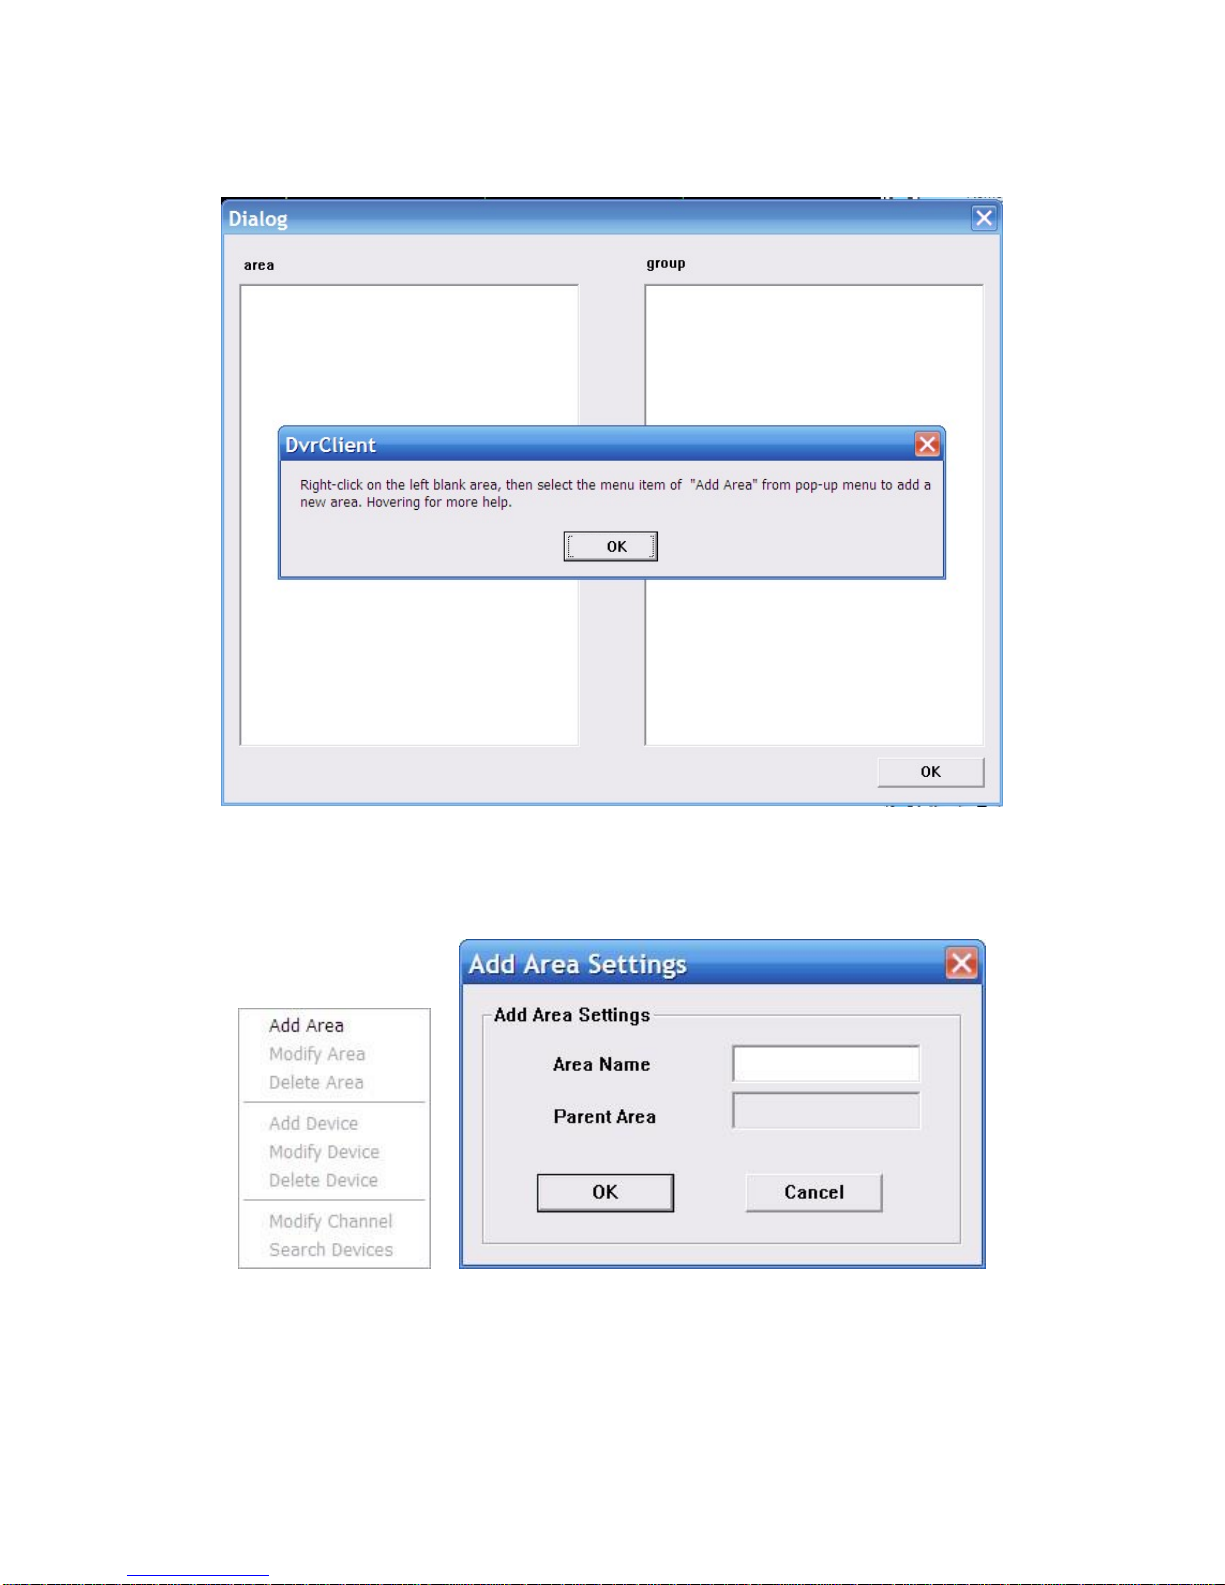
4.1 device tree configuration
When the initial run the software, the list defaults to an empty tree, right-click any blank space
can be a list of trees to add area.
Fill in the name of the regional title bar and click OK you can add a tree to the list area, and
because of this added area as the first area, there is no higher in the region area, the higher
the regional name column blank.

Regional add is complete, right-click the regional nodes may choose to sub-region, add the
operation of equipment
Right-click the Add area, pop-up a regional management menu.
Select "Add a sub-regional" sub-regions can be added.
Select "Delete area" will be removed in a selected state area.
Note: If you remove the region which contains other regions under, equipment or channels,
then delete operation will not only delete the selected area, but will remove all of the regions
under this region, equipment or channels; if the region is under the preview channel or Video
will be given a warning.
3.1.1 Manually add the device
Right-click the Add area, pop-up regional management menu, select "Add Device."
Options
Explain
device address
Device IP address or domain name
device port
device port number
http port
http port number
User name
Device’ Registered User name
User password
Device’ Registered User password
Device name
Add the device name it can be customized
channel
Device’ Channel number, please fill in the actual situation
In area
the name of the host region
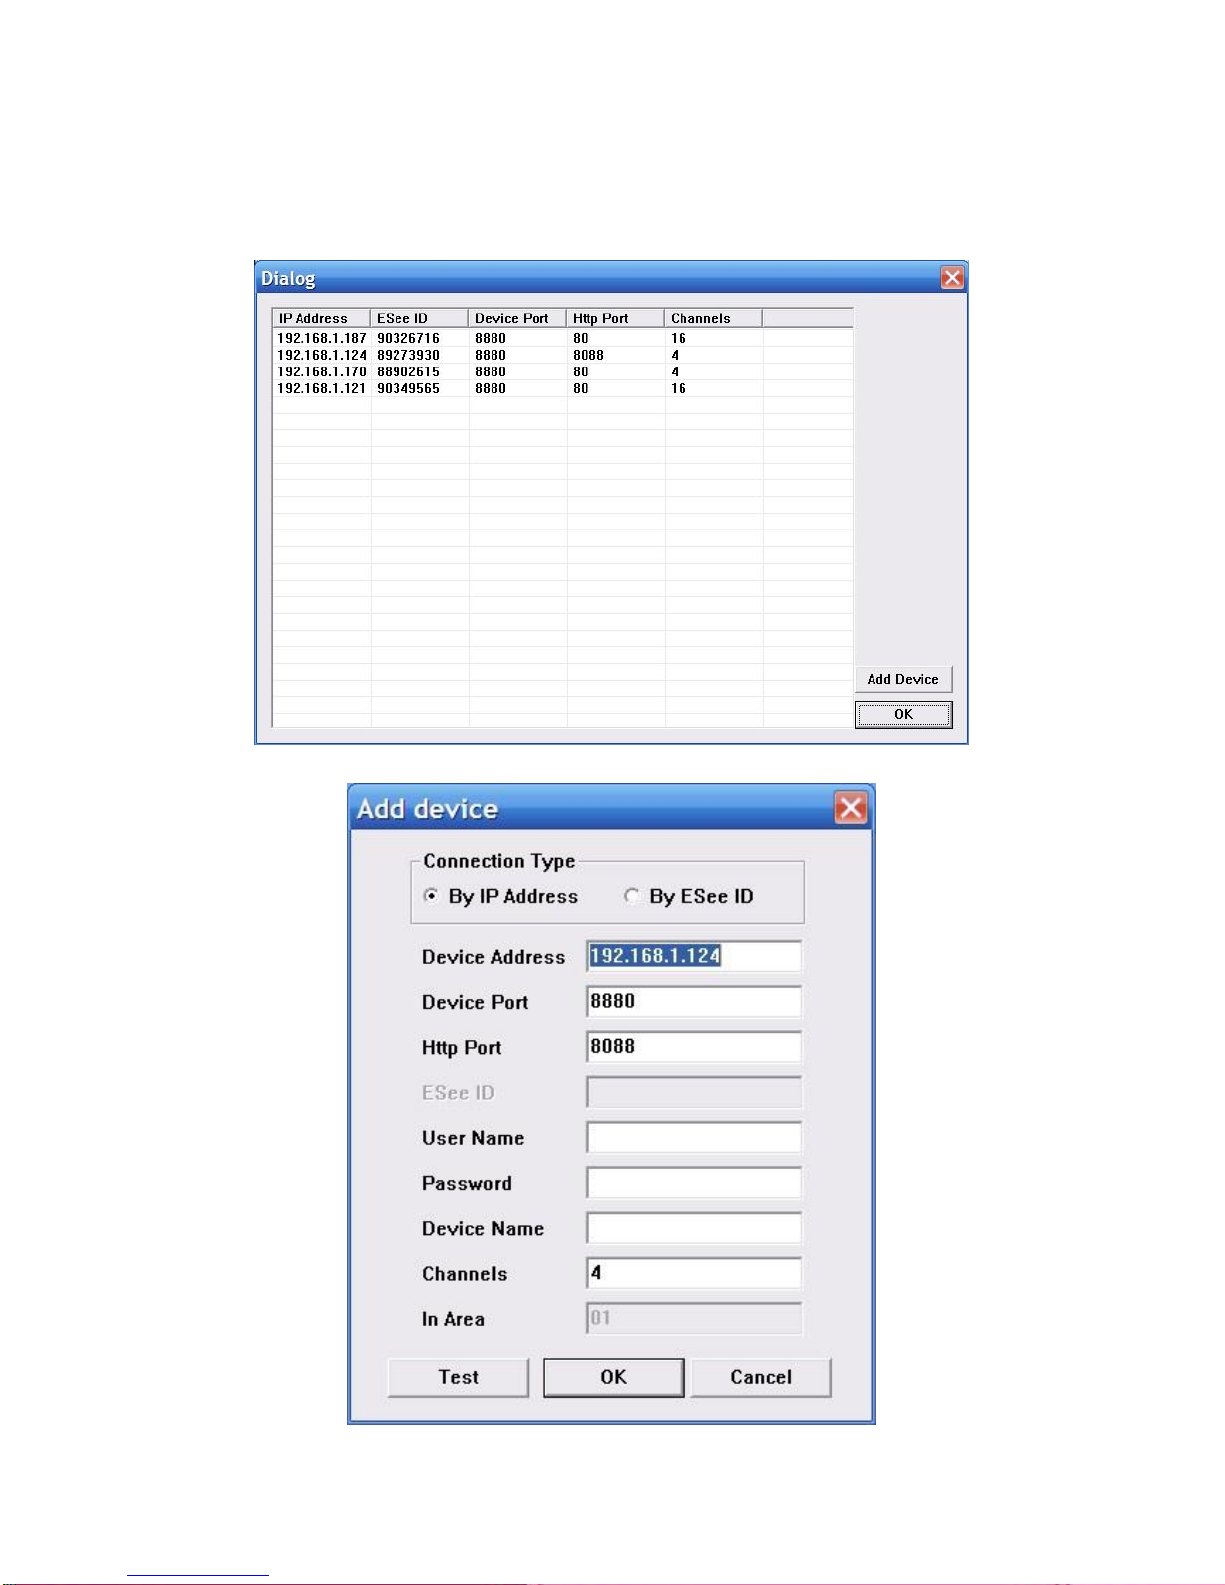
click“test connection”to check if it could connect to the device
3.1.2 Search the LAN-line equipment
Right click In any regional / sub-regional, click the menu item in the search Device, search the
same LAN-line equipment
Choose one of them,click“add device”

modify the device name in the device information menu so that the device name will be not
same.
To fill the user name and password , click the test connection, after connect successful, choose
"OK" to setup
Then continue to add other devices.
3.2 modify the device name
If the group did not contain any node in the tree, then to be add the node first
Right at the grouping column shows the space group management menu, click on "Add
Group" item
Enter a group name, click OK to add group.
Group added successfully, you can access the list in the tree node to the next selected group
Select the channel list tree node, click "add" in the Device Configuration window to add the
selected channel into the group tree
Group, the channel name will show in the form of "device name _ channel name" , after adding
a channel successfully , list tree select the next channel of the device node automatically .
Select the device in list tree, click "add" in the Device Configuration window could add the all
selected channel into the selected group. After a device successfully added all the channels,
then select the next window select list of a device tree node.
Using the device configuration window button bar "Move" and "Down" buttons can be adjust
the order of nodes under channel grouping.
Pitch up the Channels node in the grouping tree, click "delete" button in Device Configuration
window to remove select the channel from the group. After removing the channel, the group
tree will automatically select the next channel in the grouping.
Select the group node of group tree, click "delete" button in Device Configuration window will
display the warning message dialog window. Click "OK" to delete all the channels node under
the selected group.
Note: same channel couldn't be added in one group. But one channel can be added into
different group
4.live video
4.1 general live mode
4.1.1 double click to start preview
Click a player window, the selected window frame will turn into light blue.
Double-click the device list or a grouped channel, the channel will be play in this window.
4.1.2 start /close all preview
Choose device and click right mouse to choose"open all device channel" for all open, and
choose "close all device channel" for all close.
4.2 live sequence dwell
Click the switch for live sequence dwell, then begin to play.
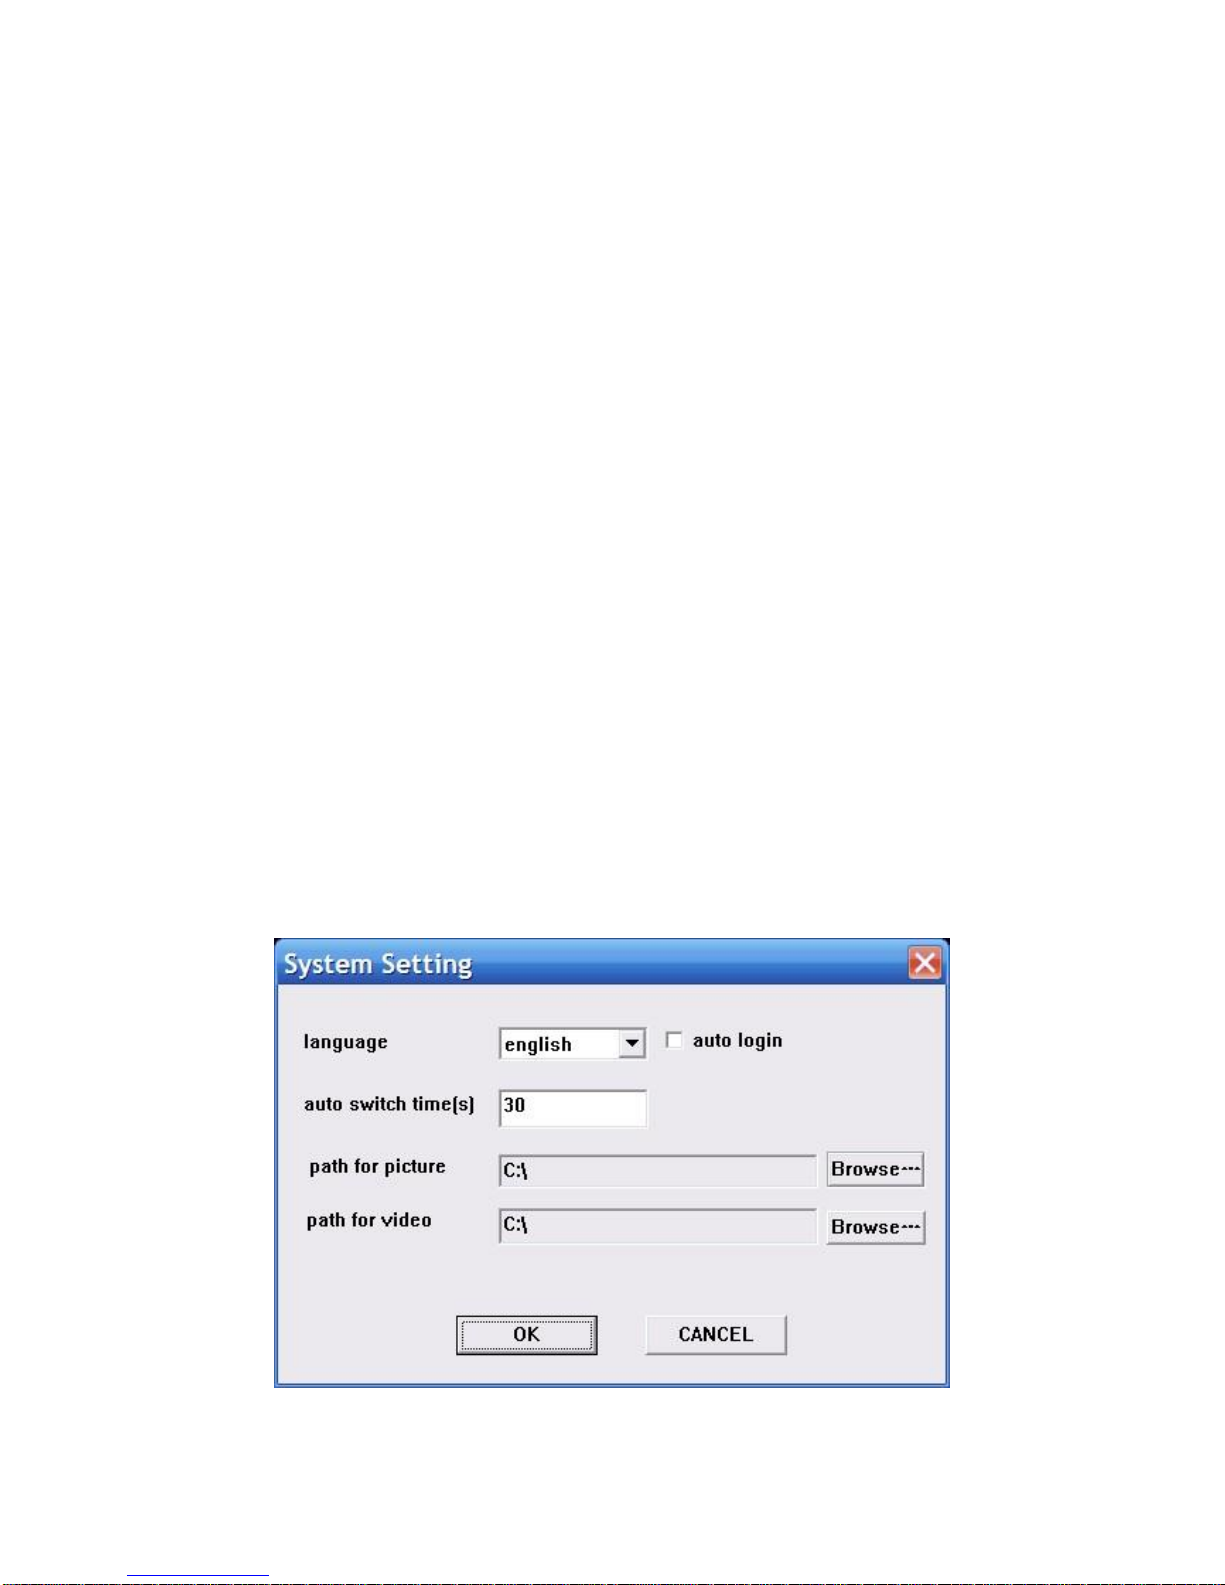
Time can be set in the client local setting-system setting.
4.3 Other function
Double click to magnify: in the mode of multi image,double click playing window can magnify it
and return after double click again
Picture mode:can be switch in multi picture.
Full screen: hide some part of item and set the play windowmaximize.
Last page,next page: show all remain window at present state. Total in 64 preview window,
each time will show 1 page. Window quantity will according to the picture mode.
5.PTZ control
5.1 PTZ control:
Control the direction of rotation, speed, Iris, focus and zoom.ect miscellaneous function.
6. Record and playback
6.1 client local record
Client record:manual client record
In the preview window,click right mouse button to choose" start save video"and begin record.
Video save route can be modify in local setting-system setting

6.2 Remote playback
Click "remote playback" button can turn into remote playback interface.
6.2.1 remote video document search
To choose the needed search device in right equipment tree, and choose channel,record
mode and starting time. click "search", the document will be there.
6.2.2 remote file playback
Video will be play automatically.,also ,it can be play in anytime point by dragging progress bar
Support 4channel playback in the same time.
6.2.3 screenshot
During playback, screenshot can be done to any window.click"screenshot" button.
Screenshot save route can be set in local setting-system setting.
6.2.4 Backup

6.2.5 playback control
can drag,suspend and double click to magnify the picture for present playback.
7. remote setting
Click"remote setting" go into remote setting menu
Choose the device in the right side device tree, double click the device to go into setting
interface.
7.1 system information setting
7.2 General setting

7.3 network setting
7.4 coding setting

7.5 record setting
7.6 screen setting

7.7 video sense setting
7.8 PTZ setting
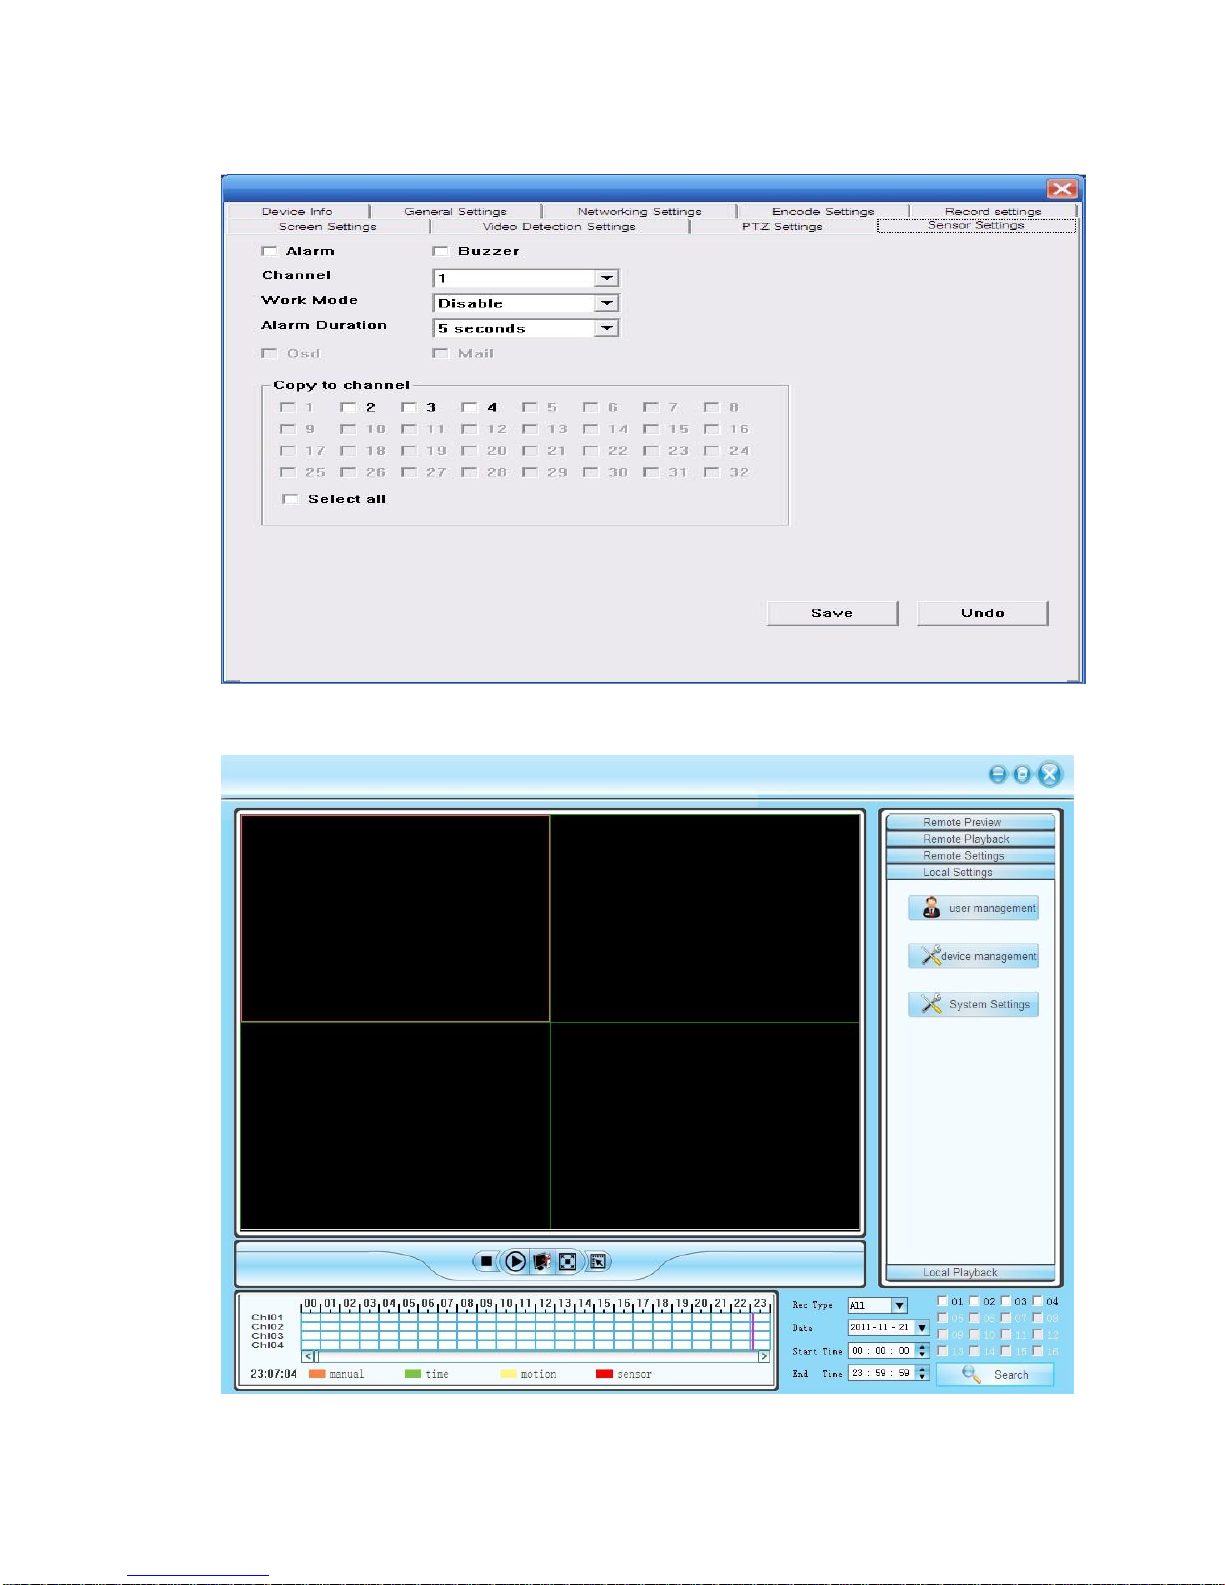
7.9 sensor setting
8. local setting
8.1 local setting
Local setting can user management, setting management, system setting
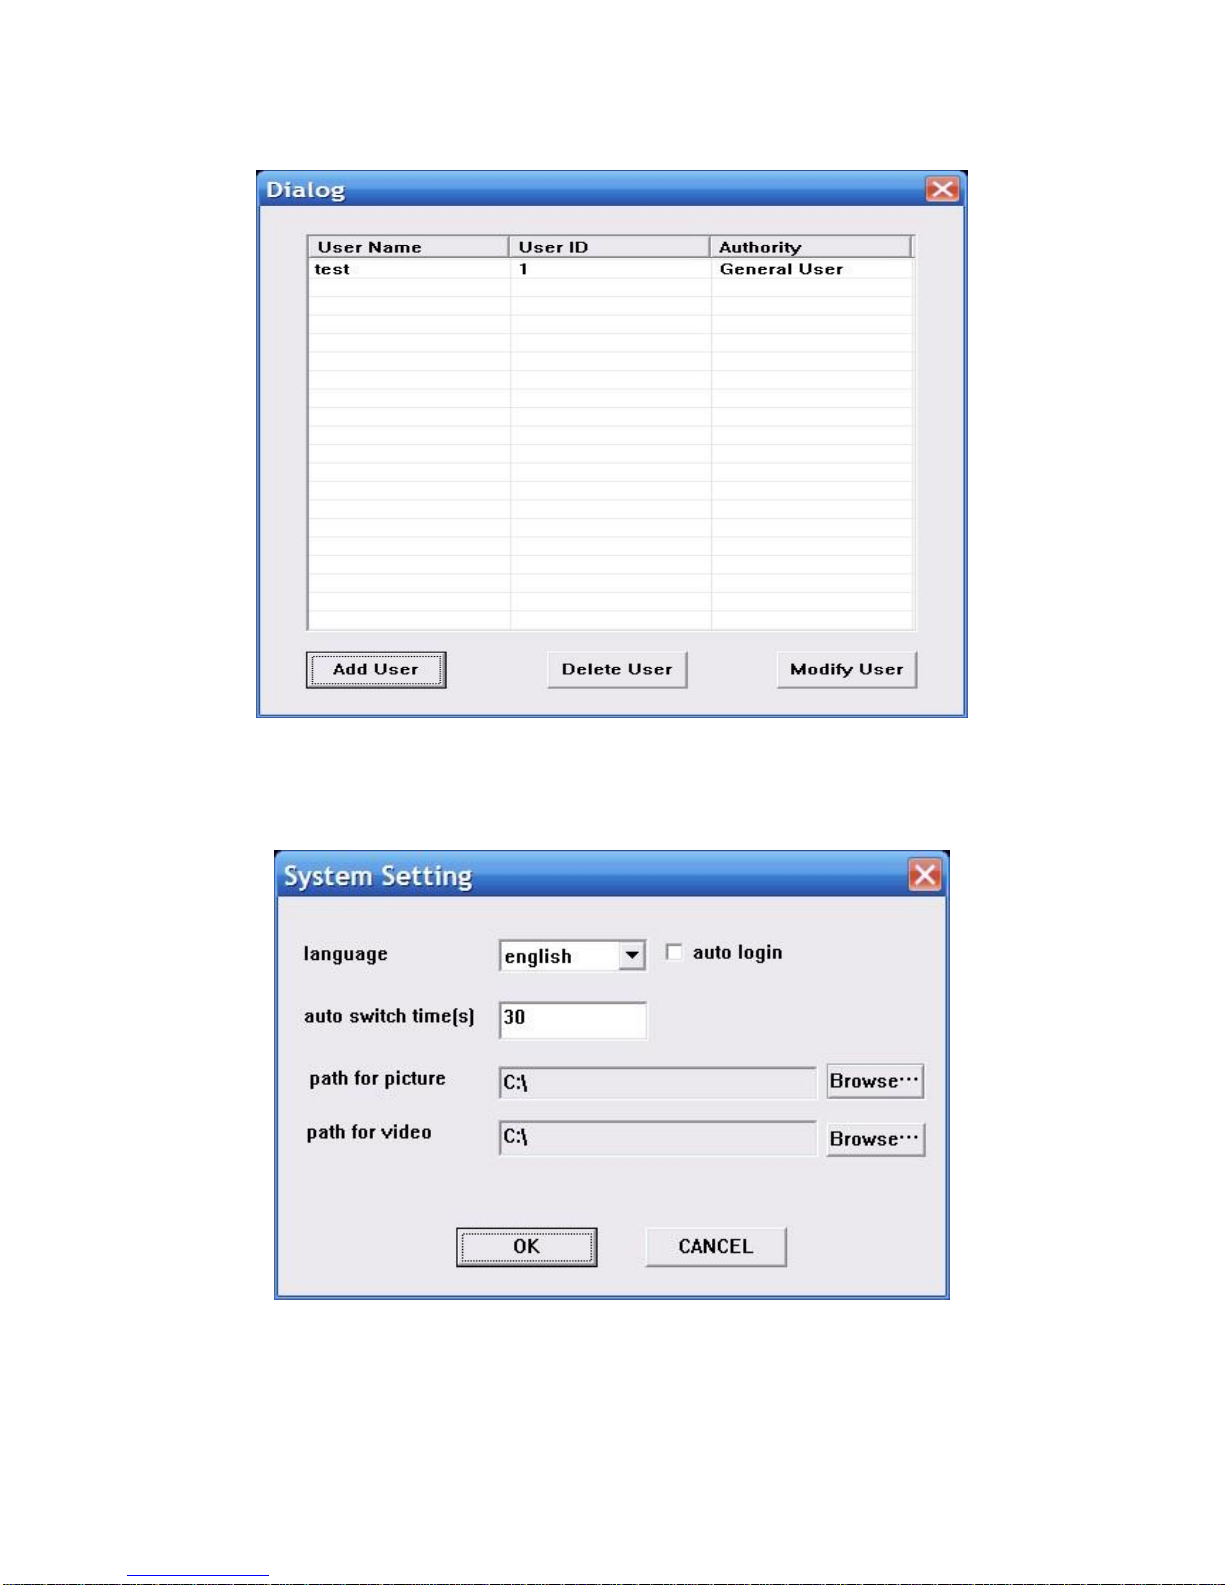
8.2 user management
Can add user,delete user and modify user
8.2. 1 device management
Add device
8.2.2 system setting
Country of Origin: CHINA
 Loading...