

Page 1
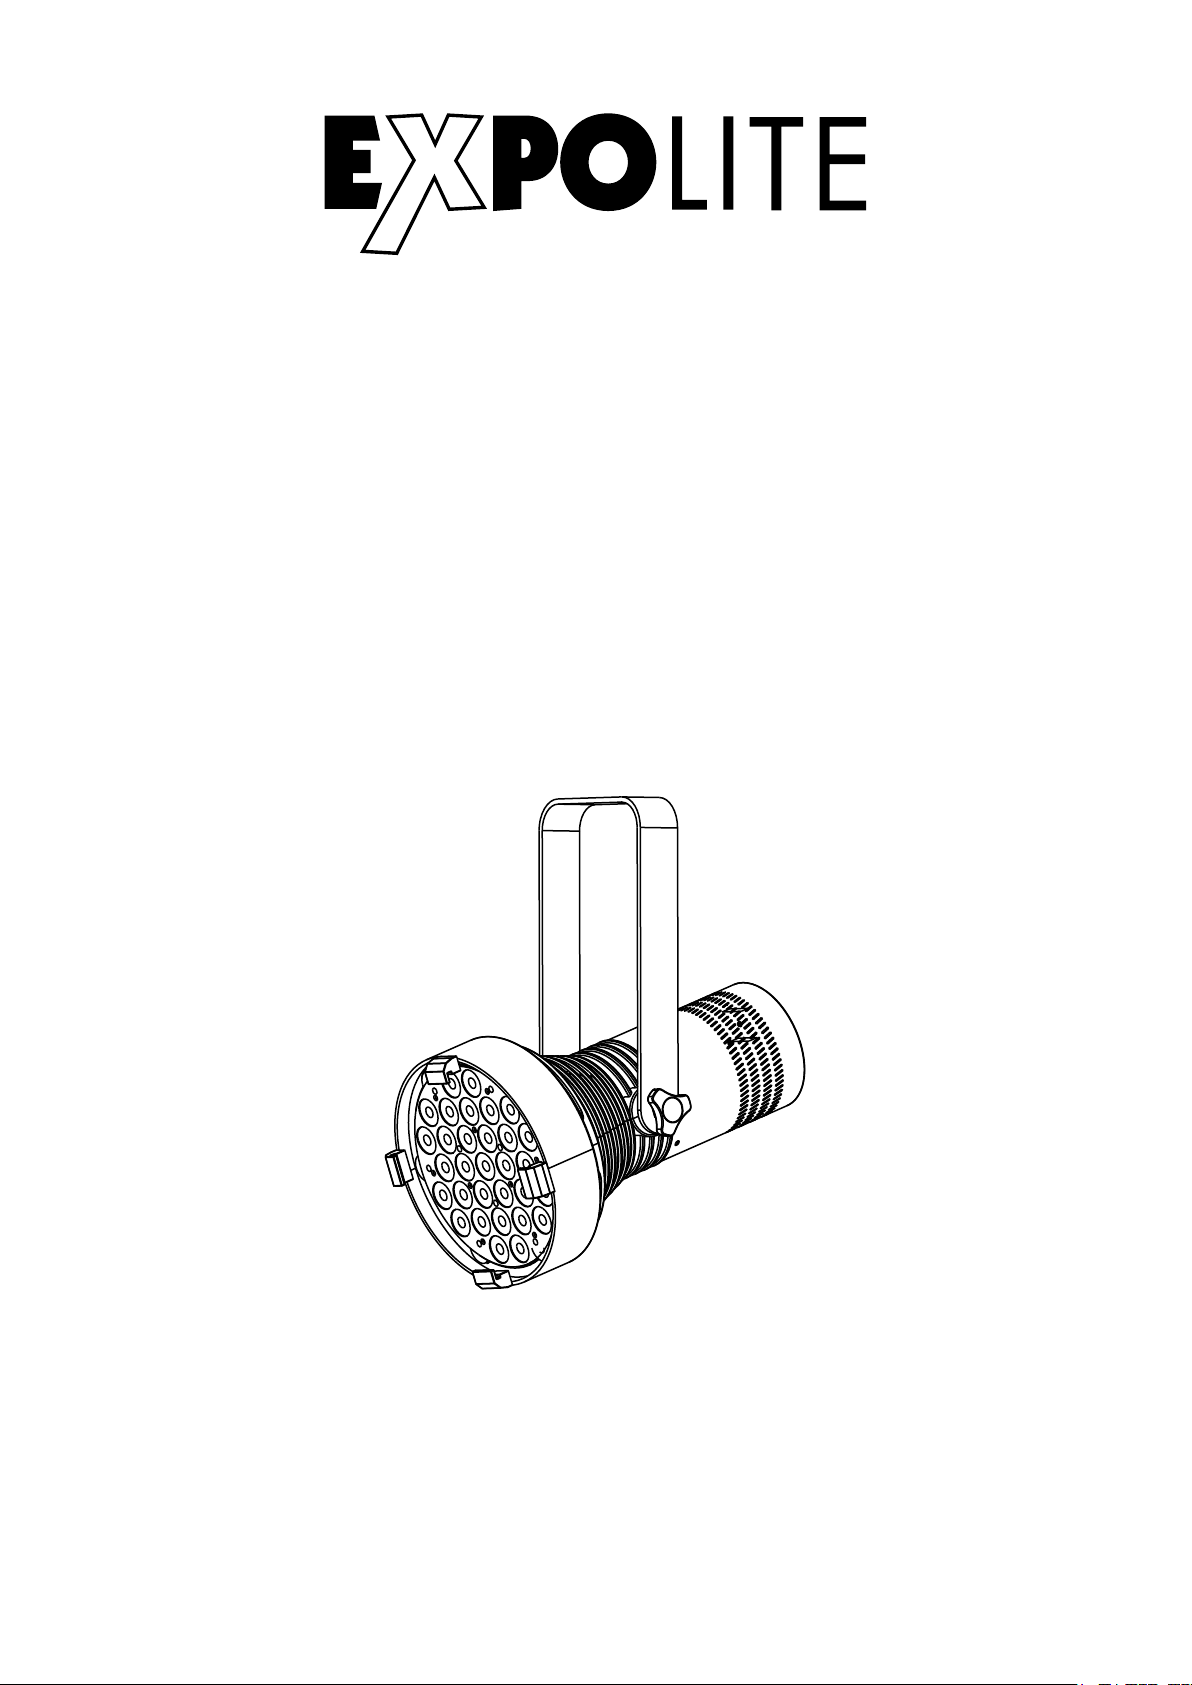
FLS Power
Bedienungsanleitung
User Manual
Art.Nr.: led26500
Eigenschaften
Bedienelemente
Steuerung
Specifications
Menu
Control
Bedienungsanleitung bitte aufbewahren
Keep this Manual for later queries
Änderungen sind ohne Ankündigung möglich.
Changes are possible without prior notice.
Rev. 2018-36-32
Page 2
Die beiliegenden Bedienhinweise für Expolite
Geräte sind Bestandteil dieser Bedienungsanleitung. Lesen Sie diese sorgfältig, bevor
Sie das Gerät in Betrieb nehmen.
The enclosed General Information for Expolite
Units are part of these user manual. Read them
carefully before operating the device.
by
FOCON SHOWTECHNIC
Vertriebsgesellschaft mbH
Teichweg 4+6
D-49504 Lotte/Wersen
Telefon: ++49 (0) 541-77095-0
Fax: ++49 (0) 541-77095-27
[email protected]
www.focon-showtechnic.com
Page 3
Inhalt - Content
DE
ENG
Inhalt - Content
Lieferumfang
Technische Daten
Abmessungen
Installation
Bedienung
Steuerung mit DMX512
Delivery
Product Information
Dimensions
Installation
Operation
Using DMX512 Controller
Seite / Page
D-04
D-05
D-06
D-07
D-08
D-12
E-14
E-15
E-16
E-17
E-18
E-22
Page 4

Lieferumfang
- Expolite FLS Power
- Anschlusskabel für Spannungsversorgung
- Bedienhinweise für Expolite Geräte
- Bedienungsanleitung
Expolite Geräte werden vor dem Versand sorgfältig geprüft. Sollte der
Lieferumfang dennoch nicht vollständig sein, wenden Sie sich bitte umgehend
an Ihren Vertriebspartner.
D-04
Page 5
Technische Daten
Spannungsversorgung
Maximale Leistungsaufnahme
Abmessungen
Gewicht
Anschlüsse
Betriebstemperatur
Luftfeuchtigkeit
Schutzklasse
Gehäuse
LEDs
Abstrahlwinkel
Steuerung
DMX-Kanäle
100V - 240V AC 50/60Hz
350W
234 x 234 x 495mm
6,4kg
Power In/Out | DMX In/Out
-20°C - 45°C
< 98%
IP 20
Aluminiumdruckguss Gehäuse
31x 10W CW/WW*
20°
Stand-Alone / DMX512
2 - 5 (2/3/4/5)
* Toleranzbereich der Farbtemperatur entsprechend Herstellerangabe +/- 10%
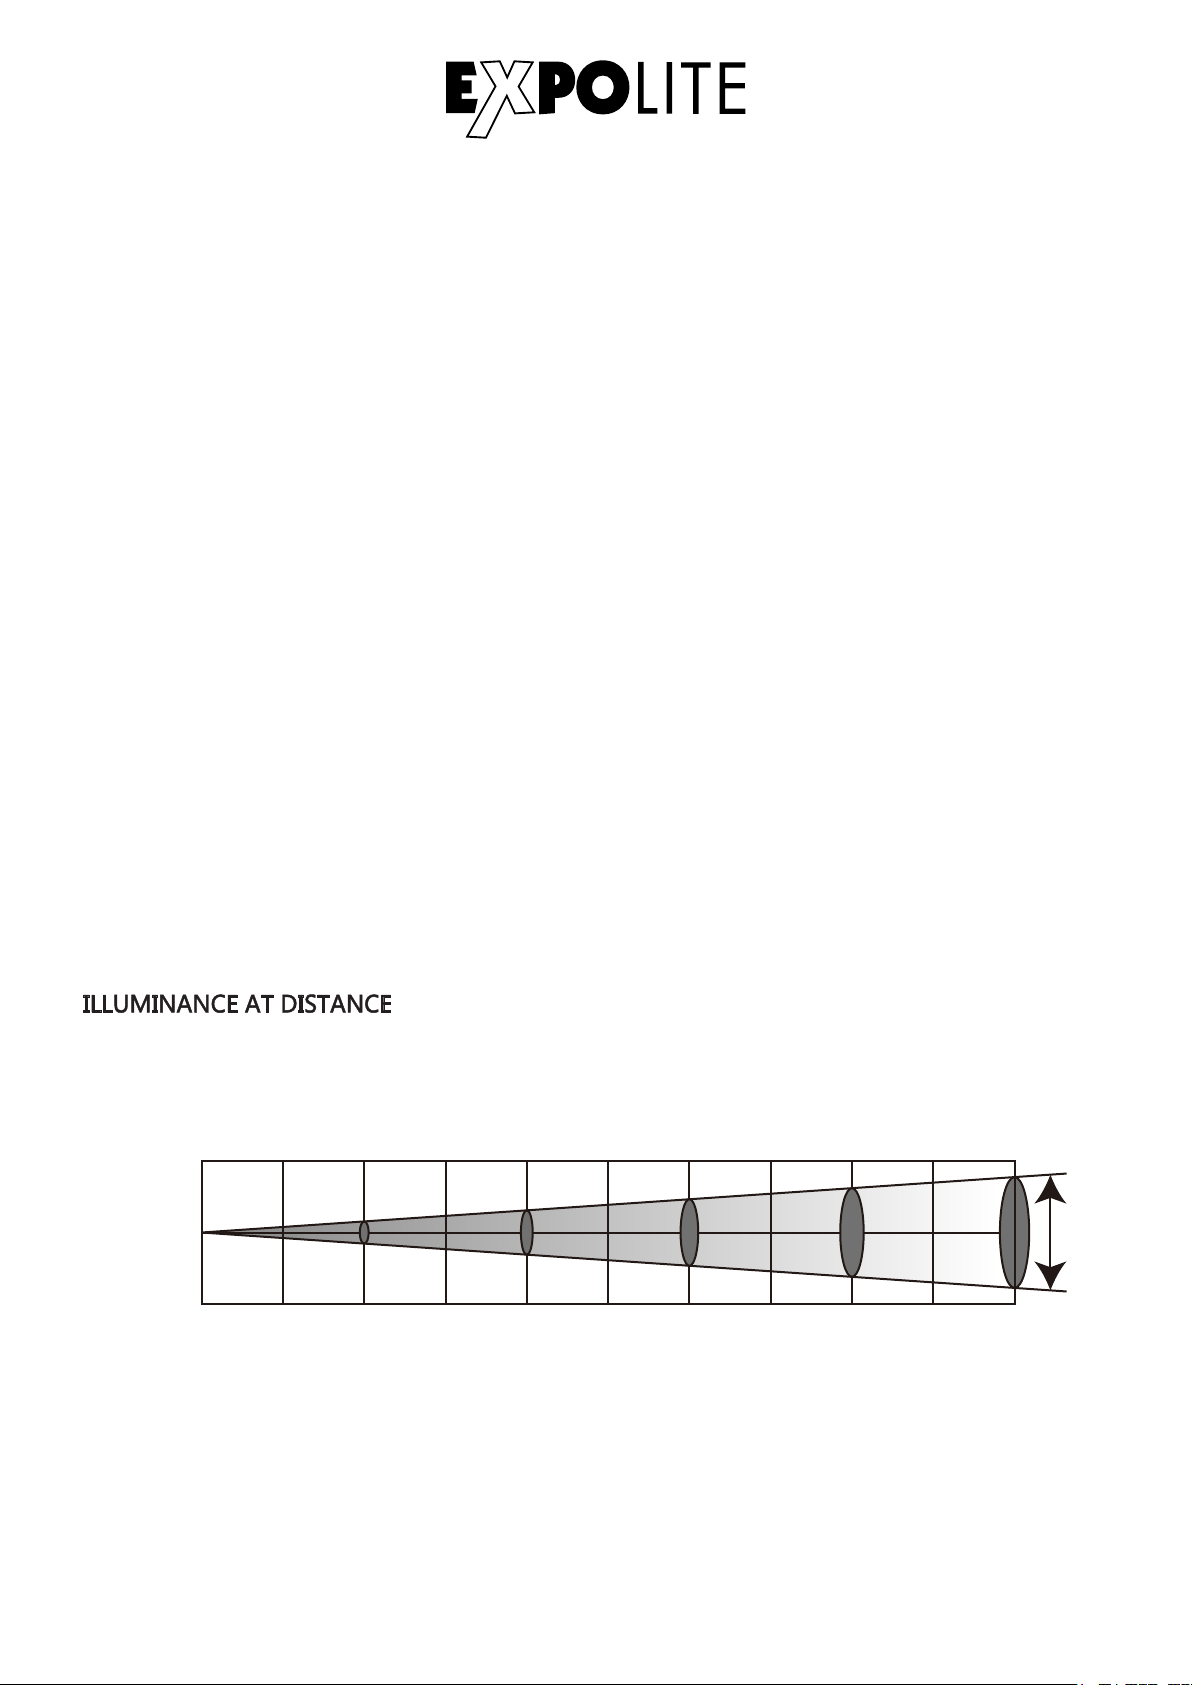
lux(CW+WW)
Beam opening
Distance(m)
Diameter(m)
lux(CW)
lux(WW)
1
0
1
0
Ø 0
66450
43480
110100
2
Ø 0.28
17220
10740
27560
4
Ø 0.56
7879
4986
12180
6
Ø 0.84
4423
2718
6957
8
Ø 1.12
2845
1754
4485
20°
10
Ø 1.14
D-05
Page 6
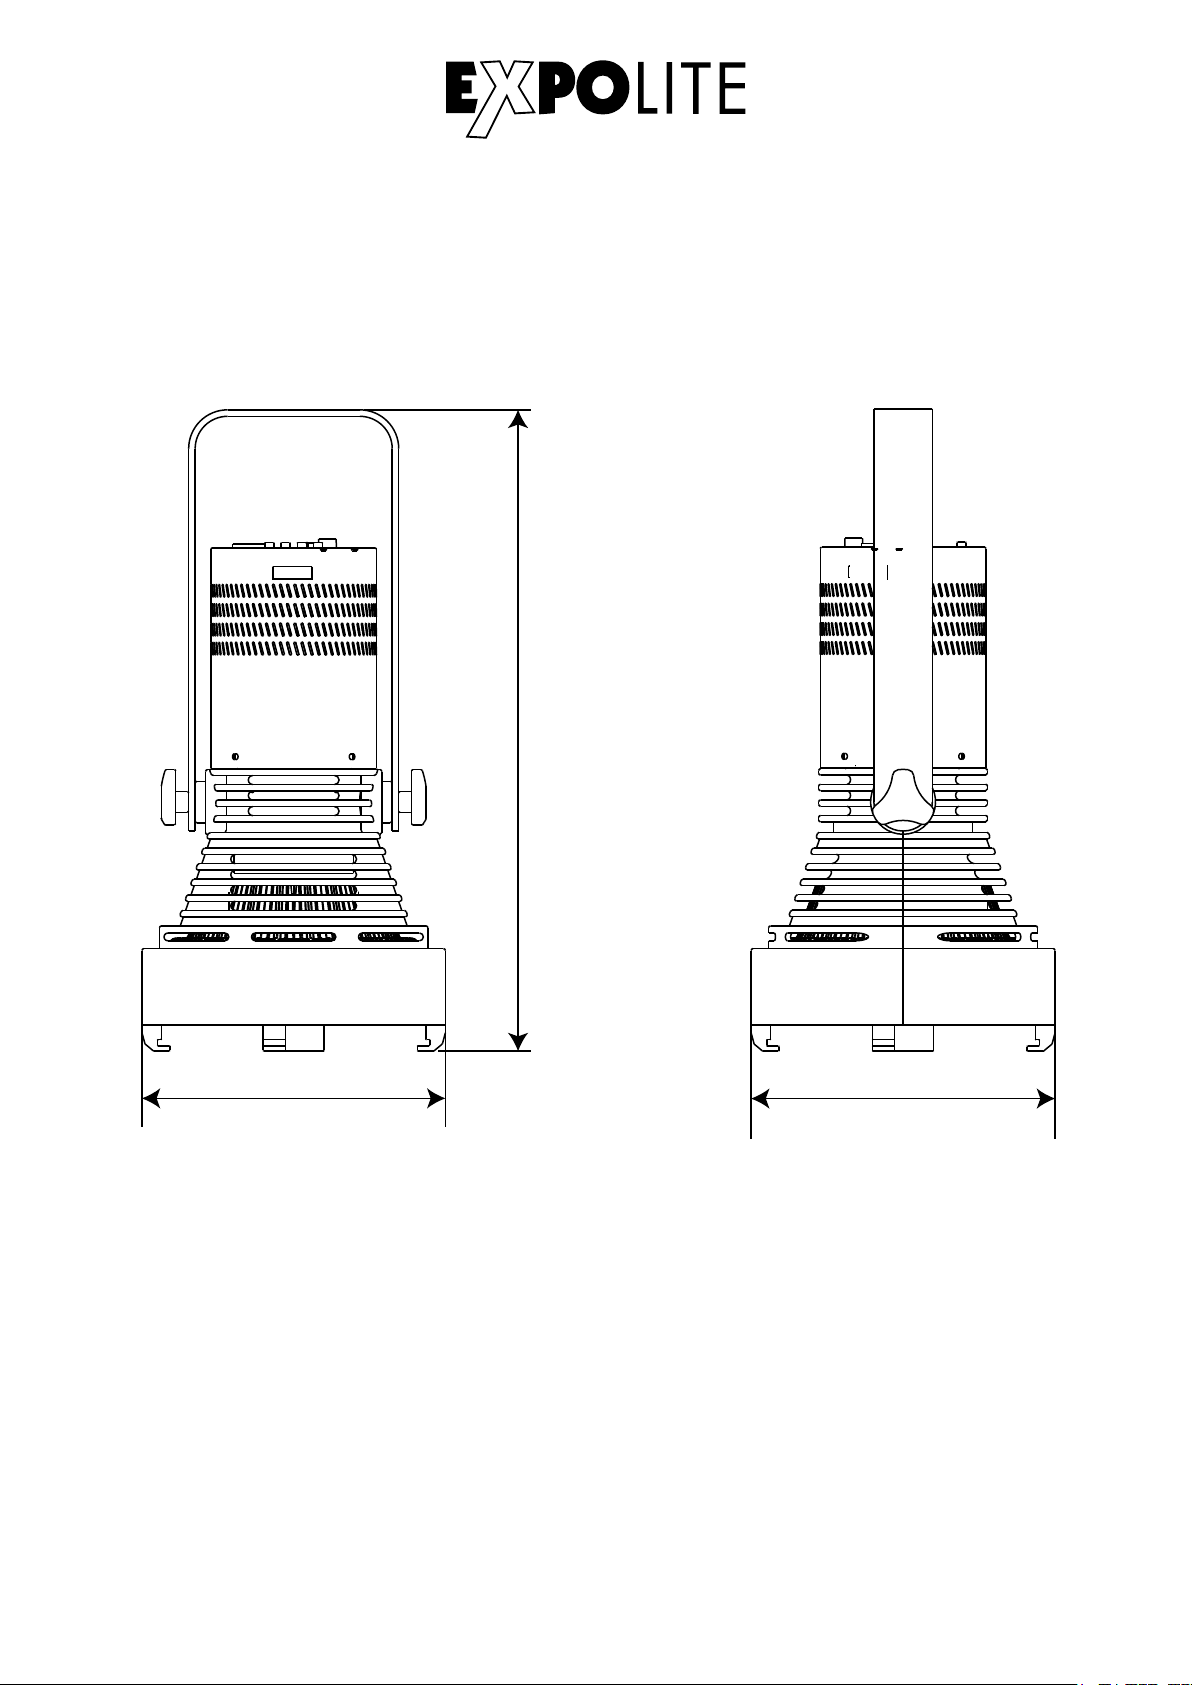
Abmessungen
494.5mm
234mm
234mm
D-06
Page 7
Installation
Montage
Hängend
Das Gerät kann in jeder beliebigen Position verwendet werden. An dem
Montagebügel sind Bohrungen vorhanden, durch die gängige Halterungen
sicher montiert werden können. Geräte müssen entsprechend der jeweils
gültigen Vorschriften sicher montiert und mit einer zweiten Sicherung gegen
herabfallen versehen werden. Hierzu ist am Gerät eine Öse für Safeties
angebracht.
HINWEIS
Das LED Modul kann in jeder beliebigen Lage betrieben werden.
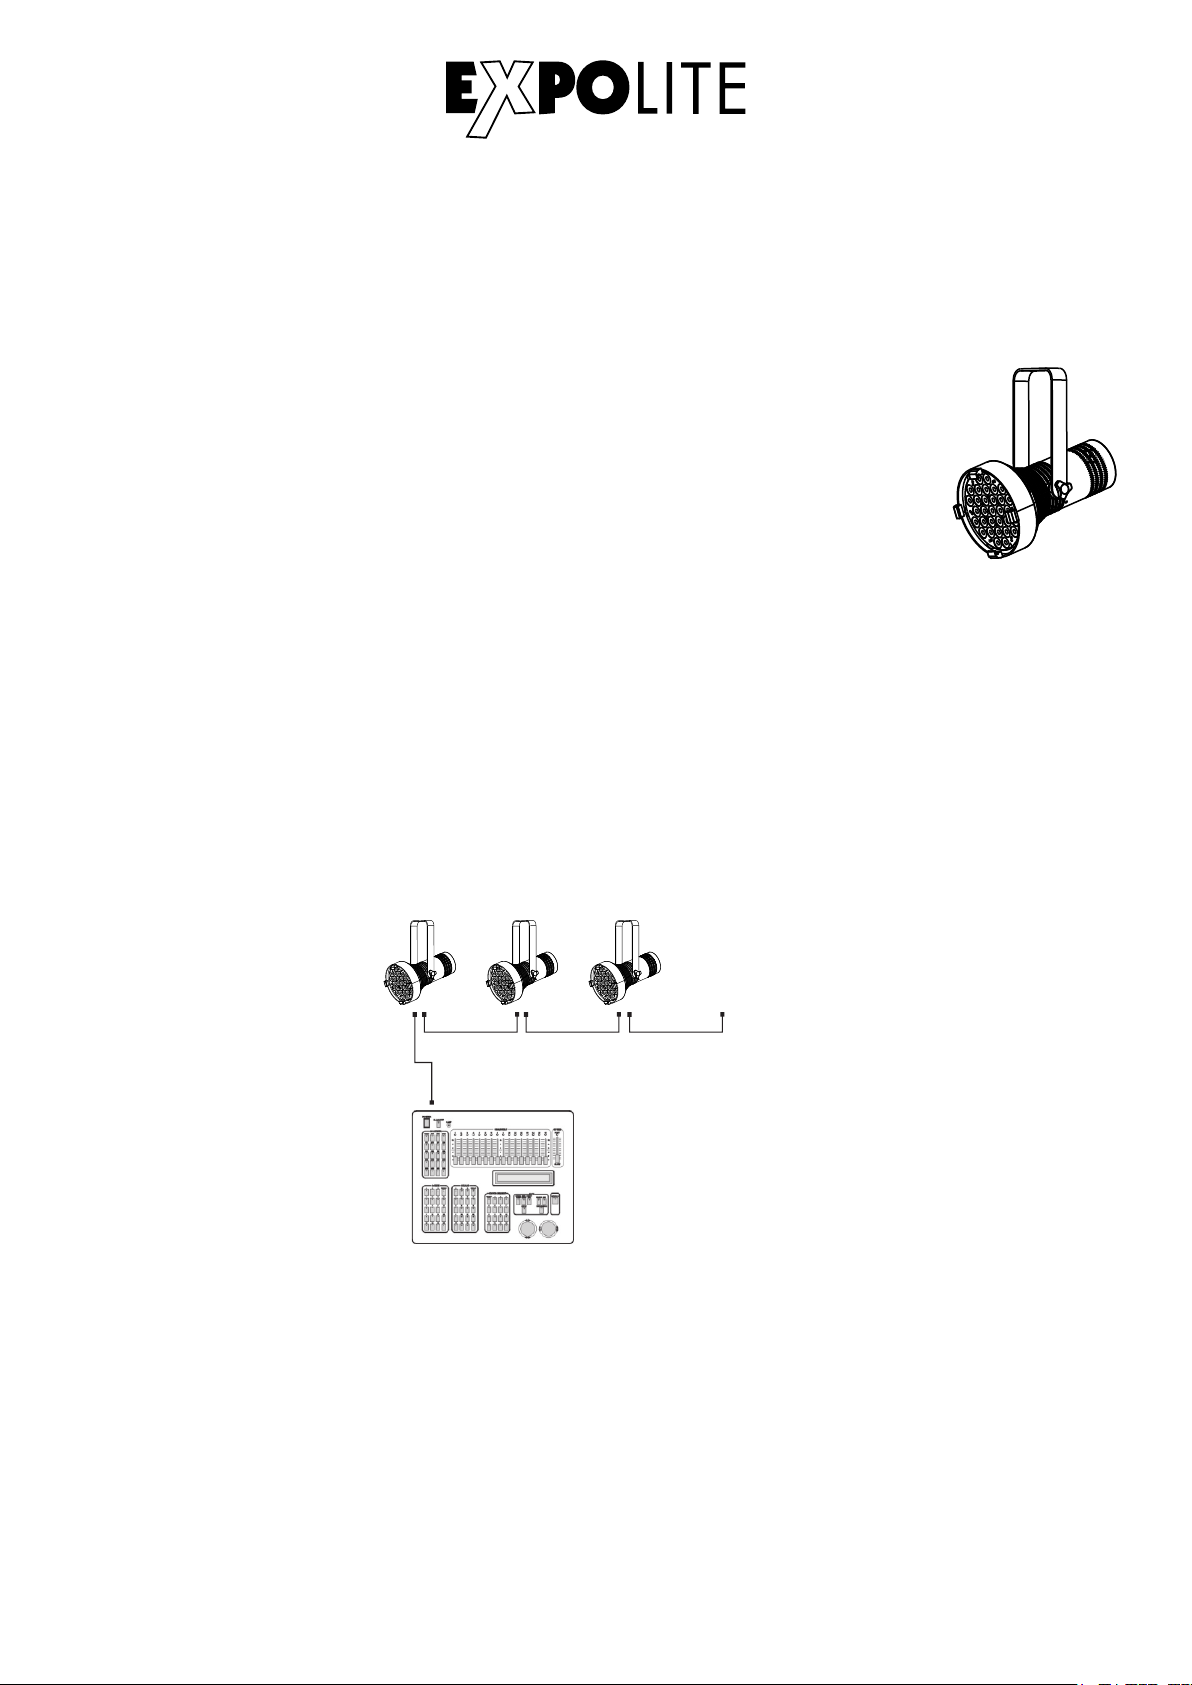
DMX-Verbindung
Die Geräte mit geeigneten DMX-Kabeln miteinander und mit dem Kontroller verbinden.
Die vorgesehenen DMX-Adressen und Personalities an den Geräten einstellen.
DM X Addr .1 DM X Addr .(N x1)+1 DM X Addr .(N x2)+1
............
DMX 512
CON TROLL ER
D-07
Page 8
Bedienung
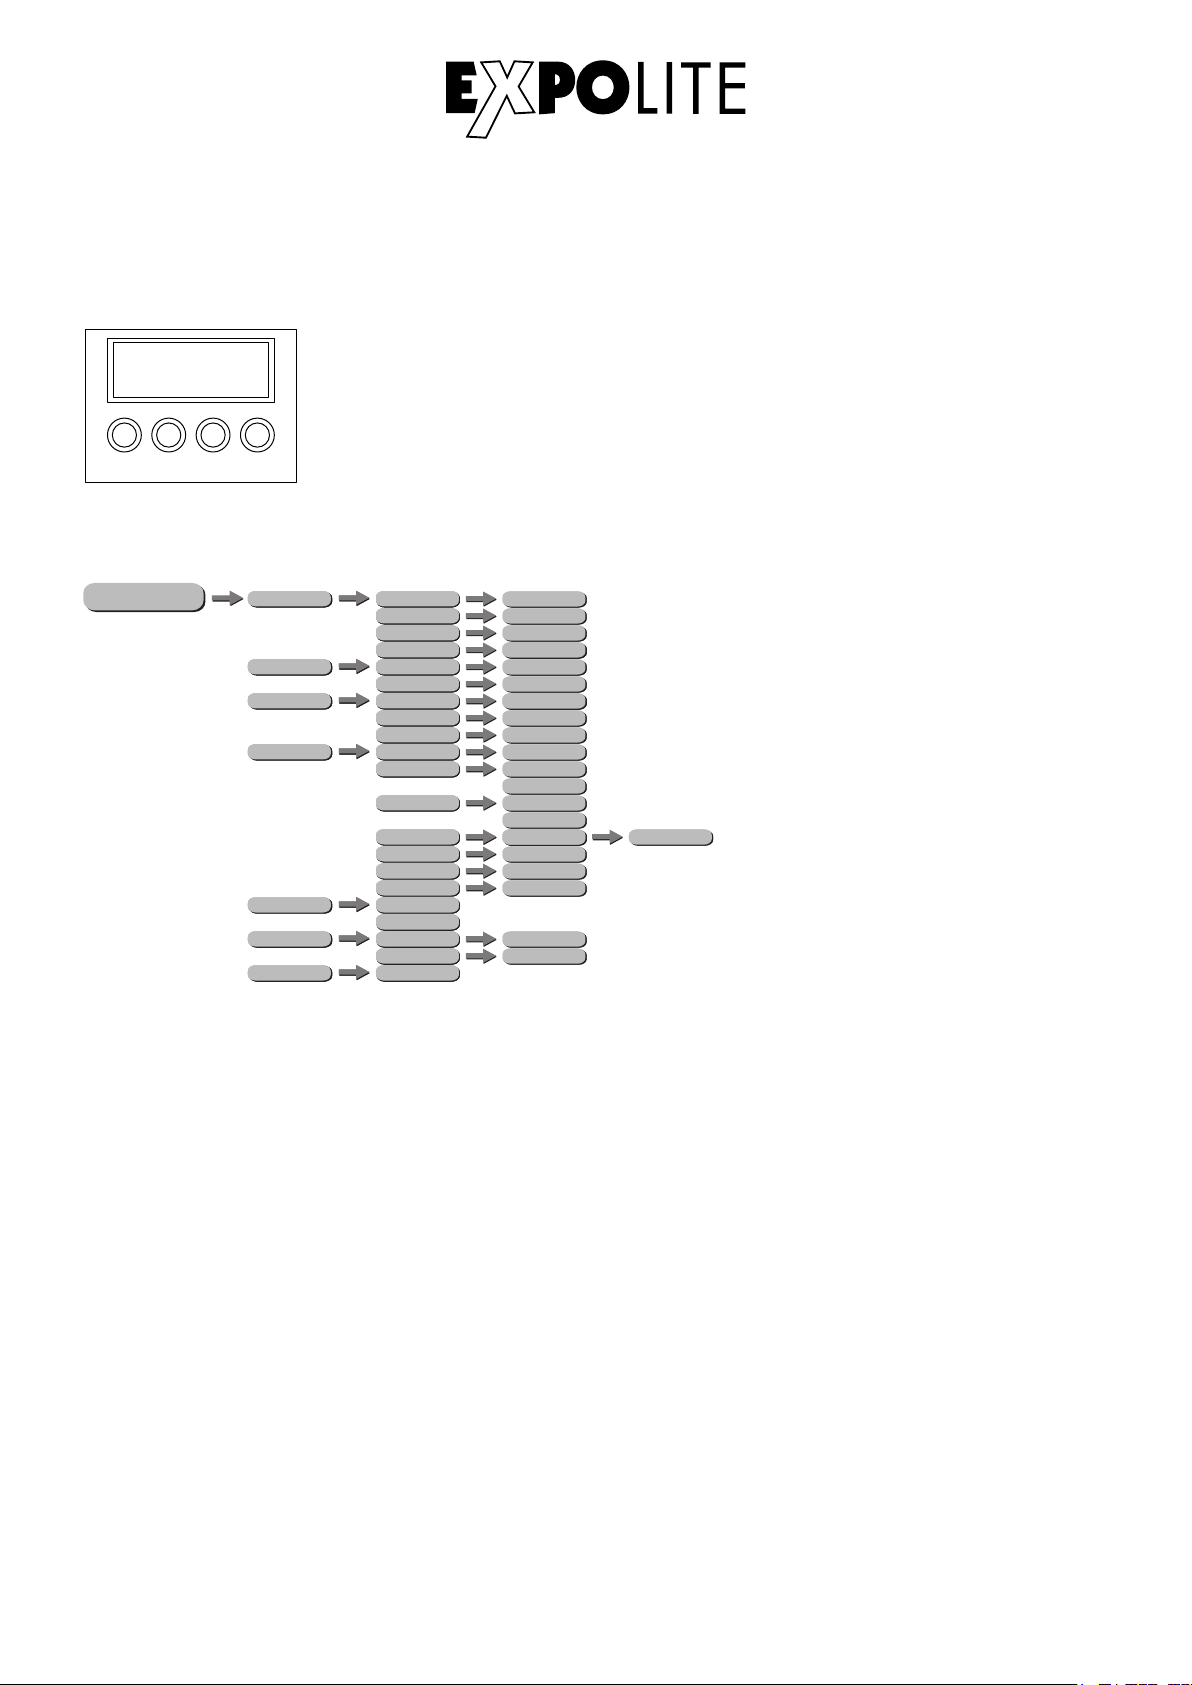
Bedienelemente am Gerät
MEN U
ENT ER UP
Menüstruktur
ME NU
DOW N
STAT COLO STAT CW
PERSON
AUTO
PERSON
PERSON
INFORMATION
SETUP
PERSON
RUN MODE
PERSON
DMX HSIC
PERSON
RESET
PERSON
MENU - Taste:
ENTER-Taste:
UP-Taste:
DOWN-Taste
HSIC
STAT WW
COLOR TEMP
HSIC
STAT STROB
HSIC
SPEED
HSIC
AUTO MODE
HSIC
HSIC
Software
HSIC
Hardware
HSIC
Fix times
HSIC
ID number
Display Led
HSIC
Key locks
HSIC
Max temp
HSIC
HSIC
Dimmer CW
HSIC
Dimmer WW
HSIC
Dimmer ALL
HSICDMX
SLAVE
HSIC
Channel Mode
HSIC
Address
HSICENTER
Eine Menüebene aufwärts
In gewähltes Menü springen; Eingabe bestätigen
Aufwärts blättern; Wert erhöhen
Abwärts blättern; Wert verringern
0-255
0-255
0-255
00-31
00
00-31
01-05
VX.X.X.
00
HX.X.X.
XXXXXh XXm
1-66
ON
OFF
OFF
On
****
0-255
0-255
0-255
2/3/4/6
1-512
002-120
D-08
Page 9
DMX-Adresse einstellen
ME NU
DMX HSIC
PERSON
Address
1-512
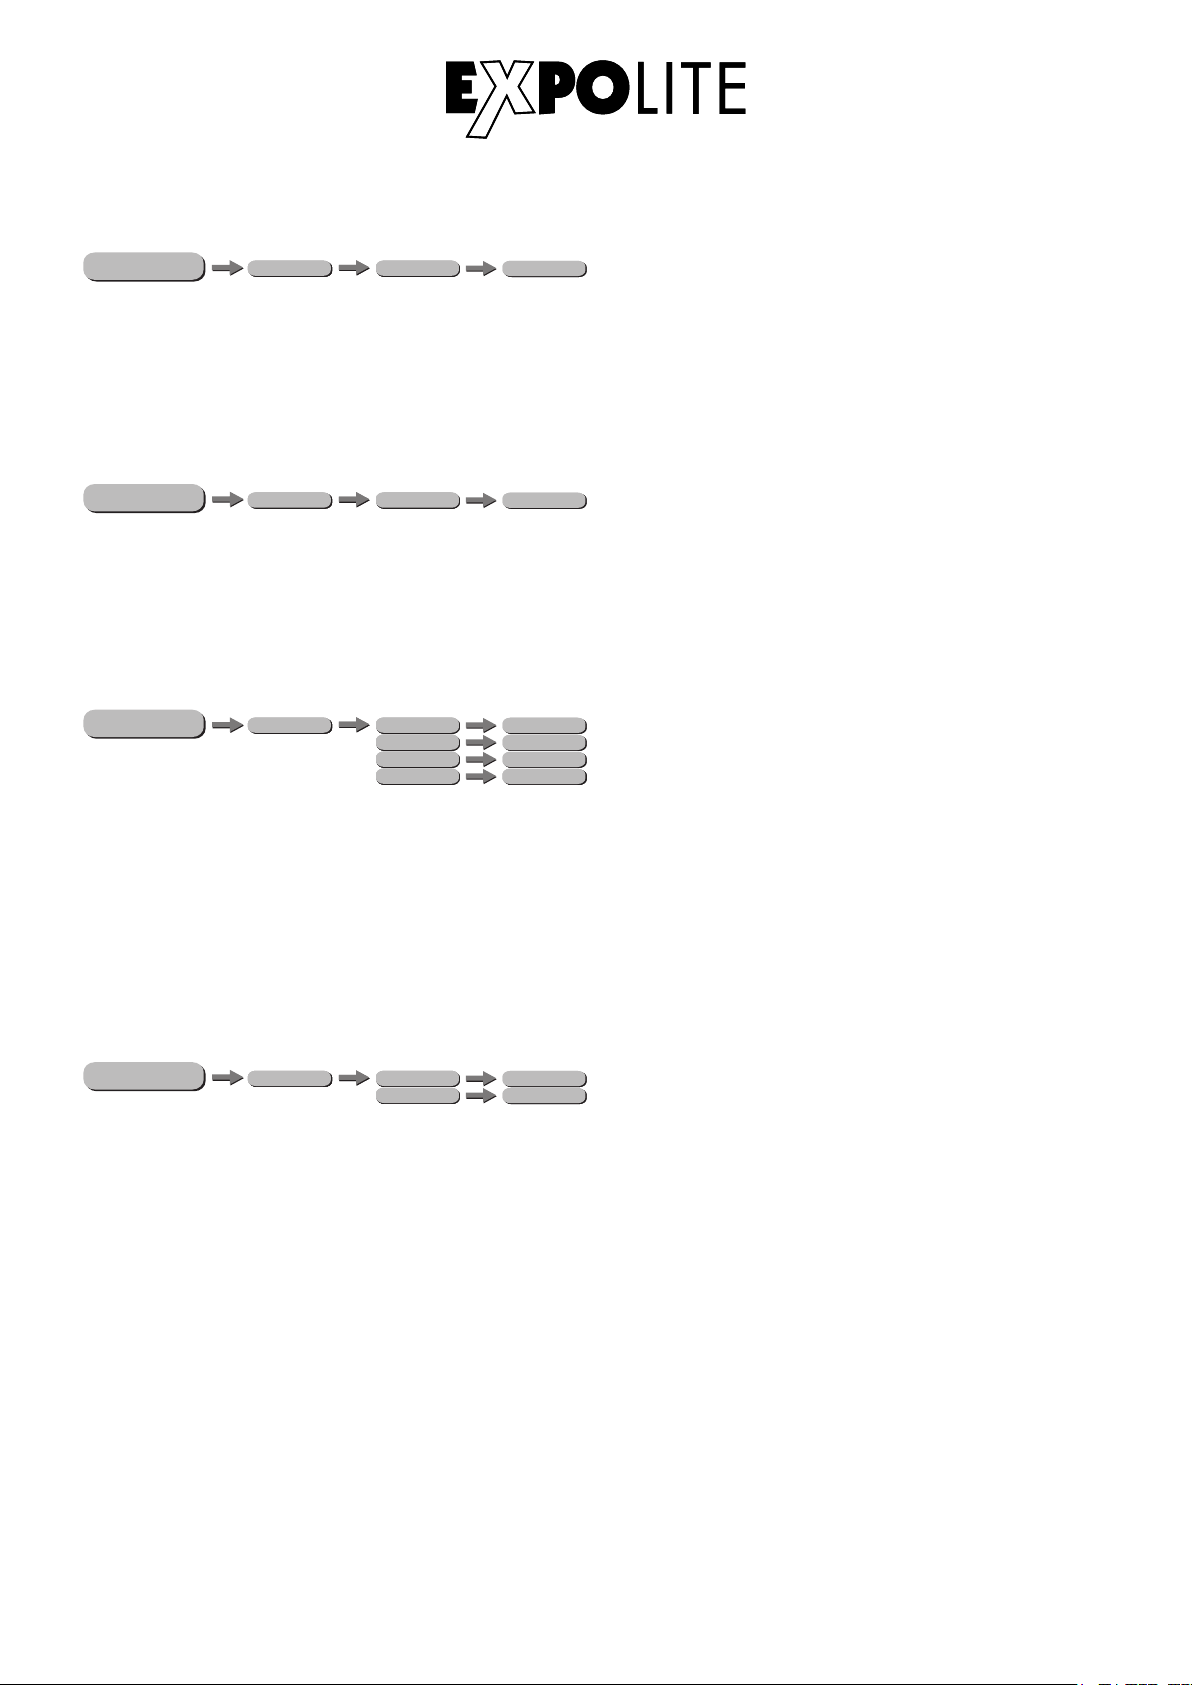
Im Menü wird im Punkt DMX, Untermenü Address die DMX-Startadresse des Gerätes eingestellt.
Diese bleibt auch bei dem Wechsel der Personality erhalten.
DMX-Kanalbelegung einstellen
ME NU
DMX HSIC
PERSON
Channel Mode
2/3/4/6
Im Menü DMX wird im Untermenü Channel Mode die Belegung der DMX-Kanäle des Gerätes
festgelegt. Es stehen ein 2-, 3-, 4- und 5-Kanal Modus zur Verfügung.
Statische Farbe einstellen
ME NU
STAT COLO STAT CW
PERSON
HSIC
STAT WW
COLOR TEMP
HSIC
STAT STROB
HSIC
0-255
0-255
0-255
00-31
00
Im Menü werden im Punkt STAT statische Farben für den Stand-Alone Betrieb eingestellt. Diese
werden anhand der DMX-Werteskala 0-255 für Kaltweiß (STAT CW), Warmweiß (STAT WW),
allgemeine Farbtemperatur (COLOR TEMP) sowie dem Stroboskopwert 0-31 (STAT STROB)
gemischt.
Automatikprogramme abspielen
ME NU
AUTO
PERSON
SPEED
HSIC
AUTO MODE
HSIC
00-31
01-05
Im Menü werden im Punkt AUTO, Untermenü AUTO MODE die im Gerät gespeicherten
Automatikprogramme abgespielt. Es sind fünf Automatikprogramme fest im Gerät gespeichert
(01-05).
Zusätzlich kann über das Untermenü SPEED die Geschwindigkeit der Automatikprogramme in 32
Schritten geregelt werden (00-31).
D-09
Page 10
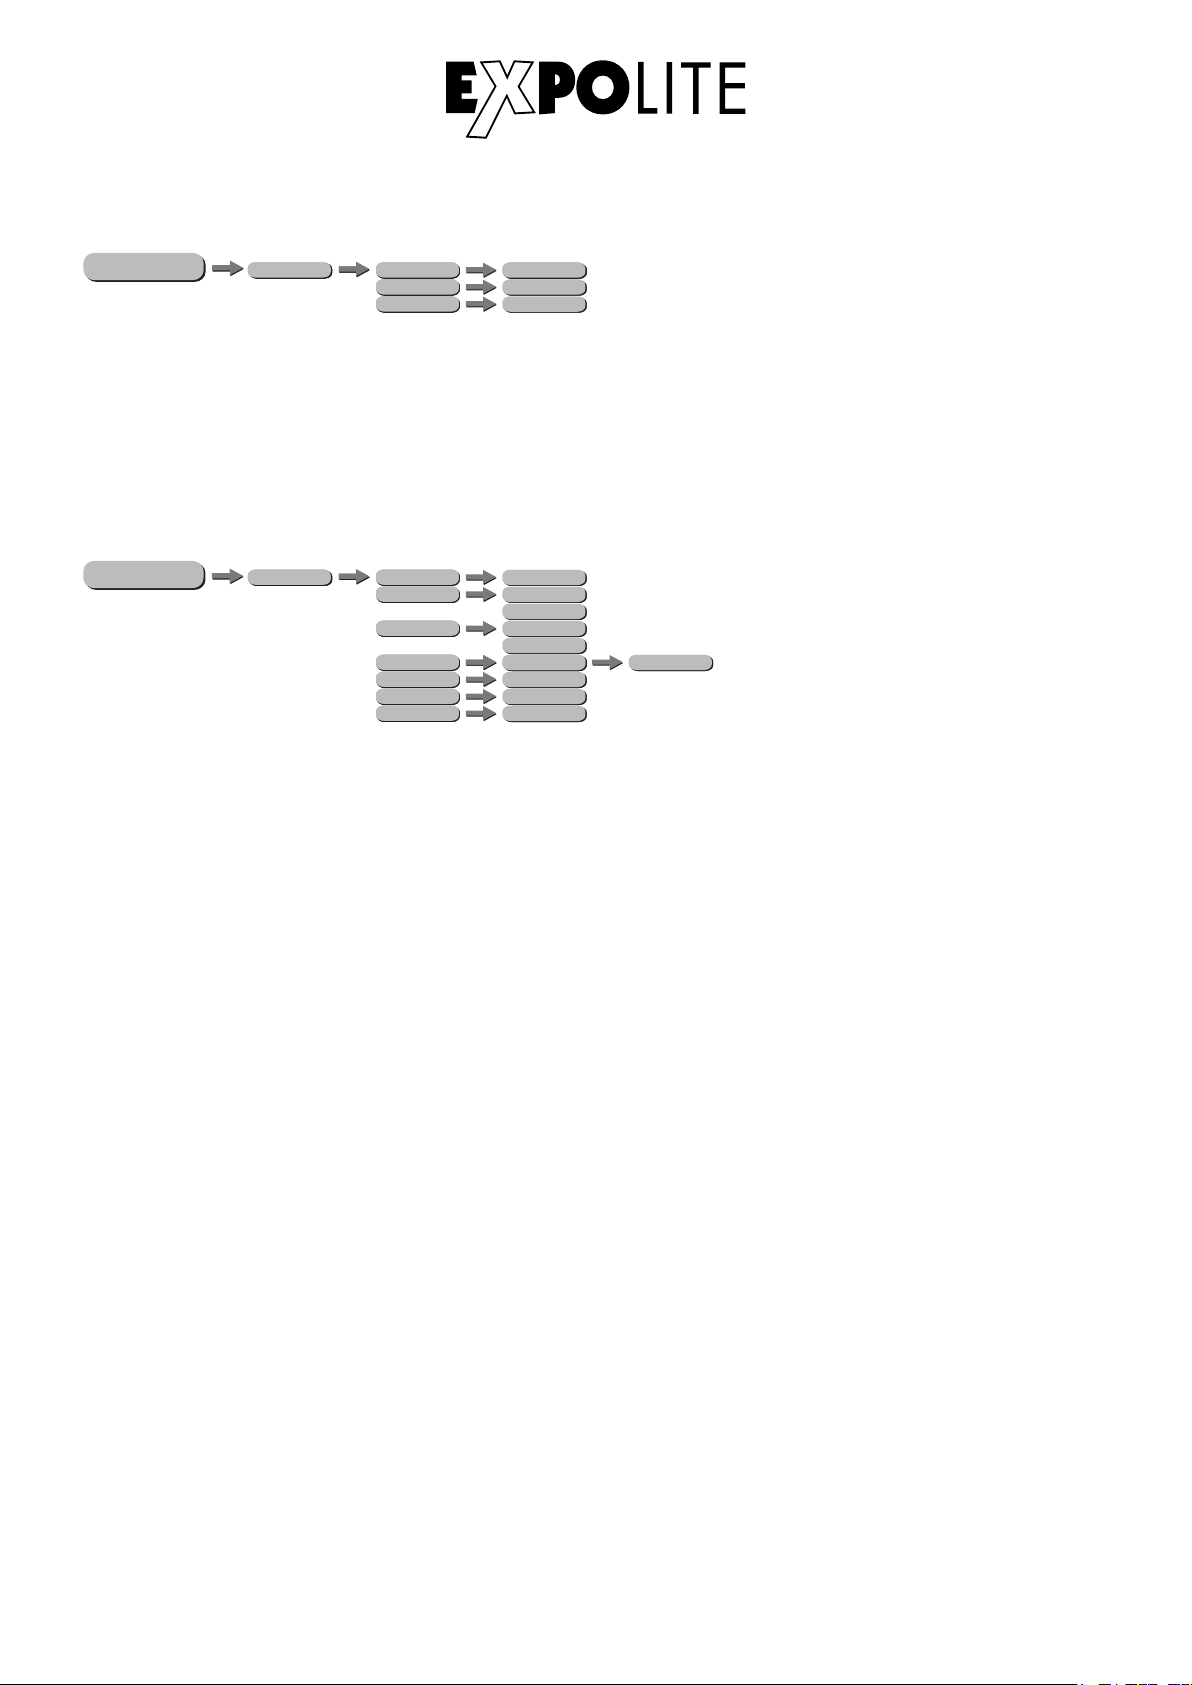
Info-Menü
ME NU
PERSON
INFORMATION
HSIC
Software
HSIC
Hardware
HSIC
Fix times
VX.X.X.
00
HX.X.X.
XXXXXh XXm
Untermenü Software: zeigt die aktuell installierte Firmware des Gerätes an.
Untermenü Hardware: zeigt die verbaute Hardwareversion des Gerätes an.
Untermenü Fix times: zeigt die bisherige Betriebsdauer des Gerätes an.
Verschiedene Einstellungen
ME NU
SETUP
PERSON
HSIC
ID number
Display Led
HSIC
Key locks
HSIC
Max temp
HSIC
HSIC
Dimmer CW
HSIC
Dimmer WW
HSIC
Dimmer ALL
1-66
ON
OFF
OFF
On
****
0-255
0-255
0-255
002-120
Das Passwort lautet: DOWN - UP - DOWN - UP - ENTER
ID number: hier kann die ID des Gerätes eingestellt werden.
Display Led: stellt ein, ob die Displaybeleuchtung generell aktiv ist (ON), oder sich nach zehn
Sekunden automatisch abschaltet (OFF).
Key locks: in diesem Menü wird der Passwortschutz des Gerätes bei Gerätestart aktiviert oder de-
aktiviert. Wenn Key locks auf ON gestellt ist, startet das Gerät gesperrt und das Menü wird jeweils
30 Sekunden nach der letzten Eingabe erneut gesperrt. Für Änderungen im Menü muss dann das
Passwort DOWN - UP - DOWN - UP - ENTER eingegeben werden.
Max temp: bietet die Möglichkeit die maximal zulässige Temperatur der LED-Einheit einzustellen,
bevor das Gerät automatisch die Helligkeit reduziert.
Hinweis:
Eine zu hohe zulässige Temperatur kann die Lebensdauer der LED-Einheit verringern!
Dimmer CW/WW/ALL: hier kann die maximale Helligkeit für den DMX Wert 255 für Kaltweiß
(Dimmer CW), Warmweiß (Dimmer WW) oder beide Werte (Dimmer ALL) eingestellt werden.
D-10
Page 11
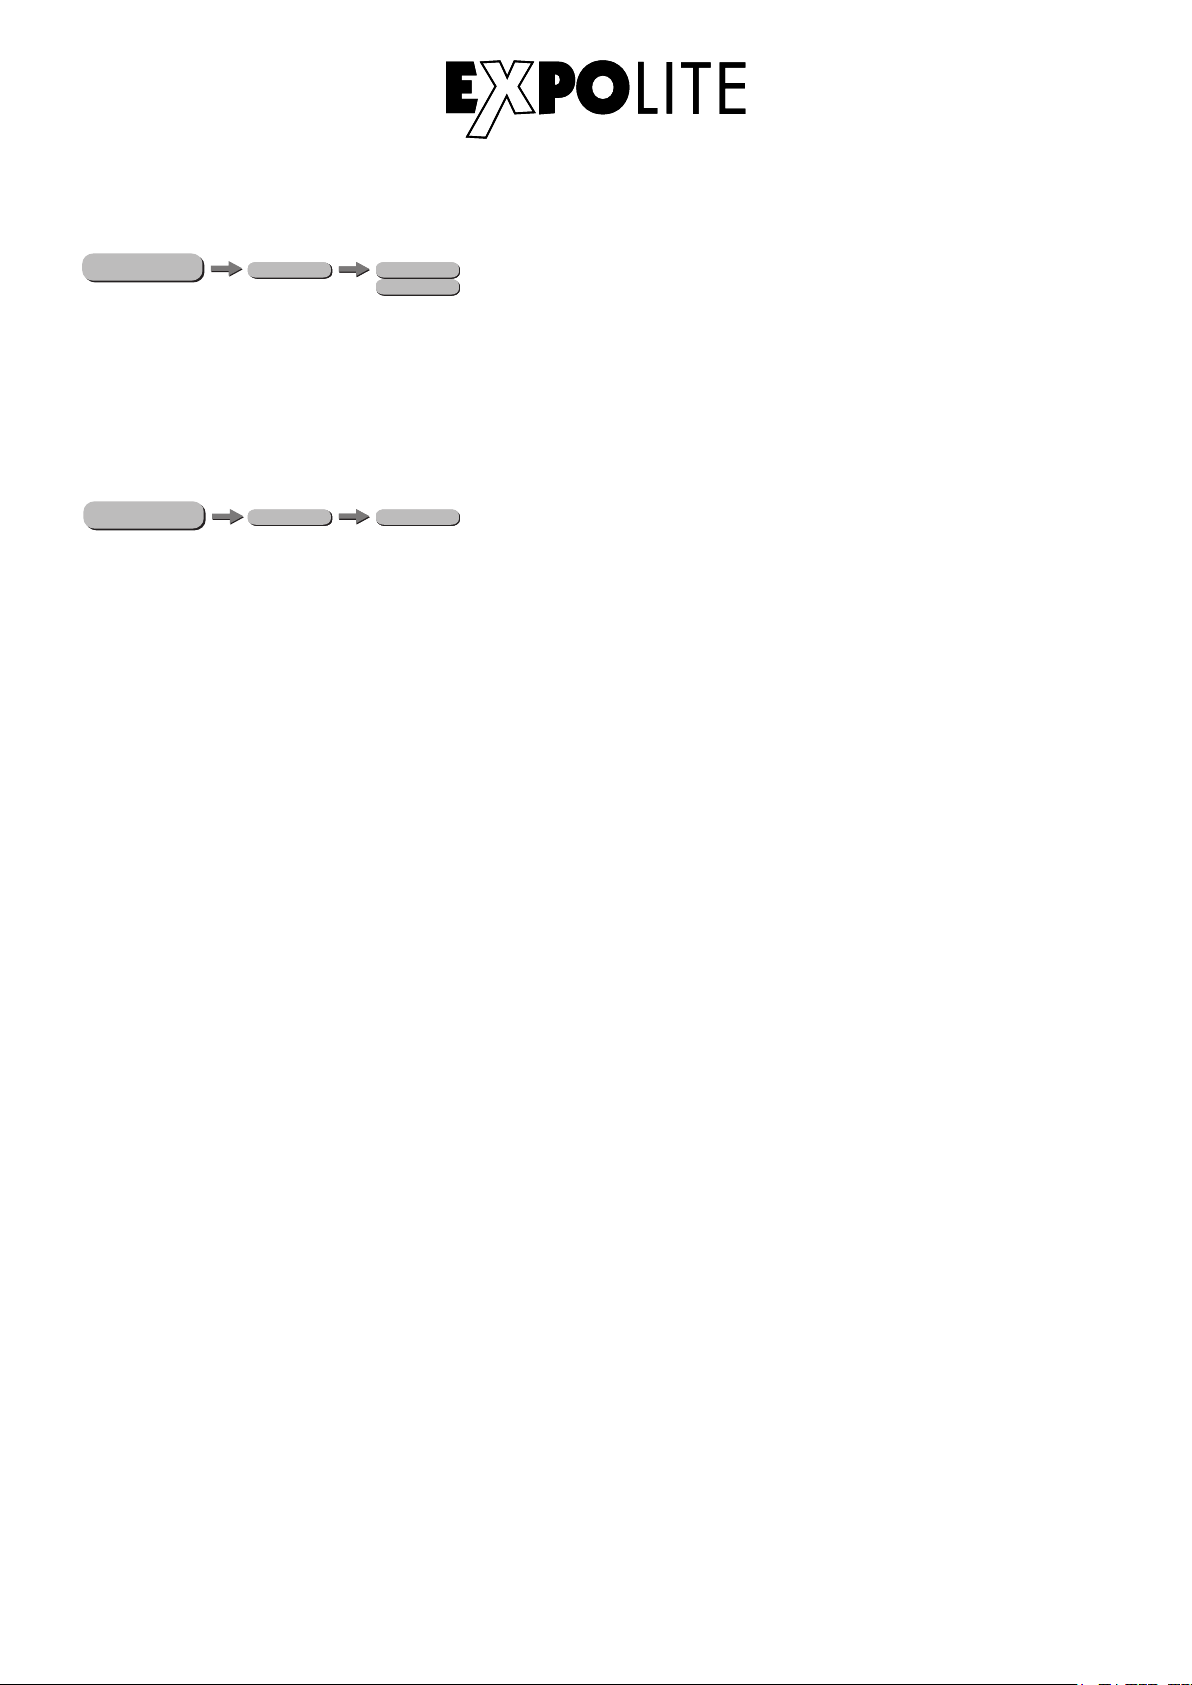
Runmode auswählen
ME NU
RUN MODE
PERSON
HSICDMX
SLAVE
HSIC
Im Menü RUN MODE wird der Betriebsmodus eingestellt. Für den Betrieb an einem DMX-Kontroller
muss DMX aktiviert werden. Im Modus SLAVE wird das Gerät von einem Master-Gerät gesteuert.
Reset
ME NU
RESET
PERSON
HSICENTER
Im Menü RESET wird das Gerät, durch das Betätigen der Taste ENTER zurück auf die
Werkseinstellungen gesetzt.
D-11
Page 12
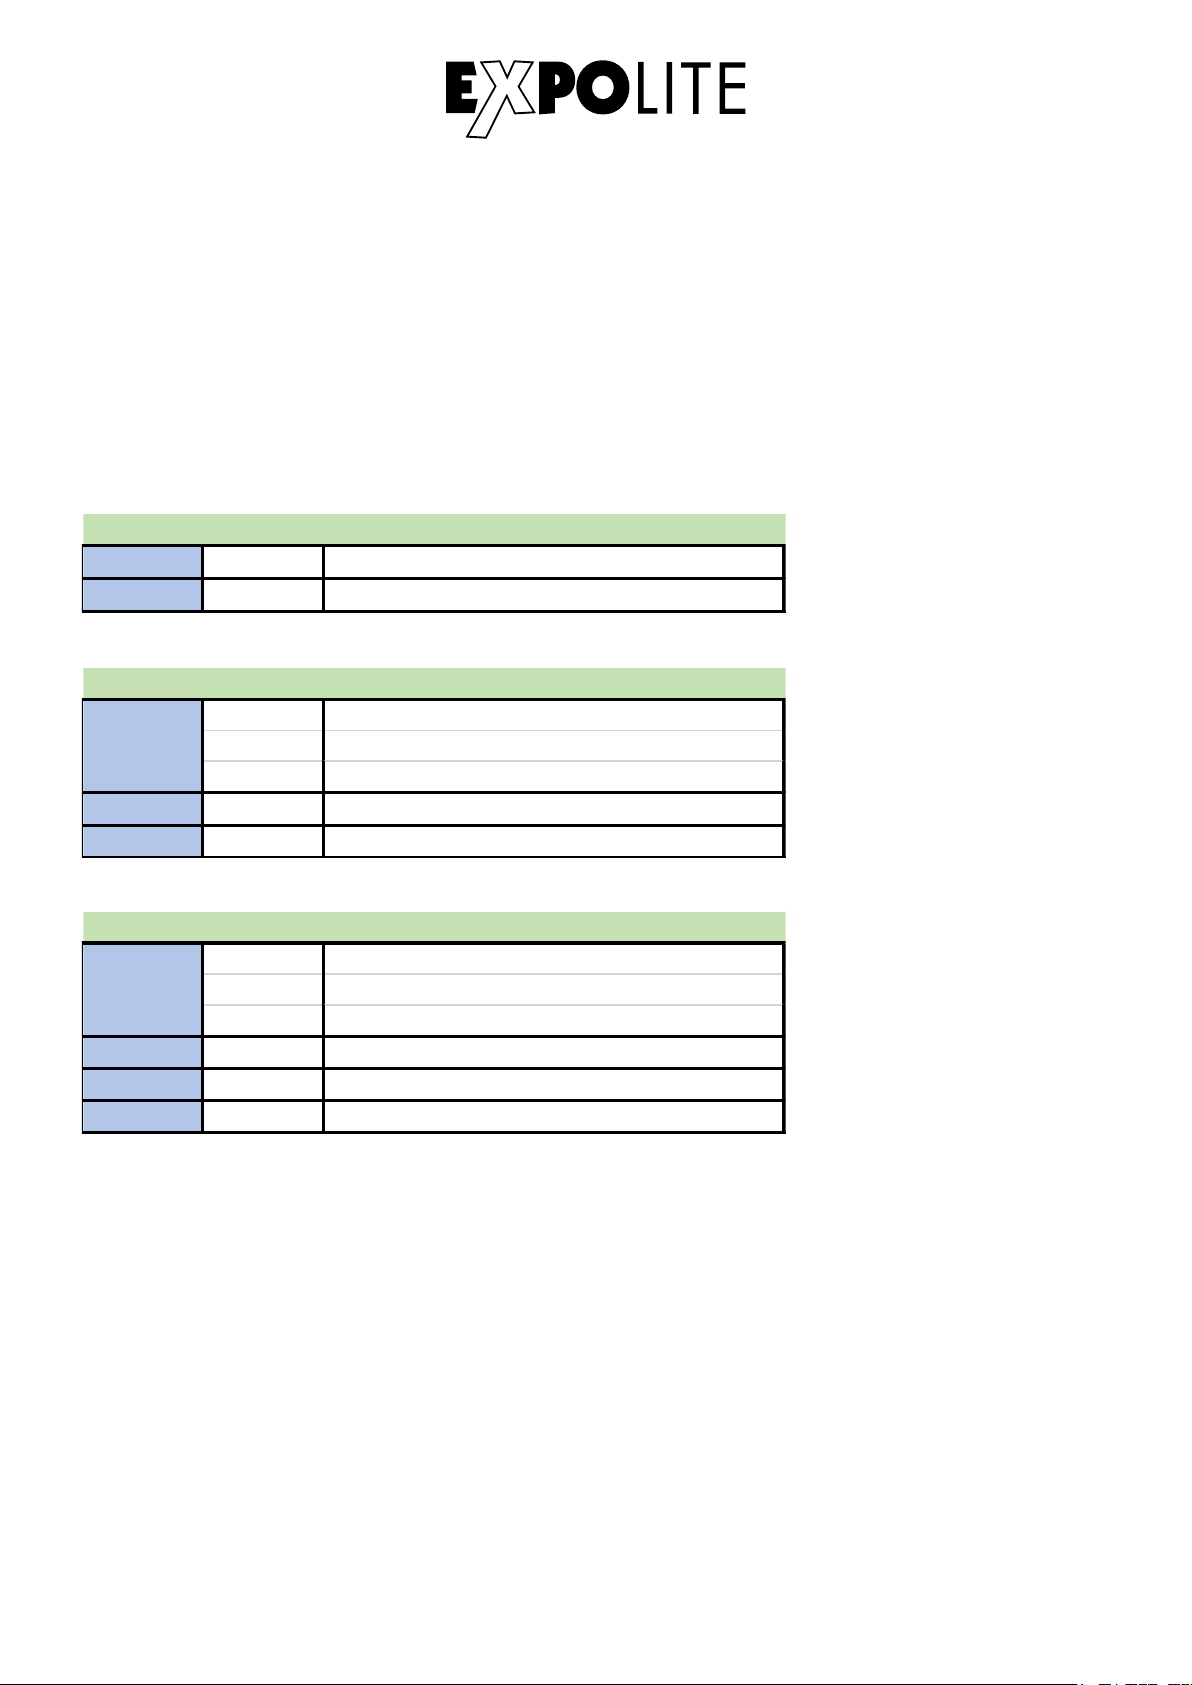
Steuerung mit DMX512
1 0-255 Dimmer CW
2 0-255 Dimmer WW
2Ch Mode
Master Dimmer
0 Off
1-255 Master Dimmer
2 0-255 Dimmer CW
3 0-255 Dimmer WW
3Ch Mode
1
Master Dimmer
0 Off
1-255 Mas ter Dimmer
2 0-255 Dimmer CW
3 0-255 Dimmer WW
4 0-255 Colour Temperature 3200K - 6500K
4Ch Mode
1
DMX-Kanalbelegung
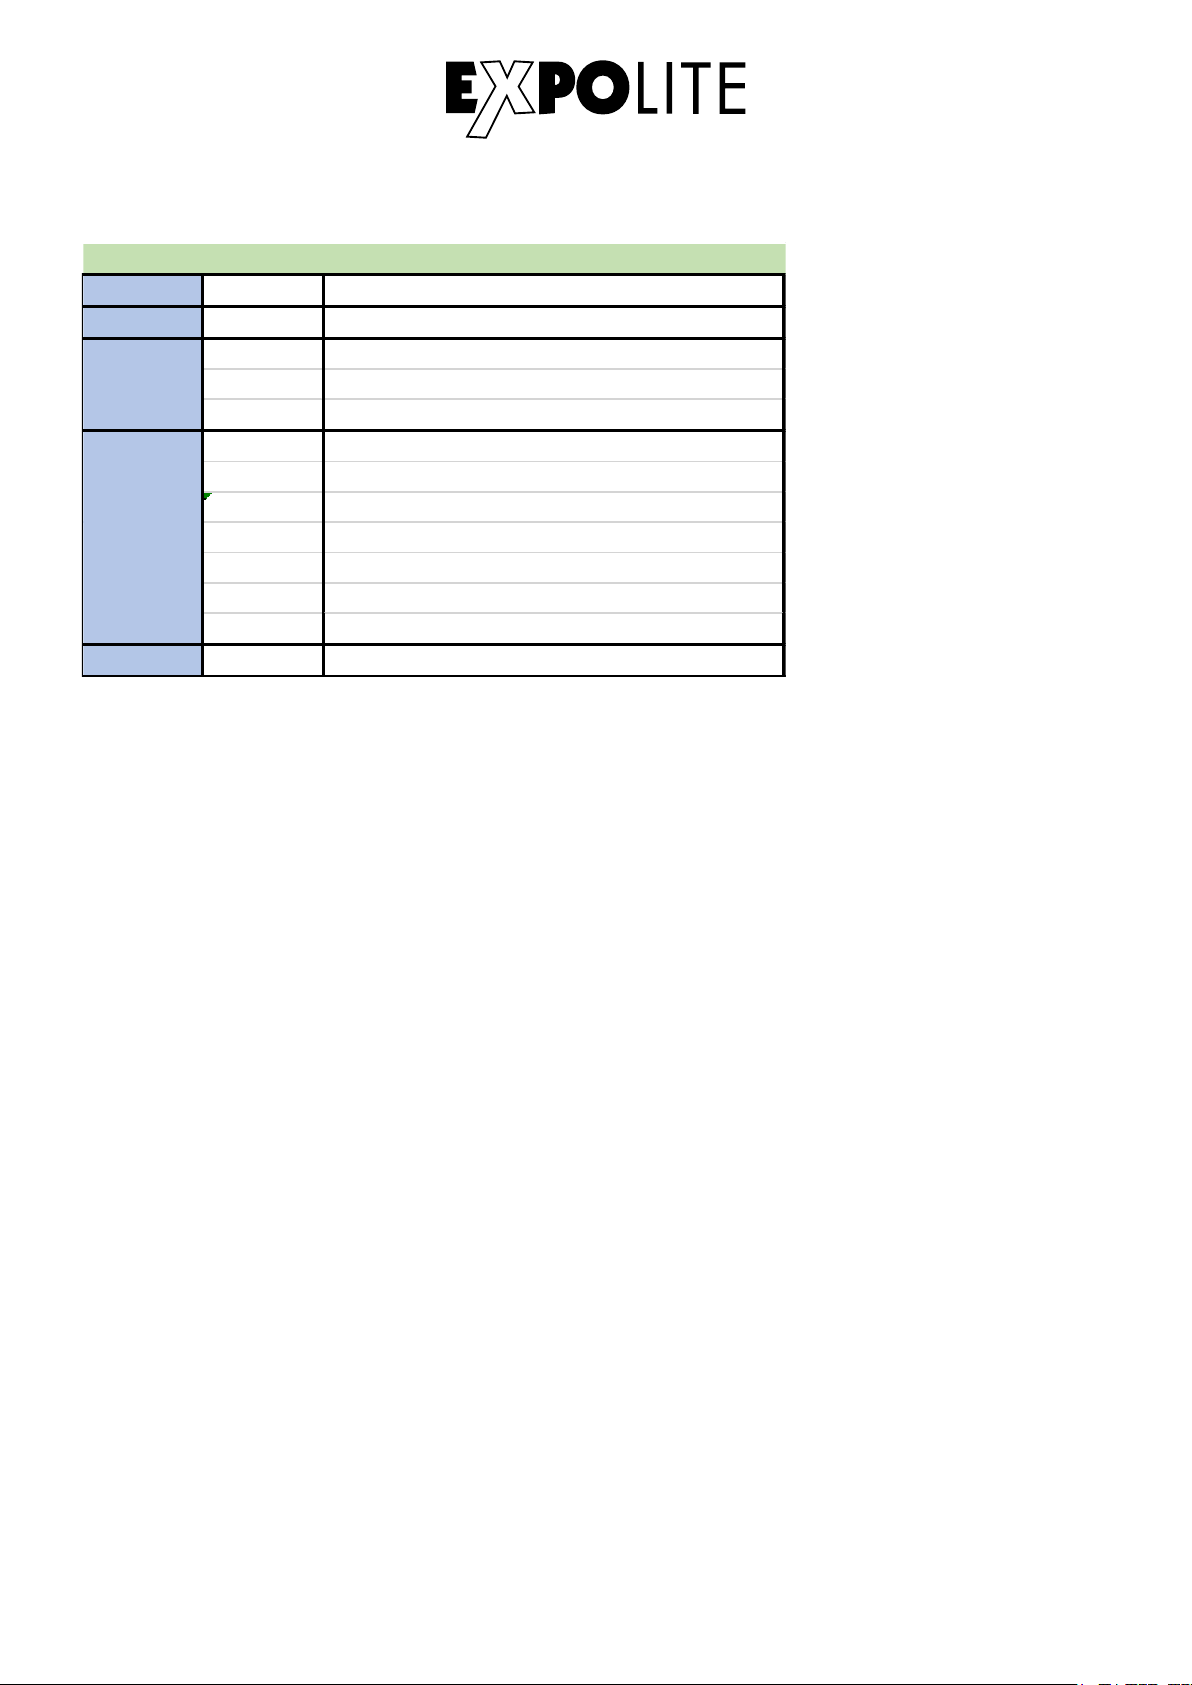
Dieses Gerät verfügt über verschiedene DMX-Personalities. Bei diesen werden unterschiedlich
viele DMX-Kanäle belegt und die Reaktion des Gerätes unterscheidet sich entsprechend.
Es sind 4 DMX-Personalities (2-/3-/4-/5-Kanäle) wählbar.
Durch Änderungen in der Gerätesoftware kann es zu weiteren oder geänderten Funktionen kommen.
Auf der Website steht das aktuellste Dokument „DMX-Channels“ als pdf zum Download zur
Verfügung.
D-12
Page 13
1 0-255 Dimmer CW
2 0-255 Dimmer WW
Strobe
0-8 No Function
9-255 Strobe (Slow to fast)
Auto Mode
0-8 No Function
9-50 Auto 1
51-100 Auto 2
101-150 Auto 3
151-200 Auto 4
201-255 Auto 5
5 0-255 Auto Mode Speed
5Ch Mode
3
4
D-13
Page 14

Delivery
- Expolite FLS Power
- Power connection cable
- General Information for Expolite Units
- User Manual
Expolite devices are carefully checked before shipment. If the delivery is not complete,
please contact your distributor immediately.
E-14
Page 15
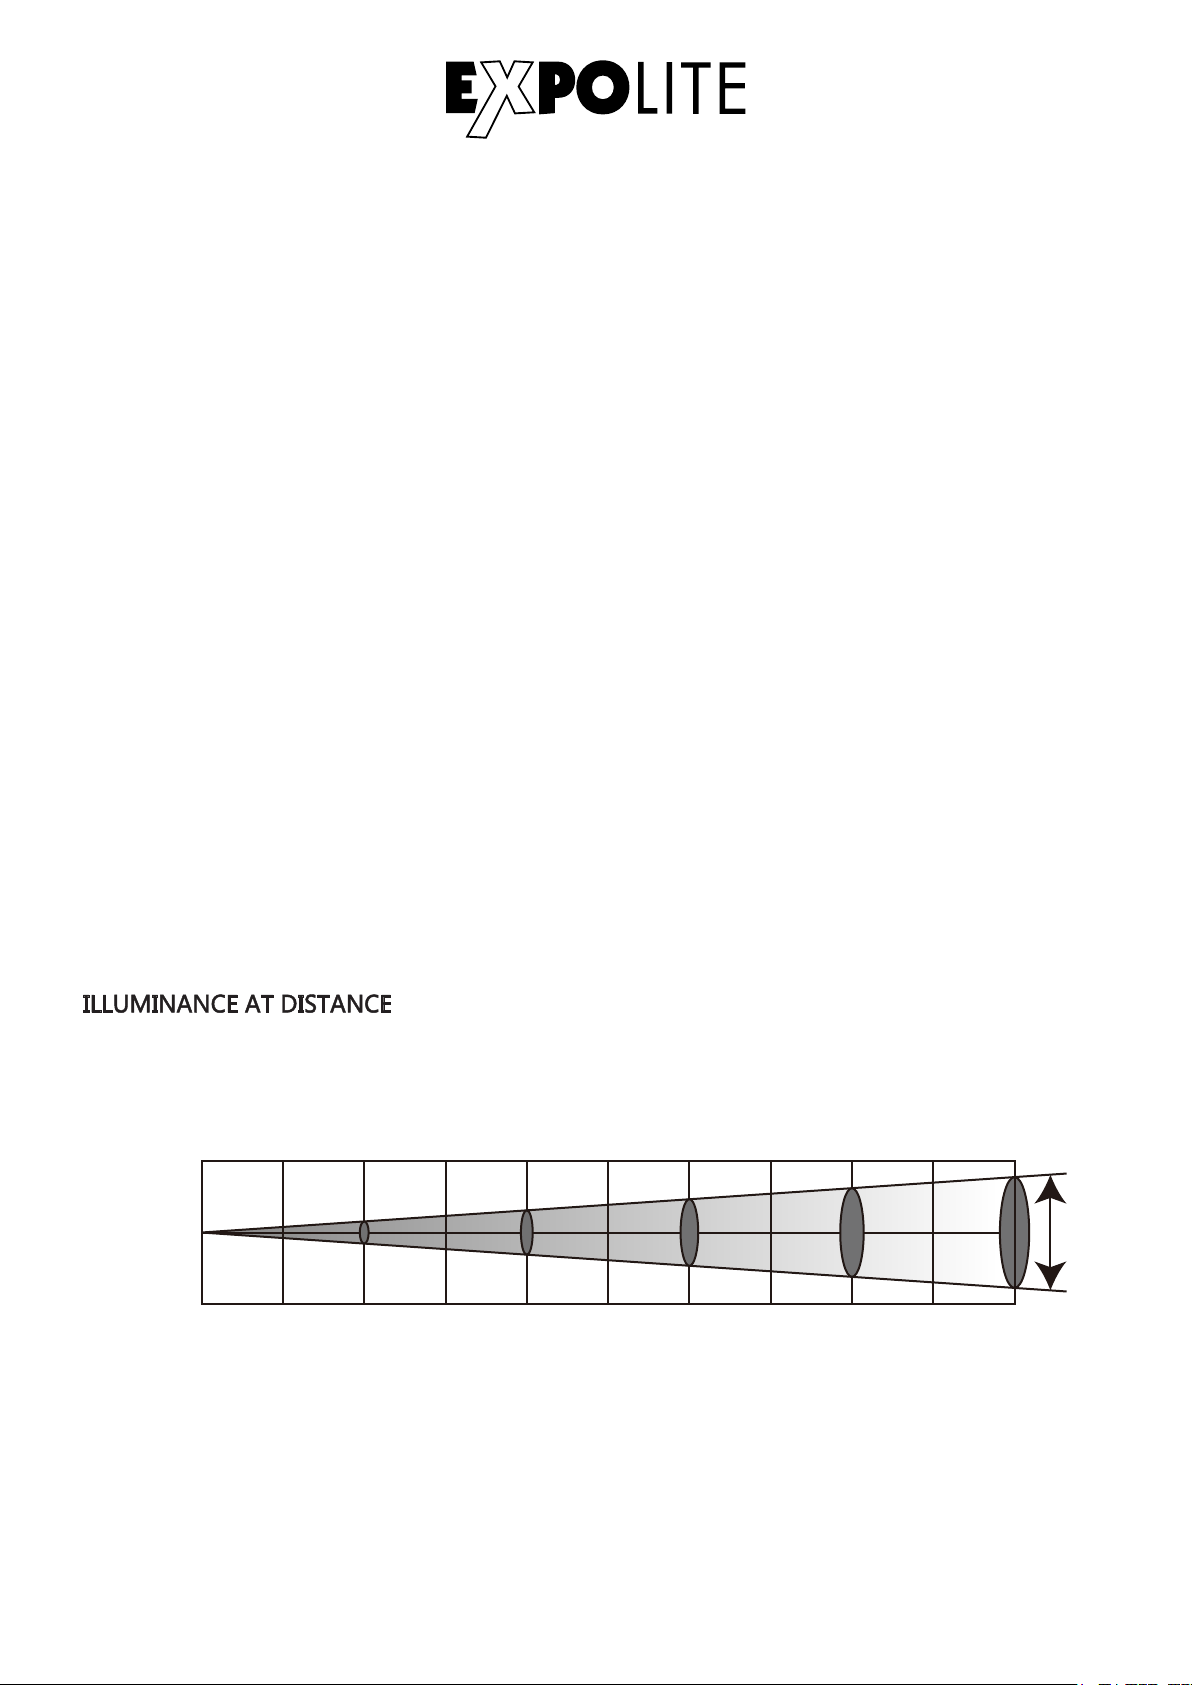
Product Information
Voltage
Power Consumption
Dimensions
Weight
Connectors
Ambient Temperature
Humidity
Protection
Housing
LEDs
Optics
Control
DMX-Channels
100V - 240V AC 50/60Hz
350W
234 x 234 x 495mm
6,4kg
Power In/Out | DMX In/Out
-20°C - 45°C
< 98%
IP 20
Aluminiumdruckguss Gehäuse
31x 10W CW/WW*
20°
Stand-Alone / DMX512
2 - 5 (2/3/4/5)
* Tolerance in colour temperature according to LED manufacturer +/- 10%.
lux(CW+WW)
Beam opening
Distance(m)
Diameter(m)
lux(CW)
lux(WW)
1
0
1
0
Ø 0
66450
43480
110100
2
Ø 0.28
17220
10740
27560
4
Ø 0.56
7879
4986
12180
6
Ø 0.84
4423
2718
6957
8
Ø 1.12
2845
1754
4485
20°
10
Ø 1.14
E-15
Page 16
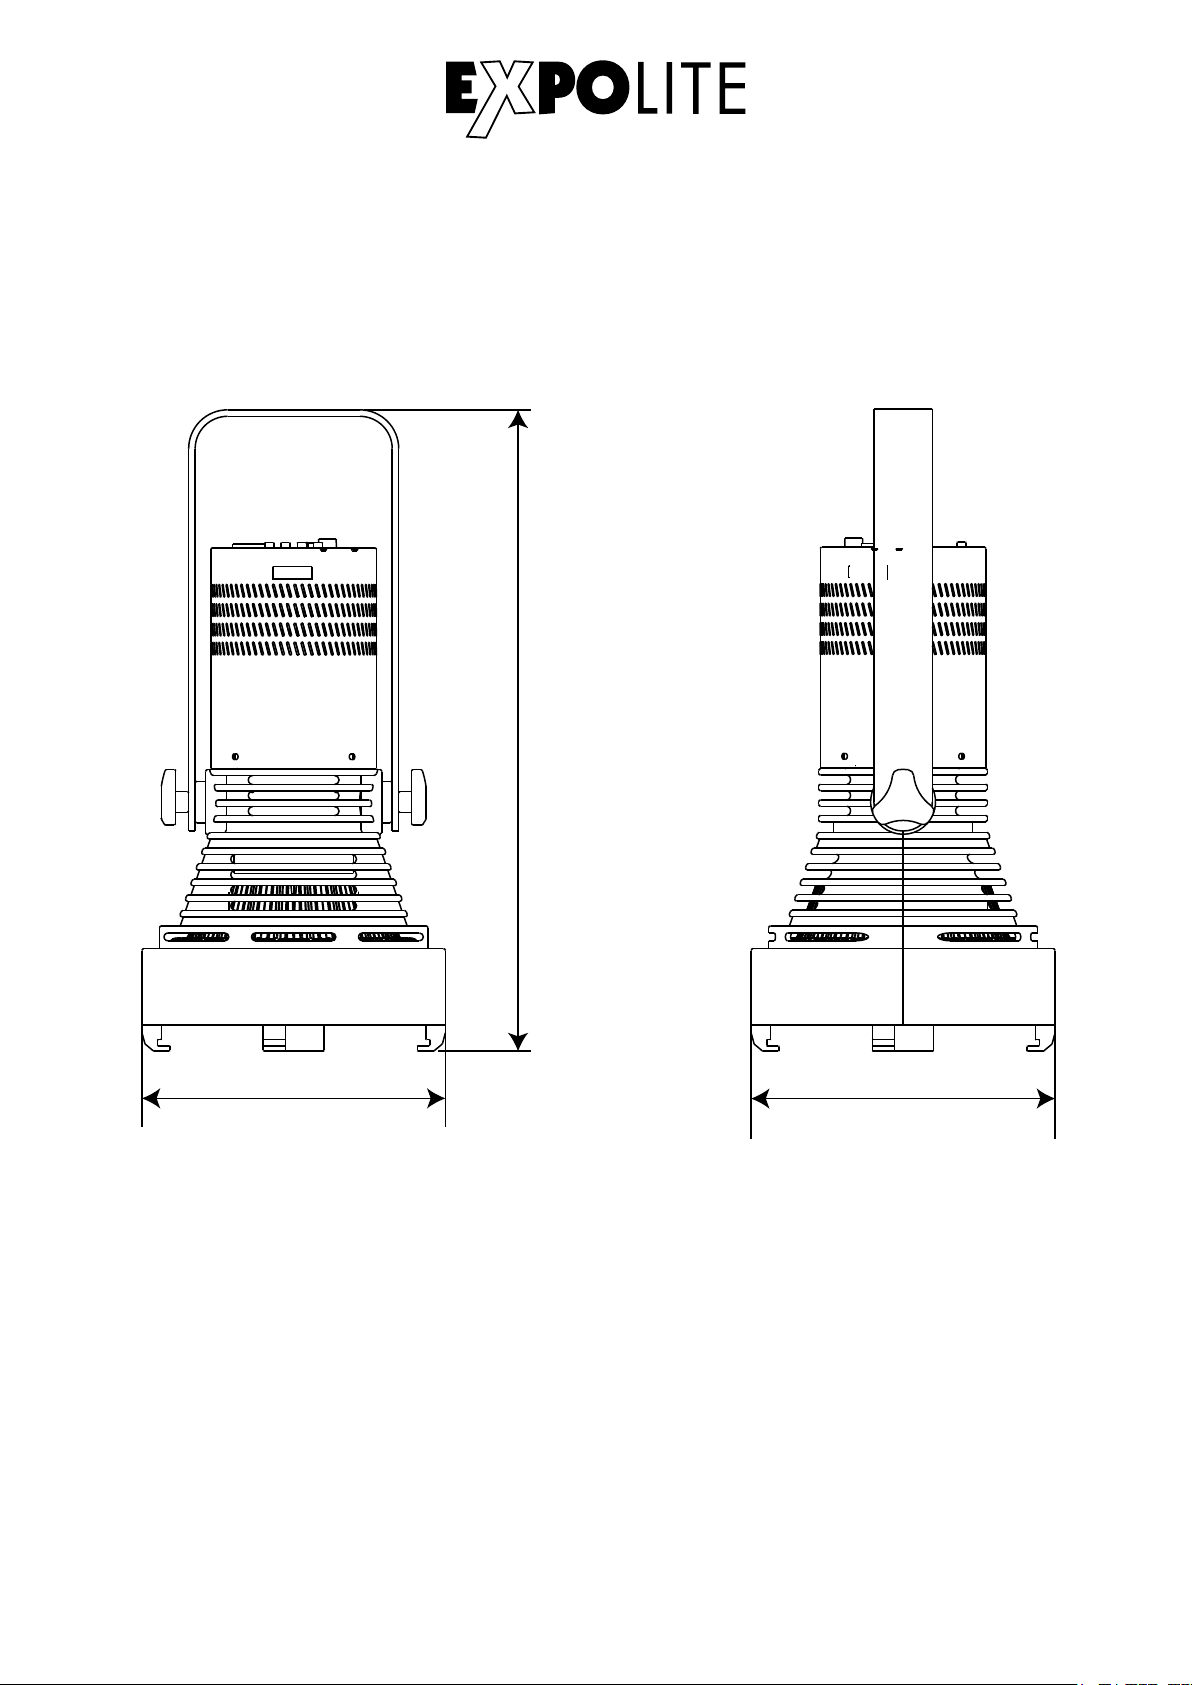
Dimensions
494.5mm
234mm
234mm
E-16
Page 17
Installation
Mounting
Hanging
The device can be used in any position. On the mounting bracket are holes
available, for attaching standard brackets. Fixture must be safe mounted in
accordance with the relevant regulations and provided with a safetycord to
prevent falling. For this purpose, an eyelet for safeties is attached to the device.
NOTE
The LED module can be operated in any position.
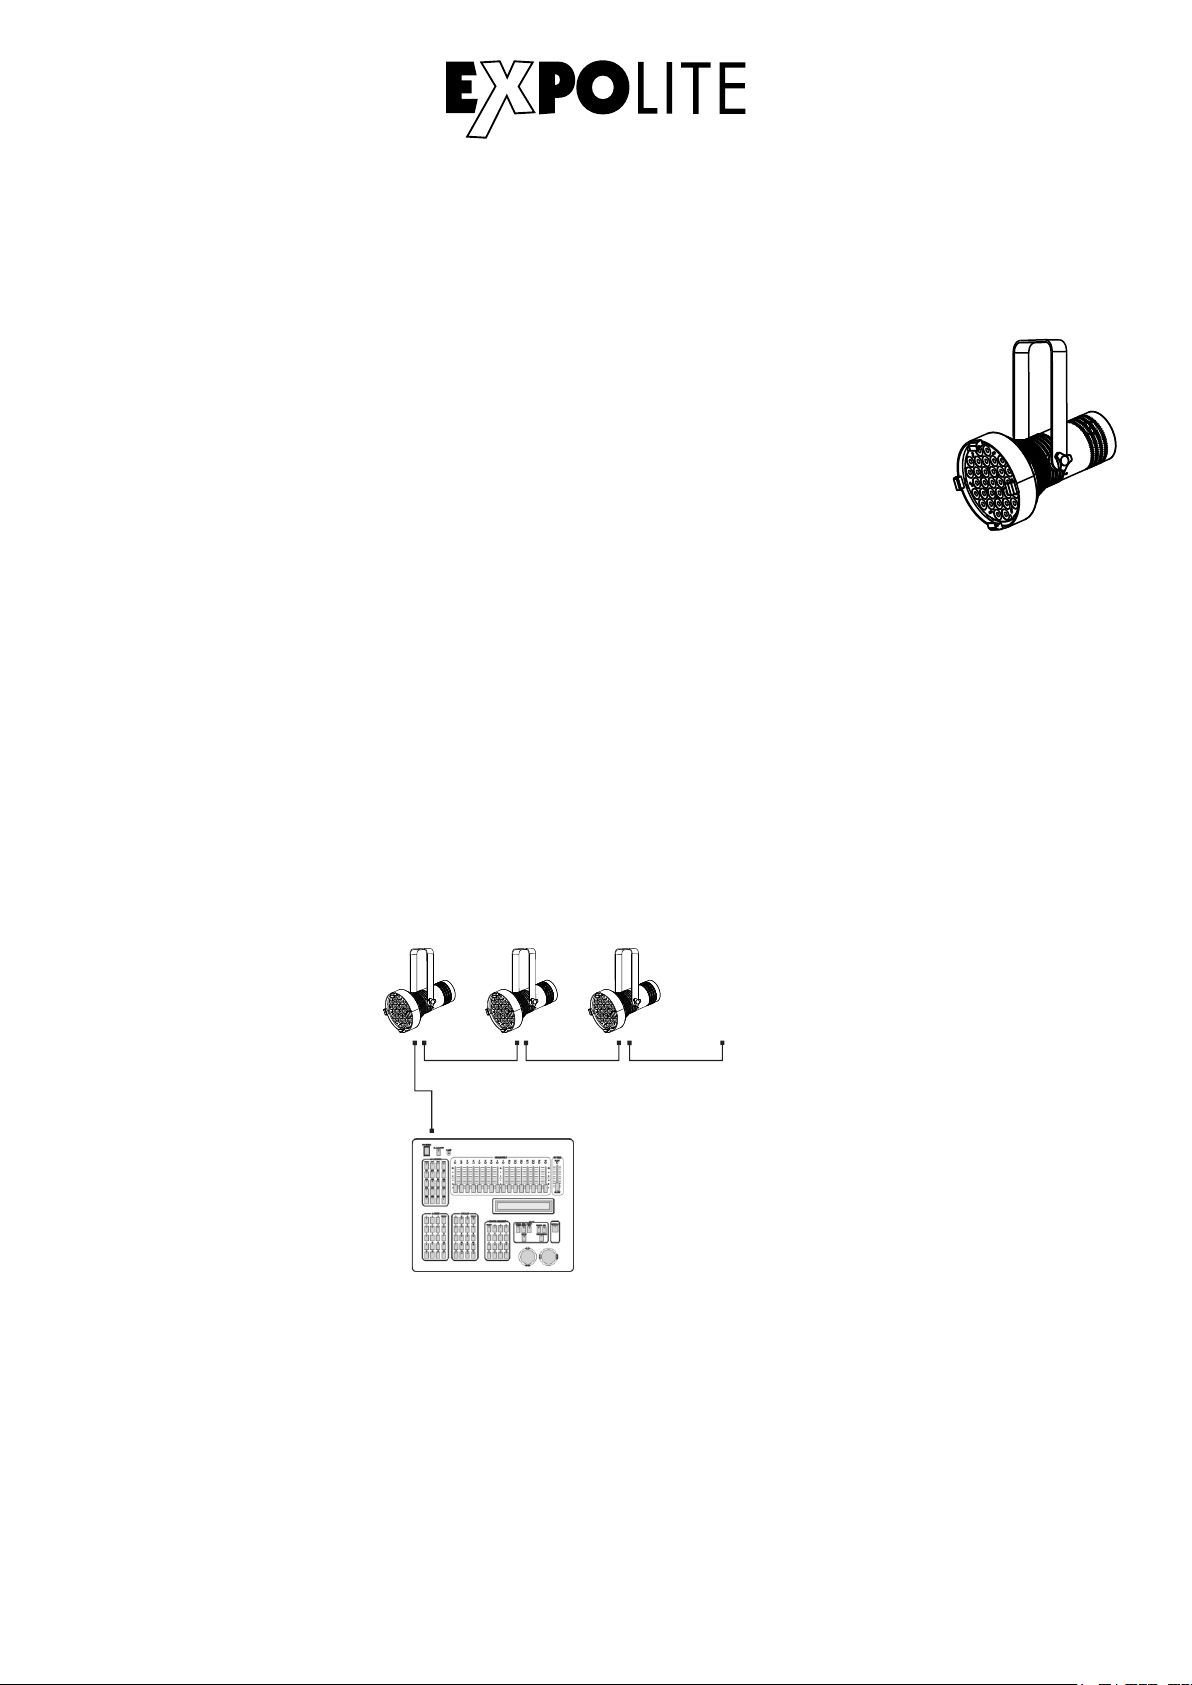
DMX-Connection
Use specified DMX-cables to connect the units to each other and to connect them to the controldesk. Enter the addresses and personalities to the units.
DM X Addr .1 DM X Addr .(N x1)+1 DM X Addr .(N x2)+1
DMX 512
CON TROLL ER
............
E-17
Page 18
Operation
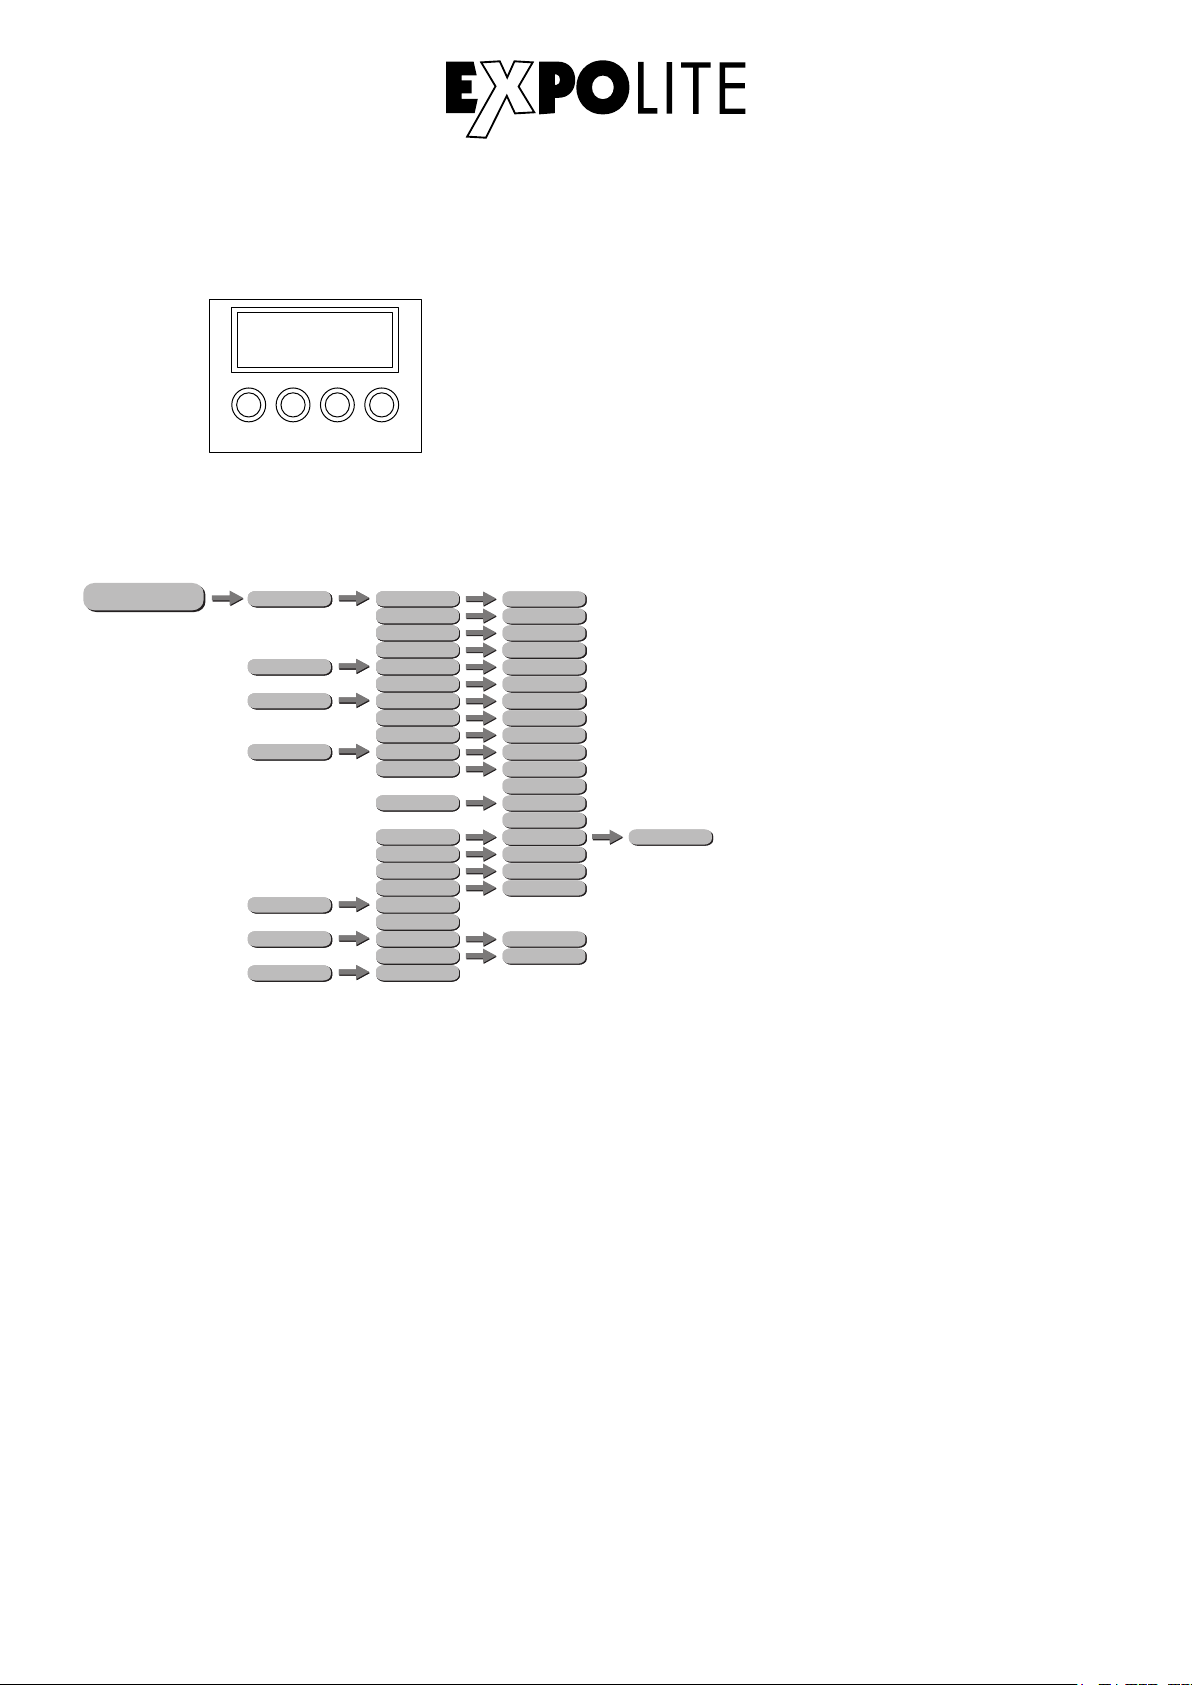
Display Operation
MEN U
ENT ER UP
Menu Map
DOW N
MENU:
ENTER:
UP:
DOWN:
Return to previous menu
Enter currently selected menu
Scroll Up, Increase value
Scroll down: Decrease value
ME NU
STAT COLO STAT CW
PERSON
AUTO
PERSON
PERSON
INFORMATION
SETUP
PERSON
RUN MODE
PERSON
DMX HSIC
PERSON
RESET
PERSON
HSIC
STAT WW
COLOR TEMP
HSIC
STAT STROB
HSIC
SPEED
HSIC
AUTO MODE
HSIC
HSIC
Software
HSIC
Hardware
HSIC
Fix times
HSIC
ID number
Display Led
HSIC
Key locks
HSIC
Max temp
HSIC
HSIC
Dimmer CW
HSIC
Dimmer WW
HSIC
Dimmer ALL
HSICDMX
SLAVE
HSIC
Channel Mode
HSIC
Address
HSICENTER
0-255
0-255
0-255
00-31
00
00-31
01-05
VX.X.X.
00
HX.X.X.
XXXXXh XXm
1-66
ON
OFF
OFF
On
****
0-255
0-255
0-255
2/3/4/6
1-512
002-120
E-18
Page 19
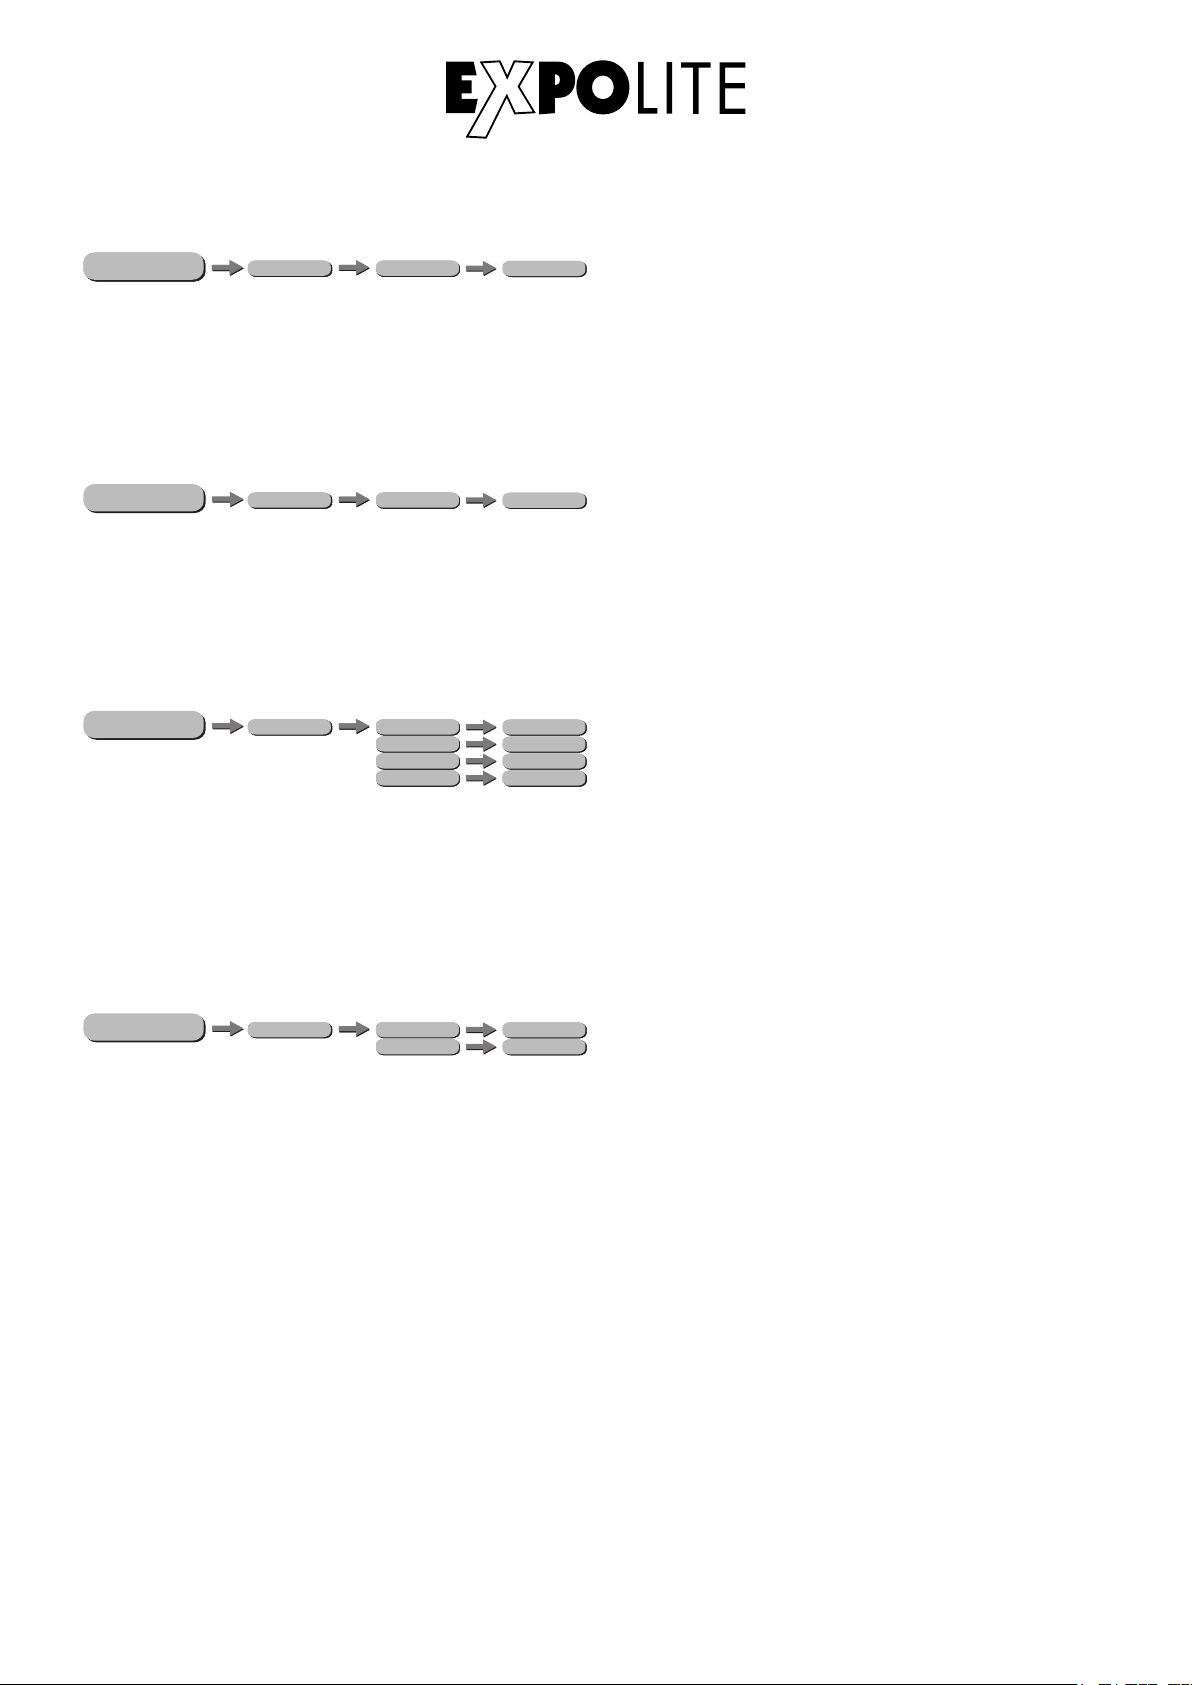
Setting DMX-Address
ME NU
ME NU
DMX HSIC
PERSON
Address
1-512
The DMX start address of the fixture is set in the menu DMX, submenu Address. This is retained
even when changing the personality.
Setting DMX-Personality
ME NU
DMX HSIC
PERSON
Channel Mode
2/3/4/6
The personality is set in the menu DMX, submenu Channel Mode. There are four different
modes which can be choosen: 2-, 3-, 4 -and 5-channels.
Edit Static Colours
ME NU
STAT COLO STAT CW
PERSON
HSIC
STAT WW
COLOR TEMP
HSIC
STAT STROB
HSIC
0-255
0-255
0-255
00-31
00
Static colours for stand-alone operation are set in STAT COLO. These are mixed using the
DMX value scale 0-255 for cool white (STAT CW), warm white (STAT WW), overall colour
temperature (COLOR TEMP) and strobe 0-31 (STAT STROB).
Activating Auto Programs
ME NU
AUTO
PERSON
SPEED
HSIC
AUTO MODE
HSIC
00-31
01-05
In the menu AUTO, submenu AUTO MODE the automatic programs stored in the device
are activated. There are five fix automatic programs stored in the fixture (01-05). Additionally the
speed of the automatic programs can be controlled in 32 steps (00-31) in the submenu SPEED.
E-19
Page 20
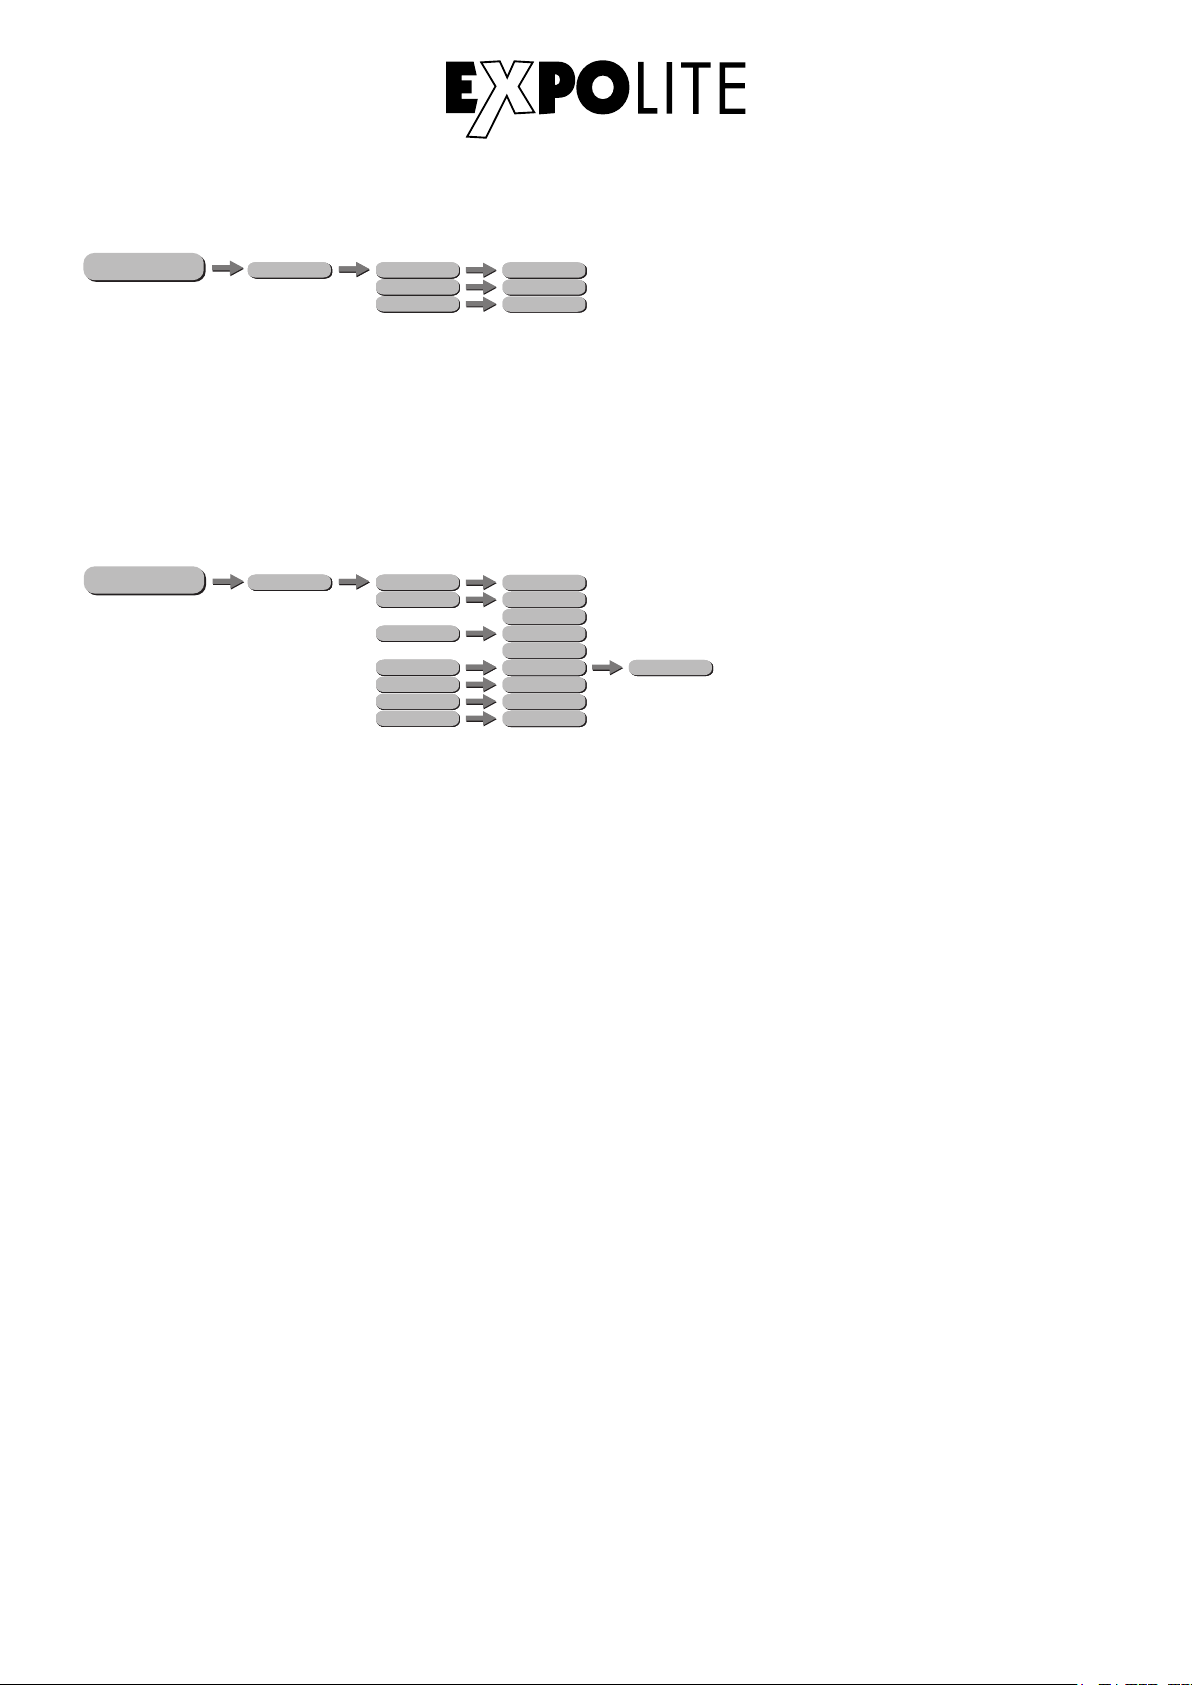
Info-Menü
ME NU
PERSON
INFORMATION
HSIC
Software
HSIC
Hardware
HSIC
Fix times
VX.X.X.
00
HX.X.X.
XXXXXh XXm
Submenu Software: shows current firmware version of the fixture.
Submenu Hardware: show current hardware versions of the fixture.
Submenu Fix times: shows current working time of the fixture.
Miscellaneous Settings
ME NU
SETUP
PERSON
HSIC
ID number
Display Led
HSIC
Key locks
HSIC
Max temp
HSIC
HSIC
Dimmer CW
HSIC
Dimmer WW
HSIC
Dimmer ALL
1-66
ON
OFF
OFF
On
****
0-255
0-255
0-255
002-120
Password: DOWN - UP - DOWN - UP - ENTER
ID number: sets ID of the fixture.
Display Led: sets if display illumination is always on (ON) or switches off automatically 10 seconds
after last display input (OFF).
Key locks: In this menu the password protection of the fixture is activated or deactivated. If set ON
the fixture is password protected when started. 30 seconds after the last setting the menu is locked
again. To be able to make changes in the menu the password DOWN - UP - DOWN - UP - ENTER
needs to be typed in.
Max temp: gives the user the possibility to set the max. acceptable temperature of the led unit,
before the intensity of the fixture is reduced.
NOTE:
A high max. acceptable temperature can reduce the life span of the led unit.
Dimmer CW/WW/ALL: limits the maximum brightness at the DMX value "255" for cool white
(Dimmer CW), warm white (Dimmer WW) or both values (Dimmer ALL).
NOTE: The maximum value can be limited to 0. In this case, a dimmer channel does not respond
to a sent DMX value, which can be misinterpreted as a device error.
E-20
Page 21
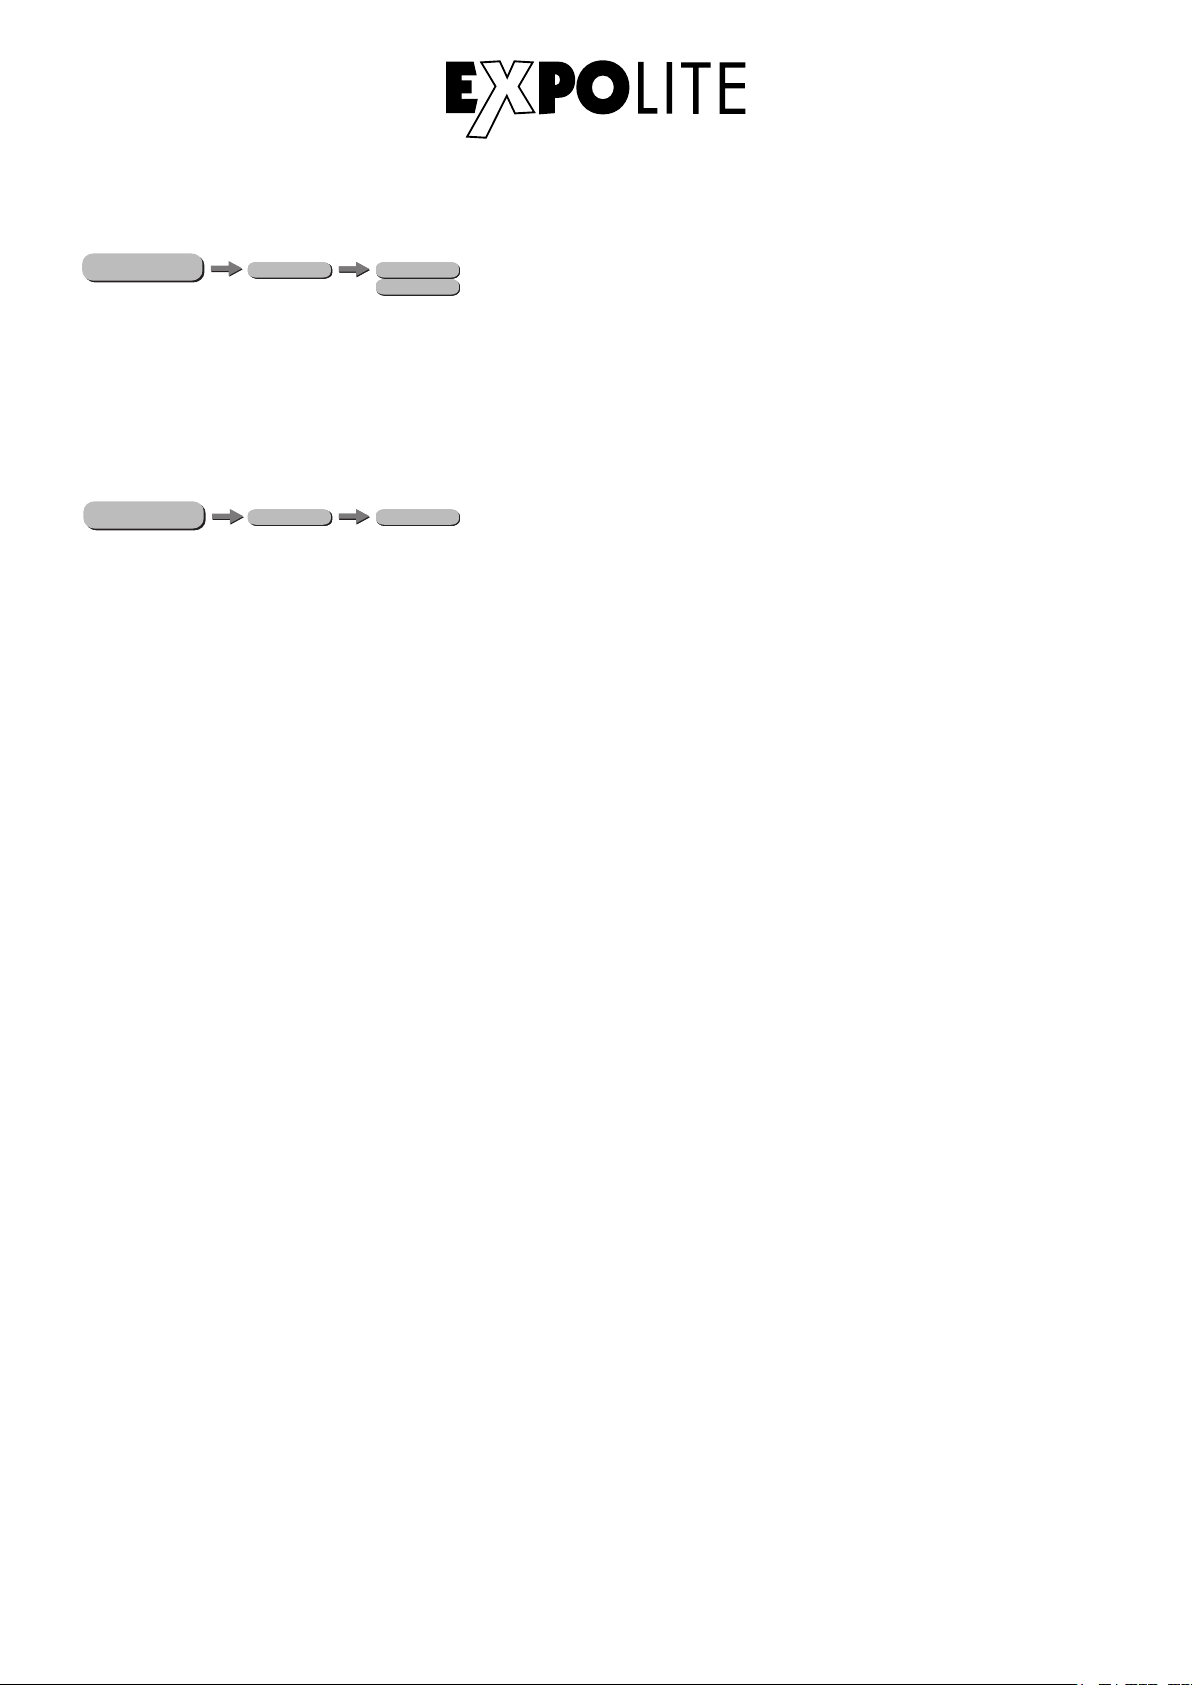
Choose Run Mode
ME NU
RUN MODE
PERSON
HSICDMX
SLAVE
HSIC
The operating mode is set in menu RUN MODE. For operation on a DMX-controller DMX needs to be
set. SLAVE sets the fixture into slave mode.
Reset
ME NU
RESET
PERSON
HSICENTER
In the menu RESET all settings can be set to factory default by pressing the ENTER button.
E-21
Page 22
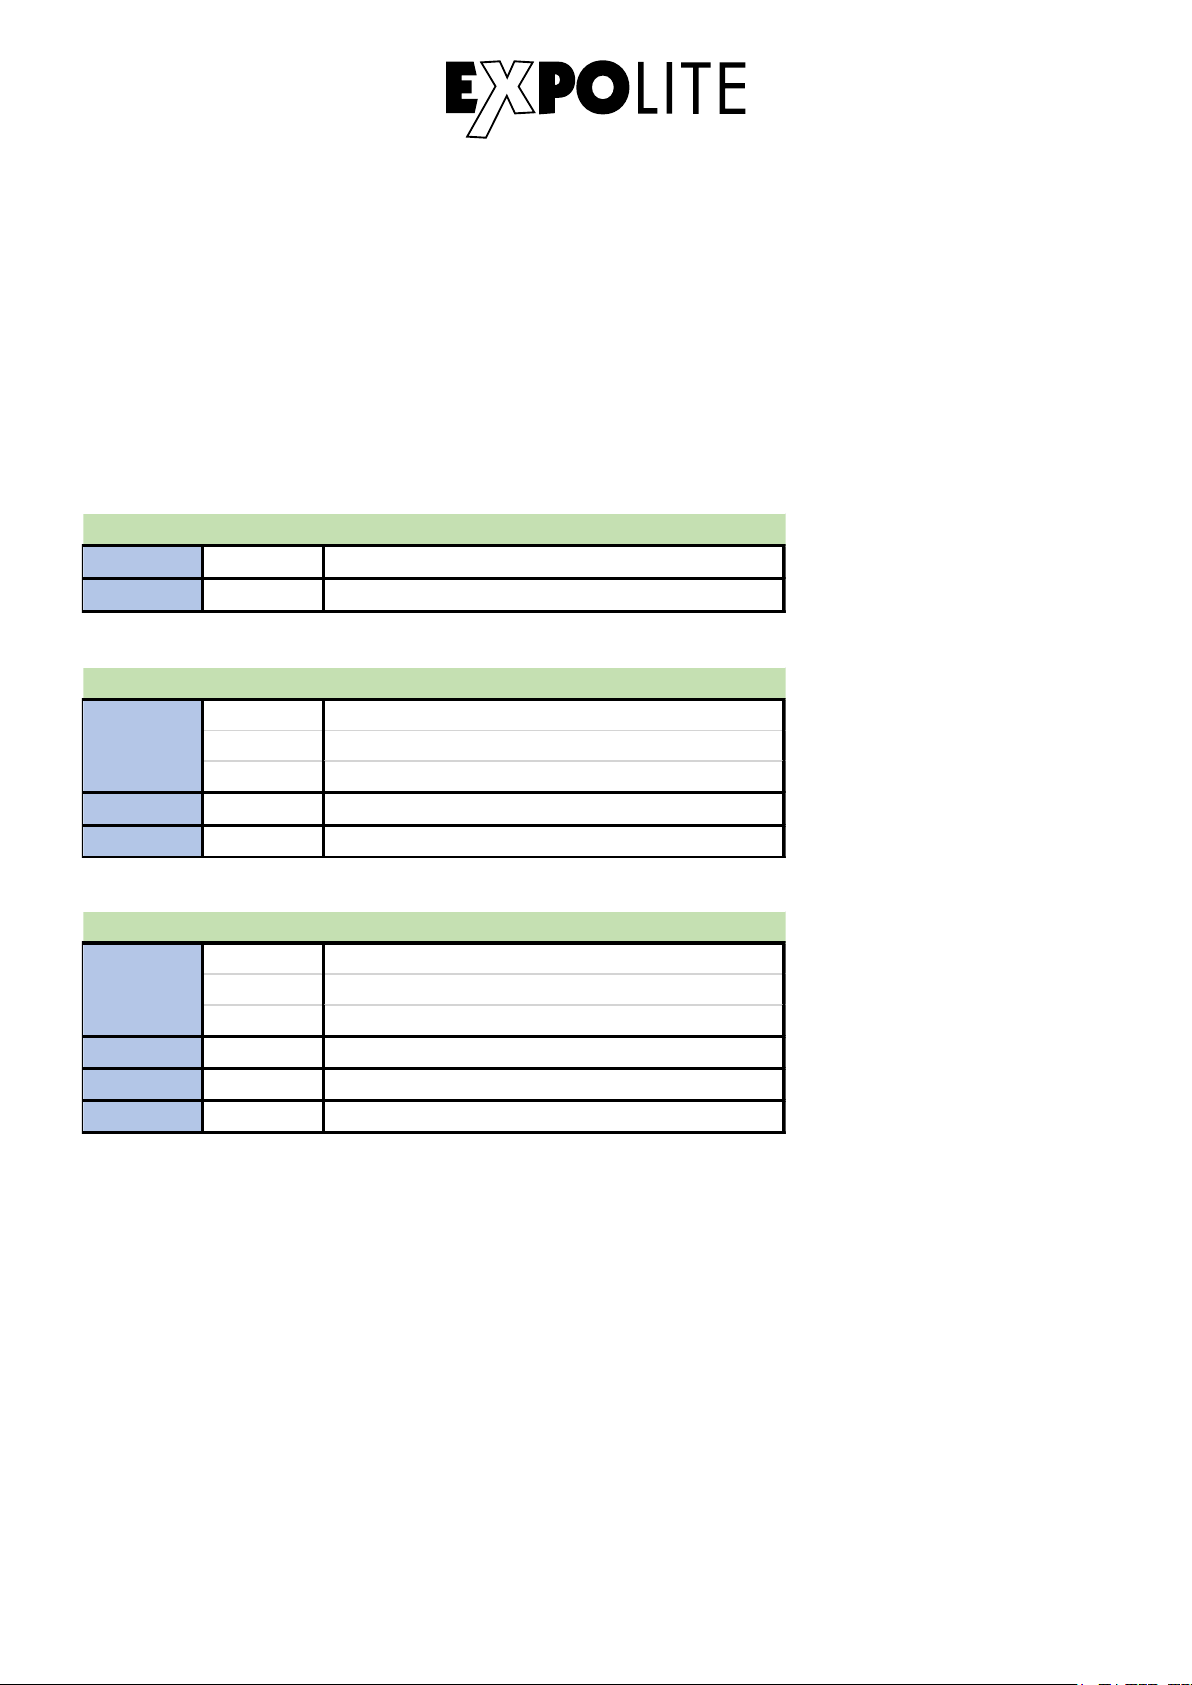
Using DMX512 Control
1 0-255 Dimmer CW
2 0-255 Dimmer WW
2Ch Mode
Master Dimmer
0 Off
1-255 Master Dimmer
2 0-255 Dimmer CW
3 0-255 Dimmer WW
3Ch Mode
1
Master Dimmer
0 Off
1-255 Master Dimmer
2 0-255 Dimmer CW
3 0-255 Dimmer WW
4 0-255 Colour Temperature 3200K - 6500K
4Ch Mode
1
DMX-Channel assignment
This device has several DMX personalities. In each personality a different number of DMX channels
is used and the reaction of the device differs accordingly. There are four DMX personalities with 2, 3,
4, 5 channels selectable.
Because of changes in the firmware of the fixture, functions can be added or changed. You can find the current version
„DMX-Channels“ as PDF-file on the website, ready to download.
E-22
Page 23
1 0-255 Dimmer CW
2 0-255 Dimmer WW
Strobe
0-8 No Function
9-255 Strobe (Slow to fast)
Auto Mode
0-8 No Function
9-50 Auto 1
51-100 Auto 2
101-150 Auto 3
151-200 Auto 4
201-255 Auto 5
5 0-255 Auto Mode Speed
5Ch Mode
3
4
E-23
Page 24
© 2018 by Focon Showtechnic Vertriebsgesellschaft mbH
 Loading...