

Page 1

Item No. ES-2ROBV
V.012021
TWO ROOM POP-UP OBSERVATORY TENT
INSTRUCTIONS
WARNING: KEEP ALL FLAME AND HEAT SOURCES AWAY FROM THIS TENT FABRIC.
This tent is made of flame-resistant fabric which meets CPAI-84 specifications. IT IS NOT FIRE-PROOF. The fabric will burn if left in continuous contact with any flame
source. The application of any foreign substance to the product fabric may render the flame-resistant properties ineffective.
– DO NOT use fuel burning devices inside or near tent materials.
– DO NOT permit children to light matches, operate burning appliances, or handle any flame sources in or near the tent.
– DO NOT smoke, use matches, candles or open flames of any kind in or near the tent.
– DO NOT refuel lanterns, stoves or heaters inside tent.
– DO NOT cook inside tent.
– DO NOT store flammable liquids inside tent.
Page 1
© 2021 Explore Scientific, LLC. 1010 S 48th Street, Springdale, AR 72762
explorescientificusa.com | 866.252.3811 All rights reserved. Made in China.
Page 2
BEFORE YOU BEGIN
Read all instructions thoroughly before beginning set up.
– Select a level site clear of rocks, branches, and other hard or sharp
objects, to set up your tent.
– Do not set up your tent under trees because of potential lightning
strikes or falling tree limbs in inclement weather.
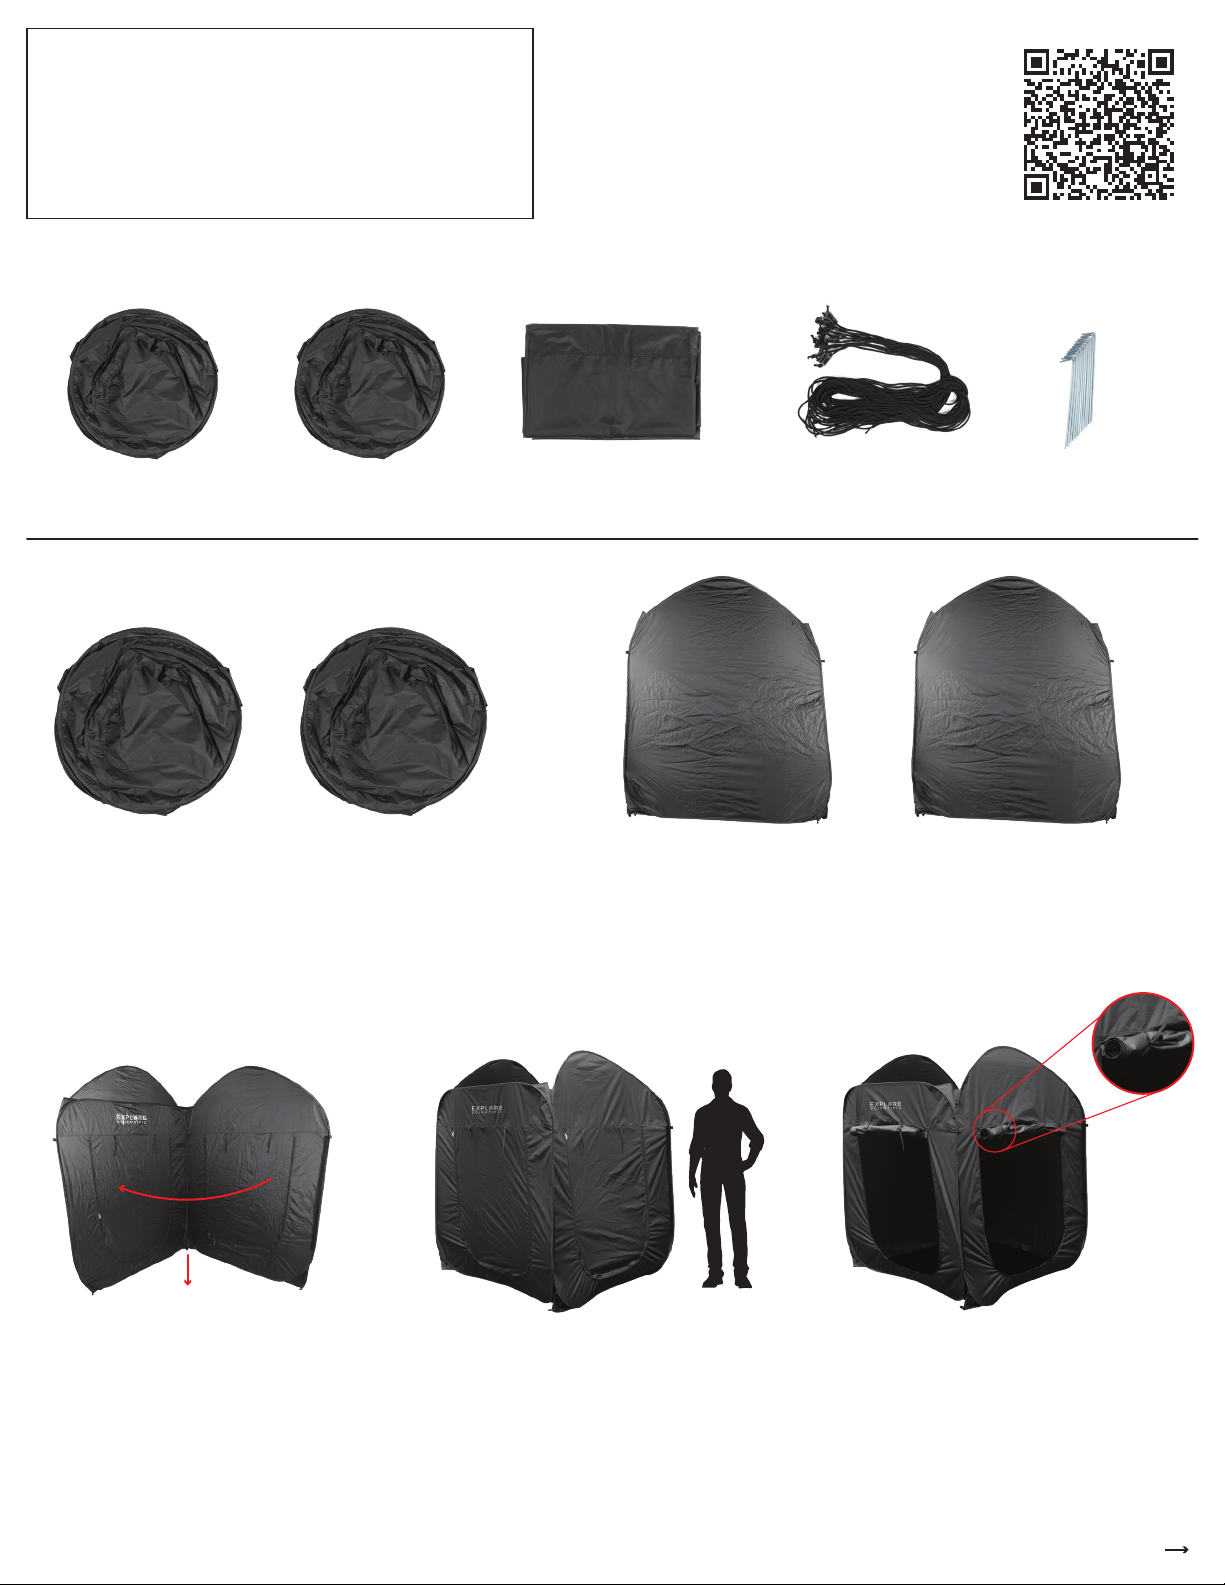
WHAT’S IN THE BOX
SCAN THE QR CODE TO VISIT OUR PRODUCT PAGE TO
VIEW OUR “HOW TO SET UP” VIDEO.
60” X 60” TENT EXTENSION TENT 120” X 180” TOP COVER
#1. Grab the 60 x 60 tent and extension tent.
CAUTION: This structure uses a spring steel loop that will pop open quickly!
Carefully expand and set aside.
12 PARACORDS
WITH CORD LOCKS
12 GROUND STAKES
1
2
#2. Stand the 60 x 60 tent upright, open and
pull from the center to form the structure.
NOTE: Some twisting of the steel loops might
be necessary to form the correct shape.
Page 2 Continue
6 ft
#3. Open both entrances and roll the door flaps.
Use the attached straps to tie the flaps.
Page 3

Hook & Loop Fastener
Hook & Loop Fastener
Hook & Loop
Fastener
#4. Stand the extension tent upright, open each side and locate the hook
and loop fasteners.
x6
#6. Attach the extension tent to the 60 x 60 tent
with the hook and loop fasteners.
#7. Take the paracords and insert one on
each top corner loop of the tents. Make a
knot of your choice to secure.
Optional: For a more secure structure, slide
stakes through each bottom loop corner and
hammer into the ground.
#5. Locate the hook and loop fasteners on the 60 x 60 tent.
Slider
#8. Hammer stakes into the ground and
extend the paracords out at a 45° angle
from the tent.
Tighten the paracords as needed by
adjusting the slider up the cord.
#9. Use the 120 x 180 top cover for temporary protection when
not in use. Follow Steps #7 and #8 to secure the top cover.
NOTE: Use the same stakes from Step #8 to attach the paracords.
Top cover should be loose and not taut to keep the structure up.
NOTE: Tents should be taut when staked
properly.
Page 3 Continue
Page 4

HOW TO FOLD AWAY
1
2
Start with the 60 x 60 tent, push one corner into the
opposite corner and fold down the center flat.
180°
Rotate tent 180° and hold as shown with the peak
pointing away from you.
Extension tent, fold each side panel to the inside flat.
Take one corner and connect it to the opposite corner.
2
1
Slide the top corner to the left. Fold in the circles that are formed on each side.
Page 4
 Loading...