

Page 1
Welcome
Congratulations on your purchase of our inspection video camera with color LCD monitor, The
Explorer Compact. Please read the user manual carefully before using this product. This product
is designed as a remote inspection device, appropriate for use in surveying pipes or other
hard-to-reach places, equipment or furnishing installation, car repair, etc. Features include
waterproof LED lens, real-time recording.
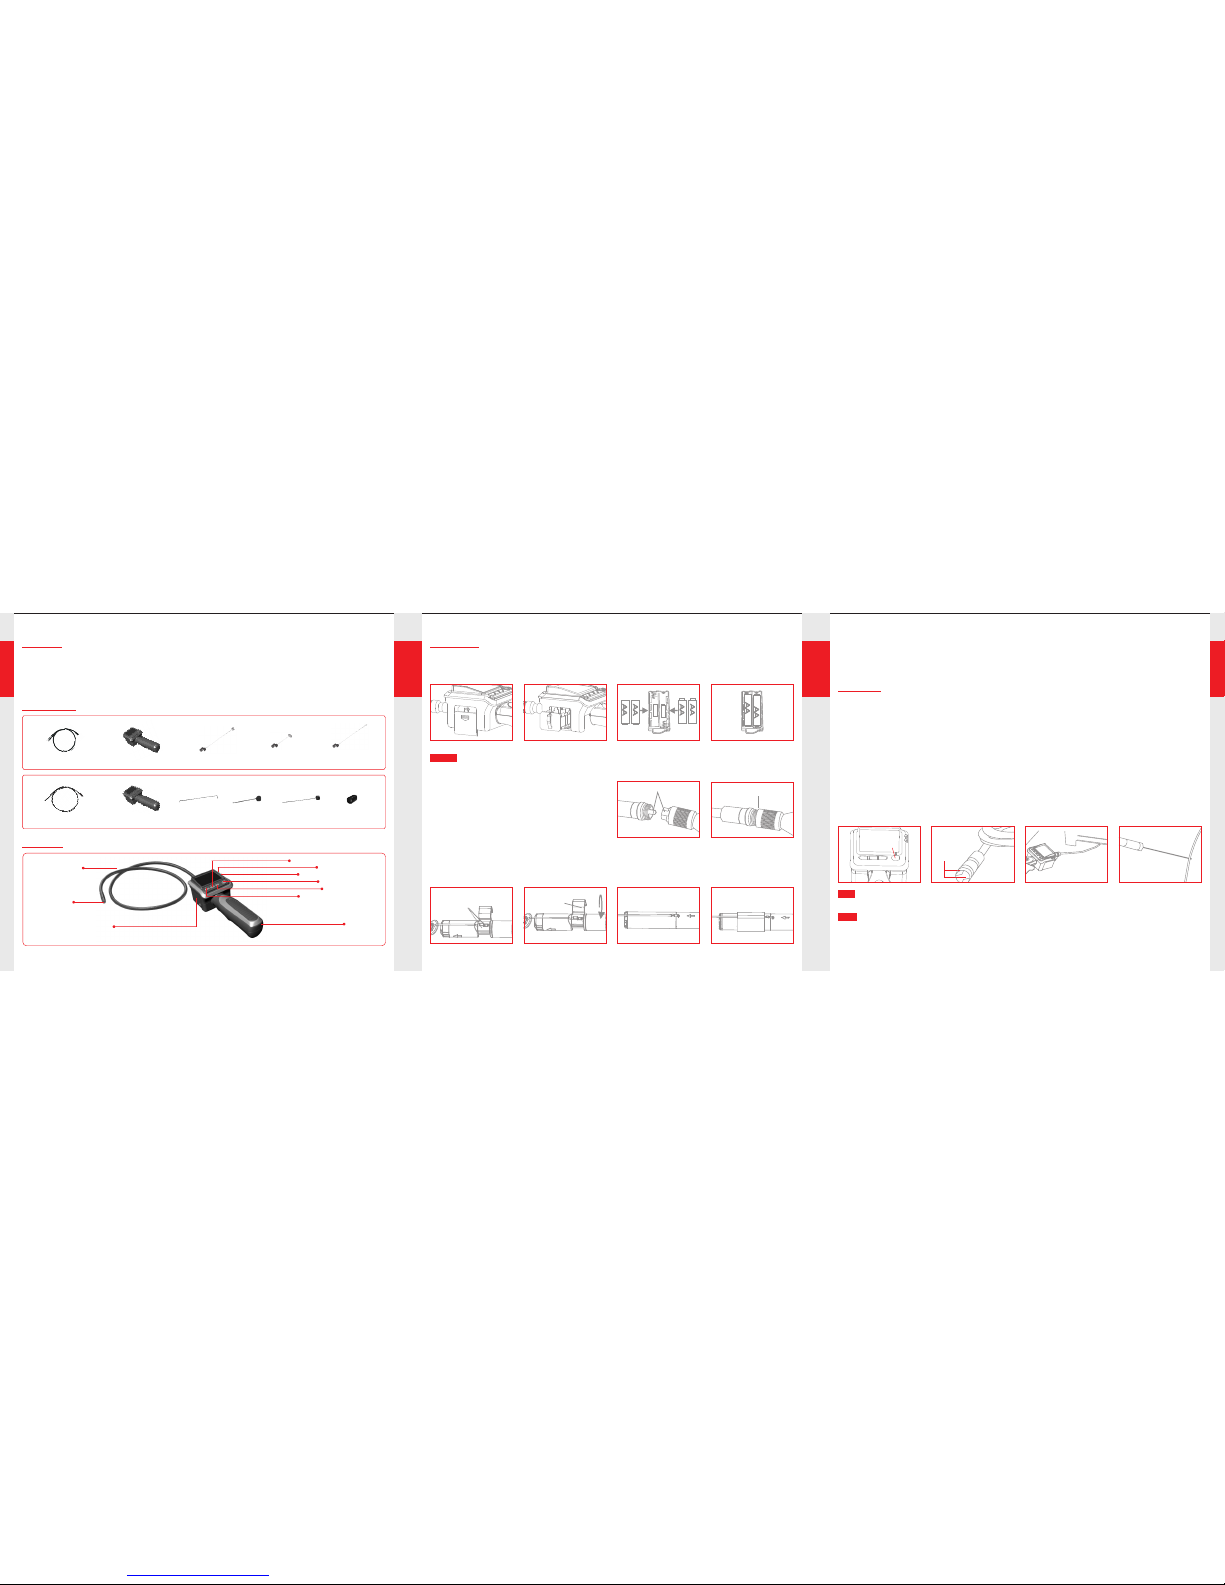
Structure
Handle
LEDs brightness control
Power Indicator
Low Voltage Indicator
Power ON/OFF
Mirror button
LCD contrast control
Flexible Tube
Mini 9mm
Waterproof LED Lens
Battery Compartment
Packing List
For GL8806
Hook
Magnet
Mirror
Rubber Ring
Mini 9mm Waterproof
LED Lens
2.5" TFT-LCD
Monitor x 1
For GL8805
Mirror
17mm Waterproof
LED Lens
Magnet
Hook
2.5" TFT-LCD
Monitor x 1
Installation
To Install Batteries
Dry your hands before installation or replacing batteries.
NOTE!
1. Remove the cover and liberate the battery compartment from its casing;
2. Insert four (4) AA batteries into their appropriate slots, with proper orientation, as indicated
on the battery compartment;
3. Reinstall battery compartment and replace battery cover.
To Attach Flexible Tube with Monitor
To connect the flexible tube camera with monitor,
first make sure that the keyed end of the tube
is aligned with the slot in the handle, then use
slight force to push them together. Once properly
aligned, twist the treaded knob clockwise until
the connection is securely in place.
Fasten the
treaded knob
Keyed end plugs
into socket
-1-
For GL8806: to prepare accessory for installation, push down on stem-side of black interface
while pulling away from adjacent side. This will open the base of the accessory. Next, align inside
of stem-side to either treaded surface at the base of camera head. Tighten to secure the
accessory in place.
For GL8806:
To Install Accessory
The three (3) included accessories (mirror, hook and magnet) are all attached to the tube in
the same way as illustrated below:
Click to lock upAim at the cut of slot Place hook into hole
at end of tube
Place rubber ring
around camera head
and hook
For GL8805:
Operation
1. Press the power switch to turn the camera on (refer to Fig-1). The power indicator will illuminate
and the LCD will become viewable.
2. If the image on the LCD is unclear, please adjust brightness, contrast and mirror by toggling the
buttons on the monitor face.
* LEDs Brightness Control: The 6 levels of LED brightness can be adjusted by pressing the LEDs
Brightness Control button (refer to Fig-2).
* LCD Contrast Control: The 8 levels of LCD contrast may be adjusted by pressing the LCD
Contrast Control button.
O
3. To rotate the orientation of the image displayed on the LCD by 90 , press the Mirror button.
There are four (4) possible image orientations that you can toggle through by pressing this
button.
4. When in use, the tube should easily maneuver itself into position. Do not apply excessive force
(refer to Fig-3).
5. The accessories included with Explorer Compact can be used to retrieve small items like
dropped rings or screws (refer to Fig-4).
Power Switch
Twin LEDs
provide
lighting
Do not immerse the monitor in water. Store in a dry place. Such measures reduce the
risk of electric shock and damage. Only the lens and tube are water resistant when the
unit is fully assembled.
TIP!
NOTE!
The flexible tube can be bent into numerous shapes that may help you explore areas you
otherwise thought were impossible to see.
Fig-1
Fig-3
Fig-4
-2- -3-
Fig-2
Page 2
Version 1.1
Please read this user manual carefully before using this product.
Failure to understand operation procedures may result in injury.
Model: GL8805, GL8806
FCC Information
This device complies with part 15 of the FCC R ules. Operation is subject
to the following two conditions:
(1) this device may not cause harmful interference;
(2) this device must accept any interference received, including interference
that may cause undesired operation. Changes or modifications not
expressly approved by the party responsible for compliance co uld void the
user's authority to operate the equipment.
Horizontal Viewing Angle
0 Lux
Minimum Illumination
PAL / NTSC
480 x 234
150mA
4 x AA batteries
IP67 (for lens/tube only)
17mm
9mm
2.36 TFT-LCD
Effective Pixels
Video System
Power Supply
Waterproof Capacity
Tube Diameter
LCD Screen Type
Consumption Current (Max.)
1.5m
Night Vision Range
201 x 83 x59(mm)
383g
15~85%RH
OOO O
-10 C~50C/14 F~122 F
Dimensions (W x D x H)
Approx. Weight
Operating Temperature
Operating Humidity (Max.)
473g
Imaging Sensor
Total Pixels
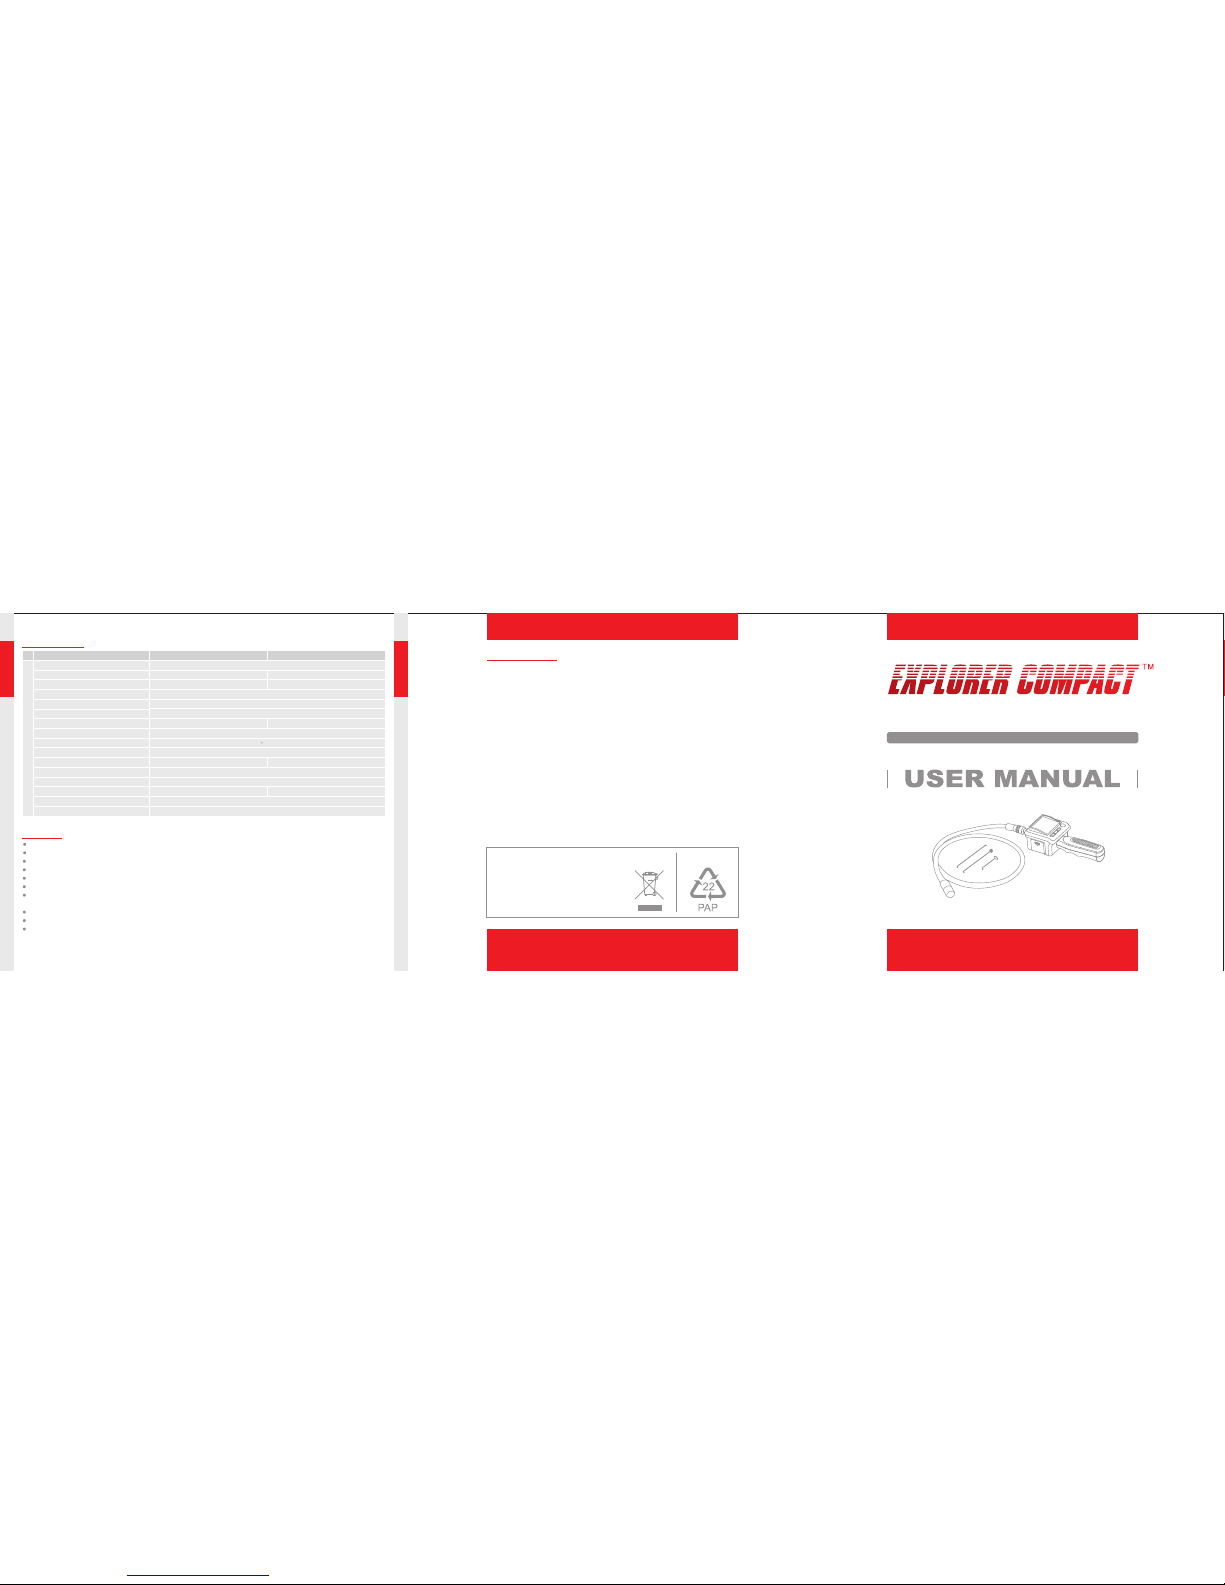
Model No.
Explorer Compact
CMOS
Specifications
* All specifications are subject to minor change without prior notice.
GL8805 GL8806
704 x 576 (PAL); 712 x 486 (NTSC)
PAL / NTSC
INSPECTION VIDEO CAMERA WITH COLOR LCD MONITOR
o
45
o
50
Warnings
Turn off the system if it is not in use.
This product can only be completely disconnected for from its power source by unplugging the power adapter.
Do not cut the DC power cable of provided with this product to fit with another power source.
Attention should be given to the environment aspects of battery disposal.
Remove the batteries when cleaning the unit.
Remove the batteries before storing the unit for a long time.
When necessary, REPLACE ALL FOUR (4) BATTERIES in this unit with new ones, not one (1) or two
(2) batteries at a time.
Use only the size and type of battery specified.
Be sure to install the battery with the correct polarity as indicated in the battery compartment.
Properly dispose of the battery. Exposure to high temperatures can cause the battery to explode,
so do not dispose of in a fire. Place tape over the terminals to prevent direct contact with other objects.
Some countries have regulations concerning battery disposal. Please follow all applicable regulations.
-4-
640 x 480 (PAL); 640 x 480 (NTSC)
EU Environmental Protection
Waste electrical products should
not be disposed of with household
waste. Please recycle where
facilities exist. Check with your
local authority or retailer for
recycling advice.
 Loading...