

Page 1
USB DirectLink Cable Quick Installation Guide
Enabling the USB Function
In order to successfully connect the USB DirectLink cable to
your PC, you must first make sure that your USB Function is
enabled. The following steps will instruct you how to do this.
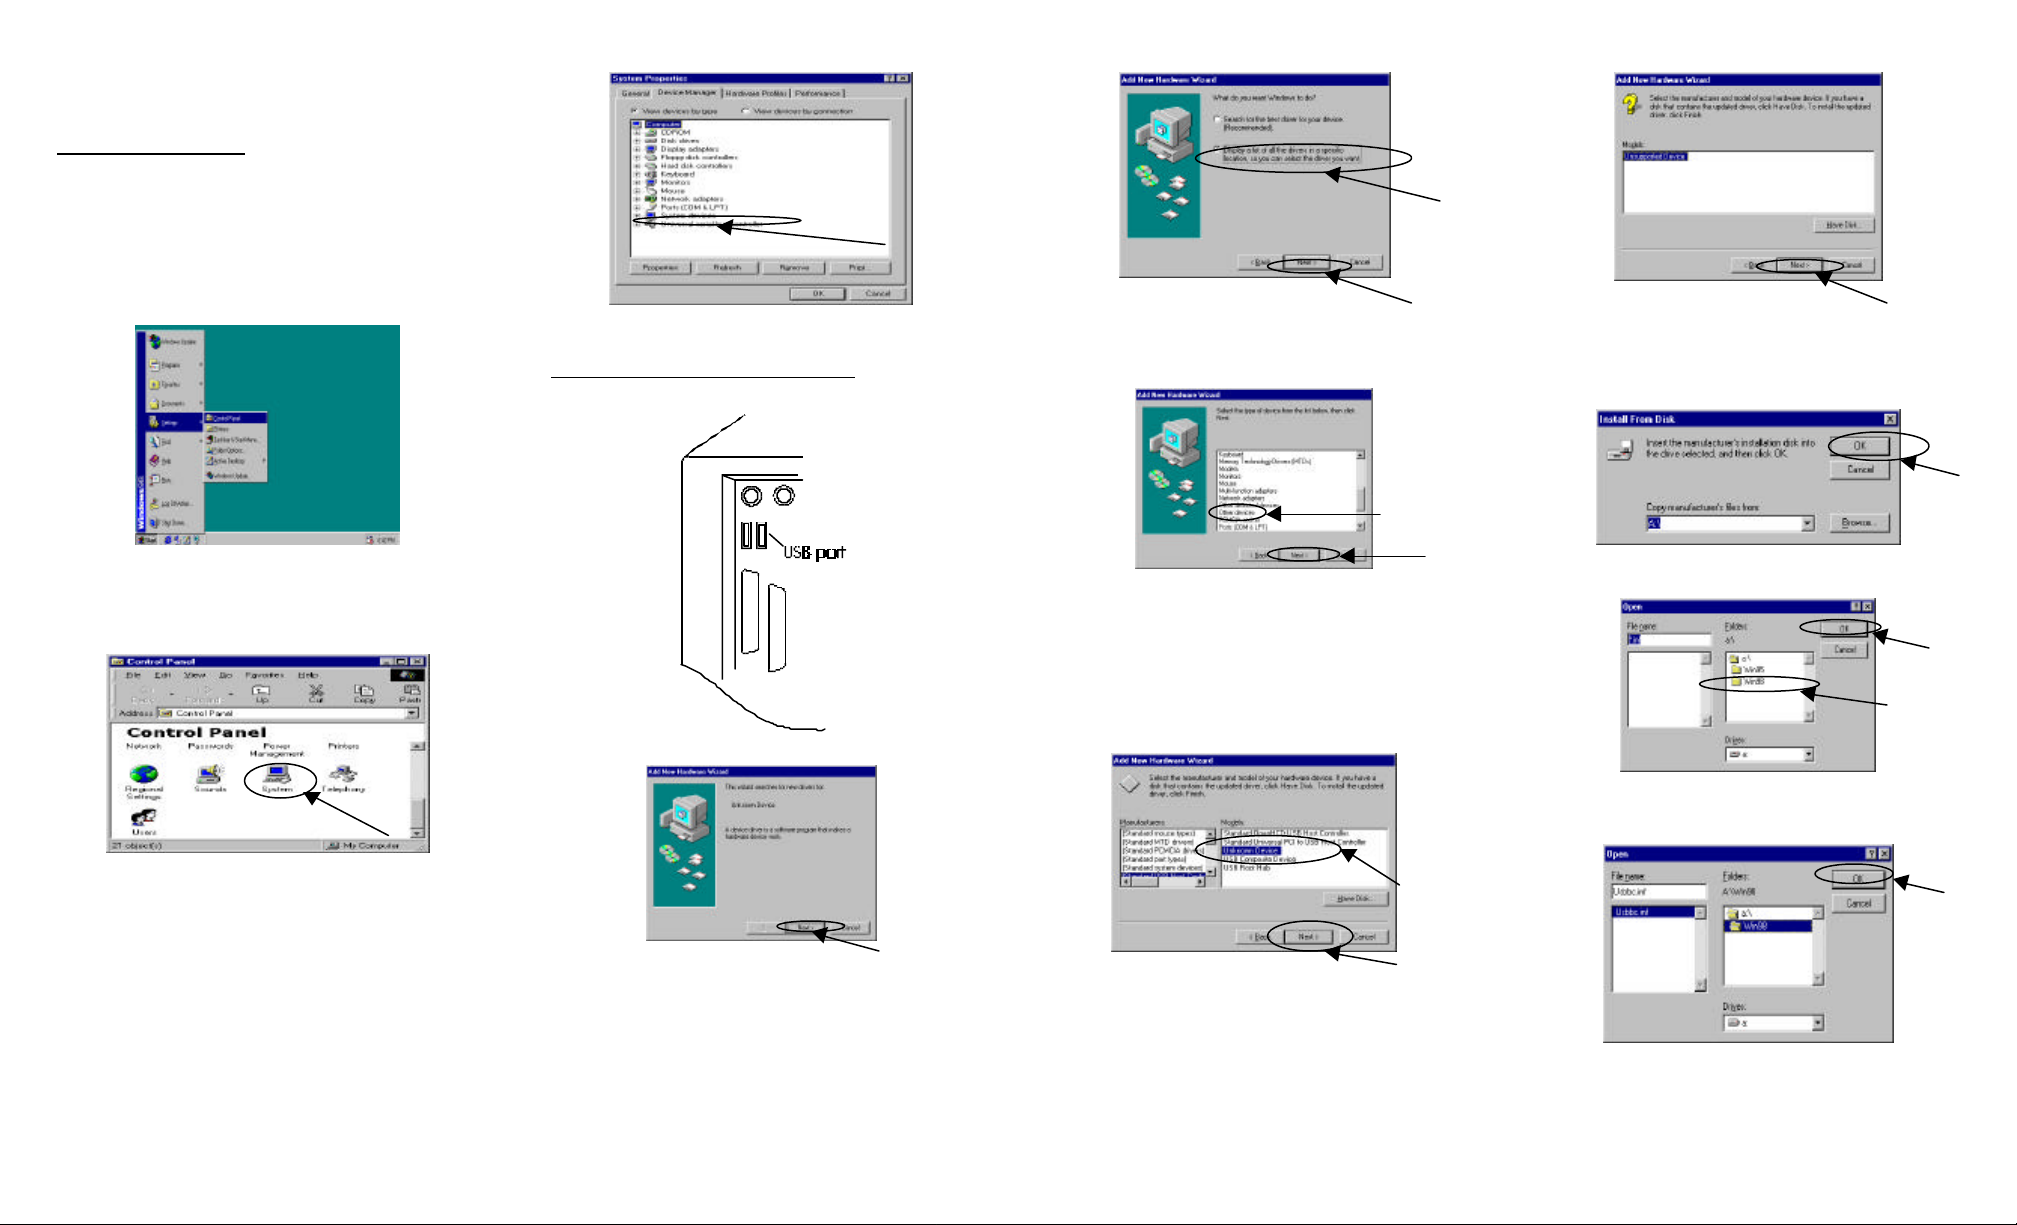
1. Go to the Start menu. Pull up the Start menu and
select Settings. Then click on the Control Panel
folder.
2. Once the Control Panel window appears, double-
click on the System icon.
3. Once the System Properties window appears, click
on the Device Manager tab. The Universal serial
bus controller item, shown below, indicates that the
USB function is already enabled in you computer. If
you see this item on your screen, you can skip to the
next section entitled Installing the USB DirectLink
Cable Drivers .
Installing the USB DirectLink Cable Drivers
After plugging in
the USB
DirectLink
cable, you will
see the Add New
Hardware
Window
displayed below
Click the Next
button to
continue.
In this display, choose the second item (shown below), and then
click Next.
In this display, select the Other devices item, and then click
Next.
Now you can insert the USB DirectLink cable diskette into the
Floppy drive.
Depending on your PC, one of the two displays below will
appear. In either case, click the Have Disk button and then click
the Next button to continue.
The Install From Disk display should now appear, click the
Browse button to choose the correct drivers.
Once you see the Open display, double-click the Win98 icon.
Make sure that Usbbc.inf appears in the file name box, and then
click the OK button.
Note: If you do not see this item, you will need to refer to your
computer’s reference manual on how to enable the USB function.
Once the display below appears, click the OK button to begin the
installation process.
Page 2
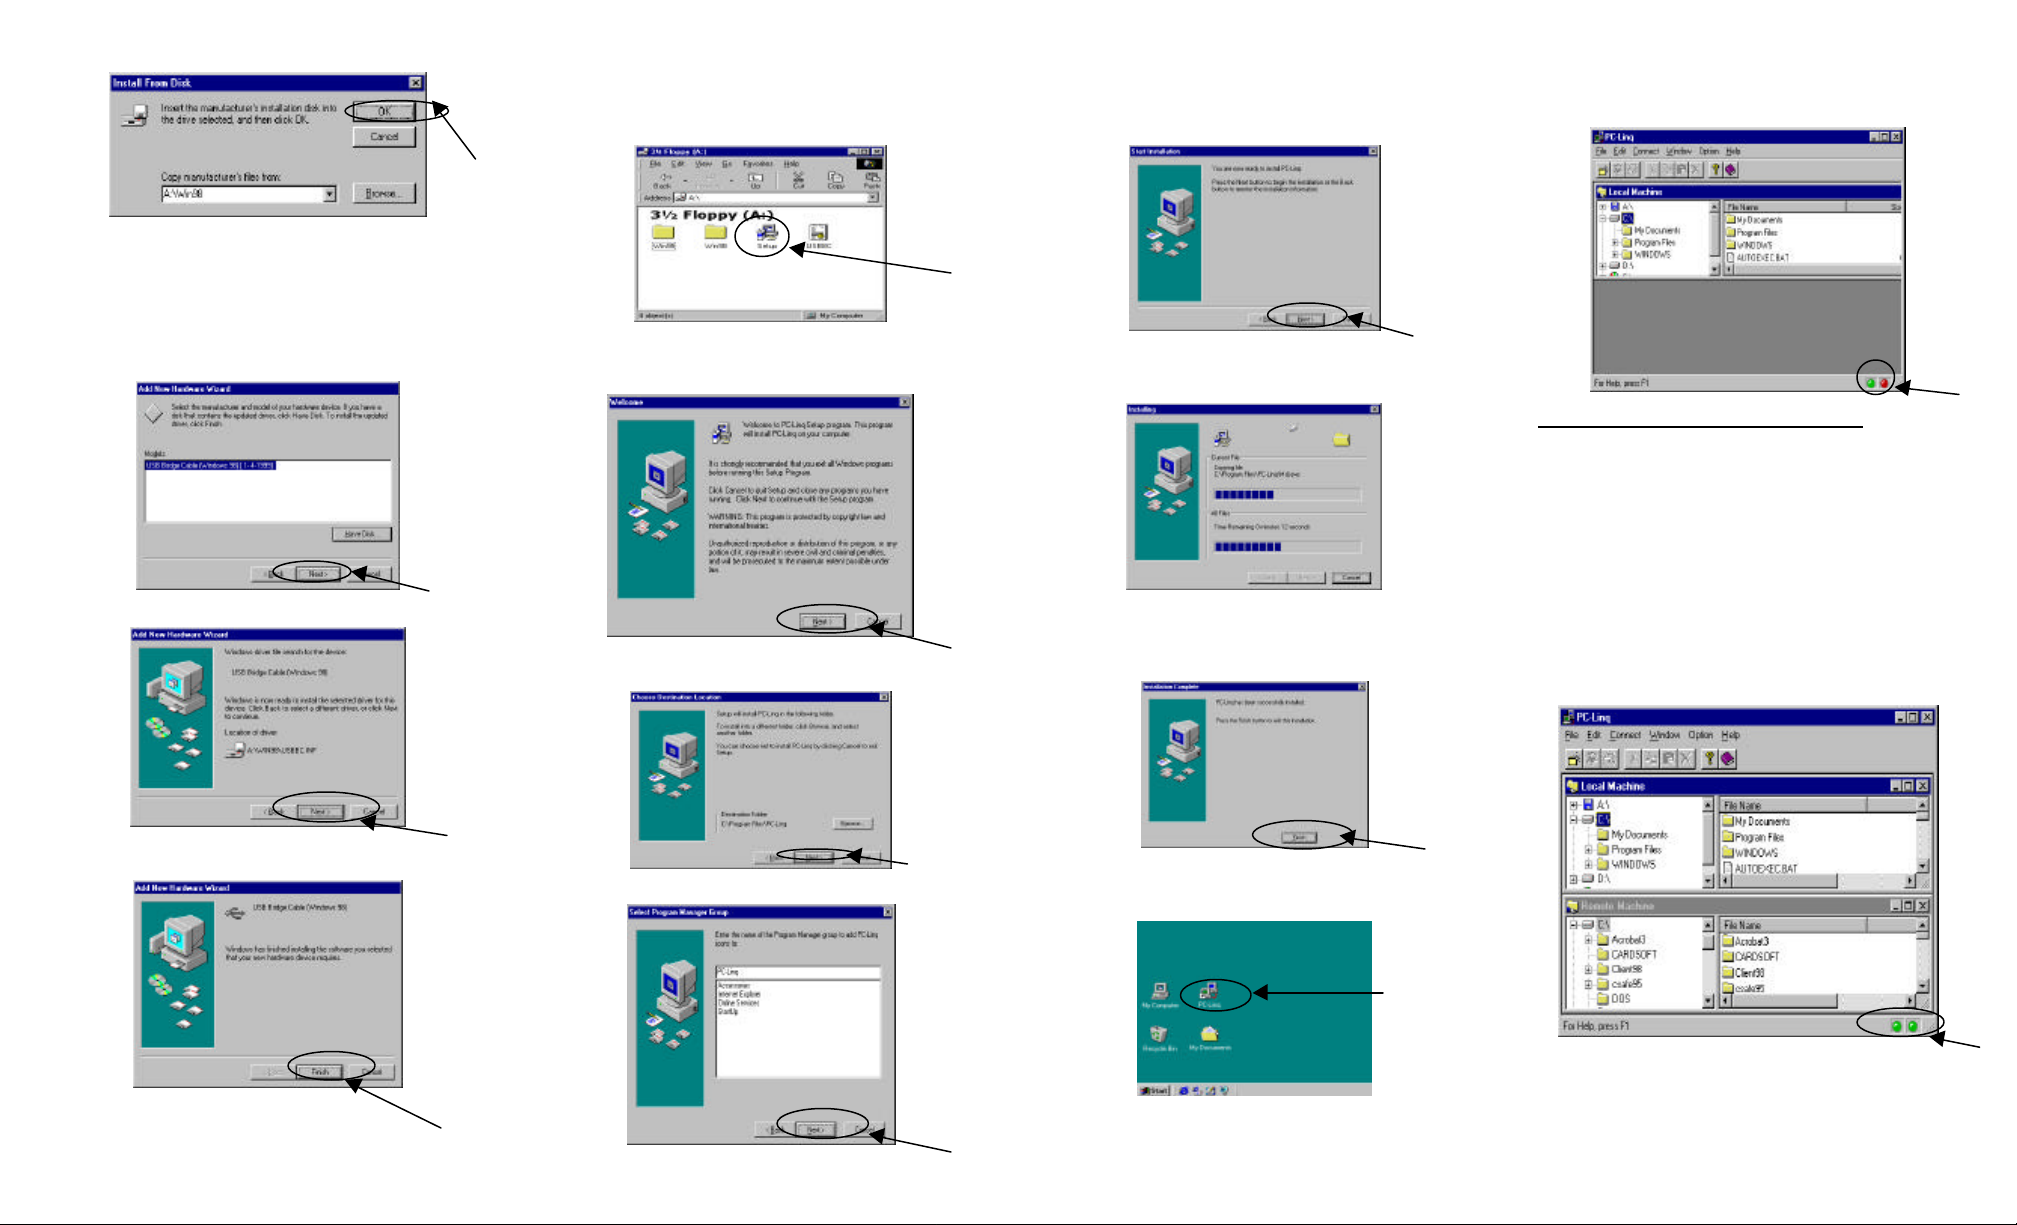
Once the Add New Hardware Wizard screen appears, click the
Next button.
Go to your PC’s Desktop. Double-click on the My Computer
icon and then double-click the 3 1/2 Floppy (A:) icon. Once the
display below appears, double-click the Setup icon.
In the Welcome window, click the Next button.
Once the following display appears, click the Next button.
Click the Next button to begin the installation.
Wait until all the files are copied.
Once the files have been copied the Installation Complete
window will appear. Click the Finish button to complete the
installation.
indicates that the USB DirectLink cable is plugged into your PC
and in working mode.
Using the USB Cable Link to Connect Two PCs
To connect two PCs with the USB Link cable, follow the
previous instructions for each PC. Once you have completed the
installation on both PCs the below window should appear on
each PC.
The Local Machine window represents your PC and the Remote
Machine window represents the PC that you want to share files
via the USB DirectLink.
When you want to use the USB DirectLink cable to move or
copy files between two PCs, you need to start the PC-Linq
utility on both PCs. (Double-click the PC-Linq icon on each
PC.) Two illuminated green lights (displayed below) indicate
that the PC-Linq is installed and working on both PCs.
Now you can click the Finish button to complete the installation.
Once the following display appears, click the Next button.
Once the installation is complete, you will see the PC-Linq icon
on your Desktop screen. Double-click the PC-Linq icon.
The following display should now appear on your screen. The
illuminated green light (located in the bottom right corner)
 Loading...