

Page 1
Joystick Calibration
GETTING STARTED
After the installation procedure has been completed, please check to see
if your PCMCIA Game card is functioning correctly by performing the
following steps.
1) Select Control Panel from My Computer.
2) Select Joystick.
3) Click on “Calibrate...” and then “Test...”.
4) Follow the on-screen instructions to finish the joystick calibration.
If the PCMCIA Game card is not connected properly to the PCMCIA
socket, clicking on the Joystick icon will cause nothing to happen.
On the other hand, if the PCMCIA Game card is not connected properly
to the joystick, “Calibrate...” and “Test...” will not be displayed, and you
will not be able to calibrate the joystick at all.
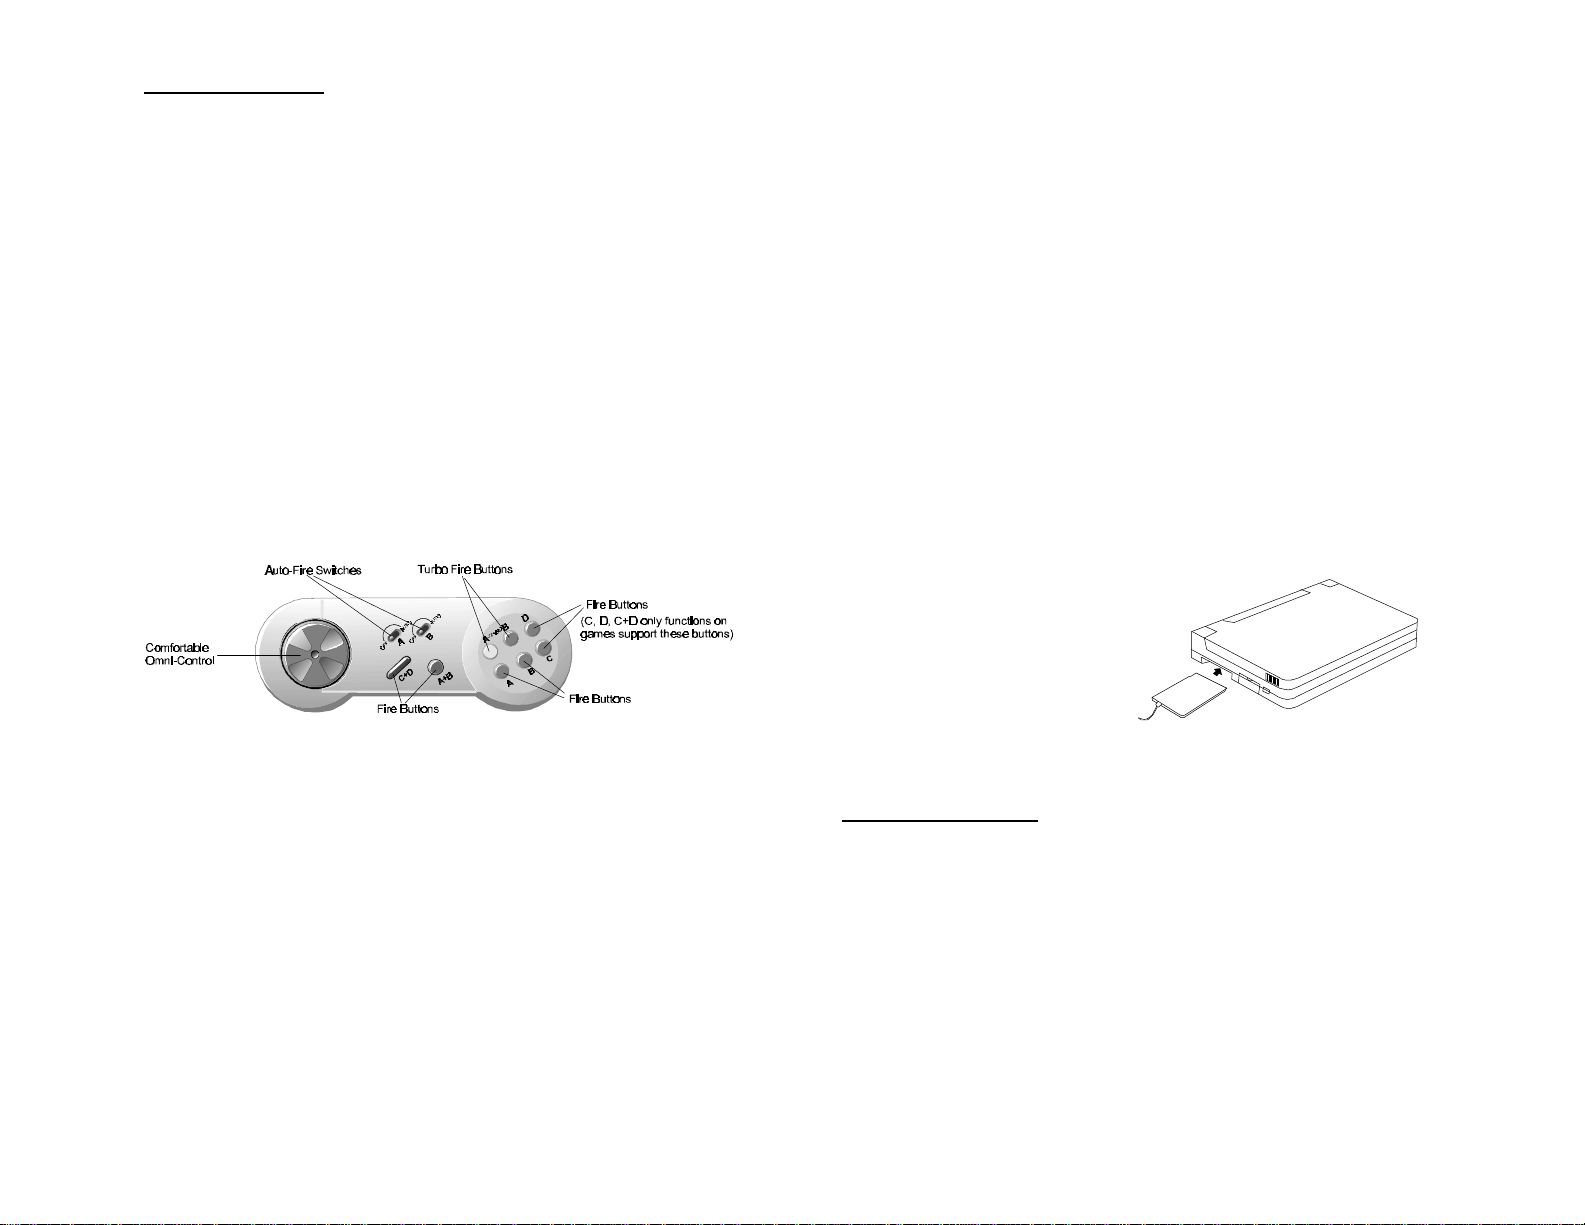
Game Pad Controller Description
Welcome to the world of portable gaming!
We make it easy with this simple to install PCMCIA game card.
Just follow the easy-to-install instructions as described below and in just
a few minutes, you will have fun on the run!
REQUIREMENTS
1. To use your PCMCIA Game card, your computer must be equipped
with a PCMCIA 2.1 compliant socket.
2. The I/O address 200-207 must be available in your computer.
HARDWARE INSTALLATION
1) Locate the PCMCIA socket, which is usually on one side of the
computer.
2) Align the PCMCIA Game card with the arrow sign pointing towards
the computer’s socket. (Please note that the card has been keyed to
guide in for proper installation.)
3) Slowly insert the PCMCIA Game card into the socket and press
firmly until the PCMCIA
Game connector is seated.
4) Attach the PCMCIA Game
card to your joystick or game
pad.
5) Turn on your computer.
SOFTWARE INSTALLATION FOR DOS/WINDOWS 3.1
Automatic Installation
1) Insert the PCMCIA Game card device driver diskette into your
floppy disk drive.
2) Change the working directory to the floppy drive containing the
device driver diskette by typing “A:” or “B:”, and then press
ENTER.
3) At the DOS prompt (A:\> or B:\>), type “INSTALL” followed by the
ENTER key.
4) Press ENTER or click on the OK button when the opening screen
appears. A warning screen will be displayed to remind you that this
installation program is for DOS/Windows 3.1, rather than for
Window 95. Press “C” or ENTER to continue; otherwise, press “X”
to exit.
Page 2
5) If you select to continue the installation, a dialog box will then
appear for specifying the directory to install the device driver. Enter
the directory you prefer and press ENTER to continue. The rest of
the installation will proceed automatically.
6) After completing, remember to reboot your system.
Manual installation
You may also manually install the device driver by performing the
following steps.
socket to your system. Please click on the “Add New Hardware” icon in
1. Copy the files EXPGAME.EXE from the PCMCIA Game card device
driver diskette to your hard disk.
2. Add the following lines to the BOTTOM of your CONFIG.SYS file:
DEVICE = driver:\path\EXPGAME.EXE /P200
where drive:\path specifies the directory containing the file
EXPGAME.EXE.
/P is used to set the I/O port. The only valid number is 200.
If your computer has been loaded with ExCA compliant PCMCIA
software, then you are allowed to hot insert/remove the Game Card,
which means you can connect or remove the PCMCIA Game card at any
the time without rebooting your system. If your system doesn’t have this
software, each time you remove the card and insert it again, you need to
type EXPGAME.EXE /P200 at DOS prompt to re-enable the PCMCIA
Game card.
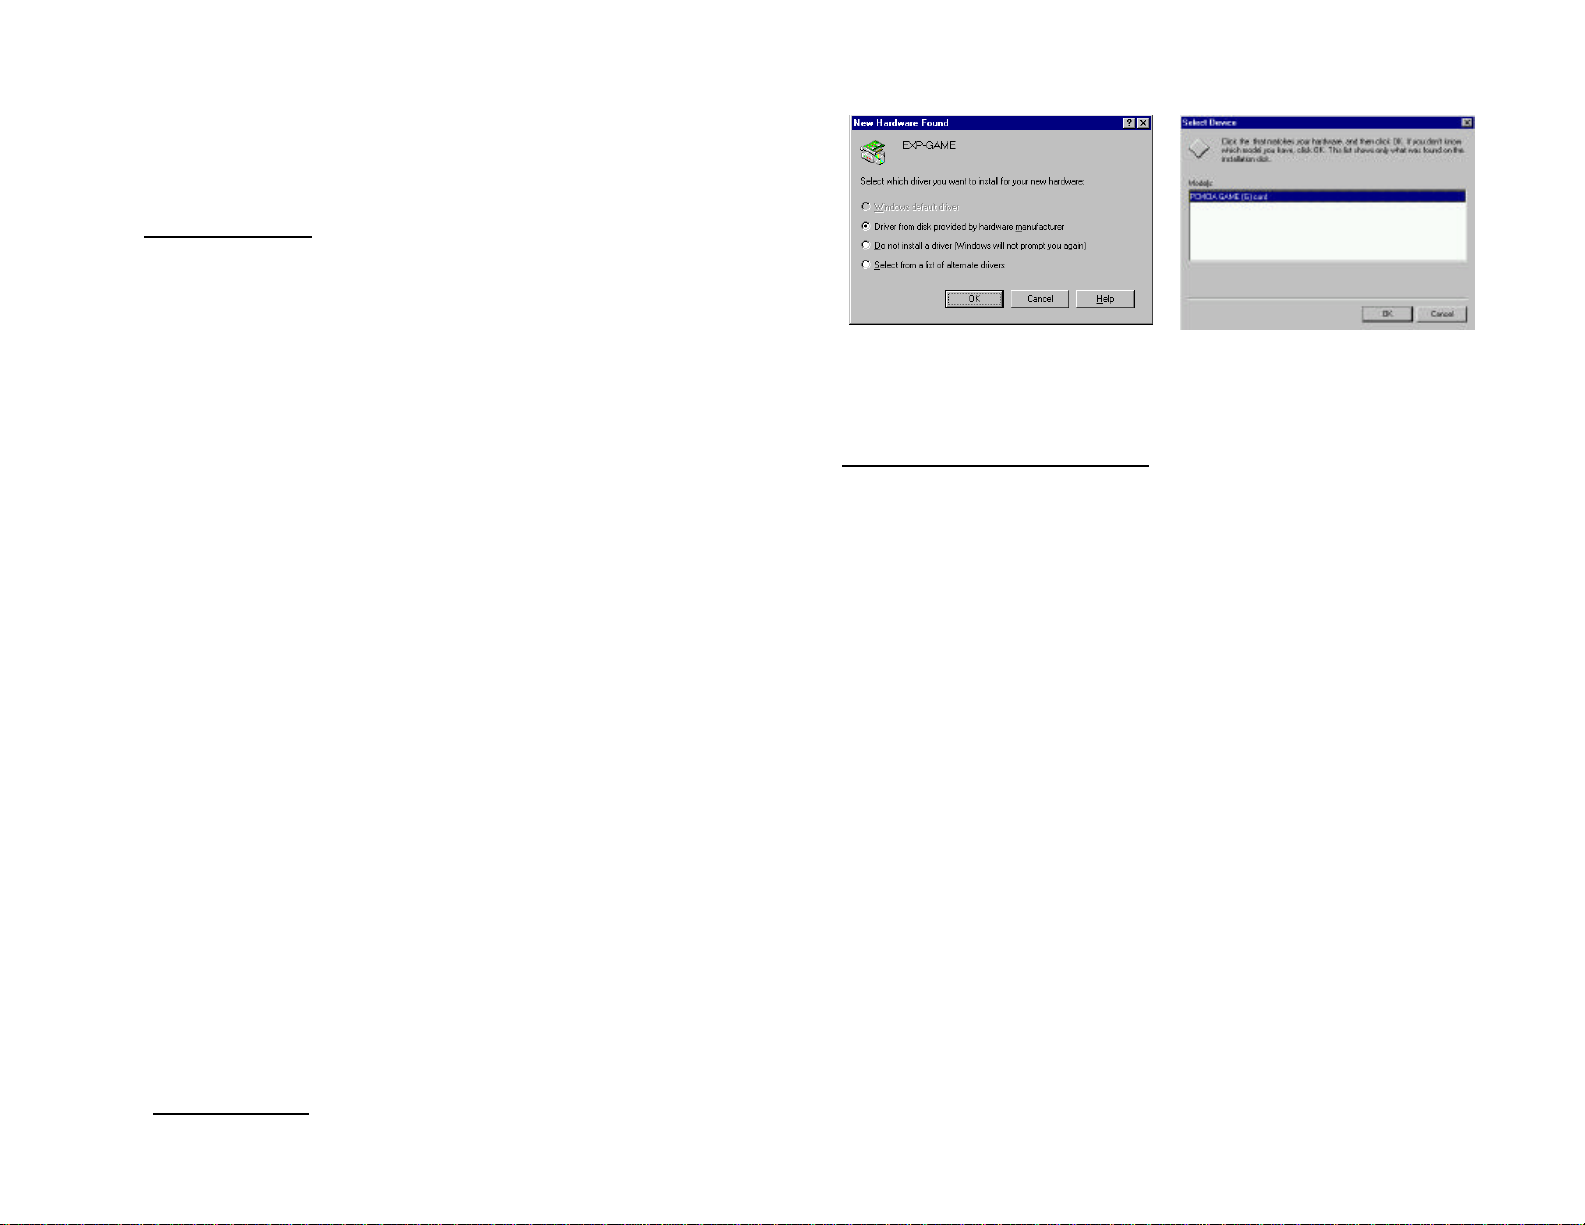
SOFTWARE INSTALLATION FOR WINDOWS 95
The following dialog box will appear when you are using the PCMCIA
Game card under Windows 95 for the very first time.
Select “Driver from disk provided by hardware manufacturer” and click
on the OK button. Windows 95 will then prompt you to insert the
manufacturer’s installation disk. Insert the PCMCIA Game card device
driver diskette into your floppy drive. Specify the directory as A:\WIN95
(or B:\WIN95), whichever drive contains the device driver diskette.
the Control Panel folder and select “PCMCIA socket”. Select the
appropriate type of PCMCIA Controller which matches yours and
follow the on-screen instruction.
Changing I/O Setting Under Win95
The default I/O setting for Game Traveler is 200, however, some of the
systems do not have this port available, you might need to switch the I/O
address to 201 which can be done by following procedures -
1. open "Control Panel", choose "System"
2. click at "Device Manager"
3. expand the "Sound, Video and Game Controller" list by clicking at
the "+"
4. double click at "PCMCIA Game Card", choose "Resources"
5. find the "setting base on" input box and change base configuration
from 0000 to 0001which will switch the I/O to 201 from 200-207
6. Choose "OK"
When the following screen appears, select PCMCIA GAME card and
click on the OK bottom. After this installation, please see back page for
“Joystick Calibration” to ensure your PCMCIA Game card is installed
properly.
If the above dialog boxes do not appear the first time, check whether your
Page 3

EXP COMPUTER, INC.
EXP MEMORY PRODUCTS, INC.
NON-TRANSFERABLE LIMITED WARRANTY
EXP COMPUTER INC., AND EXP MEMORY PRODUCTS("EXP") warrants that the Game
Traveler (“products”) manufactured or distributed by EXP to be free from failures due to defects
in materials or workmanship for full one year from the date of purchase of the products.
This warranty is void if the product is damaged by abnormal or improper use or by accident,
abuse or if any attempt to repair or modify the product without authorization from EXP. Your
sales receipt or invoice, showing the date of purchase and the name of the authorized reseller, is
your proof of the date of purchase. During the warranty period, EXP will at its option, replace or
repair, at no charge, the product which in its opinion is defective.
Before you return the failed products, contact EXP. You must obtain a Return Merchandise
Authorization (RMA) number by calling EXP Computer Inc. At (516) 496-7629. The RMA number
should be displayed on the outside of the returned package and on the accompanying packing
list. EXP cannot be held responsible for any package returned without the RMA number. You
are responsible for packaging, providing proof of the date of purchase and the shipping cost of
the failed product to EXP Computer, Inc. You are responsible for mailing the warranty
registration card. The warranty claims may not be honored if there is no corresponding
registration card on file at EXP.
IN NO EVENT WILL EXP BE LIABLE FOR ANY DIRECT, INDIRECT, SPECIAL, INCIDENTAL
OR CONSEQUENTIAL DAMAGE, INCLUDING LOSS OF PROFIT, LOSS OF SAVINGS; OR
ANY OTHER DAMAGES CAUSED BY PRODUCT OR FAILURE OF THE PRODUCT TO
PERFORM.
THIS LIMITATION OF LIABILITY APPLIES EVEN IF EXP HAS BEEN ADVISED OF THE
POSSIBILITY OF SUCH DAMAGES. SOME SATES DO NOT ALLOW THE EXCLUSION OR
LIMITATION IN INCIDENTAL OR CONSEQUENTIAL DAMAGES, SO THE ABOVE EXCLUSION
OR LIMITATION MAY NOT APPLY TO YOU.
EXP Game Traveler
Installation Manual
How to contact us:
Internet http://www.expnet.com
EXP Technical Support 516-496-7629
EXP BBS 516-496-3753
EXP Sales 800-EXP-6922
Technical Support E-mail tech_support@expcomputer.com
Sales E-mail sales@expinc.com
PC Card(PCMCIA) Game Adapter
Apr. 1997
 Loading...