

Page 1

In Car ,Video
Sonic Excellence by EXONIC
Mobile Entertainment
INSTRUCTION MANUAL
EXONIC Mobile Entertainment
Buena Park, CA 90621 U.S.A. www.exonicmobile.com
EXM 930HP with Headphones
9" Ceiling M ount Monitor wi th Multimedia D isc Player
Page 2

Contents
SPECIFICATIONS
Caution
Features and Con trols
Monitor/DVD Pl ayer
Remote Control
Power and Mode Sel ectio n
Releasing Th e Monit or
Tur ning on The Moni tor
Mute Function
AV mode
Picture Contro l
Contrast/Bri ghtne ss/Co lor/F M
DVD Setup
Setup Menu
System Setup
Language Setup
Audio Setup
Video S etup
Speaker Setup
Digital Setup
DVD Functions
Eject
Vol+/Vol-
Mute
Play or Pause
Audio
Stop
Arrows
Setup
Menu
Display
Number Buttons
Subtitle
Tit le
Slow
Fast Reverse Sea rchin g
Fast Forward Sea rchin g
Previous
Next
3
Repeat A-B
5
Repeat
5
NTSC/PAL
6
Angle
9
PBC
9
Zoom
9
GO TO
9
SD/USB Functio ns
10
Connection Dia gram
11
Installation
11
12
Disc Informati on
12
Tro ubles hooting
13
14
Specificatio ns
15
15
16
17
18
16
18
18
18
18
19
19
19
19
20
20
21
21
21
22
22
23
23
23
24
24
24
25
25
25
26
27
28
29
30
31
Power
Screen Format
Resolution Pixel
Color System
A/V Input
A/V Output
Dimension
D C 1 2 V
1 6 : 9
1 9 2 0 x 2 3 4
N T S C / PA L Au to S el ec t
D V D - AV 1- AV 2
1 E A
11 .9 (L )X 10 .4 (W )X 1. 2 (H ) in ch e s
Note: This equipment has been tested and h as b een found to comply
with the limit s fo r a Class A digital de vi ce , pursuant to part 15 of the
FCC Rules. These limits are designed to pr ov ide reasonable protection
against ha rm fu l interference when the equipment is operated in a
commercial e nv ironment. This equip me nt generates, uses, and can
radiate radi o fr equency energy and, if not installed and used in
accordan ce w it h the instruction manual, may cause harmful interference
to radio commu ni cations. Operation of this equipment in a residential
area is like ly t o ca use harmful interference. In some cases, the user will
be require d to c or rect the interference at his own expense.
2
31
Page 3
Troubleshooting
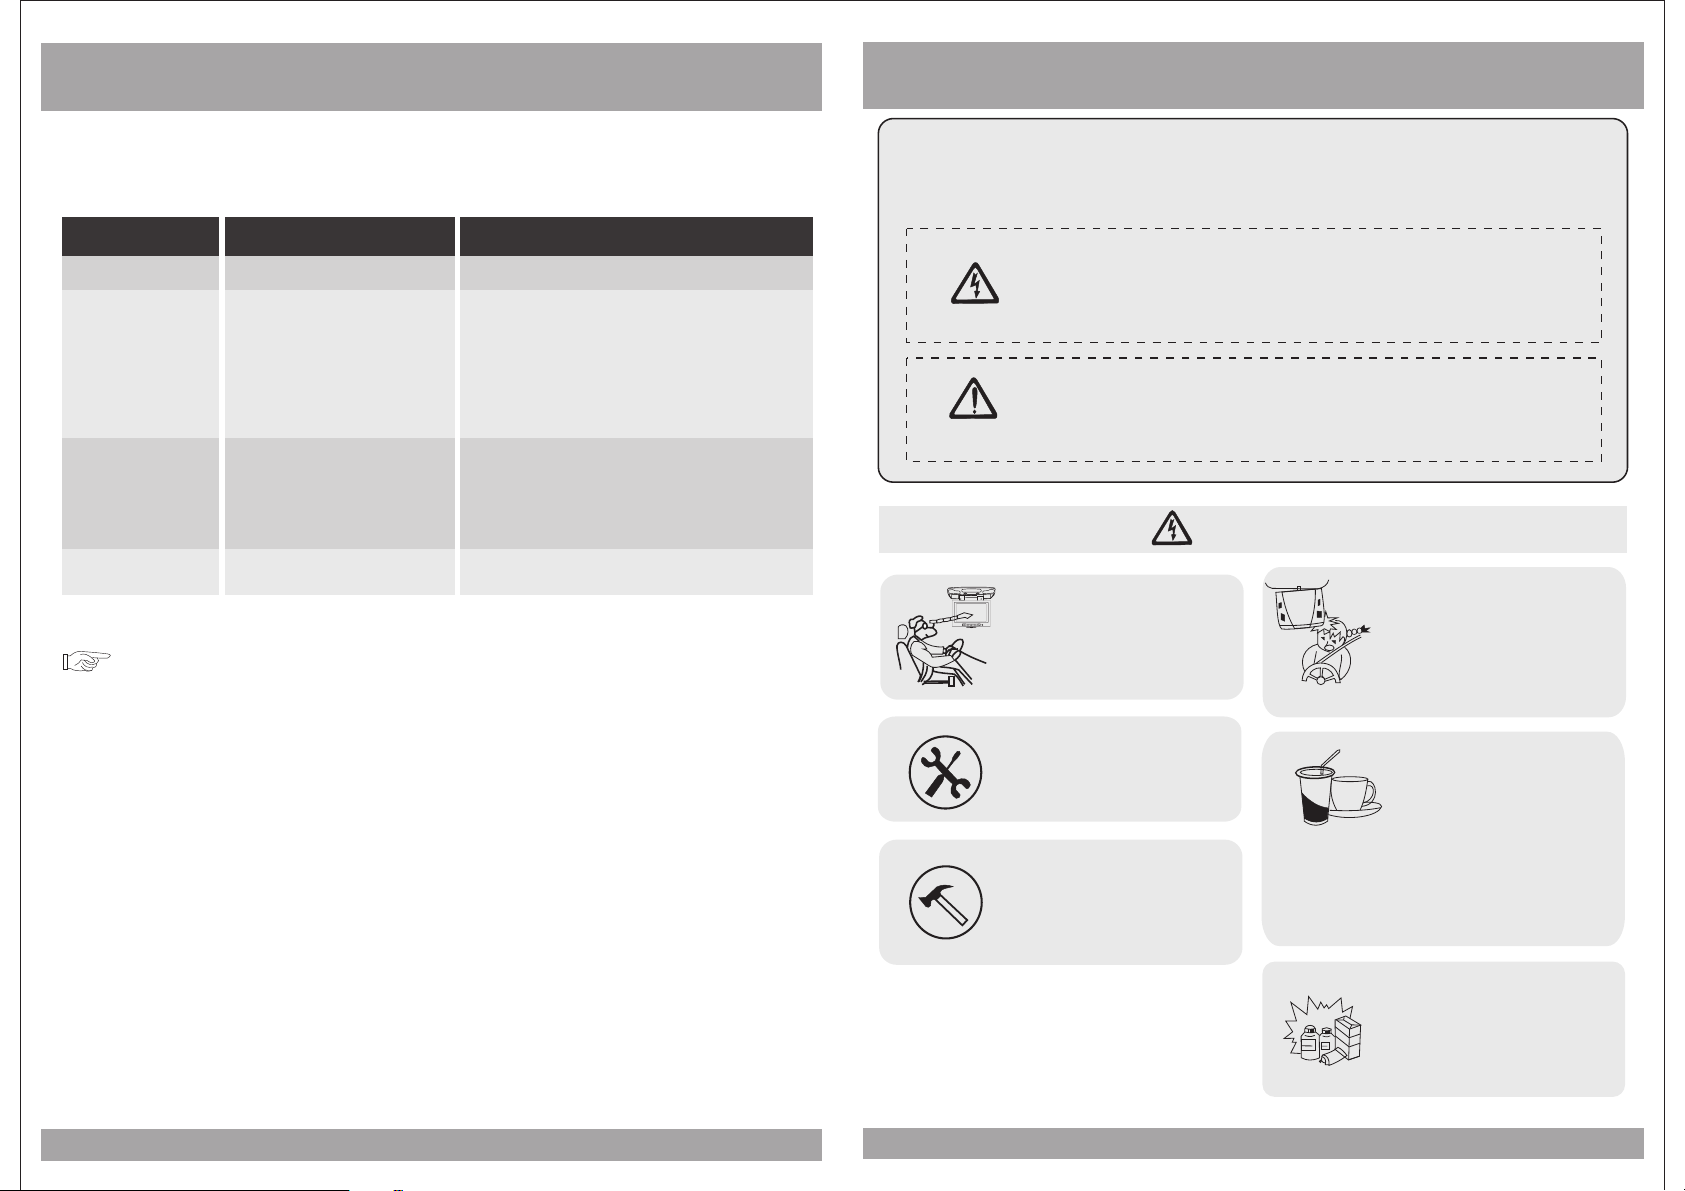
Caution
Please read and o bserve all warnin gs and instruct ions in this manual
and those marke d on the unit. Retain t his booklet for f uture referen ce .
There are two ki nd s of alarm symbols as follows:
Symptom
Button s do no t wor k.
No sound
Remote c ont rol d oes
not work p rop erl y.
Items to Check
Is th e pow er tu rne d on?
Is th e aud io wh ich i s conn ect ed wi th
the a udi o cab le se t to rec eiv e
the D VD si gna l out put?
Is au dio c abl e con nect ed se cur ely?
Is th e mon ito r whi ch is co nne cte d
with the a udi o cab le tur ned o n?
Is th e aud io ou tpu t set
in the cor rec t pos itio n?
Is th e rem ote c ont rol fa cin g
the r emo te se nso r?
Is th e dis tan ce to o far?
Is th ere a ny ob sta cle in t he mi ddl e?
Is th e bat ter y wea k?
Actions to be Taken
Check th e car b att ery ca pac ity.
Select t he co rre ct inp ut mo de fo r the audio r ece ive r.
Connec t the a udi o cabl e int o the j acks secu rel y.
Tur n on the moni tor c onn ecte d wit h the a udi o cabl e.
Set the Aud io Ou tpu t to the c orr ect p osition ,
and then t urn o n the D VD pla yer a gai n by pressi ng
the P OWE R but ton .
Point th e rem ote c ontr ol to war d the remot e sen sor o f
the p rod uct .
Use the re mot e con trol w ith in 15 f eet.
Remove t he ob sta cle.
Replac e wit h new b atte ry.
Moisture or condensation on lens
When a disc is broug ht from a c old env ironm ent to a warm one, the re may be m oistu re
on the the disc, or co ndens ation o n the pic kup lens. It will affec t disc pl ayback.
1. Remove the disc f rom the D VD play er.
2. Turn on the power an d leave i t on for an h our to va porize the conde nsati on.
WARNING
CAUTION
P
O
W
E
R
A
V
MEN
U
The lightning bo lt with a rrowh ead ins ide in an e quila teral
triangle is inte nded to a lert th e user to t he pres ence of
dangerous volt age within the produ ct s encl osure t hat may b e
" "
,
of sufficient ma gnitu de to con stitu te a risk o f electric shock t o
people.
The exclamatio n point i nside a n equil atera l triangle is inte nded
to alert the user to t he pres ence of i mport ant ope rating and
maintenance (s ervic ing) in struc tions i n the literature a ccomp anyin g
the product.
WARNING
Do not mo unt t he pr oduct wher e
Insta lla tio n of all TV mo nitors
must be o ut of t he dr iver s
field o f vis ion .
Do not tr y and s erv ice these
produ cts y our self, a
quali fie d ser vice cente r or
facto ry se rvi ce center fo r all
repai rs.
Be caref ul no t to dr op or
apply un der p res sur e to th e
front pa nel o f you r vid eo
monito r. If th e scr een c rac ks
due to mis use , you r war ran ty
will be vo id!
,
local e
or wipe t he pr odu cts with a tow el. D o not
opera te th e equ ipment unt il al l liq uids have
eithe r eva por ated or you ha ve ha d the m onitor
inspe cte d at a se rvice cent er by a q ual ified
techn ici an. S evere harm o r dan ger c an result.
it will o bst ruc t the deploy men t of
the air bag o r in an a rea where it
would a ffect th e dri ver s a bility
to cont rol t he ve hicle. Al so be
caref ul to a voi d mounting t he
produ ct wh ere i t can become
hazar dou s dur ing sudden s top s
or in the e ven t of an a ccident.
Use ext ra ca uti on with any li qui ds
in your c ar. If y ou or y our child
spill s any l iqu id on these pr odu cts ,
pull yo ur ve hic le to the road sid e
and tur n the k ey of f to di sco nnect
’
30
3
Use onl y a dam p clo th to clean
the scr een a nd us e only purif ied
water o n the c lot h. wring out a ll
exces s wat er pr ior to wipin g the
scree n. Do n ot us e any cleane rs
or chem ica ls to c lean the scr een .
In most c ase s a dry c loth will do !
Page 4
Caution
Disc Information
CAUTION
Quality instal latio ns are be st
performed by qua lifie d and
certified inst aller s.
,
Don t touch the unit i f there i s
a flash of lightni ng. You may
receive an elect ric sho ck.
Do not cover or stop u p heate r
ducts or vents. It m ay caus e a
fire or receive an e lectr ic shoc k.
Operating No te s
1. The oper at ing temperatu re of this produc t is limited to 14 ~+14 0 F.
2. If your vehicl e is extremely hot or c old you must allo w time for your air
conditioner o r heater to cool or hea t the vehicle unt il operating temp eratures
have returned t o normal operatin g ranges.
3. Optimal pict ure quality is achi eved when viewe d from directly fro nt of the
monitor (+/-3 0degrees).
Wat ching t he monitor for an
extended perio d of time
without the engi ne runn ing
may deplete the ve hicle s
battery charge .
This product is de signe d for
operation with a 1 2 Volt DC,
negative groun d vehic le. It
is not suitable fo r opera tion
under other cond ition s or
voltages.
Do not bring magne tic dev ices
such as credit car d or magn etic
card near the magn ets.
DVD features
DVD discs provi de high-resolut ion images with h igh-quality sou nd. This DV D pl ayer
can play not only D VD discs of various v ersions, but al so S-VCD, VCD, au di o CD and
MP3 discs.
,
Discs that can no t be p layed
DVD-RW, DV D- REM, CD-ROM, CD -EXTRA discs can not be played on this u nit. In
addition, a CD or a C D-RW which wa s recorded on spe ci al software can not be played.
Region code
Your DVD p layer is design ed and manufactur ed to region mana gement inform at ion
that is recorde d on a DVD disc. Please c heck the region c ode.
1: North America 2 : Japan 3: Korea an d So utheast A sia
4: Australia, Mi d & South America 5: Rus sia 6: China
How to handle the di sc
,
Don t touch the shi ny side of the disc (th e side with the emb edded informa ti on).
,
Don t stick a label o r a glue-based note o n either side of th e disc.
,
Don t use discs tha t have glue or a damage d label with expo sed adhesive resi due.
It might result i n damage to your DVD pl ayer.
,
Don t put discs in th e sunshine.
Park your car in th e shade.
How to handle the discs
Only use round di scs. Discs with oth er shapes like a st ar, a heart, etc. ma y ca use
damage to the pla yer. If a disc is dirty, wipe softly w ith a wet cloth and the n with a dry
one. Before pla yback, wipe the dis c outward from th e center with a cle an c loth. Do not
use any type of sol vent such as thinne r, benzene, comm ercially availa ble cleaners or
antistatic sp ray. To avoid damag ing your DVD play er, d on t use a scratche d disc.
,
4. Do not open the ho using and yourself. Ref er
servicing to qu alified personn el.
5. DVD Players us e an invisible lase r beam which can ca use hazardous rad iation
exposure. Be su re to operate the uni t correctly as in structed.
6. Do not cut the car p ower supply off while a disc is pl aying. It can cause
damage to the DVD P layer.
attempt to make a ny repairs
4
29
Page 5

Installation
Features and Controls
1. Open the packa ge and check that the se items are pres ents.
INSTALLATION PLATE
2. Connect the ex ternal compomen ts to the RCA c able or AV output.
(Refer to the con nection diagram o n page 33)
3. Match the posi tion of installat ion bracket and
UNIT
installatio n plate with screw A.
SCREW A SCREW B
Monitor/DVD Player
TV
MONITOR
Remote Control
Monitor/DVD Player
4. Tighten the uni t with the supplied
screw B.
28
5
Page 6

Features and Controls
Connection Diagram
POWER B utt on
Dome Li ght B utt on
AV Sel ect Button
MENU Bu tto n
+/- But ton s
PLAY/PAU SE Bu tto n
EJECT Bu tto n
Disc loa din g slo t
+ 12 V DC Batt ery
Cha ssi s Gro und
ACC
YEL LOW
BLACK
RED
GAM E
CAMCOR DER
Red AUD IO(R)
Whi te A UDIO(L)
Yellow VI DEO
Car dome l amp
WHI TE
AV Input
(AV 2)
Red AUD IO(R)
Whi te A UDIO(L)
Yellow VI DEO
AV Input
(AV 1)
Output
Red AUD IO(R)
Whi te A UDIO(L)
Yellow VI DEO
AV
GAM E
CAMCOR DER
AMP
MONITOR
POWER
AV
VOL-
VOL+
MENU
SD In put USB Inpu t
.
.
.
X
.
Caution
Do not bring magn etic devices
such as credit ca rds or magnetic
cards near the mo nitor.
6
AUX Inp ut Ja ck
VIDEO AUDIO
L
R
AV2 INPUTS
Pos itive N egat ive
Trig ger Doo r Trig ger Doo r
Swi tch Sw itc h
Dome Light Trigger
FM ANTENNA
27
Page 7

SD/USB Functions
Features and Controls
1. When USB or SD is in puted, the monito r will be display ed as shown below. And you
can select the de sired menu by2.pressing the MO DE button on the remo te control of
S
monitor.
Use the (arrow an d ENTER) buttons to s elect and set des ired settings .
Remote Control
1
POWER
Tur ns the DV D Player/Monit or on or off.
MUTE
2
Press this butto n to swit ch off the
audio during pla yback . Press a gain
to restore the aud io.
Auto T V (not i nclud ed)( )
3
UP/DOWN/RIGH T/LEF T ARROWS
A/V SELECT
DVD AV1 Av 2
MENU (OSD on monit or)
Press this butto n to open t he on-
screen menu syst em to set up and
control variou s param eters o f the
monitor and DVD pl ayer.
UP/DOWN
Use to move to the des ired me nu.
P/N
This button perm its you t o choos e
among Multi, PAL and N TSC.
MODE
Use this button to s witch b etwee n
three modes
DVD SD US B
MENU (DVD menu)
This bu tton pe rmi ts you to v iew the
menu on t he DVD.
SUBTITLE
Use this button to s elect t he menu
for choosing a sub title l angua ge.
TITLE (Tit le menu )
When a DVD is playin g, pres s this
button to view the Ti tle Men u.
DISPLAY
Press to show elap sed or re maini ng
time of a chapter or a t itle.
PBC (Vi deo CD on ly)
Press this butto n to acce ss the sp ecial
Playback Contr ol func tions f or VCD
2.0 format Vid eo CD S.
NUMERIC button
Use when making a se lecti on on the
menu screen.
TV
RETURN
Press this butto n to retu rn to the r oot men u.
SETUP
Press this butto n to disp lay the S etup
menu. The Setu p menu en ables y ou
to enter the setti ngs req uired f or the
unit to work prope rly.
REPEAT
Press this butto n to chan ge the pl aybac k
mode to repeat.
MONI TOR
26
7
Page 8

Features and Controls
A-B (repeat from A to B)
Use this button to s elect t he begi nning
and end of a track whi ch you wi sh to hav e
repeat in playba ck.
VOL-/+ button
Use to incease or de creas e volum e level .
AUDIO
Use this button to s elect o ne of the
audio soundtra cks pro gramm ed on a
DVD disc. It is alse u sed to se lect th e
audio output mod e for the D VD
playback.
ENTER
Press this butto n to conf irm the i tem
you have found and h ighli ghted u sing
the arrow button s. Usua lly thi s is done
to confirm a selec tion or i tem to be
played on the DVD.
ZOOM
If your DVD disc sup ports z oomin g in
to see the program d iff erent ly, pres sing
this button will e nable y ou to cha nge
the amount of zoom .
UP/DOWN/RIGH T/LEF T ARROWS
Use thes buttons t o navig ate the
various menus an d scree ns for th e
monitor and DVD sy stems .
PLAY/PAUSE
To start playback of a d isc, pr ess thi s
button. Press ag ain to pa use the
playback. If pla yback i s pause d, pres s
this button to res ume pla yback .
GO TO
Use to search for a ti tle or a ch apter o n
your DVD disc.
STOP
Press this butto n to stop t he play back
of the current dis c.
FAST FORWARD/R EVERS E PLAY
Use these button s to sele ct eith er fast
forward or fast re verse p layba ck.
DVD Functions
PBC
[DVD]/[AUD IO ]/[MP3]
This button doe s not function in PBC m ode.
[VCD]
You can tu rn the PBC (Play Ba ck Control) fun ct ion on or off b y pressing this but ton.
When PBC is loade d, the PBC function i s enabled autom atically. This functi on i s
similar to sele ction of DVD title. P lease note that t his function do es n ot work with
MP3 dics.
Zoom
[DVD/VCD]
Some DVDs are pro grammed to allow yo u to zoom into
the image, magn ifying it. Pressi ng the ZOOM butto n
does this in step s, according to the c hart to the right .
[AUDIO]/[M P3 ]
OSD
2 X
3 X
4 X
1 / 2
1 / 3
1 / 4
This button doe s not function in thi s mode.
GO TO
The GO TO func tion allows you to b egin pl aybac k at a spec ific lo cation on t he disc . Tod o this,
press GO TO an d navigate the scr een whi ch foll ows to se lect th is playba ck loca tion.
Title
Move to the desire d title .
DVD
TT 01/02 CH 001/001 00:00:00
Chapter
Move to the desire d chapt er.
CONDI TIO N
ZOO M X 2
ZOO M X 3
ZOO M X 4
ZOO M X 1 / 2
ZOO M X 1 / 3
ZOO M X 1 / 4
Off
Time Display
Wat ch play t ime.
SKIP FO RWARD/ BACK
Use these button s to skip t o the nex t
or last track, cha pter or f ile on th e
disc in the player.
8
25
Page 9

DVD Functions
Repeat
[DVD]
Pressing RE PEAT but ton changes
the play mode a s follows:
[AUDIO]
Pressing RE PEAT but ton changes
the play mode a s follows:
Power and Mode Selection
Releasing The Monitor
Push t h e r e l e a se b u t ton ( l o cated o n t h e f r o n t e d g e o f t h e s c r e e n h o u s i ng) a n d
lower t he m o n i tor. You can a l s o a d j u s t t h e s w i vel a n g le.
OSD CONDITION
REP Cha pter
REP Titl e
REP All
Repea t chapt er
Repea t title
Repea t All
Repea t off
[VCD]
The REPEAT button does n ot function
when a VCD disc i s being played.
OSD CONDITION
REP 1
REP All
Repea t 1
Repea t All
Repea t off
[MP3]
Pressing RE PEAT but ton changes
the play mode a s follows:
OSD CONDITION
REP DIR
REP 1
REP All
Repea t DIR
Repea t 1
Repea t All
Repea t off
NTSC/PAL
This button is us ed to select the vi de o standard for th e DVD mode betwee n NT SC
PLA60 Auto and PAL format s.
RELEA SE BU TTO N
Make th is ar row i n DOWN
direc tio n onl y.
Turning on The Monitor
1. Connect the mo nitor to external d evices.
2. Press the POWE R button on eithe r th e remote contro l or the unit once to t urn
the power on.
Press the same PO WER button to tur n th e power off .
POWER
POWER
UNIT
3.Power on the ex ternal devices an d play.
REMOT E CON TRO LLER
Mute Function
1. Press the button on the rem ote control to mute t he audio.MUTE
2. Press the button again on t he remote control t o return to theMUTE
previous volu me level.
24
9
Page 10

Power and Mode Selection
Selecting an AV mode
1. Turn the power ON t he unit and externa l devices.
2. Select the DVD , AV1 or AV2 mode b y pressing the AV Select button on
the unit or on the re mote control.
3. Play the exter nal device.
DVD Functions
Prev( )
[DVD]/[VCD ]
Press this butt on to advance the pla yer from the curr ent chapter.to the previous
chapter
[AUDIO]/[M P3 ]
Press this butt on to move to the pre vi ous track.
Next( )
[DVD]/[VCD ]
Press this butt on to advance the pla yer from the curr ent chapter .to the next chapt er
[AUDIO]/[M P3 ]
Press this butt on to move from the c ur rent track .to the next track
10
Repeat(A-B)
[DVD]/[VCD ]/ [AUDIO]
You can se t the player to rep eat a segment ove r an d over until you ca ncel it. To do
this, you mark th e beginning of the de sired segment ( A) and the end of seg me nt (B).
The selected se gment will be
repeated auto matically until c anceled.
OSD CONDITION
A
A B
Sta rt po int o f rep eat
Ending p oin t rep eat fu nct ion
23
Page 11

DVD Functions
Fast Reverse Searching( )
Picture Control
[DVD]
Pressing FR but ton repeatedly ch anges
the play mode as fo llow:
OSD CONDITION
FR 2X
FR 4X
FR 8X
FR 20X
PLAY
2X rewind search
4X rewind search
8X rewind search
20X rewind searc h
Play
Fast Forward Searching( )
[DVD]
Pressing FF but ton changes
the play mode as fo llow:
OSD CONDITION
FF 2X
FF 4X
FF 8X
FF 20X
PLAY
repeatedly
2X forward searc h
4X searchforward
8X searchforward
20X searchforward
Play
[AUDIO]
Pressing FR but ton
changes the pla y mode as follow:
OSD CONDI TIO N
FR 2X
FR 4X
FR 8X
FR 20 X
PLAY
repeatedly
2X re wind se arch
4X re wind se arch
8X re wind se arch
20X r ewind s earch
Pla y
[MP3]
Pressing FR but ton
changes the pla y mode as follows:
OSD CONDI TIO N
FR 2X
FR 4X
FR 8X
FR 20 X
PLAY
repeatedly
2X re wind se arch
4X re wind se arch
8X re wind se arch
20X r ewind s earch
Pla y
[AUDIO]/[VCD]
Pressing FF but ton
changes the pla y mode as follow:
OSD CONDI TIO N
FF 2X
FF 4X
FF 8X
FF 20 X
PLAY
repeatedly
2X fo rward s earch
4X sea rchfor ward
8X sea rchfor ward
20X se archfo rward
Pla y
[MP3]
Pressing FF but ton
changes the pla y mode as follows:
OSD CONDI TIO N
FF 2X
FF 4X
FF 8X
FF 20 X
PLAY
repeatedly
2X fo rward s earch
4X sea rchfor ward
8X sea rchfor ward
20X se archfo rward
Pla y
Contrast/Brightness/Color/FM
To adjust CONTRAS T, BRIGHTNESS, CO LO R or FM press the MEN U button until
you arrive at the s creen for that it em . Use the arrow but tons to adjust th e value.
Press the MENU bu tton to make anothe r adjustment or l eave the MENU sys te m.
1. Bring up the on- screen function m enu by pressing t he MENU button on t he u nit
or the remote con trol.
2. Press the MENU b utton on the unit or th e remote contro l of monitor unti l yo u see
the item you wish t o adjust.
3. Use the arrow bu ttons to adjust the v alue.
4. Press the MENU b utton to make anoth er adjustment o r leave the MENU sy st em.
CONTRAST
50
BRIGHTNESS
50
COLOR
50
FM
87.7
(FM function ad ded 87.7 87.9 88.1 88 .3MHz)
22
11
Page 12

DVD Setup
DVD Functions
Setup Menu-Main Page
When the button is press ed, the setup menu wi ll be displayed a s shown
below. Select th e menu category and m ake changes acc ording to your pref erences.
1. Press the button if the dis c is playing.STOP
2. Press the button to dis play setup menu.SETUP
3. Use the (arrow a nd ENTER) buttons t o select and set de sired setting s.
4. Press the button agai n to turn off the s etup menu.SETUP
SETUP
SYSTEM SETUP
TV SYS TEM
SCREE N SAVE R
VIDEO
TV TYPE
DEFAULT
EXIT SE TUP
Subtitle(SUB-T)
[DVD]
This button is us ed to select the lang uage for the on-s creen display s ys tem.
(This title men u may vary, depe nding on the part icular DVD.)
Title
[DVD]
Used to display t he title menu of the lo aded DVD disc.
This function i s only present on dis cs which suppor t it.
Slow( )
[DVD]/[VCD]
Use this button t o play a disc in slow-f orward or
slow-revers e. Slow playback ca n be done at five
differe nt s peeds. Pressi ng this button re peatedly
decreases the s peed in steps. Pres sing a sixth
time returns pl ayback to the norma l speed.
OSD
for ward 2X
for ward 4X
for ward 8X
for ward 16 X
for ward 20 X
rew ind 2X
rew ind 4X
rew ind 8X
rew ind 20X
Pla y
CONDITION
2X sl ow forw ard
4X sl ow forw ard
8X sl ow forw ard
16X s low for ward
20X s low for ward
2X sl ow rewi nd
4X sl ow rewi nd
8X sl ow rewi nd
16X s low rew ind
Pla y
12
21
Page 13

DVD Functions
DVD Setup
Display
[DVD]
Pressing th e DISPLAY on the
remote cont rol chang es the play mod e as
follows:
OSD
Tit le El aps ed
Tit le Re mai n
Chapter El aps ed
Chapter Re mai n
Display Off
button
CONDITION
Display th e Titl e Ela pse d
Display th e Titl e Rem ain
Display th e Cha pte r Ela pse d
Display th e Cha pte r Rem ain ing
No sign
[VCD]
Whenever pr ess the but ton,title c hapter
will be displ ayed as fol lows:
OSD
Tit le El aps ed
Tit le Re mai n
Chapter El aps ed
Chapter Re mai n
Display Off
CONDITION
Display th e Titl e Ela pse d
Display th e Titl e Rem ain
Display th e Cha pte r Ela pse d
Display th e Cha pte r Rem ain ing
No sign
[AUDIO]
Pressing th e display b utton displ ays
informati on about th e current CD on t he
screen as fol lows:
OSD CONDI TION
Single Ela pse d
Single Rem ain
Total Elapse d
Total Remain
Display th e sin gle e lap sed
Display th e sin gle r ema in
Display th e tot al el aps ed
Display th e tot al re mai nin g
[MP3]
Your D VD player wil l display t he counter
automatic ally when y ou play the MP3 d isc.
OSD
Chapter El aps ed
Chapter Re mai n
CONDITION
Display th e Cha pte r Ela pse d
Display th e Cha pte r Rem ain ing
SYSTEM Setup
1. TV SYSTEM
Choose the prop er TV format ap propriate to th e
monitor you hav e connected to the pl ayer from
the following : NTSC, PAL or Multi ty pe .
2. Screen Saver
The screen saver i s usefu l to prev ent you r display
from becoming da maged . The s creen sav er pict ure
appears when you l eave th e DVD pla yer in st op mode
for about two minu tes.
3. Video
Use this option to s elect Vide o out mode, use the
/ buttons and pre ss the ENTER butt on .
4. TV Type
SYST EM SETUP
TV SY STEM
SCR EEN SAVE R
VID EO
TV TY PE
DEFAU LT
EXI T SETUP
SYST EM SETUP
TV SY STEM
SCR EEN SAVE R
VID EO
TV TY PE
DEFAU LT
EXI T SETUP
SYST EM SETUP
TV SY STEM
SCR EEN SAVE R
VID EO
TV TY PE
DEFAU LT
EXI T SETUP
NTS O
PAL
AUTO
ON
OFF
S-V IDEO
INT ERLAC E-Y UV
TV- RGB
P-S CAN YPB PR
PC- VGA
Number Buttons
[DVD]
The 0 through 9 numb er butt ons are u sed to en ter the number of th e track , the num ber
of the DVD chapter, t he time , the dat e, etc.
[AUDIO]
Select a track by pr essin g the
correspondin g numbe r butto n.
[DVD]
You ca n selec t a track in the folde r by
OSD CONDITION
Select :__ Select track no
OSD CONDITION
Select :__
Select track no
pressing the cor respo nding n umber b utton.
20
In the Setup funct ion cal led TV Display, you se t the pla yer to ou tput the video sig nal at th e
same aspect rati o as your m onito r. If the mo nitor is widescr een for mat, se lect W IDE.
If it is as norma l scre en (4:3 ), choo se NORM AL/PS (Pa n and Sca n) or NOR MAL L/B
“ ”
“ ”
(Letterbox).
Normal / PS 4:3 PAN S CAN
Choose this sett ing if yo u want th e movie t o fill the entire sc reen.
(This might mean t hat the l eft and r ight ed ges won t be seen)
,
Normal / LB 4:3
Choose this sett ing if yo u want to s ee the mo vie in its origina l aspec t ratio .
(The movie might a ppear w ith bla ck bars a t the top and bottom o f the scr een.)
Wide 16:9 WIDE SCR EEN
Choose this sett ing if yo ur DVD Pl ayer is c onnected to a wide scree n TV.
(This opition is a vaila ble onl y if the di sc has a 16:9 displa y aspec t ratio .)
13
Page 14

DVD Setup
DVD Functions
5. Default
Use this option to R estor e defau lt sett ings.
LANGUAGE Setup
1. OSD Language
Use this option to s et the OS D langu age.
When selected, c hange t o set the o n-scr een display
language.
2. Audio LANG
Use this option to s et the AUD IO lang uage.
When selected, c hange t o set AUDI O language.
3. SUBTITLE LANG
Use this option to s et the SU BTITL E langu age.
When selected, c hange t o set the o n-scr een display
language.
4. MENU LANG
SYST EM SETUP
TV SY STEM
SCR EEN SAVE R
VID EO
TV TY PE
DEFAU LT
EXI T SETUP
LAN GUAGE SE TUP
OSD L ANGUA GE
AUD IO LAN G
SUB TITLE L ANG
MEN U LANG
DIV X[R] VO D
LAN GUAGE SE TUP
OSD L ANGUA GE
AUD IO LAN G
SUB TITLE L ANG
MEN U LANG
DIV X[R] VO D
LAN GUAGE SE TUP
OSD L ANGUA GE
AUD IO LAN G
SUB TITLE L ANG
MEN U LANG
DIV X[R] VO D
RES TORE
ENG LISH
CHI NESE
GER MAN
SPAN ISH
FRE NCH
POR TUGUE SE
ENG LISH
CHI NESE
JAPA N
FRE NCH
SPAN ISH
POR TUGUE SE
LATI N
GER MAN
ENG LISH
CHI NESE
JAPA N
FRE NCH
SPAN ISH
POR TUGUE SE
GER MAN
OFF
Stop( )
[DVD]/[AUDIO]
In DVD mode, Press S TOP to stop pl aybac k.
To resume playback , press P LAY/ PAUSE. I f
you press STOP and then PLAY/ PAUS E twice,
the player will be gin pla yback a t the fir st
scene of the movie .
[MP3]
In MP3 mode, Press ing STOP wil l stop
audio playback . Press P LAY/ PAUSE to b egin
playback of the fi rst tit le on the d isc.
the
1 Time Pres s Pla y Key To Con tin ue
2 Time
1 Time Stop Sto p
OSD CONDITION
Sto p
Disc Sto p
OSD CONDITION
Arrows( / / / )
[DVD]
In addition to nav igati ng the va rious m enus, you can use th e arrow b utton s to defi ne the area
of the screen you wa nt to enl arge in Z OOM mod e.
[MP3]
After pressing S TOP button , selec t the des ired fo lder an d set the conditio n by pres sing
ENTER button.
Setup
Pressing the SET UP bu tton op ens the Setup Menu , where y ou can ma ke and ad just DVD
settings to suit y our equ ipmen t and pre ferences.
Menu
[DVD]
Pressing the SET UP br ings up t he DVD disc menu. The con tent of t his menu va ries,
depending on the p rogra mming o f the dis c.
Use this option to s et the ME NU lang uage.
When selected, c hange t o MENU di splay l anguage.
14
LAN GUAGE SE TUP
OSD L ANGUA GE
AUD IO LAN G
SUB TITLE L ANG
MEN U LANG
DIV X[R] VO D
ENG LISH
CHI NESE
JAPA N
FRE NCH
SPAN ISH
POR TUGUE SE
GER MAN
LATI N
19
Page 15

DVD Functions
DVD Setup
Eject
When this button i s press ed, the d isc is ej ected. When this b utton i s press ed for mo re
than 3 seconds, th e disc is u ncond ition ally ejected. Us e this fu nctio n if you en counter
diffi cultl y eject ing a dis c.
Vol+/Vol-
Use these button s to adju st the au dio out put level of the spe aker fr om 0 to 100 .
Mute
Press MUTE to turn o ff th e audio p art of the
currently play ing pro gram. P ress it a gain to
return the audio v olume t o the lev el at whi ch
you were last list ening .
OSD CONDITION
Mute
Mute off
Mute off
Play or Pause( )
Whenever this bu tton is p resse d, the mo de
switches from pa use to pl ay or pla y to paus e.
OSD CONDITION
Play Dis c
Pause
Mute
4. DIVX[R] VOD
Use this option to s et REGI STER CO DE MRAZ QZT.
AUDIO Setup
1. AUDIO OUT
Use this option to s et the AUD IO OUT Mode.
Use this option to s elect Vide o out mode,
/ buttons and pre ss the ENTER butt on .
use the
1. KEY
Use this option to s elect K EY.
VIDEO Setup
1. BRIGHTNESS
LAN GUAGE SE TUP
OSD L ANGUA GE
AUD IO LAN G
SUB TITLE L ANG
MEN U LANG
DIV X[R] VO D
AUD IO CUT
KEY
EXI T SETUP
AUD IO CUT
KEY
EXI T SETUP
REG ISTER C ODE
MRI AZQZT
AUD IO SETU P
SPD IF/OF F
SPD IF/RA W
SPD IF/PC M
AUD IO SETU P
#
+4
+2
0
-2
-4
b
Audio
[DVD]
Change the audio o utput f ormat .
(A the disc support s avail able au dio
vailable only if
type.)
[VCD]/[AUDIO]
Changes the audi o outpu t forma t.
(Avai lable o nly of th e disc su pports av ailab le audi o
type.)
[MP3]
An invalid butto n press .
18
OSD
1 / 2 : Ac3 2C H Eng lis h
2 / 2 : Ac3 5. 1CH E ngl ish
OSD
Ste reo
Mono Lef t
Mono Rig ht
Mix Mono
CONDITION
2 Channe l
5.1 Chan nel
CONDITION
Ste reo
Mono Lef t
Mono Rig ht
Mix Mono
Use this option t o adjust the displa y brightness.
When you reach de sired brightnes s level, use
the / buttons and p ress the ENTER bu tt on.
2. CONTRAST
Use this option t o adjust the contra st level.
Use the / buttons a nd press the ENTE R
button, when yo u reach the desired c ontrast
level. Th e co ntrast contro l increases or
decreases the r atio of bright and da rk screen
sections.
15
VID EO SETU P
BRI GHTNE SS
CON TRAST
HUE
SATU RATION
SHA RPNES S
EXI T SETUP
VID EO SETU P
BRI GHTNE SS
CON TRAST
HUE
SATU RATION
SHA RPNES S
EXI T SETUP
12
10
8
6
4
2
0
12
10
8
6
4
2
0
Page 16

DVD Setup
3. HUE
Select screen h ue level using the di rection
/ buttons and pre ss the ENTER butt on .
4. SATURATION
VID EO SETU P
BRI GHTNE SS
CON TRAST
HUE
SATU RATION
SHA RPNES S
EXI T SETUP
DVD Setup
DIGITAL Setup
1. OP MODE
+6
+4
+2
0
-2
-4
-6
Use this option to s elect D IGITAL ou t mode.
OP MO DE
DYN AMIC R ANG E
DUA L MONO
EXI T SETUP
DIG ITAL SET UP
LIN E OUT
RF RE MOD
Select screen s aturation level u sing the
direction / but tons and press th e EN TER
button.
5. SHARPNESS
Use this option t o adjust the displa y
SHARPNESS. Wh en you reach desire d
SHARPNESS lev el, use the / butto ns
and press the ENT ER button.
SPEAKER Setup
1. DOWNMIX
Use this option t o select downmix ou t mode.
VID EO SETU P
BRI GHTNE SS
CON TRAST
HUE
SATU RATION
SHA RPNES S
EXI T SETUP
VID EO SETU P
BRI GHTNE SS
CON TRAST
HUE
SATU RATION
SHA RPNES S
EXI T SETUP
SPE AKER SE TUP
DOW NMI X LT/RT
STE REO
VSS
12
10
8
6
4
2
0
8
6
4
2
0
2. DYNAMIC RANGE
Use this functi on to change the sett ing
from the factor y.
2. DUAL MONO
Use this functi on to set the input aud io
signal to match y our speaker setup .
OP MO DE
DYN AMIC R ANG E
DUA L MONO
EXI T SETUP
OP MO DE
DYN AMIC R ANG E
DUA L MONO
EXI T SETUP
DIG ITAL SET UP
DIG ITAL SET UP
STE REO
MON O L
MON O R
MIX M ONO
FUL L
6/8
4/8
2/8
OFF
16
EXI T SETUP
17
 Loading...