

Exhausto EON-TOUCH-6, EON-TOUCH-8 User Manual

EXHAUSTO A/S
Odensevej 76
DK-5550 Langeskov
Tel. +45 65 66 12 34
Fax +45 65 66 11 10
exhausto@exhausto.dk
www.exhausto.dk
3001577-2006-12-01.fm
EON-TOUCH-6
EON-TOUCH-8
GB
DK
D
N
S
NL
3001577-2006-12-01.fm
2/16
With the EON-TOUCH panel, users in the room can operate the EXHAUSTO air
handling unit by overriding the in-door climate level during a pre-programmed period.
The function the panel is to have in the separate rooms can be defined on the rear of
the panel.
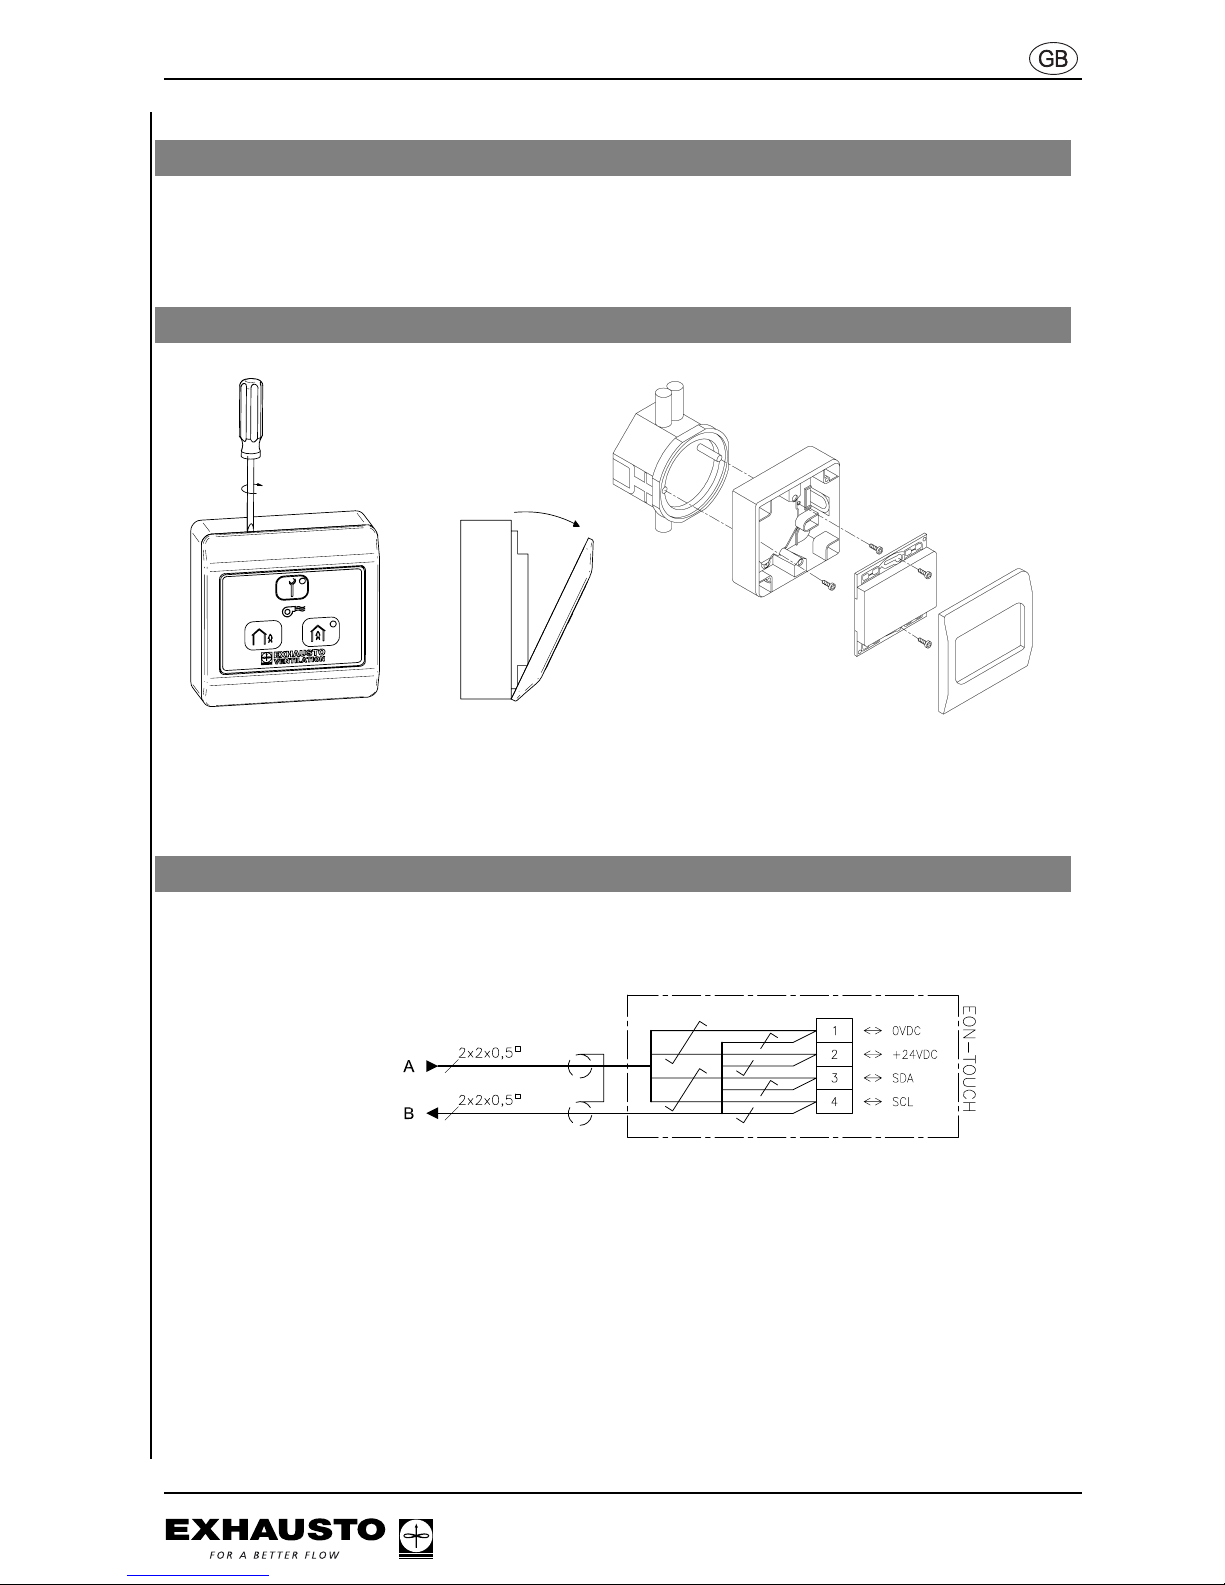
A. Back-box (not included) - B. Backing - C. Panel - D. Frame
• To dismantle the panel, start by removing the frame – see the picture to the left.
• Behind the frame are the two screws that hold the panel in place. Loosen these
screws and dismantle the panel.
Connect the EON-TOUCH module as shown in the diagram below.
To see how to connect a shielded cable, please see chapter 4, section: “Connection of
shielded cable to EON-BUS” in the instructions for the VEX unit.
Product information
Fitting the TOUCH-panel
A
B
C
D
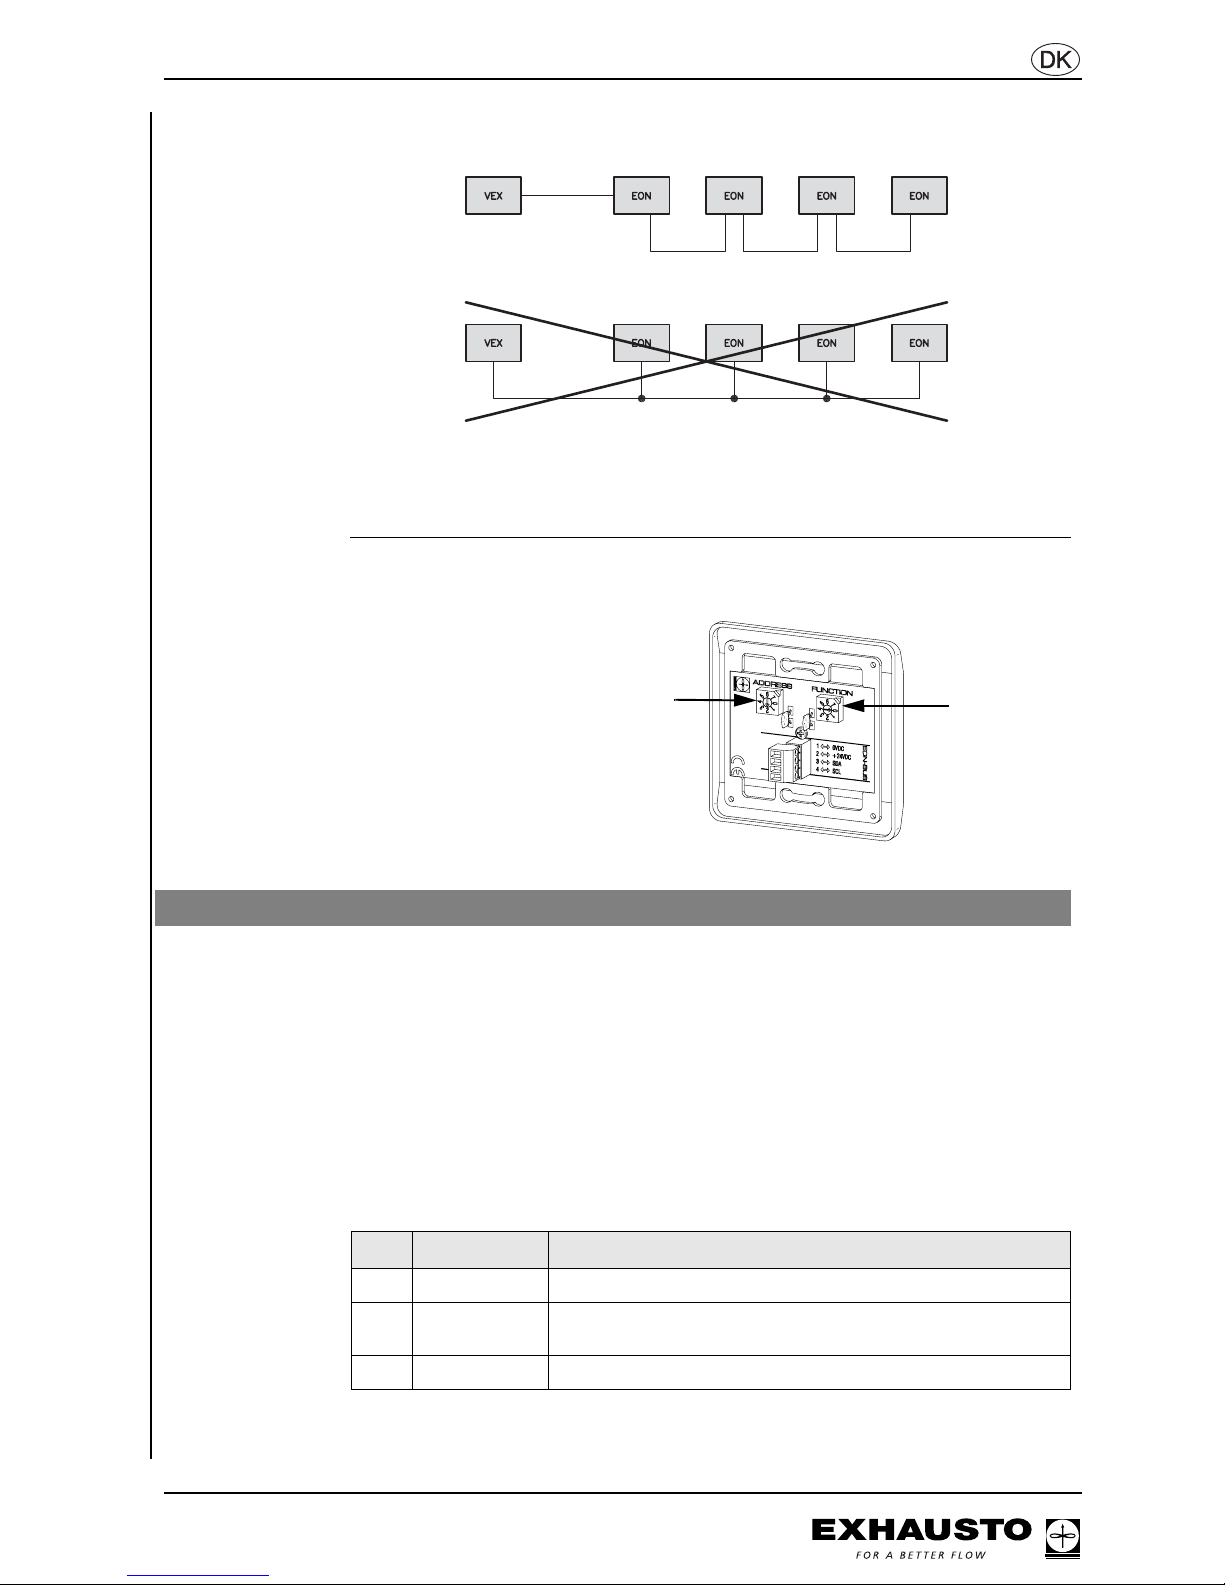
Connection diagram
A: From the previous EON module or close up
external connection box. (terminal 9-12).
B: To the next EON module

3001577-2006-12-01.fm
3/16
NB All EON modules must be connected in series – like a “daisy-chain” – from the
connection box.
The total length of the EON connection must not exceed 50 m (see chapter 4, section:
“Wiring diagram” in the instructions for the VEX unit).
Setting the address
and function
Please refer to the section “Setting the address and function of the TOUCH panel”
in the instructions for the VEX unit.
The EON-TOUCH module is detected automatically by the main control system when
the address and function have been set.
The setting of the pre-programmed period
*)
is specific to the address chosen and is
defined using menus 431–438 in the DISPLAY panel, see supplementary guidelines
“Alarm list and menu overview for VEX100” or “Alarm list and menu overview for
VEX200”.
*) Only set when the TOUCH panel is set to a timer function (FUNCTION 1 or 2).
NB The DISPLAY panel must be in specialist or technician mode for the control procedure
to be carried out. See chapter 5, section: “Change between service modes” in the
product description for the VEX.
FUNCTION
ADDRESS
Use the DISPLAY panel to check and set the connection of the module.
Step Go to menu Action
1
—
• Disconnect main supply and restart unit.
2
921
• Check that there is an EON-AI module with the address
chosen and that the number of devices has increased by
one.
3
431 - 438
• For the Timer function, set the time using menus 431–438.

3001577-2006-12-01.fm
4/16
Med EON-TOUCH-panelet kan brugerne i rummet betjene EXHAUSTO
luftbehandlingsaggregat, ved at overstyre det aktuelle indeklimaniveau i et
forprogrammeret tidsrum. Bag på panelet indstilles hvilken funktion panelet skal have i
de enkelte rum.
A. Indmuringsdåse (ikke medleveret) - B. Underlag - C. Panel - D. Ramme
• TOUCH-panelet skilles ad ved først at afmontere rammen se venstre billede.
• Bag ved rammen sidder de to skruer som holder panelet. Løsn disse skruer og
demonter panelet.
Tilslut EON-TOUCH efter nedenstående diagram.
Tilslutning af skærmet kabel kan ses i kapitel 4, afsnit: “Tilslutning af skærmet kabel til
EON-bus” i produktvejledningen for VEX-aggregatet
Produktinformation
Montage af TOUCH-panel
A
B
C
D
Tilslutningsdiagram
A: Fra forrige EON-modul eller ekstern
tilslutningsboks. (klemme 9-12).
B: Til næste EON-modul
3001577-2006-12-01.fm
5/16
Bemærk Alle EON-moduler skal kobles i serie som “perler på en snor”, fra tilslutningsboksen
.
Den samlede længde af EON-forbindelsen må ikke overstige 50 m (se kapitel 4, afsnit
“Kabelplan” i produktvejledningen for VEX-aggregatet).
Indstilling af
adresse og funktion
Se afsnittet “Indstilling af adresse og funktion på TOUCH-panel” i VEXaggregatets vejledning.
EON-TOUCH modulet detekteres automatisk af hovedstyringen, når adressen og
funktionen er indstillet.
Indstillingen af det forprogrammerede tidsrum
*)
er specifik for den valgte adresse og
indstilles i hhv. menu 431-438 i DISPLAY-panelet, se tillægsvejledningen “Alarmliste og
menuoversigt for VEX100” eller “Alarmliste og menuoversigt for VEX200”.
*) Indstilles kun når TOUCH-panelet er indstillet på timer-funktionen (FUNCTION 1 eller 2).
Bemærk DISPLAY-panelet skal stå i specialistniveau eller teknikerniveau for at kontrollen kan
udføres (se kapitel 5, afsnit “Skift mellem betjeningsniveauer” i produktvejledningen for
VEX’en).
FUNCTION
ADDRESS
Kontrol og indstilling af modulets tilslutning via DISPLAY-panelet
Trin Gå til menu... Handling
1
—
• Afbryd hovedforsyningen og genstart anlægget.
2
921
• Kontroller at der findes et EON-AI modul med den valgte
adresse og at antallet af “devices” er øget med 1 stk.
3
431 - 438
For Timer funktion indstilles tiden i menu 431 - 438.
 Loading...