

Exhale Fans EF34 Owner's Manual
GB
V5.1
FANS
MODEL EF34
Owner's Guide & Installation Manual
Please read this manual before installing
and using your Exhale fan to avoid injury and product damage.
We recommend to ask for a qualied electrician
to install the fan for you.
Keep this manual in a safe location for future reference.
The manual can also be downloaded from our Website.
Exhale Europe/Freerise – La Noria 14 – 806 route d’Antibes, 06410 BIOT, France
www.exhale-europe.com – contact@exhale-europe.com
Model: EF34
1
2
3
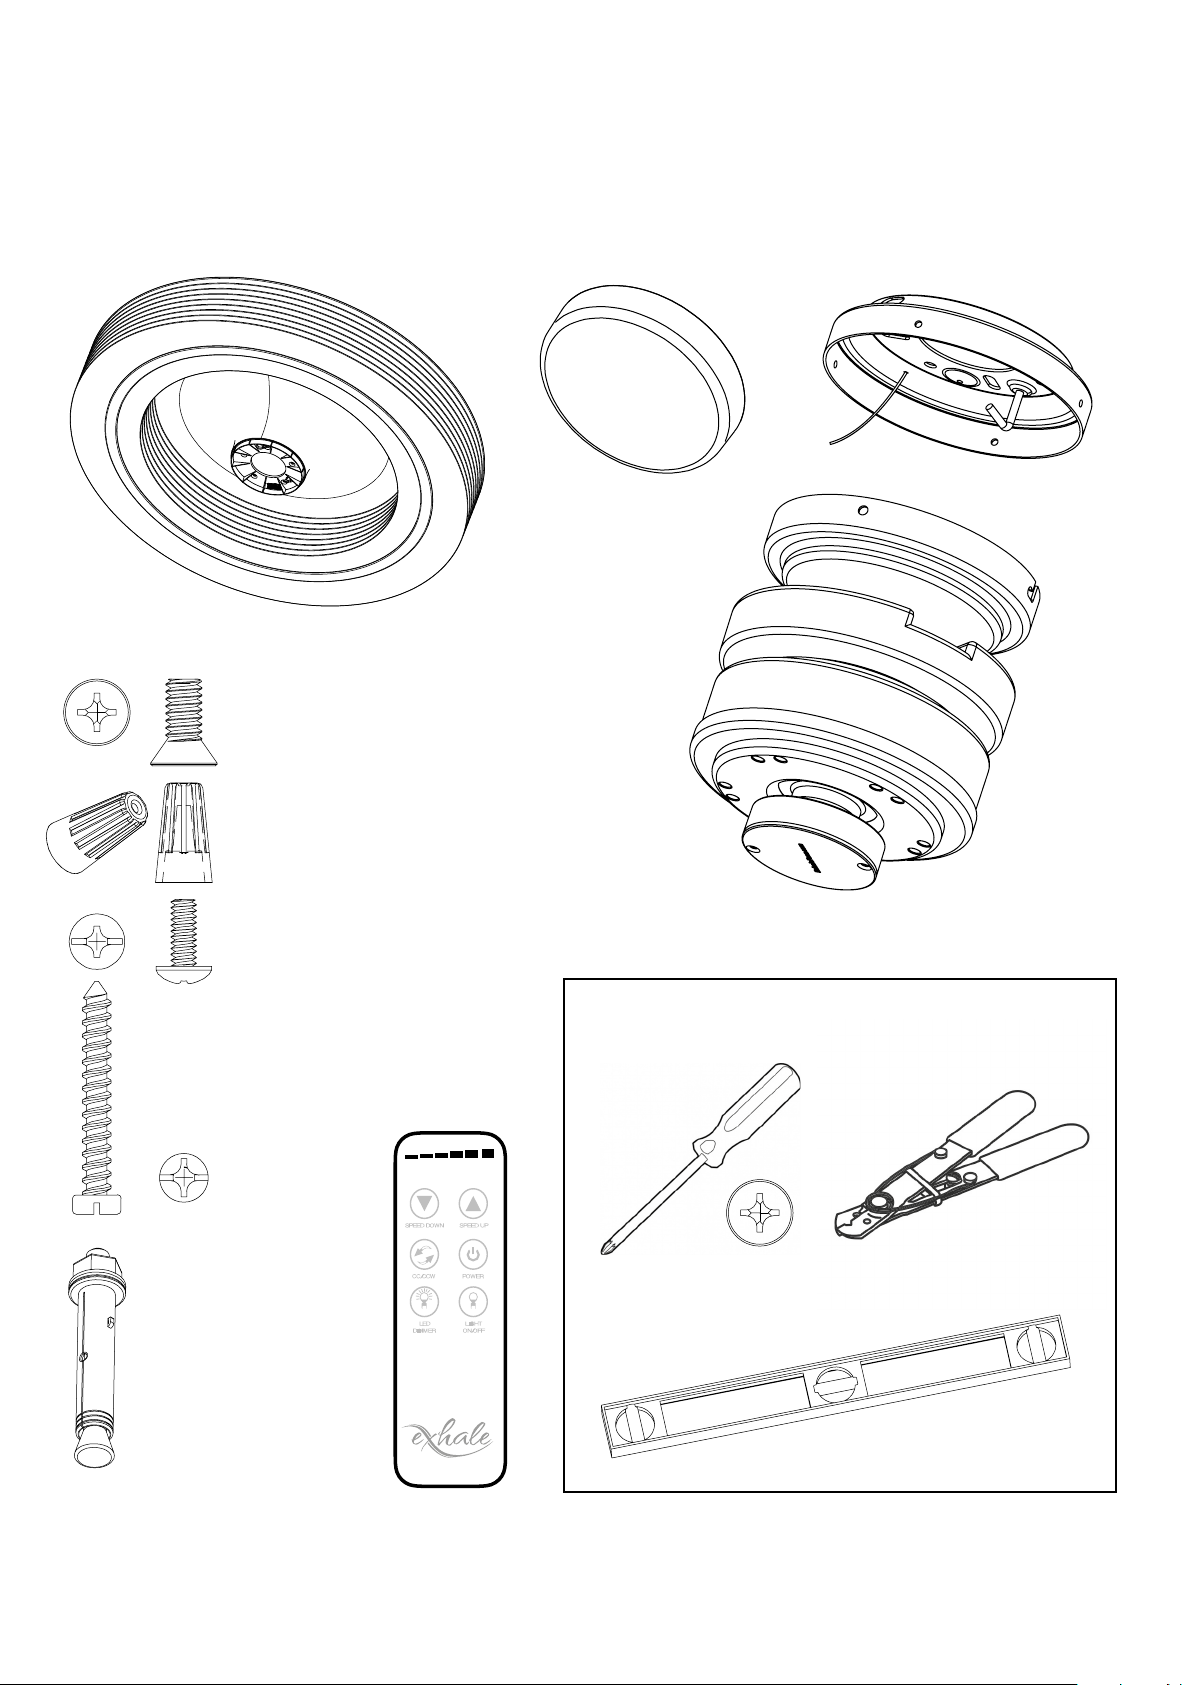
Parts List
2
Exhale Fan (Prebuilt)
Flat countersunk head screw,
quantity 5, for xing the fan on the
underside of the motor
Wire Nuts
Quantity: 3
Screw at rounded heads, golden
color, for mounting the motor on
the ceiling mount quantity 4
LED Light
Ceiling Mount
DC Motor
Tools Required
Various screws for xing the support to the
ceiling only on wooden ceiling
Quantity: 4
Expanding golden
metal anchors for
concrete laying X4
The engine must not
be placed directly
on an unreinforced
Plasterboard (BA 13)
ceiling. Ceiling xing
must be able to
support at least 25
kg (fan is 11.3 kilos)
Protected by one or more of the following US patents: (D652.133S, 29/341,859, 29/391,310, 13/662,910)
FANS
Wireless Remote
© Exhale Fans, LLC 2018. All rights reserved
Screw Driver
(Magnetic if available)
Wire Strippers
Level
FANS
Installation
Step 1. Determine the location
The preferred location for the EF34 is in the center of the room, this position will provide the best
performance of the fan.
If you intend to place multiple fans in the same room you should divide the room into equal sections
and place the fans in the center of each section. In both instances of one or multiple fans, the above
recommendations will provide air movement coverage to all corners of the space.
Step 2. Remove contents from the package
3
The 2-part protective foam covers the entire fan. Lift the top cover of the housing. Located at each corner
of the protective foam, you will nd all the parts located in storage locations.
Do not remove the body of the Exhale™ Fan at this time; that will come later in the installation.
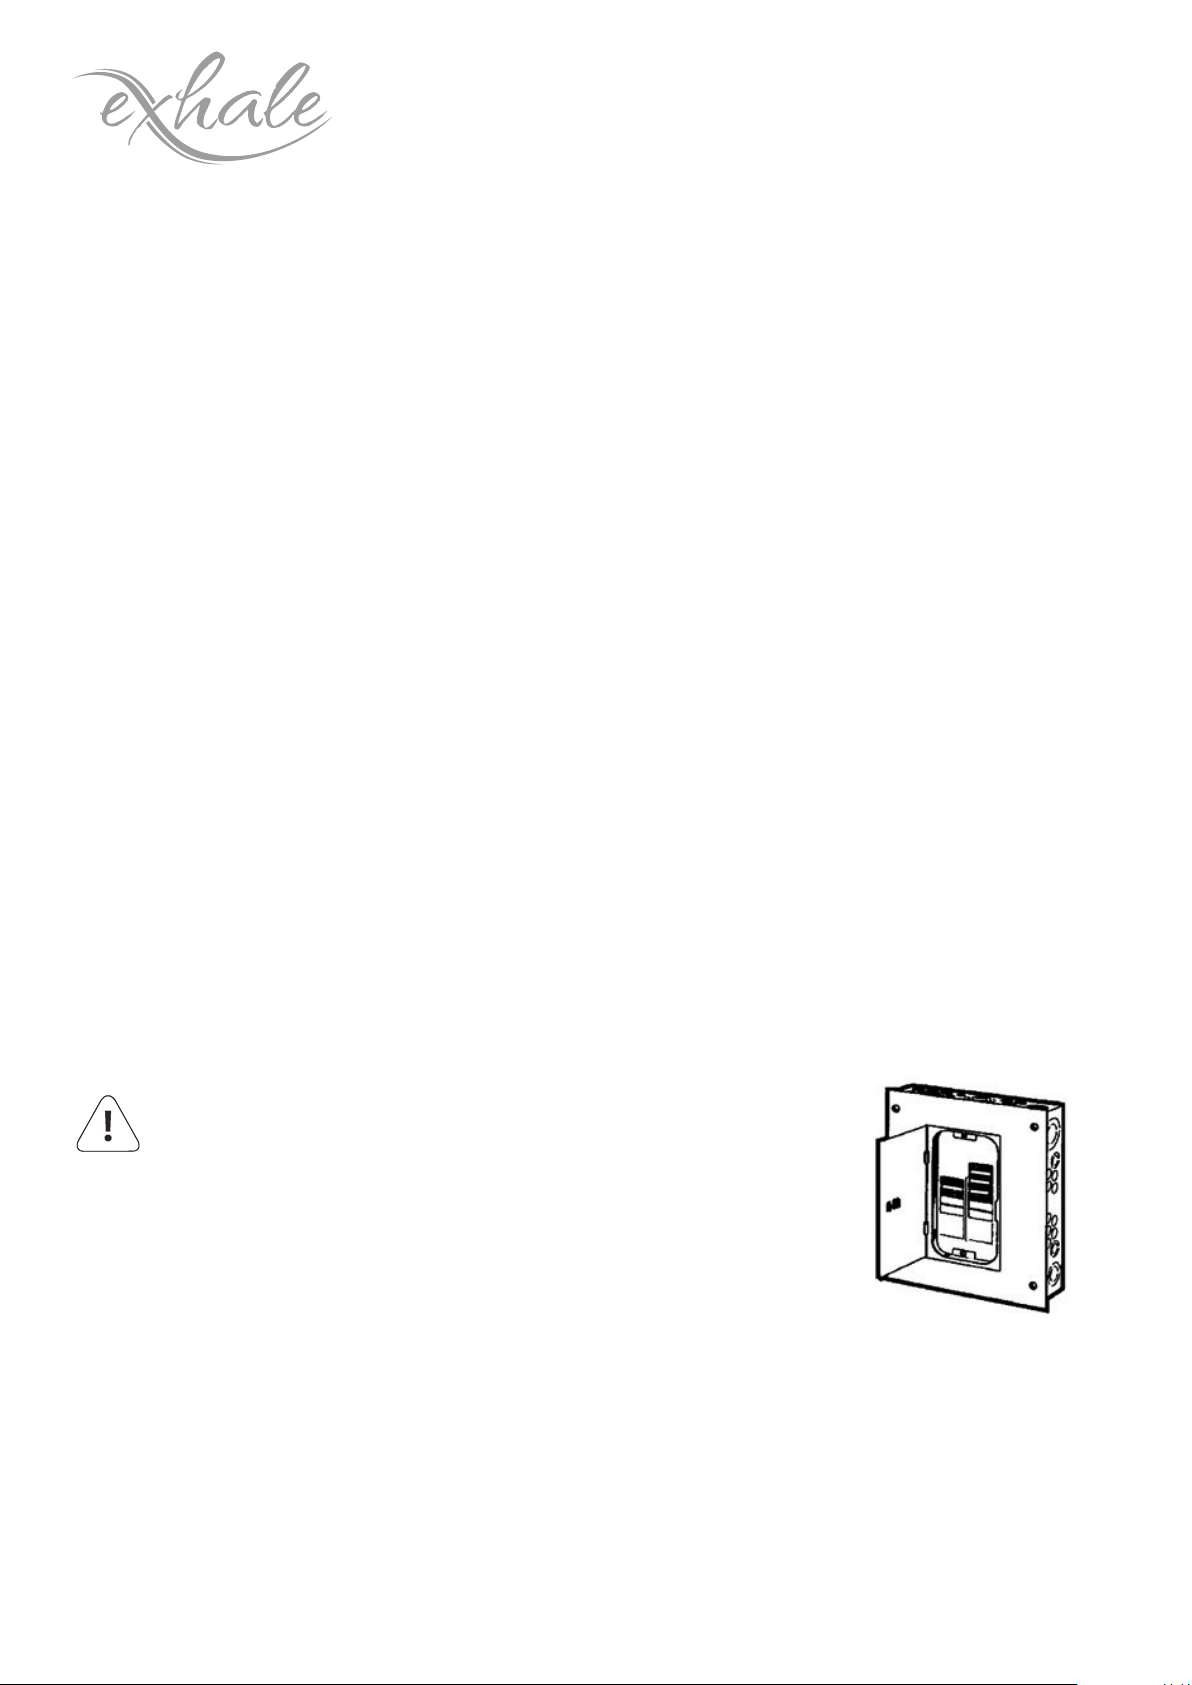
Step 3. Turn o all electrical power
Locate your electrical panel or fuse box and turn o the power to the room where you are installing the
fan.
WARNING: Turn o all electrical power prior
to making any electrical connections. Failure
to do so could result in electrical shock.
If you are unsure how to disconnect the electric
power, please consult a licensed electrician for
assistance.
Protected by one or more of the following US patents: (D652.133S, 29/341,859, 29/391,310, 13/662,910)
© Exhale Fans, LLC 2018. All rights reserved
Table of electric circuit
breakers in the house.

Model: EF34
Step 4. Ceiling Mount
a.
Pass the electrical wires from the ceiling through the
ceiling mount center hole as shown in Figure 1.
b. x the support to the ceiling with suitable plugs
c. Using a level, make sure the mount is plumb and level to
the oor, adjust if necessary.
4
d. (We oer a solution for inclined ceilings (up
to 45 degrees, contact us or check our online
shop)
Running the Exhale out of level can cause it to become unstable or wobble.
Installation to concrete ceilings requires optional mounting hardware. (See Optional Accessories A)
Step 5. Electrical Connections
Start by hanging the motor from the ceiling mount hook
as shown in Figure 3.
Connect the fan neutral wire (black)to the black household supply wire as shown in Figure 4.
a.
b. Connect the phase supply (red) to the red household supply as shown in Figure 4.
Figure 1.
c. Connect the Ground fan wire (Green & yellow) to the ground household supply as shown in gure 4.
Red = Phase. Black = Neutral. Green/yellow = neutral
d. After connecting all the wiring, spread them apart so that the Green and White wires are located on
one side of the electrical box and the Black on the other.
e. Turn the wire nuts upward and push the wires neatly into the electrical box so they are out of the way.
f. Secure the fan safety cable hook through the slot on the ceiling mount that is opposite of the ceiling
mount hook.
WARNING: To reduce the risk of electrical shock,
DO NOT use a wall-mounted speed control with this fan.
Protected by one or more of the following US patents: (D652.133S, 29/341,859, 29/391,310, 13/662,910)
© Exhale Fans, LLC 2018. All rights reserved
 Loading...