


Key Telephone
142
Table of Contents
Precaution...............................................................................................................6
Warning................................................................................................................... 6
Important Notice.....................................................................................................6
LCD Display............................................................................................................7
Panel illustration and Key-press definition........................................................ 7
Installation...............................................................................................................9
Use Guide............................................................................................................. 10
Intercom call...................................................................................................10
Intercom answer............................................................................................. 10
Call operator................................................................................................... 10
Outgoing call.................................................................................................. 10
CO line answer............................................................................................... 11
CO line booking............................................................................................. 11
Redial the outgoing call..................................................................................11
Redial..............................................................................................................11
C.O line auto dial............................................................................................11
Use private password..................................................................................... 12
Close private password function.................................................................... 12
Call pick up.....................................................................................................12
Call transfer.................................................................................................... 12
Call hold......................................................................................................... 13
Restore the held call....................................................................................... 13
Outgoing call transfer.....................................................................................13
Three way conference.................................................................................... 14
DND( Do Not Disturb) \ Call forward setting............................................... 15
Broadcast........................................................................................................ 15
Monitor...........................................................................................................16
System Query................................................................................................. 16
Alarm clock setting........................................................................................ 17
1

Key Telephone
242
Use Setting........................................................................................................... 18
Use Set Option.............................................................................................. 20
1: LANGUAGE..............................................................................................20
2: OGM RECODER......................................................................................20
3: OGM MONITOR.......................................................................................21
4: BGM (background music)....................................................................21
5: BACK LAMP SET....................................................................................21
6: EXT RING SEL(extension ring selection)........................................21
7: CO RING SEL(CO line ring selection).............................................. 21
8: DP RING SEL (door phone ring selection)......................................21
9: ALARM RING SEL(alarm ring selection)......................................... 21
10: ALARM SET........................................................................................... 21
11: DATE/TIME............................................................................................. 22
12: CLR CHARGE LIST(clear charge list)............................................ 22
13: SYSTEM QUERY.................................................................................. 22
14: QUICK TRS SET (TRS: transfer)......................................................22
15: PROMPT TONE SET............................................................................ 22
16: RESTORE KEYPHONE....................................................................... 22
17: EXT LOCK FUNC(extension lock function)..................................22
DSS Setting.......................................................................................................... 23
Auto Dial Setting.................................................................................................. 26
First step:..................................................................................................... 26
Second step:.................................................................................................26
Third step:....................................................................................................27
Fourth step:..................................................................................................27
Fifth step:.....................................................................................................27
System Programming..........................................................................................27
First step:..................................................................................................... 29
Second step:.................................................................................................29
Third step:.......................................................................................................29
Fourth step:................................................................................................30
Fifth step:.....................................................................................................30
2

Key Telephone
342
Sixth step:.................................................................................................... 30
Seventh step:................................................................................................31
Eighth step:..................................................................................................31
Ninth step:................................................................................................... 31
Tenth step:....................................................................................................31
Eleventh step:.............................................................................................. 31
Twelfth step:................................................................................................ 31
System Parameter.........................................................................................32
101: RESET DEFAULT (restore the default setting)..........................32
102: SYSTEM RESET (restore the PBX)...............................................32
103: MODIFY PASSWORD (modify program password)................. 32
104
::::
HOOK FLASH TIME......................................................................... 33
105
::::
OPREATOR........................................................................................ 33
106: AA NO ANSwer (automated attendant, no answer process).33
107: CID SIG F(S) (Send Mode of transfer caller ID)......................... 33
108
::::
CID SIG F(R) (Receive mode of transfer caller ID)................. 33
109: DOOR PHONE.....................................................................................33
110: DAY DP RING...................................................................................... 33
111: NIGHT DP RING.................................................................................. 34
112: CHARGE MODE..................................................................................34
113: DAY/NIGHT SW (Day/night mode switch)................................... 34
114: DAY START TIME............................................................................... 34
115: AUTO ATTENDANT (Automated attendant mode enable
setting)..................................................................................................34
116: ADD DIGITS CID (add digits for intercom CID)..........................35
117: OGM SECTION US (US: use set)................................................... 35
118: OFFICE CODE SET............................................................................35
119: WEEKEND mode................................................................................35
120:CRBT(coloring ring back tone).......................................................35
121: CO TR CA BK (CO line transfer, no answer call back)............35
122: CF RESERVED....................................................................................35
123: CF EXT RING (Indicating Tone for No available or busy)...... 36
3

Key Telephone
442
124: KP MONITOR (KP: key phone).......................................................36
125: CALL operator....................................................................................36
126: CO CA IN RD (RD: CO call in, ringing delay)............................. 36
127: NA TRS TIME (no answer, call forwarding time).......................36
128: CO hold time....................................................................................... 36
Extension Parameter....................................................................................36
201: EXTENSION GROUP.........................................................................36
202: DIAL OUT MODE................................................................................ 37
203: A GP RESTRICTION (set restriction group A)........................... 37
204: B GP RESTRICTION(set restriction group B)............................37
205: ASS SPE CALL OUT......................................................................... 37
206: CALL DURATION............................................................................... 37
207: FLEXIBLE NUMBER (extensions).................................................38
208: PRIVATE PW (Private password).................................................. 38
209: DAY SEV GRADE(day service grade).......................................... 38
210: NIGHT SEV GRADE(night service grade)................................... 38
211: DAY ACCESS CO (assign extension’s access CO line right in
day mode)............................................................................................38
213
::::
HOT LINE............................................................................................39
C.O. Line Parameter....................................................................................39
302: OPERATING MODE (Automated Attendant (OGM) mode)..... 39
303: EN/DI CO LINE(enable/disable Co line).......................................40
304: LCR CO GROUP.................................................................................40
305: INIT ROUTE
((((
Initialize routing
))))
.................................................. 40
306: ROUTE SET.........................................................................................40
307: SPE BUSY U NOR
is on busy
))))
((((
you can use normal CO when special CO
........................................................................................ 40
308: NOR BUSY U SPE (you can use special CO when normal CO
is on busy)...........................................................................................40
309: NOR CALL IN/OUT (normal CO can call in or call out the
phone)...................................................................................................40
310: SPE CALL IN/OUT (special CO can call in or call out the
4

Key Telephone
542
phone)...................................................................................................41
311: SPEC CO OUT NUM (outgoing number of special CO).......... 41
312: NOR CO OUT NUM (outgoing number of normal CO)............ 41
313: SEPC CO PREFIXE (routing number setting)............................41
314: DAY CO CA IN (CO Line Incoming call ringing Assignment in
Day mode)............................................................................................41
315: NHT CO CA IN.....................................................................................41
5

Key Telephone
642
Precaution
If occur some problems in the course of using, please pull extension
line out and connect with a good working state phone set. If the phone
works properly, it indicated the key phone is failure; if the phone set
works improperly, please check the PBX system and cables of
extensions and contact your dealer or direct contact with maintenance
service center.
Please keep this unit away from heating appliances and electrical
noise generating devices such as air conditioners and televisions, etc.
This unit should be kept free of dust, moisture and vibration, and
should not be exposed to direct sunlight.
Don’t use any other kind microphone.
Never disassemble this unit by Non-professionals, only qualified
maintenance technicians for disassembly and repair.
When a failure occurs which results in the internal parts becoming
accessible, disconnect the telephone line immediately and send this
unit to maintenance service center.
Warning
To prevent fire or shock hazard, keep this unit away from gas pipe
device and do not expose this unit to rain or any type of moisture.
Important Notice
In power failure mode, this unit would not be operated.
6

Key Telephone
742
LCD Display
Panel illustration and Key-press definition
7

1
○
PROGRAM ---Enter using setup, system program setup, DSS key
Key Telephone
842
setup, and auto-dial number setup status.
2
○
FWD/DND(light) ----FWD: Forward the call to different EXT;
DND(Do-not-disturb)function can be used to stop calls when you are busy.
3
○
CONF (light) ---- For conference talking
4
○
BROAD (light) ---- Broadcast for external broadcasting system and key
phone system, including group call and monitoring function.
5
○
REDIAL ---- For CO line redial.
6
○
RECALL/ FLASH ---- For incoming calls recalling; or flash operation
during conversation.
7
○
AUTO ANS / MUTE (light) ----Enable the auto answer mode; press to
mute the microphone in talking mode.
8
○
INTERCOM(ICM) (light) ---- Making or answer internal call.
9
○
TRANSFER—Transfer the call to the other EXT in talking state
10
○
HOLD/STORE----For holding calls (including extension line and CO
line); and store the settings in programming setup mode
11
○
SP-PHONE / EXIT (light) ---- With SP-PHONE, dial numbers or talking
without picking up the handset is possible; for exit in programming setup
mode.
12
○
Navigation key / volume adjustment key ---- 4 direction keys, the
normal state up and down keys for ringing volume adjustment and
sp-phone volume adjustment, left right keys for dialed and incoming calls
checking. In programming state, 4 direction keys are menu choosing keys.
13
○
DSS key -------total twelve from NO1 to NO12 with green and red led;
default setting is below
NO9-12 is CO keys, correspond to NO1 to NO 4 CO lines------ display
the status of Co line ;press it for calling or answer of the CO. line show
working status of each CO line. Press key to make corresponding single
key operation of CO line, such as make or answer calls.
NO1-8 is EXT keys, correspond to EXT601 to EXT608(default NO) -------
display the status of EXT; press it for calling or answer of the EXT
Notice: 12 DSS key can be flexible set to corresponding different
8

Key Telephone
PIN 2
PIN 3
PIN 2
PIN 3
PIN 2
PIN 3
PIN 1
PIN2
#
PIN3
PIN 4
942
extensions or CO. line, the detail see “DSS SETTING” sections.
14
○
MESSAGE (light) ----For voice mail, indication waiting or recall. This
function is not available now.
15
○
AUTO DIAL-----For auto dial
16
○
Ringer/day-night LAMP ----the lamp flashing when this telephone is in
the ringing; also it can indicate the day/night mode, PBX is in night mode
where lamp is always turn on.
Installation
! ! ! Only extension 601-604 can connect with key phone. Other ports
are not available.
The connection is as below:
#
PIN 1
PIN 4
PIN 1
PIN 4
PIN 1
PIN 4
PIN 1
PIN 4
#
PIN 2
#
PIN 3
#
#
#
#
#
#
#
#
#
#
#
#
#
#
#
#
Using four core lines to connect key phone to Ext. port of PABX directly,
Pay attention to the order of four core lines, Key phone will not show
anything if error connected.
PIN4
PIN1
PIN4
PIN1
Remark: 1. The PIN2 and PIN3 can be exchanged, but PIN1 & PIN4
cannot.
9

1042
Key Telephone
2. The PIN2 & PIN3 of key phone can connect
with normal telephone
Use Guide
The word pick up ( ) below indicate following 3 methods: Pick the
handset / Press HANDFREE Key (SP-PHONE) / Press INTERCOM key.
(The latter two will into hands-free operation)
The key telephone will display the indication on LCD when you pick up
the phone and make other operation.
Intercom call
Pickup + Ext. NO + talking
Pickup +EXT. DSS key+ talking
+ Ext. No. ( or ) +
Intercom answer
Just pick up.
+
Call operator
Pickup + 0
+ 0
Outgoing call
Pickup (or under hang up state) + CO. DSS key + external number +
10

1142
CO
Key Telephone
talking
Pickup + out number (default: 9) + external number + talking
( )
+
(
or 9)+ external number +
CO line answer
Pickup or Press corresponding CO. DSS key
CO line booking
Press # 0 after Handset pickup
# 0
Redial the outgoing call
Query the CID or called number(use or ►key +RECALL key)
( or ►)+
Redial
Pick up+ REDIAL key (1 to 48 group is PBX number, The remaining is
telephone number)
+
C.O line auto dial
Pick up+ AUTO DIAL key + Auto Number(1-50)
+ + Auto Number (1-50)
11

1242
CO
Key Telephone
Use private password
Pick up+# 5+Private password +CO. DSS key(or 9 ) +external number
+talking
+ # 5 + Private password +
(
or 9)+ external number +
Close private password function
Hang the phone after using the private password
Call pick up
(Take over the other extension’s call)
Pick up the defined extension’s call (intercom calling):
Pick up the handset +# 3+extension number or press respective DSS
key
+# 3 + extension number (or press respective DSS key)
Pick up a defined external line(CO. line) call: press the respective C.O
DSS key
Pick up a defined external line(CO. line) call: Pick up +# 1+CO number
(1-8)
This function available for the normal phone
+ # 1 + C.O. line Number (1-8)
Pick up all call (General Pick up function) Pick up+# 9
Note: suggest not to use this function when PBX is busy, because this easy
to get unacceptable call)
Call transfer
This function include two mode
Normal transfer(default setting)
Quick transfer
12

1342
CO
Key Telephone
Normal call transfer:
When talking with Co line or extension , press Transfer key ,then dial
extension number(EXT.NO)(or respective CO.DSS key)+notice +hang
up.
+Extension number(or
Note: While in transfer (transfer CO. line operates) dial Ext. NO course,
you can press the corresponding CO. DSS key to restore the conversation
with the CO line.
Quick call transfer:
When system in quick transfer mode ,besides the above operation ,you
can directly press DSS key to transfer CO line to the extension.
)
+ notice +
Call hold
When key phone is in talking, press key to hold the call from
Co line or Extension line, then the key phone will enter the inner call
pre-dial state. If holding the Co. line, the respective green LED of CO key
will flash slowly. If holding the extension line, the extension line key will
flash slowly.
Restore the held call
Restore the held Co. line: press the respective Co line key (
Restore the held extension line: Pick up and press INTERCOM key
)
Outgoing call transfer
First method:Same as call transfer.
Second method:During inner talking conversation(talk with a extension
who want to dial out ) ,press
, later press respective CO key and
13

1442
CO
CO
Key Telephone
you can dial the CO line number (external number) after hearing the CO
line dialing tone, then you can press and hang up ,then the
extension can keep talking with CO line)
+ +
+ CO number + + +
Three way conference
One CO line and two extensions During conversation with CO line press
Re m a r k
+The third part extension number +talking +
Two CO line and one extension:During conversation with CO line press
CONF key ,then press CO.DSS key which is spare and dial another
external number and communicate then dial CONF key.
Remark: If key phone hang up, the conference will be shut down
::::
If o n e ex t e n s i o n h a n g u p , t h e o t h e r
ex t e n s i o n c a n re m a i n t h e ca l l
+ + the third part extension number + +
immediately.
+ +
+ +
If key phone press CONF key again, the Co line can make a call to other
Co line. Now the Key phone can hang up, and the Co line can remain the
call. In this state, the system will call the key phone per 25 seconds. If you
pick up the handset, the conference will call rebuild.
14

1542
Key Telephone
Remark: In CO. line transfer CO. line (conference hold) state, the key
phone can not proceed to other operation.
If in Conference hold state, press CONF key again to quit.
DND( Do Not Disturb) \ Call forward setting
Call forward Pick up + FWD/DND key+1+ Extension number
+ + 1 + Extension number
Call forward when extension is busy or no answer Pick up + FWD/DND
key +2+ Extension number
+ + 2 + Extension number
Setting No not Disturb (DND) Pick up+ FWD/DND key +3
+ + 3
Cancel above setting Pick up+ FWD/DND key + 0
+ +0
Remark: After setup the call forward function, The red LED of
FWD/DND will flash slowly; and After Setup the DND
function , The red LED FWD/DND will turn on, Also
display DND state on the screen of phone per 10
seconds.
Broadcast
Group Call (urgent call) Pick up+ Broad key +1 then broadcast Light on
+ + 1 (broadcast Light on)
Broadcast in Key phone Pick up+ Broad key +2 then broadcast light on
+ + 2 (broadcast Light on)
15

1642
Key Telephone
Monitor Key phone Pick up+ Broad key +3 then broadcast light on
+ + 3 (broadcast Light on)
Cancel Press Broad key (or hang the phone), then broadcast light
turn off
Remark
( )
::::
only NO 1(EXT601) and NO2(EXT602) key phone have
these function as above as default setting.
broadcast Red light off
Monitor
Monitor the CO. line:
+ # 71M (M=1-8 CO line code number)
Monitor the Extension line:
+ # 72 + Ext. NO.
System Query
Pick up+# + 6 Press navigate key (use or ) to check system version,
outgoing mode, grade and other data..
+ # 6 + (using or )
Auto answer in HANDFREE state
In hang mode press AUTOANS key, then red light turn on
+
Attention:This function available only for intercom call
16

1742
Key Telephone
Day /Night service mode setting
Enter Day service mode:Pick up+ # + 2 + 0
+ # 20 Enter day mode
Enter Night service mode
:
Pick up + # + 2 + 1
+ # 21 Enter night mode
Remark: Above setting only available in Manual switch mode.
System enter auto switch mode: Pick up+ # + 2 + 2
+ # 22 Enter auto switch mode
System enter manual switch mode: Pick up+ # + 2 + 3
+ # 23 Enter manual switch mode
Alarm clock setting
Pick up+ # + 4 Phone is directly into the alarm setting menu, detail
operation in the introduction of the USE SETTING.
+ # 4 enter the alarm clock setup parameters
Press EXIT key (SP-PHONE key) to exit.
REMARK
::::
>> Press PROGRAM key one time to enter USE setting
>> Press PROGRAM key three times to enter DSS setting.
>> Press PROGRAM key four times to enter auto dial number setup.
>> Press PROGRAM key two times to enter System program state.
Press EXIT three times to exit to hang up state.
17

1842
Key Telephone
Use Setting
Press one time, then system will enter USE SETTING state.
LCD shows as follow
In the USE SETTING state press key or ( navigate key) you
can select setting item, such as “LANGAGE SET”, “OGM RECODER”, …
“QUICK TRANS SET”, It can be select recycle.
Then press key or you can setting the item which select in the
USE SETTING. For example when current sub-item is “EXT.AL.TIME
SET”,then press or you can enter the extension alarm clock time
setting,continue press and to make choice in the sub-item in the
setting items, after chosen ,you can use and to adjust the data
:
USE SET SEL
LANG. SET ENT
。
When setting finished,press to save,you will hear “DI” to show
setting is successfully
Finally press one time to exit from the current setting back to the
USE SETTING state,press twice you can let key phone into
NORMAL IDLE state from the USE SETTING state.
Below is an example show how to setup “EXT.AL.TIME SET”,the result is
to set the alarm clock time of extension 8 as 12 : 00
。
First step
18

1942
Key Telephone
Press once,enter in USE SETTING state,then LCD shows as
follow
:
USE SET SEL
LANG. SET ENTER
Second step
Press 9 times,or press 8 times, then LCD shows as follow
USE SET S E L
ALARM SET
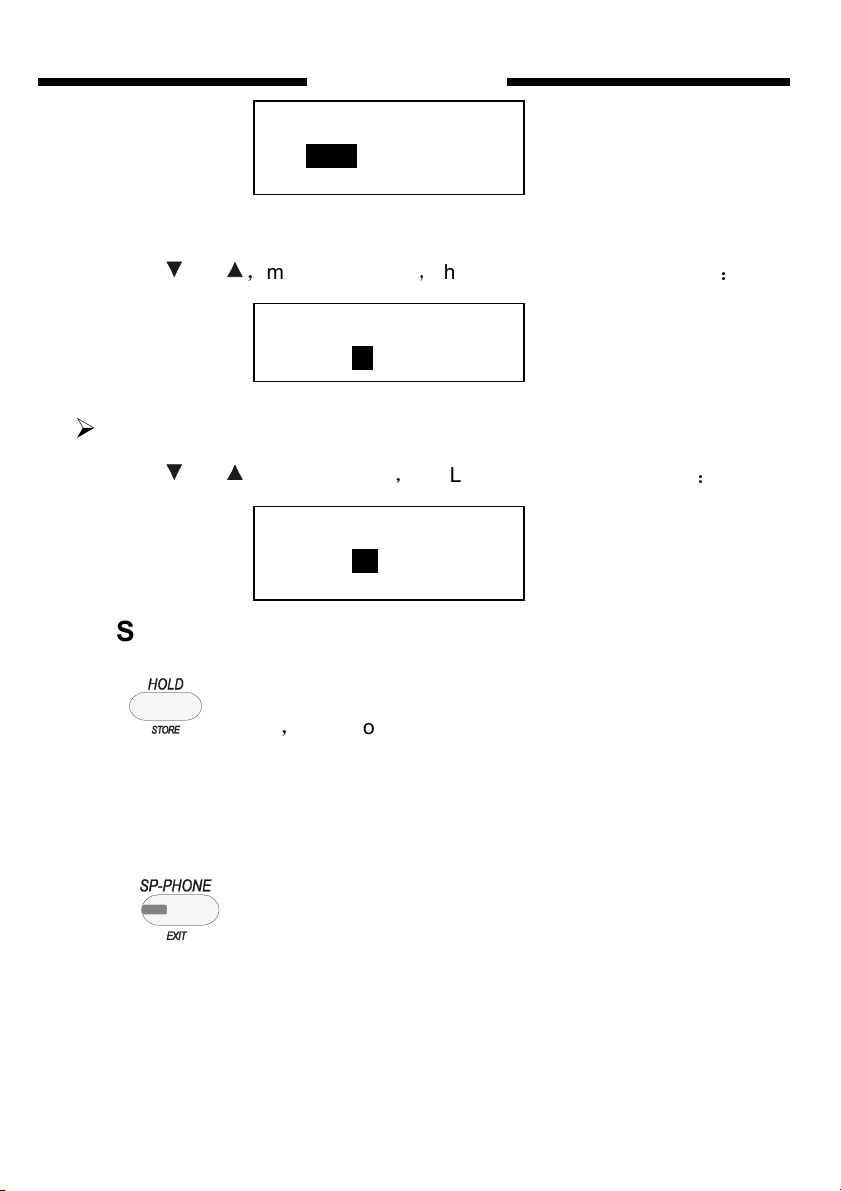
Third step
Press once, then LCD shows as follow
ALARM SET
EXT 0 1 01: 32
Fig. 3.1
Then press or the choice as below
ALARM SET
EXT 00 0 1 : 32
Fig 3.2 Fig 3.3
:
:
ALARM SET
EXT 00 01: 32
:
ALARM SET
CLEAR EXT.
Fig 3.4 Fig 3.5
0 0
19
ALARM SET
CLEAR ALL

2042
Key Telephone
Fourth step
press or can adjust the EXT.NO as 8 in Fig.1( the same to adjust
Alarm clock ’s parameter “ Hour” in Fig 3.2; also “Minute” in Fig3.3, and
“Extension Number ” in Fig 3.4 or Fig 3.5)
ALARM SET
EXT 0 8 01:32
Repeat the third and fourth step, adjust hour and minute as following
ALARM SET
EXT 08 1 2 :32
ALARM SET
EXT 08 12: 0 0
:
The fifth step
press to save,you will hear sound “DI” to show storage succeeds
The sixth step:
press twice to quit the setting stat and come back to NORMAL
IDLE state.
Use Set Option
1: LANGUAGE
Option:
中文
/ English
2: OGM RECODER
Option: 1 / 2 / 3 / SINGLE TONE
20

2142
Key Telephone
3: OGM MONITOR
option: 1 / 2 / 3 / SINGLE TONE
4: BGM (background music)
option: Playing…
5: BACK LAMP SET
option: OFF/ AUTO / ON
6: EXT RING SEL(extension ring selection)
option: RING 01 to 16
7: CO RING SEL(CO line ring selection)
option: RING 01 to 16
8: DP RING SEL (door phone ring selection)
option: RING 01 to 16
9: ALARM RING SEL(alarm ring selection)
option: RING 01 to 16
10: ALARM SET
option:
EXT 01 to 96 00:00
CLEAR EXT. 01 to 96
SET ALL 00:00
CLEAR ALL
21

2242
Key Telephone
11: DATE/TIME
option:
20**--**--** MON
00: 00
12: CLR CHARGE LIST(clear charge list)
option: YES/ NO
13: SYSTEM QUERY
option:
VER ************
OUT IN-DIRECT
GRADE **
14: QUICK TRS SET (TRS: transfer)
option: YES / NO
15: PROMPT TONE SET
option: YES / NO
16: RESTORE KEYPHONE
option: 832 /896
17: EXT LOCK FUNC(extension lock function)
option:
EXT 01 to 96 UNLOCK/LOCK
SET ALL UNLOCK/LOCK
22

2342
Key Telephone
DSS Setting
Press three time then system will enter DSS Setting state , LCD
will display as follows
Or
Press and (navigate key) ,you can adjust one of the three
parameters in DSS Setting which is “DSS number” or “CO./EXT” or “CO
line number/EXT number”. When select one of those item, the cursor will
move to the optional. It can be select recycle.
At the time,press and (navigate key) can adjust the chosen item
parameter, for example when cursor is at DSS NO; You can press the two
keys to adjust from 1 to 72 (there are 72 DSS key total in this key phone),
:
DSS SET
01 CO. 01
DSS SET
01 EXT 01-6010
certainly you also can press DSS key directly to modulate the
parameter.
Select “CO.” or “EXT” assign to a corresponding DSS key;If it is a CO.
selection, adjustable range by the two keys is from 1 to 8;If it is an EXT
selection, adjustable range by the two keys is from 1 to 96. It can be select
circularly.
After you finish the setting,please press key
you will hear “DI” to show save successfully.
23
to save the setting,

2442
Key Telephone
Finally press one time to exit to the NORMAL IDLE state from the
DSS SETTING state.
Take to set” DSS key 12 as EXT 18(extension 618)” as example
First step
press three times,enter DSS setting state,the LCD will display as
follows
:
DSS SET
0 1 CO. 001
Second step
press key or key
key directly, the LCD will display as follows
,
adjust 01 to 12,or press NO12 of DSS
DSS SET
1 2 CO. 001
Third step
press key
,
move the cursor to “CO.”,the LCD will display as follows
DSS SET
12 CO. 001
Fourth step
press key
or
,
adjust “CO. ”to “EXT”,the LCD will display as follows:
24
:
:
Fifth step
2542
Key Telephone
DSS SET
12 E X T 01-6010
press key or
,
move the cursor,the LCD will display as follows
DSS SET
12 EXT 01-6010
:
Sixth step
press key or adjust 01 to 18,the LCD will display as follows
DSS SET
12 EXT 1 8-6180
:
Seventh step
press to save,then you will hear a sound “di” that means save
successfully.
Eighth step
press once, exit this setting state and come back to NORMAL
IDLE state.
25

2642
Key Telephone
Auto Dial Setting
press four times then system will enter AUTO DIAL Setting state,
the LCD will display as follows
AUTO DIAL 49
KEYPHONE
In this state press key or ( navigate key) or input number
directly you can adjust auto dial team number,the adjustable range is from
1 to 96,it can be adjust recycle. Choose the right team NO. , press directly
the CO. numbers you want. If the input is wrong please choose the right
team NO., and input again.
After finish to set the AUTO DIAL number, please press to save
the setting,Then you will hear “ DI” to show save successfully. Finally you
:
can press once to exit the AUTO DIAL setting state into NORMAL
IDLE state.
Take to set the 20th number of AUTO DIAL team as”13302818996” as
example
First step:press four times, key phone will enter AUTO DIAL
setting state,the LCD will display as follows
AUTO DIAL 01
SYSTEM
Second step:press
or to set the AUTO DIAL number as 20
26
:
,
2742
13302818996
Key Telephone
the LCD will display as follows
AUTO DIAL 20
SYSTEM
:
Third step:First, press key , let it be to input telephone number state.
Then, press directly the number keys “13302818996”,the LCD will display
as follows
:
AUTO DIAL 20
Fourth step:
successfully.
press to save,you will hear “DI” to show it save
Fifth step:press once to exit this setting state and come back
to NORMAL IDLE state .
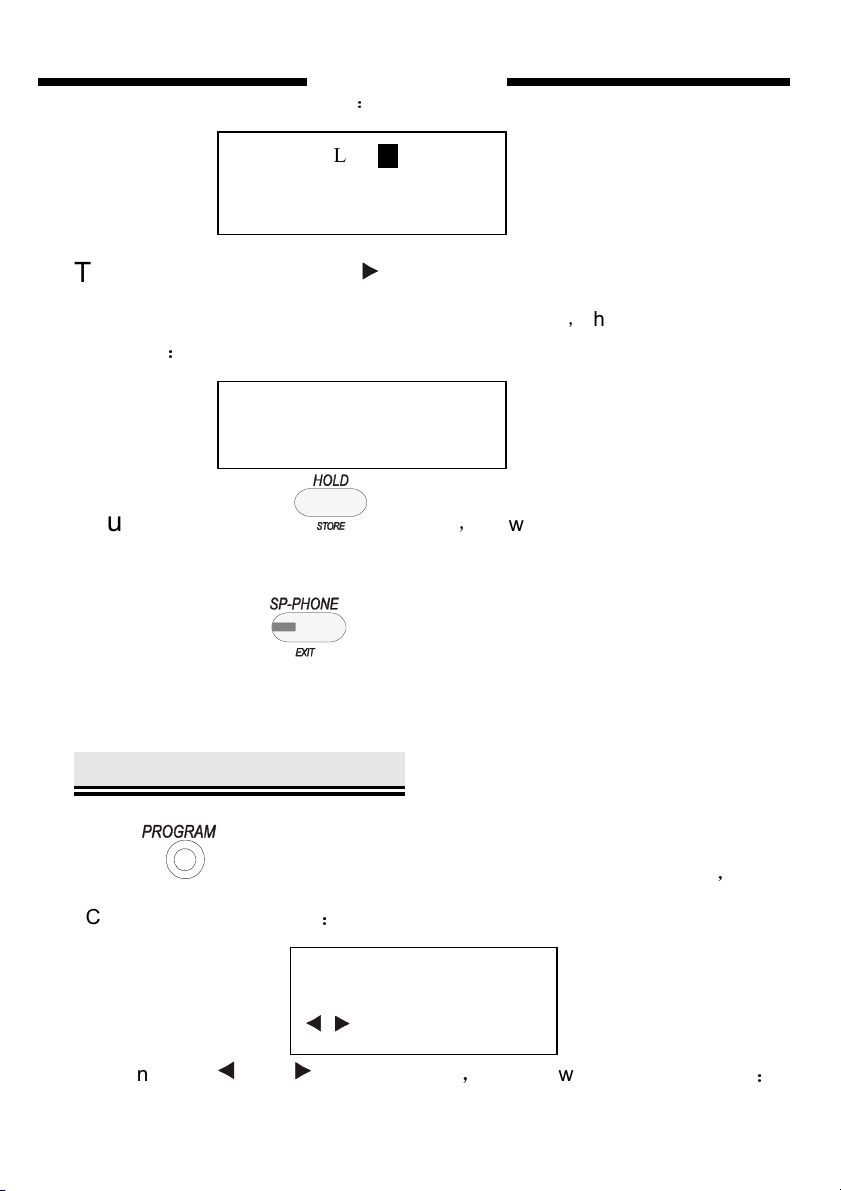
System Programming
Press twice ,then system will into SYS. PROGRAM state,the
LCD will display as follows
You can press
and ( navigate key),the LCD will display as follows
:
SYS. PROGRAM
ENTER
:
27

2842
Key Telephone
PASSWORD
You can input the system password on the keyboard, the password default
setting is ”0000” .After you input the first digit of password,”*” is displaying,
prompt you to input the second digit of password,analogy in turn. If your
input password is wrong, you will hear warning voice ”DI,DI,DI”, prompt
you to input the password again.
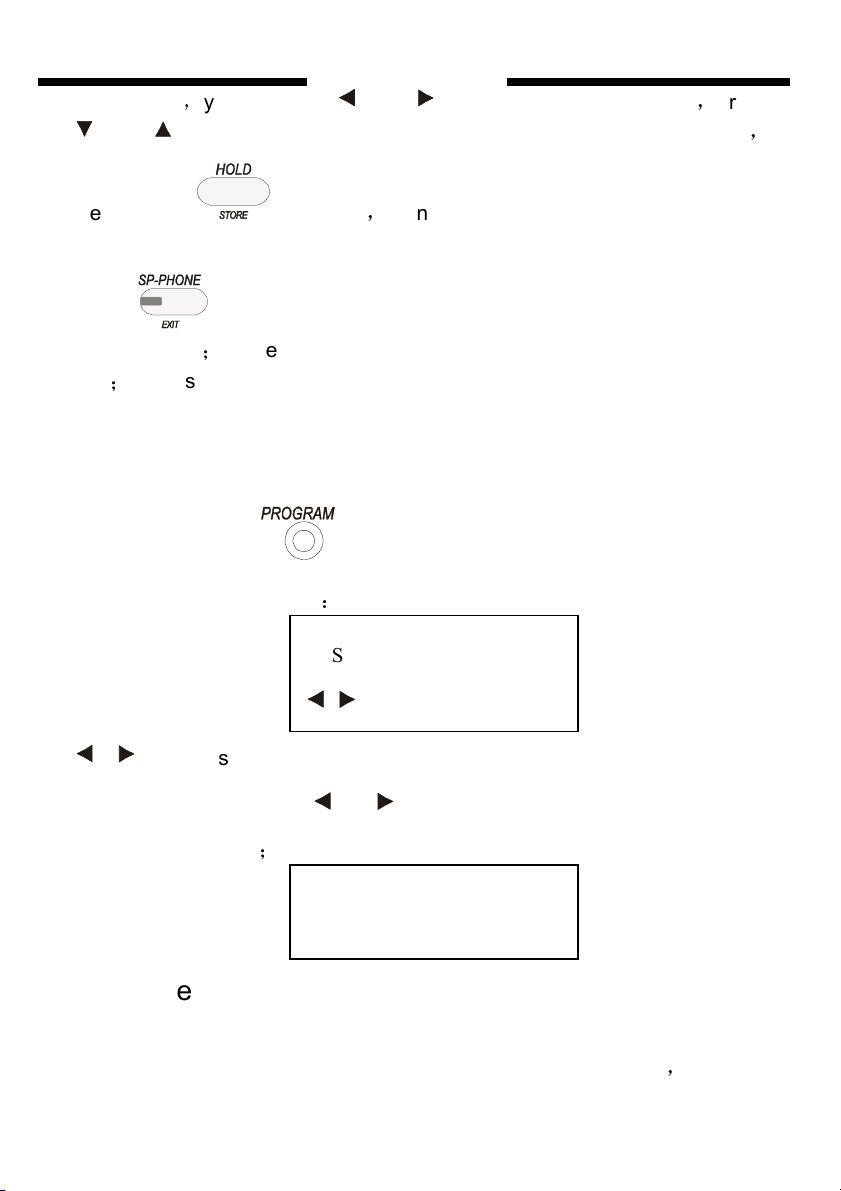
the LCD will display as follows
:
S E L
S Y S. P A R A. E N T
Fig6.1
Meanwhile, the cursor is on the system parameter setting icon, you can
choose one sort of parameter which need to be adjusted, there are three
sorts, “SYS.PARA”(system parameter), “EXT.PARA.”(extension parameter)
and “CO. PARA.”(CO. line parameter),the cursor will move with your
choice.
After you choose the right sort, you can press and to enter each
option of the sort,for example, if your choice is “EXT. PARA.” setting,press
the two keys you can enter options of extension parameter,such as
“DIAL OUT MODE” “A GRU RESTRIC” (setting restriction Group A)… and
“NIGHT ACCESS CO.” (Assign EXT. Outgoing to Certain CO. Line or to
Clear in night mode)etc.,can recycle to choose. Meanwhile:
1》If you press once, you will come back to sort optional
menu(see Fig6.1). If press twice will come back to NORMAL IDLE state
;
2》If you press and will go into the selection setting. For example,
you want to set “ DIAL OUT MODE”,the LCD will display as follows
:
DIAL OUT MODE
001 DE-DIRECT
28
2942
Key Telephone
At that time,you can press and to choose setting subentry,press
and to adjust the parameter of setting subentry. After finish setting
please press to save,then you will hear “DU” to show it saved
successfully. If you need to continue to set other parameters, you can
press once come back to the last menu, choose other options of
the same sort;or press twice to come back to sort choice menu to choose
sort;or press three times to exit system program setting. the phone will be
in NORMAL IDLE state.
Take to set dial-out mode of extension 20 as direct dial-out mode as
example
,
First step:press twice to enter SYSTEM PROGRAM state, the
LCD will display as follows
ENTER is flashing
:
SYS. PROGRAM
ENTER
Second step: press or , the LCD will display as follows, “****”
will flash continually
Third step:
“0000”,while entering the correct password the LCD will show (If you input
the error password, you will hear warning voice “DI,DI,DI”,and the
;
PASSWORD
* * * *
input the system password, the default password is
29

3042
Key Telephone
first“*”will flash,prompt you to input the password again.)
SEL
S Y S. P A R A. ENT
Fourth step : press or to choose “EXT. PARA” (or input
number 202 directly) , and the LCD will show
E X T. P A R A ENT
Fifth step:press twice
E X T. P A R A S E L
OUT MODE
Sixth step:press once
DIAL OUT MODE
01 DE-DIRECT
continue to press
,
,
or press 11 times, the LED show
,
the screen will show
Fig 6.1
you can select from Fig 6.2, 6.3, 6.4 show below
:
SEL
:
:
:
DIAL OUT MODE
ALL DIRECT
Fig 6.2 Fig 6.3
DIAL OUT MODE
ALL DE-DIRECT
30

3142
20
DE-DIRECT
Key Telephone
Seventh step:press
DIAL OUT MODE
01 DE-DIRECT
Fig 6.4
Eighth step:press or
display as follow:
DIAL OUT MODE
Ninth step:press
,
DIAL OUT MODE
20 DE-DIRECT
Tenth step:press or
,
to let the cursor as Fig6.4.
,
adjust the EXT. NO as 20,the LCD will
then LCD shows as follow:
,
adjust DR-DIRECT to DIRECT
Eleventh step:
that you have save successfully
Twelfth step: press
Fig6.5 ,Fig6.6,Fig6.7 in turn, and key phone exit the SYSTEM PROGRAM
DIAL OUT MODE
20 DIRECT
press to save,you will hear “DI” , that means
three times ,the LCD shows as follow
31

3242
Key Telephone
state and come back to the NORMAL HANG UP state.
E X T. P A R A S E L
DIAL OUT MODE
E X T. P A R A E N T
Fig 4.5 Fig 4.6
And setup is succeed.
S E L
REMARK
All EXT. NO. indicate extension 601-696 series number. Such as
Ext.01 indicate extension 601, Ext.96 indicate extension
696(default setting)
All CO. NO. indicate CO. LINE series number ,from
LINE1-LINE16 interface . Such as “CO.1” means CO. LINE1
interface.
::::
System Parameter
101: RESET DEFAULT (restore the default setting)
option:YES / NO
102: SYSTEM RESET (restore the PBX)
option:YES / NO
103: MODIFY PASSWORD (modify program
password)
OPTION: ****
32

3342
Key Telephone
104::::HOOK FLASH TIME
option: 0.1S to 2S (second)
105::::OPREATOR
option:
NO.1 01 to 96
NO.2 01 to 96 (PBX need be restored)
106: AA NO ANSwer (automated attendant, no
answer process)
option:
FREE CO. (Release Co. line)
TRANSFER/GROUP 1 to 4 (transfer operator / transfer EXT group)
107: CID SIG F(S) (Send Mode of transfer caller ID)
option: FSK / DTMF
108:::: CID SIG F(R) (Receive mode of transfer caller
ID)
option: AUTO/ FSK&DTMF / DTMF / FSK
109: DOOR PHONE
option:
DOORP1to 4 01 to 96
110: DAY DP RING
33

3442
Key Telephone
(Door phone ring assignment in day)
optional
NUM 01 to 08 - **
:
111: NIGHT DP RING
(Door phone ring assignment in night)
option
:
NUM 01 to 08 - **
CLEAR
112: CHARGE MODE
option
:
DELAY 00 to 99 S.
REVERSE
113: DAY/NIGHT SW (Day/night mode switch)
option: AUTO / MANUAL
114: DAY START TIME
option:
START 00:00
END 00:00
115: AUTO ATTENDANT (Automated attendant mode
enable setting)
option: BOTH/NIGHT/DAY
34

3542
Key Telephone
116: ADD DIGITS CID (add digits for intercom CID)
option:
ADD **
117: OGM SECTION US (US: use set)
OPTION:
1
2 ONE IN DAY/ ONE IN NIGHT
3
118: OFFICE CODE SET
OPTION: */ # (PBX need be restored)
119: WEEKEND mode
OPTION:
ENABLE / DISABLE
SUN to SAT WORKDAY / WEEKEND
120:CRBT(coloring ring back tone)
OPTION: DISABLE / TRS. OP. / GROUP 1 / GROUP 2 / GROUP 3 /
GROUP4 / RINGING
121: CO TR CA BK (CO line transfer, no answer call
back)
option: CALL BACK OP./GIVE UP)
122: CF RESERVED
35

3642
Key Telephone
(call forwarding settings reserved when Power Failure)
OPTION: YES / NO
123: CF EXT RING (Indicating Tone for No available
or busy)
OPTION: YES / NO
124: KP MONITOR (KP: key phone)
OPTION: YES / NO
125: CALL operator
OPTION: YES / NO
126: CO CA IN RD (RD: CO call in, ringing delay)
OPTION: YES / NO
127: NA TRS TIME (no answer, call forwarding time)
OPTION: 01 to 60 S
128: CO hold time
OPTION: 10 to 990S
Extension Parameter
201: EXTENSION GROUP
option:
G. 1-01/88 11111111
36

3742
Key Telephone
CLR ALL
CLR
202: DIAL OUT MODE
option:
01 to 96 DE-DIRECT/DIRECT
ALL DIRECT
ALL DE-DIRECT
203: A GP RESTRICTION (set restriction group A)
option:
NUM 01 to 16 - ********
CLR ALL
CLEAR 01 to 16
204: B GP RESTRICTION(set restriction group B)
option:
NUM 01 to 16 - ****
CLR ALL
CLEAR 01 to 16
205: ASS SPE CALL OUT
(assign special calling out number)
option:
NUM 01 to 16 - ****
CLR ALL
CLEAR 01 to 16
206: CALL DURATION
option: EXT 01 to 96 - UN-LIMIT / 01 to 99
37

3842
Key Telephone
207: FLEXIBLE NUMBER (extensions)
option: (key phone need be restored)
RESTORE
LENTH 1 TO 4
SAME AS EXT 1
EXT 01 to 96 -- ****
GROUP 1 to 4--****
208: PRIVATE PW (Private password)
option:
NO.01 to 96 -**** (password) - 0 to 6 (grade)
CLEAR 01 to 96
CLR ALL
209: DAY SEV GRADE(day service grade)
option
:
EXT 01 to 96 – 0 to 6 (grade)
ALL 0 to 6 (grade)
210: NIGHT SEV GRADE(night service grade)
option:
EXT 01 to 96 – 0 to 6 (grade)
ALL 0 to 6 (grade)
211: DAY ACCESS CO (assign extension’s access
CO line right in day mode)
(The 1st 0 means the first Ext, the last 0 means the 16 Ext..0 means can
not use,1 means allowed to use)
38

3942
Key Telephone
option:
EXT 01 to 96 – 00000000
ON ALL EXT – CO. 01 to 16
OFF ALL EXT – CO. 01 to 16
212: NIGHT ACCESS CO (assign extension’s access
CO line right at night mode)
option
:
EXT. 01 to 96 – 00000000
ON ALL EXT – CO. 01 to 16
OFF ALL EXT – CO. 01 to 16
213::::HOT LINE
option
:
EXT01 to 96 DISABLE / ENABLE
ALL DISABLE
ALL ENABLE
C.O. Line Parameter
301: CO UCD (CO uniform call distribution)
option: CYCLENCE /
SEQUENCE
302: OPERATING MODE (Automated Attendant
(OGM) mode)
option: CO. 01 to 16 AUTO / MANUAL
ALL MANUAL
ALL AUTO
39

4042
Key Telephone
303: EN/DI CO LINE(enable/disable Co line)
option:
CO 01 to 16 ENABLE / DISABLE
ALL ENABLE / ALL DISABLE
304: LCR CO GROUP
option:
CO. 01 to 16 NORMAL / SPEC
ALL SPEC
ALL NORMAL
305: INIT ROUTE((((Initialize routing))))
option: YES / NO
306: ROUTE SET
option: OFF / MANUAL / AUTO
307: SPE BUSY U NOR (((( you can use normal CO
when special CO is on busy))))
option: YES / NO
308: NOR BUSY U SPE (you can use special CO
when normal CO is on busy)
option: YES / NO
309: NOR CALL IN/OUT (normal CO can call in or
call out the phone)
option: YES / NO
40

4142
Key Telephone
310: SPE CALL IN/OUT (special CO can call in or
call out the phone)
option: YES / NO
311: SPEC CO OUT NUM (outgoing number of
special CO)
option: 0 to 9
312: NOR CO OUT NUM (outgoing number of normal
CO)
option: 0 to 9
313: SEPC CO PREFIXE (routing number setting)
option:
NUM01 to 16 - ***
CLEAR 01 to 16
CLR ALL
314: DAY CO CA IN (CO Line Incoming call ringing
Assignment in Day mode)
option:
CO. 01 to 16 – NUM01 **
CLEAR 01 to 16
315: NHT CO CA IN
(CO Line Incoming call ringing Assignment in night mode)
option:
41

C
O. 01 to 16 – NUM01 **
CLEAR 01 to 16
4242
Key Telephone
1141 Budapest, Fog
Tel.: *
220-7940,
220-8881, 364-3428 Fax: 220-7940
Mobil: 30 531-5454, 30 939-9989
arasi út 77.
220-7814, 220-7959,
EXCELLTE
E-mail: info@delton.hu Web: www.delton.hu
A dokumentáció a Delton szellemi tulajdona, ezért annak változtatása jogi következményeket vonhat maga
után. A fordításból, illetve a nyomdai kivitelezésből származó hibákért felelősséget nem vállalunk.
A leírás és a termék változtatásának jogát a forgalmazó és a gyártó fenntartja.
1095 Budapest, Mester u. 34.
Tel.: *218-5542, 215-9771, 215-7550,
216-7017, 216-7018 Fax: 218-5542
Mobil: 30 940-1970, 30 959-0930
L.HU
42
 Loading...