

Page 1
C1M
Quick Start Guide
PCIe Storage & Switches
v2.0 (Nov. 10th, 2014)
Page 2

ExaSAN C1M Quick Start Guide
TABLE OF CONTENTS
Page#
TABLE OF CONTENTS
..................................................................................................
P.1
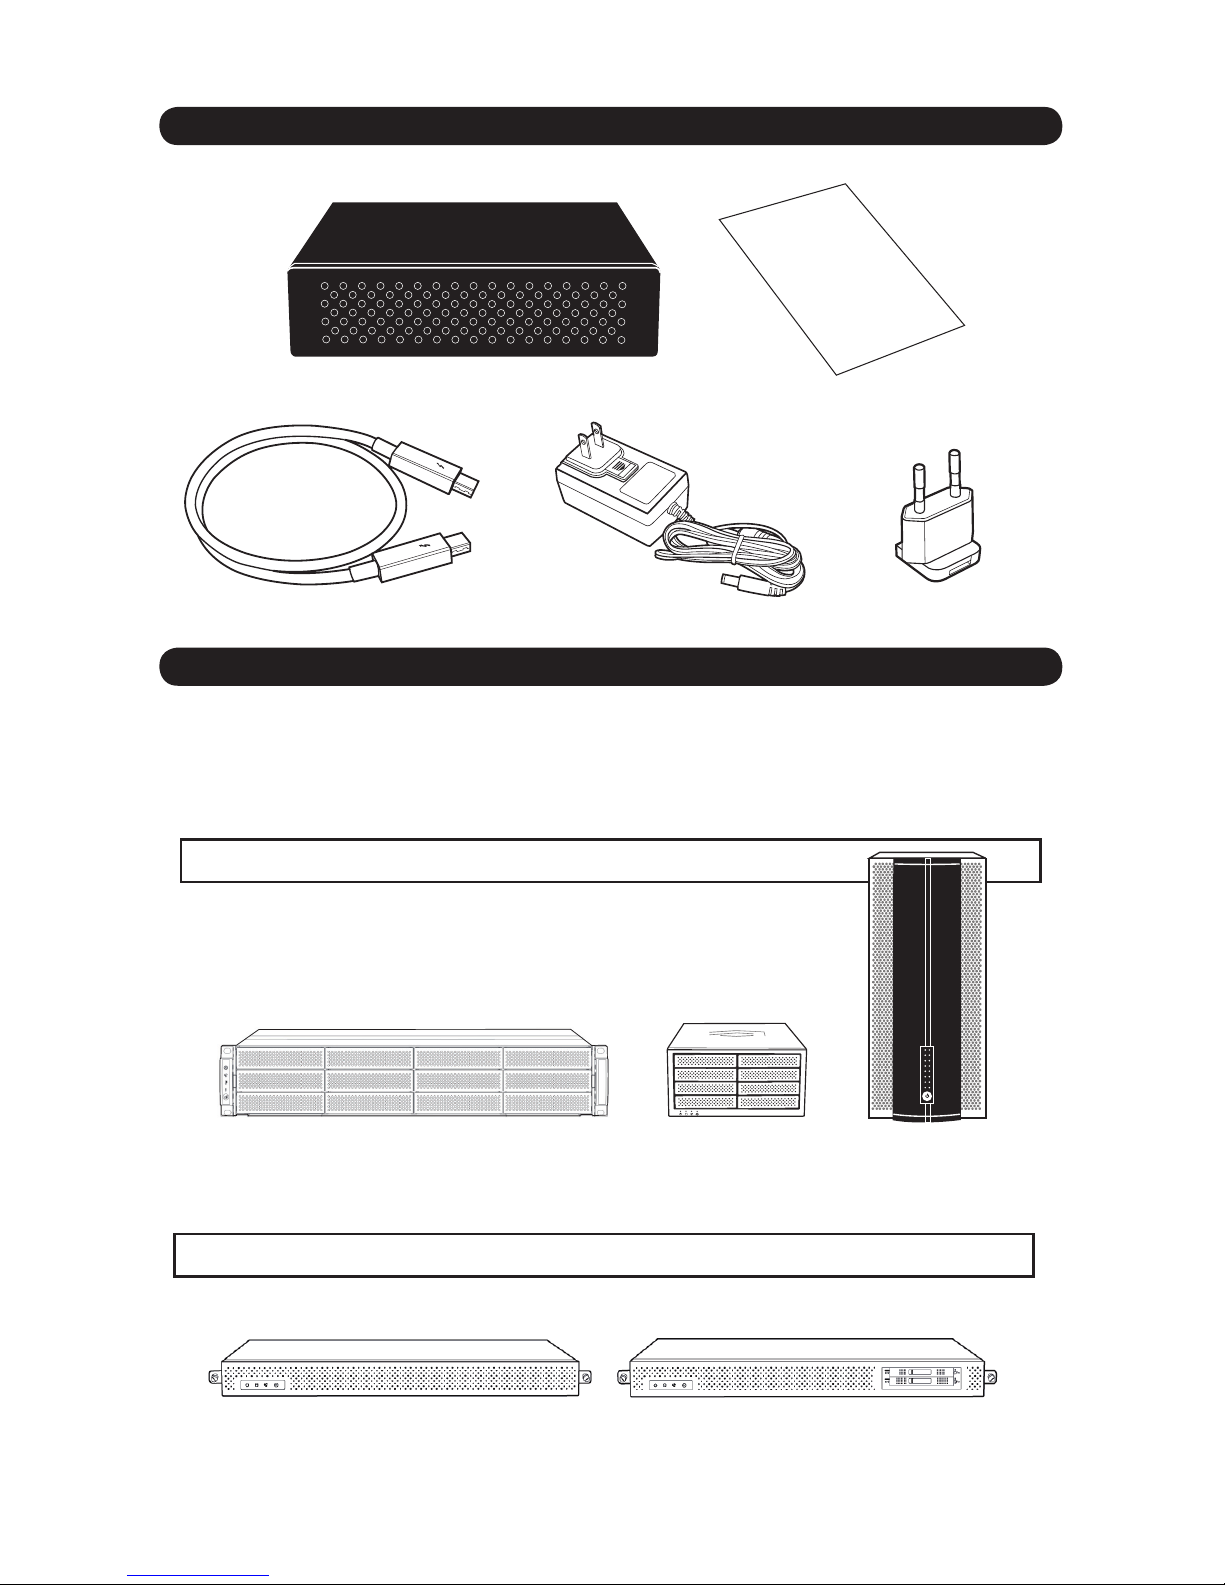
1. What should be in the box?
.............................................................................
P.2
2. What "C1M" supports?.
.......................................................................................
P.2
3. Hardware configuration
.....................................................................................
P.3
4. C1M LED indicators
...............................................................................................
P.6
5. Note
..............................................................................................................................
P.6
P.1
Page 3
1. What should be in the box?
2. What "C1M" supports?
The ExaSAN C1M has 1 QSFP port and 1 Thunderbolt port to convert ExaSAN
PCIe to Thunderbolt with downward compatibility. C1M is compatible with
following ExaSAN products:
A12S2-PS
A08S3-PS /
A08S2-TS
B08S3-PS
SWF16 V2
SW16
Quick Start Guide
ExaSAN PCIe Storage:
ExaSAN PCIe Switch:
P.2
Page 4
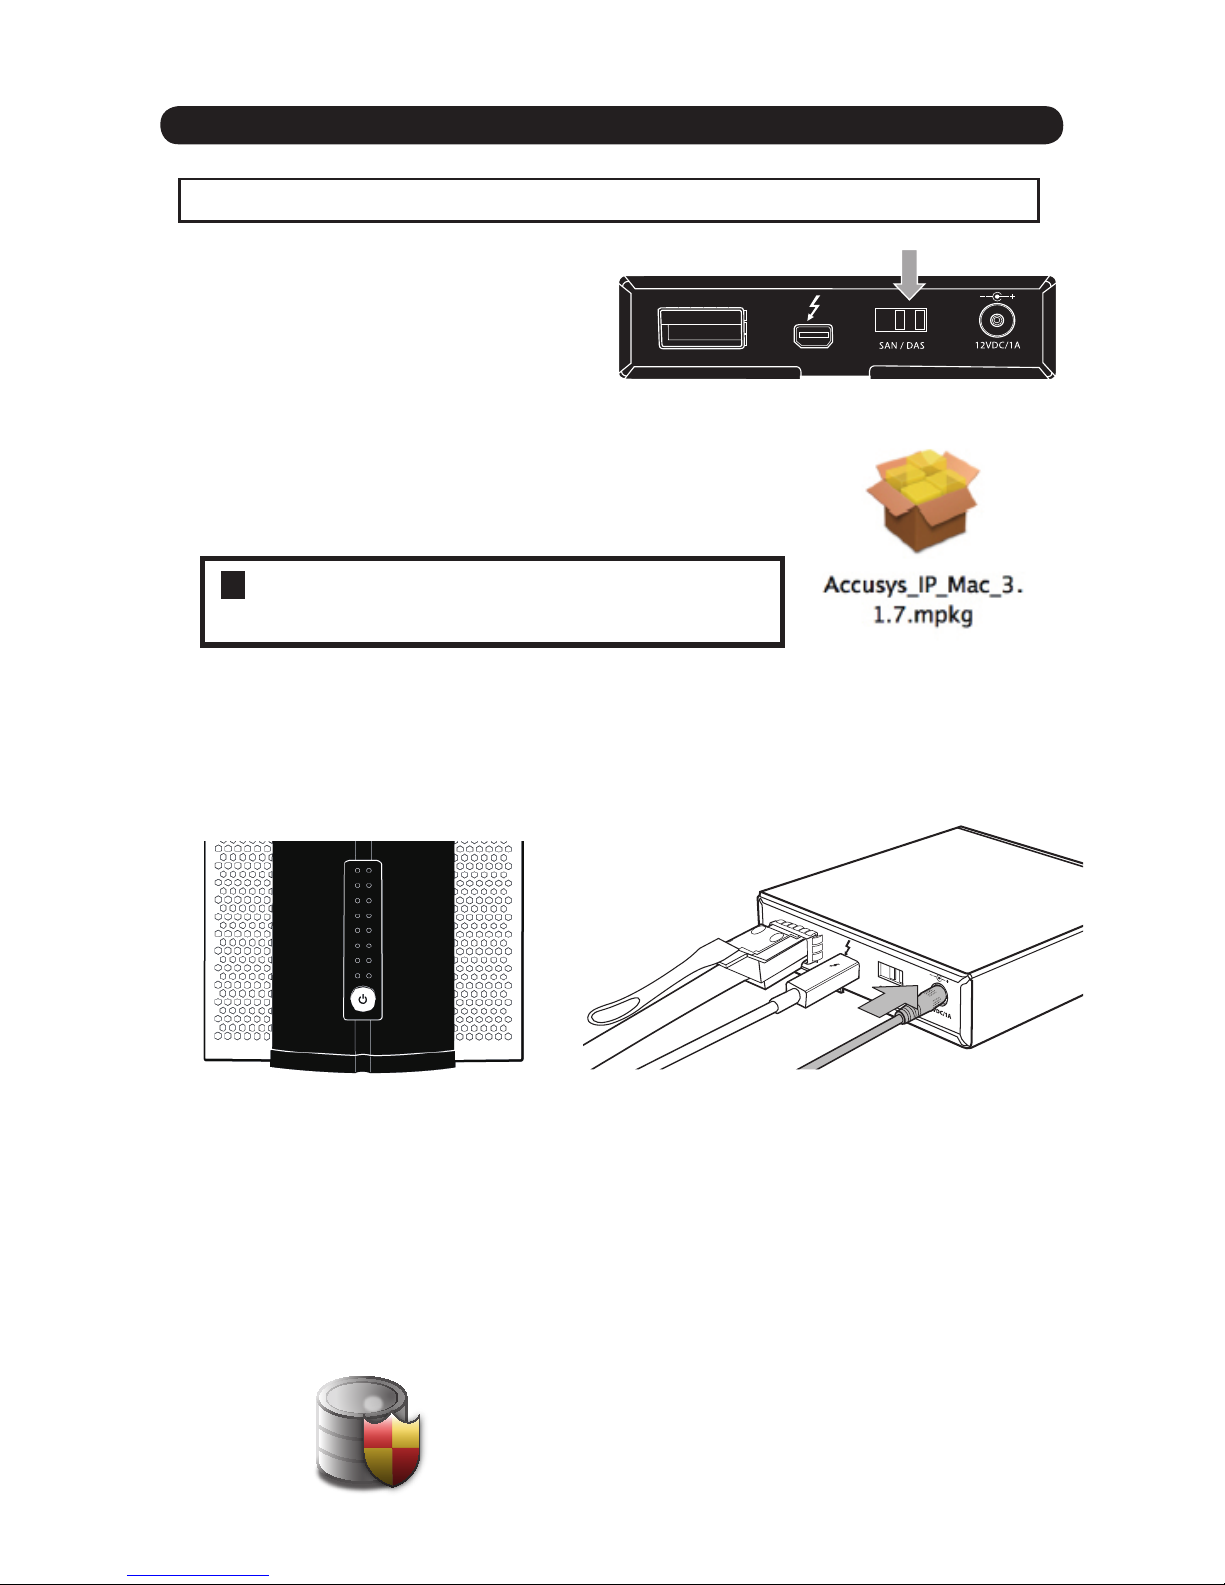
1. Before you begin, please install the software package
on to your MAC device rst, and then continue your
hardware installation.
2. Connect up your hardware accordingly, power up your storage rst, then power
up the C1M ( connect the power adapter to C1M and make sure the ip switch
in on DAS mode ), lastly power up your MAC device.
3. If you have a brand new storage, you will need to congurate the new desk
array by using RAIDGuardX. You can nd the software in nder/applications/
RAIDGuardX. Please conduct the following steps to create storage array and
export LUN(s).
a. Execute RAIDGuardX app
Power on your storage rst. Than power on C1M
3. Hardware conguration:
DAS mode :
! Note : DO NOT connect to any ExaSAN storage
or switch before you install the software package.
If this is your first time setting up an
Accusys products, please refer to the
following step.
P.3
Page 5
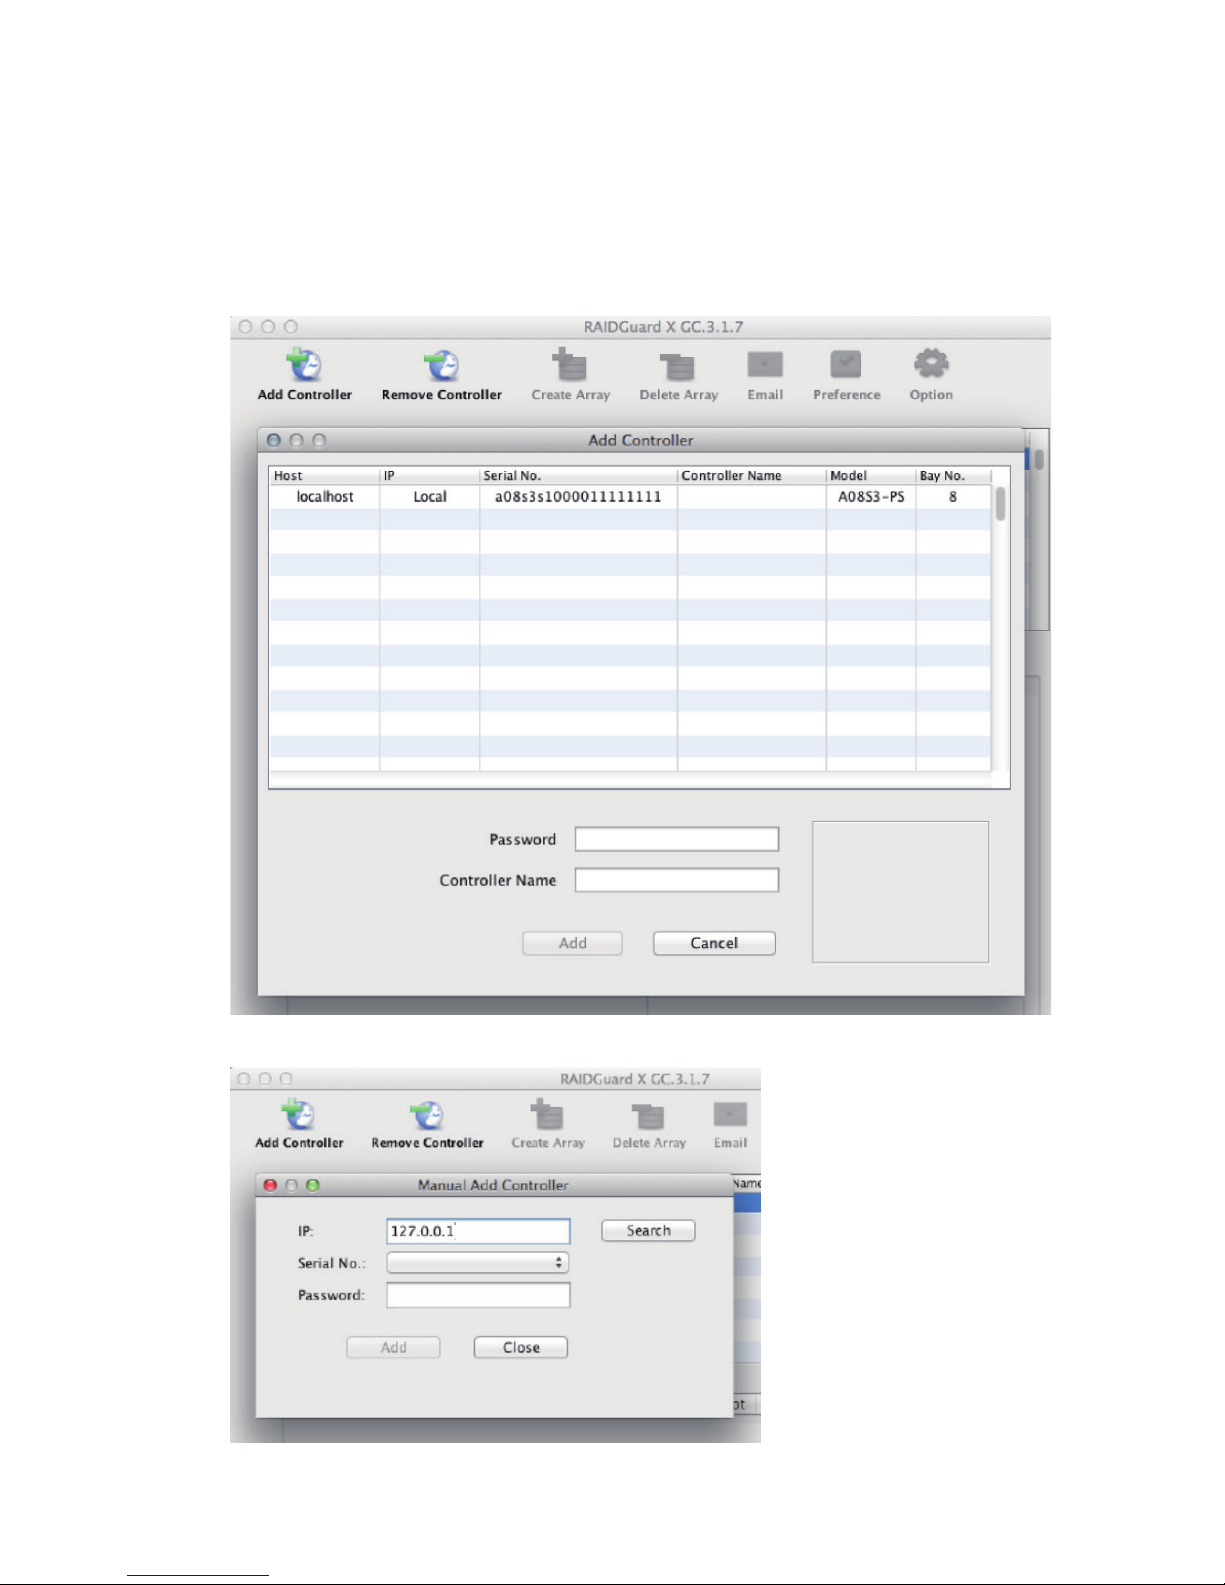
b. Add controller (click Add Controller bottom in RAIDGuardX GUI)
If all hardware were connected correctly, your storage controller should appear
as localhost, if not, please try manually adding on the controller (you can nd
“Manual Add Controller” in Manu Bar/Controller) and input IP 127.0.0.1 to
search, notice, default password is 00000000(eight zero)
Storage controller appear as localhost.
If not, please try manual add controller.
P.4
Page 6
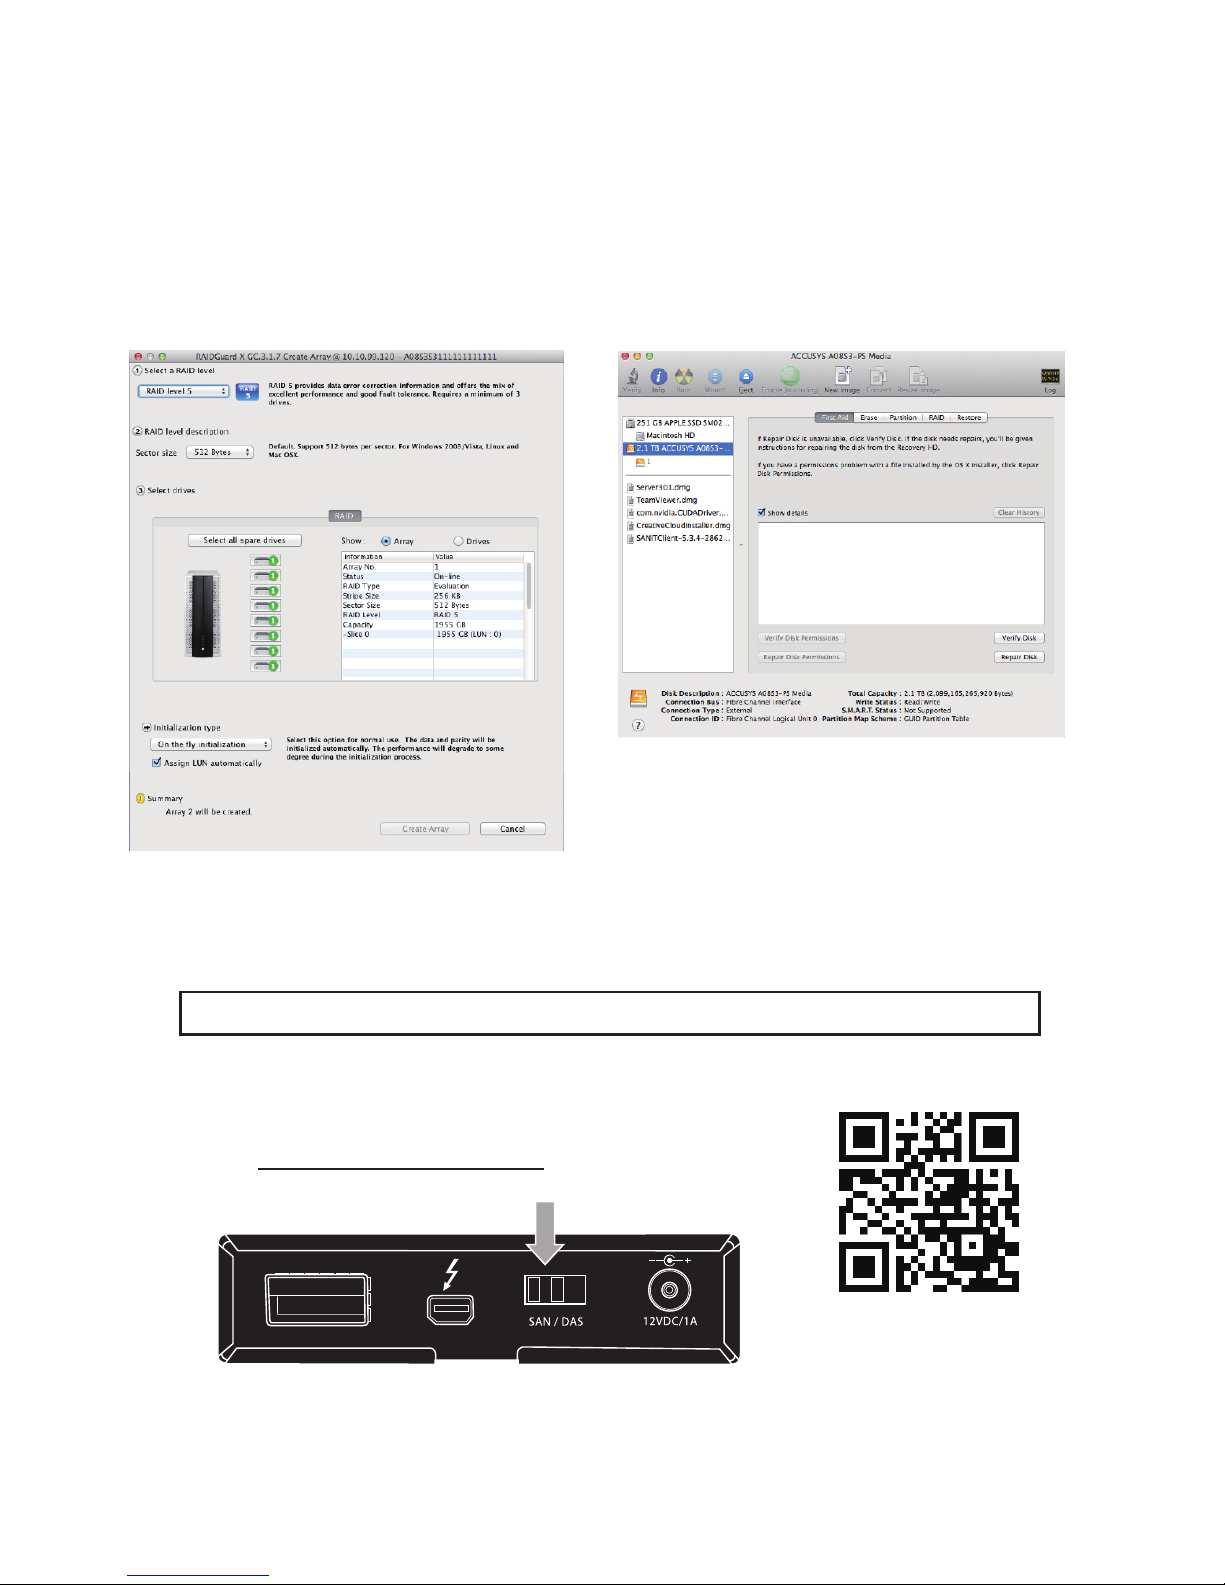
c. Create array
(click Create Array bottom in
RAIDGuardX GUI)
After adding the controller, you can
create your storage array to your
desired conguration.
d. Format device
(/Applications/Utilities/Disk Utility)
Once storage array is created, you
can see the storage device in disk
utility, format it to your desired layout
and the storage is ready to go.
SAN mode :
SAN mode conguration will be conducted with SAN
software and SAN switch, please contact your SI, or
visit http://www.accusys.com.tw for more information.
P.5
Create array.
www.accusys.com.tw
Format device.
Page 7
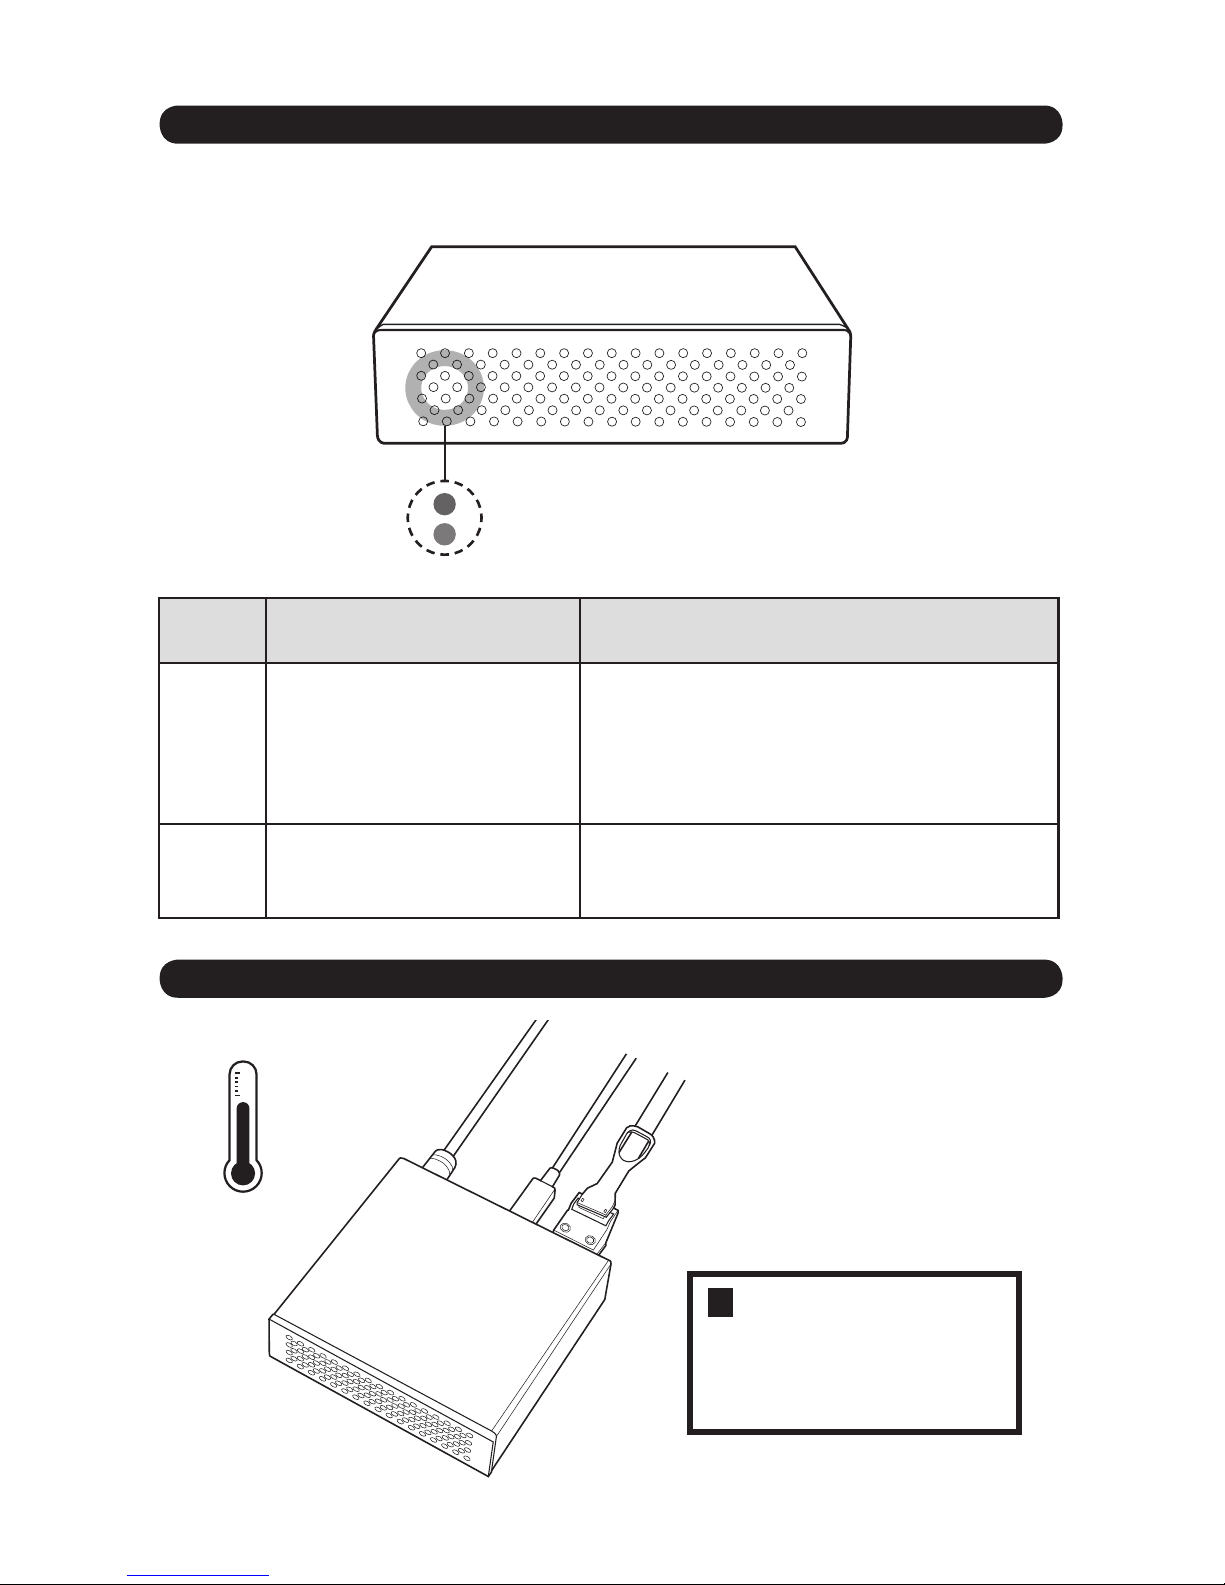
0º to 40ºC
(32º to 104º F)
No. Name Description
1
Mode/Access indicator
DAS mode in green/
Flash when data transfer is occurring
SAN mode in white/
Flash when data transfer is occurring
2
Link indicator Blue light on when PCIe link up
Green / White
Blue
4. C1M LED indicators
5. Note
1
2
When C1M is active, you can refer to the following description for the front LED.
indicators.
! When C1M is operating,
ple as e ta ke not e of it s
operating temperature and
its ventilation area.
P.6
Page 8

42-33000-5048
 Loading...