

Page 1

SYSGuard 6001
Quick Installation Guide
Page 2
Welcome to SYSGuard 6001 Main Unit Quick Installation Guide
INTRODUCTION
Box Contents
SYSGuard 6001 Main Unit
4 Assembly Screws
Mounting Kit
12 V DC Adapter
Step 1
Plug-in 12 V DC Adapter to SYSGuard 6001 Main Unit. Wait for the “READY” LED. When the LED
comes online SYSGuard 6001 Main Unit is ready to run.
Step 4
Before connecting the sensor to the system, it is necessary to have SYSGuard 6001 Main Unit gone
into Sensor Assignment Mode. Enter “Sensor Settings” section in WebPack interface. Click on “Add
New Sensor”, SYSGuard 6001 Main Unit will go Sensor Assignment Mode.
Step 2
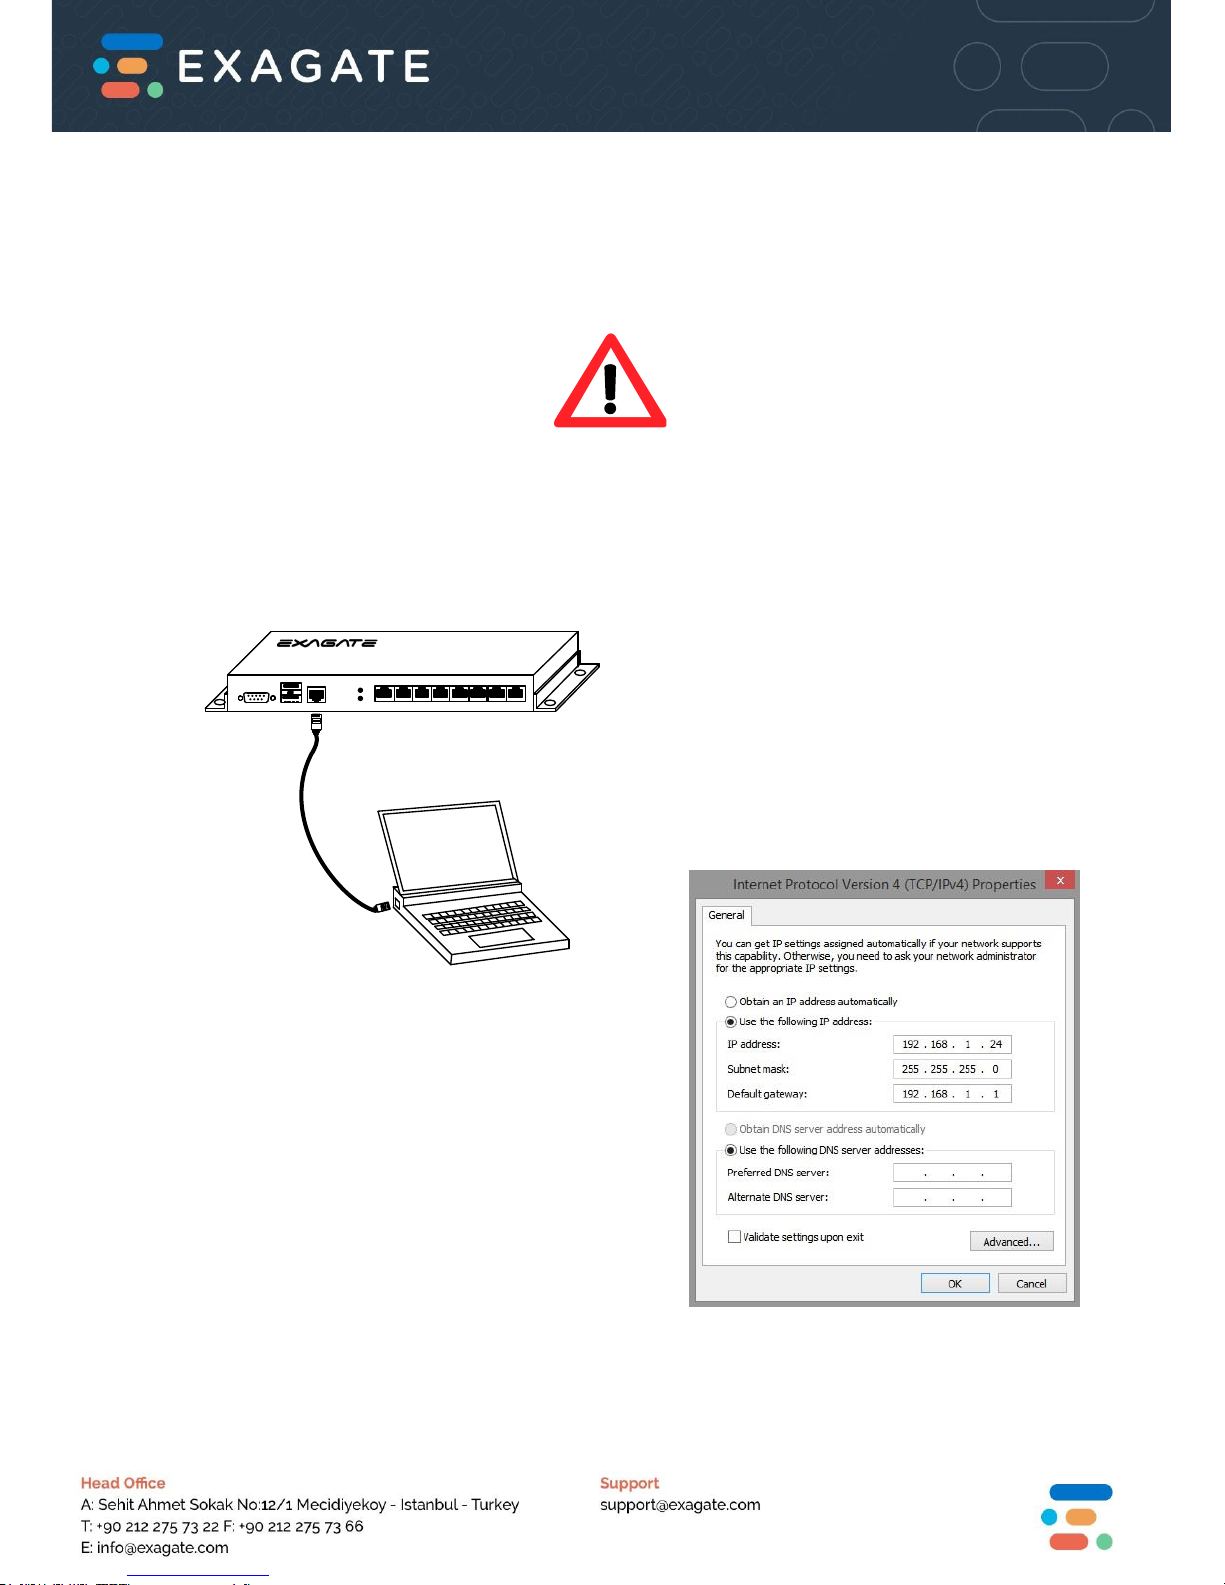
Main unit is equipped with default IP address
(192.168.1.131). For the first access to the
device a PC must be used to access the main
unit and devices should be connected to the
same network.
Your PC should have a static IP in order to
access SYSGuard 6001. You can carry out
these settings in TCP/IP Settings sections of
Local Area Network Connection options.
Step 3
Write 192.168.1.131 on the address bar of your
browser (for instance Internet Explorer) and press
Enter button.
Homepage of the SYSGuard6001 Main Unit is as
follows: Default user name is “admin” and password
is “123456”.
RS-232
LAN
USB
POWER
READY
Before Installation!
Make sure your device is properly
mounted and ready to operate
safely.
Page 3
Step 5
Plug the ExaBus Cable in the ExaBus Port of the sensor so that it communicates with SYSGuard 6001
Main Unit or SYSGuard 6070 Expansion Module. Confirm that Power LED of ExaBus Port constantly
lights. Press sensor assignment button for 2 seconds, Marking LED of the sensor will light. When
sensor is detected by SYSGuard 6001 Main Unit Marking LED does not light anymore. During this
process ExaBus Port Communication LED blinks 2 times rapidly. As a result of the abovementioned
process, SYSGuard 6020 Temperature Sensor is recognized by the system.
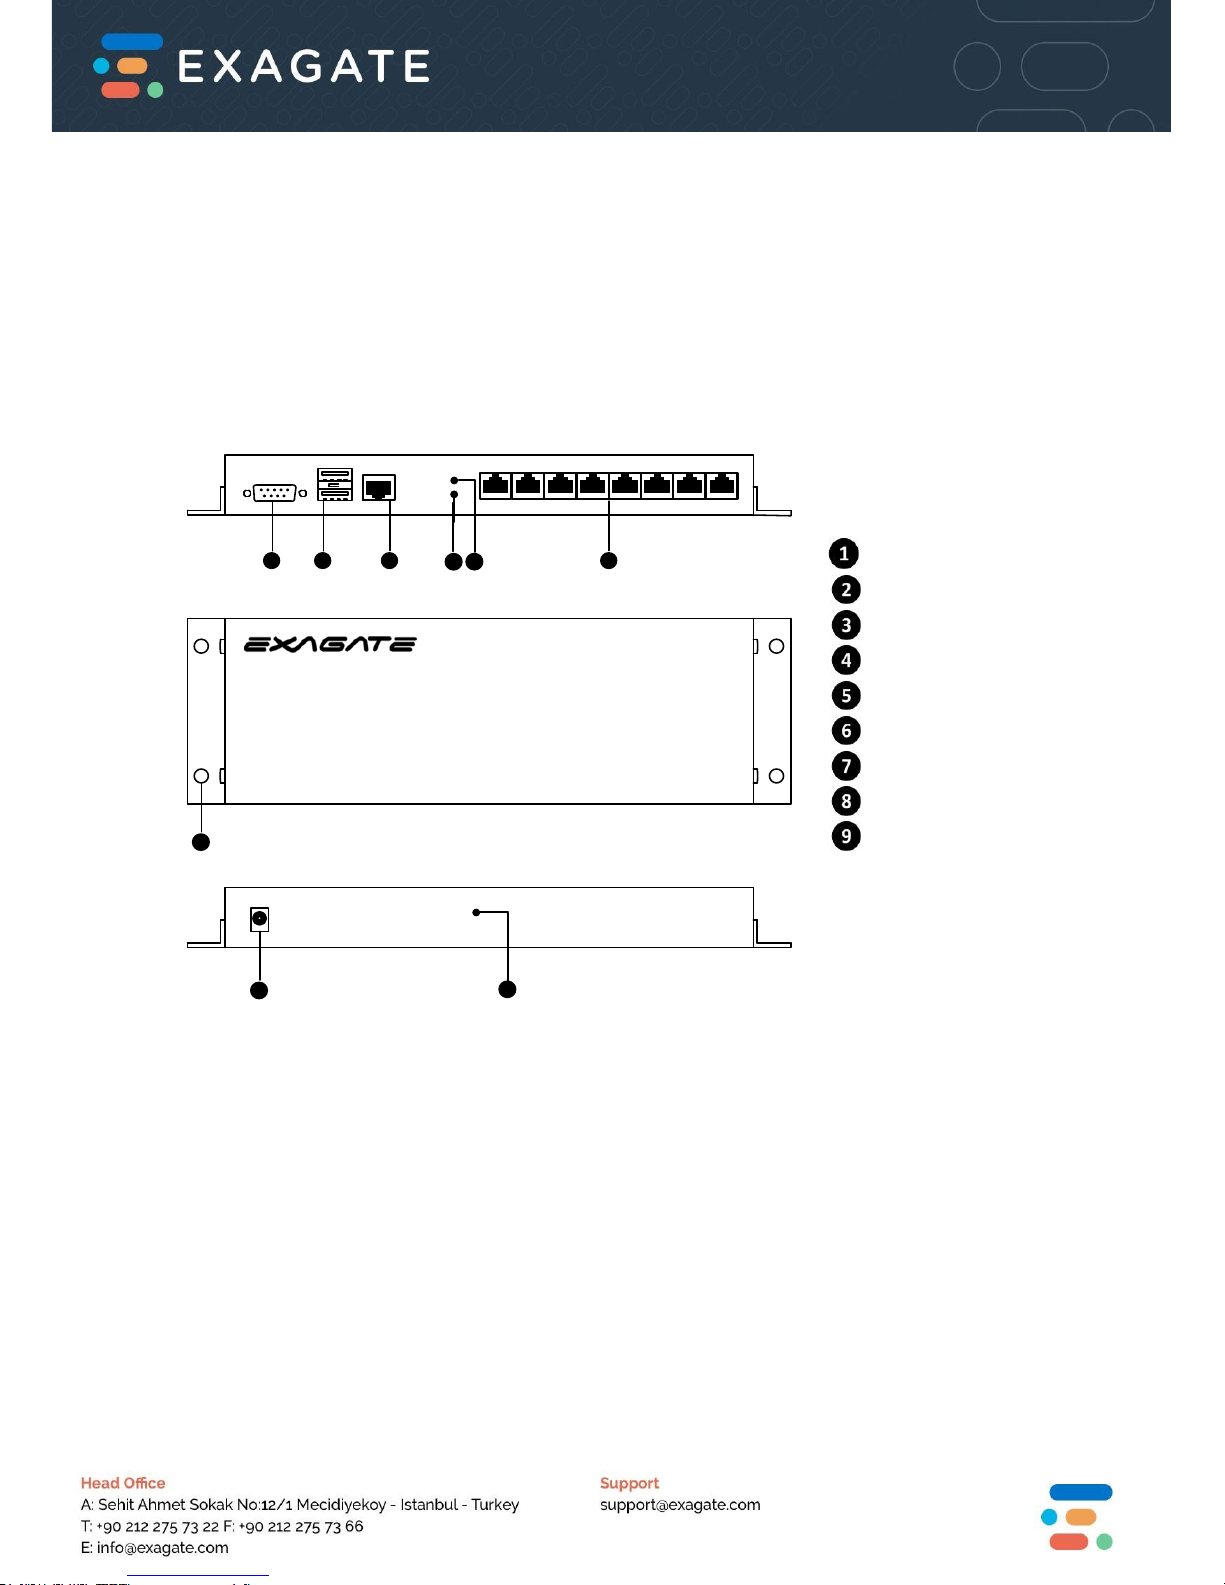
SYSGuard 6001 Layout
SYSGUARD 6001
Main Unit
RS-232
LAN
USB
POWER
READY
RESET
12V 2.5A
Front Panel View
Top Panel View
Rear Panel View
1
2
3 6
5
4
7
8
9
RS-232, GSM Modem Input
USB Ports, For Programming
LAN Port
Status LED
Power Status LED
Sensor / Module Inputs
Montage Hole
Power Input
Reset Button
Page 4
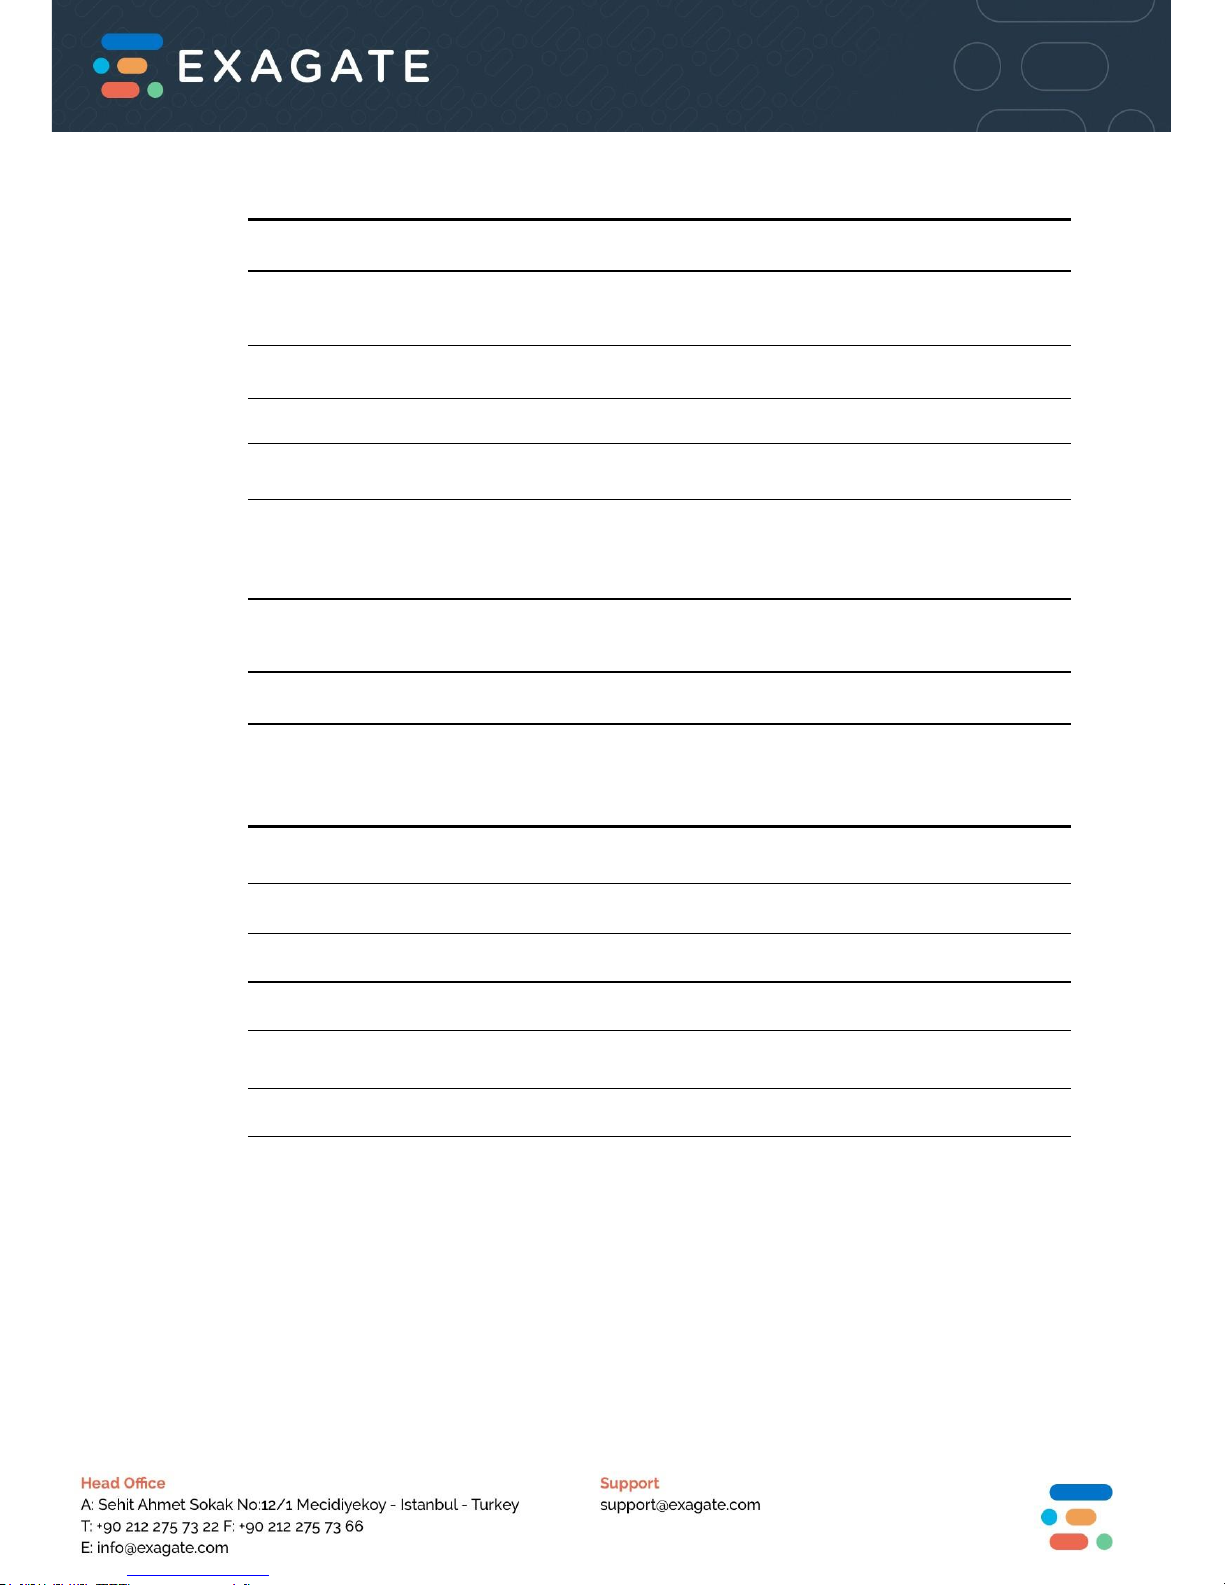
Operational Properties
Power Supply Voltage 10,5 - 14,4 VDC typical 12 VDC
Power Consumption 0,22 - 0,36 A typical 0,24 A
2,64 - 4,62 W typical 2,88 W
Operational Temperature Range -10 +70 oC
Operational Humidity Range 0 - 85 % Rh
Storage Temperature Range -40 +85 oC
Storage Humidity Range 0 - 85 % Rh
Physical Properties
Dimensions (H x W x D) 30 x 310.5 x 104,3 mm
1,18 x 12,22 x 4,10 inches
Color Black
Weight 500 (+/-5%) grams
Technical Properties
ExaBus Port 8 Units
External Device Input 8 Units
Power Supply over External Device Yes
Power Supply over ExaBus Port No
Supported External Devices All SYSGuard sensors and modules
RS232 Port 1 Units
USB Port 2 Units
Page 5
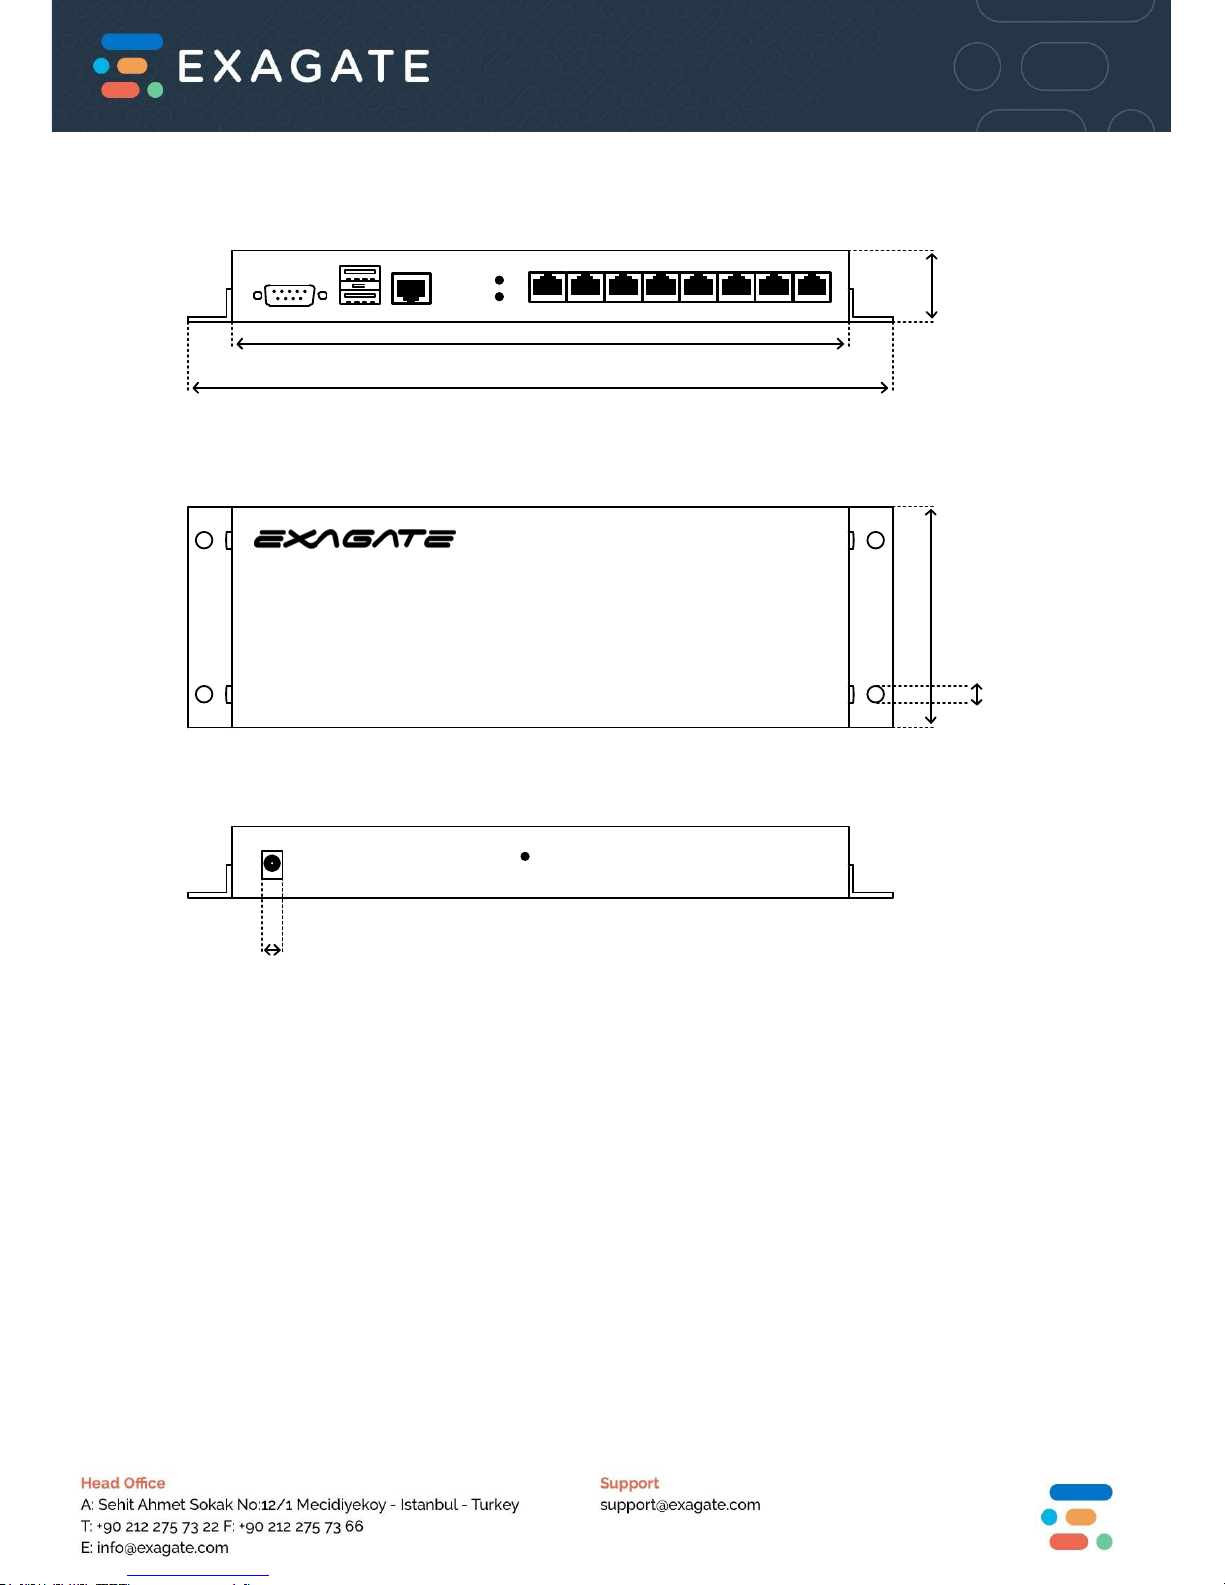
Dimensions
SYSGUARD 6001
Main Unit
RS-232
LAN
USB
POWER
READY
RESET
12V 2.5A
Top Panel View
Rear Panel View
12.22 in
310.5 mm
10.63 in
270.2 mm
1.18 in
30 mm
4.10 in
104.3 mm
0.37 in
9.6 mm
0.24 in
6.2 mm
Page 6

Installation Notes:
………………………………………………………………………………………………………………………………………………....
………………………………………………………………………………………………………………………………………………….
………………………………………………………………………………………………………………………………………………….
………………………………………………………………………………………………………………………………………………….
………………………………………………………………………………………………………………………………………………….
………………………………………………………………………………………………………………………………………………….
………………………………………………………………………………………………………………………………………………….
………………………………………………………………………………………………………………………………………………….
………………………………………………………………………………………………………………………………………………….
………………………………………………………………………………………………………………………………………………….
………………………………………………………………………………………………………………………………………………….
………………………………………………………………………………………………………………………………………………….
………………………………………………………………………………………………………………………………………………….
………………………………………………………………………………………………………………………………………………….
………………………………………………………………………………………………………………………………………………….
………………………………………………………………………………………………………………………………………………….
………………………………………………………………………………………………………………………………………………….
………………………………………………………………………………………………………………………………………………….
………………………………………………………………………………………………………………………………………………….
………………………………………………………………………………………………………………………………………………….
………………………………………………………………………………………………………………………………………………….
………………………………………………………………………………………………………………………………………………….
………………………………………………………………………………………………………………………………………………….
………………………………………………………………………………………………………………………………………………….
………………………………………………………………………………………………………………………………………………….
………………………………………………………………………………………………………………………………………………….
Page 7
All ExaGate products are covered with 2 years limited guarantee from the date of original
purchase. (Warranty duration may change depending on your country) Your sales or delivery
receipt, showing the date of purchase of product is your proof of purchase. ExaGate is obliged to
repair or replace the defective hardware (or any part of it’s) with no charge to owner.
Conditions Void of Warranty
Damages on unit, cable or screen.
Defections due to electrical wiring and/or city network.
Interference to unit by non-authorized staff.
Any problems caused by act of nature.
Misusage of unit stated by the user manual.
Removal or destruction of serial number, warranty labels.
Any kind of modifications.
Instructions in this QIG are in abstract essence.
For detailed information and instructions please visit www.exagate.com/support
or in Help Menu in SYSGuard 6001 Main Unit WebPack interface.
 Loading...