

Page 1

1
Exacme Basketball Ball Hoop Instruction
EXACME
Page 2

2
Copyright Notice:
This material is protected by copyright laws and is proprietary. Disclosure,
reproduction, translation, modification or use of this document by anyone other than
authorised employees, authorised users or licensees without the piror written consent
is prohibited.
The information in this document is subject to change without notice. We shall not be
liable for any damages resulting from technical errors or omissions, which may be
present in this document or from use of this document.
Before installing or using your basketball set, you must read or follow all safety
rules on this page.
Table of Contents
WARING --------------------------------------------------------------------------------------- 3
Assembly and Installation Instruction ------------------------------------------------------- 4
Tools ------------------------------------------------------------------------------------------- 4
Part lists --------------------------------------------------------------------------------------- 4
Installation ------------------------------------------------------------------------------------ 5
Step 1 ---------------------------------------------------------------------------------------- 6
Step 2 ---------------------------------------------------------------------------------------- 7
Step 3 --------------------------------------------------------------------------------------- 8
Step 4 --------------------------------------------------------------------------------------- 8
Step 5 --------------------------------------------------------------------------------------- 9
Step 6 --------------------------------------------------------------------------------------- 10
Page 3

3
WARNING
It is the responsibility of the owner to become familiar with the safety rules and to
convey these rules to all users.
Read and follow all of the warnings and use instructions for your trampoline and
safety enclosure.
Read and follow all rules specified on the warninglabels that come with your
trampoline, safety enclosure, and basketball set. If labels or signs become lost or
unreadable, please contact us immediately for replacements.
1, The basketball set should be used only as described in this manual. The basketball
set must only be mounted to a compatible safety enclosure system. It should never be
mounted on any other device, structure, or in any manner not described in this
manual.
2, Do not attach anything to the basletball set or safety enclosure that is not a
manufacturer-approved accessory or part of the enclosure system.
3, Do not hang from, kick or climb on any part of the basketball set or safety
enclosure.
4, Remove all jewellery, watches and hair clips before using the basketball set.
5, Wear clothing free of drawstrings, hooks, loops, or anything that could get caught
in the basketball set or safety enclosure.
6, Do not use the trampoline or basketball set while underthe influence of alcohol or
drugs.
7, Do not install the basketball set on a pole that is near or over a missing or damaged
frame pad.
8, When not in use, store the basketball provided with your set in a dry location.
9, Use the trampoline and basketball set only with mature, knowledgeable
supervision.
10, Do not hang on the hoop. While the basketball setis designed to withstand
rigorous use, the hoop is not designed to be hang on. Hanging on the hoop can
damage the enclosure pole and trampoline to which the basketball set is installed.
Damage resulting from hanging on the hoop is not covered by warranty.
Page 4
4
Assembly and Installation Instruction
Tools:
Installation of the basketball set requires a 10mm spanner, a13mm spanner, sissors
and a second person to assist. An 8 foot A-Frame ladder will be useful for some
steps(use care and follow procedures for use). Safety glasses and gloves are also
recommended for safety.
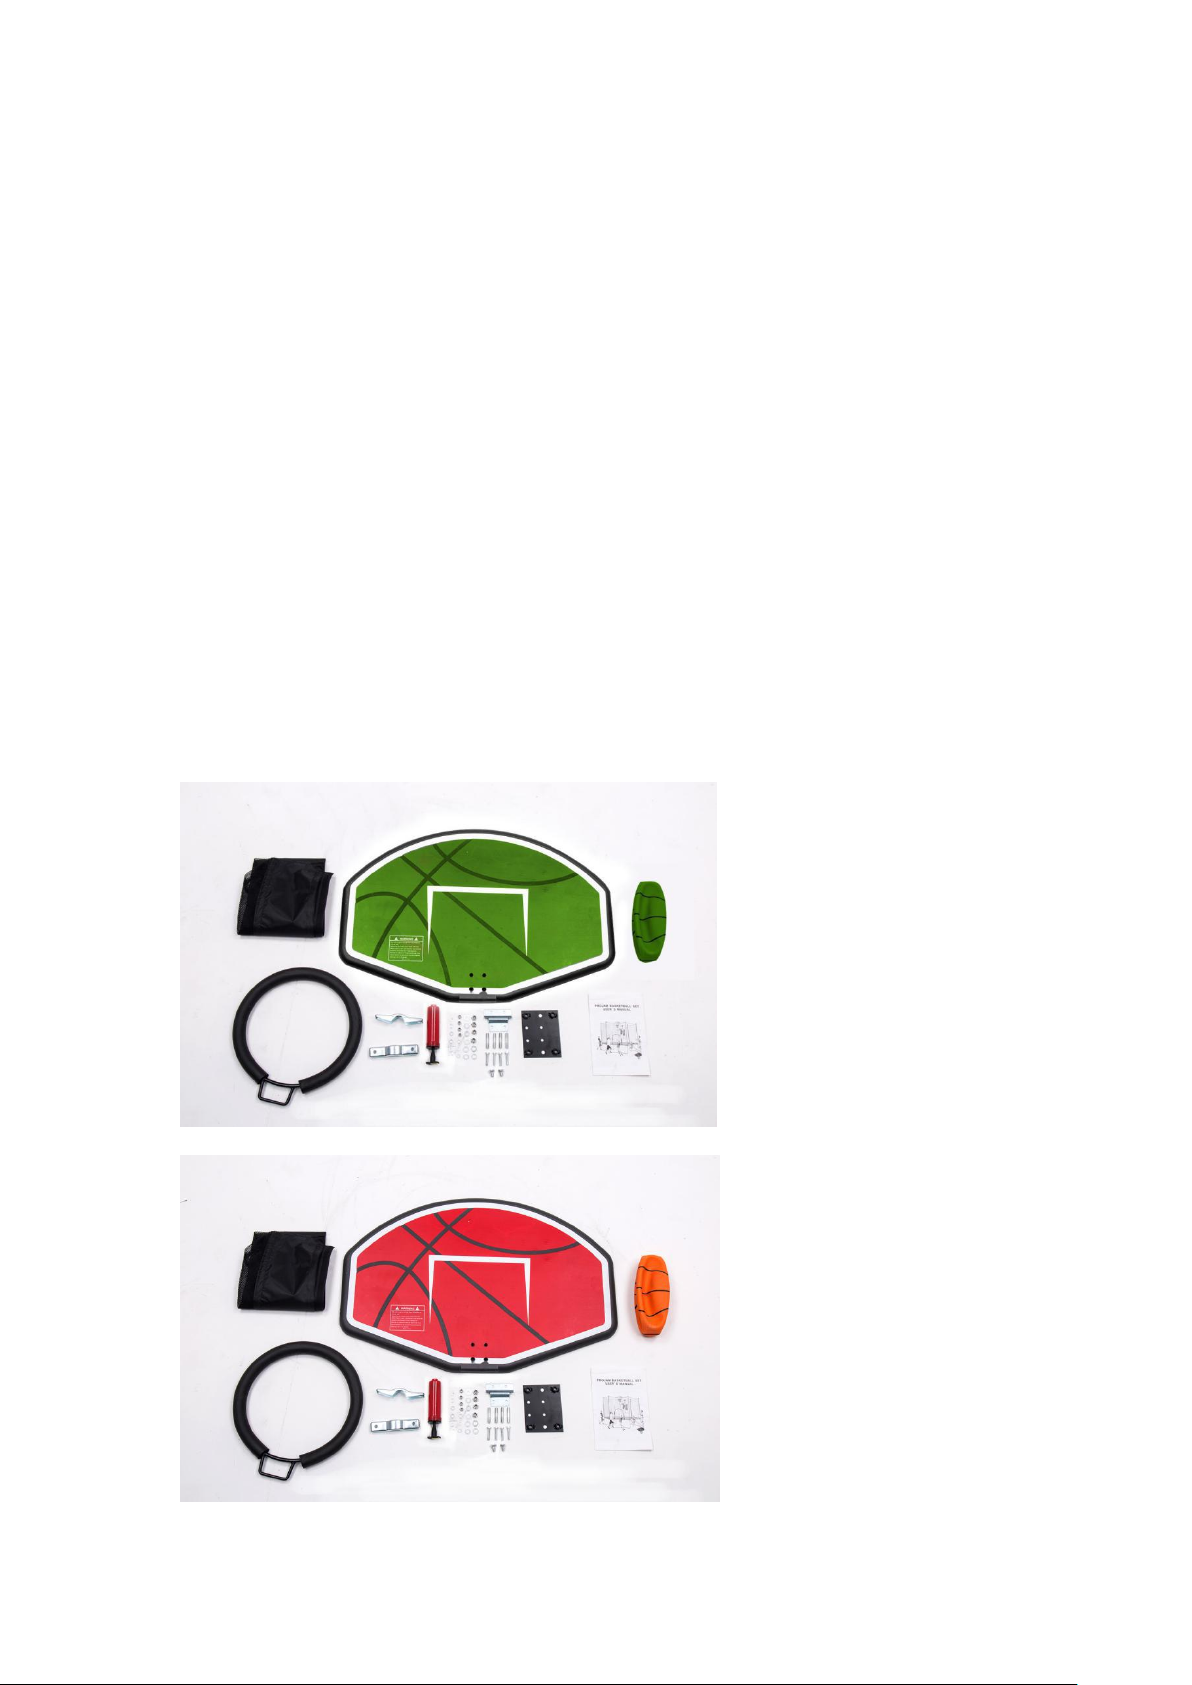
Part lists:
Your basketball set is shipped with the parts shown below. If any parts are missing,
immediately e-mail us. Some parts may have already been pre-assembled.
Note: Due to updates and improvements being made to this item, specificationa are
subject to change from what is stated in this manual i.e. Bolt sizing, tools required
etc.
Fig(1)
Page 5

5
Installation
Notes: Check part lists(Some components may have been pre-assembled)
Step 1. Attach the backing plate the backboard using the supplied bolts.
Fig(2)
Fig(3)
Page 6

6
Step 2:
Attach hoop bolts and bracket as shown using the supplied screws and bolts. Note:
Ensure the bracket is fitted the correct way up(Largest section down) to allow the
hoop to swing upwards against the backboard as Fig(5)
Next tighten the screws as shown in Fig(6)&(7)
Fig(4)
Fig(5)
Page 7

7
Fig(6)
Fig(7)
Page 8
8
Step 3: Position the assembled backboardon the inside of the safety net at the pole
furthest away from the entrance, e.g the opposite side to the entance. With assistance
of a second person, hold the bottom of the backboard at the top the safety net pole as
shown in Fig(8). The fixing bracket should be around 5cm from the top of the safety
net. Locate the four screw holes and using a pair of scissors, carefully snip one strand
at each screw location to allow easy fitment. Refer Fig(8)
Fig(8)
Step 4: Fix the screws in the order shown in Fig(9). The padding will compress as
you tighten the screws. Adequately fasten until the backboard is firmly positioned.
Fig(9)
Page 9

9
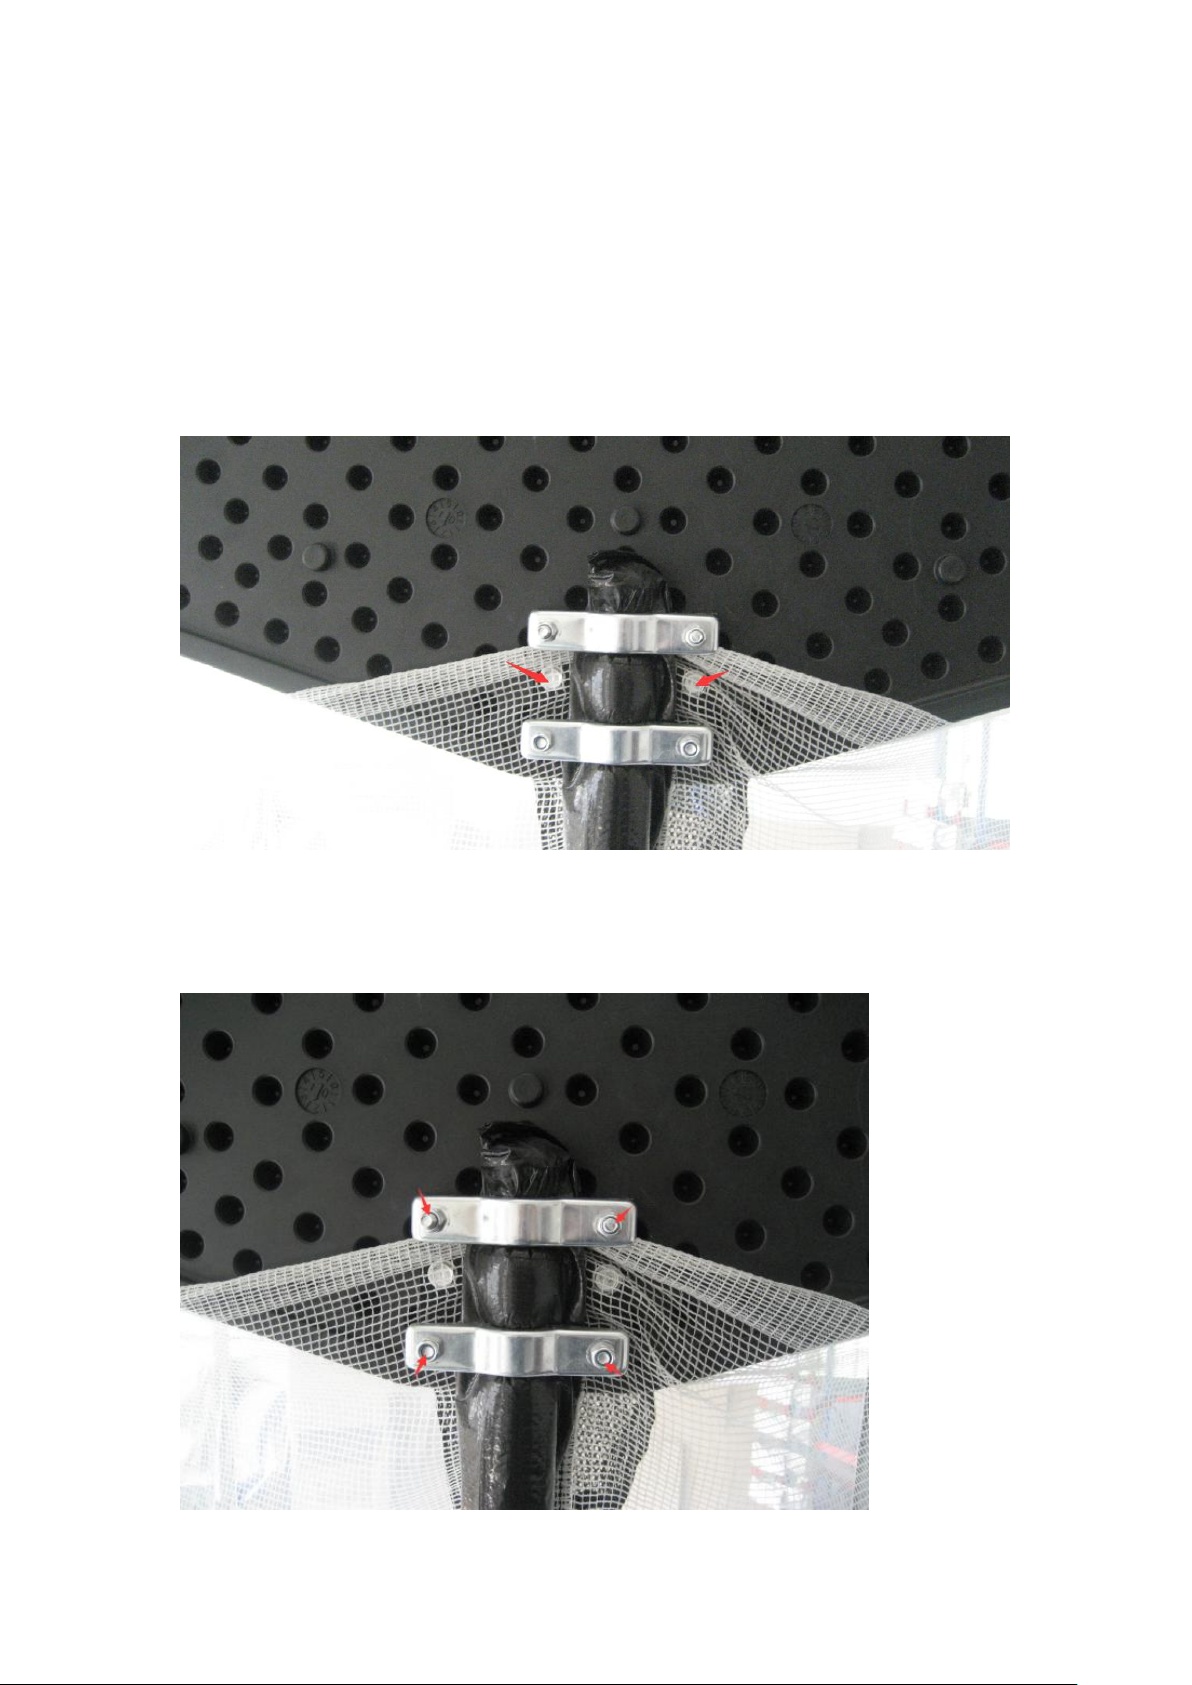
Step 5:
Double check all screws and fittings have been tightened. Refer to the following:
Page 10

10
Notice: Great addition for multiple size trampolines straight enclosure
pole, not fit for curved pole or arch style.
 Loading...