

Ewig Macao Commercial Offshore TTX302 User Manual
Thermo sensor
B C
Model: TTX302
Instruction Manual
Congratulations on your of purchasing our new long range outdoor
thermo senor which can cover up to 75m range in an open area. This
sensor is designed for everyday use for the home or office and used to
monitor the temperature change of outdoor sites.
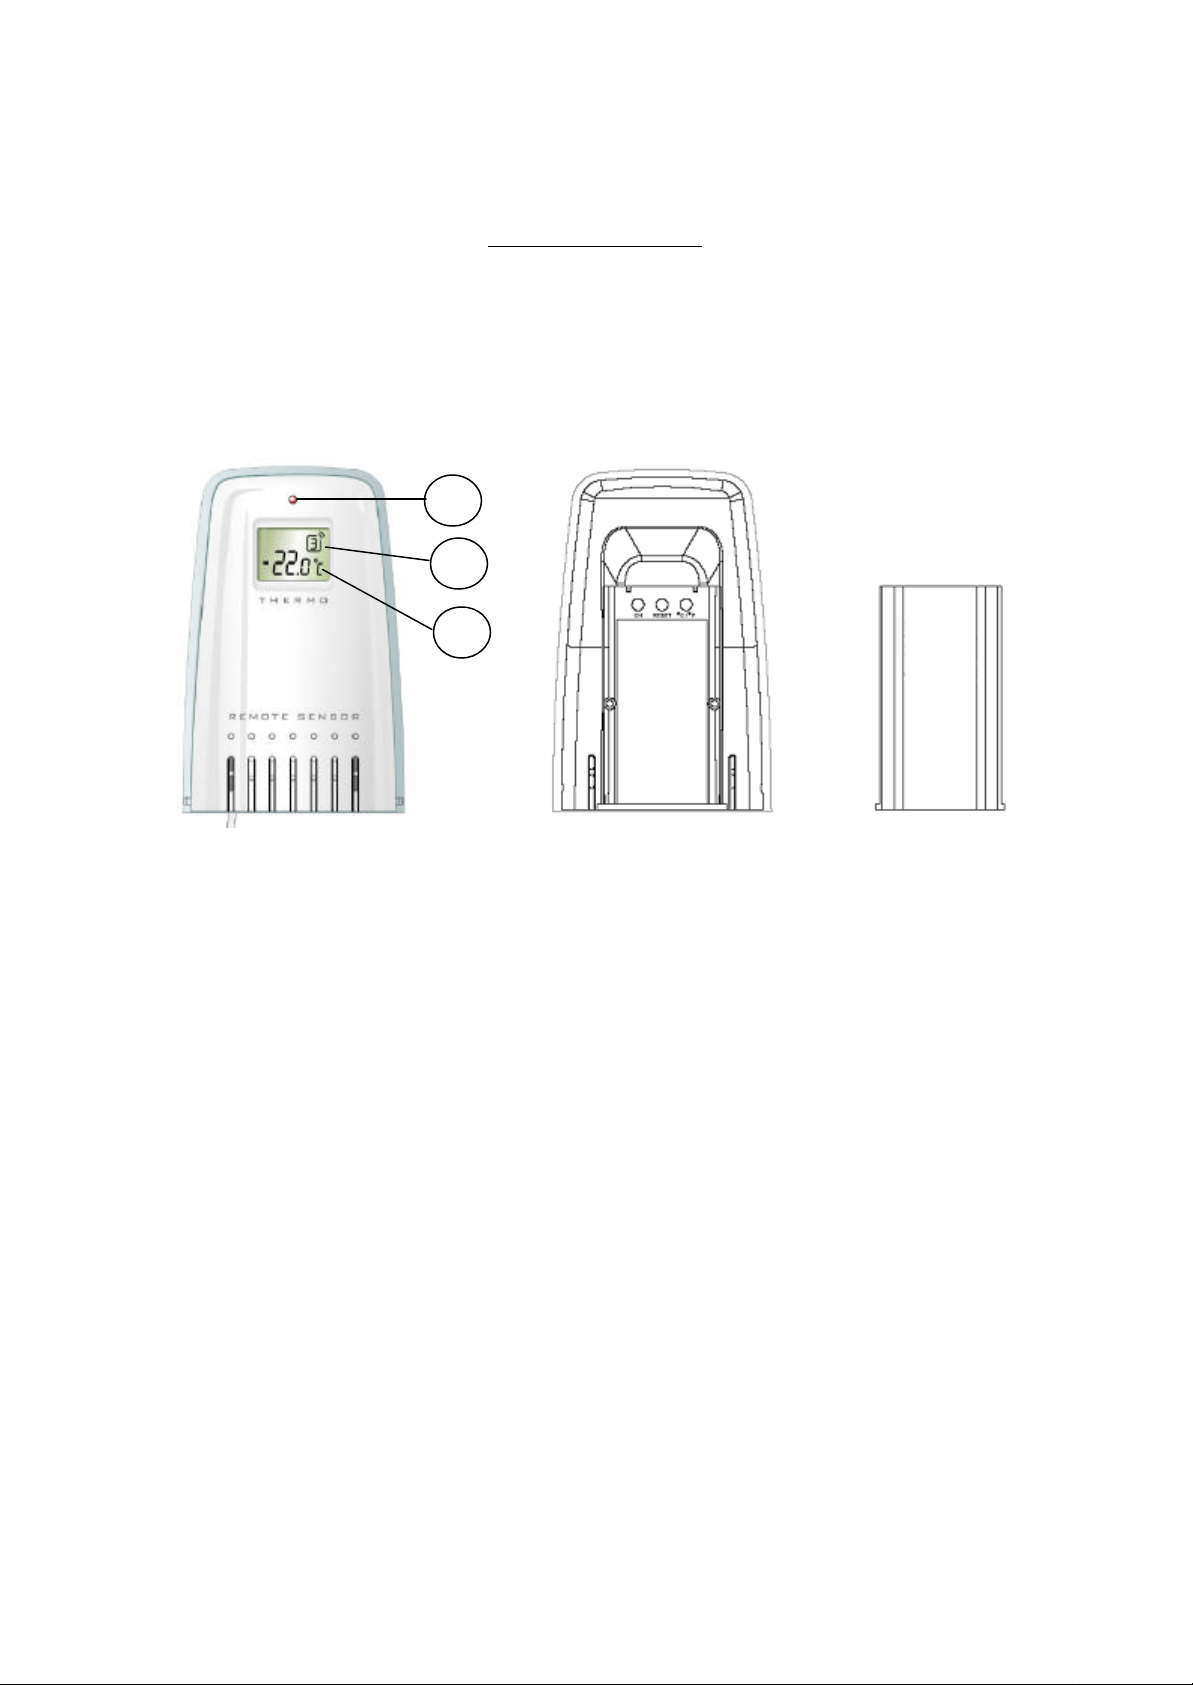
A
Features
A. LED indicator
Flashes when remote unit transmits a reading.
B. Channel number
Indicates the remote sensor is set to which channel and the user can find the
corresponding reading in the same channel in the linked receiving unit.
C. Temperature display
Displays the measured temperature.
Description of buttons
The remote sensor has 3 function buttons inside the battery compartment
1. [CH] button
After the battery installation, the LED blinks slowly every 1.5 seconds and channel
number shows ‘1’ to indicate it is now under channel setting mode and is set to
channel 1 by default. If the user presses no key within ten seconds, the unit will
auto-exit the channel setting.
If the user press [CH] button once during the channel setting, the channel number

is changed to ‘2’ to indicate the unit is set to channel 2. If the user press [CH]
button again, the channel number will be advanced to channel ‘3’ and so on.
The maximum channel number is ‘5’ and the unit will be scrolled back to channel
‘1’ at the 5th press of the [CH] button.
2. [C/F] button
Press to toggle unit °C or °F
3. [ RESET ] Button
Press to hardware reset the unit to factory setting
Setting procedure to link up with a receiving unit
This device is designed for easy set up with no wire installation. The following steps are
required to be done in proper sequence to link up with a receiving unit. Please insert
batteries for the receiving unit before doing so for the remote unit.
1. Remove the bracket stand.
2. Unlock two latches in the bottom to release the semi-transparent jacket.
3. Slide down the battery door in the back.
4. Insert 2 pieces AAA size batteries according to polarity marking on the
battery compartment.
5. The LED blinks slowly to indicate it is under the channel setting mode and the
user can set it to other channel by press [CH] key.
6. The temperature of the sensor will appear on the selected channel of the
receiving unit if it is linked up with the receiving unit successfully.
7. Close the battery door and use two latches in the bottom to lock it with the
semi-transparent jacket. Follow the same procedure (1 to 7) to register other
remote sensors.
Note: For the user purchasing more than one remote sensor, he must set the sensors to
different channel in the start up to avoid conflicts.
Precautions
a. Do not clean the unit with abrasive or corrosive compound. It may scratch the
plastic parts and corrode the electronic circuits.
b. Do not subject the unit to excessive force shock, dust, temperature or humidity,
which may result in malfunctioning, shorter electronic life span, damaged battery
and distorted parts.
 Loading...