

E-Wheels EW-M34 Owner's Manual
0
EW-M34
Owner’s Manual
www.ewheelsdealers.com
(888) 305-0881 Sales
(888) 571-2845 - Service

1
-Read and follow all instructions, warning, and notes in this manual before
attempting to operate your mobility scooter for the first time.
-If there is any additional information in this manual which you do not
understand or require additional assistance for setup or operation, please
contact your authorized provider.
-Your safety to operation of this product depends on whether you completely
follow the instructions, cautions and warnings in this manual.
-These symbols below in this manual are used to identify warnings, notices,
and operation instructions. All of them are very important to your safety. It is
strongly recommended to read and understand them completely and carefully.
Warning! – Failure to heed the warnings in this manual may
result in personal injury.
Caution! – Failure to heed the cautions in this manual may
result in damage to the power scooter.

2
-The mobility scooters combined the modern technology with contemporary
styles, and are divided into two models as to their structure: integral and
separated. Especially the ladder has a structure for quick assembly and
disassembly that is convenient to be stores or placed at the trunk of your
vehicle while traveling. We are certain that the design features, excellent
performance and trouble-free operation of this product will ensure your daily
life more convenient.
-For your safety, please ensure that you read carefully and follow strictly all
instructions warning, and notes in this manual before attempting to operate
your mobility scooter for the first time. These items are recommended for your
benefit. Your understand is important for your safety to operate this scooter.
-Once you master how to operate and maintain your mobility scooter, it is
sure that this product will give years of trouble-free service and enjoyment.
-We appreciate your questions, comments, and suggestions about this
mobility scooter, especially its performance of safety and reliability, and the
service from your authorized provider.
3
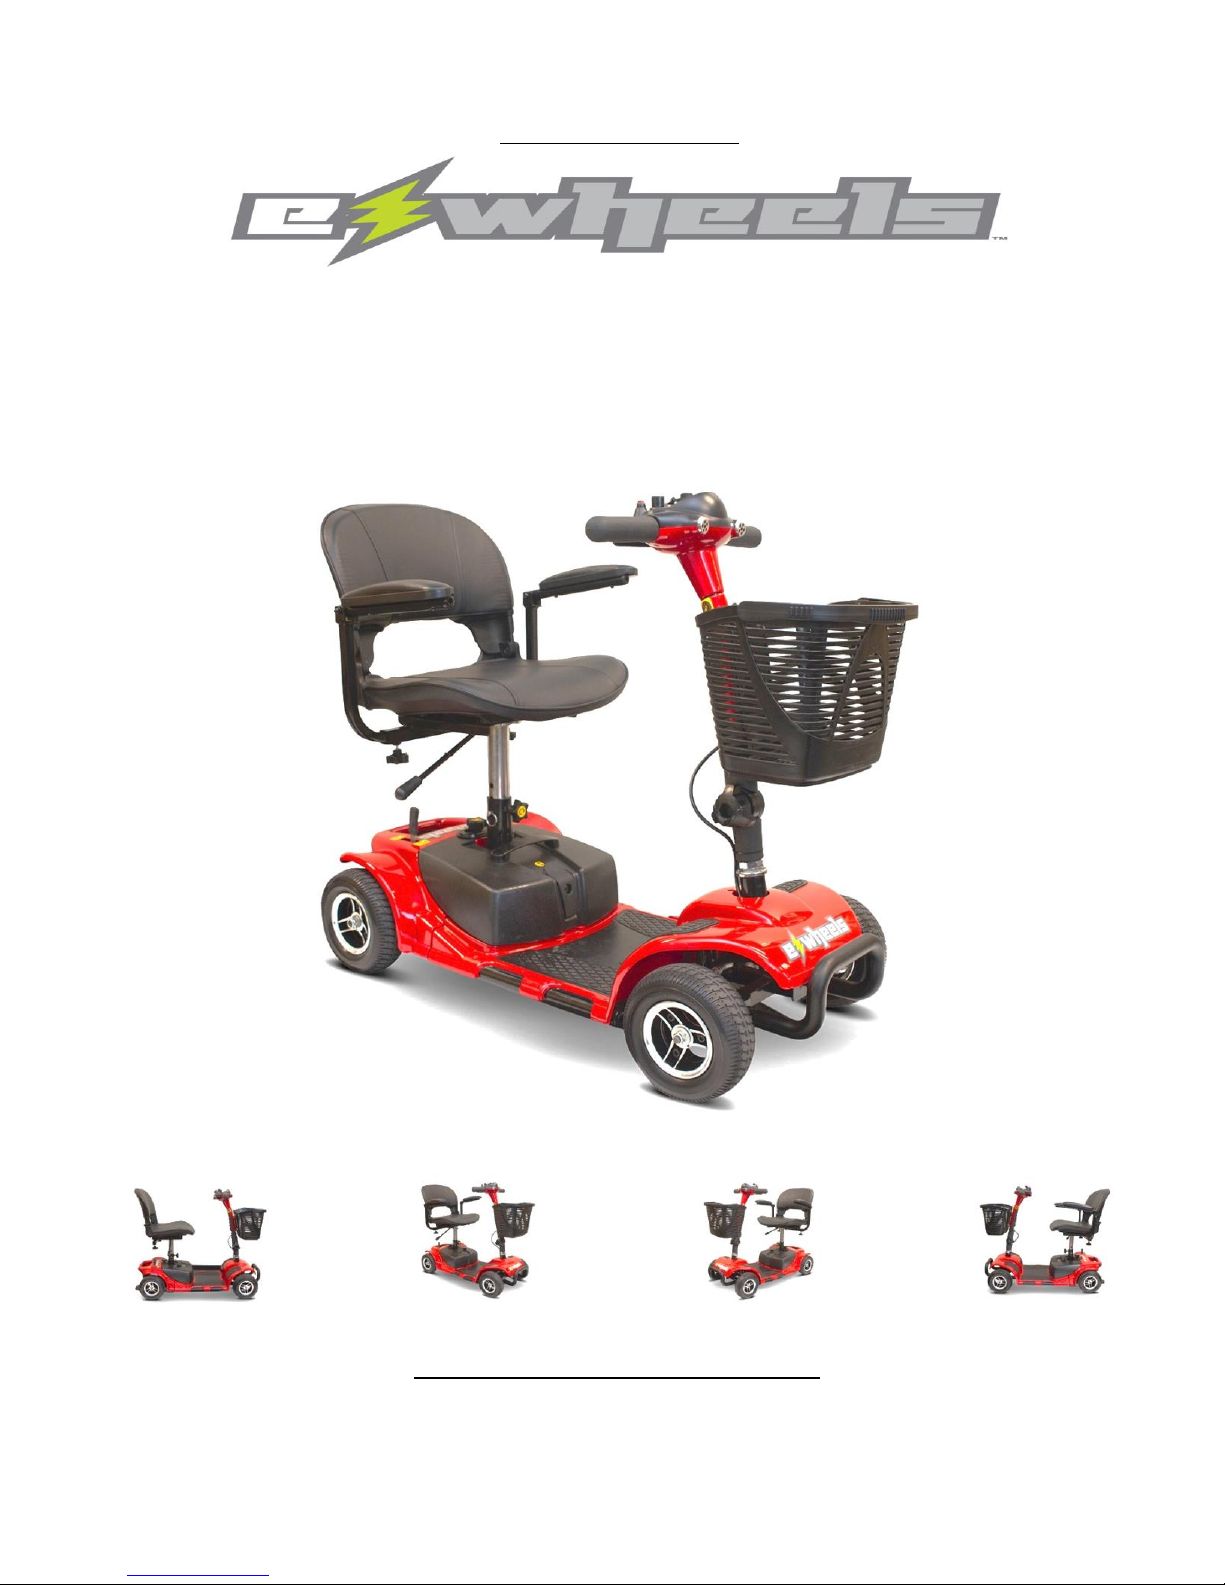
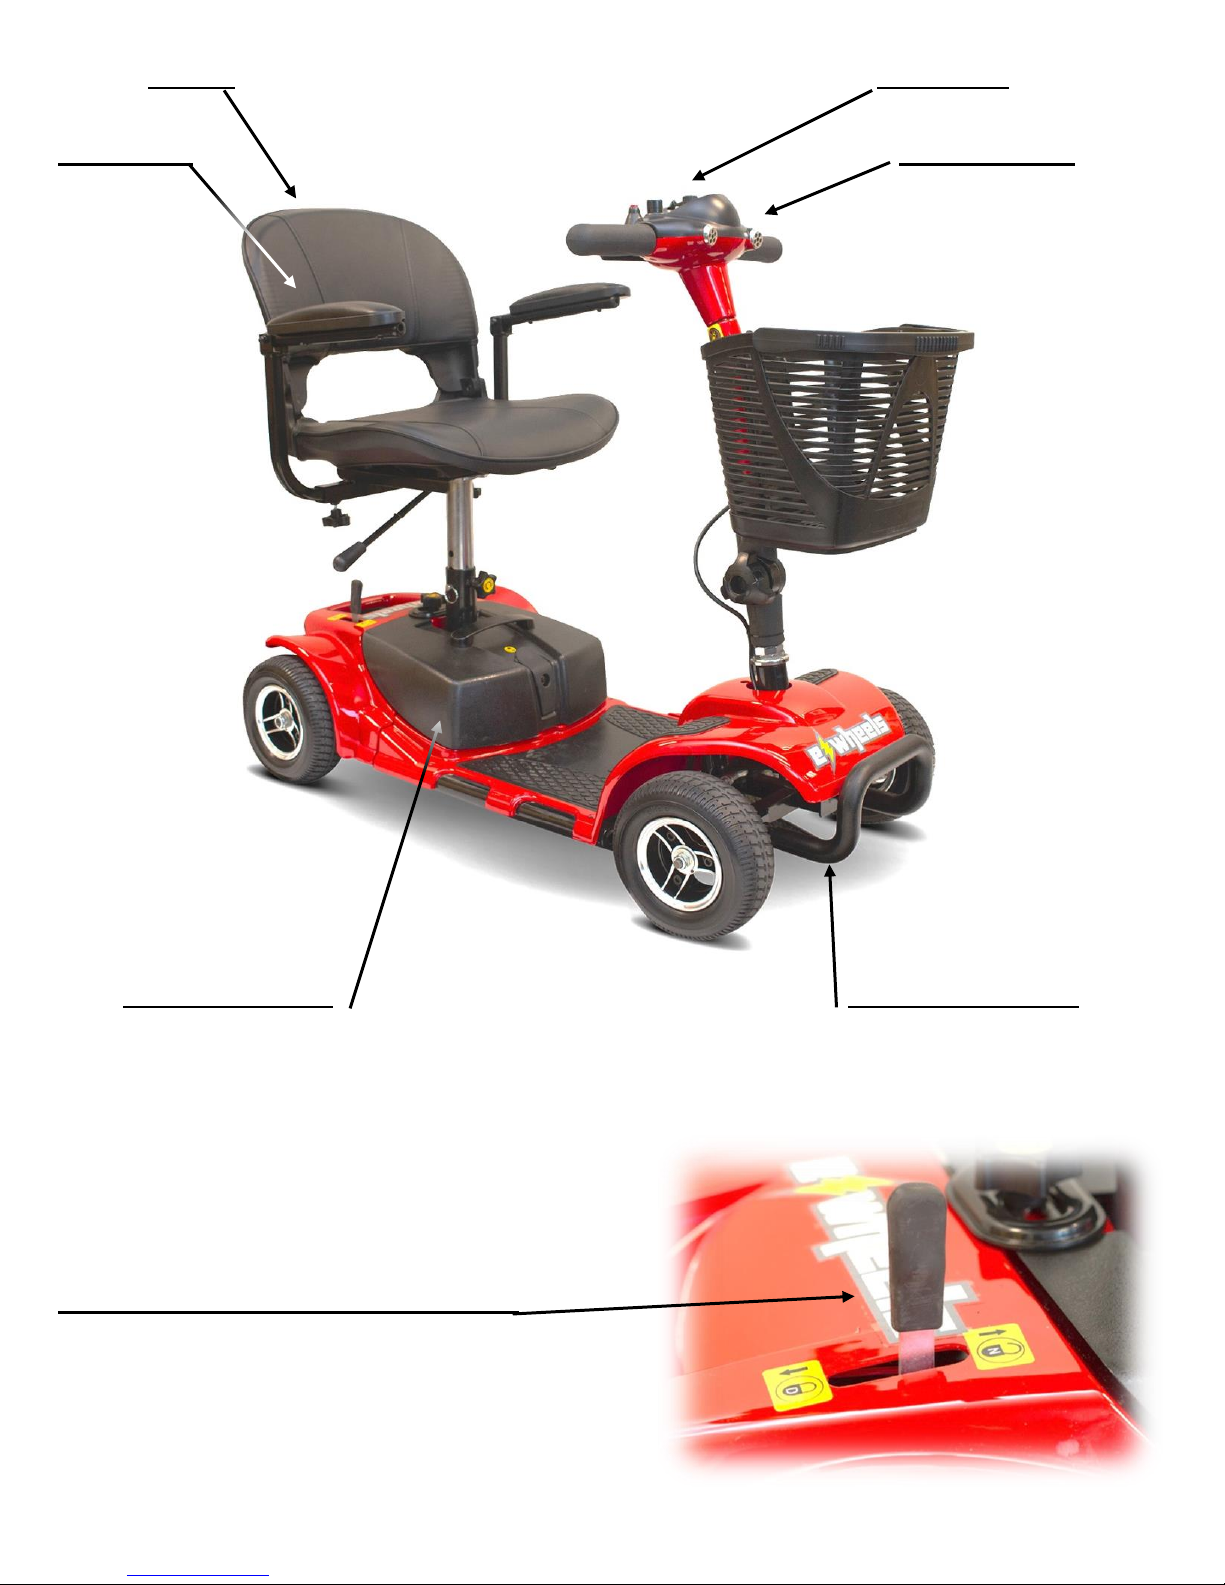
Chair Console
Armrest Headlights
Battery Pack Front Bumper
Free-Wheel and Drive Lever

4
Table of Contents
Page 5 – Technical Specifications
Page 6 to 8 – Scooter Assembly
Page 8 – Main Scooter Components
Page 9 – Scooter Disassembly
Page 10 to 11 – Adjustments
Page 12 to 13 – Charging and Battery Information
Page 14 to 19 – Scooter Operation
Page 20 – General Guidelines
Page 21-26 – Safety Information
Page 27 to 29 – Warranty
Page 30 to 37 – Safety Manual

5
Technical Specifications
Model
EW-M34
Weight Capacity
300LBS
Speed:
Up to 4.5 MPH
Distance:
10 miles per charge (distance varies on terrain, riders
weight, road surface, etc.)
Electro-Mechanical Brakes:
Yes
Seat Size:
17” x 16”
Adjustable Armrests:
Yes
Headlights:
Yes (LED)
Electric Battery Gauge:
Yes
Drive Type:
Rear Wheel Drive
Under Deck Clearance:
2”
Power:
24V 12AH
Watts:
180 Watt
Motor Type:
Rear Transaxle
Amps:
12 AH Batteries
Volts:
24 Volts
Dimensions:
39” x 20” x 31-33” (LxWxH)
Floor Clearance:
2”
Front Basket:
Yes
Batteries:
X2 12 AH SLA Batteries
Throttle Type:
Delta Paddle Throttle
Can Charge Off Scooter:
Yes
Front Tire Type:
Solid Flat Free Tires
Rear Tire Type:
Solid Flat Free Tires
Charger:
Off-Board (Included)
Total Weight:
92 LBS
Heaviest Piece:
28 LBS
Total Number Of Pieces:
5
Cargo Box Storge:
10” x 20” x 10” (DxWxH)
Headlight:
LED Headlights
Rear lights:
Reverse Indicator Lights
Electric Horn:
Yes
Frame Warranty:
Lifetime
Drive Train Warranty:
2 Years
Electronics Warranty:
2 Years
Battery Warranty:
1 Year
Charger Warranty:
6 Months
FDA Certified:
Yes
6
Assembly:
Installing the Seat Post
1.) Place the seat post into the frame of the
back half.
2.) Place the seat post securing pin through a
hole in the silver seat post and through
the black seat post holding frame.
3.) Tighten the post securing and stabilizing
knob on to finish securing.
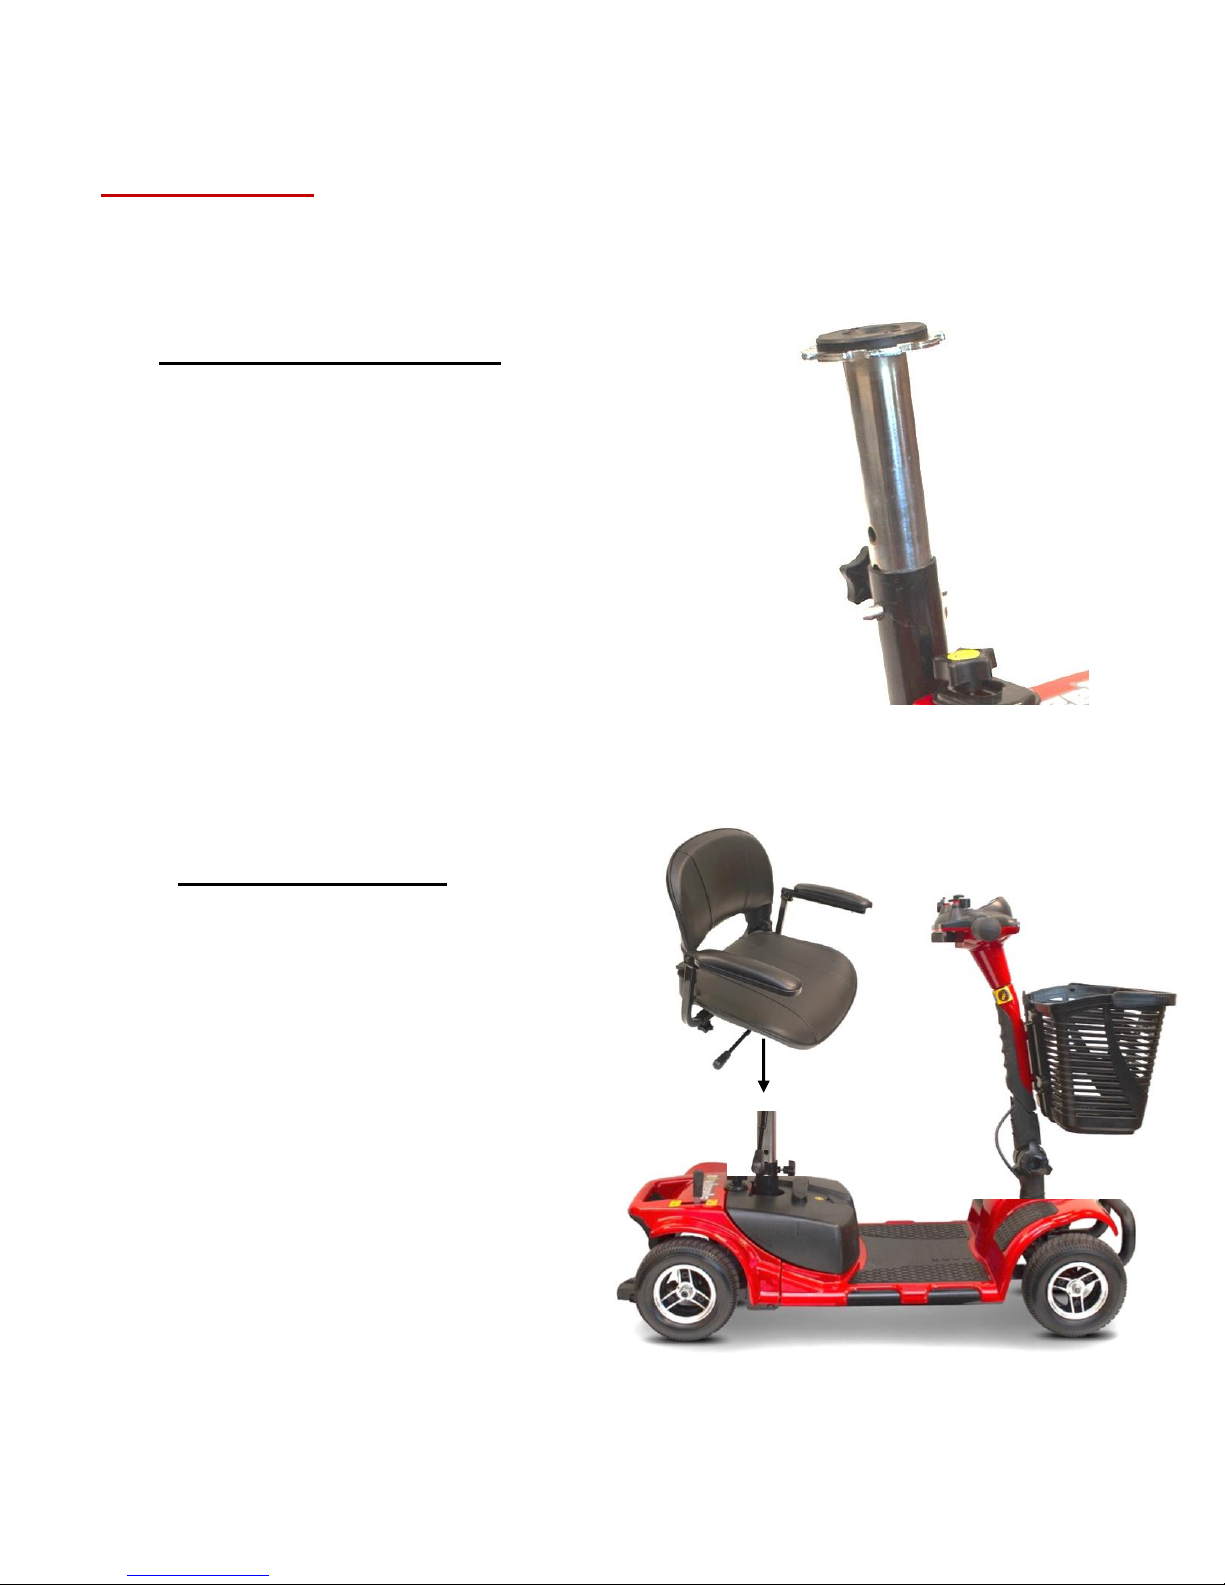
Installing the Seat
1.) Install the seat post to
the frame of the scooter.
2.) Slide the seat onto the
seat post assembly.
3.) Install and tighten
the armrests on both
sides of the seat.
7
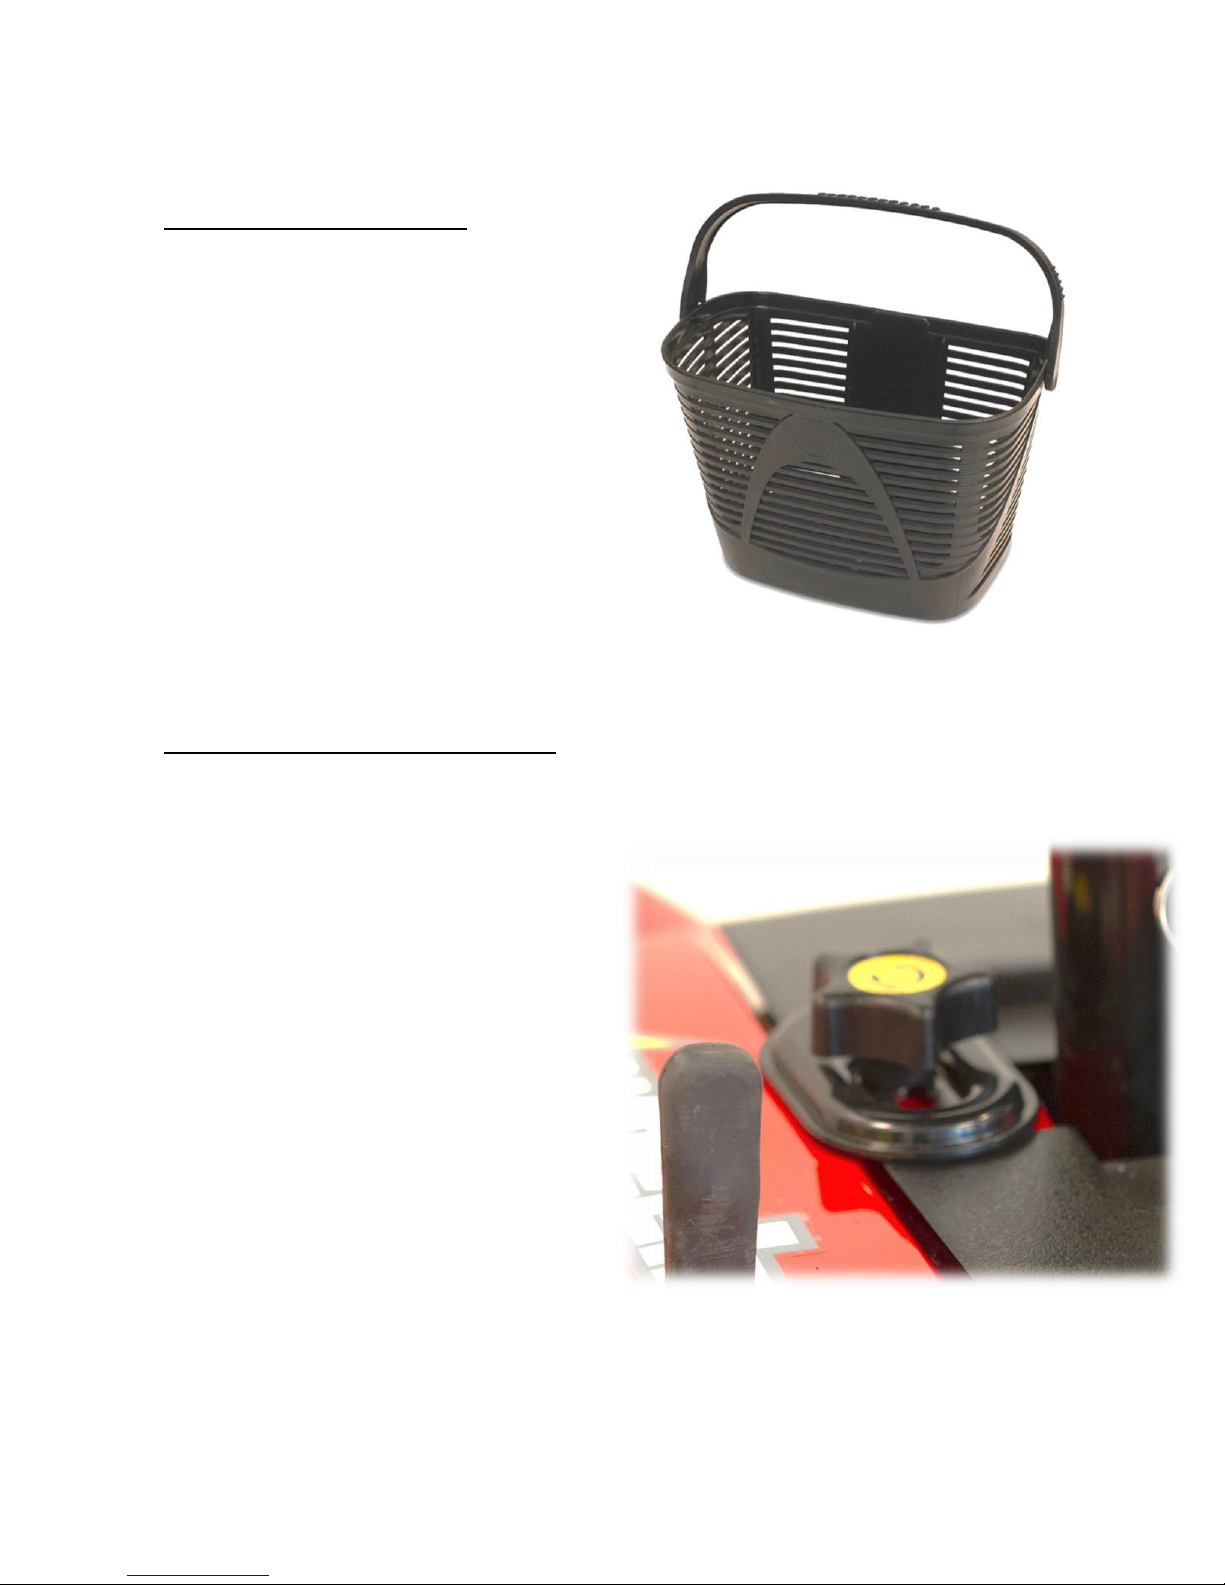
Installing the Basket
1.) Unwrap basket from plastic
2.) Slide Basket onto handlebar
bracket.
3.) Ensure the basket tab is
locking the basket in place.
Installing the Battery Pack
1.) Check that the battery
securing knob is loose, and the
battery securing plate is facing
vertically with the body of the
scooter.
2.) Place the battery pack on the
scooter.
3.) Turn the battery securing
plate horizontal over the top
lip of the battery pack.
4.) Tighten down the battery
securing knob.
8
Front Half to Back Half Connection
1.) The scooter will come with the front and back half already connected.
See steps for disassembly under disassembly section of manual.
Main Scooter Components
Battery Pack
Back Half
Seat
Front Half
Basket

9
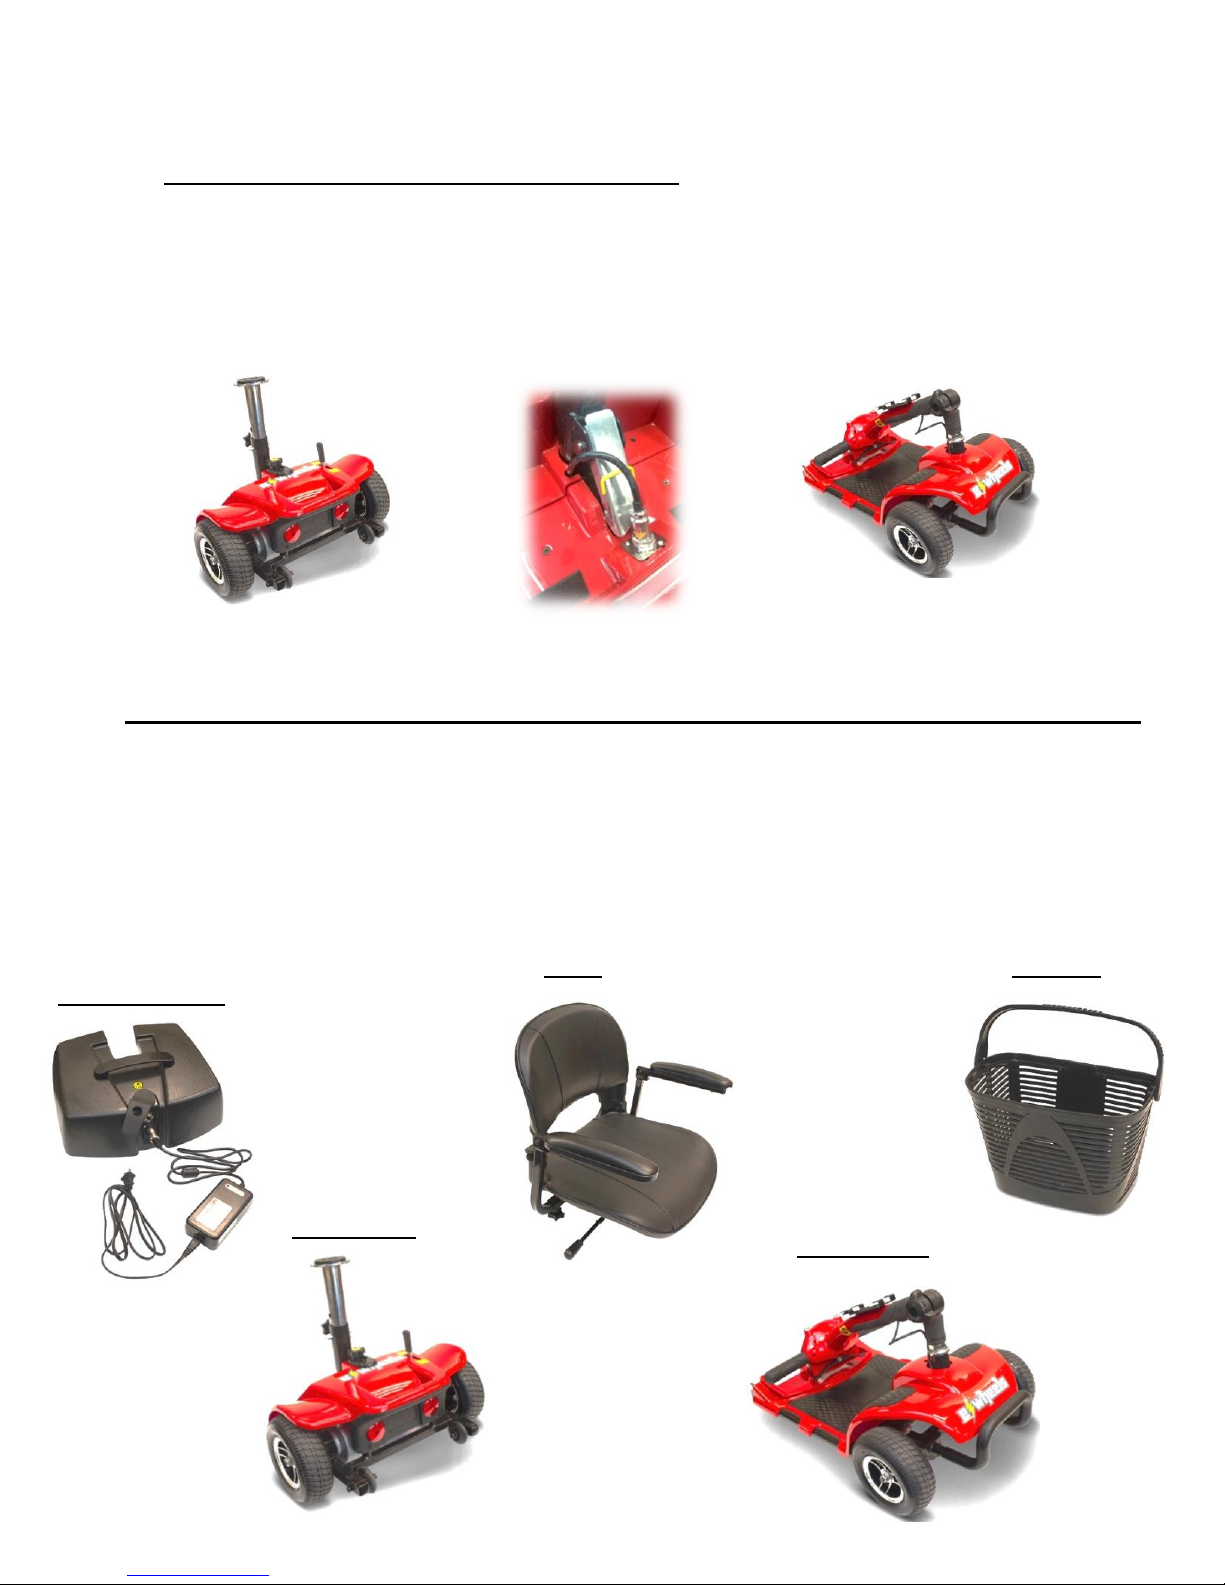
Disassembly:
Remove the basket, seat, and seat post the same way there were installed
on the scooter. See below for steps of disconnecting the front half of the
scooter from the back half of the scooter.
Steps for Frame Separation
1.) Spin the securing washer for the power
supply cable counter clockwise to loosen
until it is loose from the threads.
2.) Pull the power supply cable out of the socket
where it plugs into and set aside in a way
that it will not get pinched when the frame
pieces are separated.
3.) Pull the yellow grip of the release handle
to separate the two frame components
from each other. When reinstalling, make
sure the black side frame guides line up.

10
Adjustments:
Warning!
Pull out power key before making any adjustments;
never do it while driving or with the scooter power
turned on.
Seat Height
• Pull up the seating fixing bar to release the seat.
• Remove the seat from the seat post.
• Loosen the seat post securing and stabilizing knob.
• With one hand hold the silver seat post, and the with other hand remove
the seat post securing pin.
• Adjust to desired position.
Seat Rotations
• Pull up the seat lock lever to release the seat.
• Rotate the seat to the desired position.
• Release the seat lock lever and the seat will automatically lock in place.
Armrest Width

11
• Find the armrest securing knobs on the frame of the seat where the
armrest brackets attach to the scooter.
• Loosen the securing knob on the desired side.
• Adjust the armrest to the desired position.
• Retighten the armrest securing knobs.
Tiller Angle Adjustment
• Loosen the front tiller securing knob.
• Adjust the tiller to the desired position.
• Retighten the tiller securing knob.
 Loading...