

ewheels EW-1100 Owner's Manual

EW-1100
Owners Manual
Electricwheelstore.com

Table of Content
Ⅰ、General Assembly Instructions
Ⅱ、Inspect before riding
Ⅲ、Charging
Ⅳ、Maintenance
Ⅴ、Simple Troubleshooting
Ⅵ、Guarantee
Ⅰ、General Assembly Instructions
Packaging – Remove packaging materials. Cut out sides of carton and remove bicycle. Remove all
materials and set parts aside for assembly.
Minimal assembly is required for a foldable bicycle. However please follow the guidelines below for correct
assembly.
Tools required -8 mm ring spanner, 10 mm ring spanner, 15mm pedal spanner, 14 mm open end spanner, 5
mm hex key, 6 mm hex key, screw driver, Cutters/Pliers
Assembly.
Set Up.
• Remove all packaging materials from the bike.
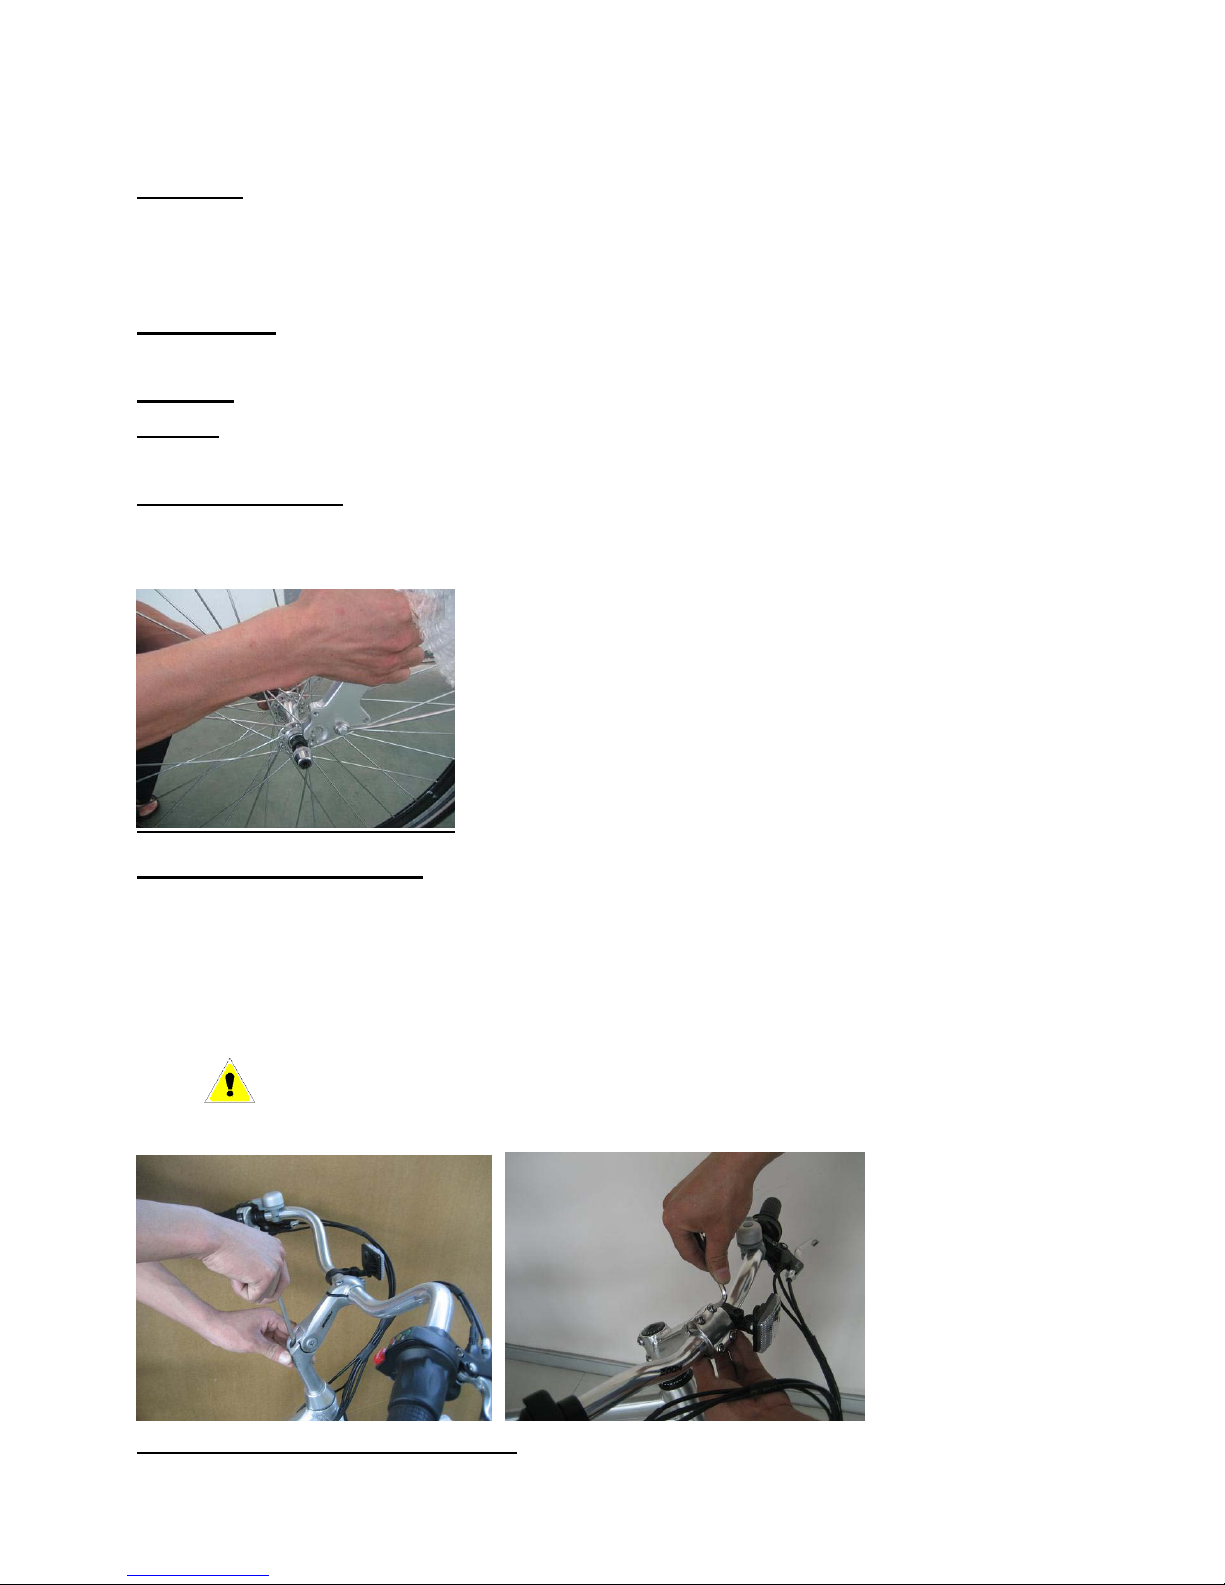
Install fron t wheel
The front wheel is a quick release type. The quick release mechanism must be seat square and firmly
tightened to ensure safety. Please check before each ride.
Alignment of handle bars
• The handle bar assembly may need some small adjustment for the alignment of the headset to the
front wheel.
• Use a 6 mm Hex key to loosen the handle bar stem.
• Relocate and lock the head stem hinge.
• Align handle bars so it is perpendicular to the front wheel.
• Carefully lower the handlebars back down and tighten the 6mm hex key firmly. Check and
recheck for firmness.
Install Pedals and Tighten Crank.
Use a small amount of axel grease on shaft before installing. Ensure you clearly identify Right and Left
pedals via the R or L stamped on the end of the pedal shaft. Screw pedal in clockwise. Tighten with pedal
 Loading...