

Page 1
Page 2

Xesar System manual 2.0 for version 2.0.36.17 | 24.06.2015 | misprinting and technical changes reserved
CONTENTS
CONTENTS .......................................................................................................................................................................................2
Introduction .....................................................................................................................................................................................9
General legal notes .................................................................................................................................................................9
Customer support ................................................................................................................................................................. 10
Signs and symbols ............................................................................................................................................................... 12
System overview ......................................................................................................................................................................... 13
Xesar system requirements .............................................................................................................................................. 15
Xesar performance features ............................................................................................................................................. 16
User administration......................................................................................................................................................... 16
Xesar access components ............................................................................................................................................ 16
Media/user administration .......................................................................................................................................... 17
Protocol/events ................................................................................................................................................................. 18
Authorisation types ......................................................................................................................................................... 18
Available languages ........................................................................................................................................................ 18
System accessories .................................................................................................................................................................... 19
Xesar coding station............................................................................................................................................................ 19
Xesar tablet .............................................................................................................................................................................. 20
Functional principle ........................................................................................................................................................ 21
Xesar application (app) ................................................................................................................................................. 22
Emergency power device .................................................................................................................................................. 23
System medium .......................................................................................................................................................................... 24
Admin Card.............................................................................................................................................................................. 24
Xesar identification media ..................................................................................................................................................... 25
Construction Card ................................................................................................................................................................. 27
Access with a Xesar identification medium .............................................................................................................. 28
Single access (standard configuration) .................................................................................................................. 28
Manual office mode ....................................................................................................................................................... 28
Automatic office mode (schedule-based) ............................................................................................................ 29
DeleteKey function .......................................................................................................................................................... 29
2
Page 3

Xesar System manual 2.0 for version 2.0.36.17 | 24.06.2015 | misprinting and technical changes reserved
Xesar access component interface ............................................................................................................................... 30
Xesar software ............................................................................................................................................................................. 31
EVVA KeyCredits .................................................................................................................................................................... 32
Credit schemes ................................................................................................................................................................. 32
You can merge quantity-based and time-based credit. ............................................................................... 32
Changes charged in KeyCredits (relevant to quantity credit only) .......................................................... 34
No KeyCredits deducted .............................................................................................................................................. 34
Software
plus
package ............................................................................................................................................................ 35
Xesar access components ...................................................................................................................................................... 36
Xesar escutcheon .................................................................................................................................................................. 36
Xesar escutcheon — functional description ....................................................................................................... 37
Xesar handle............................................................................................................................................................................ 43
Xesar handle — functional description ................................................................................................................. 44
Xesar cylinder ......................................................................................................................................................................... 50
Xesar cylinder — functional description ............................................................................................................... 51
Cylinder tool ....................................................................................................................................................................... 60
Xesar wall reader................................................................................................................................................................... 61
Xesar wall reader — functional description ........................................................................................................ 63
Xesar wall reader connection label ......................................................................................................................... 65
Xesar control unit ................................................................................................................................................................. 66
Xesar control unit connection configurations .................................................................................................... 67
One Xesar wall reader -> one Xesar control unit ............................................................................................ 68
Two Xesar wall readers -> one Xesar control unit (double-sided access) ........................................... 69
Two Xesar wall readers -> one Xesar control unit .......................................................................................... 70
Mains adapter for control unit .................................................................................................................................. 76
How Xesar access component indicate events ...................................................................................................... 77
Installing Xesar access components ................................................................................................................................. 78
Installation support .............................................................................................................................................................. 78
Language-neutral assembly manual ....................................................................................................................... 78
Product-specific assembly video clips ................................................................................................................... 78
3
Page 4

Xesar System manual 2.0 for version 2.0.36.17 | 24.06.2015 | misprinting and technical changes reserved
Language-neutral drilling template ........................................................................................................................ 78
Drilling template ................................................................................................................................................................... 79
Installing the Xesar software ................................................................................................................................................ 80
Configuring Xesar software for the first time .............................................................................................................. 85
Backing up access data and DB key ............................................................................................................................ 87
Roles ........................................................................................................................................................................................... 88
Xesar software ............................................................................................................................................................................. 89
Starting the program .......................................................................................................................................................... 89
Logging in using Admin Cards ...................................................................................................................................... 90
Logging in using the DB key .......................................................................................................................................... 91
Home page ................................................................................................................................................................................... 92
Loading KeyCredits ................................................................................................................................................................... 93
Administrator ............................................................................................................................................................................... 96
Changing the administrator password .................................................................................................................. 96
Settings ........................................................................................................................................................................................... 97
Time settings ........................................................................................................................................................................... 97
Summer and winter time settings ........................................................................................................................... 97
Setting special days ........................................................................................................................................................ 97
Security settings .................................................................................................................................................................... 99
Security PIN ........................................................................................................................................................................ 99
Identification media validity periods ...................................................................................................................... 99
Replacement media validity periods ................................................................................................................... 100
Logging personal data ............................................................................................................................................... 100
Maximum archiving period for personal data ................................................................................................ 100
Programming device ........................................................................................................................................................ 101
IP address/proxy server settings................................................................................................................................. 101
Configuration settings ..................................................................................................................................................... 101
Administration .......................................................................................................................................................................... 102
Journal ..................................................................................................................................................................................... 102
Changing the client logo ............................................................................................................................................... 104
4
Page 5

Xesar System manual 2.0 for version 2.0.36.17 | 24.06.2015 | misprinting and technical changes reserved
Users ........................................................................................................................................................................................ 105
Editing users ......................................................................................................................................................................... 106
Details ................................................................................................................................................................................ 107
Deactivate user .............................................................................................................................................................. 107
Changing access data and passwords .............................................................................................................. 107
User groups ..................................................................................................................................................................... 108
Creating users...................................................................................................................................................................... 108
Access data ...................................................................................................................................................................... 109
User groups ..................................................................................................................................................................... 109
General rights ................................................................................................................................................................. 110
User groups .......................................................................................................................................................................... 110
Deleting user groups .................................................................................................................................................. 111
Creating user groups .................................................................................................................................................. 112
Details ................................................................................................................................................................................ 113
General rights ................................................................................................................................................................. 113
Editing user groups ..................................................................................................................................................... 114
Doors and areas ...................................................................................................................................................................... 115
Doors and areas ................................................................................................................................................................. 115
All doors ............................................................................................................................................................................ 116
Doors within an area................................................................................................................................................... 116
Doors that have not been assigned to areas.................................................................................................. 116
Creating door areas ..................................................................................................................................................... 117
Creating additional doors ......................................................................................................................................... 118
Deleting doors ............................................................................................................................................................... 120
Removing doors from areas .................................................................................................................................... 120
Adding doors to areas ............................................................................................................................................... 121
Listing authorised persons within an area ........................................................................................................ 122
Deleting door areas ..................................................................................................................................................... 122
Editing door areas ........................................................................................................................................................ 123
Editing doors .................................................................................................................................................................. 124
5
Page 6

Xesar System manual 2.0 for version 2.0.36.17 | 24.06.2015 | misprinting and technical changes reserved
Access components ..................................................................................................................................................... 124
Details ................................................................................................................................................................................ 124
View battery status ...................................................................................................................................................... 124
Creating doors .................................................................................................................................................................... 125
Details ................................................................................................................................................................................ 125
Settings .............................................................................................................................................................................. 126
Editing doors........................................................................................................................................................................ 127
Protocol settings ........................................................................................................................................................... 127
Personal data (per Xesar access component) ................................................................................................. 128
Adding Xesar access components ............................................................................................................................. 131
Adding Xesar access components — step 1 ................................................................................................... 131
Selecting escutcheon, handle or cylinder — step 2A ................................................................................. 132
Selecting Xesar wall readers — step 2B ............................................................................................................ 132
Option A 1x Xesar wall reader with the Xesar control unit ..................................................................... 132
Option B 2x Xesar wall readers with the Xesar control unit) .................................................................. 133
Option C 1x Xesar wall reader (existing)/1x Xesar wall reader (new) <-> 1x Xesar control unit
134
Added Xesar access components on the door list ....................................................................................... 135
Door list icons ................................................................................................................................................................ 136
Initialising Xesar access components — step 3A .......................................................................................... 137
Initialising two Xesar wall readers for one control unit – step 3B ........................................................ 142
Re-synchronisations with the Xesar software – step 4 ............................................................................... 142
Removing Xesar access components ....................................................................................................................... 143
Undoing assembly ............................................................................................................................................................. 144
Removing Xesar access components ....................................................................................................................... 146
Removing Xesar access components from the Xesar software — step 1 ......................................... 147
Synchronising the Xesar tablet with Xesar access components — step 2 ...................................... 147
Re-synchronisations with the Xesar software – step 3 ............................................................................... 149
Forcing disassembly .................................................................................................................................................... 150
Replacing thumbturns ..................................................................................................................................................... 150
Automatic office mode (schedule-based) .............................................................................................................. 153
6
Page 7

Xesar System manual 2.0 for version 2.0.36.17 | 24.06.2015 | misprinting and technical changes reserved
Configuring office mode ........................................................................................................................................... 154
Specifying the office mode period ....................................................................................................................... 154
Deleting office mode .................................................................................................................................................. 154
Specifying special days ................................................................................................................................................... 155
Activating or deactivating special days .............................................................................................................. 156
How special days affect access components .................................................................................................. 156
Persons......................................................................................................................................................................................... 157
Filtering entries .............................................................................................................................................................. 158
Creating persons ..................................................................................................................................................................... 159
Details ................................................................................................................................................................................ 159
Authorisations ................................................................................................................................................................ 160
Loading authorisations (transferring authorisations from another person) ..................................... 160
Importing persons from CSV files.............................................................................................................................. 161
Authorisations ..................................................................................................................................................................... 164
MasterKey authorisation ................................................................................................................................................. 165
Adding access authorisations ................................................................................................................................. 166
Time profiles ................................................................................................................................................................... 166
Permanent access (person) ...................................................................................................................................... 166
Periodic access (person) ............................................................................................................................................ 166
Special days ..................................................................................................................................................................... 167
How special days affect periodic access authorisations ............................................................................ 168
Editing persons ........................................................................................................................................................................ 169
Details...................................................................................................................................................................................... 170
Settings ................................................................................................................................................................................... 170
Expiration date ............................................................................................................................................................... 170
Manual office mode .................................................................................................................................................... 170
Personal access events ............................................................................................................................................... 170
Managing identification media ........................................................................................................................................ 171
Adding identification media to persons' accounts ....................................................................................... 171
Withdrawing identification media ......................................................................................................................... 172
7
Page 8

Xesar System manual 2.0 for version 2.0.36.17 | 24.06.2015 | misprinting and technical changes reserved
Blocking persons ................................................................................................................................................................ 174
Deleting persons ................................................................................................................................................................ 176
Updating identification media ..................................................................................................................................... 178
Assigning replacement media ..................................................................................................................................... 179
About Xesar ............................................................................................................................................................................... 180
Restoring databases .............................................................................................................................................................. 181
Replacing the Admin Card ................................................................................................................................................. 182
Uninstalling software ............................................................................................................................................................. 183
Synchronising the Xesar software with access components .............................................................................. 185
Starting the application (tablet) .................................................................................................................................. 186
Synchronising the Xesar software with the Xesar tablet ........................................................................... 187
Maintenance tasks ............................................................................................................................................................. 189
All tasks .................................................................................................................................................................................. 190
Maintenance tasks ............................................................................................................................................................. 191
Activating access media blocks at the access component ............................................................................ 194
Checking the battery status using the Xesar tablet .......................................................................................... 194
Additional maintenance tasks ...................................................................................................................................... 197
Xesar tablet error messages ......................................................................................................................................... 197
Xesar-tablet error messages ......................................................................................................................................... 199
Xesar’s virtual network (XVN)....................................................................................................................................... 200
Software
plus
package (virtual network) ................................................................................................................ 201
Transferring access events using identification media ............................................................................... 202
Transferring blacklist entries using identification media ........................................................................... 202
Transfer "Unlocking attempt by medium" notifications using identification media .................... 203
Transferring "Identification medium deleted by door component" notifications .......................... 204
Transferring the battery status using identification media ....................................................................... 205
List of illustrations .................................................................................................................................................................. 206
8
Page 9

Xesar System manual 2.0 for version 2.0.36.17 | 24.06.2015 | misprinting and technical changes reserved
Introduction
This XESAR system manual describes how to operate the Xesar software and any associated Xesar
system components.
The products and/or systems described in the Xesar system manual must exclusively be operated
by persons that have been adequately qualified for the corresponding task. Qualified personnel is
able to identify risks when handling products/systems and prevent potential hazards on the basis
of their expertise.
General legal notes
EVVA concludes the contract on the use of Xesar exclusively on the basis of its General Terms of
Business (EVVA-GTB) as well as its General Licensing Conditions (EVVA-ALB) with regard for the
software for the product. Please refer to http://www.evva.at/terms-and-conditions/en/ to view
these documents.
We explicitly notify clients that the use of the locking system subject to this contract may trigger
legal approval, reporting or registration obligations, in particular with regard to data protection
(e.g. if you are establishing a comprehensive information system), as well as grant the right of codetermination to staff in the event of use on corporate premises. Customers, clients and end users
shall be responsible for product use in compliance with legal stipulations.
The aforementioned information must be observed and passed on to operators and users as per
the defined manufacturer product liability according to product liability legislation. Noncompliance releases EVVA from any liability.
Any use deemed as non-compliant with the contract or as unintended use, any repair work or
modifications that have not been explicitly approved by EVVA as well as all types of incorrect servicing may cause malfunctions and are prohibited. Any modifications that have not been explicitly
approved by EVVA render claims to liability, warranty as well as any separate guarantee claims
void.
9
Page 10

Xesar System manual 2.0 for version 2.0.36.17 | 24.06.2015 | misprinting and technical changes reserved
Architects and advisory institutions are obliged to request all necessary product information from
EVVA and take into account all such information to comply with obligations regarding information
and instructions under the Product Liability Act. Specialist retailers and installers must comply with
the information in EVVA documentation and they must pass on such information to customers, if
applicable.
Please refer to the Xesar product catalogue for additional information beyond these vital instructions. Please visit: http://www.evva.at/products/electronic-locking-systems-access-
control/xesar/system-overview/en/.
Customer support
We have provided our online form at http://support.evva.at/xesar/en/ in case you have any questions regarding the information below.
You have exceeded the maximum attempts to enter credit codes.
Unable to add credit
Please contact your local retailer if you have any further questions. We have provided a list of all
local EVVA (Certified) Partners here: http://www.evva.at/partners/search-for-retailers/en/
For instance, select a city near you in the first step and click
the search results here by searching exclusively for Electronic System Partners.
One of our partners near you will be happy to advise you.
For general information on Xesar visit our homepage at
http://www.evva.at/products/electronic-locking-systems-access-control/xesar/system-overview/en/
A KeyCredit was redeemed, but the remaining credit has not increased
Search
. You can additionally restrict
10
Page 11

Xesar System manual 2.0 for version 2.0.36.17 | 24.06.2015 | misprinting and technical changes reserved
Legal notice
1. English edition, September 2014
This edition shall not longer be valid upon publication of a new system manual.
All rights reserved. This system manual must not be reproduced, copied or adapted neither in full
or in part using electronic, mechanical or chemical methods or any other procedures without written consent by the publisher.
We shall not assume any liability for technical or printing errors and their potential consequences.
However, the data in this system manual is revised regularly and corrections are incorporated.
All trademarks and industrial property rights reserved. We reserve the rights to make adaptations
and update the document without prior notification.
11
Page 12

Xesar System manual 2.0 for version 2.0.36.17 | 24.06.2015 | misprinting and technical changes reserved
Signs and symbols
Warning, risk of material damage in the event of non-compliance with
the corresponding safety measures.
Notices and additional information
Hints and recommendations
Error messages
Options
Sequences of commands are illustrated as follows.
For instance
Persons menu > Create person
or for commands and buttons, such as
Save
12
Page 13
Xesar System manual 2.0 for version 2.0.36.17 | 24.06.2015 | misprinting and technical changes reserved
System overview
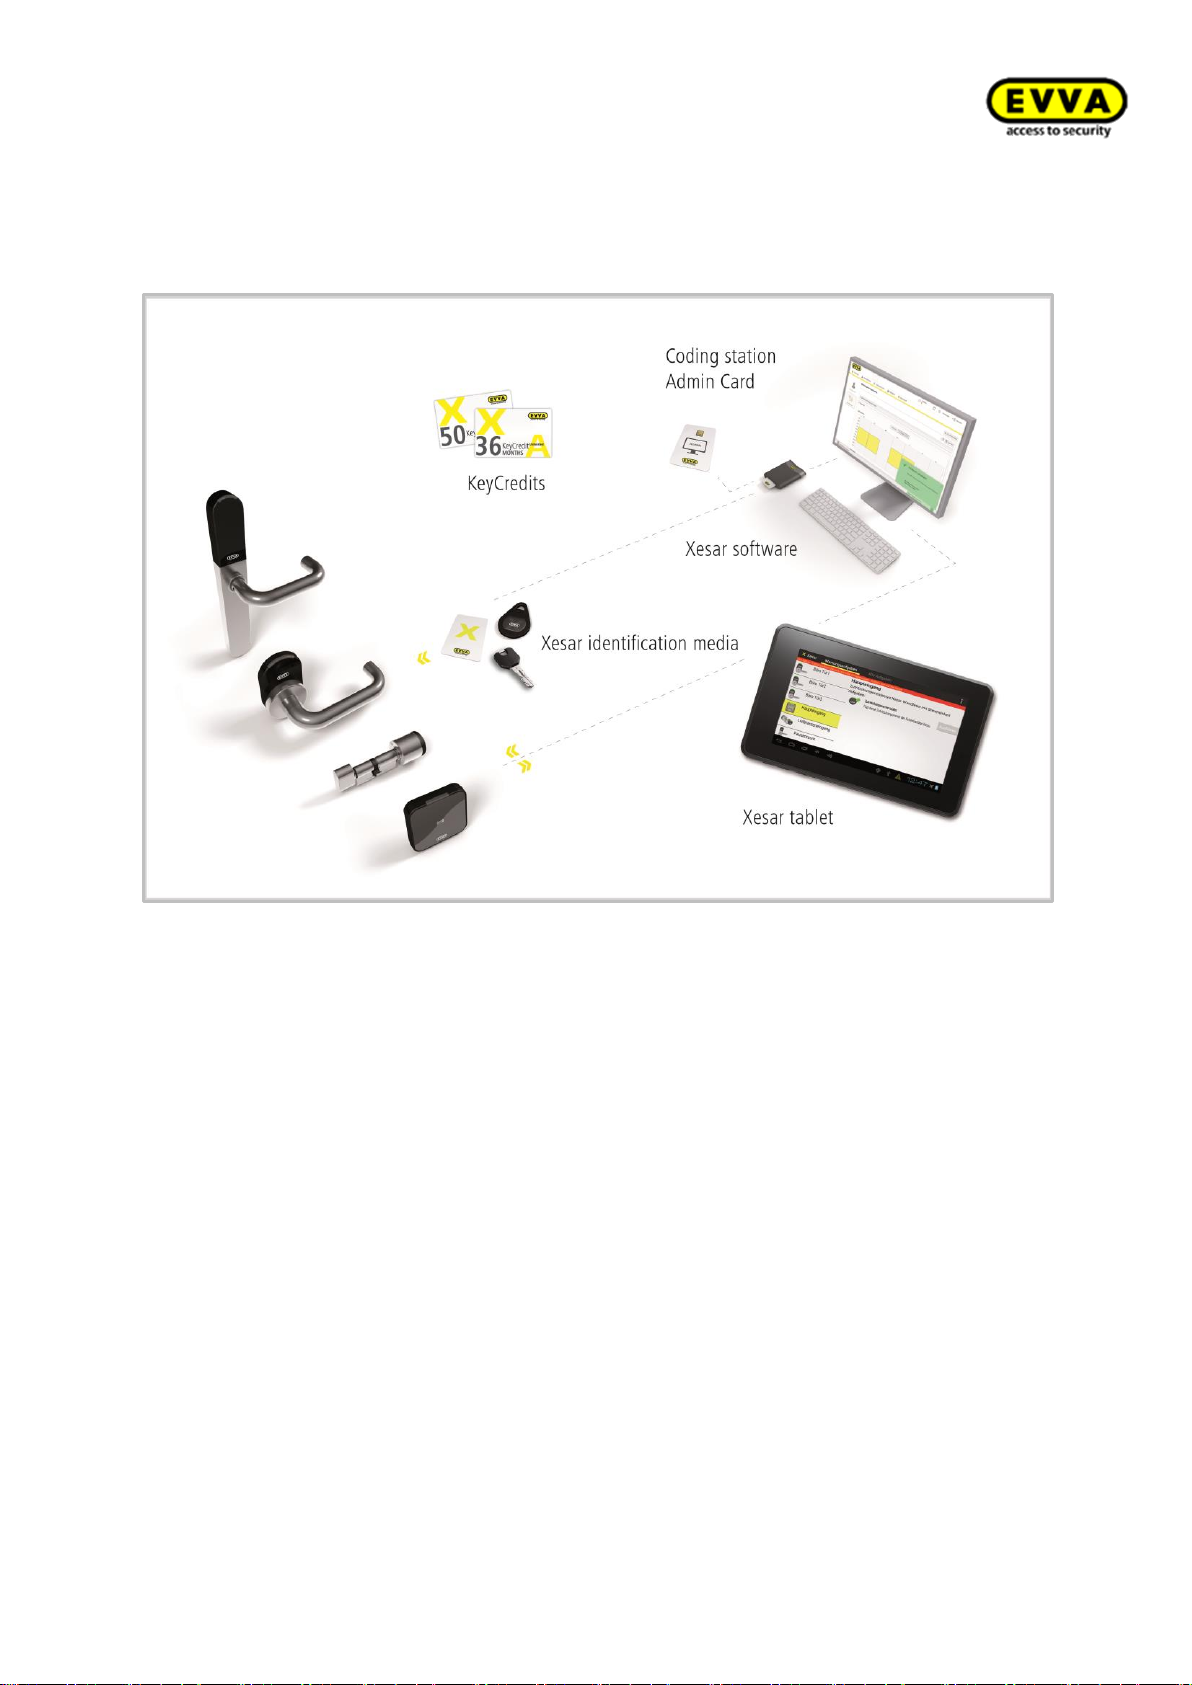
Figure 1: System architecture (sample image)
Xesar is the innovation from EVVA.
Developed and manufactured in Austria, the electronic locking system offers companies a wide
variety of products. Each Xesar access component brings about its individual benefits to profoundly safeguard your comprehensive security demands. The ideal product for each situation most of
all depends on the installation location, security demands and the level of convenience required.
13
Page 14
Xesar System manual 2.0 for version 2.0.36.17 | 24.06.2015 | misprinting and technical changes reserved
Xesar access components at a glance
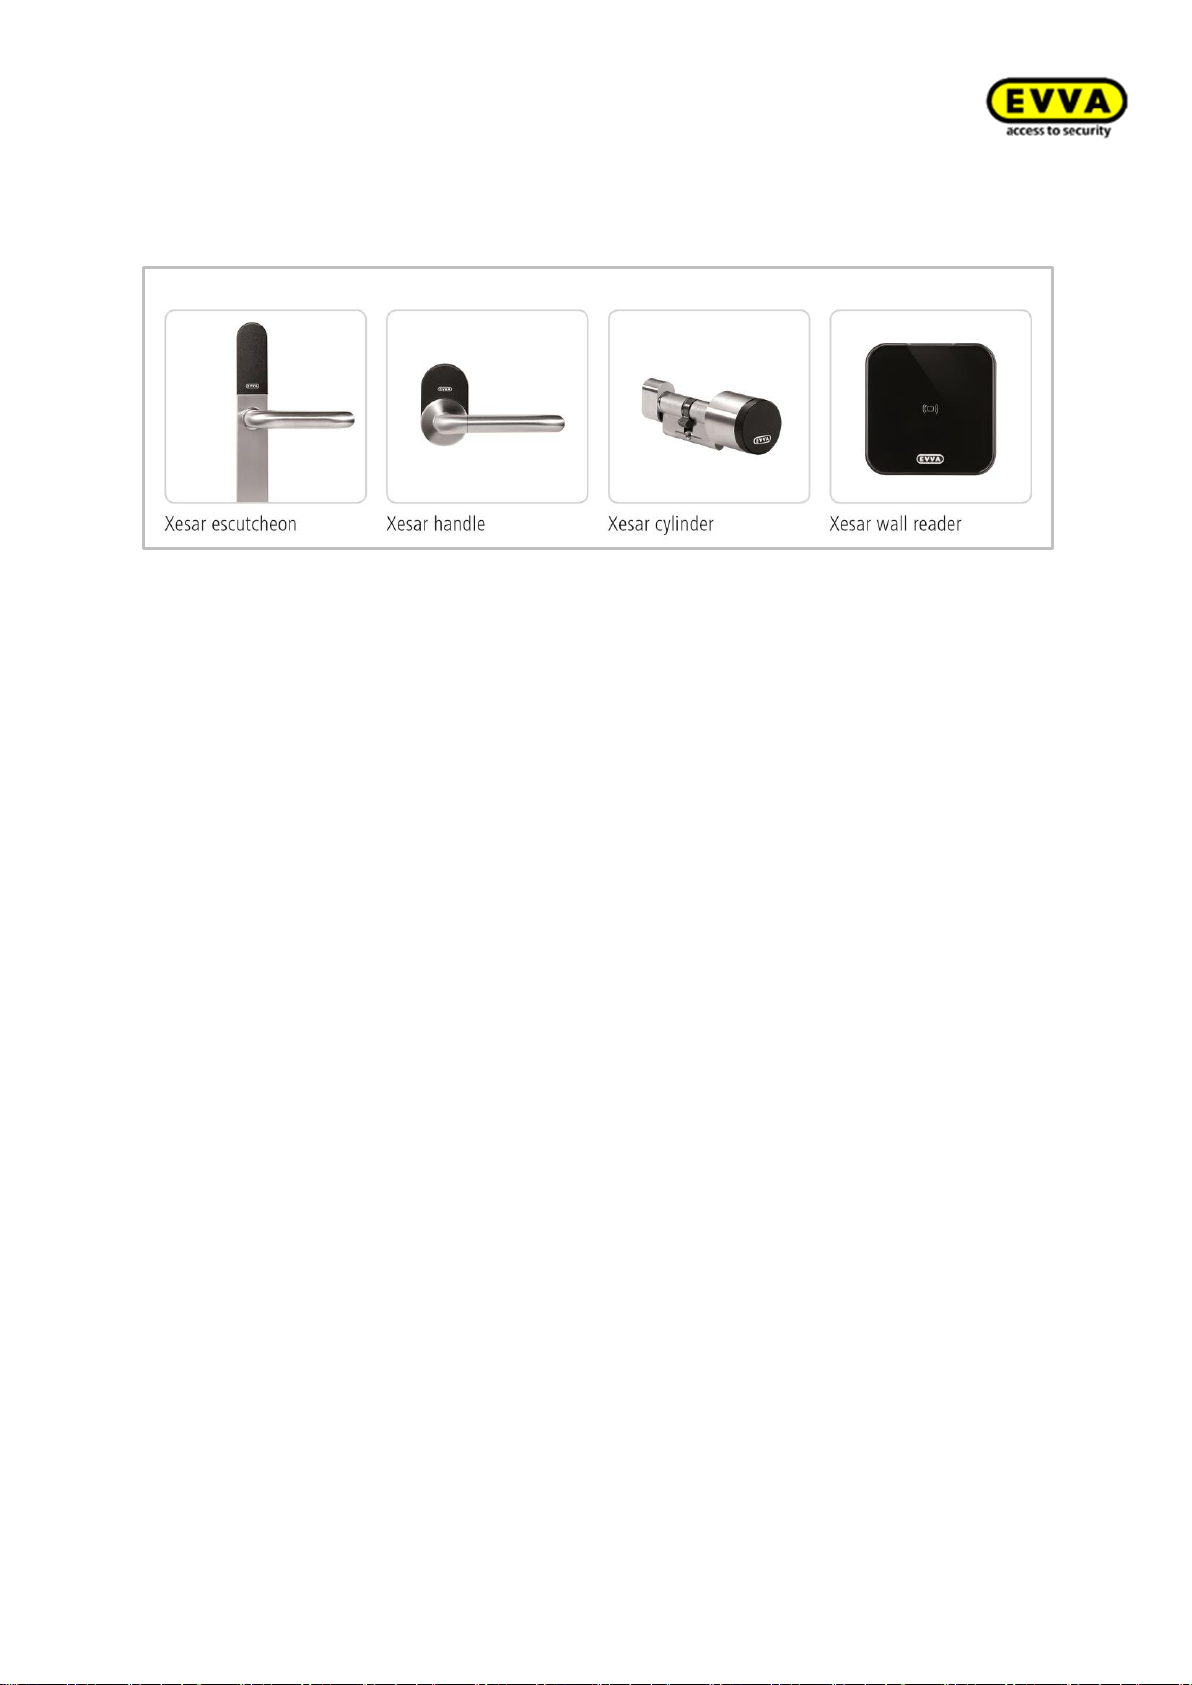
Figure 2: Xesar access components (sample image)
Xesar escutcheon
The all-rounder with a high level of operating convenience. Its unbeaten design is universally suitable, also for metal frame doors. Xesar escutcheons are also perfectly suitable for
outdoor applications.
Xesar handle
The Xesar handle is the ideal solution for almost any internal door, from solid doors to
glass doors. A convenience product that meets almost any requirements.
Xesar cylinder
Xesar cylinders are ideal if security or easy retrofitting are paramount. It locks securely and
is easy to install.
Xesar wall reader (in conjunction with the control unit)
Scores high marks amongst wall readers with high-quality glass design. In conjunction with
the control unit it forms an invincible team when it comes to controlling electronic locking
components (e.g. automatic sliding doors).
14
Page 15

Xesar System manual 2.0 for version 2.0.36.17 | 24.06.2015 | misprinting and technical changes reserved
Xesar system requirements
Please check your firewall-configuration if no connection to the Xesarsoftware can be established:
Personal computer; at minimum 1.2 GHz or faster
At minimum 4 GB RAM
USB host 2.0 for coding stations and Xesar tablet
Windows 7-32 bit, Windows 7-64 bit, Windows 8.1-32 bit or Windows 8.1-64 bit
operating system
The software must be installed locally, server installations are not intended.
The installation requires approximately 1 GB free hard disk space.
Input/output devices:
Keyboard | Mouse | Minimum screen resolution 1024 × 768
Internet connection to enable KeyCredits
Server: licence.evva.com
Port: 8072
Protokoll: https
15
Page 16

Xesar System manual 2.0 for version 2.0.36.17 | 24.06.2015 | misprinting and technical changes reserved
Xesar performance features
User administration
Assign access authorisations to software users
Different software features can be enabled per user role
Xesar access components
Manual office mode -> (De)activated by an authorised Xesar identification medi-
um at the Xesar access component
Temporary office mode -> Controlled by time profiles saved in the software
Enables to define up to 96 door areas -> Merge several doors to facilitate an as-
signment of authorisations
Blacklist -> List of blocked identification media
DeleteKey function -> Blocked identification media are deleted upon attempting
identification at the door
Automatically changes the time -> Summer/winter time
Softwareplus package -> information exchange through identification medium
16
Page 17

Xesar System manual 2.0 for version 2.0.36.17 | 24.06.2015 | misprinting and technical changes reserved
Media/user administration
Note:
Xesar currently supports MIFARE DESFire EV1 with AES 128 bit encryption,
all Xesar identification media are equipped with a memory of 4 kB. In version 2.0.x.x the Xesar segment requires 384 bytes, the remaining memory on
the Xesar identification medium may be used for external applications (enquire for more detailed information).
Additional 1365 bytes are available for logs with the software
plus
package.
Up to 65,000 persons per system
Assign one Xesar identification medium and one replacement medium per person
Time profiles can be configured for identification media:
- 7 weekdays, 5 special days
- Allows to define 50 special days (time profile)
- Automatically updates the Xesar identification medium upon holding it to the
Xesar coding station
17
Page 18

Xesar System manual 2.0 for version 2.0.36.17 | 24.06.2015 | misprinting and technical changes reserved
Protocol/events
Each Xesar access component logs 1,000 events.
Events are transferred from door to software using the Xesar tablet.
It is possible to disable the collection of personal access events.
Events saved:
- Access granted (person, date, time, door)
- Office mode (automatically and manually)
- Battery warnings
- Time change
- Firmware updates
- Battery replacements
Authorisation types
Permanent access (without time profile)
Periodic access (with time profile)
Manual office mode (can be enabled per medium)
Automatic office mode (with time profile)
Expiry of authorisations can be set
Validity can be set (extended periodically)
MasterKey authorisation
Available languages
German
English
French
Italian
Dutch
Polish
Slovakian
Czech
Spanish
Portuguese
18
Page 19
Xesar System manual 2.0 for version 2.0.36.17 | 24.06.2015 | misprinting and technical changes reserved
System accessories
Note:
We have provided the driver required for the Xesar coding station in the download
section of our homepage:
http://www.evva.at/products/electronic-locking-systems-accesscontrol/xesar/system-overview/en/.
Note:
Please refer to the corresponding data sheet for additional specifications at
http://www.evva.at/products/electronic-locking-systems-accesscontrol/xesar/assembly-instructions-datasheets/en/
Xesar coding station
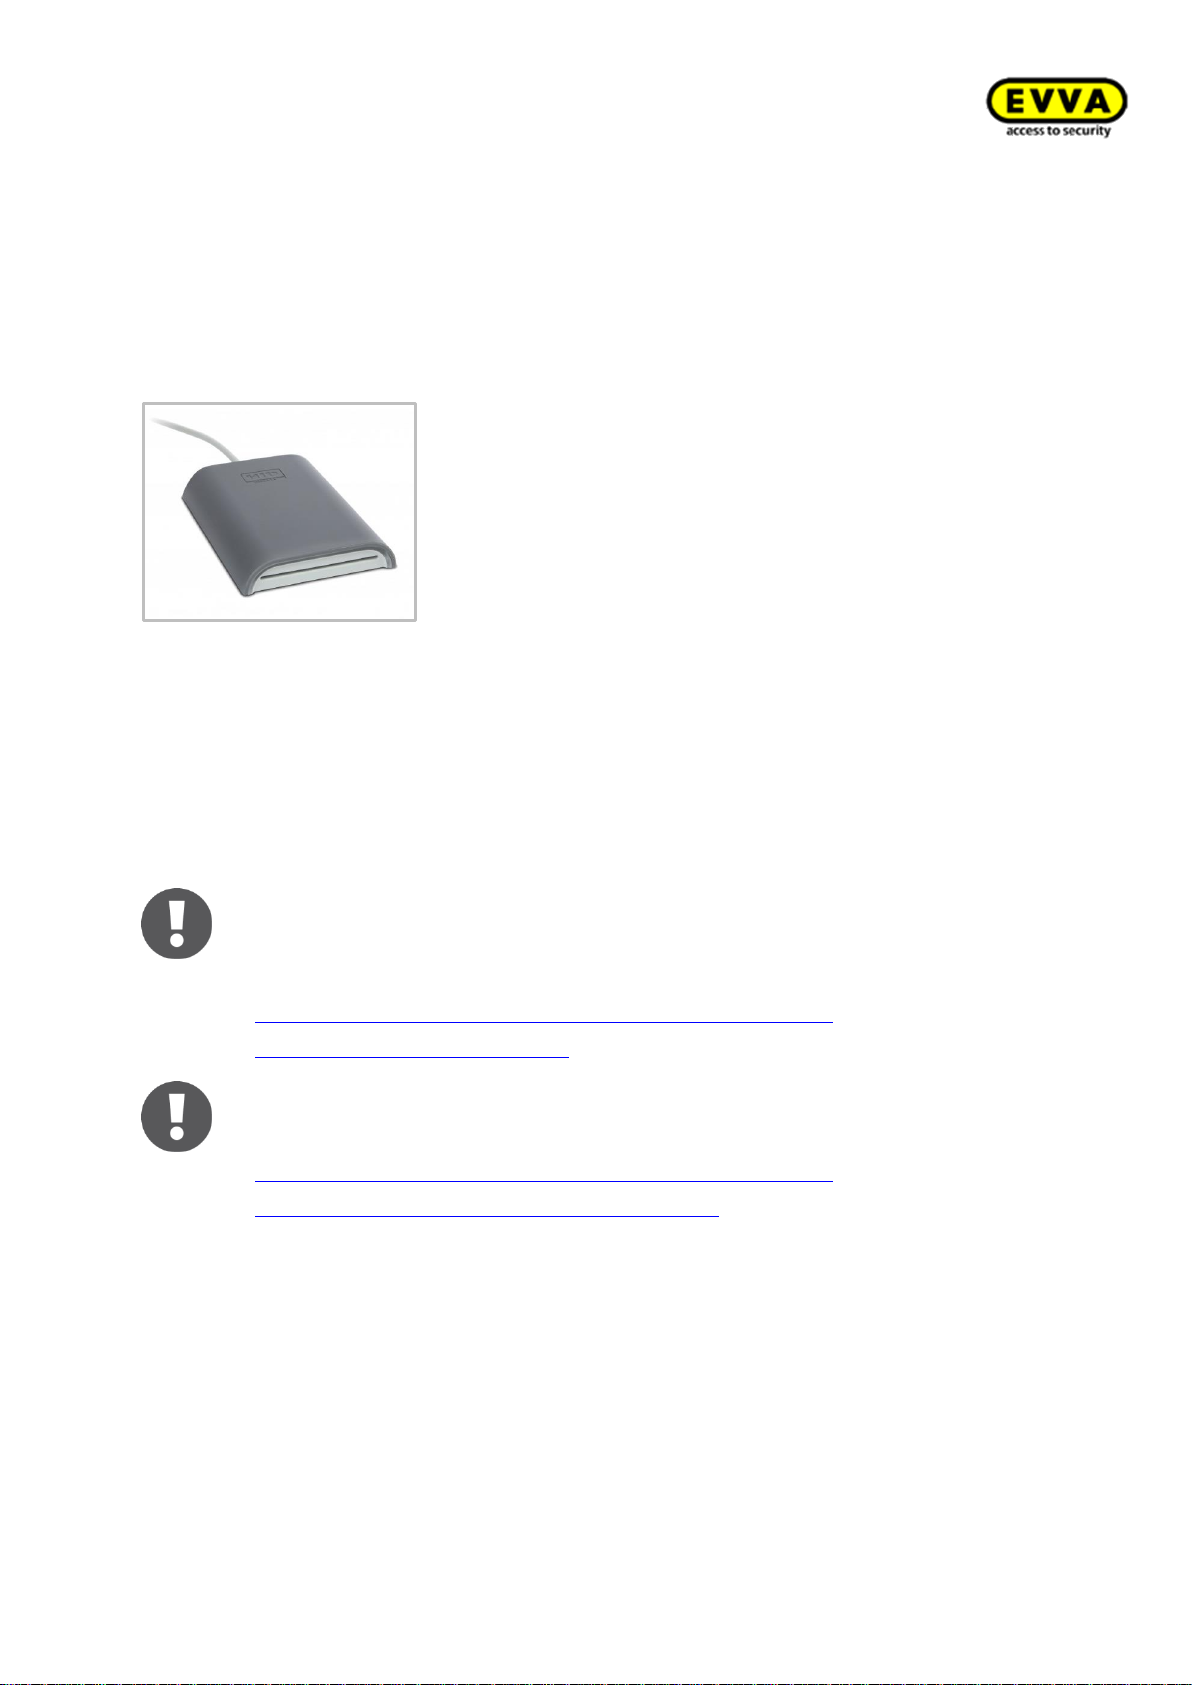
Figure 3: Xesar coding station (sample image)
The Xesar coding station is a read/write device for any type of contactless Xesar identification
media as well as the conventional Admin Card medium, which is one of the system cards (see
Section:
Xesar coding station for the Admin Card. Install the associated driver and connect the Xesar coding station to the USB port of the computer where you installed Xesar software.
Admin
Card). The Xesar coding station provides a separate card slot on the front of the
19
Page 20
Xesar System manual 2.0 for version 2.0.36.17 | 24.06.2015 | misprinting and technical changes reserved
Xesar tablet
Caution:
Do not install additional applications as otherwise EVVA will be unable to safeguard
the product security and functionality of the system.
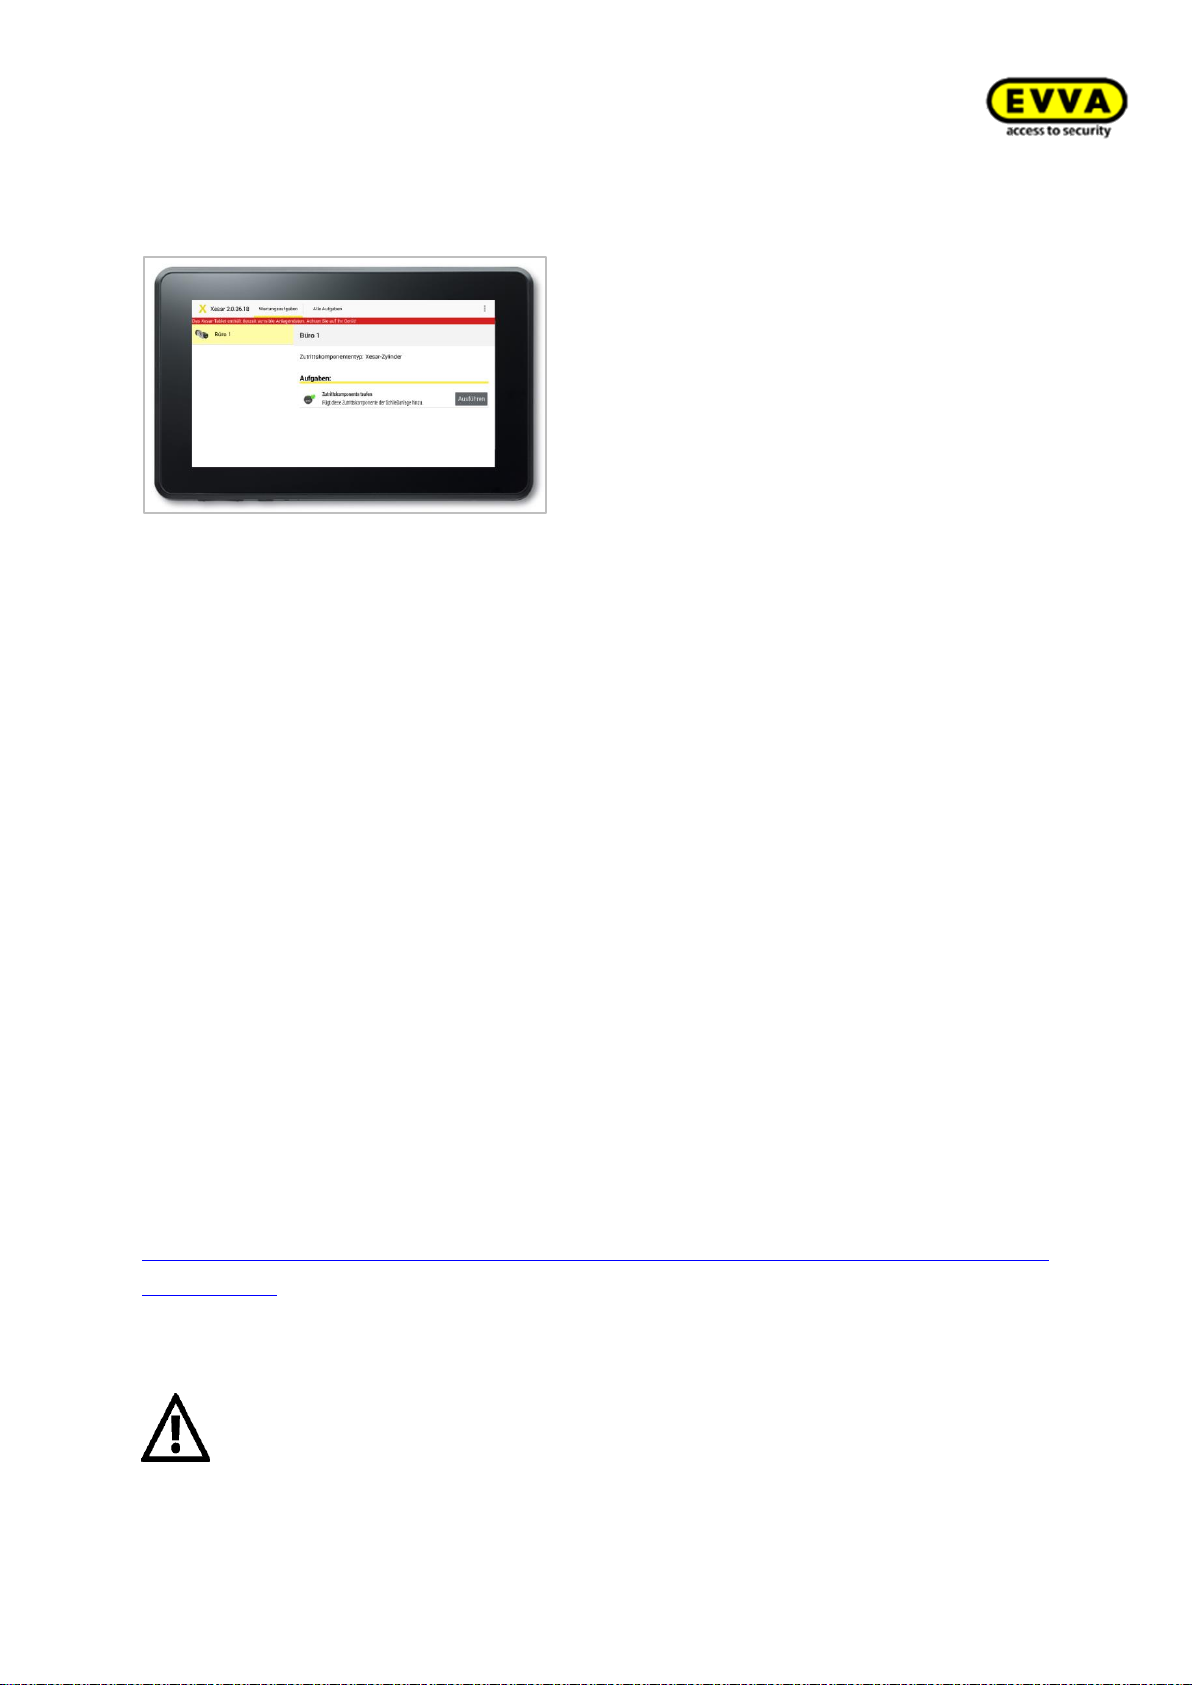
Figure 4: Xesar tablet (sample image)
The Xesar tablet is intended to synchronise and transfer information between Xesar software and
Xesar access components.
The Xesar tablet delivery scope includes proprietary EVVA connection cable. Use the connection
cable to link your Xesar access components to the Xesar tablet. You can identify the connection
cable by the EVVA logo, located on the USB jack of the connection cable.
All Xesar access components feature an interface at the front, behind the connector cover (EVVA
logo). Slightly press towards the inside on the left-hand side of the EVVA logo (near the "E") and
fold out on the right-hand side (near the "A") to access it.
The integrated interface of the Xesar access component in conjunction with the Xesar tablet is
designed to synchronise Xesar software and Xesar access components only.
After use, once again carefully close the connector cover (EVVA logo) of your Xesar access components to continue to protect the connector from penetrating dust and humidity.
For this purpose, do not use pointed objects to prevent damage.
Please refer to the corresponding data sheet for additional specifications at
http://www.evva.at/products/electronic-locking-systems-access-control/xesar/assembly-instructionsdatasheets/en/.
20
Page 21
Xesar System manual 2.0 for version 2.0.36.17 | 24.06.2015 | misprinting and technical changes reserved
Caution:
Please note only one Xesar tablet is intended per system and the use of several
Xesar tablets within the same Xesar locking system may cause malfunctions.
Caution:
Synchronising several different Xesar locking systems with the same Xesar tablet
may cause malfunctions. For this reason, exclusively use the dedicated Xesar tablet
for each Xesar locking system.
Note:
The Xesar tablet is unsuitable as an emergency power supply for battery-operated
Xesar access components.
Tip:
We recommend you regularly synchronise data at each Xesar access component to
be able to quickly synchronise events with the software (caution: at maximum 1,000
events per access component, from then on, the oldest events will be overwritten).
Synchronise each access component at minimum once a year to make sure the
time has been synchronised with the system.
Functional principle
Any maintenance tasks or any other tasks for the corresponding Xesar access component
are loaded and listed upon each synchronisation between Xesar tablet and Xesar software.
The connecting cable enclosed with your Xesar tablet enables to connect the Xesar access
component and subsequently exchange data using the Xesar app.
21
Page 22

Xesar System manual 2.0 for version 2.0.36.17 | 24.06.2015 | misprinting and technical changes reserved
It enables the following:
Note:
We have enclosed the manufacturer's independent user guide for the Xesar tablet.
It is enclosed with the product packaging.
Note:
Fully charge your Xesar tablet prior to first use.
Initialising Xesar access components (upon commissioning)
Synchronising changed door parameters in Xesar access components
Transferring blacklists to Xesar access components
Battery status queries
Firmware updates (Xesar access components in battery mode are supplied with energy
from the Xesar tablet during firmware updates)
Retrieving Xesar access component events
Resetting Xesar access components to construction mode
Automatically synchronising the time in access components upon communication be-
tween tablet and access components
Xesar application (app)
The Xesar application is already preinstalled on your Xesar tablet. The Xesar application is
automatically updated once a more recent application version becomes available, for instance following initial Xesar software installations or software updates upon synchronising
with the Xesar tablet.
22
Page 23
Xesar System manual 2.0 for version 2.0.36.17 | 24.06.2015 | misprinting and technical changes reserved
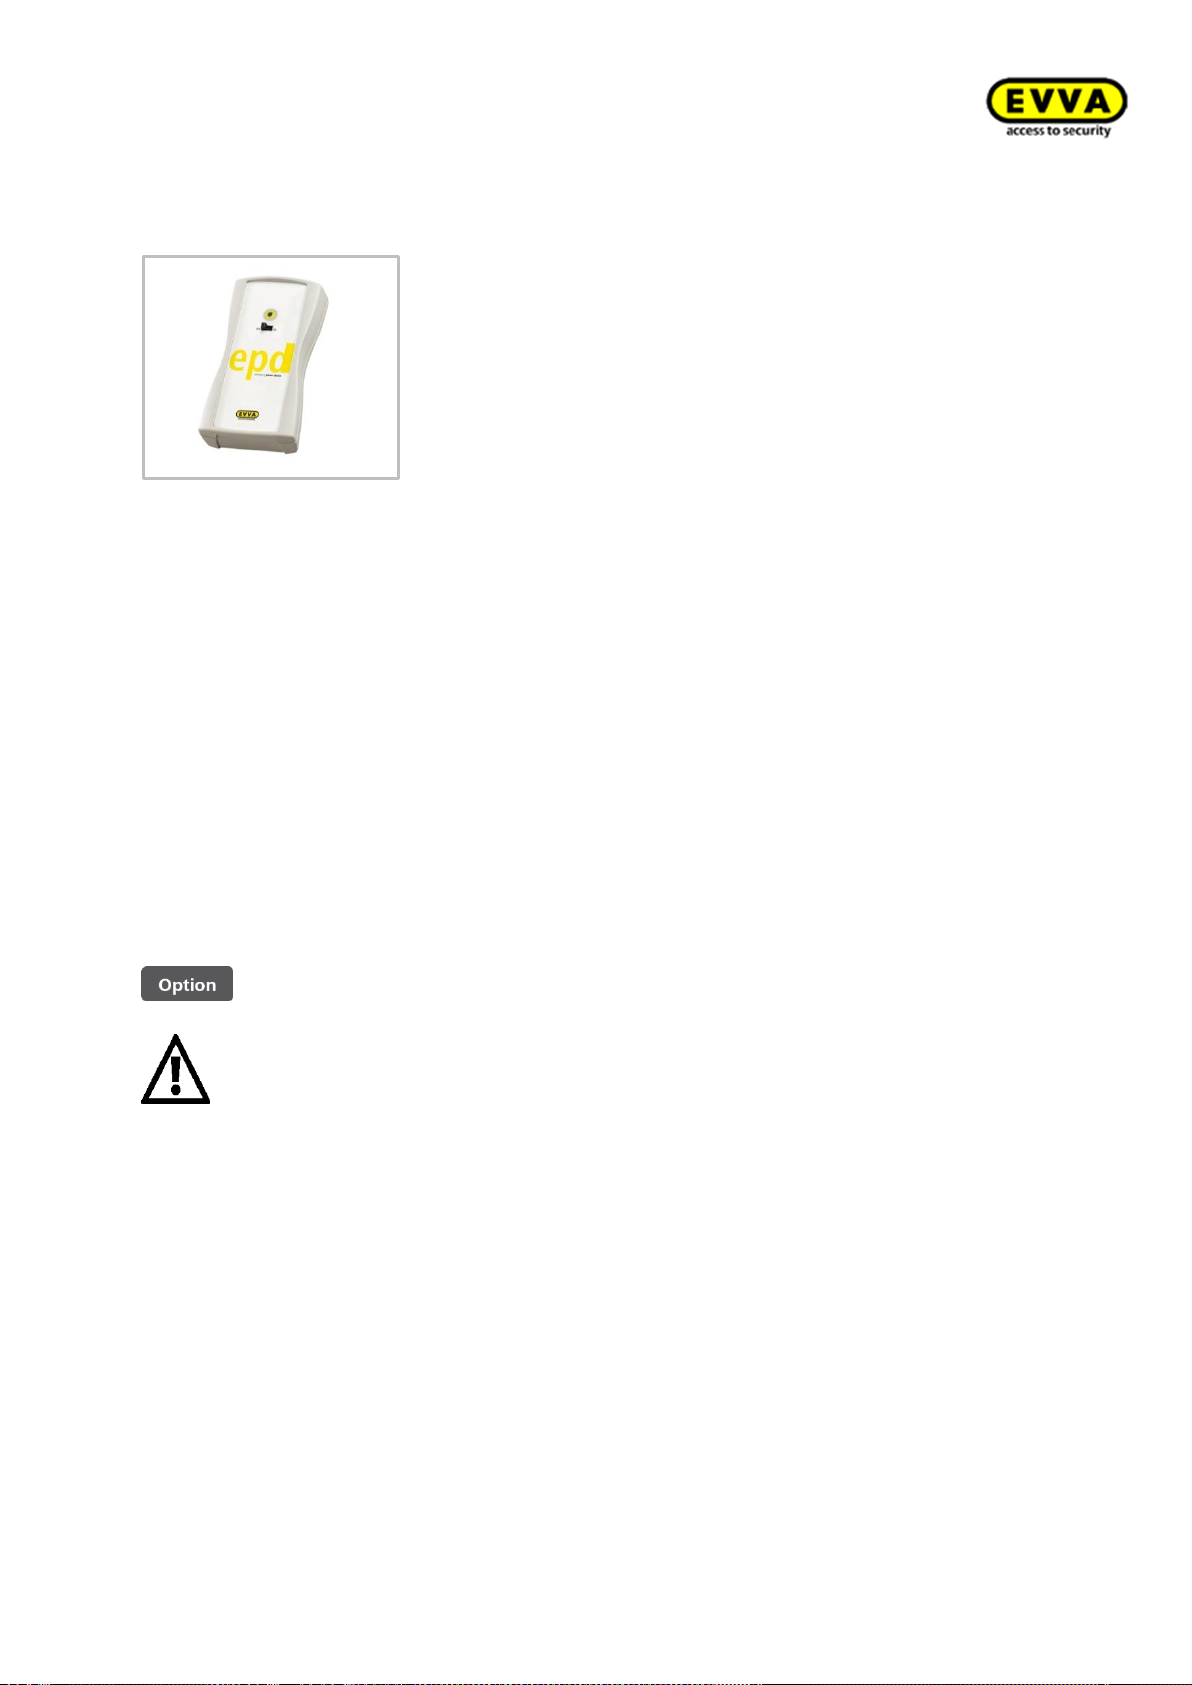
Emergency power device
The emergency power device is optionally available.
Product code: E.ZU.NG.V1
Caution:
Please note that you require a Xesar identification medium with MasterKey authorisation to open Xesar access components supplied with the emergency power supply as the time setting is lost if the power supply is interrupted for too long, causing standard media to be unable to open them.
Figure 5: Emergency power device (sample image)
All access components feature an interface at the front of the access component, below the EVVA
logo. Slightly press towards the inside on the left-hand side of the logo (near the "E") and fold out
on the right-hand side (near the "A") to access it. The installed interface in conjunction with the
emergency power device is intended for emergency power supply only and it is not required as
part of normal operation.
Immediately replace batteries after having used the emergency power device to operate access
components and subsequently update access components using the Xesar tablet to once again
enable access with all authorised identification media.
23
Page 24
Xesar System manual 2.0 for version 2.0.36.17 | 24.06.2015 | misprinting and technical changes reserved
System medium
Note:
The Admin Card is not transferable and hence it cannot be used for other systems.
Caution:
You can replace the Admin Card in the event of loss or damage.
Admin Card
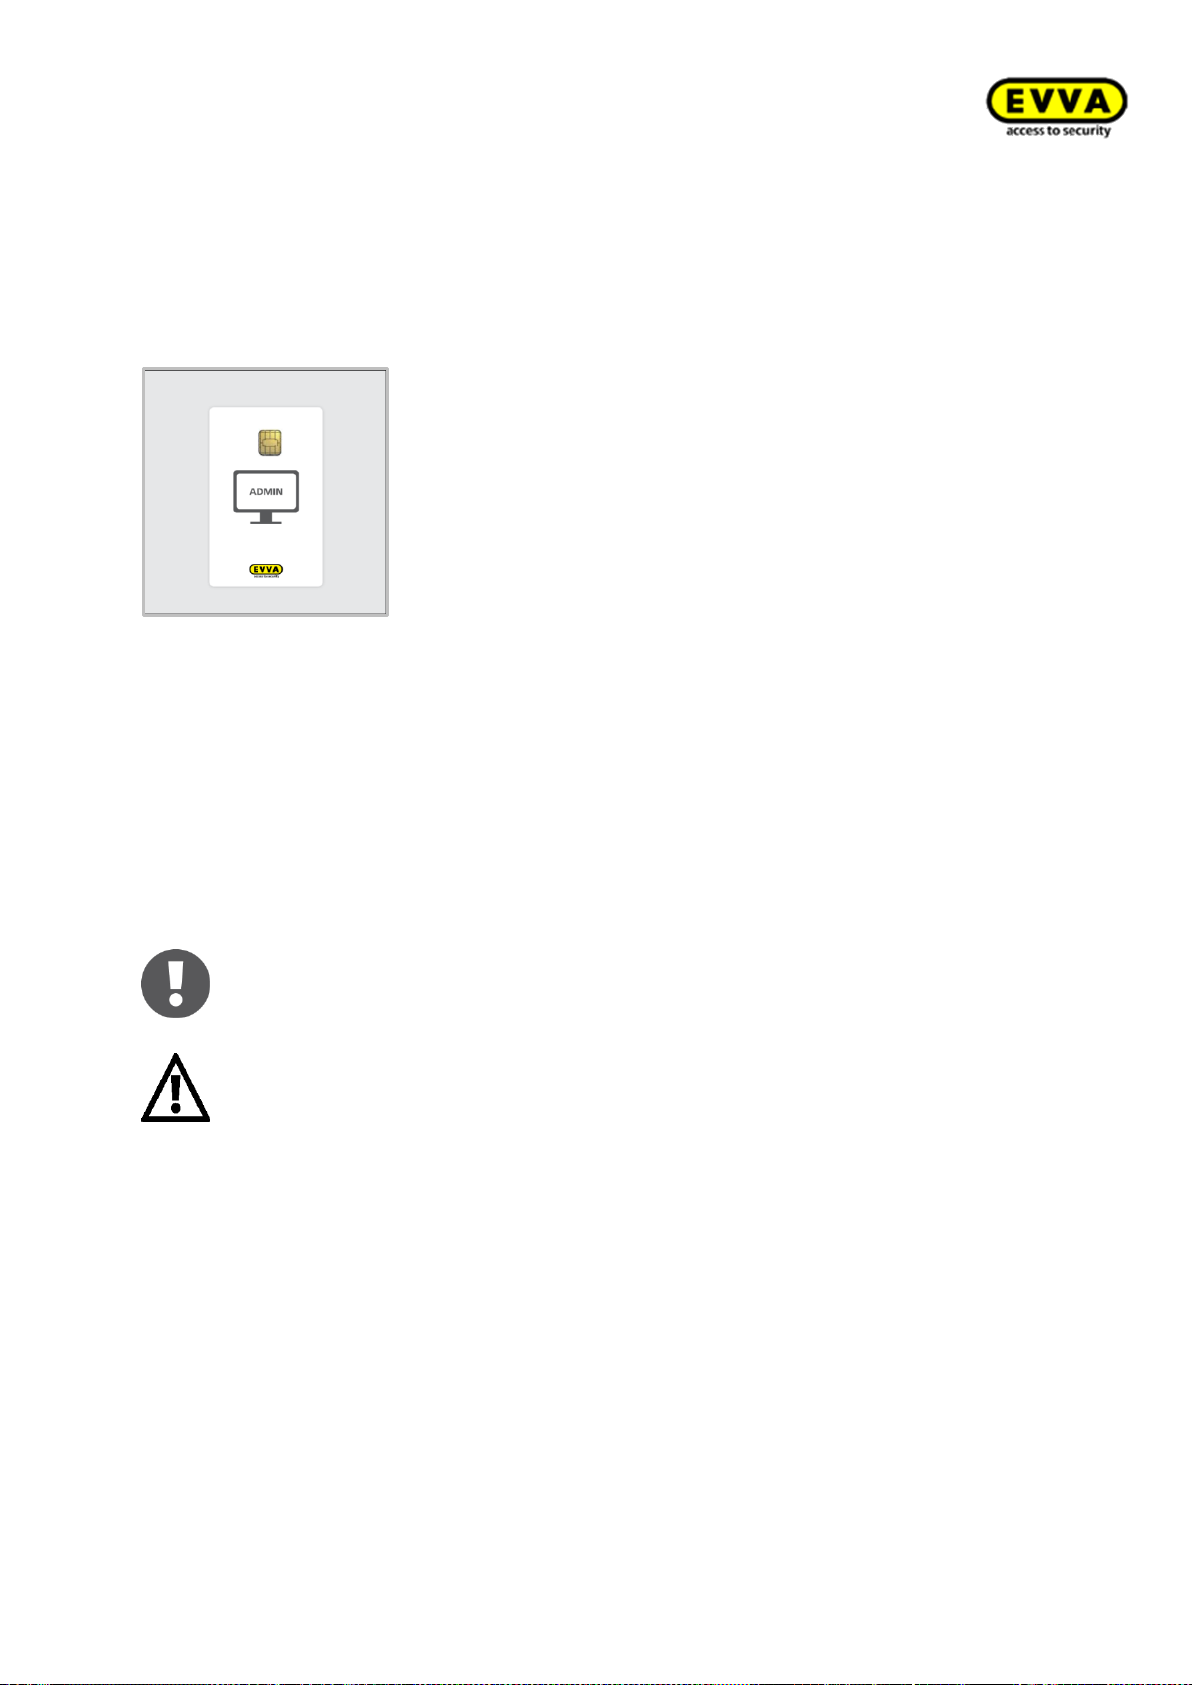
Figure 6: Admin Card (sample image)
The Admin Card is a contact-type, electronic chip card in standard format. It enables to access the
Xesar software and uniquely identifies the system. Any KeyCredits purchased to make changes to
authorisations are saved on the card (also applies to KeyCredits Unlimited).
Xesar software only enables the full range of functionality if a
valid Admin Card with sufficient credit has been inserted into the Xesar coding station.
24
Page 25
Xesar System manual 2.0 for version 2.0.36.17 | 24.06.2015 | misprinting and technical changes reserved
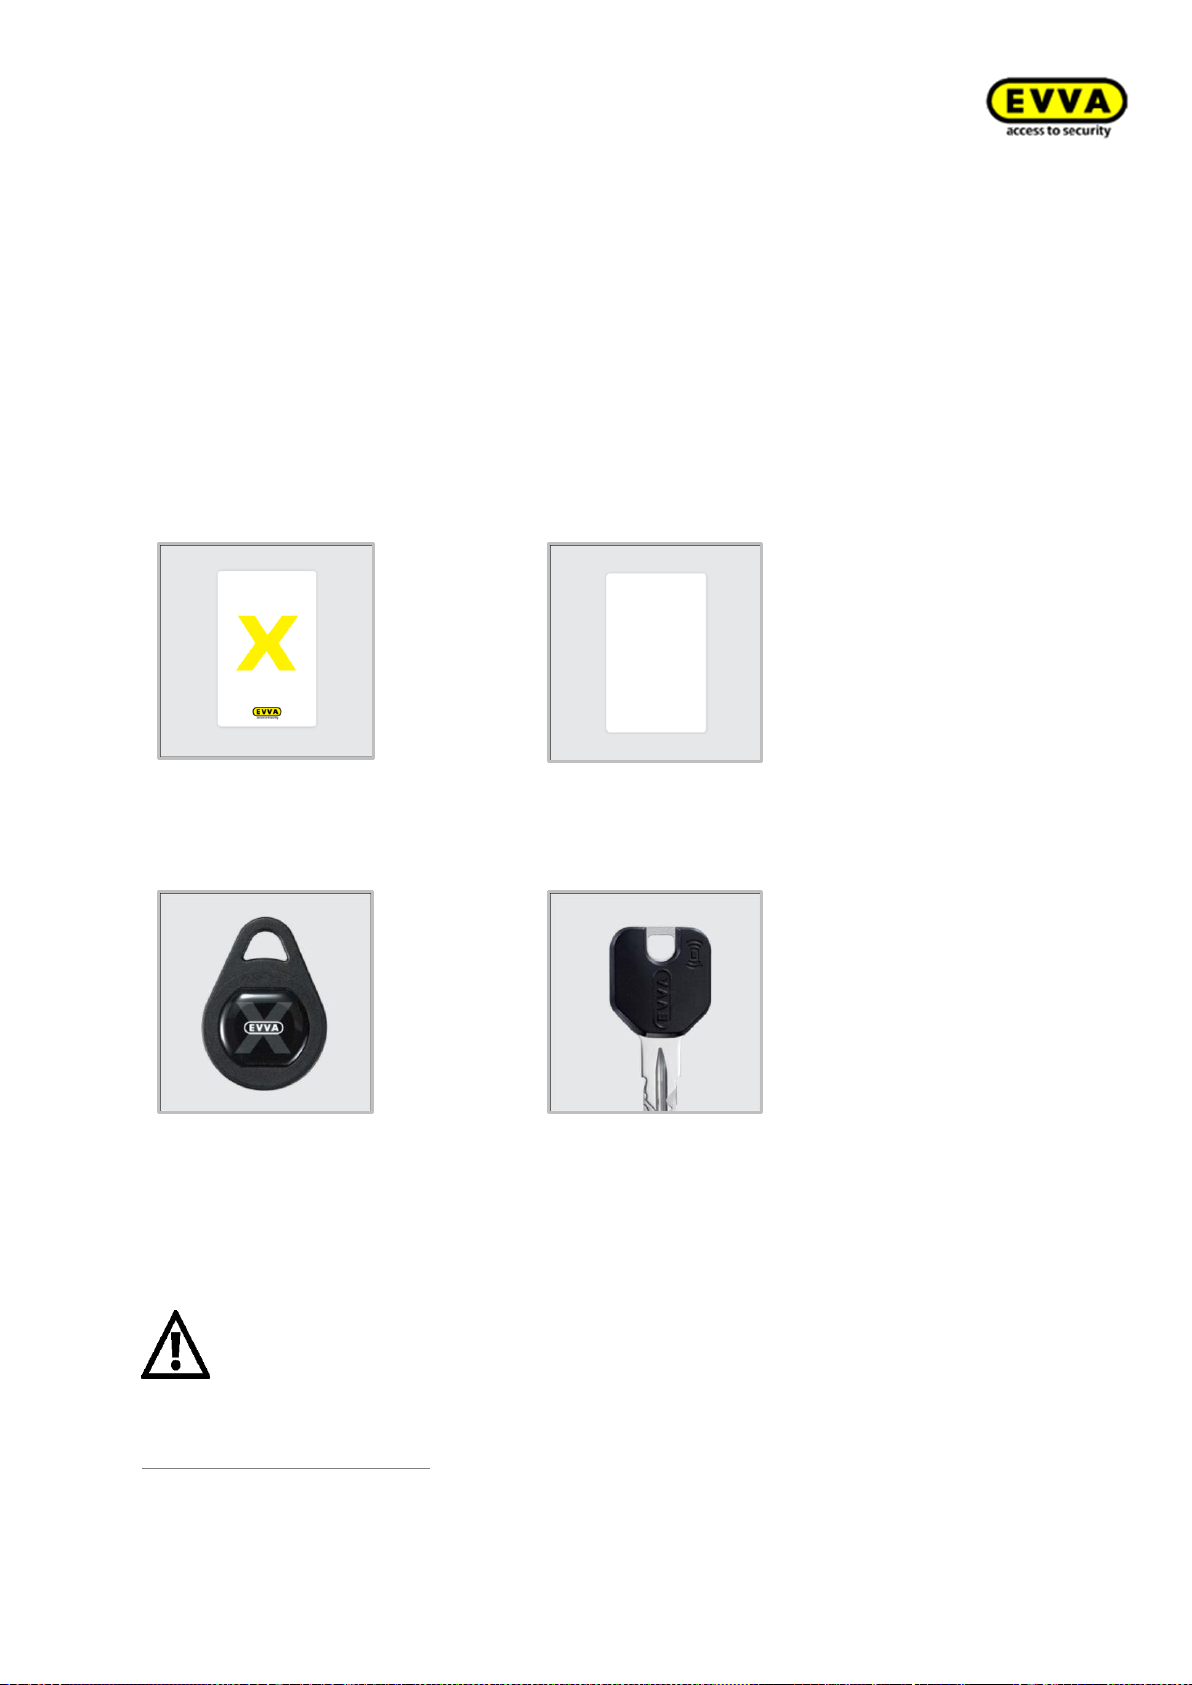
Xesar identification media
Xesar EVVA Card
Figure 7: Xesar EVVA Card (sample image)
Xesar Partner Card
Figure 8: Xesar Partner Card (sample image)
Xesar key tag
Figure 9: Xesar key tag (sample image)
Xesar combi key1
Figure 10: Xesar combi key (sample image)
Caution:
Do not place more than one Xesar identification medium on the Xesar coding station. Otherwise identification media may be incorrectly configured.
1
Xesar identification media are non-contact RFID chips based on MIFARE DESFire EV1 with
an overall memory capacity of 4 kB.
Overview of available Xesar identification media
In preparation
25
Page 26
Xesar System manual 2.0 for version 2.0.36.17 | 24.06.2015 | misprinting and technical changes reserved
Note:
Please refer to the corresponding data sheet for additional specifications at
HYPERLINK "http://www.evva.at/products/electronic-locking-systems-accesscontrol/xesar/assembly-instructions-datasheets/en/"
http://www.evva.at/products/electronic-locking-systems-accesscontrol/xesar/assembly-instructions-datasheets/en/
.
Once your system is no longer in construction mode following commissioning, you can use Xesar
Note:
Construction mode is active as long as the Xesar access component has not been
assigned to a system. Every Xesar access component is in this state upon delivery.
Note:
All Xesar identification media types are programmed using the Xesar coding station
by placing the identification media on an operating coding station and following
the corresponding instructions in the software.
identification media programmed with the Xesar coding station to open Xesar access components.
26
Page 27
Xesar System manual 2.0 for version 2.0.36.17 | 24.06.2015 | misprinting and technical changes reserved
Construction Card
Note:
Construction mode is active as long as the Xesar access component has not been
assigned to a system. Upon delivery, each Xesar access component is in construction mode.
Caution:
Please note that your system can be operated with any Construction Card when it
is in construction mode. For this reason, initialise your system as quickly as possible.
Figure 11: Construction Card (sample image)
The Construction Card is a contactless RFID chip based on MIFARE DESFire EV1, which is able to
open Xesar access components in construction mode.
Manual office mode is also available in addition to conventional access component operation (see
Section:
Manual office
mode). The Construction Card is ready for use immediately and it must not
be programmed using the Xesar coding station.
27
Page 28

Xesar System manual 2.0 for version 2.0.36.17 | 24.06.2015 | misprinting and technical changes reserved
Access with a Xesar identification medium
Caution:
Please note that you must move the identification medium away from the reader
field (approximately 20 cm) each time you hold it to the access component to
(de)activate office mode.
Xesar identification media can be used to operate access components according to the same principle. The reader unit is located in the black cap above the connector cover (EVVA logo). The corresponding access component reacts as configured once an authorised identification medium is
held to the reader field.
Single access (standard configuration)
In this process, the corresponding Xesar access component unlocks for five seconds after
having used a corresponding access component. Unlocking is confirmed by a visual and
acoustic signal. Unlocking is then completed automatically and the system once again confirms this with a visual and an acoustic signal.
Manual office mode
Each Xesar access component features a manual office mode function. It enables to engage access components or keep them open. This function is also available in factory state
(construction mode) in conjunction with the Construction Card.
Manual office mode is (de)activated by holding the identification medium to the corresponding Xesar access component twice within a space of two seconds. The Xesar access
component indicates the status change with an acoustic and a visual signal (refer to
Xesar access component).
How
Configure this function in the Xesar software if Xesar access components have already
been assigned to the system.
When the battery charge reaches a low level, a Battery warning is issued.
In this state, no automatic or manual office opening to be started.
Current permanent openings (automatic / manual), however, can still be closed. In addition, a clear log entry is applied to indicate not started automatic continuous openings.
28
Page 29

Xesar System manual 2.0 for version 2.0.36.17 | 24.06.2015 | misprinting and technical changes reserved
Automatic office mode (schedule-based)
Caution:
Manual and automatic office mode are equivalent with regard to authorisations. For
this reason, users with appropriate authorisations can manually suspend or reactivate automatic office mode. Manual office mode can also be deactivated by schedule-based, automatic office mode, providing this has been configured accordingly
in the software.
In addition to manual office mode, Xesar components can also be set to office mode automatically. In this process, you can set a certain time window in the Xesar software. The
Xesar access component indicates the status change of automatic office mode acoustically
and visually (refer to
Automatic office mode in factory state in conjunction with the Construction Card is not
possible.
When the battery charge reaches a low level, a Battery warning is issued.
In this state, no automatic or manual office opening to be started.
Current permanent openings (automatic / manual), however, can still be closed. In addition, a clear log entry is applied to indicate not started automatic continuous openings.
DeleteKey function
The blacklist (= list of all blocked media within a system) is transmitted to each
Xesar access component upon updating. If a medium on the blacklist is used at a
door component, the access component deletes it, regardless of whether or not it
was authorised for the respective door.
How
Xesar access component).
29
Page 30

Xesar System manual 2.0 for version 2.0.36.17 | 24.06.2015 | misprinting and technical changes reserved
Xesar access component interface
Caution:
Do not use pointed objects to open and close the cover to prevent potential damage.
All Xesar access components feature an interface to update Xesar access components. The interface may also be used as an emergency power supply for battery-operated Xesar access components.
The interface is located on the front of all Xesar access components, behind the connector cover
(EVVA logo). Slightly press towards the inside on the left-hand side of the EVVA logo (near the
"E") with your finger and fold out on the right-hand side (near the "A") and access the interface.
After having used the interface, once again carefully close the connector cover (EVVA logo) to
protect the your Xesar access components from penetrating dust and humidity.
30
Page 31
Xesar System manual 2.0 for version 2.0.36.17 | 24.06.2015 | misprinting and technical changes reserved
Xesar software
Note:
The Xesar software must be installed locally, server installations are not intended.
The installation requires approximately 1 GB free hard disk space.
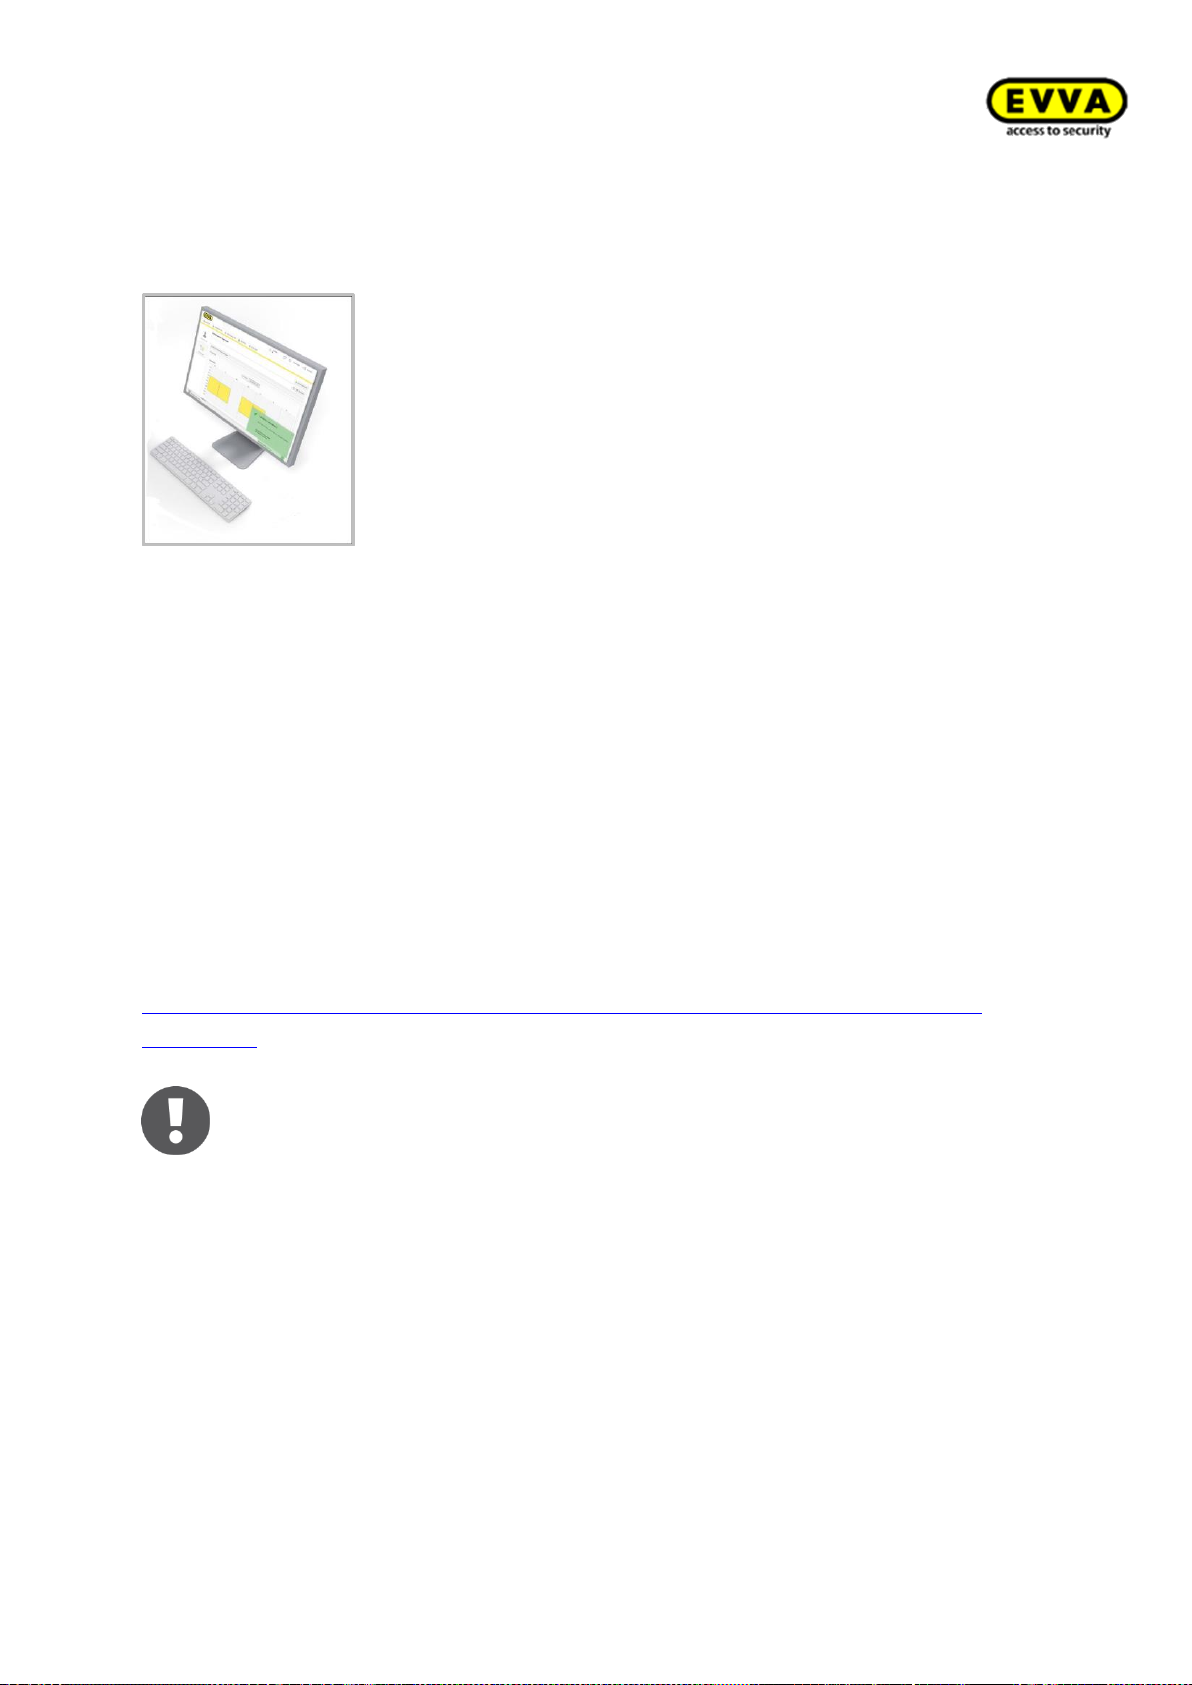
Figure 12: Xesar software (sample image)
EVVA provides the Xesar software free of charge as an administration and management tool suitable for the most diverse requirements. These include managing personal authorisations, creating
and deleting electronic keys, managing different access components, setting up time zones depending on authorisations, creating and managing areas, managing schedule-based office mode
options and many more functions.
In addition to password protection, the Xesar software features an additional security feature to
enhance the security of your system, the Admin Card.
(Refer to Section:
Register online to download the Xesar software:
http://www.evva.at/products/electronic-locking-systems-access-control/xesar/demand-xesarsoftware/en/
Admin
Card)
31
Page 32

Xesar System manual 2.0 for version 2.0.36.17 | 24.06.2015 | misprinting and technical changes reserved
EVVA KeyCredits
Figure 13: KeyCredits (sample image)
You benefit from all the free features of a comprehensive access software and with KeyCredits you
only pay what you actually need. Merely one KeyCredit is necessary to create or change an identification medium with any number of access authorisations.
Credit schemes
We provide the following credit schemes:
Quantity credit (10/50/100 KeyCredits)
Time-based credit (KeyCredit Unlimited with an unlimited number of
access authorisation changes for a duration of 12 or 36 months)
Software
plus
-package (to use the virtual network XVN)
You can merge quantity-based and time-based credit.
Any currently valid flat rate for time-based credit covers all authorisation changes that are
subject to a charge and EVVA KeyCredits are only deducted from the quantity credit for
authorisation changes that are subject to a charge once the time-based credit has expired.
32
Page 33

Xesar System manual 2.0 for version 2.0.36.17 | 24.06.2015 | misprinting and technical changes reserved
Functional principle
Note:
Please note that you require an Internet connection to enable loaded KeyCredits.
A balance must be redeemed for the replacement of an Admin-Card.
EVVA KeyCredits are enabled and locally saved on the Admin Card once you have entered
the code from the card in the Xesar software.
Time-based, limited flat rate KeyCredits, for instance with a flat rate for either 12 or 36
months, are saved on the EVVA Server and not on the Admin Card.
In the event that an Admin Card with time-based credit is lost or develops a fault, the remaining time-based credit of the 12/36-month flat rate saved on the server can be accessed and reactivated after having issued a replacement card. It is not possible to reactivate any remaining credit for quantity credits of 10/50/100 KeyCredits on faulty or lost
Admin Cards.
33
Page 34

Xesar System manual 2.0 for version 2.0.36.17 | 24.06.2015 | misprinting and technical changes reserved
Changes charged in KeyCredits (relevant to quantity credit only)
Note:
The system always deducts one KeyCredit upon saving (after having created or
changed authorisations).
You will be deducted one KeyCredit for the following changes:
Changing access authorisations for doors/areas
Changing time profiles (permanent access/periodic access)
Changing the expiry date of identification media
No KeyCredits deducted
You will not be deducted any KeyCredits for the following changes:
(De)activating manual office mode for a person
Blocking persons (blacklist)
Writing to/updating media
Changing personal master data
Extending the identification media validity
Additional information about EVVA KeyCredits
When you load KeyCredit Unlimited, the new period is added on to any on-going
KeyCredit Unlimited product validity periods.
KeyCredit codes can be redeemed only once.
Any KeyCredit codes available upon market launch can be redeemed for Xesar and AirKey.
The Xesar software notifies users in due time before expiry of the KeyCredits.
Use this voucher code from Xesar version 2.0.x.x and higher only.
The code will be permanently invalidated if it is entered in an older version!
Never unplug the coding station from your PC while activating new KeyCredits, to ensure a
successful charge.
34
Page 35

Xesar System manual 2.0 for version 2.0.36.17 | 24.06.2015 | misprinting and technical changes reserved
Software
plus
package
Figure 14: Software
plus
-package (sample image)
By activating the Software
plus
package, events must no longer be constantly transported via the
Xesar tablet to the software, but are "picked up" by the identification medium.
If an identification medium is held to an access component, events will be written onto the media.
By putting medium back on the coding station, events are transported back into the software.
Informations about the Software
plus
-package
The Software
Information about the Software
Additional Credits can be activated by clicking on
A single Software
plus
card can be purchased from an EVVA distributor.
plus
is displayed on the Dashboard (homepage).
Add Software
plus
-package is valid for 3 years, additional Software
plus
- package
plus
-package ex-
tend the licence accordenly
The Software
plus
-package (XVN functionality) also works without inserted Admin-Card
(if active)
A Software
plus
-package stays valid, even after the exchange of the Admin-Card.
(The additional KeyCredits acquired with the package expire however)
35
Page 36
Xesar System manual 2.0 for version 2.0.36.17 | 24.06.2015 | misprinting and technical changes reserved
Xesar access components
Xesar escutcheon
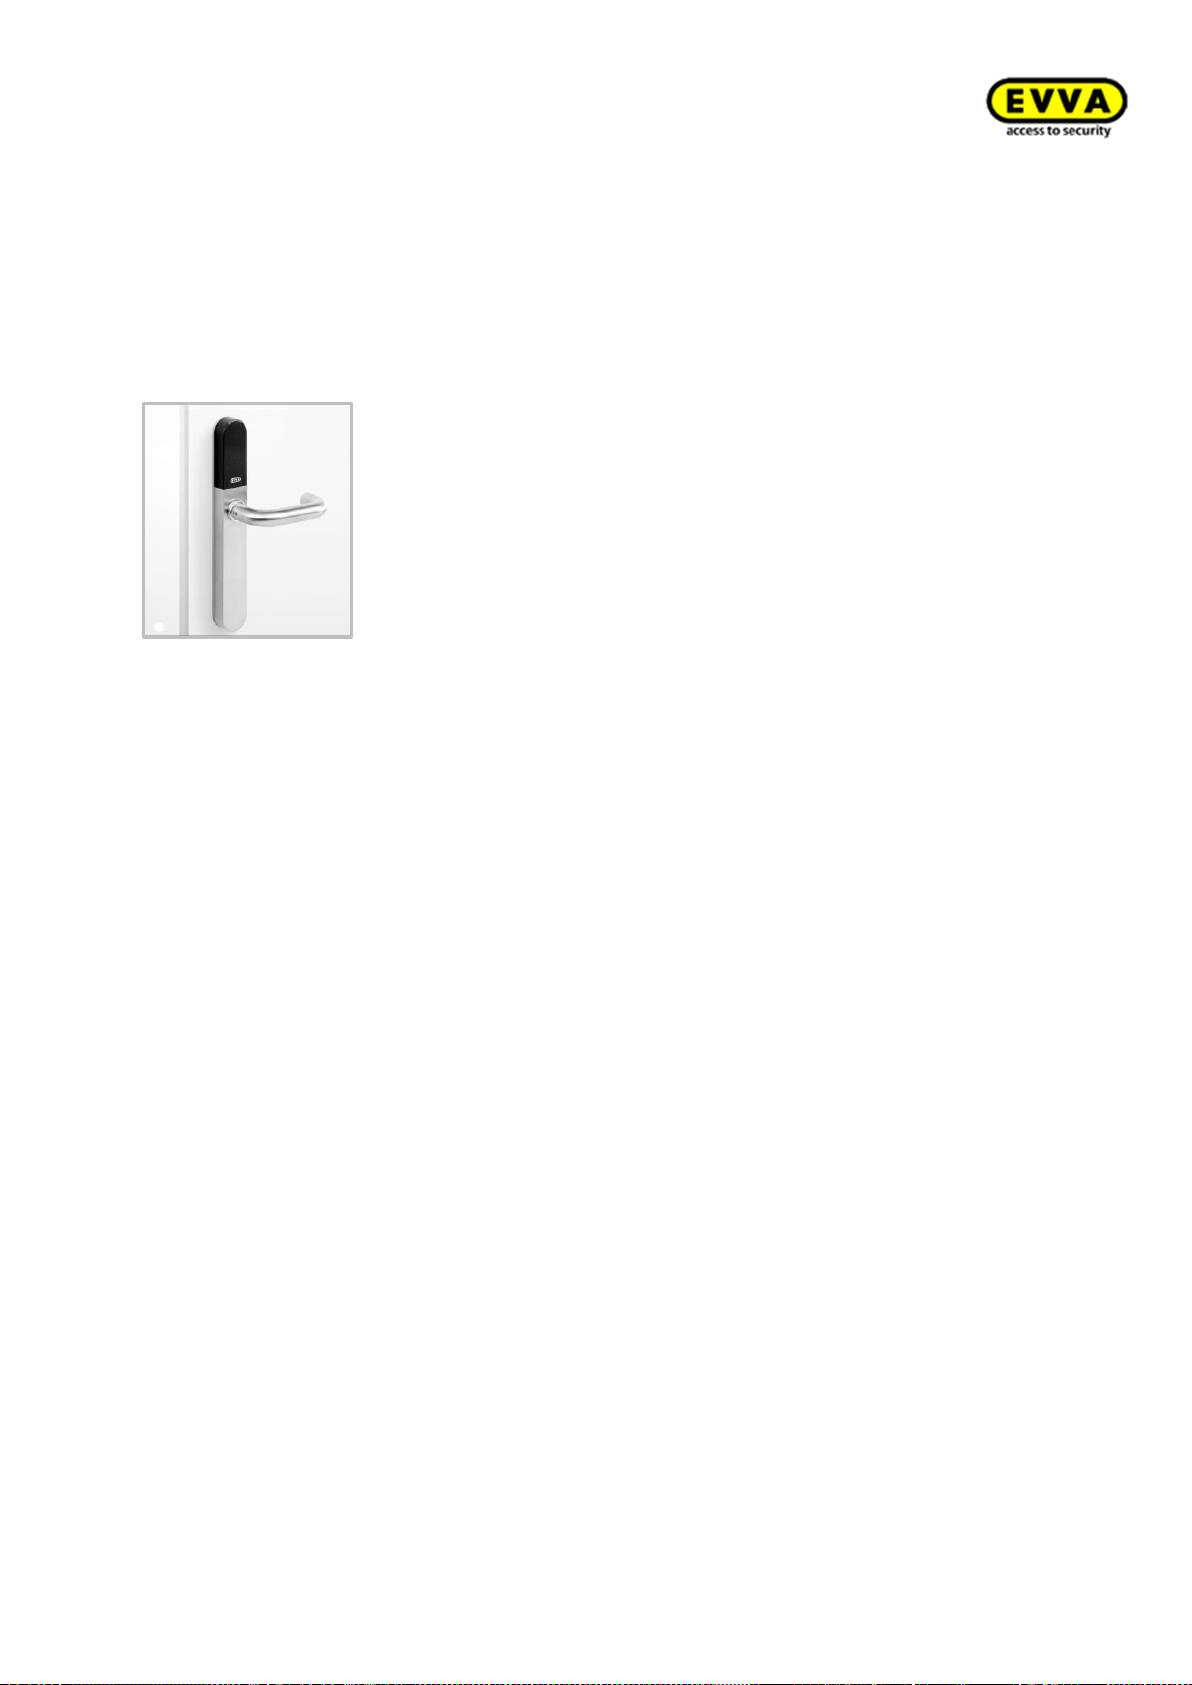
Figure 15: Xesar escutcheon (sample image)
The Xesar escutcheon is a battery-operated access component suitable for indoor and outdoor
use.
Please use the dedicated seal enclosed with the product in the event of use outdoors or in areas
that are exposed to water.
The Xesar escutcheon is suitable for conventional metal frames and solid door locks with a handle
range of up to 40°, for self-locking escape door locks as per EN 179/EN 1125, fire protection
doors and there are also versions available for panic and emergency exit doors with bar handles
or push handles as per EN 11251.
Please check carefully to make sure the Xesar product you selected is suitable for your application.
36
Page 37
Xesar System manual 2.0 for version 2.0.36.17 | 24.06.2015 | misprinting and technical changes reserved
Xesar escutcheon — functional description
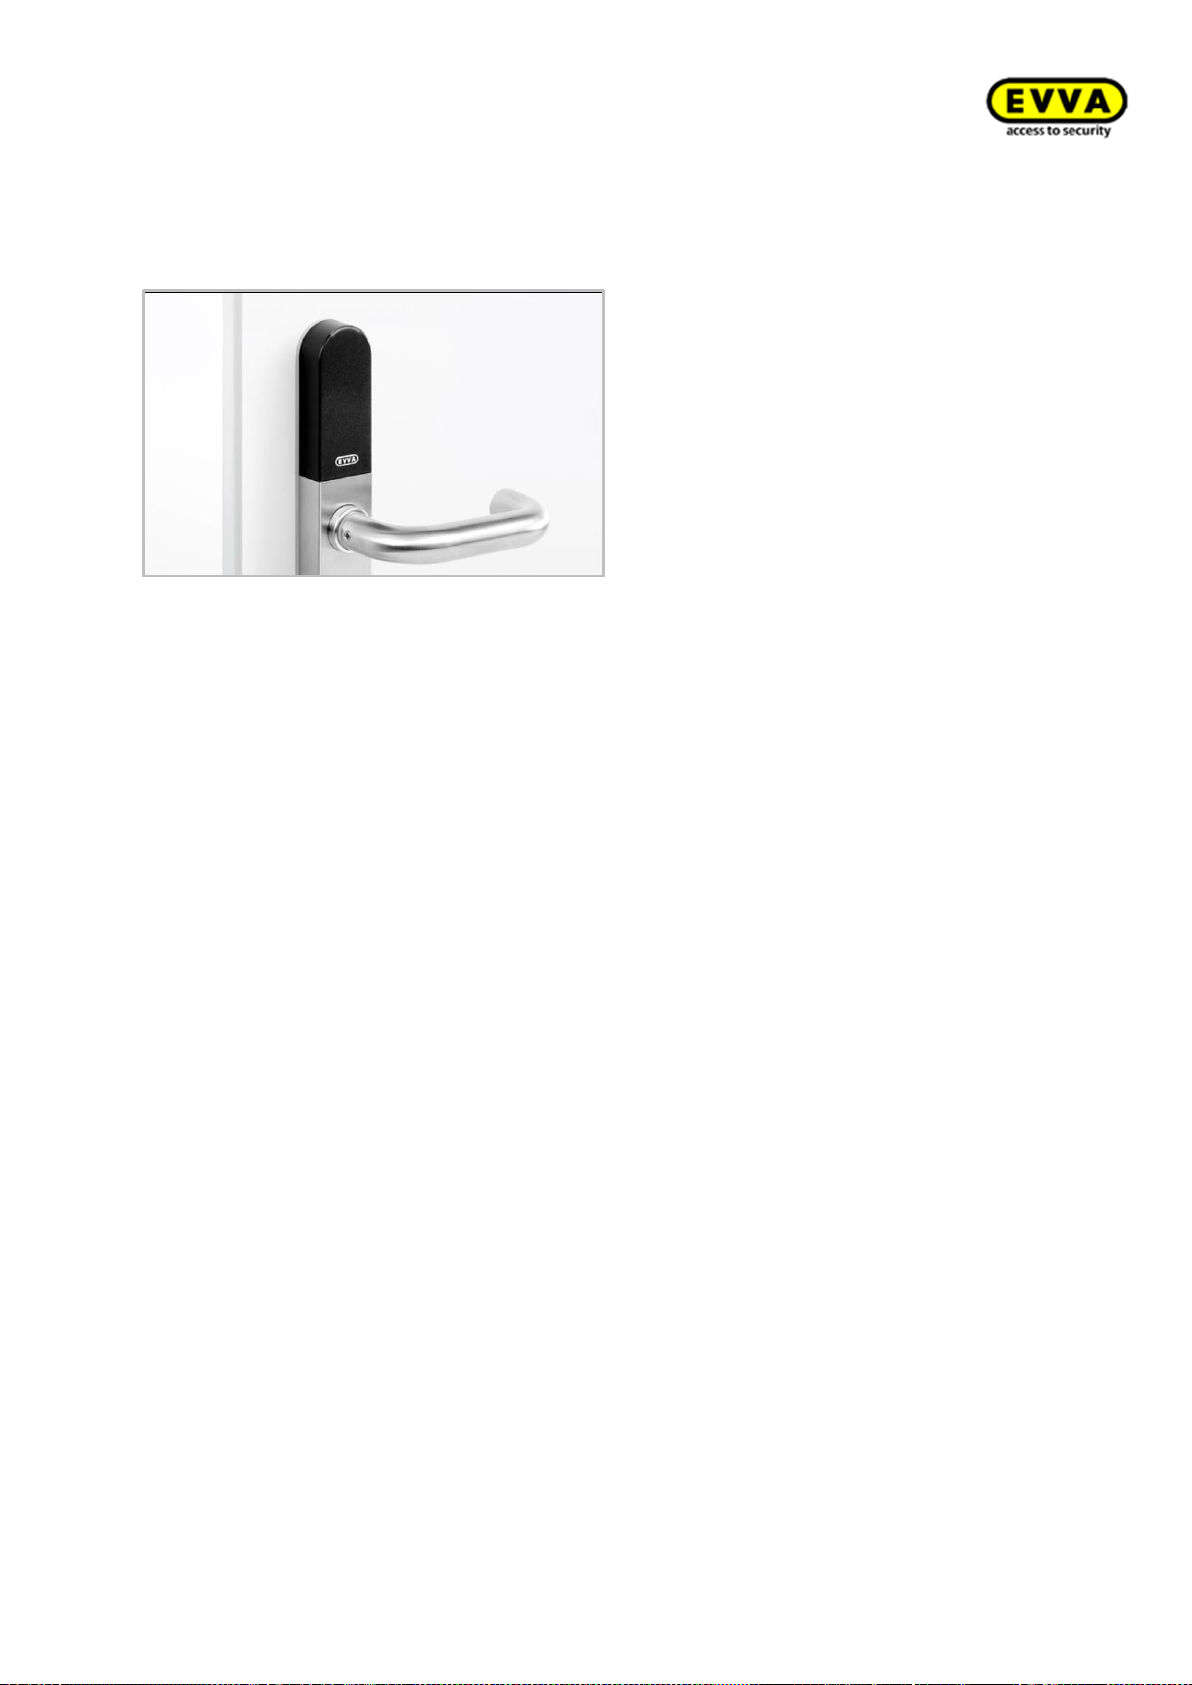
Figure 16: Xesar escutcheon (sample image)
Visual and acoustic feedback:
Xesar escutcheons indicate events acoustically and visually. For this purpose, there is an
LED on the upper edge of the reader unit of Xesar escutcheons. For a list of all signals
please refer to Section:
How Xesar access
component indicate events.
Reader unit:
The reader unit sensor is located on the outside of the Xesar escutcheon between the
connector (EVVA logo) and the LED.
Connector (synchronisation, updates, emergency power supply):
Xesar escutcheons feature a connector located under the connector cover (EVVA logo).
Slightly press towards the inside on the left-hand side of the EVVA logo (near the "E") and
fold out on the right-hand side (near the "A") to access the connector.
The connector is intended for synchronisation with Xesar tablets as well as for emergency
power supply using the optional emergency power device.
After use, once again carefully close the connector cover (EVVA logo) to protect the connector from penetrating dust and humidity. For this purpose, do not use pointed objects
to prevent damage.
37
Page 38

Xesar System manual 2.0 for version 2.0.36.17 | 24.06.2015 | misprinting and technical changes reserved
Functional principle:
The outside handle is disengaged by default – operating the outside handle will not
change the position of the latch. Hold an authorised Xesar identification medium to the
reader unit to mechatronically engage the outside handle for five seconds. If you operate
the outside handle during this period, the latch or bolt (depending on the lock type) will
be retrieved.
The inside handle is always engaged and can be operated at any time. In this process, the
mechanism always unlocks the latch.
Xesar escutcheons feature an event memory for the last 1,000 events. Once the event
memory is full, the system overwrites the oldest entries with the most recent events. For
this reason, it is important to regularly synchronise events to prevent event records from
being lost.
38
Page 39
Xesar System manual 2.0 for version 2.0.36.17 | 24.06.2015 | misprinting and technical changes reserved
Please refer to the corresponding data sheet for additional specifications at:
Please note the office mode function (Section:
Xesar
identification media) and the
different acoustic and visual signals (Section:
How Xesar access
component indi-
cate events)
Please note that if access components are installed in fire doors, the certificates are
exclusively valid in conjunction with approvals from the corresponding door manufacturer.
Please note the following, important notices before use!
http://www.evva.at/products/electronic-locking-systems-access-control/xesar/assembly-instructionsdatasheets/en/
Conditions of use
External ambient temperatures -20 °C to +60 °C, internal ambient temperatures 0 °C to +60 °C
(depending on the battery) | Humidity < 90 %, non-condensing | for ≥ 200,000 cycles as per EN
19061
Climatic and environmental effects
Note the defined suitability of the escutcheon for the respective ambient conditions as per its IP
rating and specific temperature range.
Do not use the escutcheon in very dusty environments.
Use the escutcheon in environments with a humidity below 90% only.
Clarify the application options with a specialist retailer before installing escutcheons in environments with a particularly high level of static charges.
Do not use escutcheons in corrosive atmospheres (e.g. chlorine, ammonia, lime water or salt water).
39
Page 40

Xesar System manual 2.0 for version 2.0.36.17 | 24.06.2015 | misprinting and technical changes reserved
Information regarding installation and the correct installation situation
Exclusively specialist personnel must install escutcheons according to the specifications in the assembly manual enclosed with the product. EVVA shall assume no liability for any kind for damage
resulting from improper assembly/installation.
Please note that the maximum nut correction position of the mortise lock must be 2° to ensure
the Xesar escutcheon operates correctly, as otherwise malfunctions cannot be excluded.
Check the lock for damage and dirt before assembling/installing the escutcheon. Please also observe the instructions of the lock manufacturer prior to installation of the escutcheon.
EVVA recommends using correctly operating mortise locks to safeguard the escutcheon operates
correctly.
Observe the corresponding international and national specifications in the corresponding legislation, directives, standards and guidelines, particularly regarding the requirements for escape routes
and emergency exits, during project management and installation of the escutcheons.
Note that you must choose the correct cylinder length depending on the door panel thickness
when installing mechanical lock cylinders. In installation situations or applications that are critical
to security the lock cylinder must protrude from the protective escutcheon by a maximum of 3
mm.
Before installing escutcheons – in particular in metal frame doors – check the installation situation
to prevent injuries (e.g. squashed limbs). In these cases, we recommend using a handle suitable for
metal frame doors.
Please note that if you install the escutcheon in smoke control/fire doors, you must verify the
components' suitability and potentially also obtain approval from the door manufacturer. The client shall be responsible for this.
A certificate in compliance with EN 179 or EN 1125 from the lock manufacturer is crucial for use
of the escutcheon in escape or panic doors. Check the correct function of the complete panic unit,
consisting of escutcheon, panic lock and panic bar. The aforementioned certificate must confirm
the escutcheons' suitability for installation.
An excessive tightening torque when fastening the fixing screws may cause escutcheon malfunctions or make it hard to operate the escutcheon. For this reason, note the data in the assembly
manual.
Before completing the installation, use a Construction Card to verify the correct function of the
escutcheon when the door is open as per the specifications in the assembly manual.
After having installed the escutcheon, note that you can only operate the system using a Construction Card until parameters have been completely configured.
Note that in the event of a clearance within the cylinder area of the door panel you are required
to seal the area using a conventional, mechanical cylinder, a blind cylinder or fire protection laminate. EVVA explicitly declares that this is the only method to maintain the validity of the fire protection certificate for the escutcheon.
40
Page 41
Xesar System manual 2.0 for version 2.0.36.17 | 24.06.2015 | misprinting and technical changes reserved
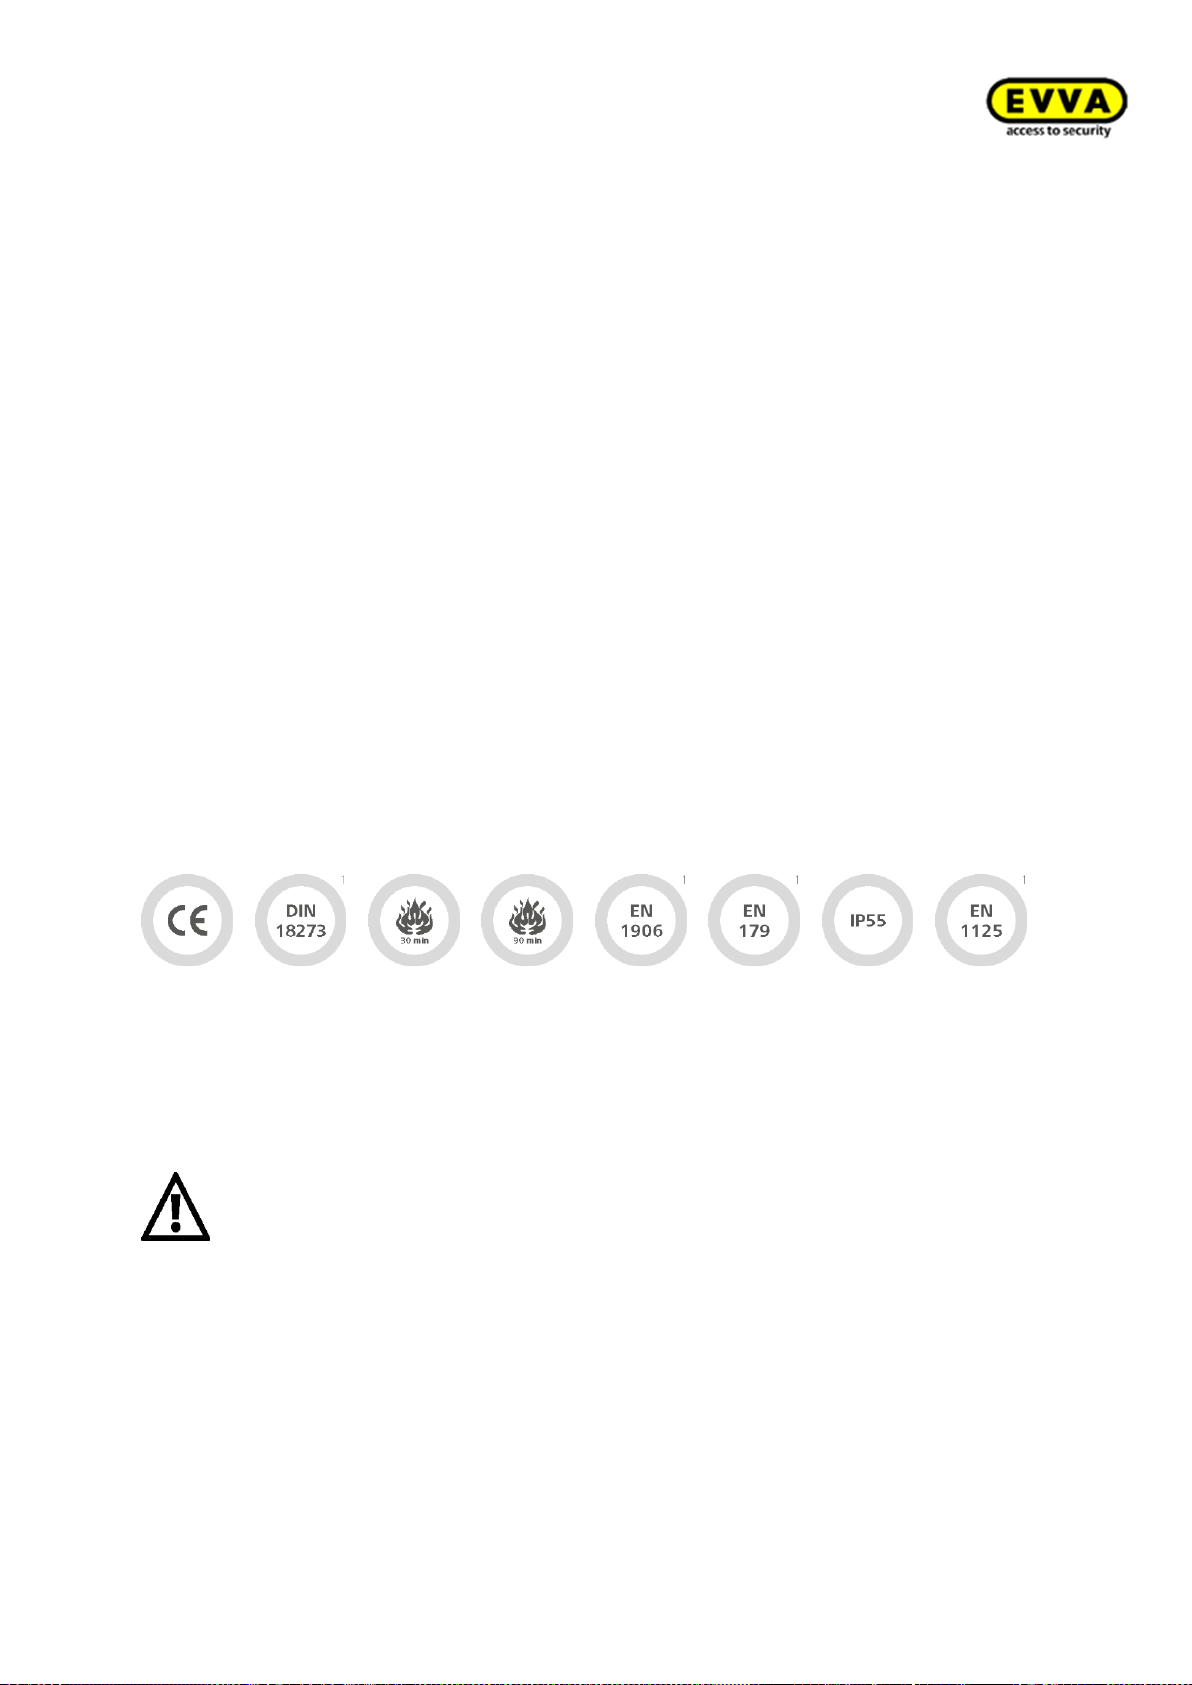
The Xesar escutcheon for fire doors is suitable for fire doors as per EN 1791. Suitable for internal and external doors | Can be combined with conventional solid door
locks with a handle range of up to 40° | Can be combined with self-locking fire
door locks as per EN 179/EN 11251 | Suitable for fire protection doors
Information on operation
Instruct users of the electronic locking system to always keep identification media safe.
In the event that Xesar identification media is lost, it must be immediately blocked using the software. The mechatronic lock cylinder must be immediately updated using the Xesar tablet.
Do not carry or lift the door panel using the handle.
Do not cover the reader equipment of the escutcheon with metal materials.
Regularly check the correct condition and function of the escutcheon (at minimum once a month)
as part of a functional check using authorised identification media.
We recommend you keep the locking system up-to-date by regularly installing software and firmware updates. Make sure to run firmware updates when the door is open and run a functional test
after having completed the update.
Cleaning information
Use a soft, lint-free cloth and soapy water to clean any visible areas of the escutcheon. Do not use
corrosive products or sprays that may be aggressive on metal surfaces, plastics or sealants and
seals.
Standards and guidelines
CE tested | DIN 182731 | EN 1634: 30 minutes | EN 1634: 90 minutes1 | Austrian standard 3859: 30
minutes1 | Austrian standard 3859: 90 minutes1 | EN 19061 | EN 1791 | IP55 protection (when using
enclosed seals IP55) | DIN 18257:ES01 (with stability plate) | ÖNORM (Austrian standard) B
5351:WB11 (ÖNORM B 5338:WK1)
Battery replacements
We recommend to have batteries replaced by trained, specialist personnel only.
Replace batteries in due time, as soon as the escutcheon indicates "Battery low", see Section "
Xesar access
component indicate events".
Repeatedly disregarding the "Battery low" warning may cause escutcheon malfunctions.
How
41
Page 42

Xesar System manual 2.0 for version 2.0.36.17 | 24.06.2015 | misprinting and technical changes reserved
At normal ambient temperatures, the first "Battery low" warning indicates that up to 1,000 actua-
Battery replacements or power cuts must not exceed a duration of one minute as
otherwise the escutcheon must be resynchronised using the Xesar tablet.
The procedure to replace batteries in Xesar escutcheons for panic doors is identical
despite the different internal escutcheon plate's design.
tions are still possible within the next 4 weeks. Temperatures deviating from normal ambient temperatures may cause the escutcheon to prematurely fail.
Do not use rechargeable batteries. Please ask your specialist retailer for a list of recommended
battery models.
Always replace all batteries used (three AAA batteries) in the corresponding lock cylinder! If applicable, you may be required to synchronise the system time using the Xesar tablet after having
replaced the batteries.
If the sealing kit has been applied, make sure not to damage the seal upon changing batteries.
If the batteries are drained, it is exclusively possible to operate the escutcheon using the emergency power device (optional accessory).
Battery replacement procedure
1. The battery compartment is located in the top of the internal escutcheon plate. You re-
quire a T8 Torx screwdriver to open the battery compartment.
2. Turn the Torx screw clockwise until you can remove the internal escutcheon plate.
3. Hold the bottom of the internal escutcheon plate and carefully remove it from the at-
tachment panel. You can now pull the internal escutcheon plate over the handle. Make
sure you do not scratch the handle in the process. You can alternatively remove the internal handle beforehand.
4. Now remove the three empty AAA batteries and replace them with new batteries you ac-
quired earlier. Ensure correct polarity when inserting batteries.
The component outputs a signal to confirm having correctly completed the battery replacement
(signal 8 in the signal table from Section
: How Xesar access
component indicate events)
Now once again position the internal escutcheon plate on the attachment plate and proceed in
reverse order to reassemble the internal escutcheon plate.
42
Page 43
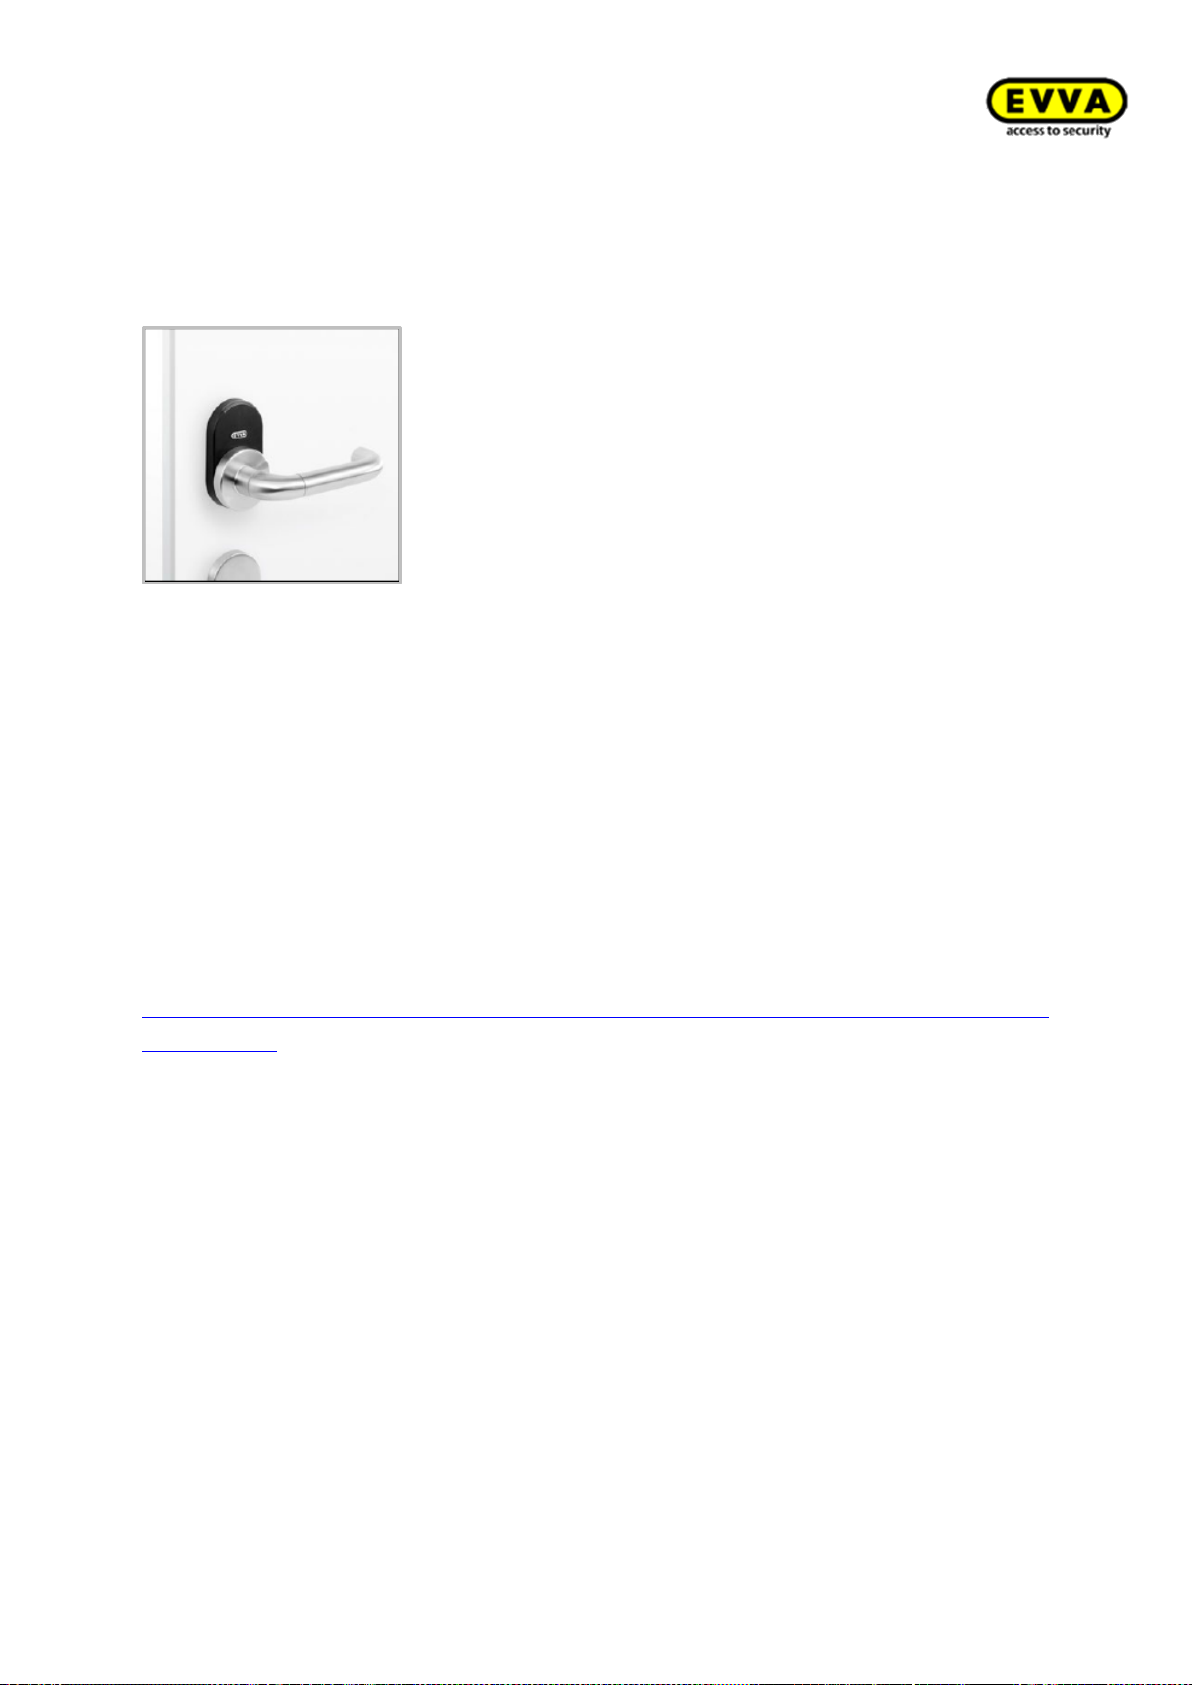
Xesar System manual 2.0 for version 2.0.36.17 | 24.06.2015 | misprinting and technical changes reserved
Xesar handle
Figure 17: Xesar handle (sample image)
The Xesar handle is a battery-operated access component suitable for internal solid or glass doors.
Thanks to compliance with fundamental lock standards and a handle range of up to 40° the Xesar
handle is compatible with many European lock types.
The Xesar handle is suitable for conventional solid door locks with a handle range of up to 40°,
self-locking escape door locks as per EN 179 and fire protection doors.
Please check carefully to make sure the Xesar product you selected is suitable for your application.
We have made the required data sheet available in the download section of our homepage:
http://www.evva.at/products/electronic-locking-systems-access-control/xesar/assembly-instructionsdatasheets/en/
43
Page 44
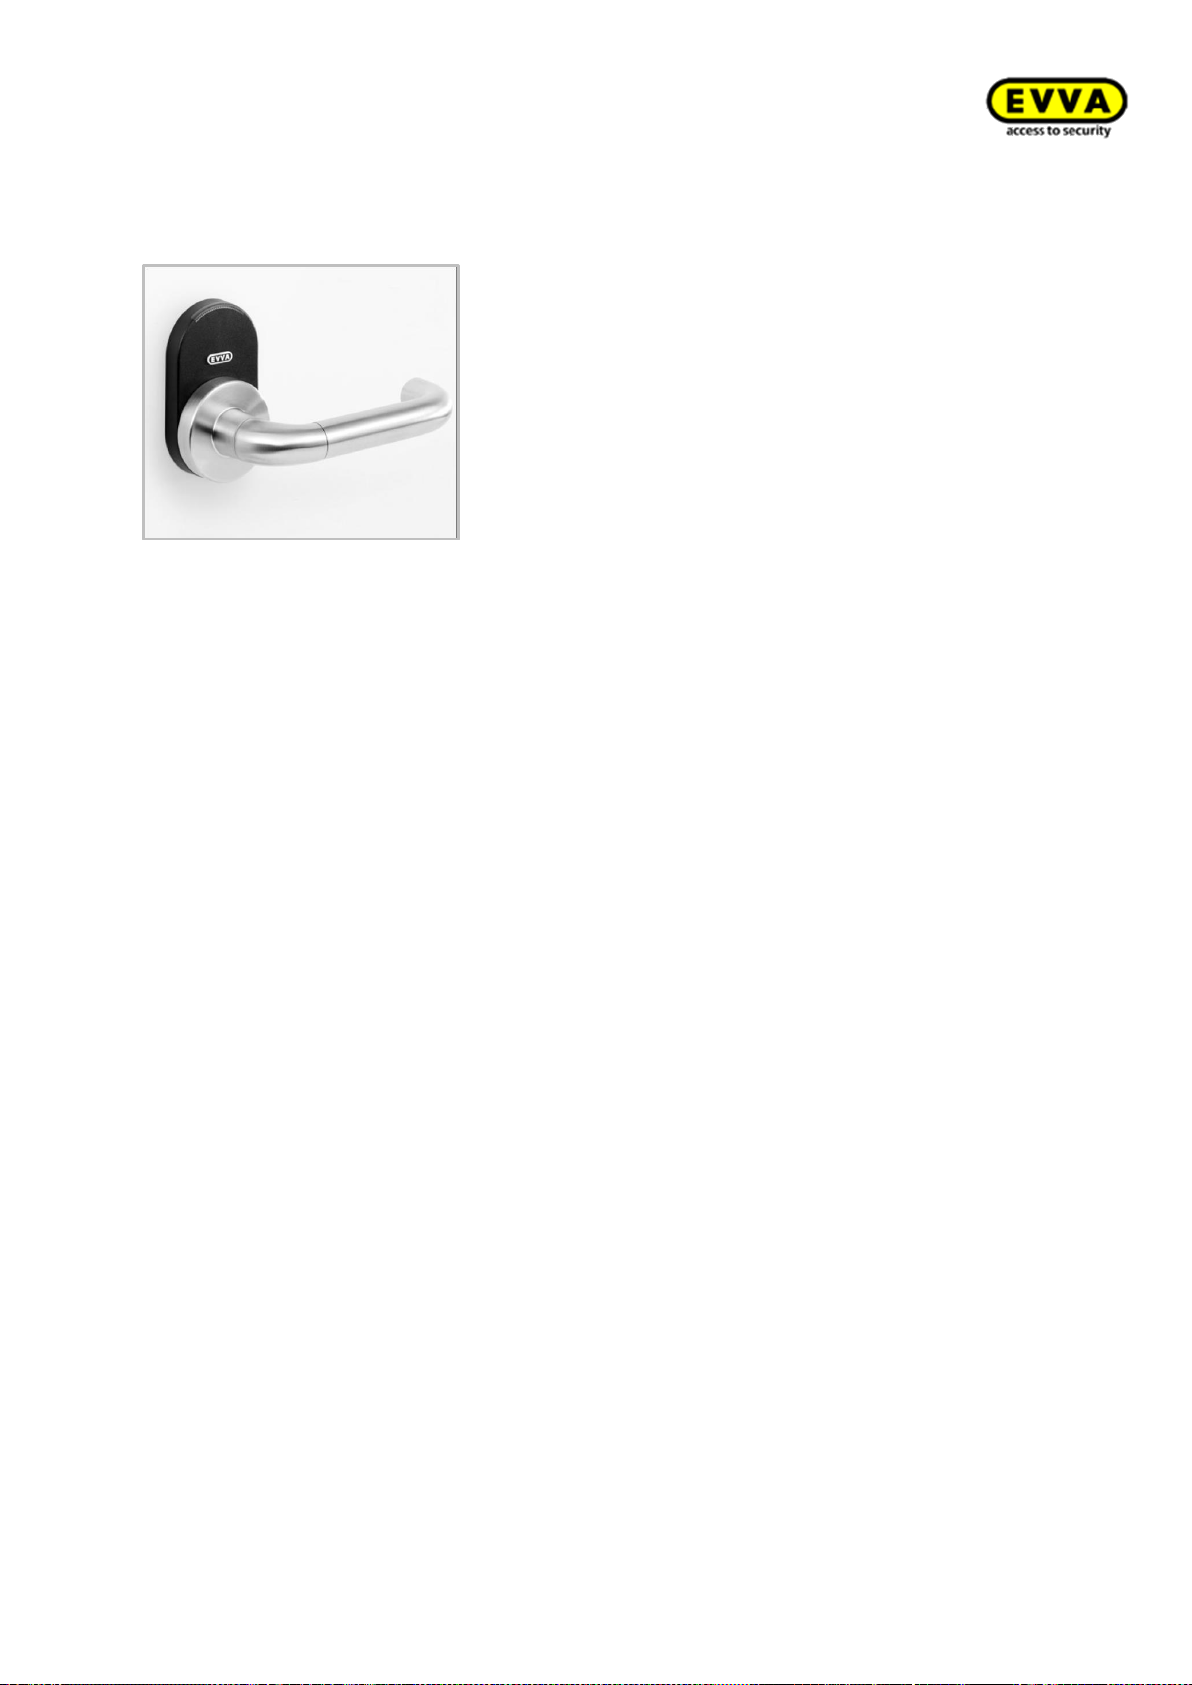
Xesar System manual 2.0 for version 2.0.36.17 | 24.06.2015 | misprinting and technical changes reserved
Xesar handle — functional description
Figure 18: Xesar handle (sample image)
Visual and acoustic feedback:
Xesar handles indicate events acoustically and visually. For this purpose, there is an LED on
the upper edge of the reader unit of Xesar handles. For a list of all signals please refer to
Section:
How Xesar access
component indicate events.
Reader unit:
The reader unit sensor is located on the outside of the Xesar handle between the connector (EVVA logo) and the LED.
Connector (synchronisation, updates, emergency power supply)
Xesar handles feature a connector located under the connector cover (EVVA logo). Slightly
press towards the inside on the left-hand side of the EVVA logo (near the "E") and fold out
on the right-hand side (near the "A") to access the connector.
The connector is intended for synchronisation with Xesar tablets as well as for emergency
power supply using the optional emergency power device.
After use, once again carefully close the connector cover (EVVA logo) to protect the connector from penetrating dust and humidity. For this purpose, do not use pointed objects
to prevent damage.
44
Page 45

Xesar System manual 2.0 for version 2.0.36.17 | 24.06.2015 | misprinting and technical changes reserved
Functional principle
The outside handle is disengaged by default – operating the outside handle will not
change the position of the latch. Hold an authorised Xesar identification medium to the
reader unit to mechatronically engage the outside handle for five seconds. If you operate
the outside handle during this period, the latch or bolt (depending on the lock type) will
be retrieved.
The inside handle is always engaged and can be operated at any time. In this process, the
mechanism always unlocks the latch.
Xesar handles feature an event memory for the last 1,000 events. Once the event memory
is full, the system overwrites the oldest entries with the most recent events. For this reason, it is important to regularly synchronise events to prevent event records from being
lost.
45
Page 46
Xesar System manual 2.0 for version 2.0.36.17 | 24.06.2015 | misprinting and technical changes reserved
Please refer to the corresponding data sheet for additional specifications at:
Please note the office mode function (Section:
Xesar
identification media) and the
different acoustic and visual signals (Section:
How Xesar access
component indi-
cate events)
Please note that if access components are installed in fire doors, the certificates are
exclusively valid in conjunction with approvals from the corresponding door manufacturer.
Please note the following, important notices before use!
http://www.evva.at/products/electronic-locking-systems-access-control/xesar/assembly-instructionsdatasheets/en/
Climatic and environmental effects
Note the defined suitability of the handle for the respective ambient conditions as per its IP rating
and specific temperature range.
Do not use the handles in very dusty environments.
Use the handles in environments with a humidity below 90% only.
Clarify the application options with a specialist retailer before installing handles in environments
with a particularly high level of static charges.
Do not use handles in corrosive atmospheres (e.g. chlorine, ammonia, lime water or salt water).
Conditions of use
Ambient temperature +5 °C to +50 °C (depending on the battery) | Humidity < 90 %, noncondensing | For 200,000 cycles as per EN 19061 | IP40 protection
Information regarding installation and the correct installation situation
Exclusively specialist personnel must install handles according to the specifications in the assembly
manual enclosed with the product. EVVA shall assume no liability for any kind for damage resulting from improper assembly/installation.
Note that the maximum nut correction position of the mortise lock must be 5° to ensure the Xesar handle operates correctly, as otherwise malfunctions cannot be excluded.
46
Page 47

Xesar System manual 2.0 for version 2.0.36.17 | 24.06.2015 | misprinting and technical changes reserved
Check the lock for damage and dirt before assembling/installing the handle. Please also observe
the instructions of the lock manufacturer prior to assembly/installation. EVVA recommends using
correctly operating mortise locks to safeguard the handle operates correctly.
Exclusively use accessories and spare parts recommended by EVVA.
Please observe the corresponding international and national specifications in the corresponding
legislation, directives, standards and guidelines, particularly regarding the requirements for escape
routes and emergency exits, during project management and installation of the handles.
Note that changing over the handle from one side to the other must be performed in accordance
with the specifications in the assembly manual and exclusively when the battery has been removed.
Please note that if you would like to install the handle in smoke control/fire doors, you must verify
the handles' suitability and potentially also obtain approval from the door manufacturer. The client
shall be responsible for this.
A certificate in compliance with EN 179 or EN 1125 from the lock manufacturer is crucial for use
of the handle in escape or panic doors. Check the correct function of the complete panic unit,
consisting of panic lock and handle fittings. The aforementioned certificate must confirm the
handles' suitability for installation.
An excessive tightening torque when fastening the fixing screws may cause handle malfunctions or
make it hard to operate the handle. For this reason, note the data in the assembly manual.
Before completing the installation, use a Construction Card to verify the correct function of the
handle when the door is open as per the specifications in the assembly manual.
After having installed the handle, please note that you can only operate the system using a Construction Card until parameters have been completely configured.
Information on operation
Instruct users of the electronic locking system to always keep identification media safe.
In the event that Xesar identification media is lost, it must be immediately blocked using the software. The mechatronic lock cylinder must be immediately updated.
Do not carry or lift the door panel using the handle.
Do not cover the reader equipment of the handle with metal materials.
Regularly check the correct condition and function of the handle (at minimum once a month) as
part of a functional check using authorised identification media.
We recommend you keep the locking system up-to-date by regularly installing software and firmware updates. Make sure to run firmware updates when the door is open and run a functional test
after having completed the update.
47
Page 48

Xesar System manual 2.0 for version 2.0.36.17 | 24.06.2015 | misprinting and technical changes reserved
Cleaning information
Use a soft, lint-free cloth and soapy water to clean any visible areas of the escutcheon. Do not use
corrosive products or sprays that may be aggressive on metal surfaces, plastics or sealants and
seals.
Standards and guidelines
CE tested | DIN 182731 | EN 1634: 30 minutes | EN 1634: 90 minutes1 | Austrian standard 3859: 30
minutes1 | Austrian standard 3859: 90 minutes1 | EN 19061 | EN 1791 | IP40 protection
Battery replacements
We recommend to have batteries replaced by trained, specialist personnel only.
Replace batteries in due time, as soon as the handle indicates "Battery low", see Section "
Xesar access
component indicate events".
How
Repeatedly disregarding the "Battery low" warning may cause handle malfunctions.
At normal ambient temperatures, the first "Battery low" warning indicates that up to 1,000 actuations are still possible within the next 4 weeks. Temperatures deviating from normal ambient temperatures may cause the handle to prematurely fail.
Do not use rechargeable batteries. Please ask your specialist retailer for a list of recommended
battery models.
If the batteries have been drained, it is exclusively possible to operate the handle using the emergency power device (optional accessory).
11 In preparation | 2 When using the enclosed seals
48
Page 49

Xesar System manual 2.0 for version 2.0.36.17 | 24.06.2015 | misprinting and technical changes reserved
Battery replacement procedure
Battery replacements or power cuts must not exceed a duration of one minute as
otherwise the Xesar handle must be resynchronised using the Xesar tablet.
1. The battery compartment is located in the outside handle of the Xesar handle. You require
one type CR123A battery (please ask you retailer for a list of recommended battery models) and the following tools to open the battery compartment: Allen key, 2.5.
2. If you would like to remove the handle tube of the outside handle, use the Allen key and
turn the attachment screw anti-clockwise until you can remove the handle tube.
3. Make sure you only screw in the attachment screw as far as absolutely necessary.
4. Now remove the empty battery and replace it with a new battery you acquired earlier. En-
sure correct polarity when inserting the battery.
5. Once again position the handle tube on the outside handle and fasten it in reverse se-
quence.
The component outputs a signal to confirm having correctly completed the battery replacement
(signal 8 in the signal table from Section
: How Xesar access
component indicate events)
49
Page 50
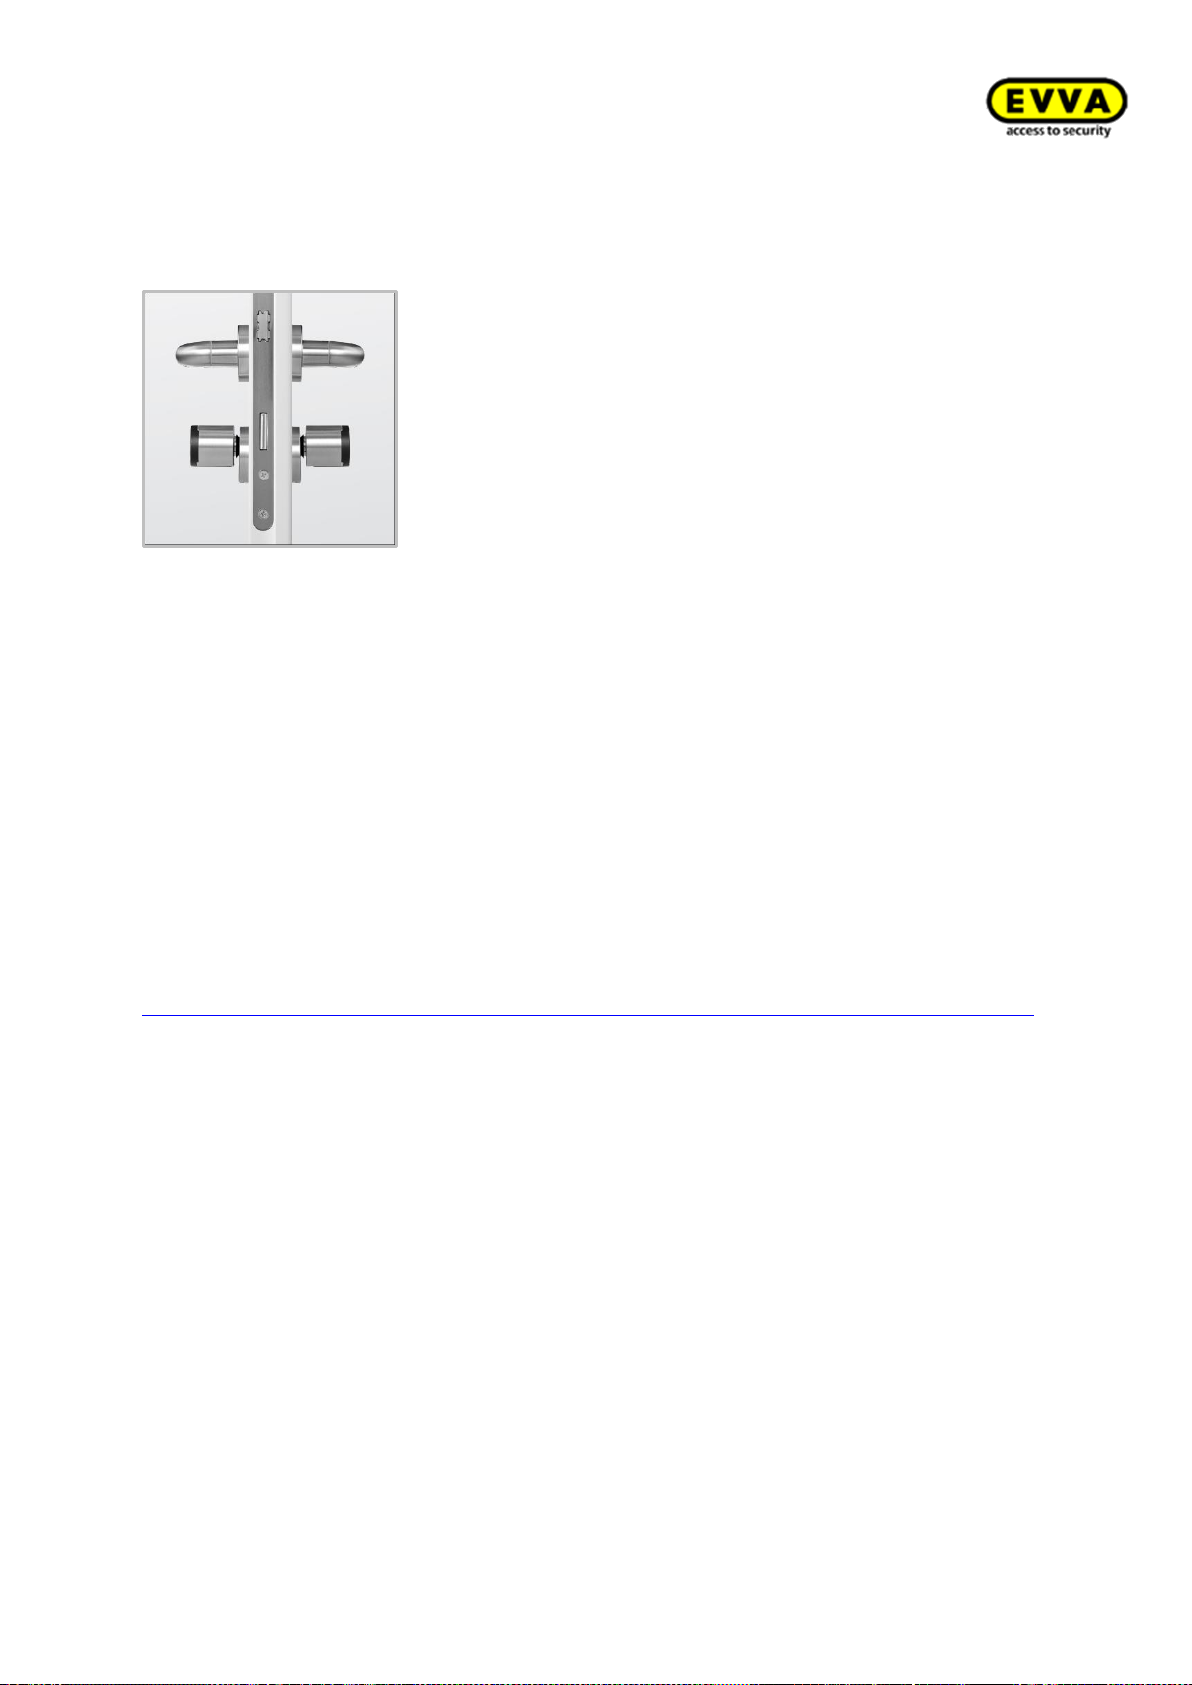
Xesar System manual 2.0 for version 2.0.36.17 | 24.06.2015 | misprinting and technical changes reserved
Xesar cylinder
Figure 19: Xesar cylinder (sample image)
Xesar cylinders are battery-operated access components.
The standard Xesar cylinder version already comes with a host of anti-manipulation protection
measures. Please refer to the product catalogue for more information.
Xesar cylinders are suitable for indoors and outdoors as well as fire and emergency exit doors.
Xesar cylinders are available as half cylinders or double cylinders with one-sided or double-sided,
electronic access.
Please carefully check the Xesar cylinder you selected is suitable for your application.
Please refer to the corresponding data sheet for additional specifications at:
http://www.evva.at/products/electronic-locking-systems-access-control/xesar/system-overview/en/
50
Page 51
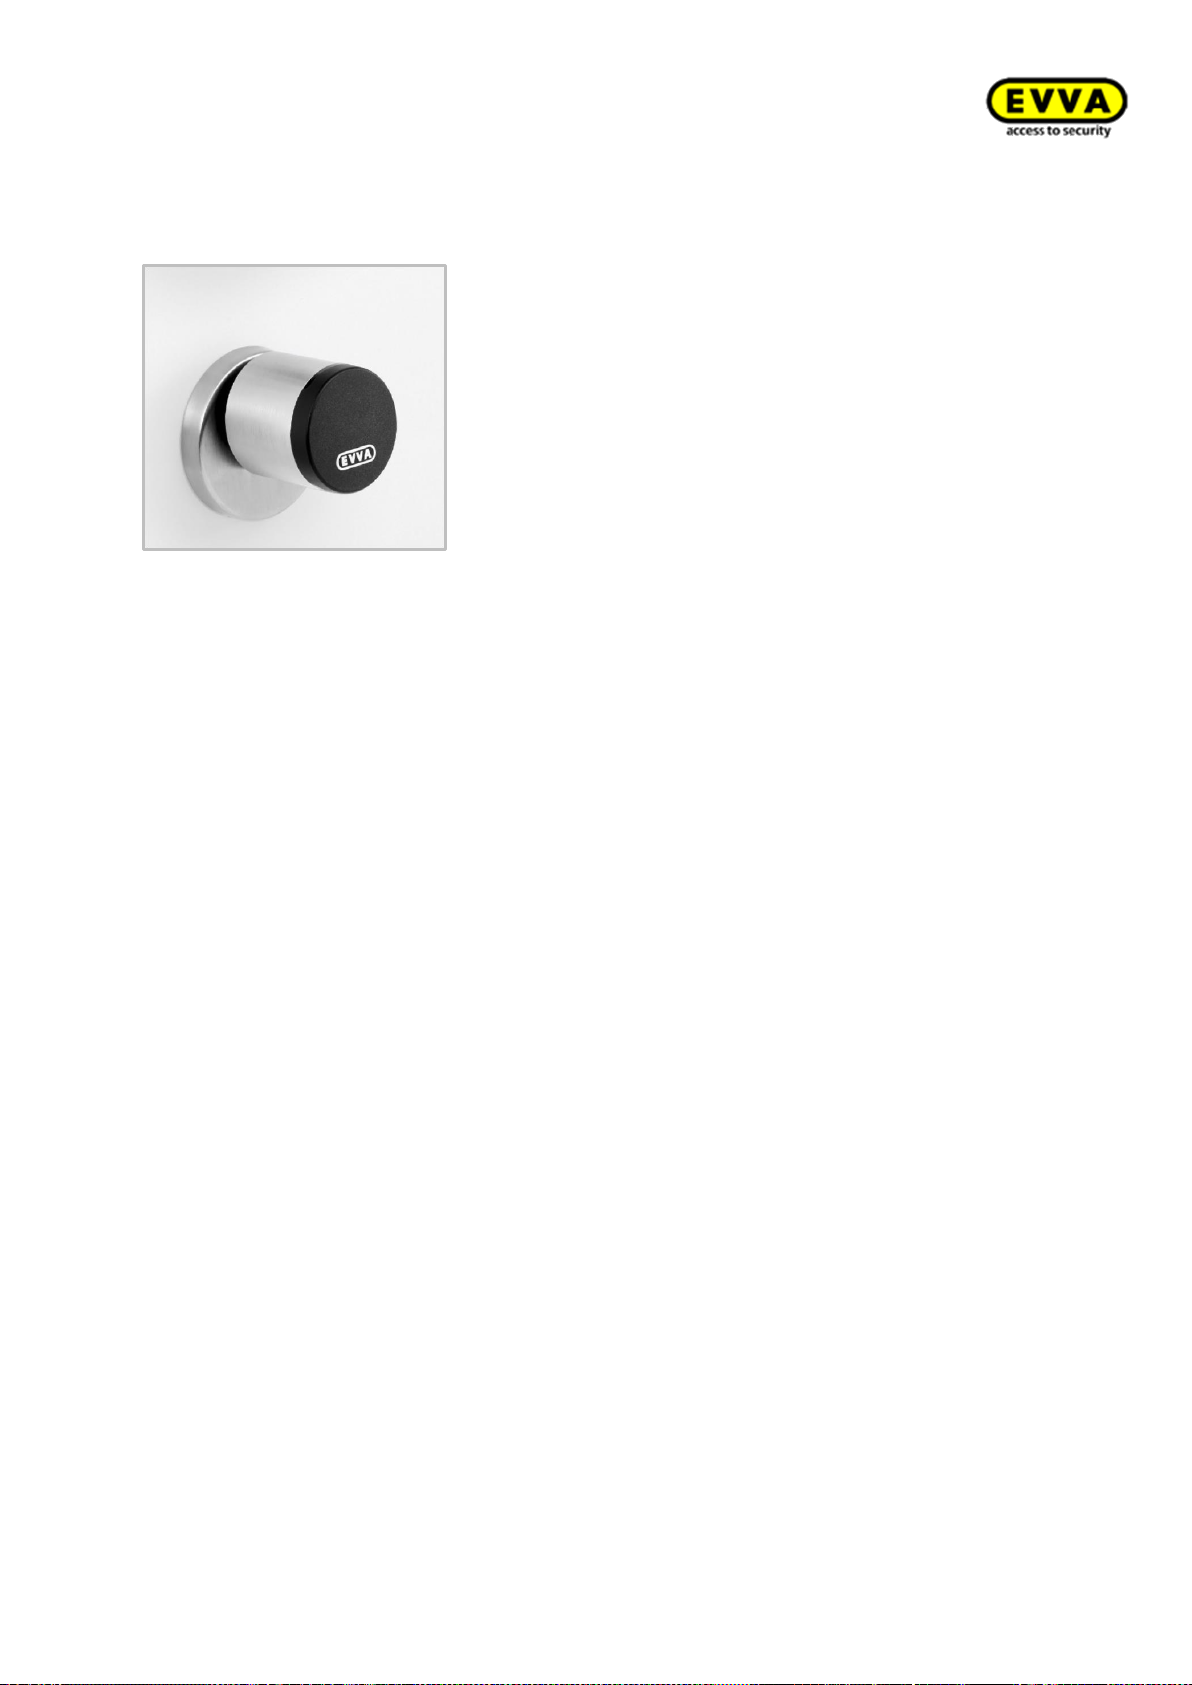
Xesar System manual 2.0 for version 2.0.36.17 | 24.06.2015 | misprinting and technical changes reserved
Xesar cylinder — functional description
Figure 20: Xesar thumbturn (sample image)
Visual and acoustic feedback
Xesar cylinders indicate events acoustically and visually. For this purpose, there is an LED
on the edge of the reader unit on Xesar cylinders. For a list of all available signals please
refer to Section:
How Xesar access
component indicate events.
Reader unit
The reader unit sensor is located in the plastic cap of the Xesar cylinder thumbturn between the EVVA logo and the LED.
Connector (synchronisation, updates, emergency power supply)
Xesar cylinders feature a connector located under the connector cover (EVVA logo). Slightly press towards the inside on the left-hand side of the EVVA logo (near the "E") and fold
out on the right-hand side (near the "A") to access the connector.
The connector is intended for synchronisation with Xesar tablets as well as for emergency
power supply using the optional emergency power device.
After use, once again carefully close the connector cover (EVVA logo) to protect the connector from penetrating dust and humidity. For this purpose, do not use pointed objects
to prevent damage.
51
Page 52
Xesar System manual 2.0 for version 2.0.36.17 | 24.06.2015 | misprinting and technical changes reserved
Functional principle
Note:
FZG and FAP versions do not feature a rotary damper for technical reasons.
Caution:
Please note the office mode function (Section:
Xesar
identification media) and the
different acoustic and visual signals (Section:
How Xesar access
component indi-
cate events )
Caution:
Xesar cylinders feature a rotary damper as standard. Ensure it is installed in its correct position (see assembly manual) as malfunctions would otherwise occur during
on-going operation. Malfunctions in unapproved installation positions do not represent product faults and are consequently not deemed as a valid reason for complaints.
Caution:
Please note the following, important notices before use!
By default, the electronic outside thumbturn of the Xesar cylinder is disengaged. The cam
remains disengaged upon operating the outside thumbturn and the outside thumbturn
turns without engaging with the cam.
Hold an authorised Xesar identification medium to the reader unit of the Xesar cylinder to
mechatronically engage the outside thumbturn for five seconds so the cam of the Xesar
cylinder engages when operating the outside thumbturn.
The purely mechanically operated inside of versions with one-sided, electronic authorisation always remains engaged on Xesar cylinders and can be operated at any time.
On Xesar cylinders with double-sided, electronic authorisation the inside thumbturn operates identically to the electronic outside thumbturn.
Xesar cylinders feature an event memory for the last 1,000 events. Once the event memory
is full, the system overwrites the oldest entries with the most recent events. For this reason, it is important to regularly synchronise events to prevent event records from being
lost.
Please refer to the corresponding data sheet for additional specifications at:
http://www.evva.at/products/electronic-locking-systems-access-control/xesar/assembly-instructionsdatasheets/en/
52
Page 53

Xesar System manual 2.0 for version 2.0.36.17 | 24.06.2015 | misprinting and technical changes reserved
Climatic and environmental effects
Please note the defined suitability of the lock cylinder for the respective ambient conditions as per
its IP rating and specific temperature range.
Do not use the lock cylinder in very dusty environments.
Use the lock cylinder in environments with a humidity below 90% only.
Clarify the application options with a specialist retailer before installing lock cylinders in environments with a particularly high level of static charge.
Do not use lock cylinders in corrosive atmospheres (e.g. chlorine, ammonia, lime water or salt water).
Information regarding installation and the correct installation situation
Exclusively specialist personnel must install lock cylinders according to the specifications in the
assembly manual which is also enclosed with the product. EVVA shall assume no liability for any
kind for damage resulting from improper assembly/installation.
Check the lock for damage and dirt before assembling/installing the lock cylinder. Please also observe the instructions of the lock manufacturer prior to assembly/installation. EVVA recommends
using correctly operating mortise locks to safeguard the lock cylinder operates correctly.
All Xesar access components are delivered ex works in so-called construction mode. In this condition any Construction Card unlocks any Xesar access component. For this reason, immediately
after having installed each Xesar access component ensure it is correctly added to the locking
system so that exclusively authorised persons have access.
Exclusively use accessories and spare parts recommended by EVVA. Mechatronic lock cylinders are
exclusively fully suitable for assembly/installation in locks, escutcheons, etc. if the lock cylinders are
subject to the corresponding dimensional standards and the respective locks, escutcheons, etc. are
exclusively designed to accommodate mechatronic lock cylinders as per said standards. In all other
cases, manufacturers, retailers and users of such locks, escutcheons and similar devices must be
certain that the lock cylinder they select is suitable for installation and its intended use.
Observe the corresponding international and national specifications in the corresponding legislation, directives, standards and guidelines, particularly regarding the requirements for escape routes
and emergency exits, during project management and installation of the lock cylinders.
Before installing lock cylinders – in particular in metal frame doors – check the installation situation to prevent injuries (e.g. squashed limbs) or damage to the lock cylinder.
53
Page 54

Xesar System manual 2.0 for version 2.0.36.17 | 24.06.2015 | misprinting and technical changes reserved
Ensure you selected the correct cylinder length for the corresponding door configuration. In installation situations or applications that are critical to security (without taking into account the thumbturn) the cylinder must protrude from the protective escutcheon by a maximum of 3 mm.
If VdS-certified mechatronic lock cylinders are installed in installation situations critical to security,
the lock cylinder must be protected by VdS-certified, burglary-resistent, category B or C door
plates. With regard to all other doors, the degree of anti-burglary measures must comply with the
corresponding, national regulations (see also EN 1627, Austrian standard 5338 or SKG).
Please note the restrictions illustrated in the assembly manual regarding the permissible installation positions of the lock cylinder. Non-compliance with the correct installation situation may
cause malfunctions – malfunctions in unapproved installation positions do not represent product
faults and are consequently not deemed as a valid reason for complaints. Please note that the
correct lock cylinder function can also only be ensured before and during installation of the lock
cylinder if the cylinder housing is positioned correctly.
Lock cylinders must be installed in such a way that they are not subject to any external forces
except when used correctly and at the designated mounting points.
A certificate in compliance with EN 179 or EN 1125 from the lock manufacturer is crucial for use
of the lock cylinder in escape or panic doors. Check the correct function of the complete panic
unit, consisting of lock cylinder, panic lock, panic bar and handle fittings. The aforementioned certificate must confirm the lock cylinders' suitability for installation.
Please note that if you would like to install the lock cylinder in smoke control/fire doors, you must
verify the cylinders' suitability and potentially also obtain approval from the door manufacturer.
The client shall be responsible for this.
An excessive tightening torque when fastening the cylinder fixing screw may cause lock cylinder
malfunctions or make it hard to operate the lock cylinder. For this reason, please note the data in
the assembly manual.
Before completing the installation, use a Construction Card to verify the correct function of the
lock cylinder when the door is open as per the specifications in the assembly manual.
After having installed the lock cylinder, note that you can only operate the system using a Construction Card until parameters have been completely configured.
54
Page 55

Xesar System manual 2.0 for version 2.0.36.17 | 24.06.2015 | misprinting and technical changes reserved
Please note that the corresponding IP rating of lock cylinders with elongated outside turn sleeves
Note:
Depending on the cylinder's protrusion beyond the escutcheon or any installed
cylinder rosettes, the Xesar thumbturn may be hard to operate as a result of friction
caused by the seal on the escutcheon or rosette of the cylinder. There is the option
to remove said seals when installing indoors.
can only be safeguarded if the elongated outside turn sleeve protrudes from the protective escutcheon by a maximum of 3 mm.
Information on operation
Instruct users of the electronic locking system to always keep identification media safe.
In the event that Xesar identification media is lost, it must be immediately blocked using the software. The corresponding lock cylinder must be immediately updated using the Xesar tablet.
Please note that a door is not automatically locked after having closed it. Doors must be locked
manually by turning the thumbturn. In the event that it is not possible to remove the thumbturn,
attempt to set the lock cylinder to office mode and then remove it as usual it using the assembly
tool. In the event that this fails, you additionally have the option of blocking the thumbturn sleeve
using a slim metal pin via a small hole on the front of the electronics module and be able to consequently remove the thumbturn using the assembly tool.
The thumbturn is not intended as an object to move the door panel (as would be the knob, handle, etc.). Do not carry or lift the door panel using the thumbturn.
Do not stand on the thumbturn.
Do not cover the reader equipment of the lock cylinder with metal materials.
Regularly check the correct condition and function of the lock cylinder (at minimum once a
month) as part of a functional check using authorised identification media.
We recommend you keep the locking system up-to-date
by regularly installing software and firmware updates. Make sure to run firmware updates when
the door is open and run a functional test after having completed the update.
55
Page 56

Xesar System manual 2.0 for version 2.0.36.17 | 24.06.2015 | misprinting and technical changes reserved
Note:
Xesar cylinders with European profiles are equipped with a service bore at the front
of the electronics module. Use it to secure the thumbturn axis with a matching
metal pin and facilitate disassembly of the cylinder thumbturn.
The metal pin must have a minimum diameter of 2 mm and be at minimum 40 mm
long.
Procedure:
Step 1:
Insert a matching metal pin (e.g. a
2 mm Allen key) into the front service duct of your European profile cylinder.
Step 2:
In this process, turn the thumbturn until you are able to insert the metal pin
considerably deeper into the service duct. Now hold the metal pin in this
position and disassemble the thumbturn as usual using the assembly tool.
Step 3:
Once again carefully remove the metal pin after having removed the
thumbturn.
56
Page 57
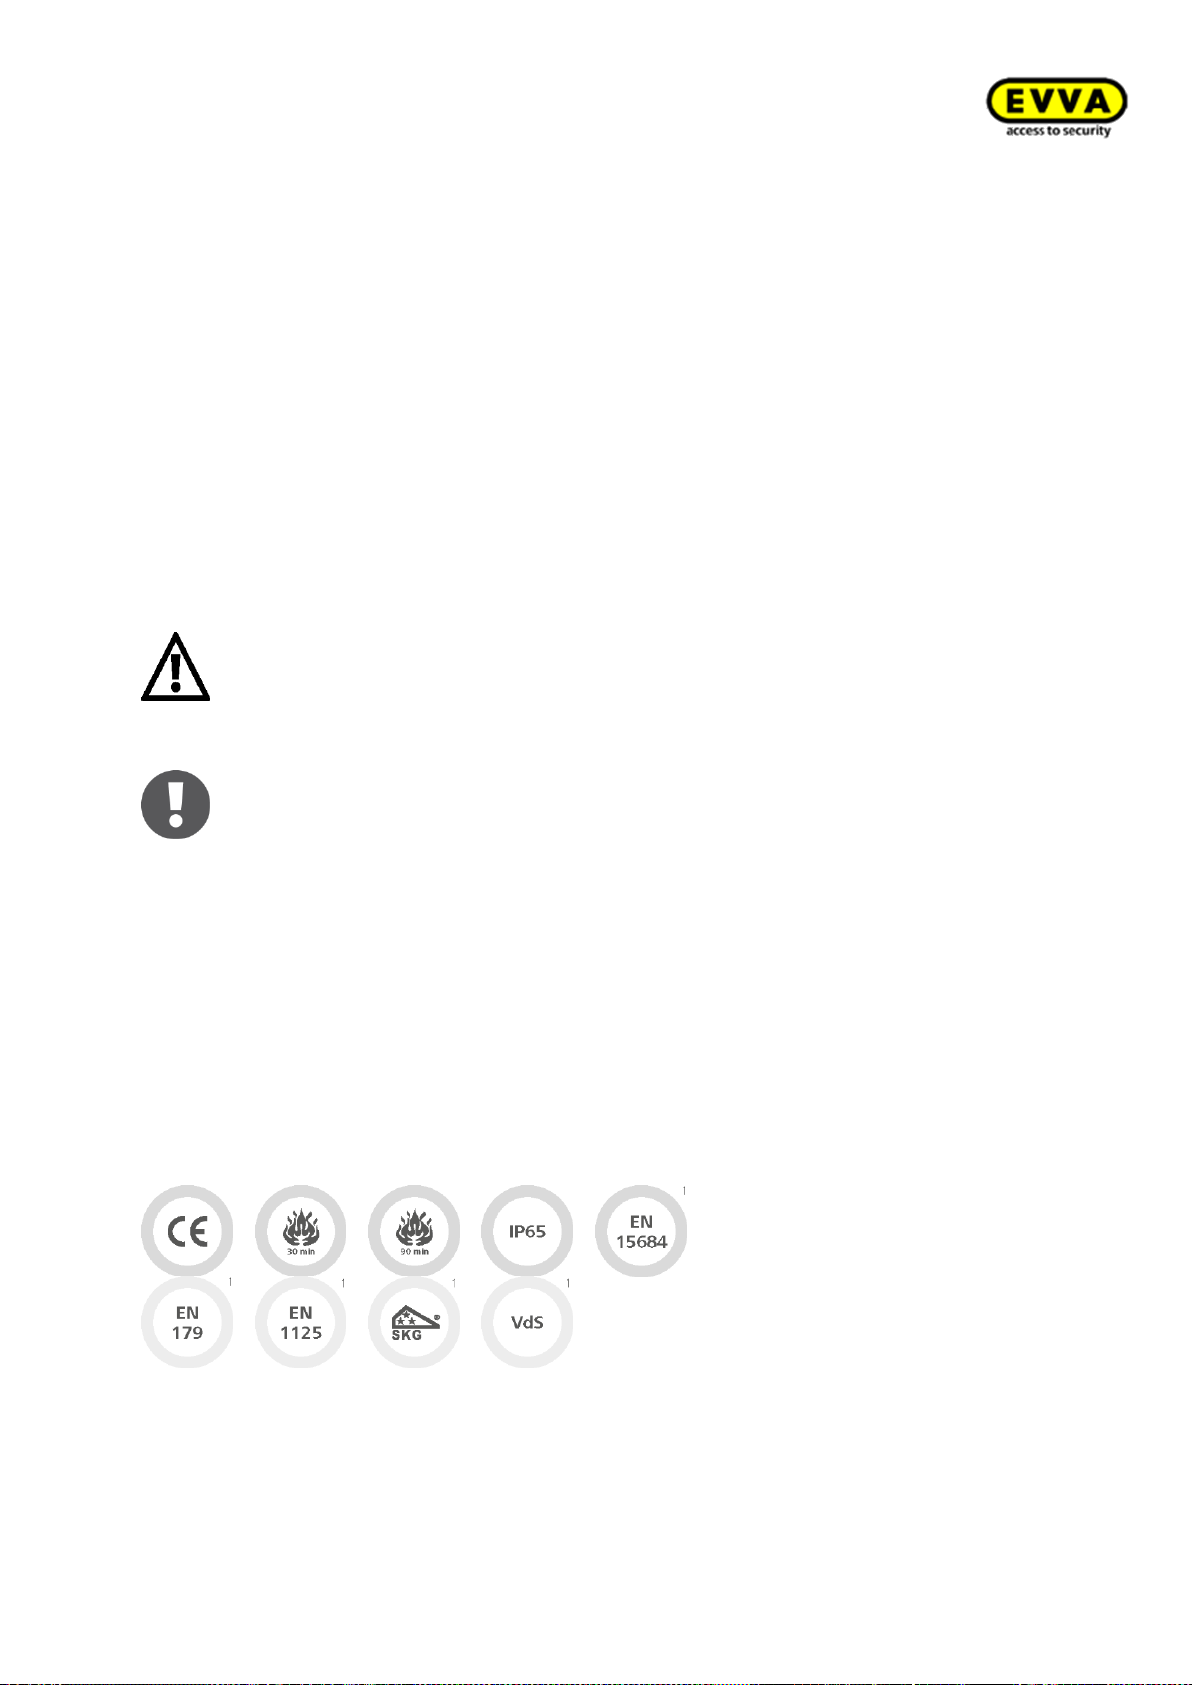
Xesar System manual 2.0 for version 2.0.36.17 | 24.06.2015 | misprinting and technical changes reserved
Cleaning information
Caution:
Note the information in the assembly manual regarding the correct position of the
cylinder.
Note:
Reset cylinders to construction mode before moving Xesar cylinders (removing
them from the door).
Regularly lubricate lock cylinders – at minimum as part of battery replacements. For this purpose,
use the lubricants recommended by EVVA only. Please refer to the Xesar system manual for more
information on the exact lubrication processes.
Use a soft, lint-free cloth and soapy water to clean any visible areas of the lock cylinder. Do not
use corrosive products or sprays that may be aggressive on metal surfaces, plastics or sealants and
seals. Ensure (particularly when the thumbturn has been removed) no liquids penetrate the cylinder and that visible areas of the electronic thumbturn must exclusively be cleaned when the
thumbturn is not open.
Conditions of use
Ambient temperature -20 °C to +55 °C (depending on the battery) | Humidity < 90 %, noncondensing | For 100,000 cycles as per EN 156841 | IP65 protection
Standards and guidelines
57
Page 58

Xesar System manual 2.0 for version 2.0.36.17 | 24.06.2015 | misprinting and technical changes reserved
CE tested | EN 1634: 30 minutes | EN 1634: 90 minutes1 | IP65 rating | EN 156841 | suitable for
1
locks as per EN 179/1125 (when using the FAP anti-panic function)1 | SKG1 | VdS1
Xesar cylinders feature an event memory for the last 1,000 events.
Assemble the component as per the assembly manual enclosed with the product.
Battery replacements
Activate office mode for the cylinder before replacing batteries so the cylinder remains engaged.
Note that lock cylinder operation is permitted using type CR2 batteries only. Do not use rechargeable batteries. Please ask your specialist retailer for a list of recommended battery models.
We recommend to have batteries replaced by trained, specialist personnel only.
Replace batteries in due time, as soon as the lock cylinder indicates "Battery low". Repeatedly disregarding the "Battery low" warning may cause cylinder malfunctions. At normal ambient temperatures, the first "Battery low" warning indicates that up to 1,000 actuations are still possible within
the next 4 weeks. Temperatures deviating from normal ambient temperatures may cause the cylinder to prematurely fail. If the batteries are empty, it is exclusively possible to operate the cylinder using the emergency power device (optional accessory).
Always replace all batteries used in the corresponding lock cylinder! Use the dedicated Xesar lock
cylinder assembly tool to assemble or disassemble the thumbturn (also when replacing batteries).
We recommend to pair up the lock cylinder using an authorised Xesar identification medium before removing the batteries. If applicable, you may be required to synchronise the system time
using the Xesar tablet after having replaced the batteries.
Store batteries in a cool, dry location. Exposure to direct, strong heat may damage batteries. For
this reason, do not expose battery-operated devices to strong heat sources.
Batteries contain chemical substances and for this reason, dispose of them correctly, taking into
account the country-specific regulations.
Battery replacement procedure
In preparation
58
Page 59

Xesar System manual 2.0 for version 2.0.36.17 | 24.06.2015 | misprinting and technical changes reserved
Please proceed as described in the assembly manual to replace batteries in your Xesar cylinder,
only in reverse order.
1. Completely position the cylinder tool on the dedicated recess on the rear of the outside
thumbturn and turn the thumbturn and the tool in anti-clockwise direction.
2. Now remove the cylinder tool and undo the three attachment screws on the rear of the
outside thumbturn using a Phillips screwdriver (PH1). Subsequently remove the thumbturn
disc.
3. Carefully open the lock in the outside thumbturn by initially moving it carefully before un-
folding it.
4. Now remove both empty CR2 batteries and clean the battery contacts using a soft, lint-
free cloth.
5. Now insert the two new and previously acquired batteries with the correct polarity into the
battery compartment and close it once again.
6. Battery replacements must not take longer than one minute. Resynchronising using the
Xesar tablet may be required once this period has expired.
7. Once you have correctly replaced the batteries, the component initialises and the corre-
sponding acoustic signal sounds (signal 8 in the signal table in Section
component indicate events)
: How Xesar access
8. Now once again position the thumbturn disc and fasten it using the three screws.
9. Completely position the cylinder tool on the rear of the outside thumbturn and fasten
both components to the cylinder together (in clockwise direction) until you can feel resistance. Subsequently turn the cylinder in the opposite direction (anti-clockwise) until you
hear a click.
10. You can now once again remove the cylinder tool.
59
Page 60

Xesar System manual 2.0 for version 2.0.36.17 | 24.06.2015 | misprinting and technical changes reserved
Cylinder tool
Figure 21: Cylinder tool (sample image)
Xesar cylinders provide a special opening mechanism to protect from manipulation and the dedicated special tool is required for assembly and disassembly as well as battery replacements.
Order the cylinder tool separately. It is not enclosed with Xesar cylinders.
The cylinder tool device is optionally available.
Product code: E.ZU.PZ.ZW.V1
Please note the instructions in the Xesar cylinder assembly manual
or watch the video instructions: http://video.evva.com/tutorials/xesar/expzkzs/expzkz-s-1/en/
60
Page 61
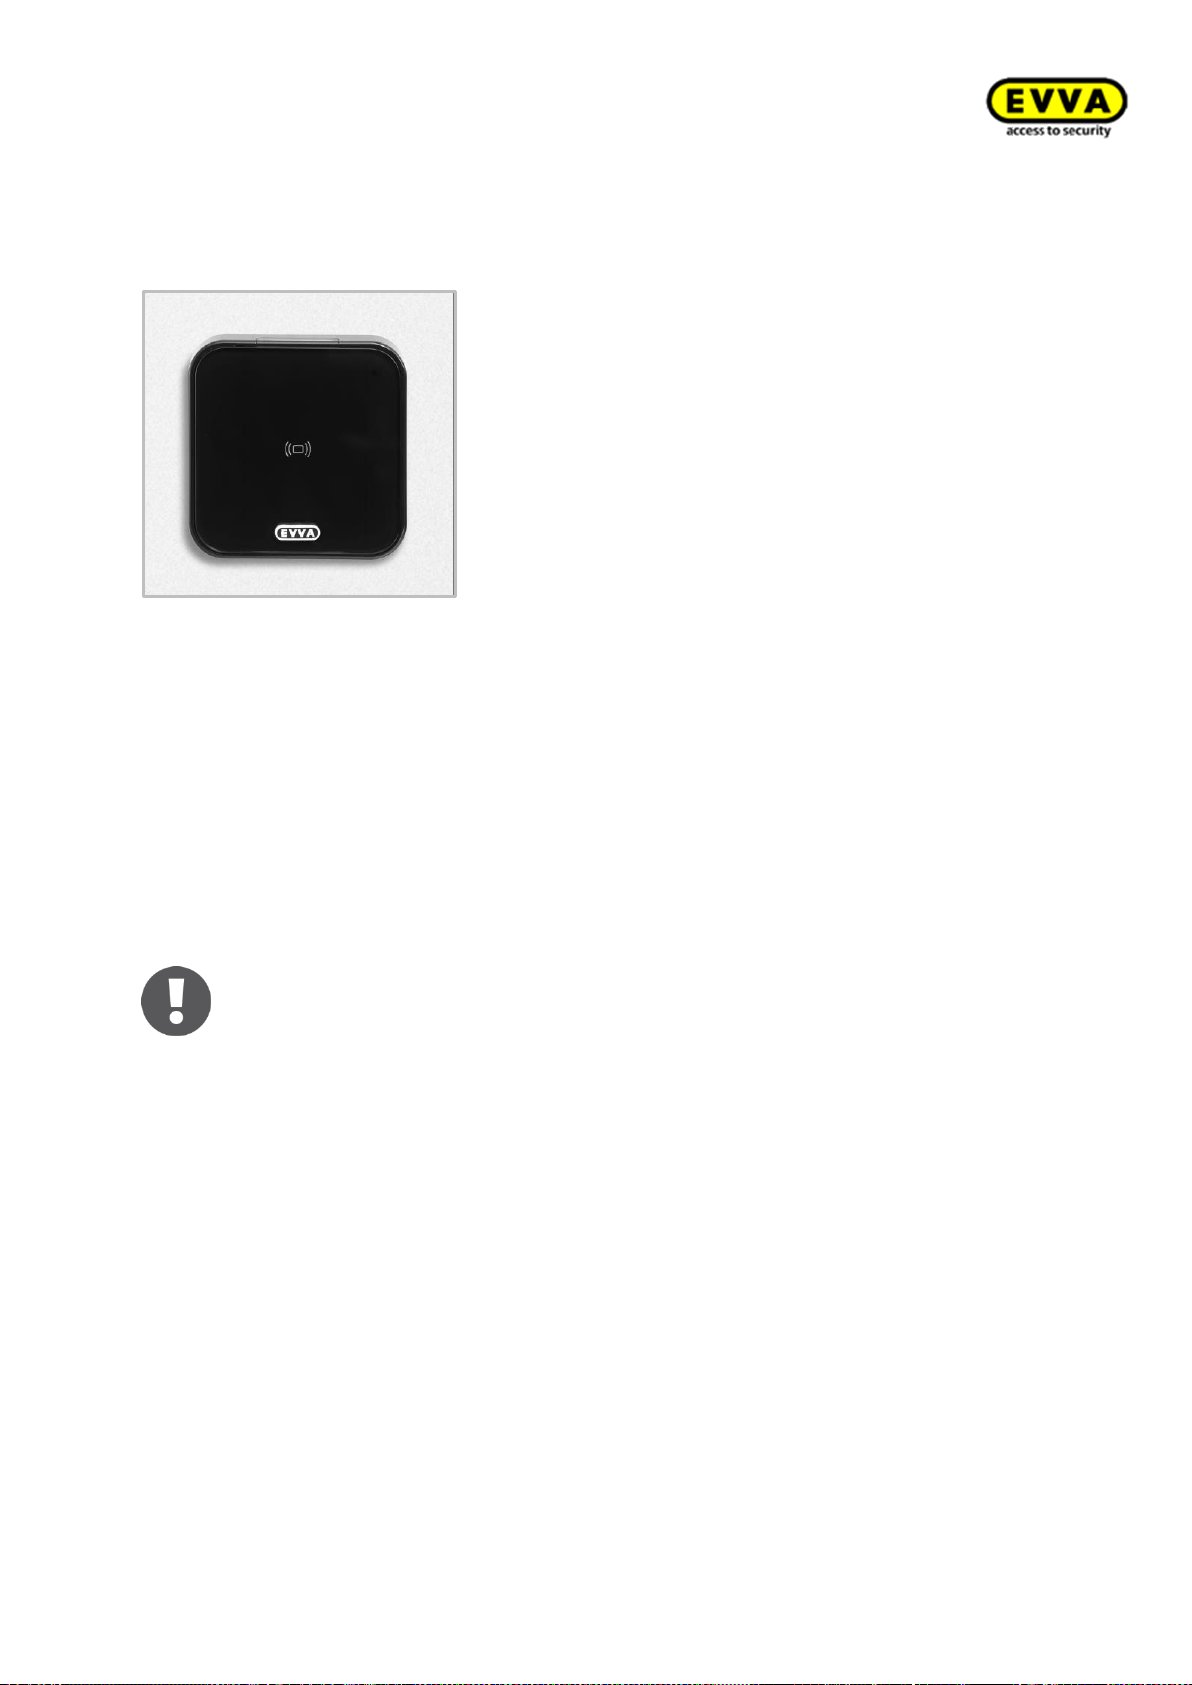
Xesar System manual 2.0 for version 2.0.36.17 | 24.06.2015 | misprinting and technical changes reserved
Xesar wall reader
Note:
Please note Xesar wall readers can only be used in connection with Xesar control
units.
Figure 22: Xesar wall reader (sample image)
Xesar wall readers are suitable for indoors and outdoors, surface-mounted or flush installation and
for areas critical to security.
Please use the dedicated seal enclosed with the product in the event of use outdoors or in areas
that are exposed to water as well as in the event of surface-mounted installation and observe the
information in the assembly manual. Xesar wall readers are connected to the Xesar control unit
and supplied with power using a connecting cable.
Connect the Xesar wall reader to Xesar control units to operate electronic components, such as
motorised cylinders, swing doors, sliding doors, etc.
61
Page 62

Xesar System manual 2.0 for version 2.0.36.17 | 24.06.2015 | misprinting and technical changes reserved
Please check carefully to make sure the Xesar product you selected is suitable for your application.
We have made the required data sheet available in the download section of our homepage:
HYPERLINK "http://www.evva.at/products/electronic-locking-systems-access-
control/xesar/assembly-instructions-datasheets/en/" http://www.evva.at/products/electronic-
locking-systems-access-control/xesar/assembly-instructions-datasheets/en/
62
Page 63
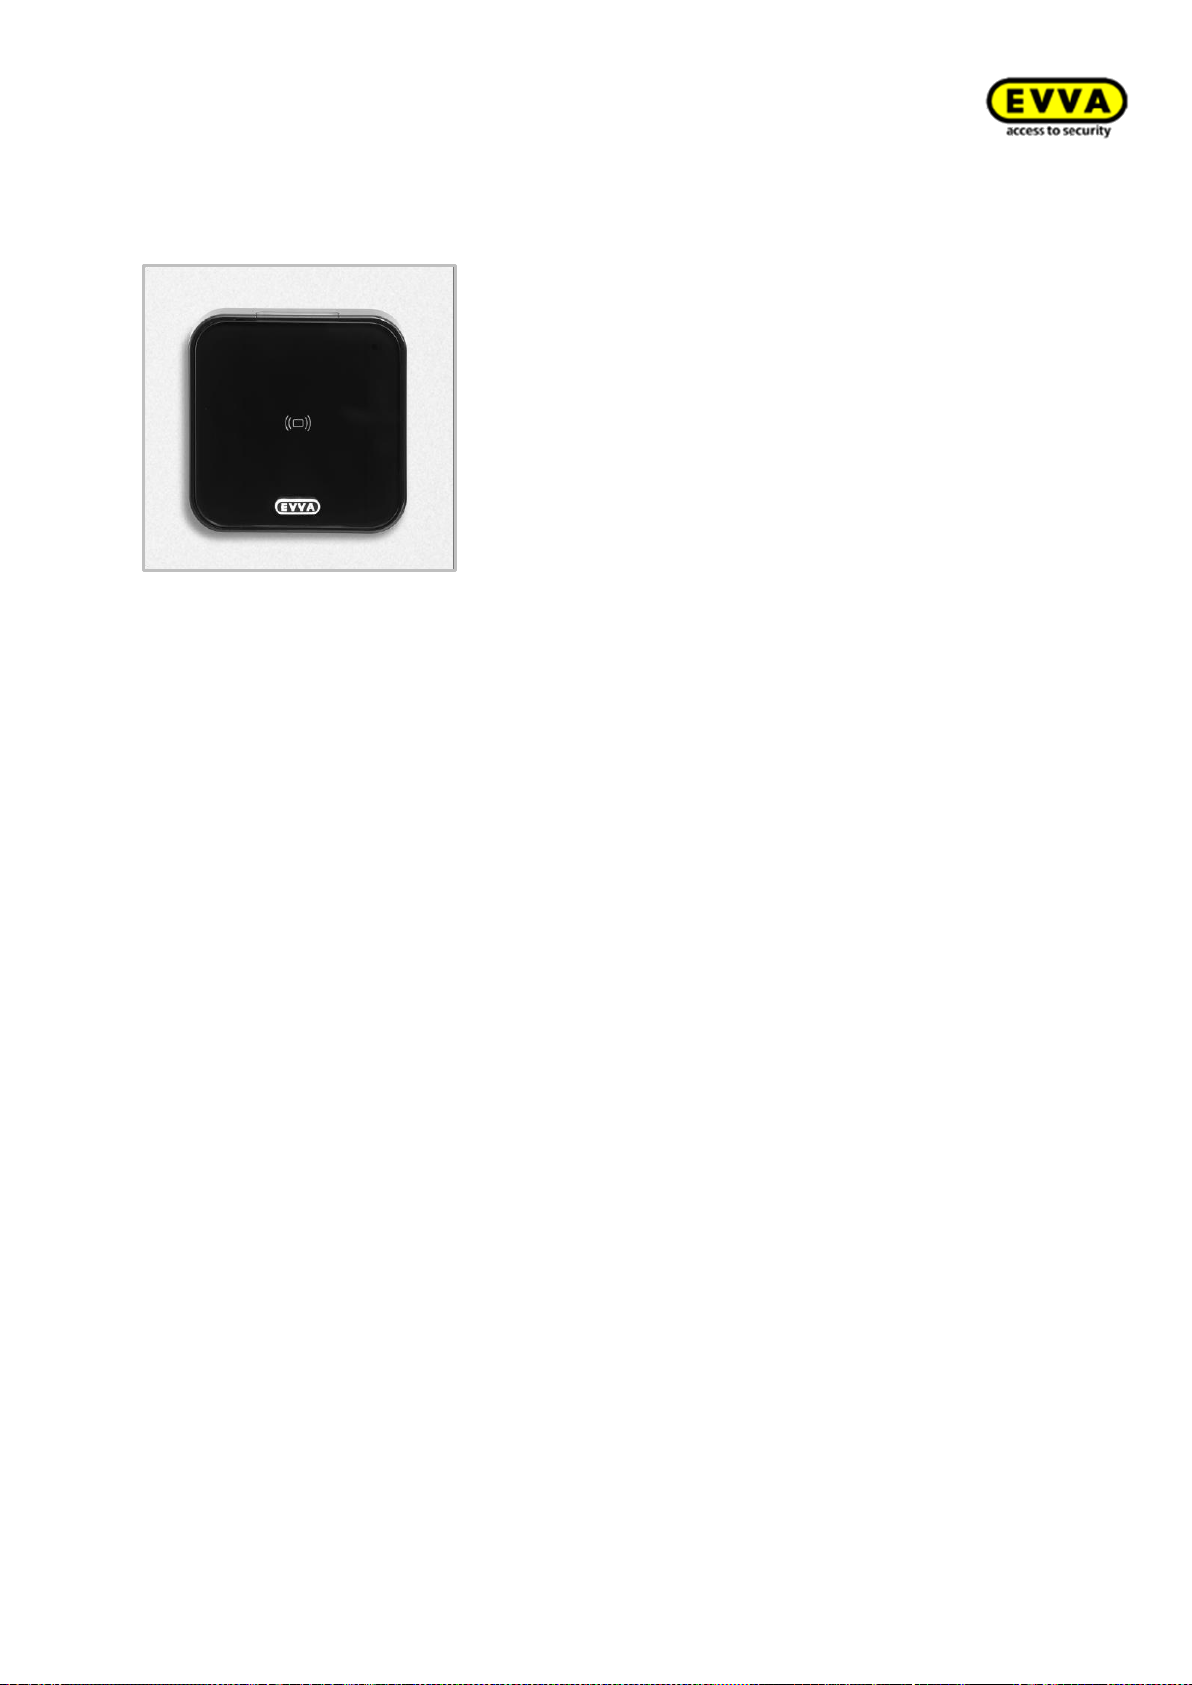
Xesar System manual 2.0 for version 2.0.36.17 | 24.06.2015 | misprinting and technical changes reserved
Xesar wall reader — functional description
Figure 23: Xesar wall reader (sample image)
Visual and acoustic feedback
Xesar wall readers indicate events visually and acoustically. For this purpose, there is an
LED at the top edge of the Xesar wall reader. For a list of all available signals please refer
to Section:
How Xesar access
component indicate events ).
Reader unit, ON/OFF status light
The reader unit sensor is located behind the glass panel of the Xesar wall reader, between
the EVVA logo and the LED. The status light of the Xesar wall reader lights up continuous-
ly during on-going operation to facilitate localising the reader unit in dark environments.
63
Page 64

Xesar System manual 2.0 for version 2.0.36.17 | 24.06.2015 | misprinting and technical changes reserved
Connector (synchronisation, updates)
Xesar wall readers feature a connector located under the connector cover (EVVA logo).
Slightly press towards the inside on the left-hand side of the EVVA logo (near the "E") and
fold out on the right-hand side (near the "A") to access the connector.
The connector is intended solely to synchronise the unit with the Xesar tablet, Xesar wall
readers cannot be operated with the optionally available emergency power device.
After use, once again carefully close the connector cover (EVVA logo) to protect the connector from penetrating dust and humidity. For this purpose, do not use pointed objects
to prevent damage.
Functional principle
Hold a Xesar identification medium to a reader unit and the Xesar control unit (connected
to the Xesar wall reader) checks the Xesar identification medium. The correspondingly trig-
gered relay of the Xesar control unit switches insofar as the identification medium is au-
thorised, depending on the jumper position (see diagram in the Xesar control unit -> JP2)
and the configuration.
Xesar control units feature an event memory for the last 1,000 events. Once the event
memory is full, the system overwrites the oldest entries with the most recent events. For
this reason, it is important to regularly synchronise events to prevent event records from
being lost.
64
Page 65
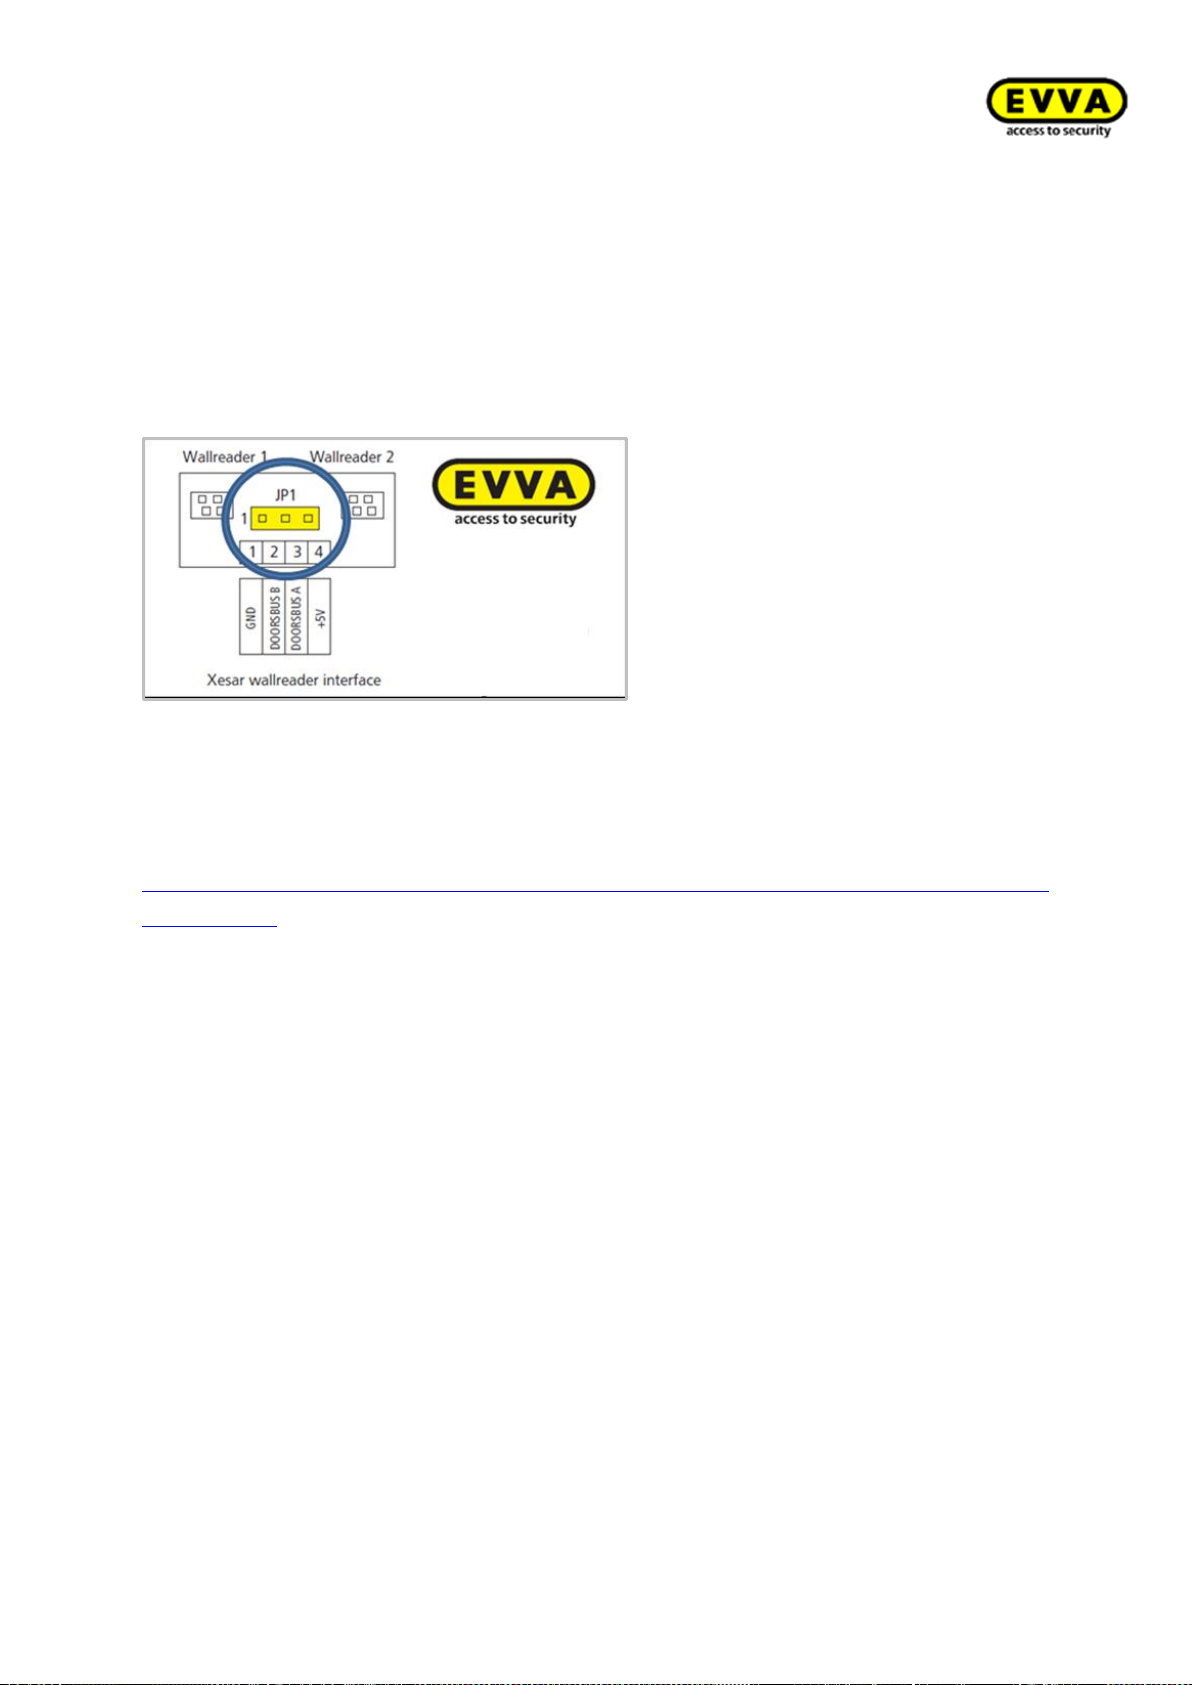
Xesar System manual 2.0 for version 2.0.36.17 | 24.06.2015 | misprinting and technical changes reserved
Xesar wall reader connection label
Use the connection label to connect Xesar wall readers to the connecting cables of the Xesar control unit. Please note the data and information in the assembly manual enclosed
with your Xesar product; in particular the jumper position of the JP1 jumper to prevent
malfunctions.
Figure 24: Xesar wall reader connection print (sample image)
We have provided the assembly manual and the data sheet of the corresponding Xesar product
on our homepage:
http://www.evva.at/products/electronic-locking-systems-access-control/xesar/assembly-instructionsdatasheets/en/
65
Page 66
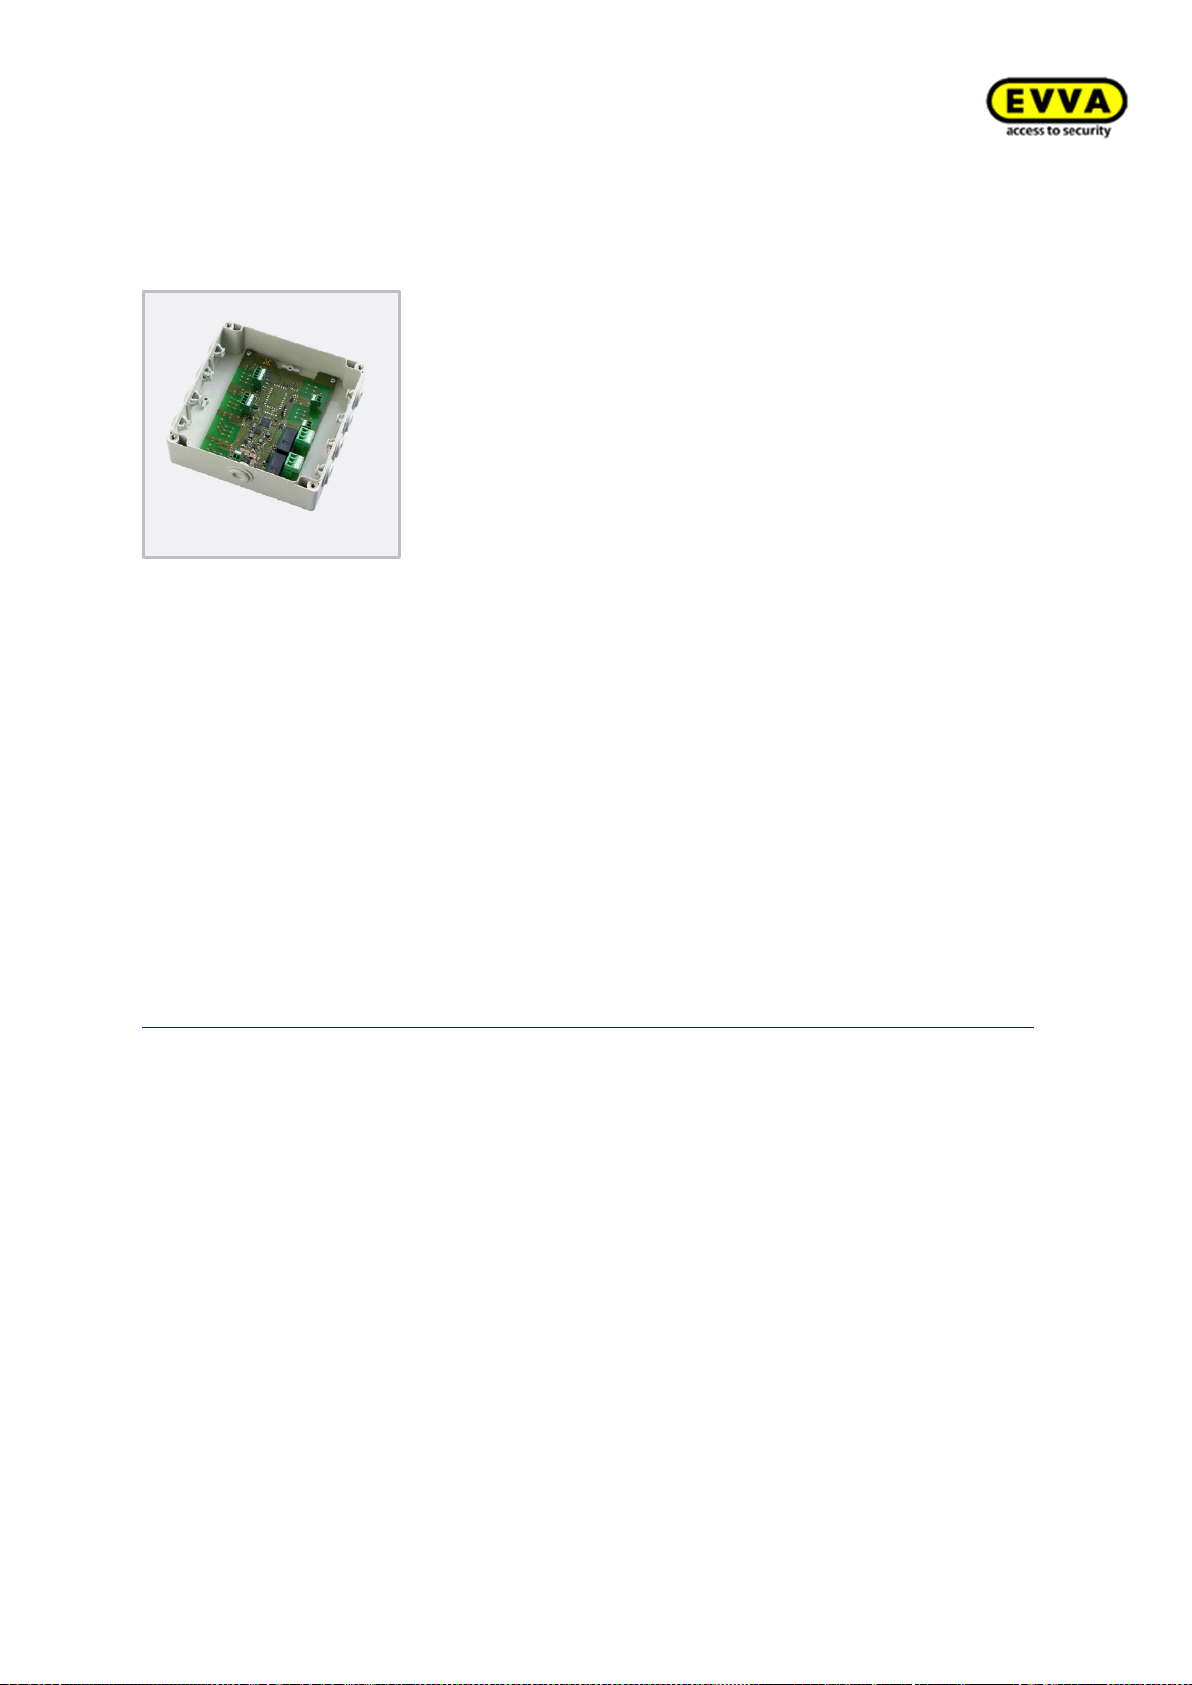
Xesar System manual 2.0 for version 2.0.36.17 | 24.06.2015 | misprinting and technical changes reserved
Xesar control unit
Figure 25: Xesar control unit (sample image)
The Xesar control unit can be exclusively used in conjunction with Xesar wall readers. Connect up
to two Xesar wall readers to one Xesar control unit. Xesar control units connected to Xesar wall
readers must be installed indoors in areas protected from manipulation.
Xesar control units are supplied with power using the power supply unit and in the event of power cuts they are equipped with data buffers for a maximum of 72 hours, providing the Xesar control unit had been previously active for a minimum of six hours.
Please refer to the product catalogue in the download section of our homepage for more detailed
information:
http://www.evva.at/products/electronic-locking-systems-access-control/xesar/system-overview/en/
66
Page 67
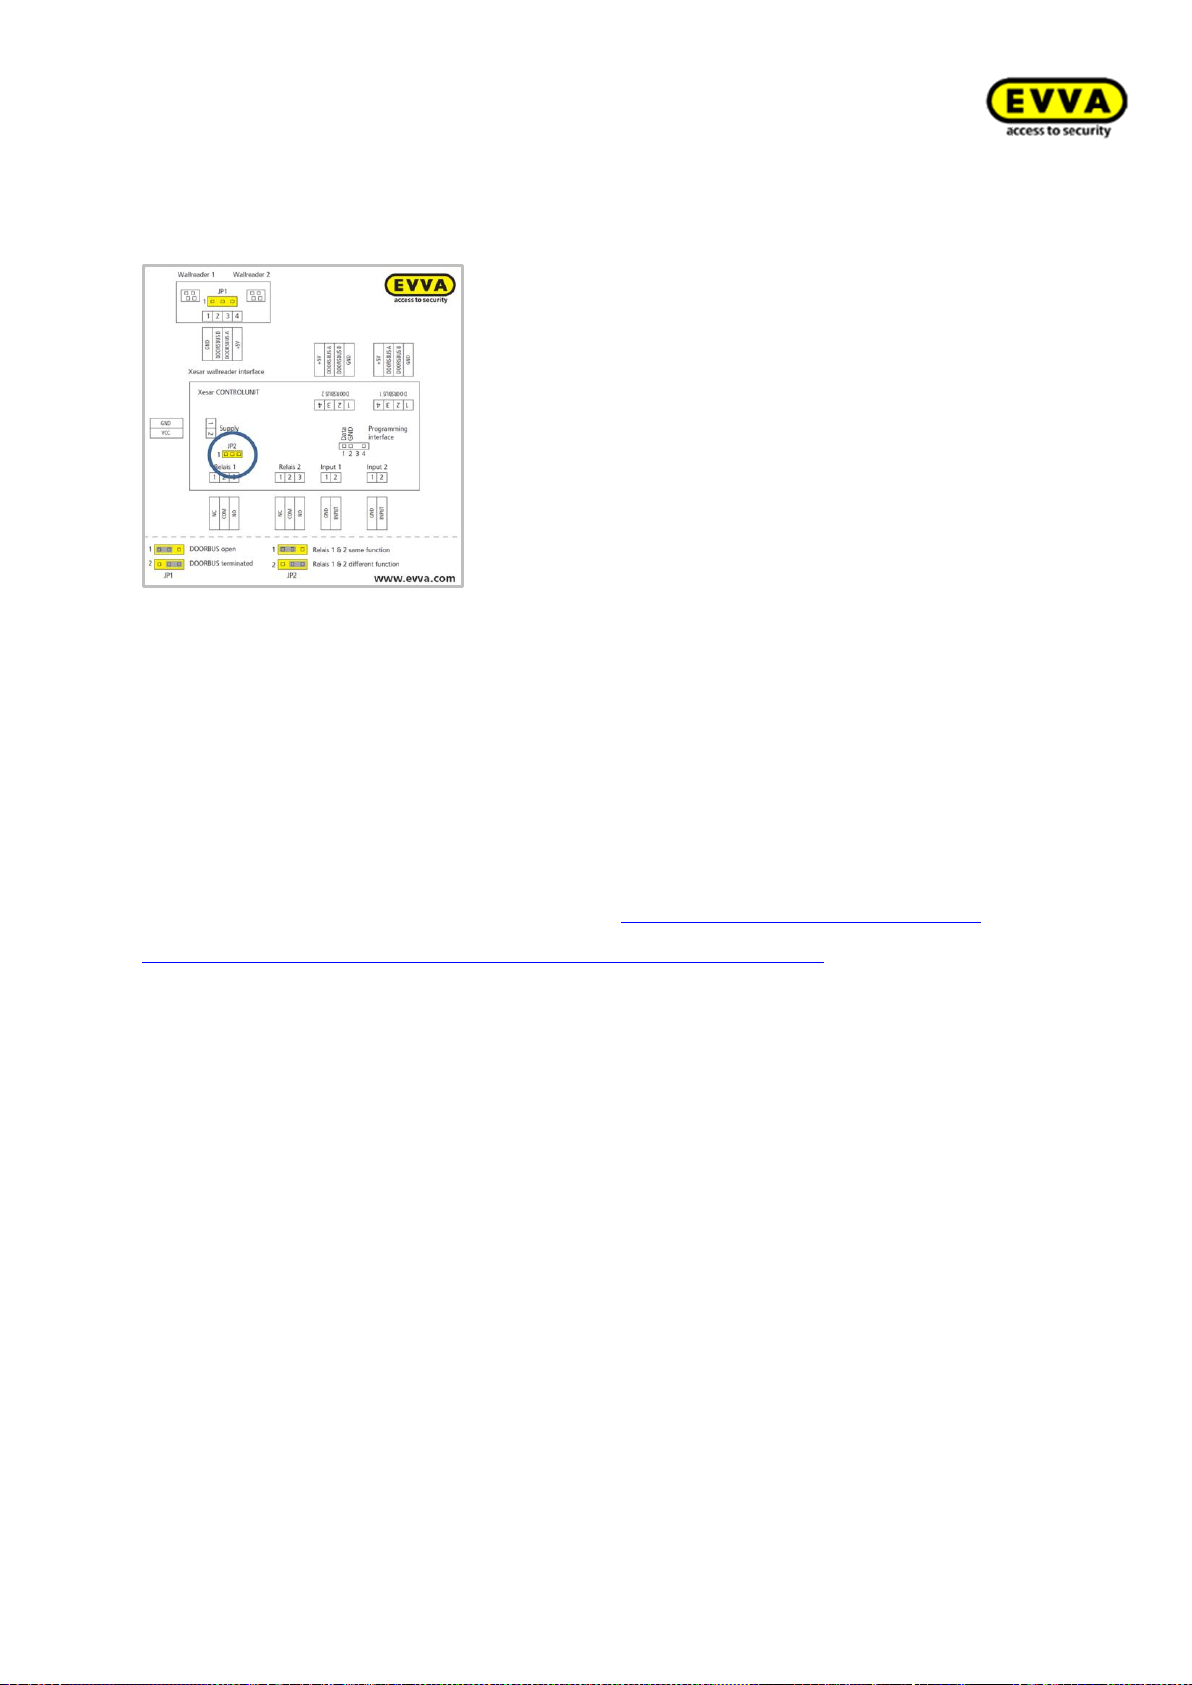
Xesar System manual 2.0 for version 2.0.36.17 | 24.06.2015 | misprinting and technical changes reserved
Xesar control unit connection configurations
Figure 26: Diagram (sample image)
You have the following connection configurations available. Pre-set connections with the position
of the JP2 jumper (Figure 26: Diagram (sample image)).
Please note the data and information in the assembly manual enclosed with your Xesar product.
We have also made the required data and information available in the download section of our
homepage:
HYPERLINK "http://www.evva.at/products/electronic-locking-systems-access-
control/xesar/assembly-instructions-datasheets/en/" http://www.evva.at/products/electronic-
locking-systems-access-control/xesar/assembly-instructions-datasheets/en/
67
Page 68
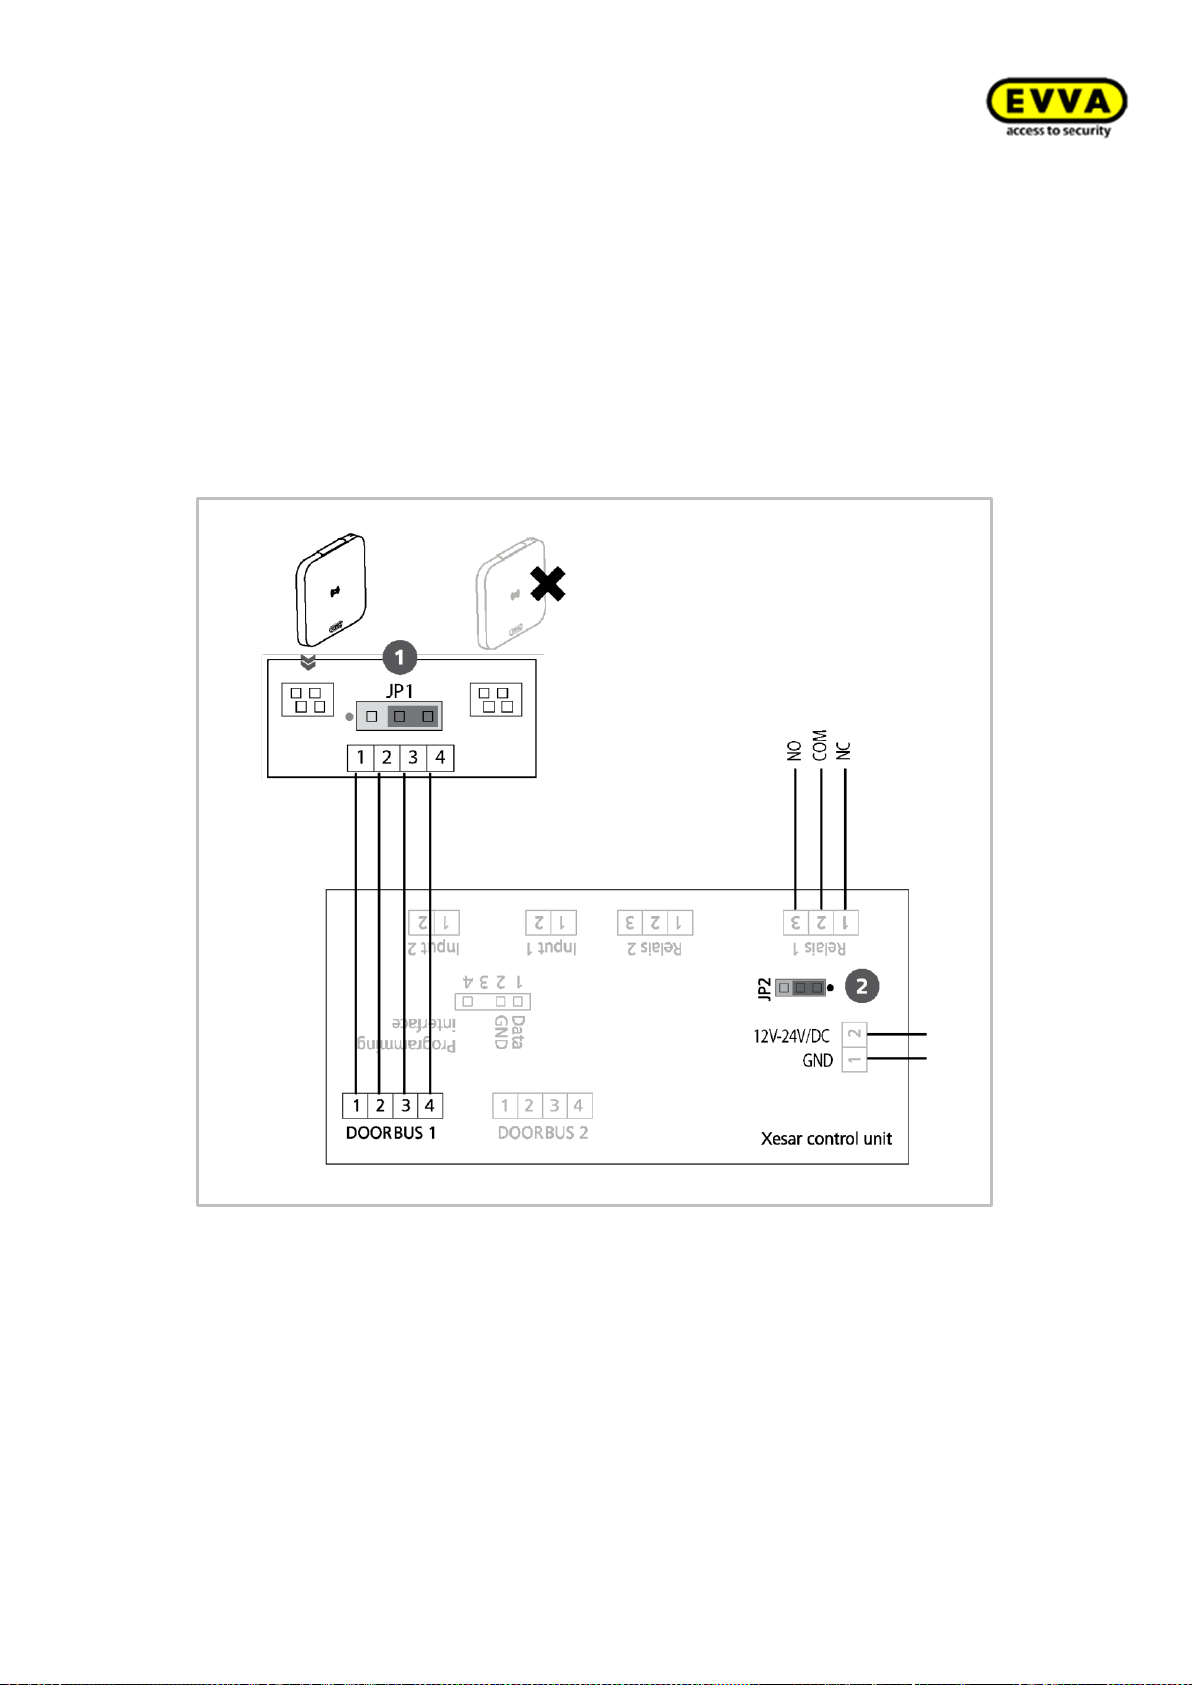
Xesar System manual 2.0 for version 2.0.36.17 | 24.06.2015 | misprinting and technical changes reserved
One Xesar wall reader -> one Xesar control unit
One or both relays can be switched at the same time depending on the jumper position (JP2).
As a result, you can use both relays for different applications (e.g. relay 1 switches with and relay 2 without an external power source).
Figure 27: One Xesar wall reader (sample image)
68
Page 69
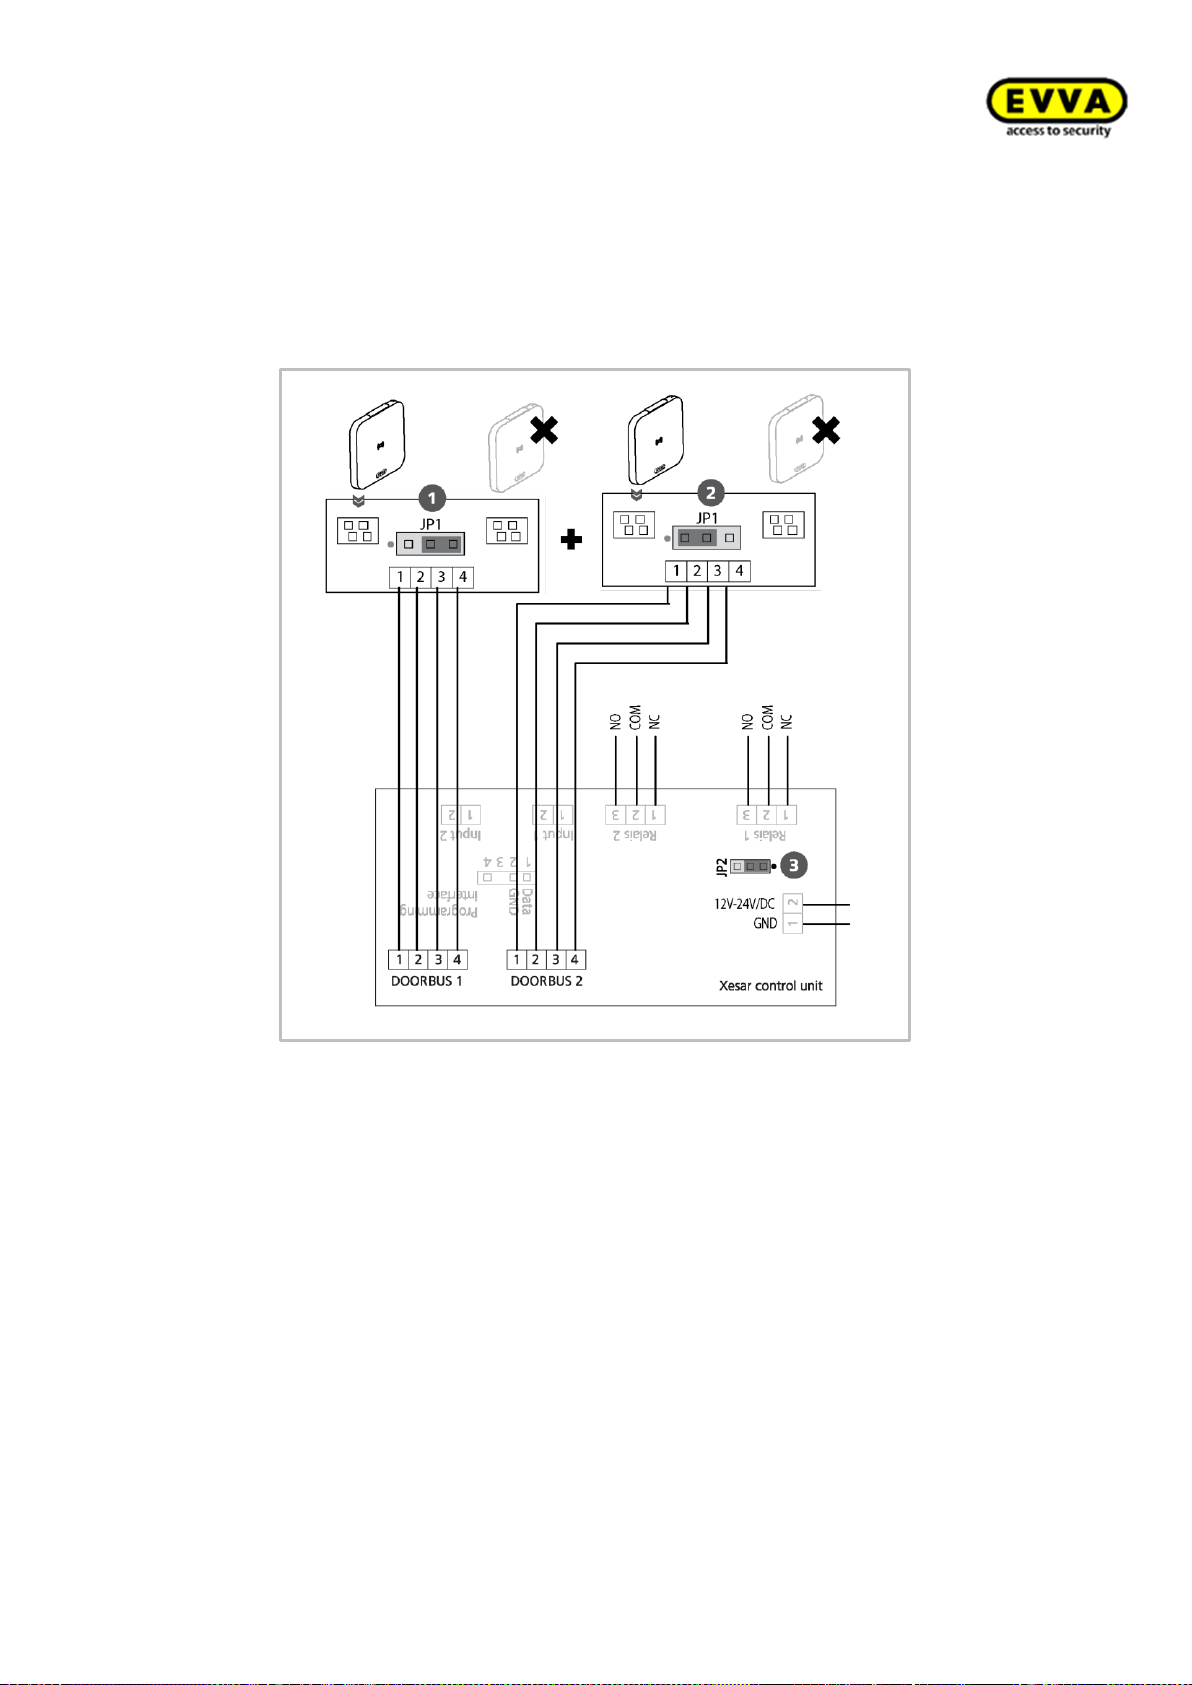
Xesar System manual 2.0 for version 2.0.36.17 | 24.06.2015 | misprinting and technical changes reserved
Two Xesar wall readers -> one Xesar control unit (double-sided access)
Depending on the jumper position (JP2) both relays can be switched by both Xesar wall readers, for instance to implement access from both sides.
Figure 28: Two Xesar wall readers (sample image)
69
Page 70
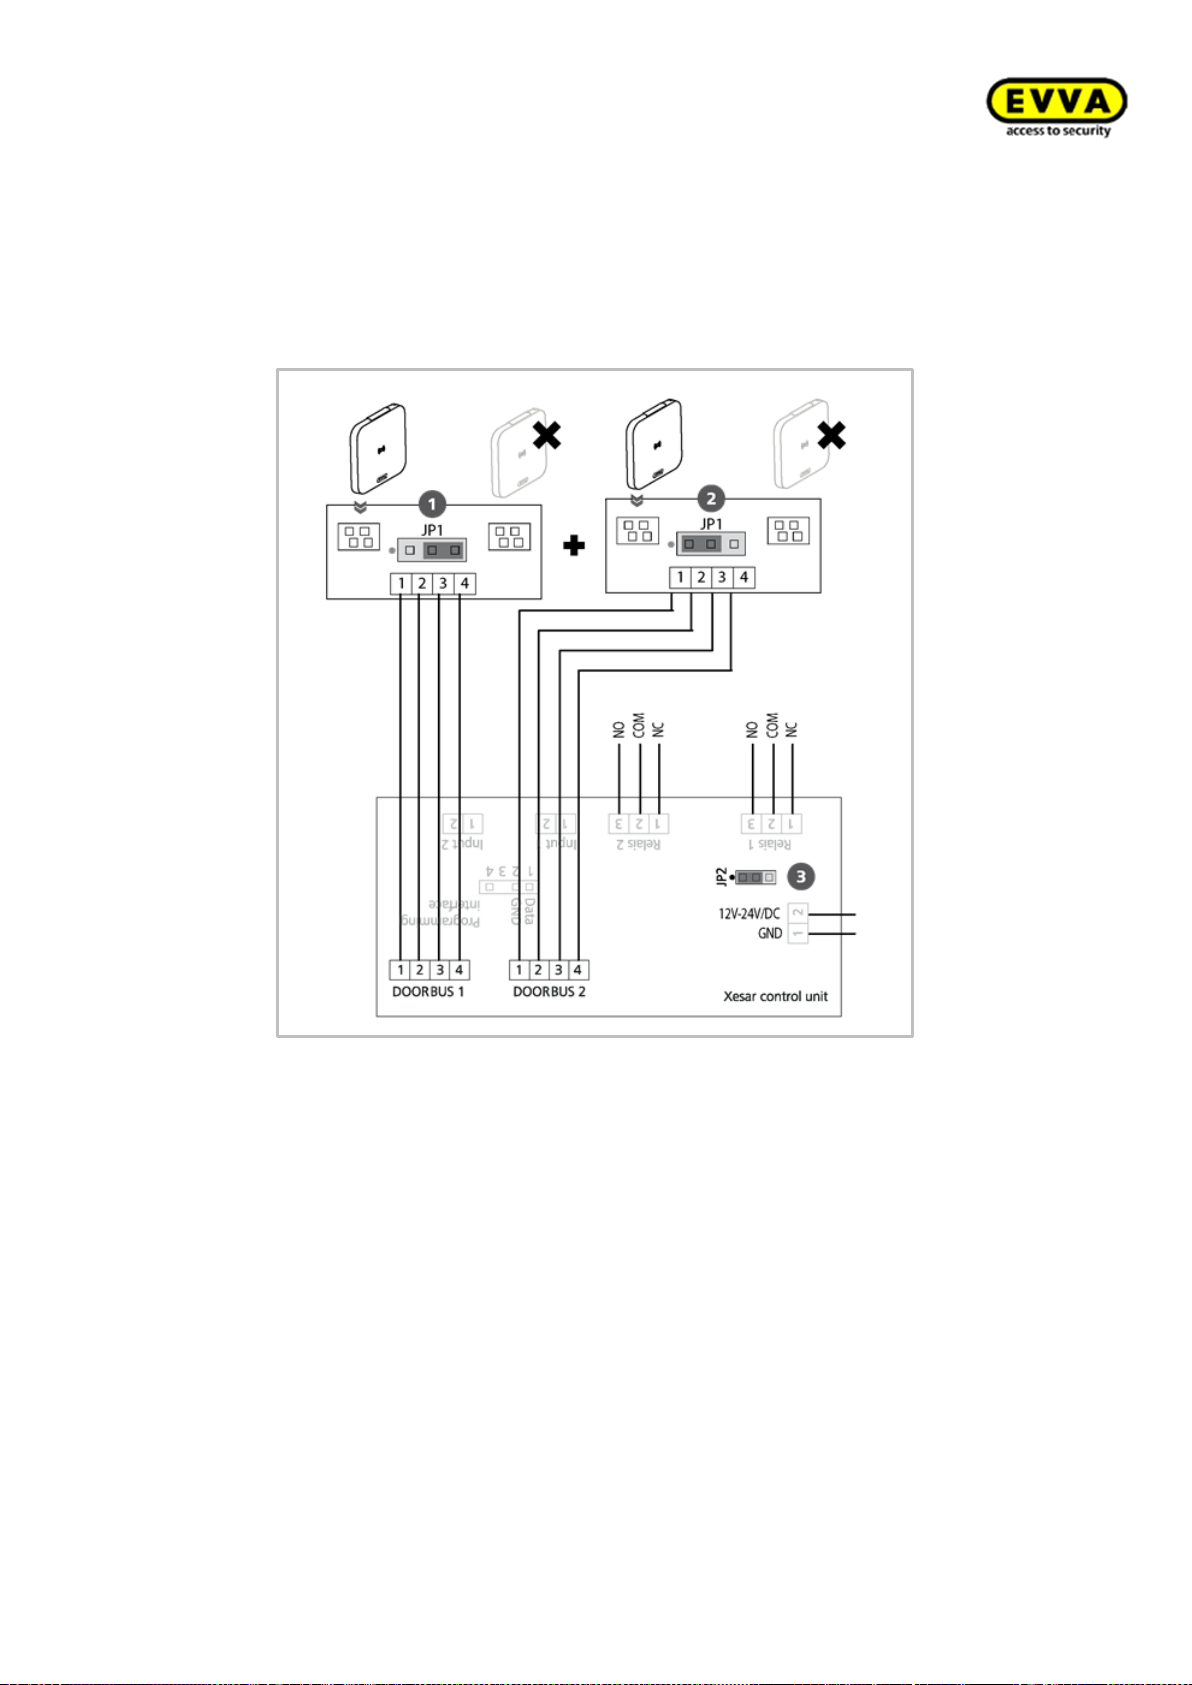
Xesar System manual 2.0 for version 2.0.36.17 | 24.06.2015 | misprinting and technical changes reserved
Two Xesar wall readers -> one Xesar control unit
Both relays can be switched differently depending on the jumper position (JP2). As a result, one
Xesar control unit and two wall readers can operate two different doors.
Figure 29: 2 Xesar wall reader (sample image)
70
Page 71

Xesar System manual 2.0 for version 2.0.36.17 | 24.06.2015 | misprinting and technical changes reserved
Note:
EVVA recommends using a CAT5 cable to connect Xesar wall readers with Xesar
control units.
Note:
Do not exceed the maximum cable length of 20 metres to safeguard correct functionality.
Note:
Maintain a minimum distance of 100 mm between Xesar wall readers to safeguard
correct functionality
Please check carefully to make sure the Xesar product you selected is suitable for your application.
We have made the required data sheet available on our homepage:
http://www.evva.at/products/electronic-locking-systems-access-control/xesar/assembly-instructionsdatasheets/en/
71
Page 72

Xesar System manual 2.0 for version 2.0.36.17 | 24.06.2015 | misprinting and technical changes reserved
Note the following, important notices regarding the use of Xesar wall readers.
Please note the office mode function (Section:
Xesar
identification media) and the
different acoustic and visual signals (Section:
How Xesar access
component indi-
cate events).
Climatic and environmental effects
Note the defined suitability of the wall reader for the respective ambient conditions as per its IP
rating and specific temperature range.
Use the wall reader in environments with a humidity below 90% only.
Clarify the application options with a specialist retailer before installing wall readers in environments with a particularly high level of static charges.
Do not use wall readers in corrosive atmospheres (e.g. chlorine, ammonia, lime water or salt water).
Information regarding installation and the correct installation situation
Exclusively specialist personnel must install wall readers and control units according to the specifications in the assembly manual which is also enclosed with the product. We particularly point out
to exclusively install the control unit when it is de-energised. EVVA shall assume no liability for any
kind for damage resulting from improper assembly/installation.
We recommend installing control units in tamper-proof areas.
Note that control unit operation requires a mains adapter. Said mains adapter is not within the
control unit's scope of delivery and optionally available as an accessory.
In the event that you are using a mains adapter you have not procured from EVVA, you must
make sure the power supply requirements illustrated in the product catalogue are complied with.
Wall readers and control units are exclusively intended to actuate electronic locking components
and technical equipment. The control unit is actuated using the relay outputs. The maximum permitted switching performance of the relay outputs as per the product catalogue must be complied
with.
All Xesar access components are delivered ex works in so-called construction mode. In this condition any Construction Card unlocks any Xesar access component. For this reason, immediately
after having installed each Xesar access component ensure it is correctly added to the locking
system so that exclusively authorised persons have access.
Exclusively use accessories and spare parts recommended by EVVA.
Observe the corresponding international and national specifications in the corresponding legislation, directives, standards and guidelines, particularly regarding the requirements for escape routes
and emergency exits, during project management and installation of the control unit.
72
Page 73

Xesar System manual 2.0 for version 2.0.36.17 | 24.06.2015 | misprinting and technical changes reserved
Before completing the installation, use a Construction Card to verify the correct function of the
Note the following, important notices regarding the use of Xesar control units.
wall reader and control unit when the door is open.
After having installed the wall reader and control unit, note that you can only operate the system
using a Construction Card until parameters have been completely configured.
Information on operation
Please note that the wall reader function can be safeguarded exclusively in conjunction with the
matching control unit. Wall readers and control units are exclusively intended to actuate electronic
locking components and technical equipment. EVVA shall assume no liability or accept warranty
claims for the correct function of the actuated devices themselves.
Instruct users of the electronic locking system to always keep identification media safe.
In the event that Xesar identification media is lost, it must be immediately blocked using the software. The Xesar wall readers must be immediately updated using the Xesar tablet.
Please note that wall readers must be removed using the dedicated special tools only. Damage
caused by other tools shall render any liability, warranty or potentially separate guarantee claims
void.
Do not cover the reader equipment of the wall reader with metal materials.
Regularly check the correct condition and function of the wall reader and control unit (at minimum once a month) as part of a functional check using authorised identification media.
We recommend you keep the locking system up-to-date by regularly installing software and firmware updates. Make sure to run firmware updates when the door is open and run a functional test
after having completed the update.
Cleaning information
Use a soft, lint-free cloth and soapy water to clean any visible areas of the wall reader. Do not use
corrosive products or sprays that may be aggressive on glass surfaces, plastics or sealants and
seals.
Important notice
You must comply with the following warnings and information from EVVA Sicherheitstechnologie
GmbH (hereinafter referred to as "EVVA") if you install, programme and use the control unit. Keep
the instructions in the vicinity of the control unit.
Carefully read the Xesar system manual before commissioning your Xesar locking system. It is
available at www.evva.com.
73
Page 74

Xesar System manual 2.0 for version 2.0.36.17 | 24.06.2015 | misprinting and technical changes reserved
General legal notes
EVVA concludes the contract on the use of Xesar exclusively on the basis of its General Terms of
Business (EVVA-GTB) as well as its General Licensing Conditions (EVVA-ALB) with regard for the
software for the product. Please refer to: http://www.evva.at/terms-and-conditions/en.
We explicitly notify clients that the use of the locking system subject to this contract may trigger
legal approval, reporting or registration obligations, in particular with regard to data protection
(e.g. if you are establishing a comprehensive information system), as well as grant the right of codetermination to staff in the event of use on corporate premises. Customers, clients and end users
shall be responsible for product use in compliance with legal stipulations.
The aforementioned information must be observed and passed on to operators and users as per
the defined manufacturer product liability according to product liability legislation. Noncompliance releases EVVA from any liability.
Any use deemed as non-compliant with the contract or as unintended use, any repair work or
modifications that have not been explicitly approved by EVVA as well as all types of incorrect servicing may cause malfunctions and are prohibited. Any modifications that have not been explicitly
approved by EVVA render claims to liability, warranty as well as any separate guarantee claims
void.
Architects and advisory institutions are obliged to request all necessary product information from
EVVA and take into account all such information to comply with obligations regarding information
and instructions under the Product Liability Act. Specialist retailers and installers must comply with
the information in EVVA documentation and they must pass on such information to customers, if
applicable.
Please refer to the Xesar product catalogue and the Xesar system manual for additional information beyond these vital instructions. These are available at www.evva.com.
74
Page 75
Xesar System manual 2.0 for version 2.0.36.17 | 24.06.2015 | misprinting and technical changes reserved
Standards and guidelines
Xesar wall reader
Control unit
Note:
EVVA recommends to operate the Xesar wall reader control unit using an independent power supply and provide an uninterrupted 12 V power supply. This consequently prevents system failure and safeguards access.
As soon as the control unit has been connected to the power supply for six hours
the system ensures the time settings are maintained for a minimum period of 72
hours in the event of a power cut.
Assemble the component as per the assembly manual enclosed with the product.
75
Page 76
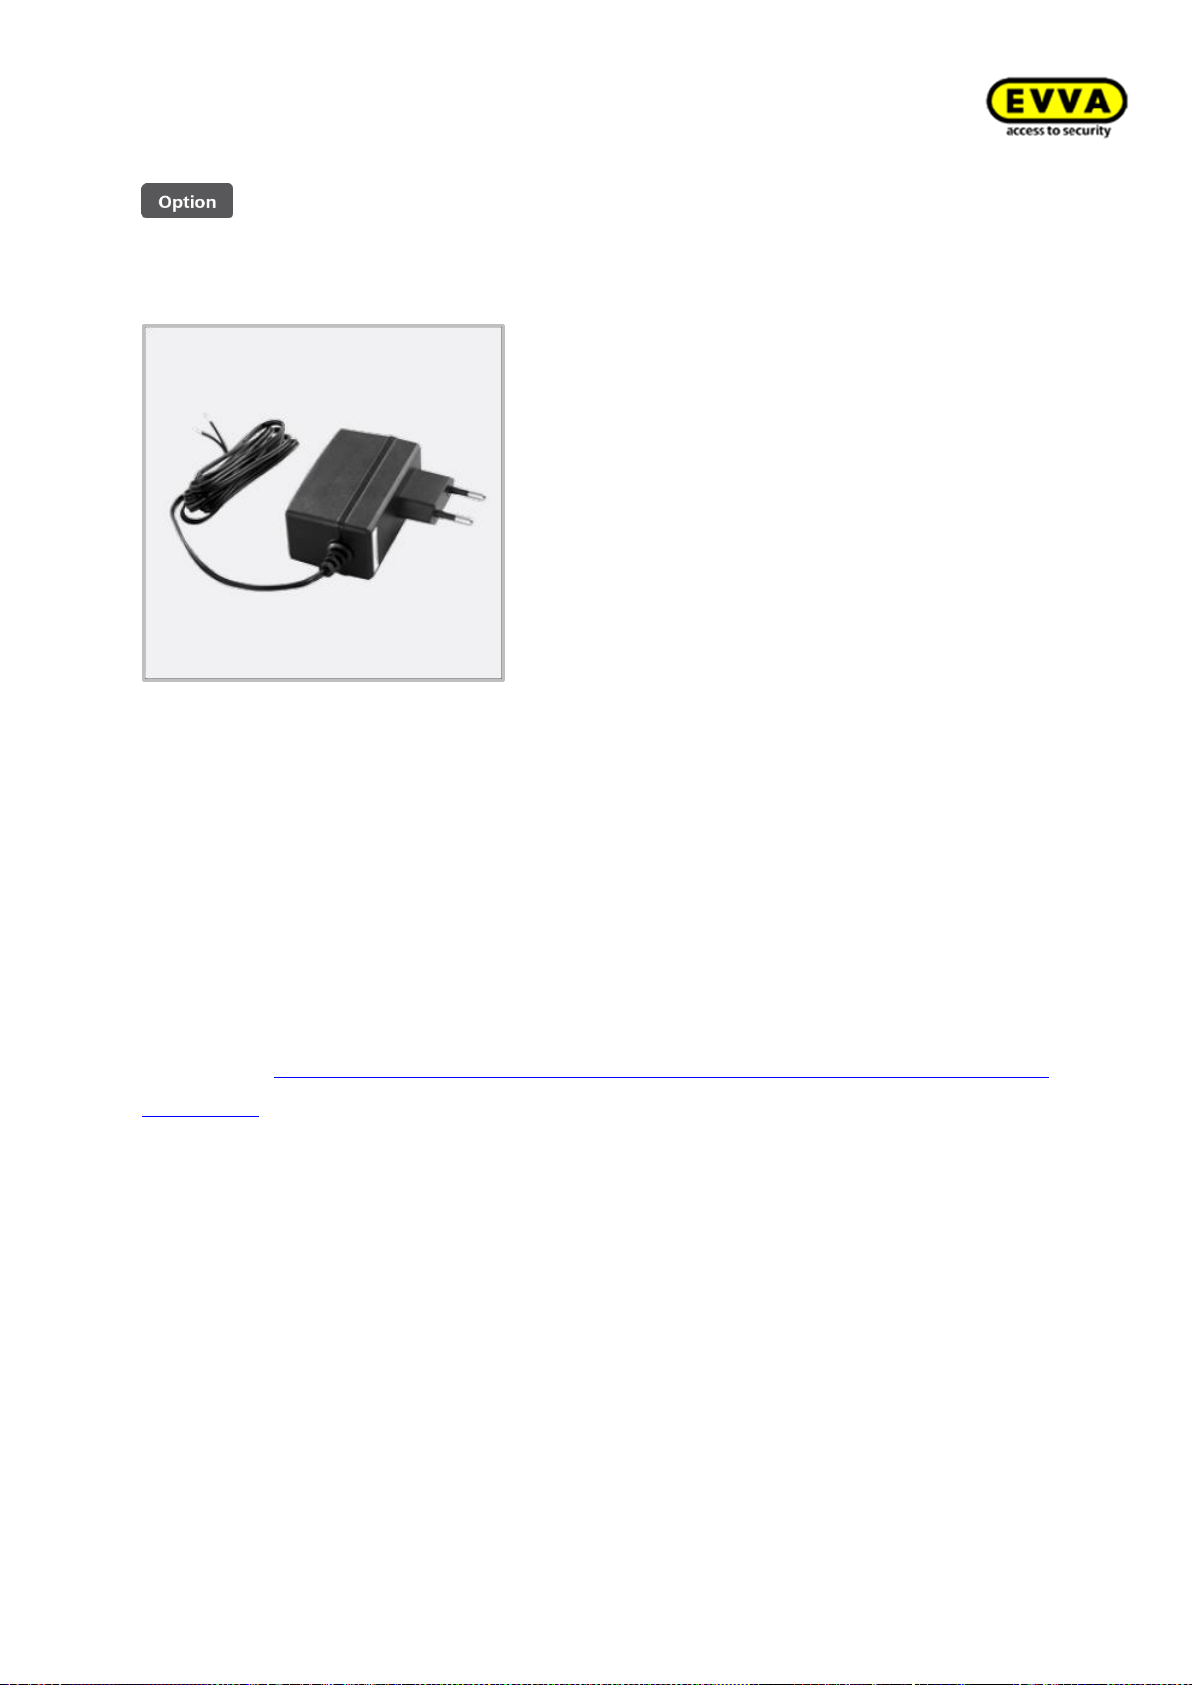
Xesar System manual 2.0 for version 2.0.36.17 | 24.06.2015 | misprinting and technical changes reserved
Mains adapter for control unit
Figure 30: Mains adapter (sample image)
The control unit mains adapter is optionally available.
Product code: E.ZU.WL.NT.V1
Please refer to the product catalogue in the general download section of our homepage for more
detailed information:
HYPERLINK "http://www.evva.at/products/electronic-locking-systems-access-control/xesar/system-
overview/en/" http://www.evva.at/products/electronic-locking-systems-access-control/xesar/system-
overview/en/
76
Page 77
Xesar System manual 2.0 for version 2.0.36.17 | 24.06.2015 | misprinting and technical changes reserved
Signal
number
Event
Visual
signal
Acoustic signals:
Note
Signal 1
Unlocking attempt
with authorised medium
mmmmm
Signal 2
End of release
ttttt
Signal 3
Rejected
medium
---
hh-hh-hh-hh
Signal 4
Unlocking attempt
with authorised medium and activated
office mode
--
tttt—hhhh
Signal 5
Start of office mode
--
tttt—hhhh
Signal 6
End of office mode
--
hhhh—tttt
Signal 7
Unlocking attempt
with authorised medium, battery low
signal
-----
h----h----h----h--
--
Signal 8
Battery inserted or
component reboot
----
tt—mm—hh
After having inserted batteries, battery charge status
display possible
Signal 9
Medium without
EVVA segmentation;
medium faulty, other
system
No signals
How Xesar access component indicate events
Visual LED signals: = Red and green simultaneously
Acoustic signals h = high-pitched sound, m = medium-pitched sound, t = low-pitched sound
Each signal corresponds to a duration of 50 ms.
Pauses are indicated by "–".
77
Page 78

Xesar System manual 2.0 for version 2.0.36.17 | 24.06.2015 | misprinting and technical changes reserved
Installing Xesar access components
Note:
The assembly manuals and the packaging feature QR codes which will take you
directly to the corresponding video sequence or assembly manual.
Caution:
You must observe the sequence of listed installation steps as otherwise malfunctions may occur.
Please note that specialist personnel must install Xesar access components as per the notes and
information as well as the assembly manual enclosed with the product.
Installation support
EVVA provides a host of different installation support to make installing your Xesar system easier.
Visit our website.
Language-neutral assembly manual
EVVA provides language-neutral assembly manuals on the packaging of the corresponding
product or our homepage to support Xesar access component assembly.
http://www.evva.at/products/electronic-locking-systems-access-control/xesar/assemblyinstructions-datasheets/en/
Product-specific assembly video clips
We have provided assembly video clips with demonstrations of complex assembly steps here:
http://video.evva.com/tutorials/xesar/expzkzs/expzkz-s-1/en/
Language-neutral drilling template
EVVA provides a language-neutral, single-use, cardboard drilling template to support the assembly of versions requiring one or several drilled holes. They are printed on the corresponding product packaging and are available in our homepage in the general download section:
http://www.evva.at/products/electronic-locking-systems-access-control/xesar/assemblyinstructions-datasheets/en/
78
Page 79
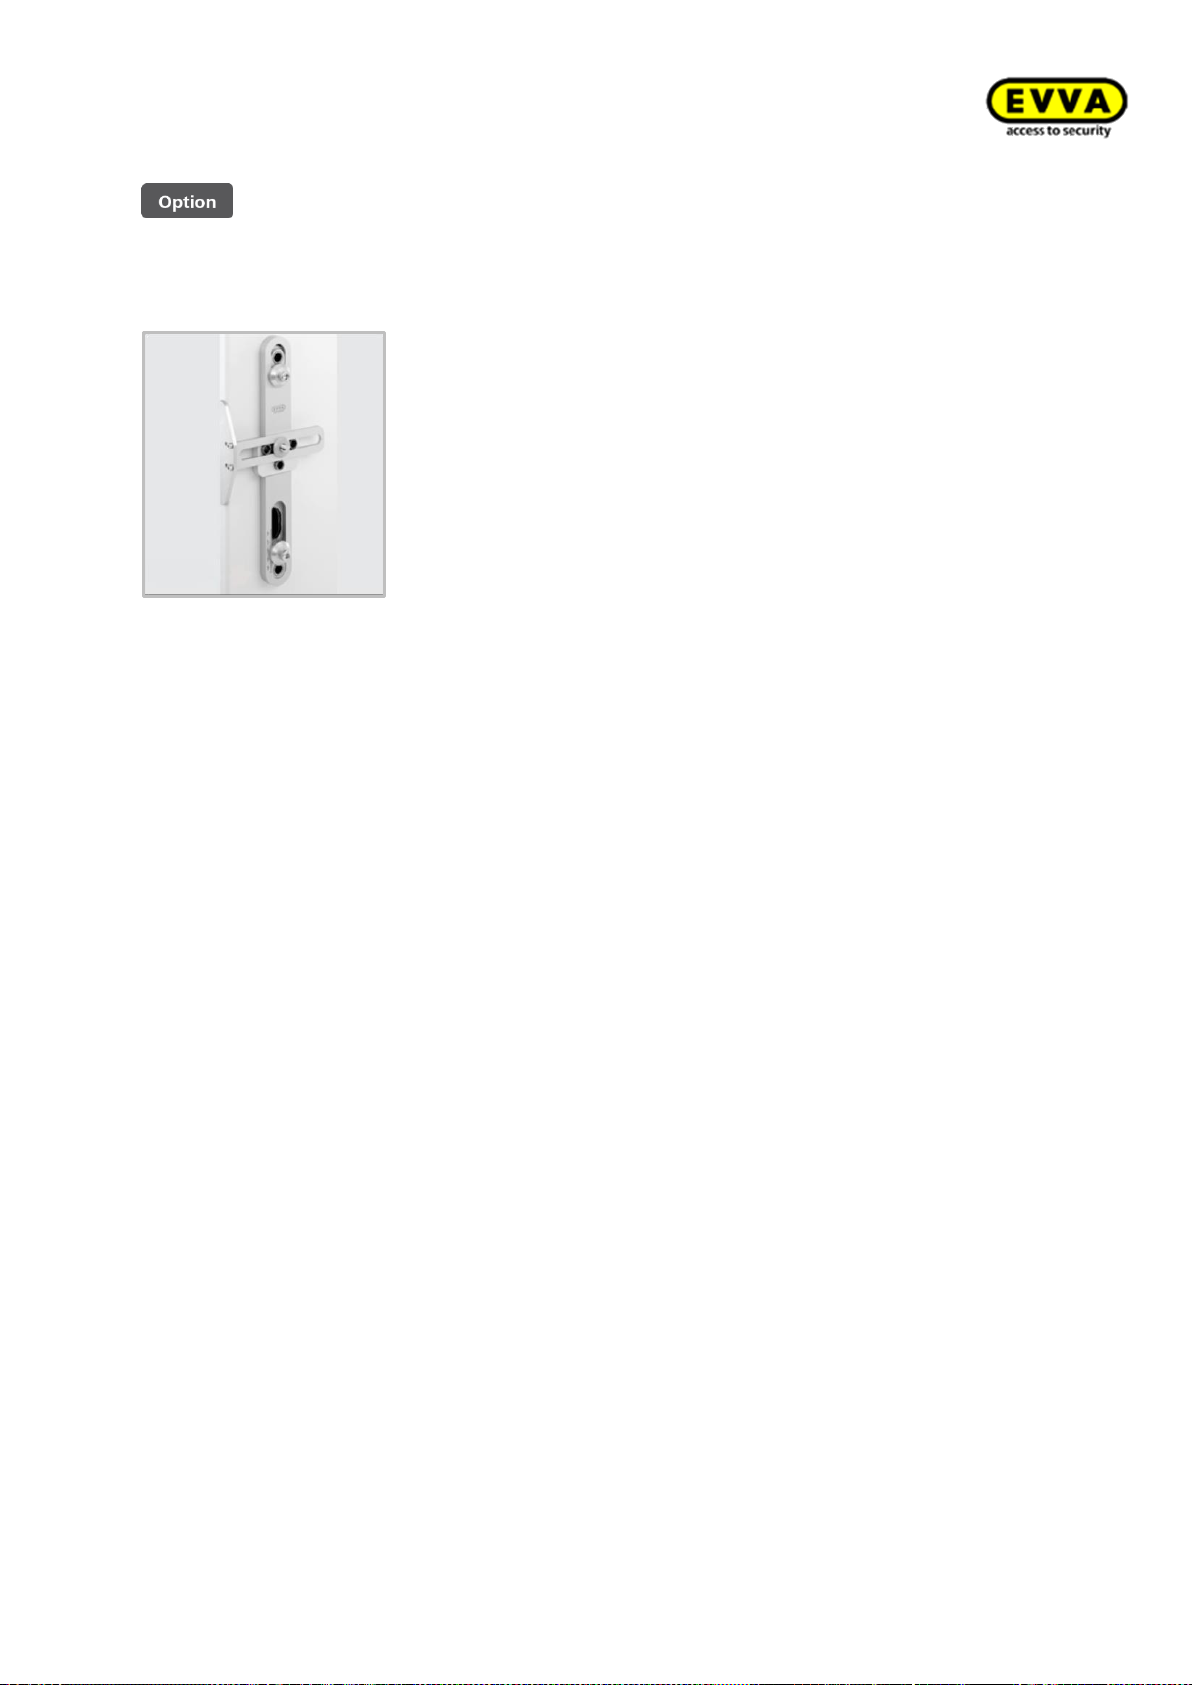
Xesar System manual 2.0 for version 2.0.36.17 | 24.06.2015 | misprinting and technical changes reserved
Drilling template
Figure 31: Drilling template (sample image)
EVVA provides a high-quality, metal drilling template to facilitate preparing the door for
an assembly of any type of Xesar escutcheons and Xesar handles.
An adjustable stop safeguards the holes are correctly aligned and it enables to adapt the settings
to match the requirements of any door situation. Hardened metal drilling sleeves guarantee a long
service life even after intense use.
The drilling template is optionally available.
Product code: E.ZU.BE.BS.V1
79
Page 80
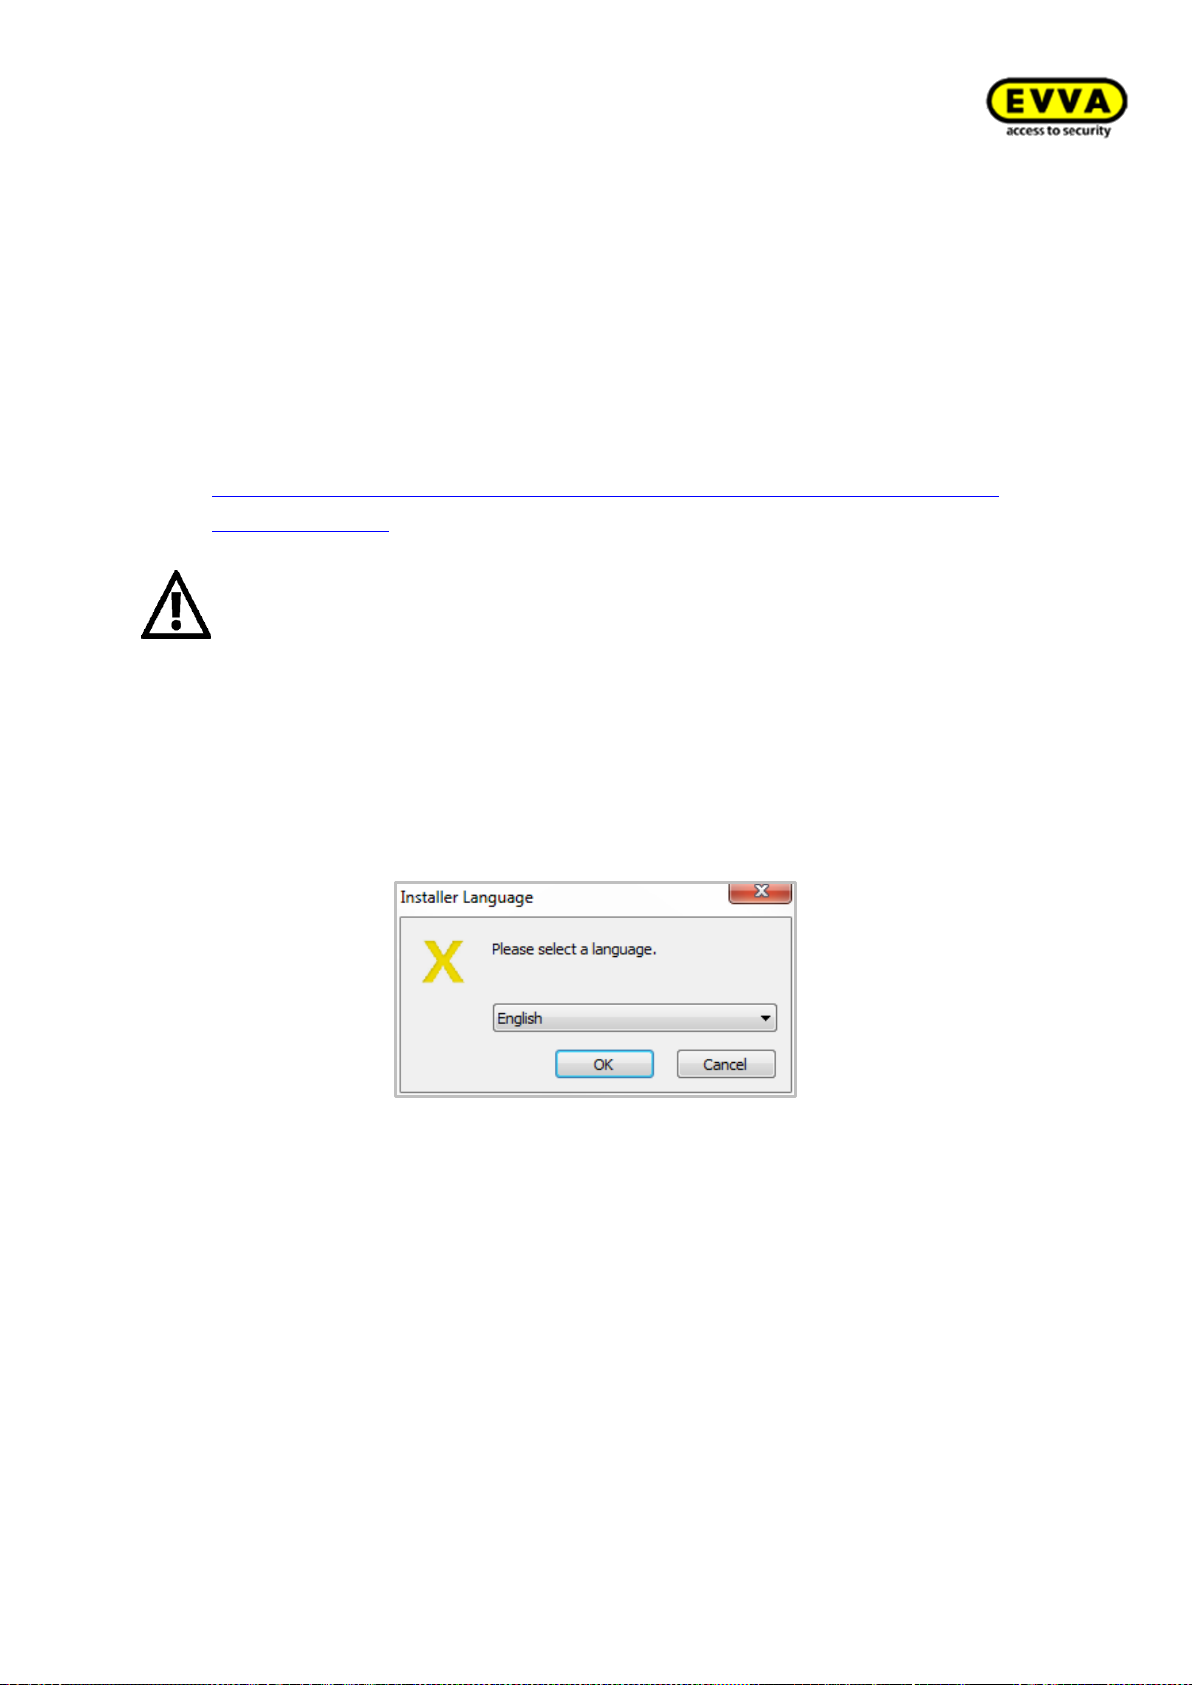
Xesar System manual 2.0 for version 2.0.36.17 | 24.06.2015 | misprinting and technical changes reserved
Installing the Xesar software
You require appropriate administrator rights on your computer to install the software.
Proceed as follows to install your Xesar software:
Step 1:
Register to download the most recent version of the Xesar software at:
http://www.evva.at/products/electronic-locking-systems-access-control/xesar/demandxesar-software/en//.
Step 2:
Proceed as follows after having downloaded your Xesar installer file (.exe):
Double-click the application.
Select your language and click OK (Figure 32) to continue.
Figure 32: Language selection
Now the installation wizard opens (Figure 33: Welcome). Follow the on-screen instructions and
then click
Next.
80
Page 81
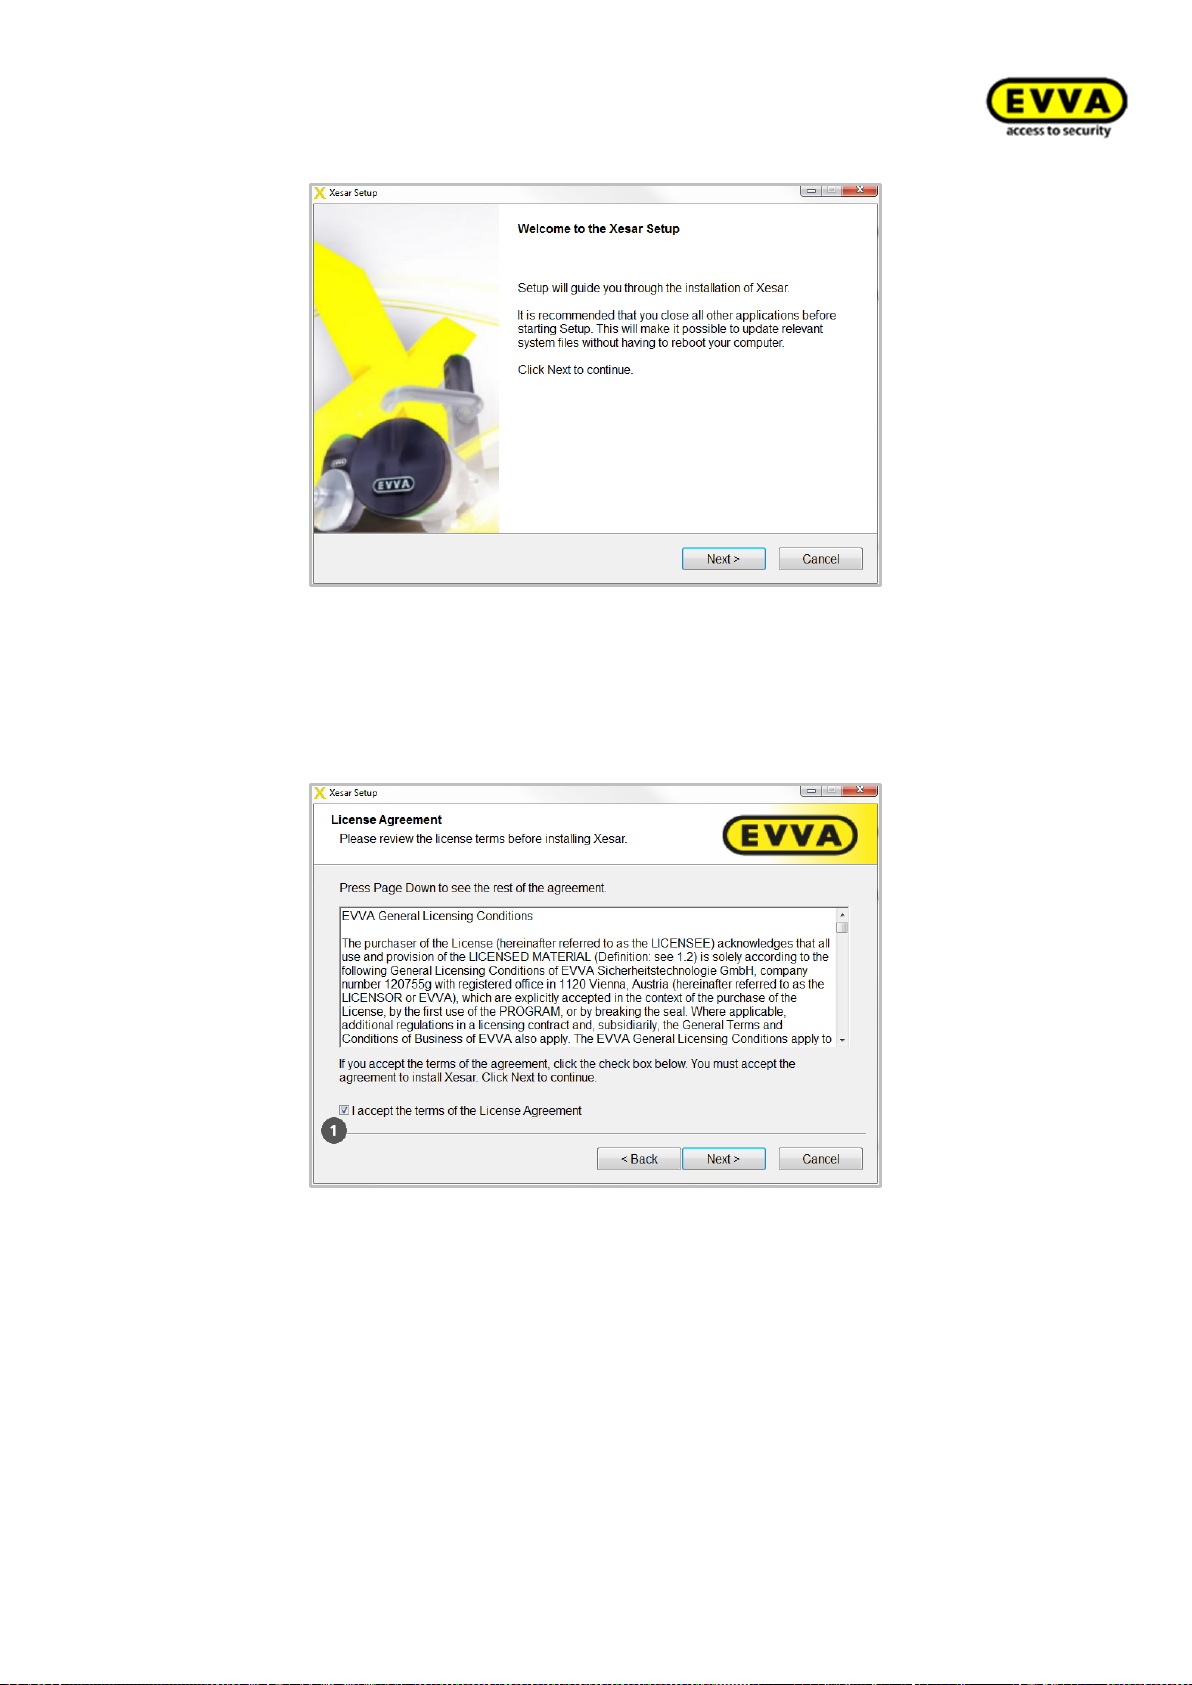
Xesar System manual 2.0 for version 2.0.36.17 | 24.06.2015 | misprinting and technical changes reserved
Figure 33: Welcome
Accept the terms and conditions to be able to install the software (Figure 34: Xesar installation
— licence agreement). Then click
Continue
.
Figure 34: Xesar installation — licence agreement
By default the Xesar software is installed in a directory on the system drive (Figure 35: Xesar
installation — selecting the designated directory). Click Browse (Figure 35: Xesar installation —
selecting the designated directory) and select a different directory if you would like to install the
Xesar software in a different directory. Then click
Continue.
81
Page 82
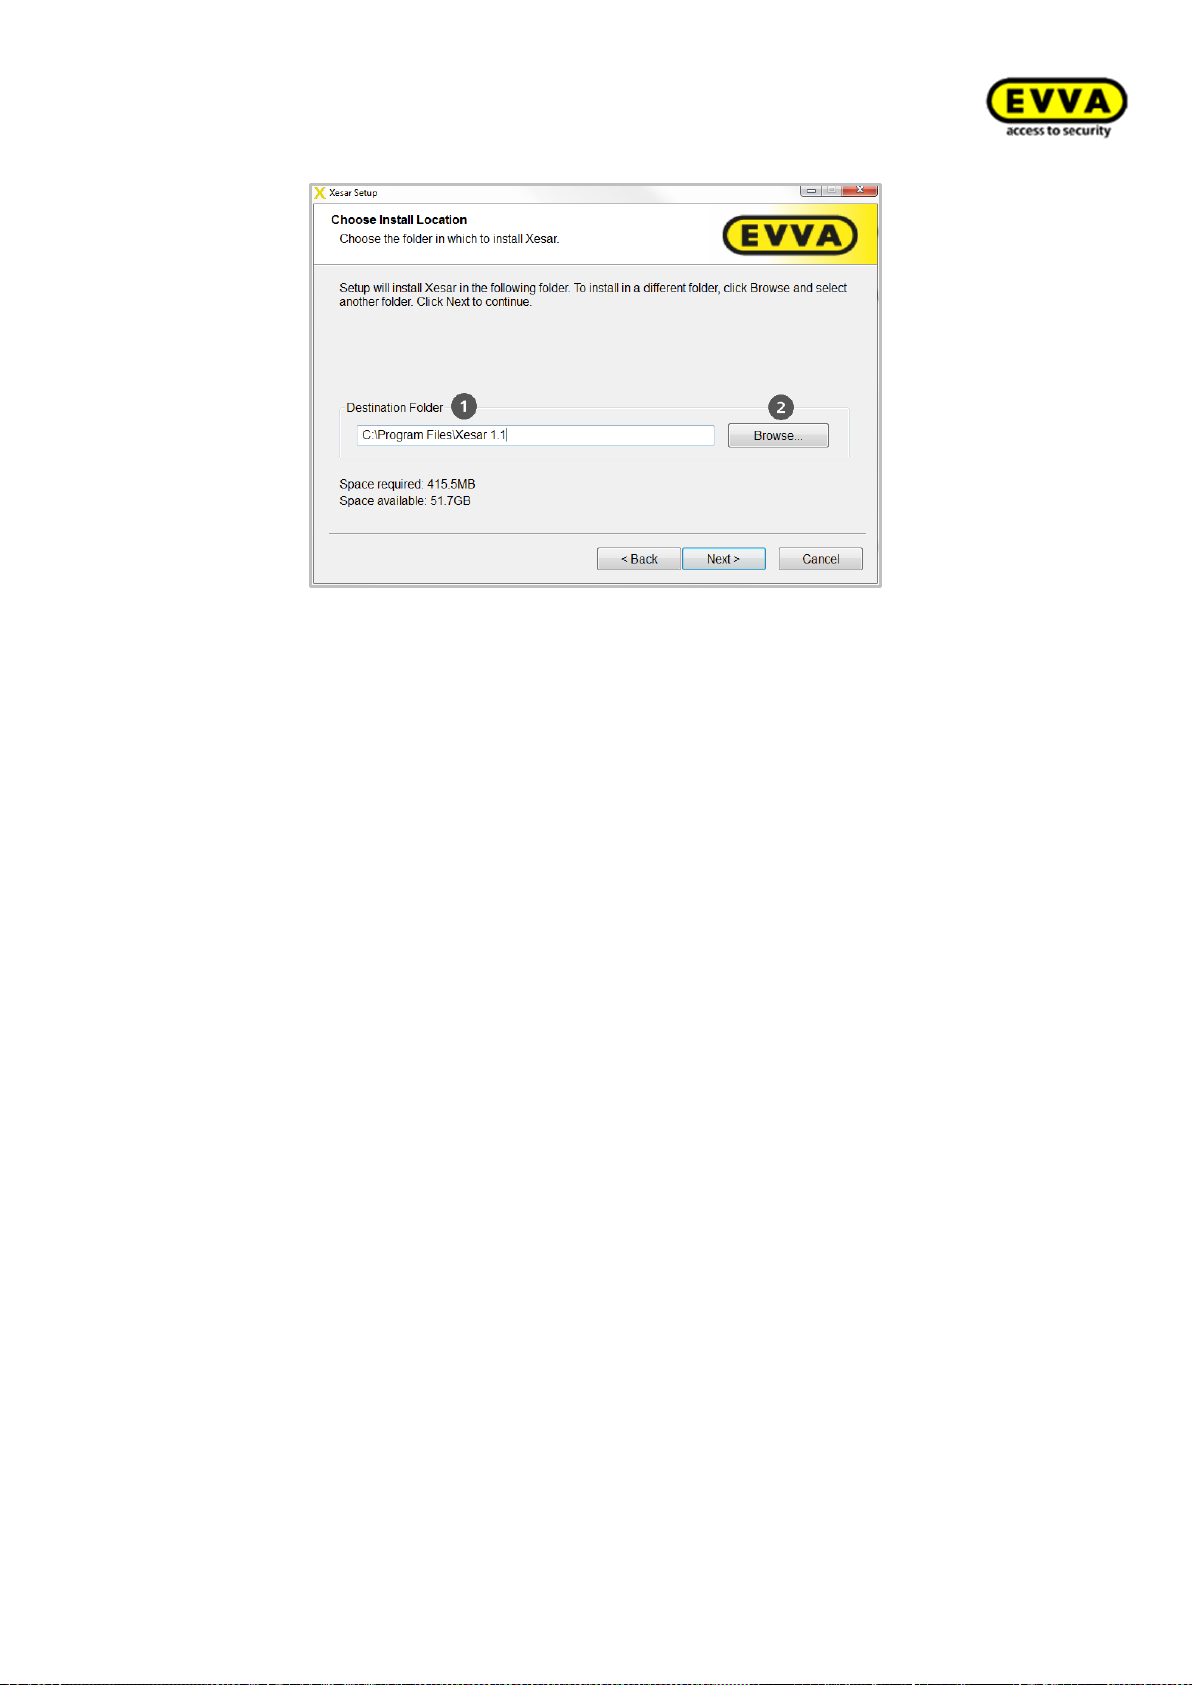
Xesar System manual 2.0 for version 2.0.36.17 | 24.06.2015 | misprinting and technical changes reserved
Figure 35: Xesar installation — selecting the designated directory
Please note that during installation with no administrative rights - no backup can created, because
access privileges to the installation file path (drive C) are missing.
Keep the installation path short and without special characters - an invalid path is signaled via an
error message.
82
Page 83
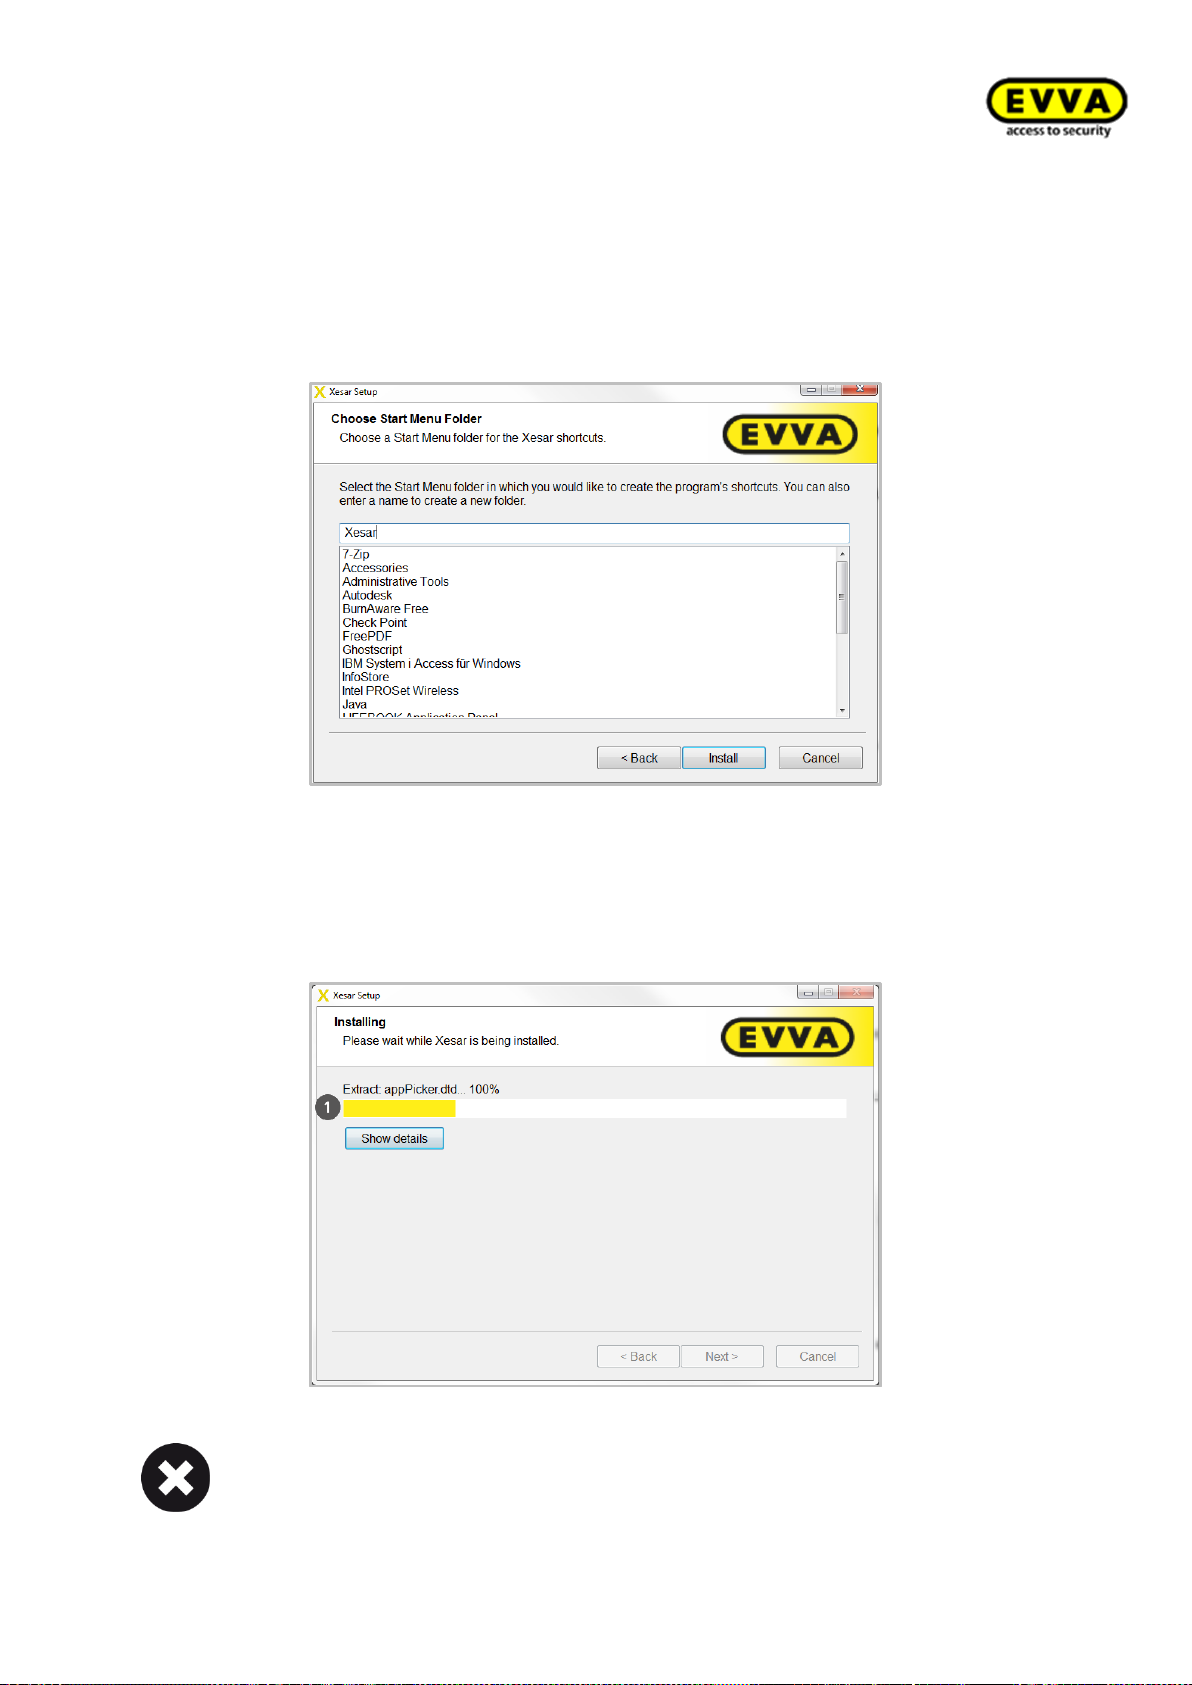
Xesar System manual 2.0 for version 2.0.36.17 | 24.06.2015 | misprinting and technical changes reserved
The system automatically creates the folder for program shortcuts. If you would like to create a
Note:
If you are reinstalling your Xesar software, but have failed to uninstall the application, you will be unable to install the software
different folder, enter its name and then click
the folder)
Figure 36: Xesar installation — specifying the folder
Install
. (Figure 36: Xesar installation — specifying
Now the system installs the Xesar software, the progress bar indicates the current activity
(Figure 37: Xesar installation).
Figure 37: Xesar installation
83
Page 84
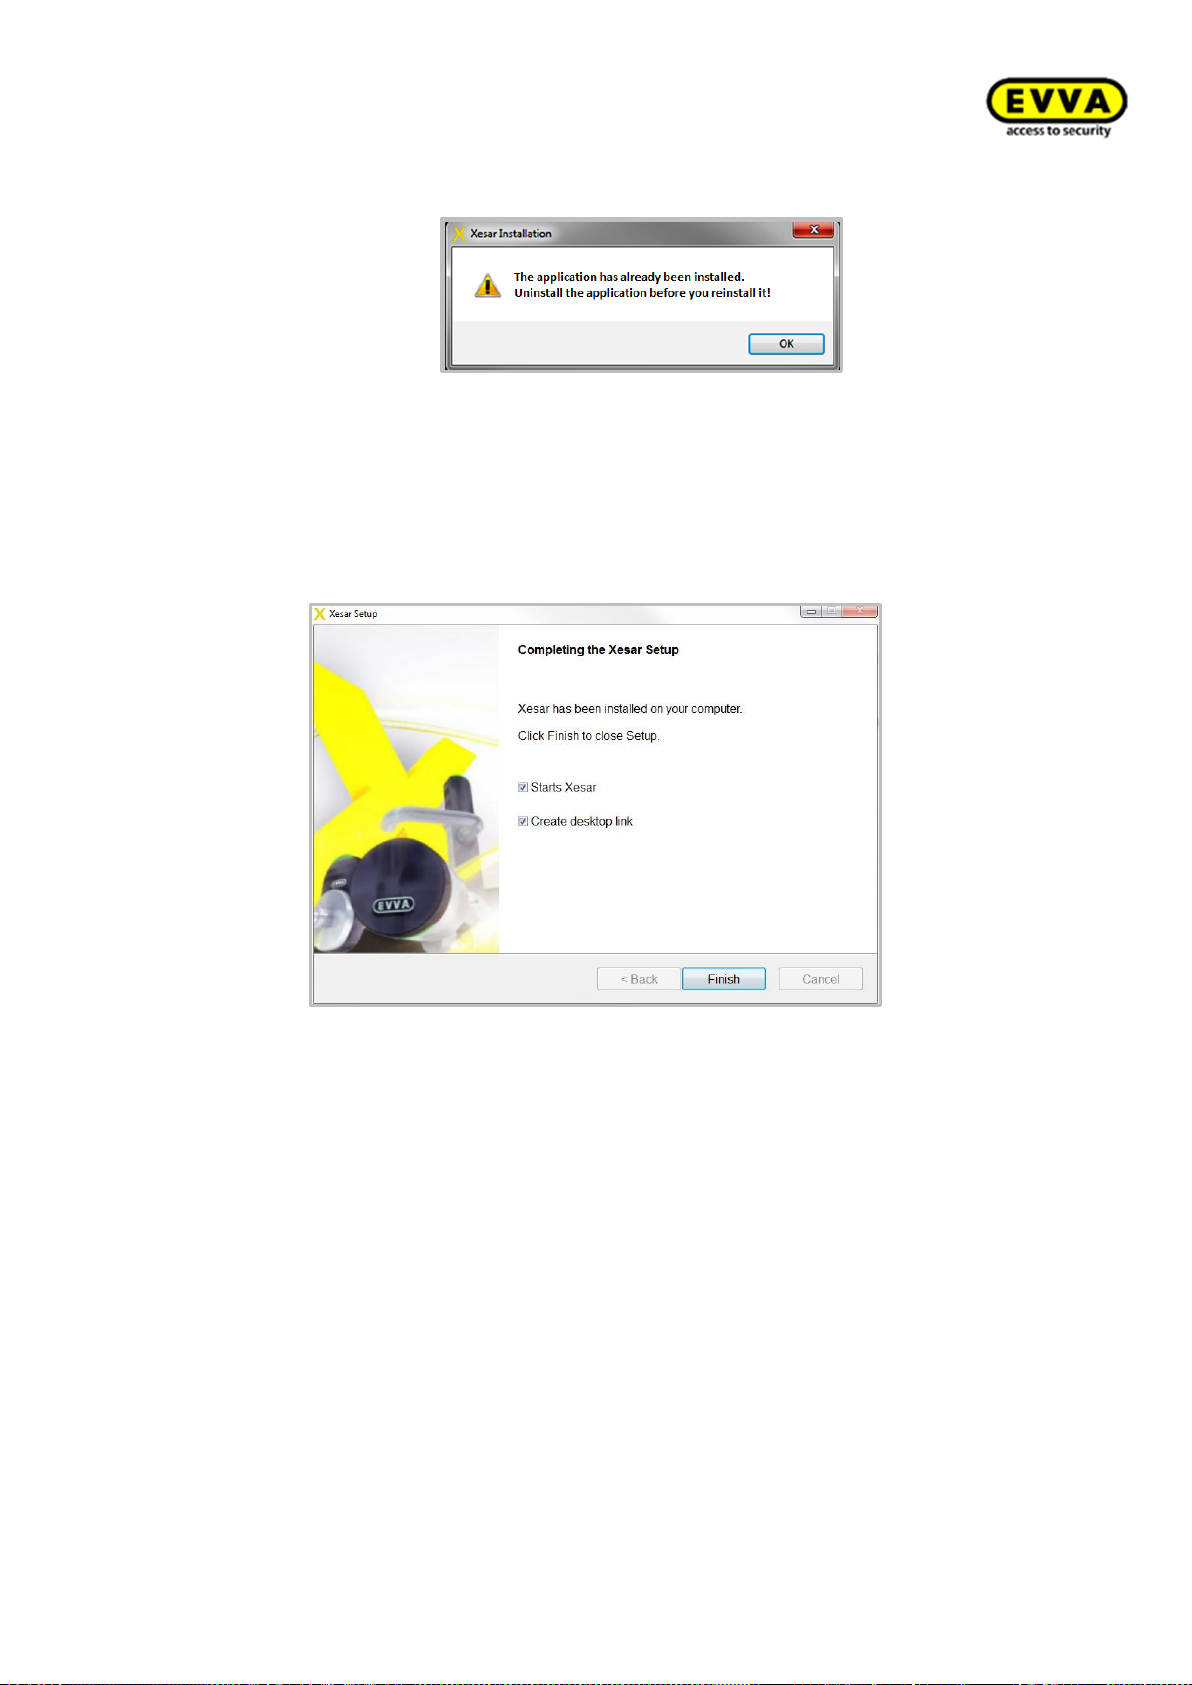
Xesar System manual 2.0 for version 2.0.36.17 | 24.06.2015 | misprinting and technical changes reserved
Figure 38: Error message/installation
Once the installation has completed, a message indicates the Xesar software has been successfully
installed. Click
Finish
(Figure 39: Xesar installation) to complete the installation.
Figure 39: Xesar installation
84
Page 85
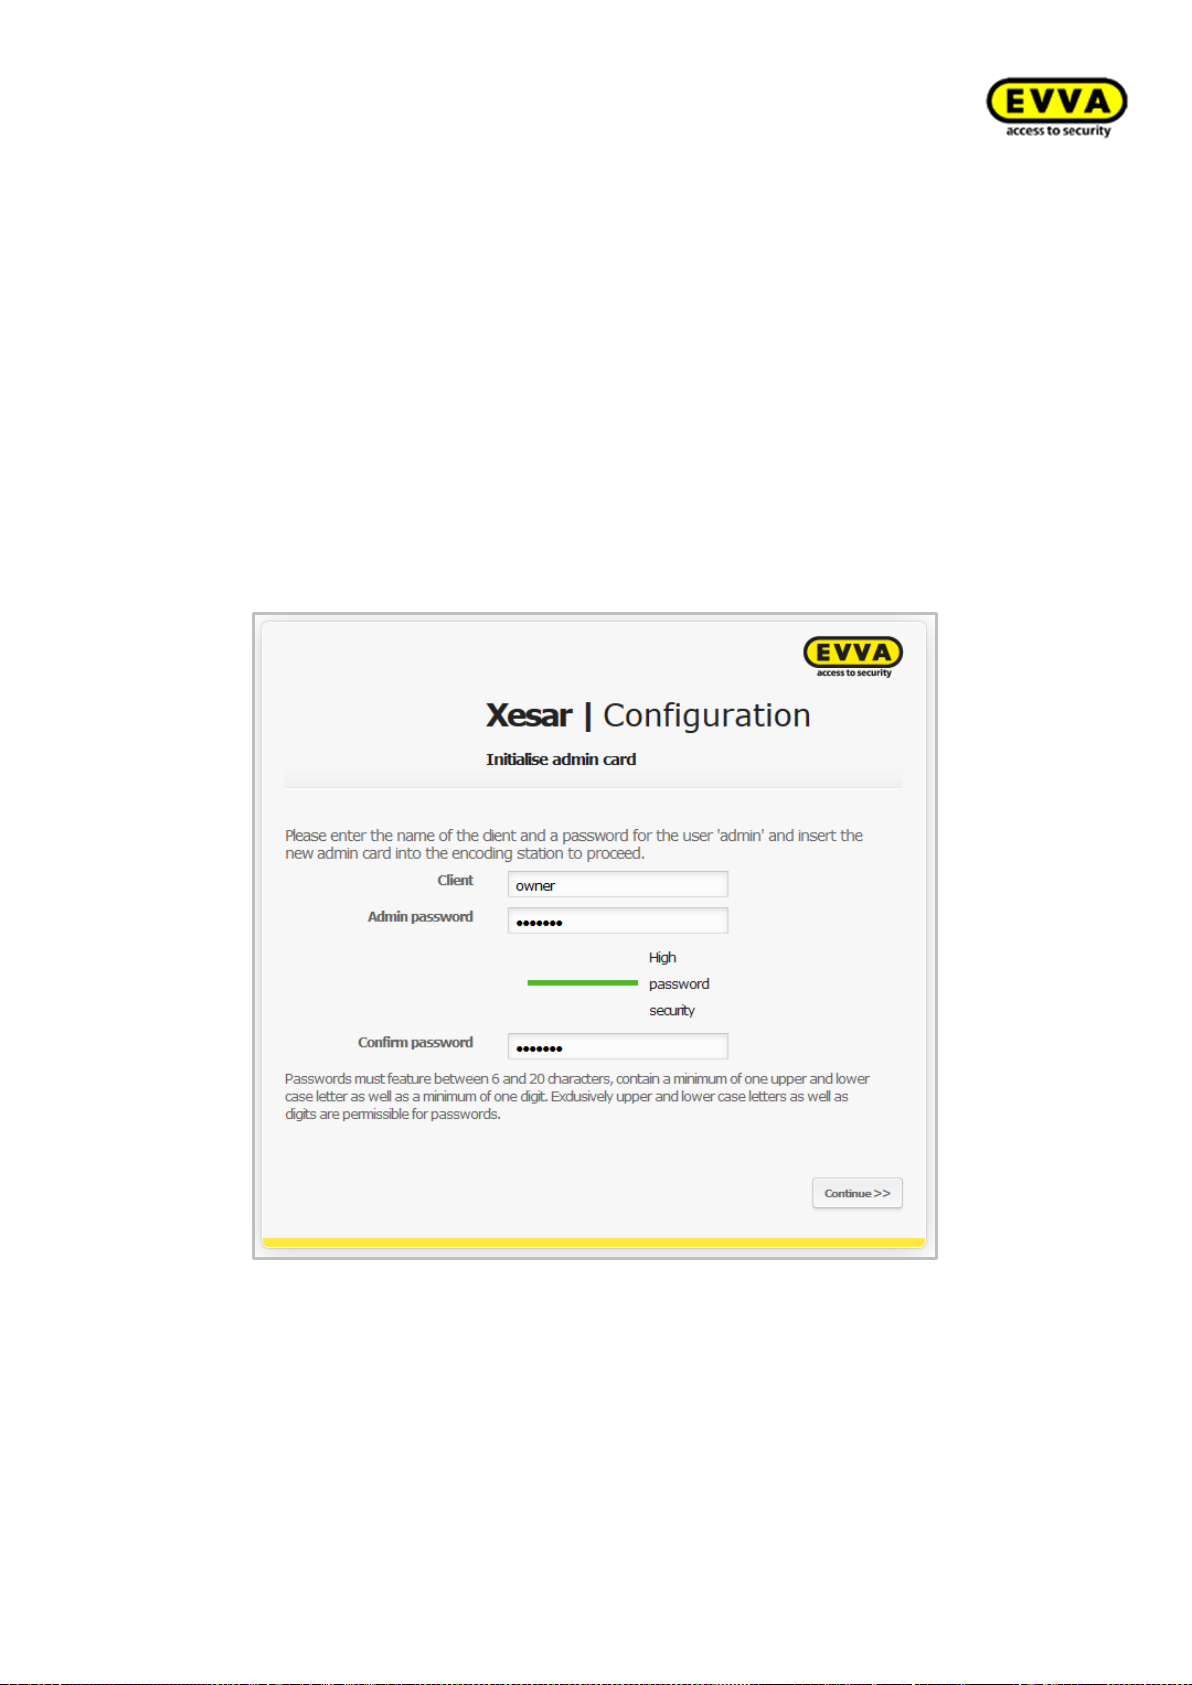
Xesar System manual 2.0 for version 2.0.36.17 | 24.06.2015 | misprinting and technical changes reserved
Configuring Xesar software for the first
time
Your Admin Card is automatically checked upon starting your Xesar software.
The following error message appears if you have inserted a faulty or invalid Admin Card or if no
Admin Card has been inserted into your Xesar coding station: „Insert a new Admin Card ".
Once you have inserted a valid Admin Card, enter the system designation and an administrator
password in the Xesar | Configuration window. Then click
Next.
Fehler! Textmarke nicht definiert.39: Initialising the Admin Card
Passwords must be 6-20 characters long and must contain at least one uppercase and one lowercase letter and one number. Only uppercase and lowercase letters and numbers are allowed.
85
Page 86
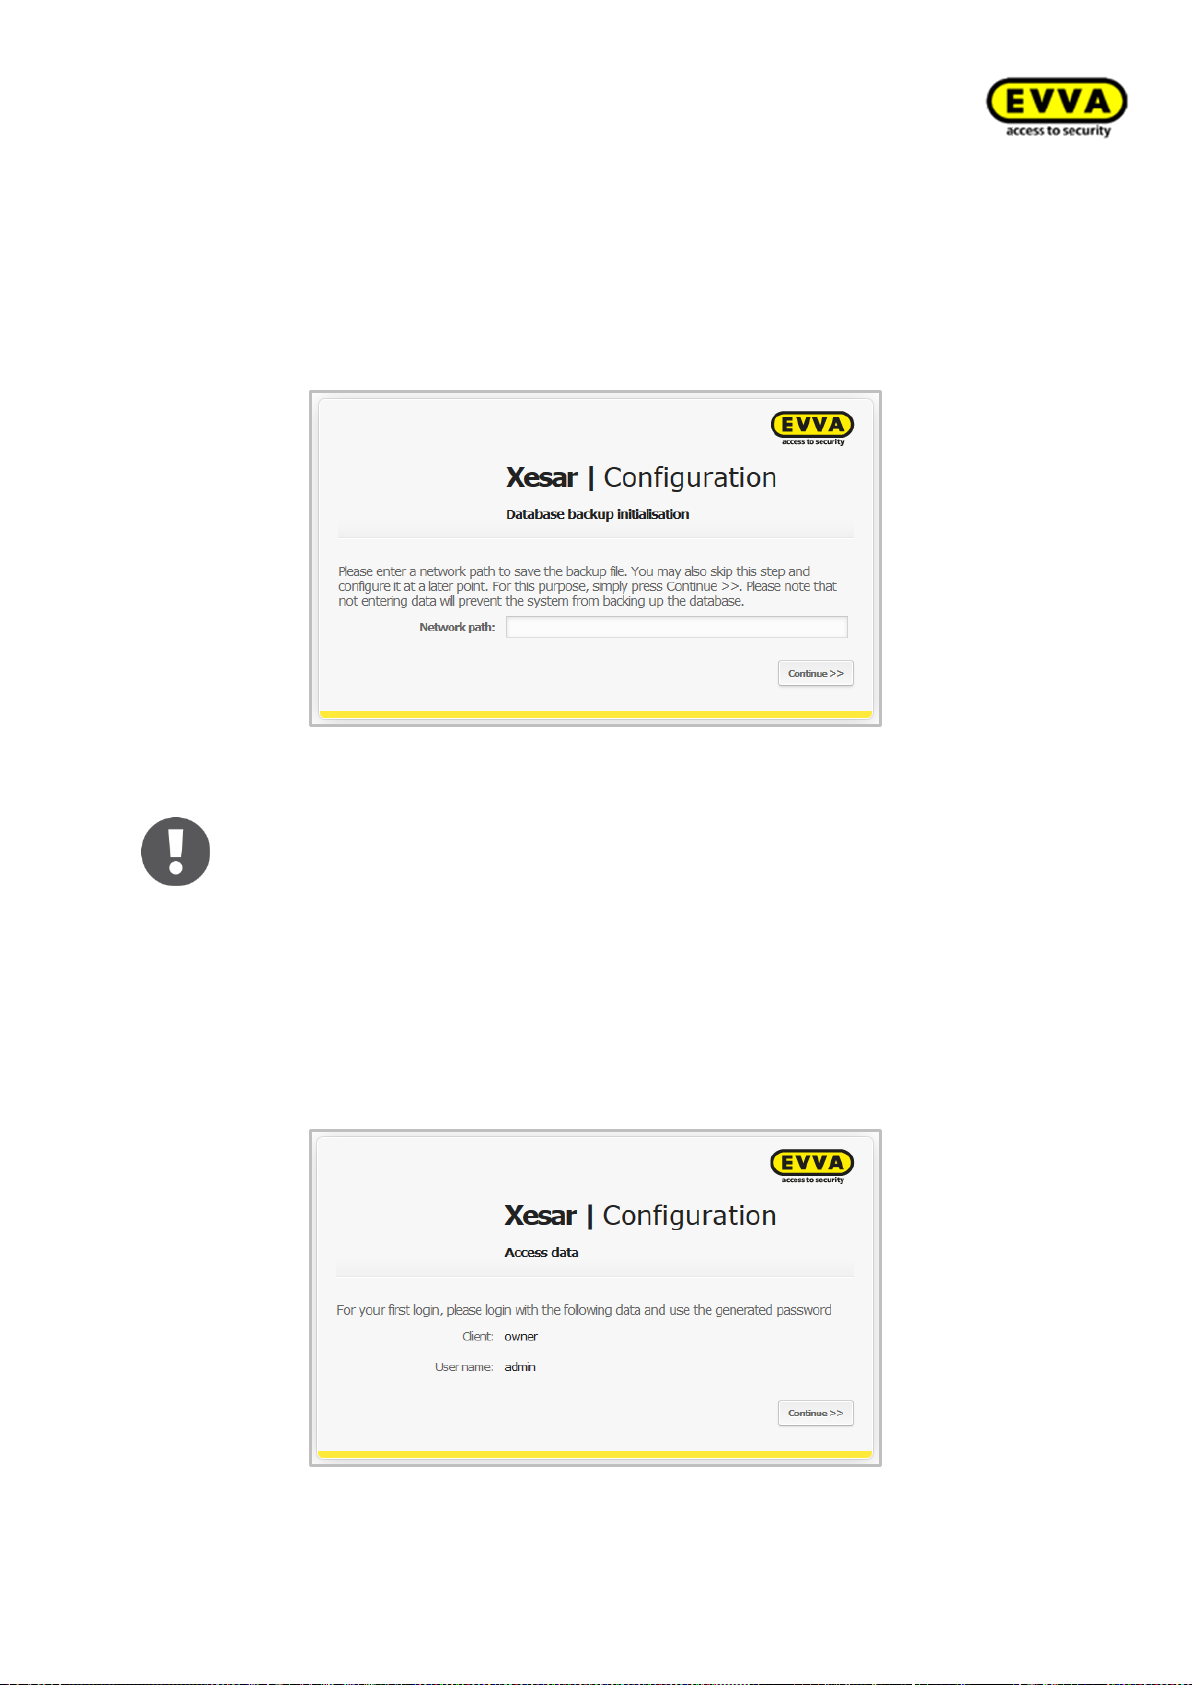
Xesar System manual 2.0 for version 2.0.36.17 | 24.06.2015 | misprinting and technical changes reserved
Now select a path for the automatic database backup (Figure 40: Network path:). For reasons of
Note:
Configure your system so backup files are regularly saved according to their version
(Windows Preferences) to be able to recover data from a certain version in the
event of a database failure.
security we recommend creating the DB backup on an external hard drive as a system hard drive
failure would put your database and the backup at risk.
Then click
Next.
Figure 40: Network path:
The system now shows the name of the system you selected
(Figure 41: Access data).
Log in by clicking
Next
.
Figure 41: Access data
86
Page 87
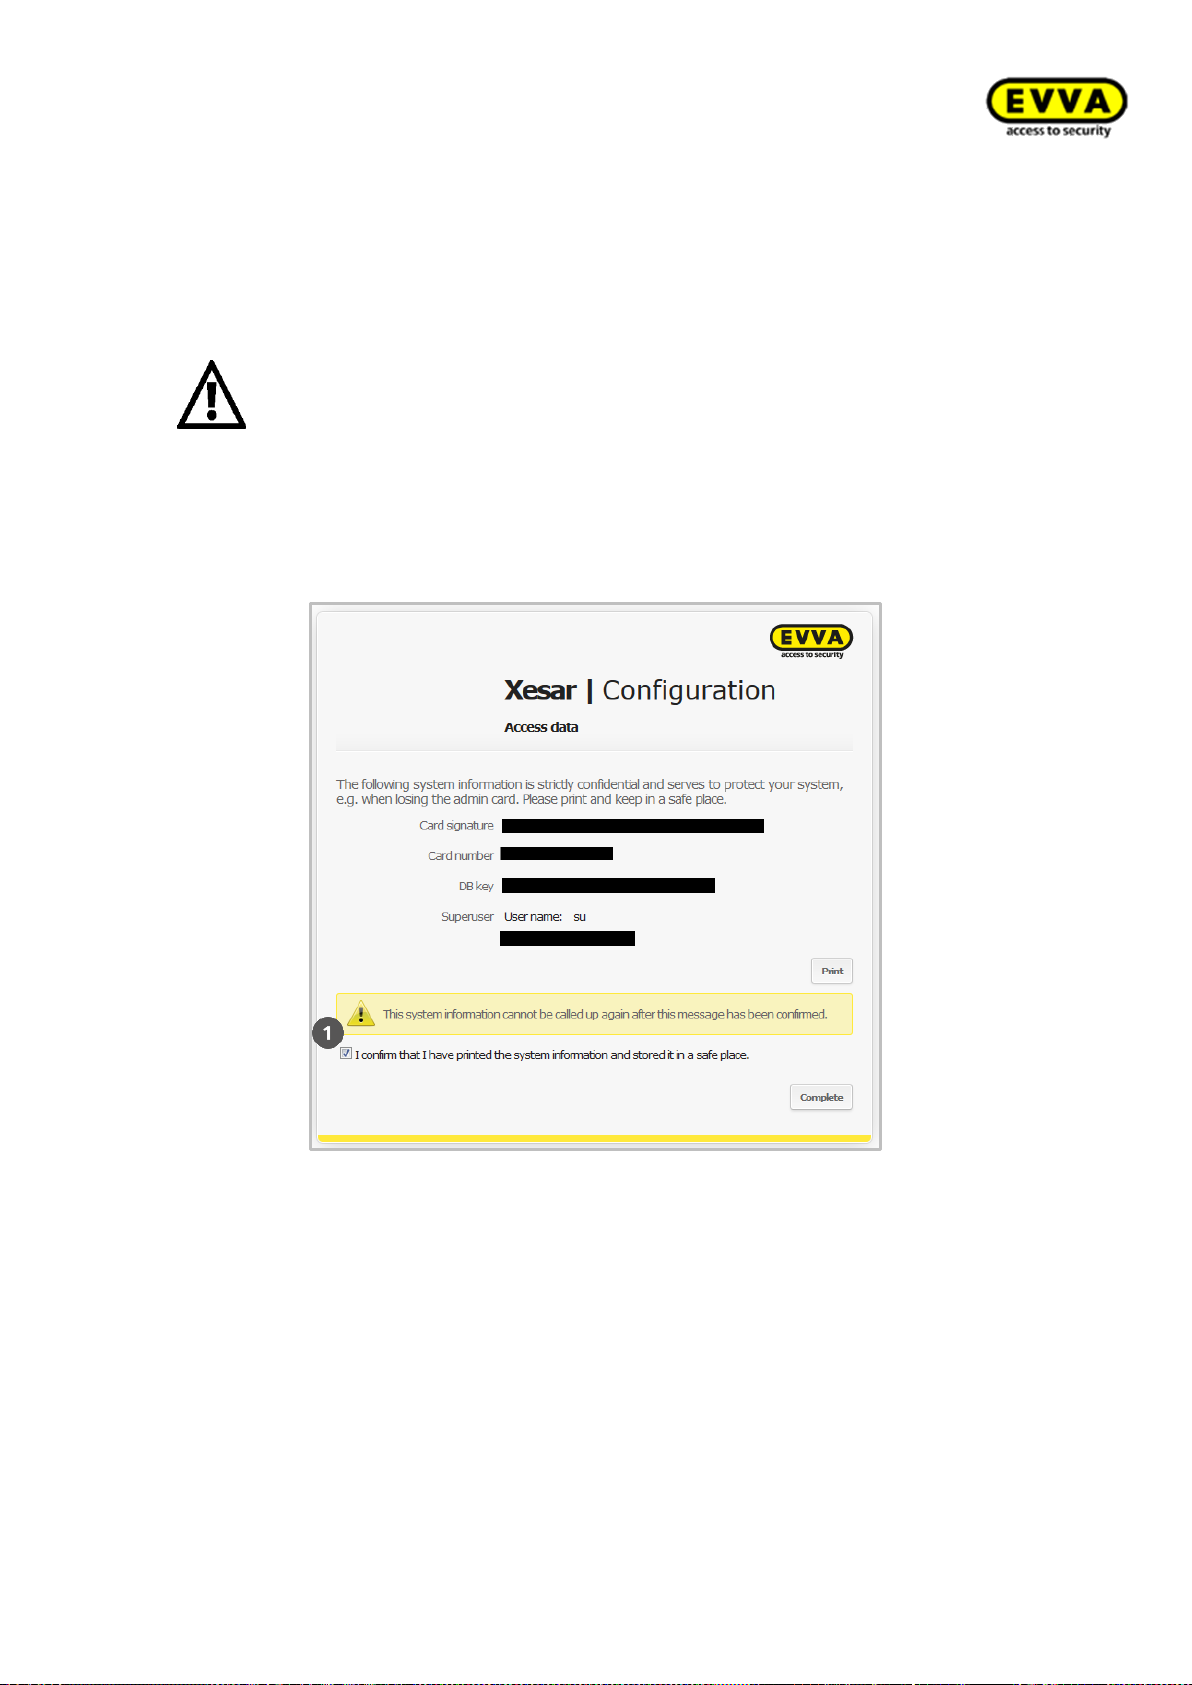
Xesar System manual 2.0 for version 2.0.36.17 | 24.06.2015 | misprinting and technical changes reserved
CAUTION:
You can exclusively view your access data ONCE and only AT THIS POINT!
Fehler! Textmarke nicht definiert.
A confirmation prompt asking whether you have printed and archived your system information appears to prevent you from accidentally skipping this window.
Backing up access data and DB key
Figure 42: Configuration
Confirm the security prompt in the Xesar | Configuration application window
(Figure 42: Configuration) and click
Complete.
After having confirmed the Xesar | Configuration with
Complete
you have
completed the initial software configuration.
87
Page 88
Xesar System manual 2.0 for version 2.0.36.17 | 24.06.2015 | misprinting and technical changes reserved
Roles
Role
Function
Admin
Owner and administrator of the locking system.
(maintenance authorization of critical settings)
Users
Users are responsible for administrative tasks within the program and
each user is assigned individual authorisations. Administrators centrally
manage the system and they always have comprehensive authorisations.
Person
Persons using authorisation media.
Persons are assigned access authorisations to door areas and doors.
EVVA has assigned certain functions to specific roles to make it easier for you to use your Xesar
software. Please note this during commissioning and operation.
Table 1: Software application roles
88
Page 89

Xesar System manual 2.0 for version 2.0.36.17 | 24.06.2015 | misprinting and technical changes reserved
Xesar software
Starting the program
A program window appears after having started your Xesar software (Figure 43: Opening the program). The system automatically loads various software modules in the background while you see
this screen. Wait until the program window has completed loading and automatically disappears.
Figure 43: Opening the program
89
Page 90
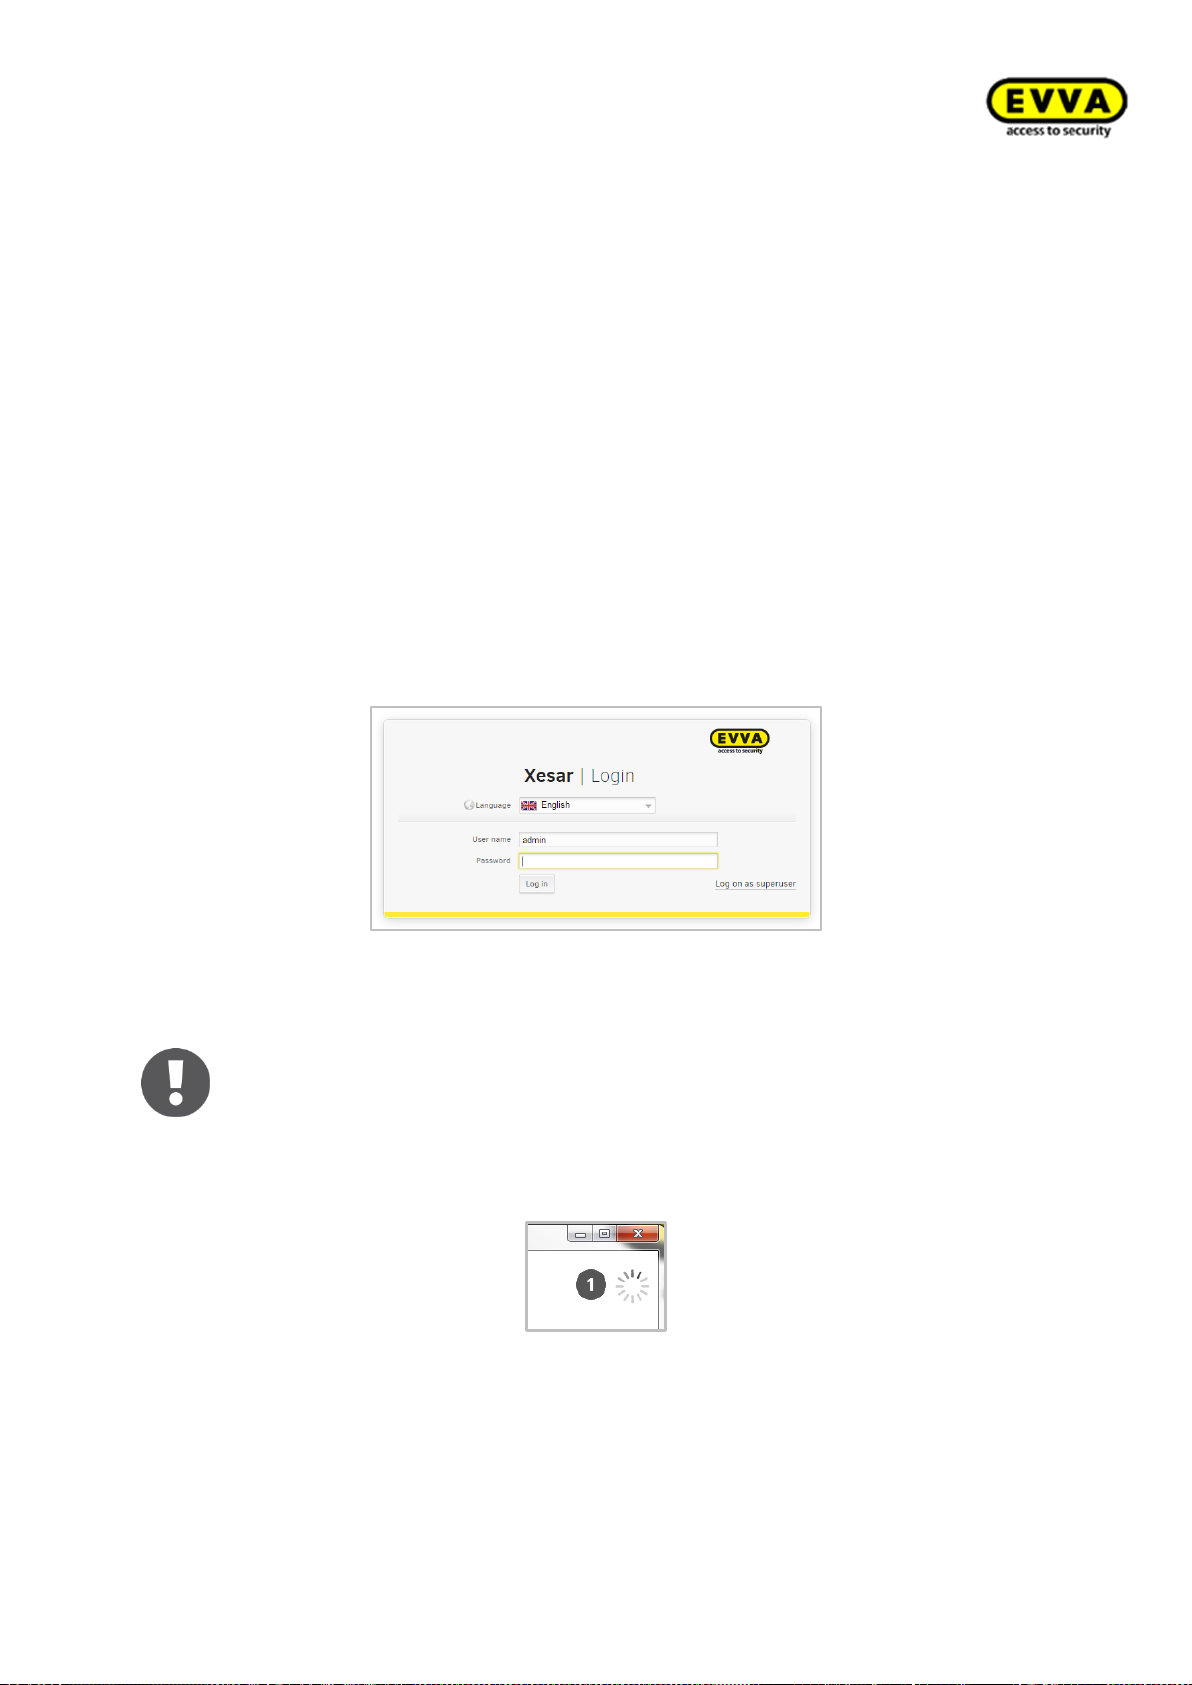
Xesar System manual 2.0 for version 2.0.36.17 | 24.06.2015 | misprinting and technical changes reserved
Logging in using Admin Cards
The user name and password are case sensitive.
The system loads the database in the background
Proceed as follows if you own a valid Admin Card:
Connect the Xesar coding station and insert the Admin Card into the Xesar coding station card
slot. (Figure 44: Login)
Enter the information required in the "Xesar | Login" (Figure 44: Login) login window:
Select the software
language
if you would like to use a language different to the de-
fault language.
Enter the selected client name in the
Enter "admin" as the
Enter the
Administrator password
user name
Client
field upon first-time configuration.
.
you selected when you first registered and click
Log in.
Figure 44: Login
Figure 45: Xesar | Login
90
Page 91
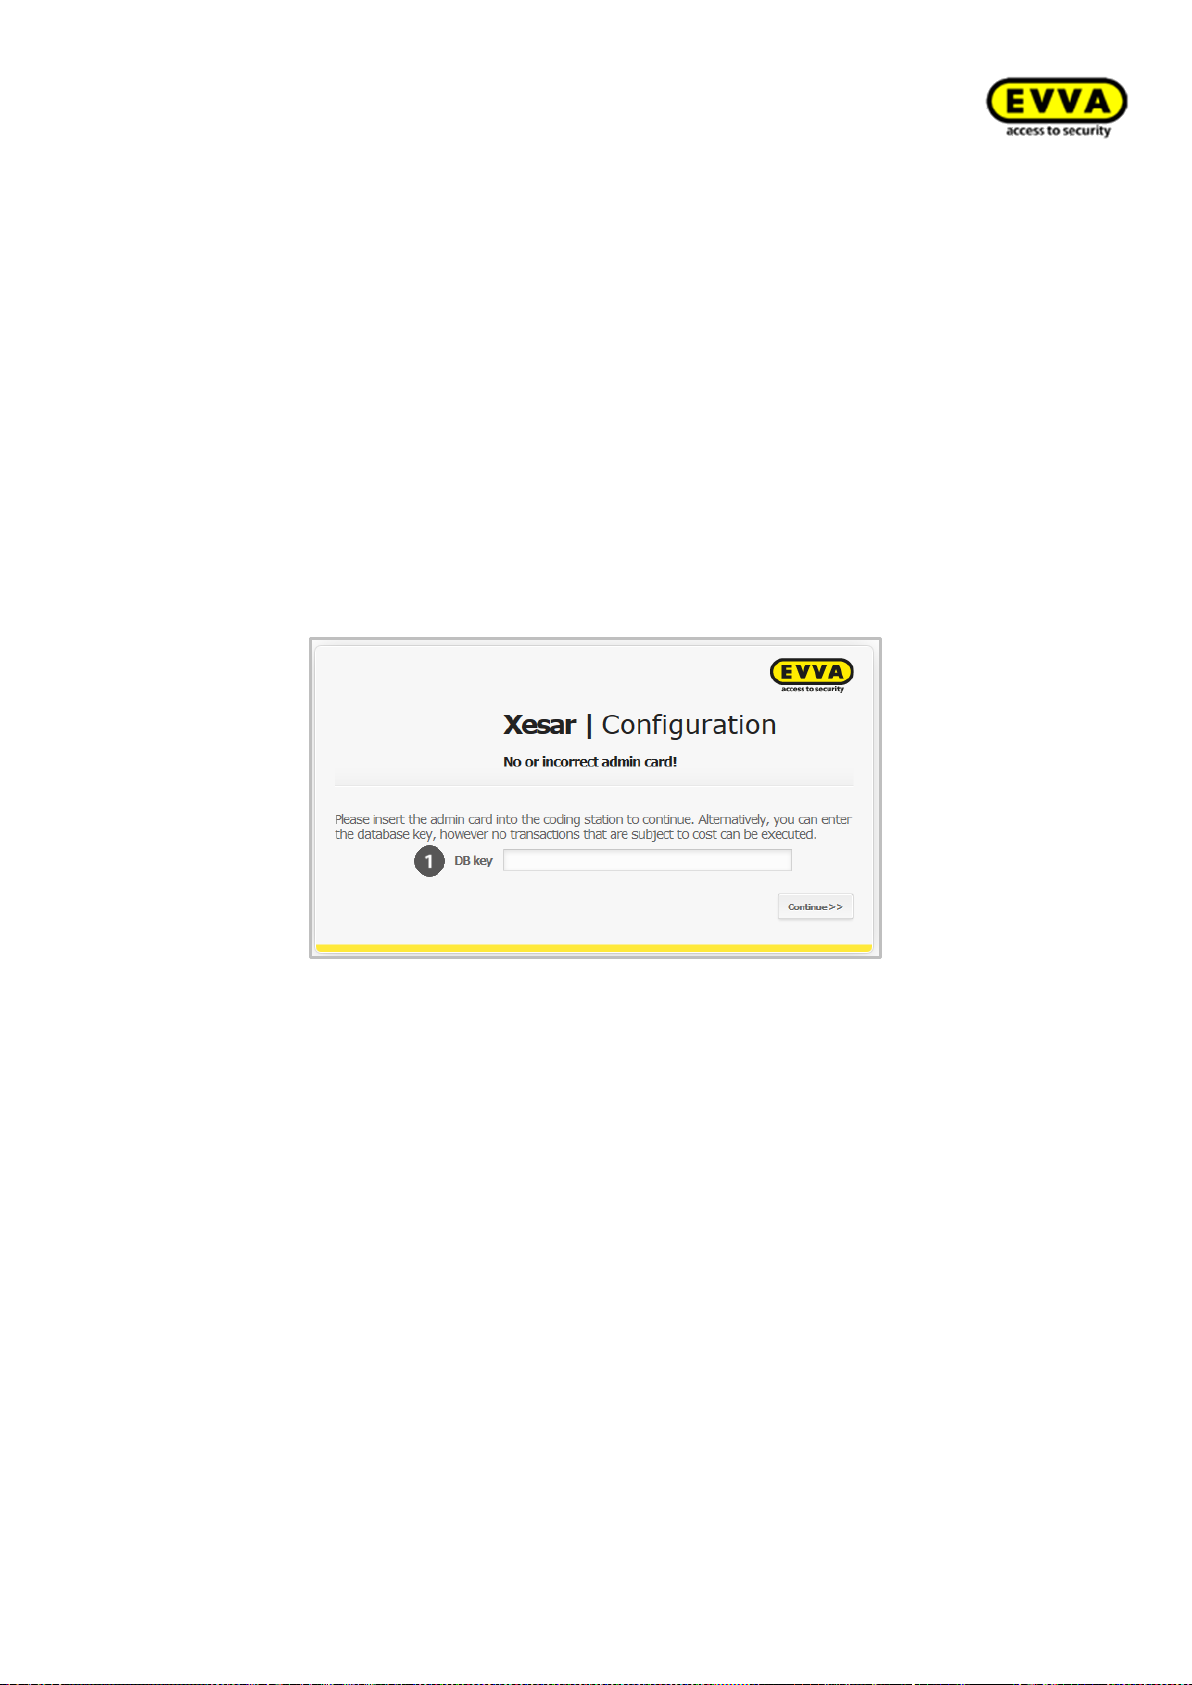
Xesar System manual 2.0 for version 2.0.36.17 | 24.06.2015 | misprinting and technical changes reserved
Logging in using the DB key
If you have not connected your Xesar coding station, your Admin Card is faulty or not available,
the system shows the "Xesar | Configuration" (Figure 46: DB key) application window allowing you
to enter the DB key to continue. Note that you will be unable to grant authorisations to persons/identification media without an Admin Card.
The DB key (Figure 46: DB key) is the automatically generated code included with your access
data (see
Backing up access data
and DB key).
Figure 46: DB key
91
Page 92
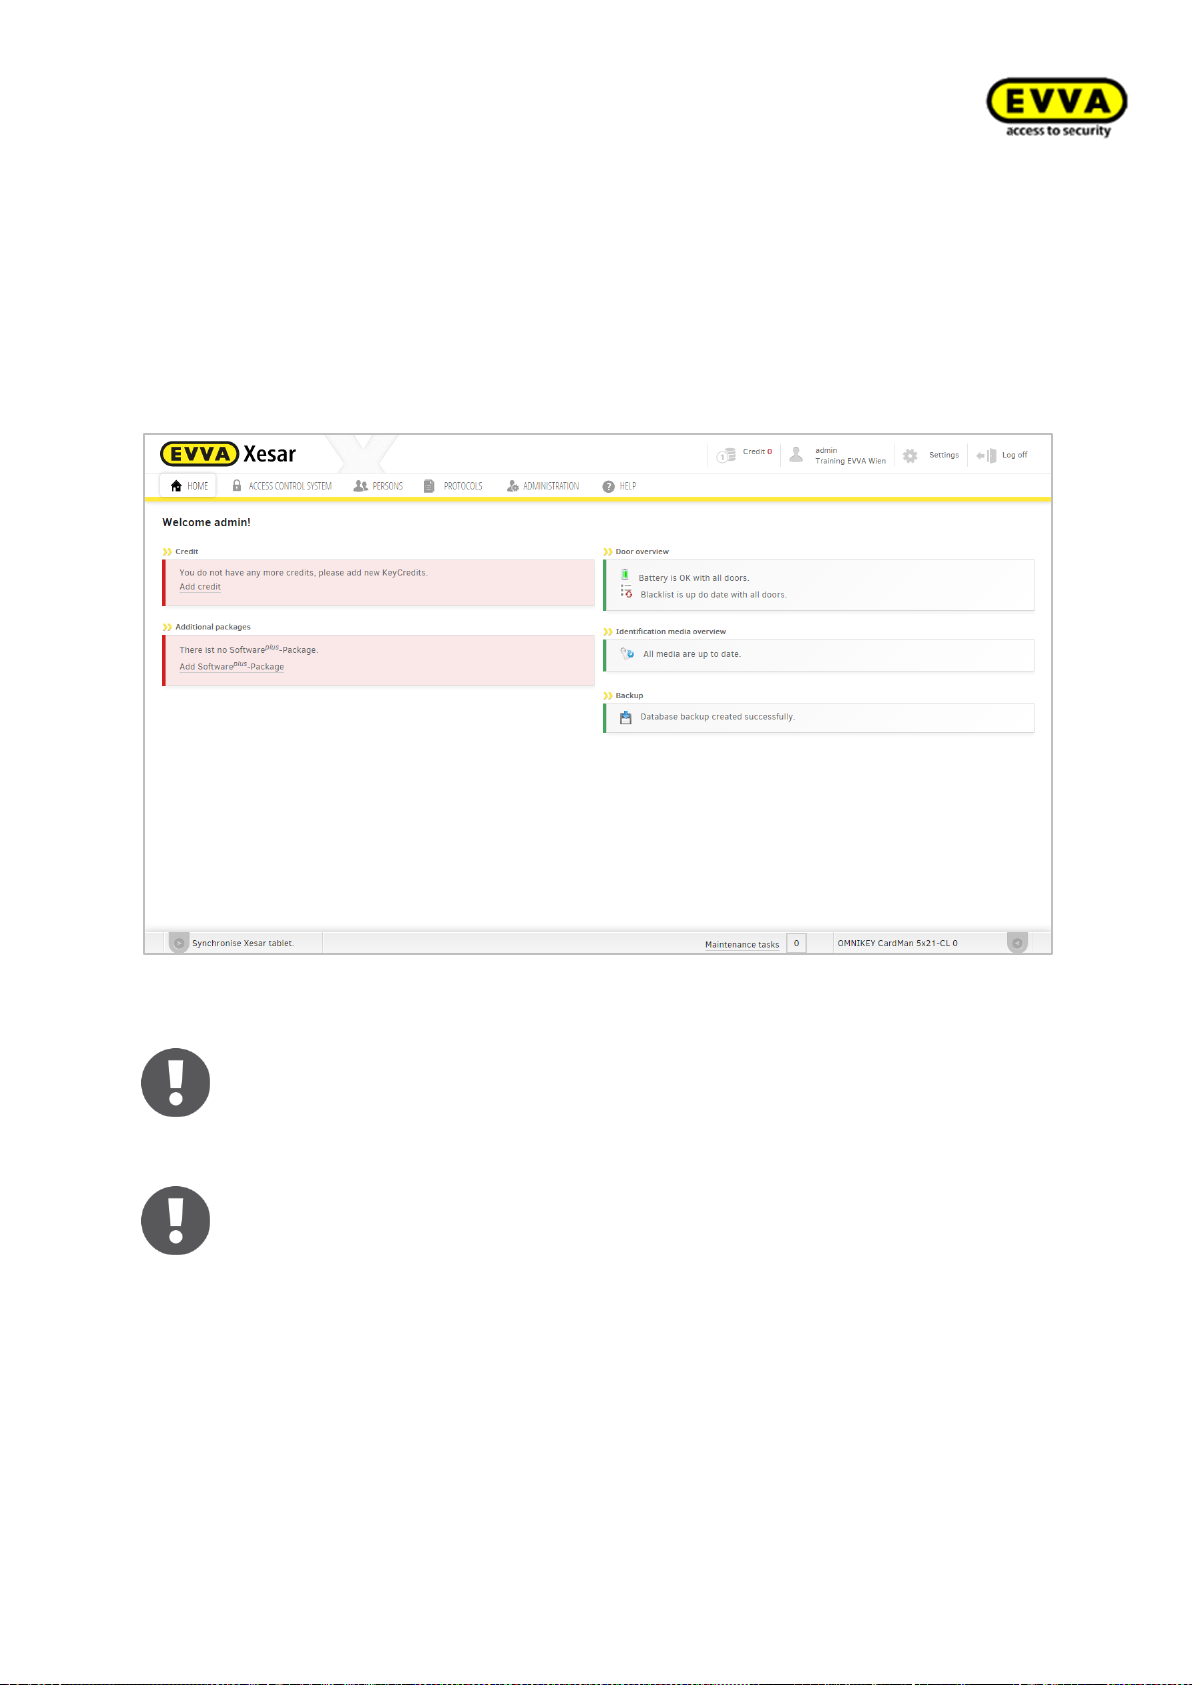
Xesar System manual 2.0 for version 2.0.36.17 | 24.06.2015 | misprinting and technical changes reserved
Home page
Note:
The system automatically logs off following ten minutes of inactivity for reasons of
security. The "Xesar | Login“
Note:
Please note that you must click the corresponding confirmation button to accept any changes you make to your system. If you fail to do so, an error message
indicating "
Unsaved changes on this page
" appears upon closing the corresponding menu.
Click OK to confirm this message and discard any changes. Click
Cancel
(in the
error message) and confirm your changes before closing the menu to save your
data.
Congratulations! You have finished installing your Xesar software!
Now you are on the Xesar software home page. The following prompt appears if you have not
loaded any KeyCredits: “
You do not have any more credits, please add new KeyCredits."
Figure 47: Home page
92
Page 93

Xesar System manual 2.0 for version 2.0.36.17 | 24.06.2015 | misprinting and technical changes reserved
Loading KeyCredits
KeyCredits enable you to create and change access authorisations. Please refer to Section
93
Page 94
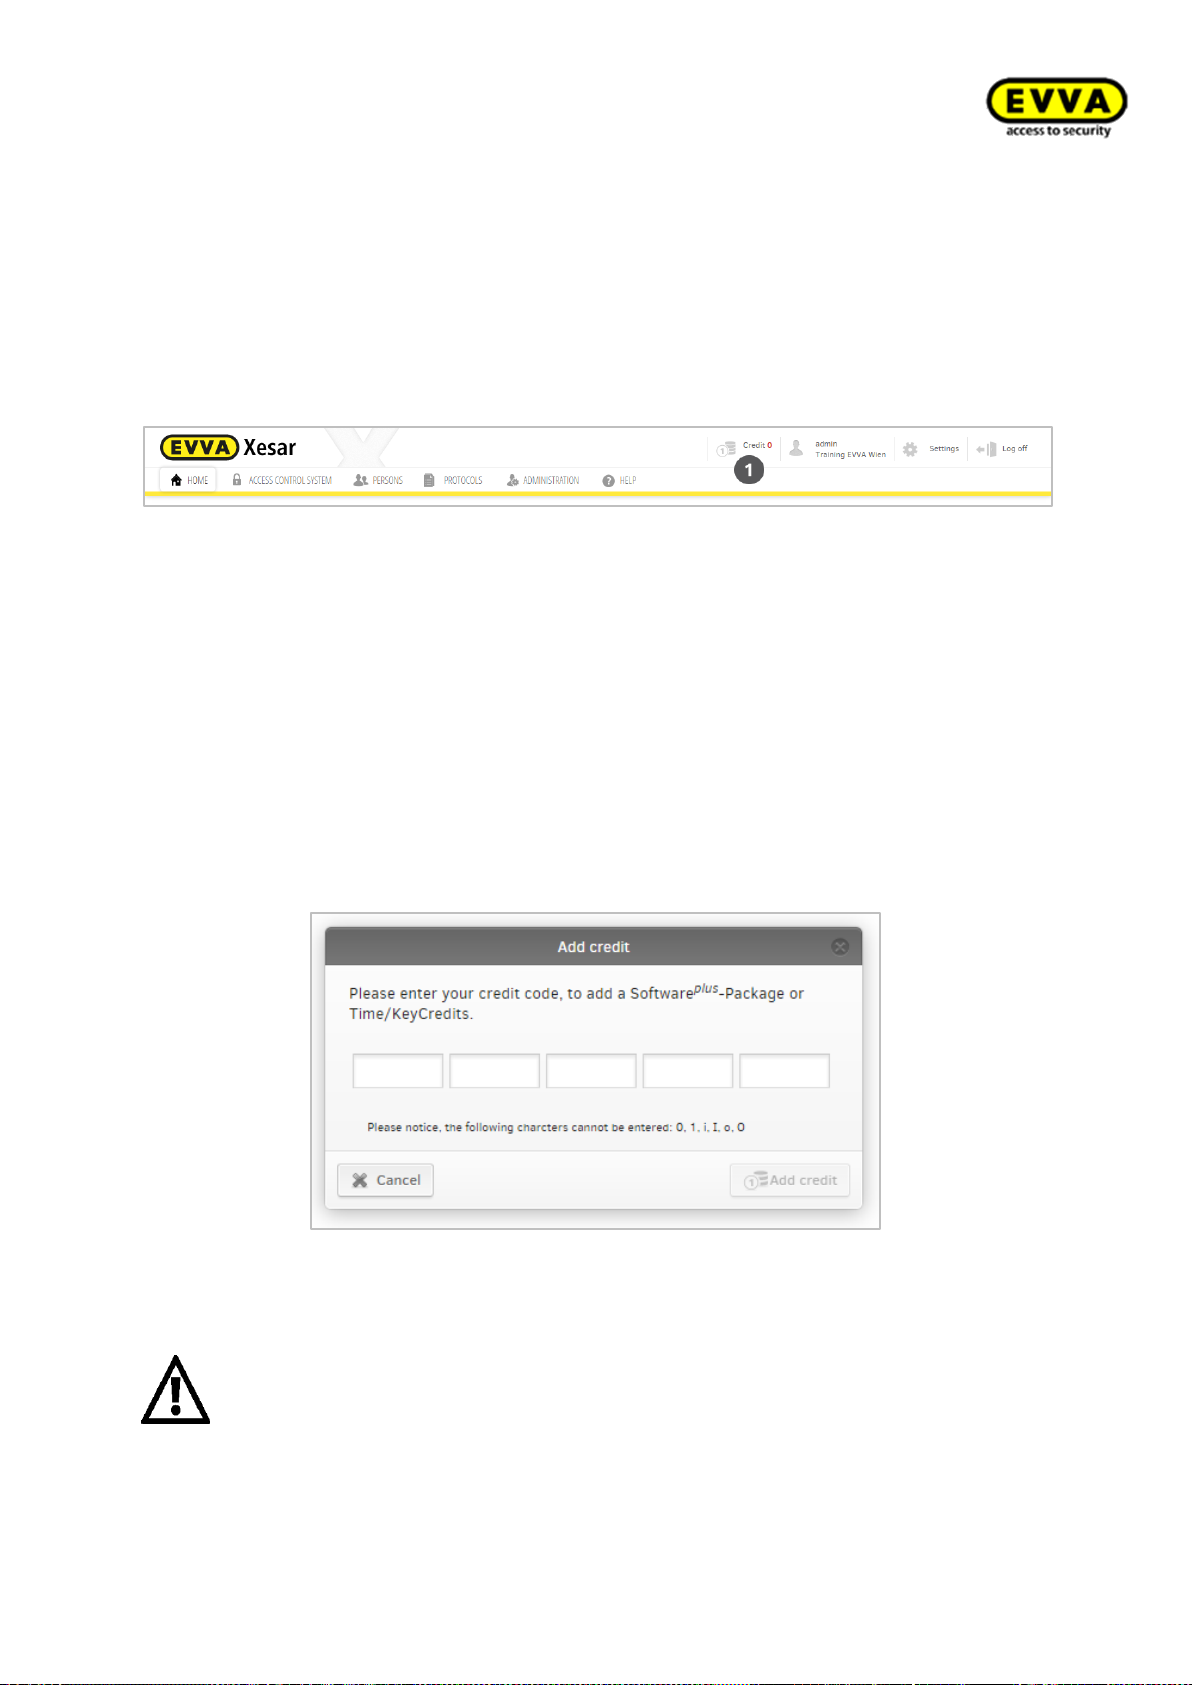
Xesar System manual 2.0 for version 2.0.36.17 | 24.06.2015 | misprinting and technical changes reserved
EVVA KeyCredits for a list of changes that are subject to a charge or changes that are free of
Caution:
The credit is linked to the Admin Card – any quantity credit will be rendered void in
the event of a failure or loss of the Admin Card. Any time-based credit is saved
centrally by EVVA and can therefore be transferred.
In this case, please directly contact EVVA Support.
charge as well as additional information about KeyCredits.
The
Credit
function in the header of the page shows the amount of available KeyCredits below.
The information in the header is always available so you have a permanent overview of the current
amount of KeyCredits. Click
Credit
to top up KeyCredits.
Figure 48: Credit
You require an operating Internet connection and the credit code on the back of the KeyCredit
Card (concealed by a scratch field) to top up credit.
Enter the code in the "Add credit" (Figure 49: Topping up credit) application window.
Press the Tab key to move to the next input field.
Click
Add credit
to confirm your input.
If you entered the code correctly, the system confirms your input (green notification in the
header) and adds the credit.
Figure 49: Topping up credit
94
Page 95
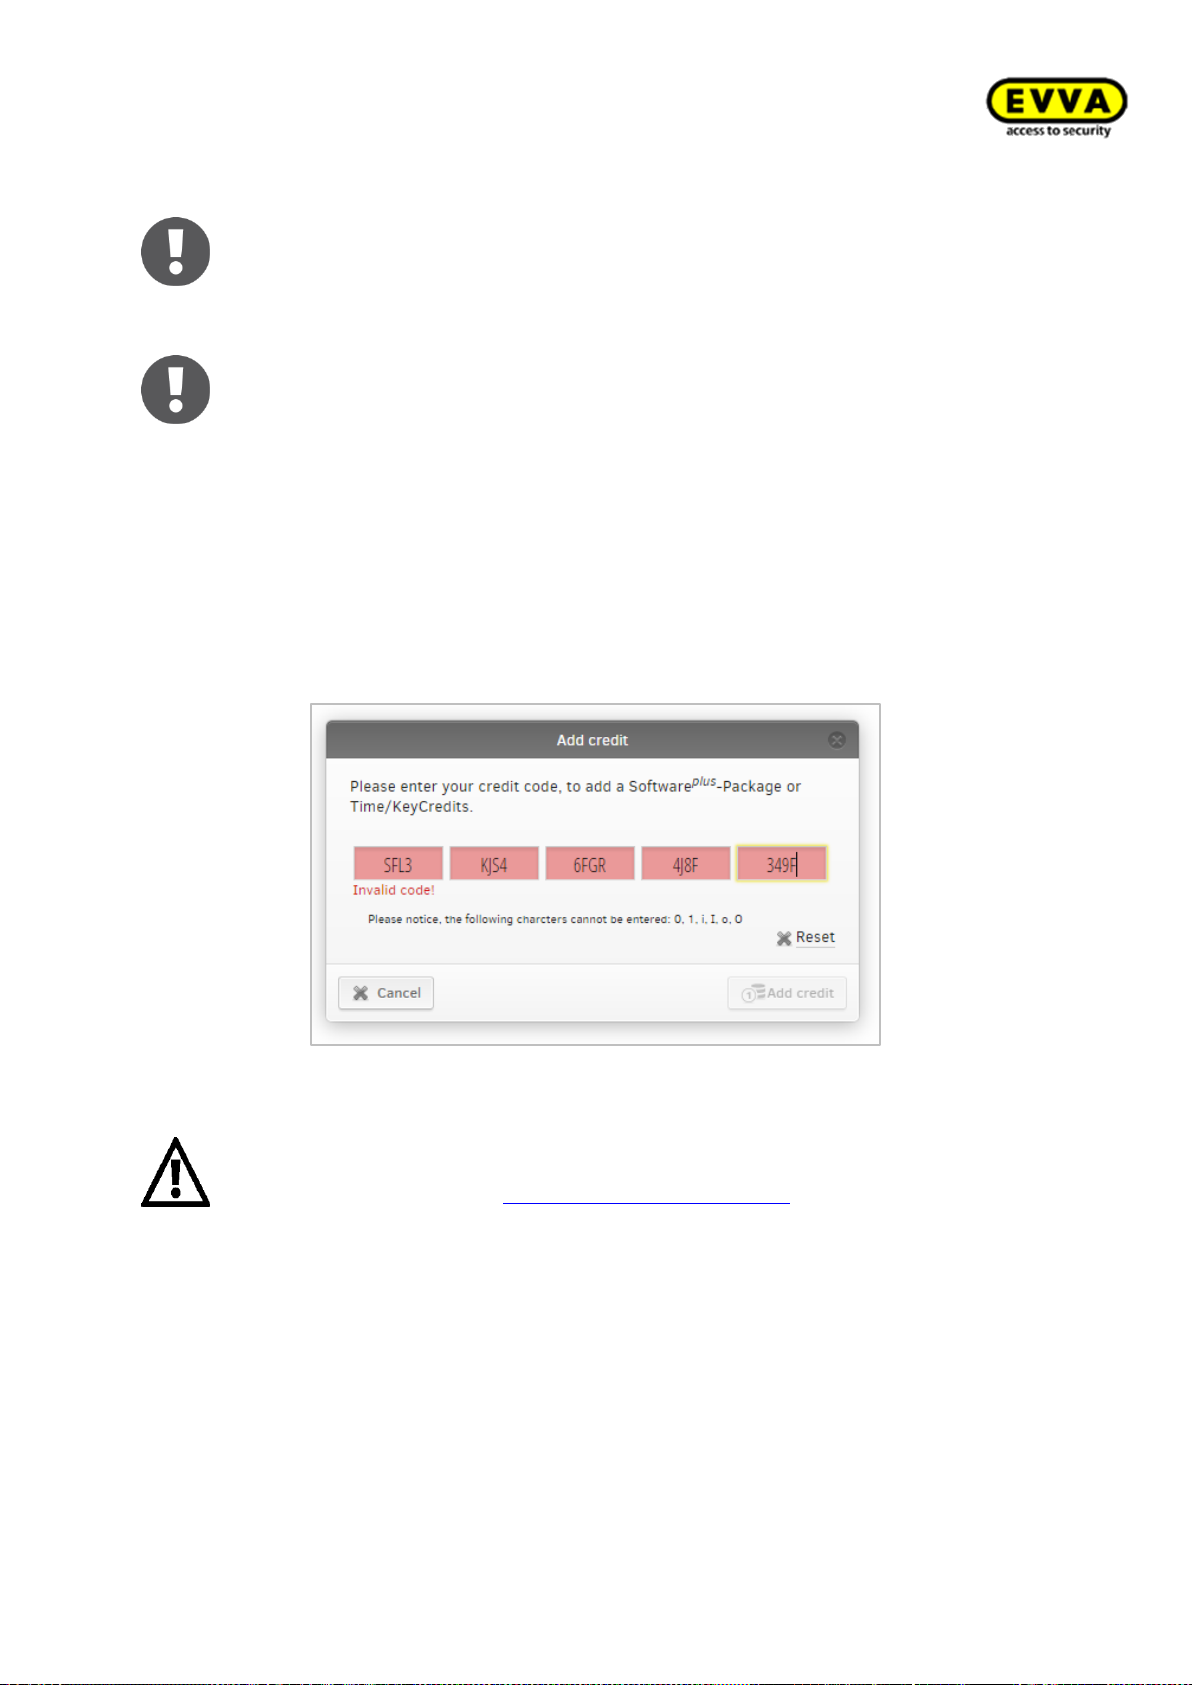
Xesar System manual 2.0 for version 2.0.36.17 | 24.06.2015 | misprinting and technical changes reserved
Note:
Credits can be redeemed only once.
Note:
Any time-based credit is highlighted in red from 14 days before expiry.
A message appears on the home page if KeyCredit Unlimited is not active or there
are no more KeyCredits available.
The Admin Card is automatically disabled after five incorrect attempts. Please contact our Online Support at http://support.evva.at/xesar/en/ if you encounter any
issues.
Invalid KeyCredit code
A message highlighted in red appears if you entered an incorrect code (Figure 50: Topping up
credit — invalid input).
Figure 50: Topping up credit — invalid input
95
Page 96
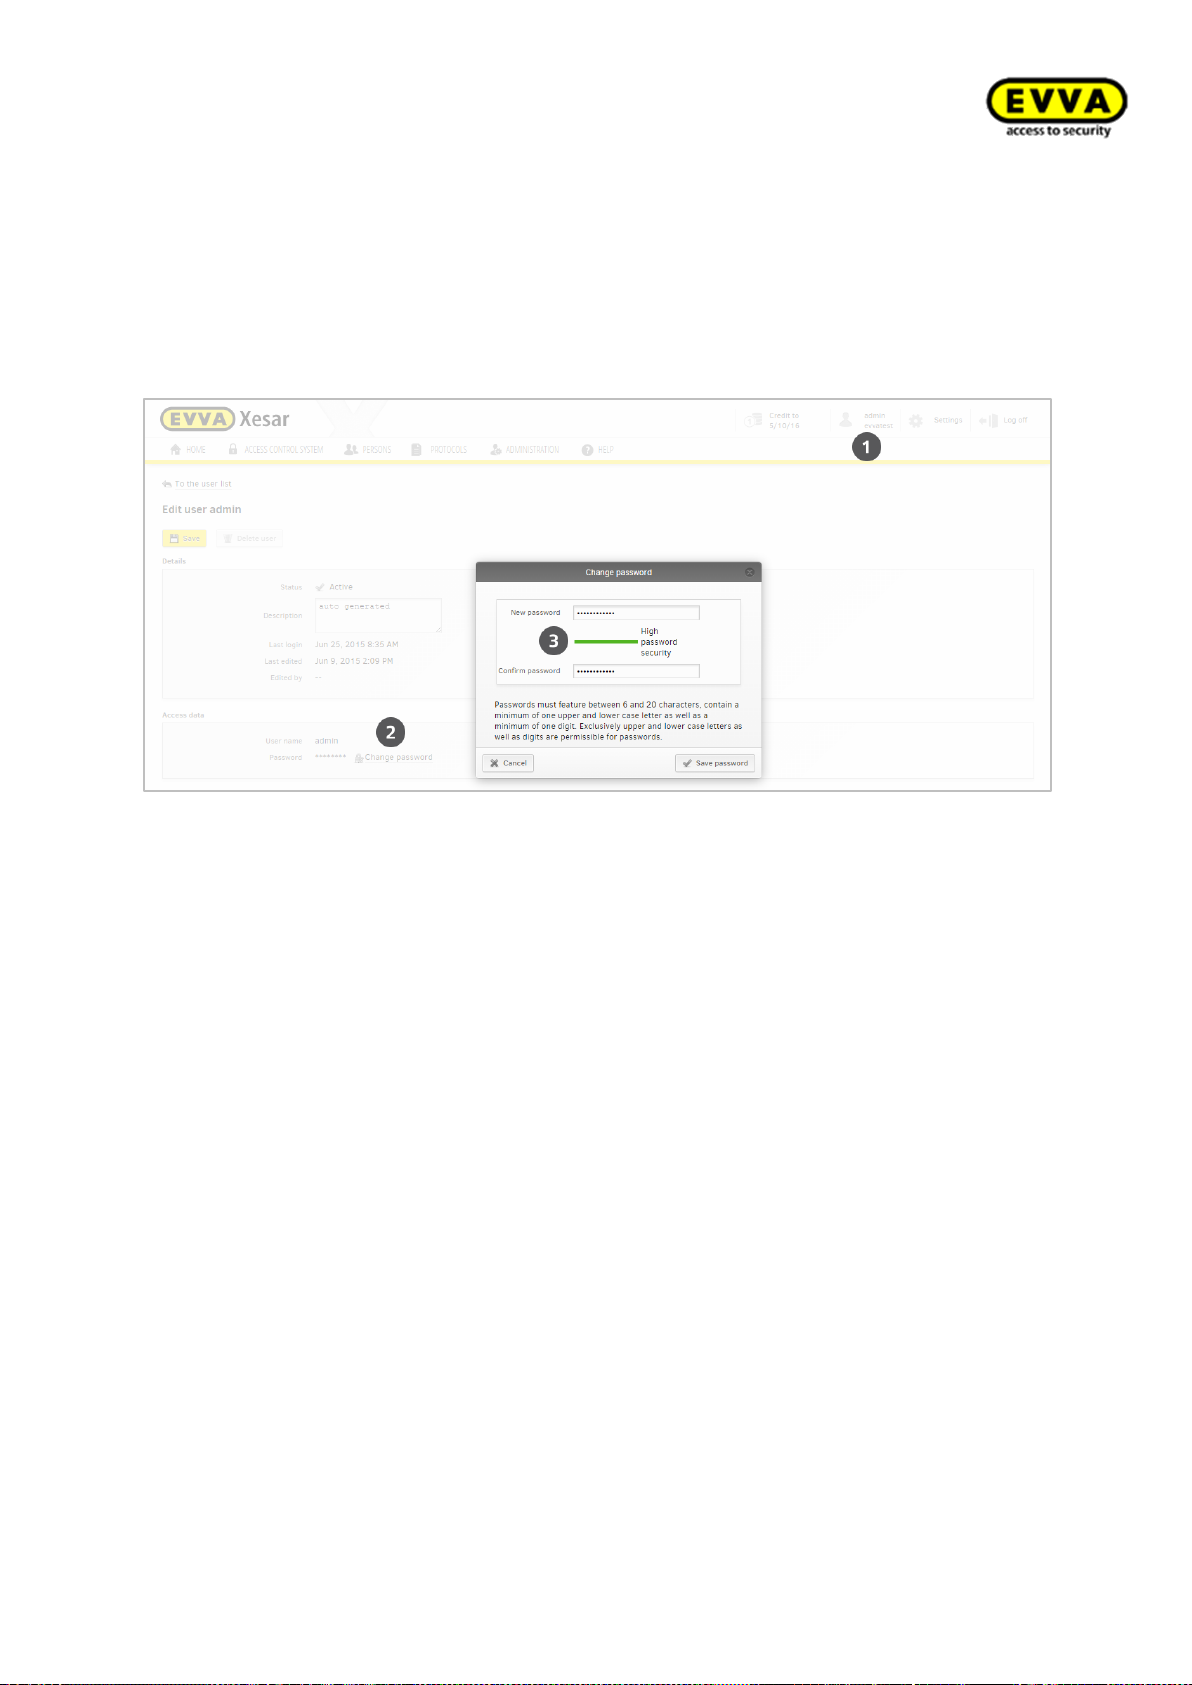
Xesar System manual 2.0 for version 2.0.36.17 | 24.06.2015 | misprinting and technical changes reserved
Administrator
Click
Admin
in.
in the tool bar to open the overview of the administrator who is currently logged
Figure 51: Changing the admin password
Changing the administrator password
1. The tool bar shows the current user name .
2. Click the name – the user's application window opens. Proceed as follows to change the
administrator's password who is currently logged in:
3. Click
Change password
lower case letters as well as digits and confirm your changes to accept them.
– always use secure passwords consisting of upper case and
96
Page 97

Xesar System manual 2.0 for version 2.0.36.17 | 24.06.2015 | misprinting and technical changes reserved
Settings
Click
Settings
Your Xesar software enables you to configure various parameters, such as time settings, security
settings and, if required, the host name as well as IP address of your proxy server. Proceed as
follows to configure settings:
(Figure 52: Settings) to open the corresponding menu.
Figure 52: Settings
Time settings
Summer and winter time settings
Slide the
dates for summer and winter time in the corresponding year to activate the summer and
winter time setting. It is important to manually update these settings once a year and
make sure you subsequently also update your Xesar access components if you work with
Setting special days
the summer and winter time function.
You can also specify five types of special days that are active at the same time over a
period of fifty days in advance (Figure 53: Time settings).
For instance, use this function if you would like to grant a company's employees access
from Monday to Friday, but not on public holidays. In such cases it is possible to define
such "special days" and the access components will react accordingly. Affected persons will
then no longer have access providing their time profile has been configured accordingly.
The same principle also applies to automatic office modes where the system must remain
Activate time change
(Figure 53: Time settings) slider to On and enter the
locked on special days.
97
Page 98
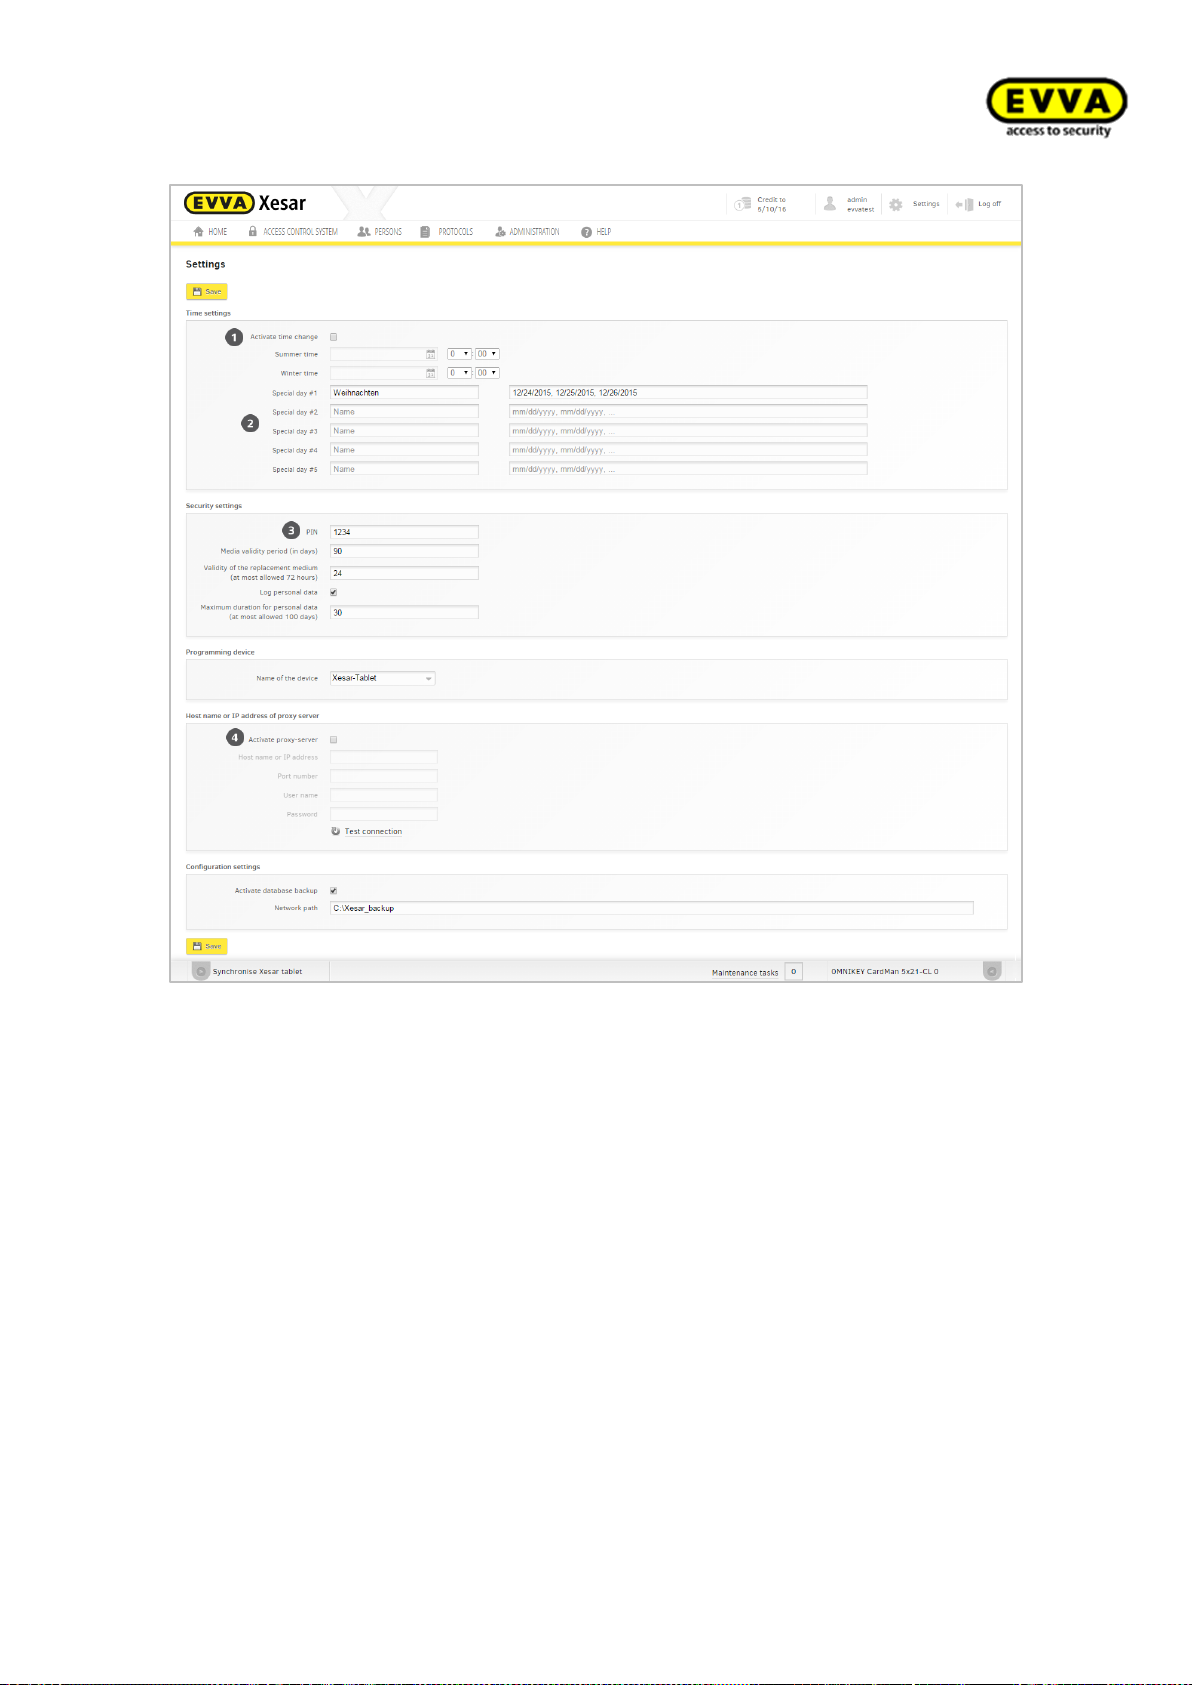
Xesar System manual 2.0 for version 2.0.36.17 | 24.06.2015 | misprinting and technical changes reserved
Figure 53: Time settings
98
Page 99

Xesar System manual 2.0 for version 2.0.36.17 | 24.06.2015 | misprinting and technical changes reserved
Security settings
Note:
If you open the
Settings
menu page for the first time, you must change the default
PIN "0000" to be able to once again close the Settings menu.
Note:
The Xesar software must be running to support this function. However, you can run
it in the background, even with a locked Desktop.
Security PIN
Enter a four-digit figure in the
tings). A PIN is mandatory and you must enter it on your Xesar tablet upon initialising Xesar access components for the first time to add them to your system.
Identification media validity periods
Specify the
identification media validity period
for ALL Xesar identification media within your Xesar locking system.
Their maximum validity period is three years. The validity period of the Xesar identification
medium is automatically extended by the specified period as soon as you hold it to the
Xesar coding station. This function is intended as a checkpoint function to enhance the security and force users to update their media within certain intervals.
PIN
field in the
Security settings
in the
Security settings
(Figure 53: Time set-
section
If the Xesar identification medium is not used at a Xesar coding station within the specified period, the identification medium expires and is deactivated until it is once again used
at the Xesar coding station.
The Xesar identification medium is reactivated automatically once it is held to the Xesar
coding station. This functionality represents a checkpoint within your system which forces
users to regularly update their Xesar identification medium at this checkpoint. EVVA recommends using a very frequently used area, such as the reception or an information point
for this function.
99
Page 100
Xesar System manual 2.0 for version 2.0.36.17 | 24.06.2015 | misprinting and technical changes reserved
Note:
Once the validity period has expired, the affected identification medium is unable
to unlock any doors until it is updated at a coding station. Take this into account if
you position an update unit indoors. The shorter the identification media validity
period, the faster your system regains a secure status in the event that media are
lost. However, in the event that identification media are lost, we strongly recommend to transfer the blacklist to access components using the tablet.
Caution:
Comply with the corresponding, national statutory regulations and directives regarding data protection!
Replacement media validity periods
You can issue one replacement medium per person should a Xesar identification medium
be temporarily unavailable. Set the general validity period of a replacement medium here.
The maximum permitted validity period is 72 hours (Figure 53: Time settings).
Logging personal data
If you would like to log personal data (event protocol), you can configure this in the Settings. In this case, please set the "Off" default setting to "On" (Figure 53: Time settings).
Maximum archiving period for personal data
You can restrict the maximum period any data is retained (Figure 53: Time settings). Data
older than the specified period will be automatically rendered anonymous.
100
 Loading...