

Nova 3-in-1 Stroller
USER MANUAL
Dream On Me Inc.
1532 S Washington Ave Piscataway TWP NJ 08854
Tel: 732-752-7220
Fax: 732-752-7221
Replacement Parts And Warranty Information
For customer service, warranty information or replacement parts, please
call us at
:
732-752-7220
or visit us online at :
www.evolurbaby.com
PLEASE FOLLOW ALL INSTRUCTIONS AND KEEP USER
GUIDE FOR FUTURE USE. ADULT ASSEMBLY REQUIRED.

SAFETY HARNESS:
Slide the harness into the crotch
buckle socket to attach it. You
will hear a click when it is
successfully attached.
To unlock the harness, push the
button on the crotch buckle.
Push the plastic ring up and
move it to a taller anchor point of
the shoulder belt, suitable for
taller kids.
P13
To adjust harness around your
child, loosen straps as shown.
Failure to follow these warnings and the
assembly instructions increase the risk of serious injury or death.
PLEASE FOLLOW ALL INSTRUCTIONS AND KEEP USER
GUIDE FOR FUTURE USE. ADULT ASSEMBLY REQUIRED.
NEVER LEAVE child unattended.
AVOID SERIOUS INJURY from falling or sliding out. Always
use seat belt. CHECK to ma ke s ur e seat belt is fastened
securely by tightening the straps.
STRANGULATION HARZARD: NEVER hang strings or toys
from stroller.
TO PREVENT STROLLER FROM BEING IN AN UNSTABLE
CONDITION, never place parcels or other items on the stroller
handle or canopy. DO NOT place more than 11lbs
(5.0kgs) in the storage basket.
NEVER USE STROLLER ON STAIRWAYS or escalators
TO AVOID STRESS AND TO PREVENT AN UNSTABLE
CONDITION ON STROLLER. Stroller is intended for a child
who weighs up to 40lbs (18kgs) and up to 45 inches
(114cm) in height. Never use with more than one child at a
time. STROLLER IS SUITABLE for children from birth to 36
months. STROLLER IS NOT INTENDED for use while
jogging, rollerblading, skating, or similar activity.
DO NOT lift the stroller with child inside.
AVOID FINGERS FROM GETTING CAUGHT IN STROLLER:
Use care when opening and closing the stroller.
ALWAYS check to make sure stroller is completely latched
open before using it.
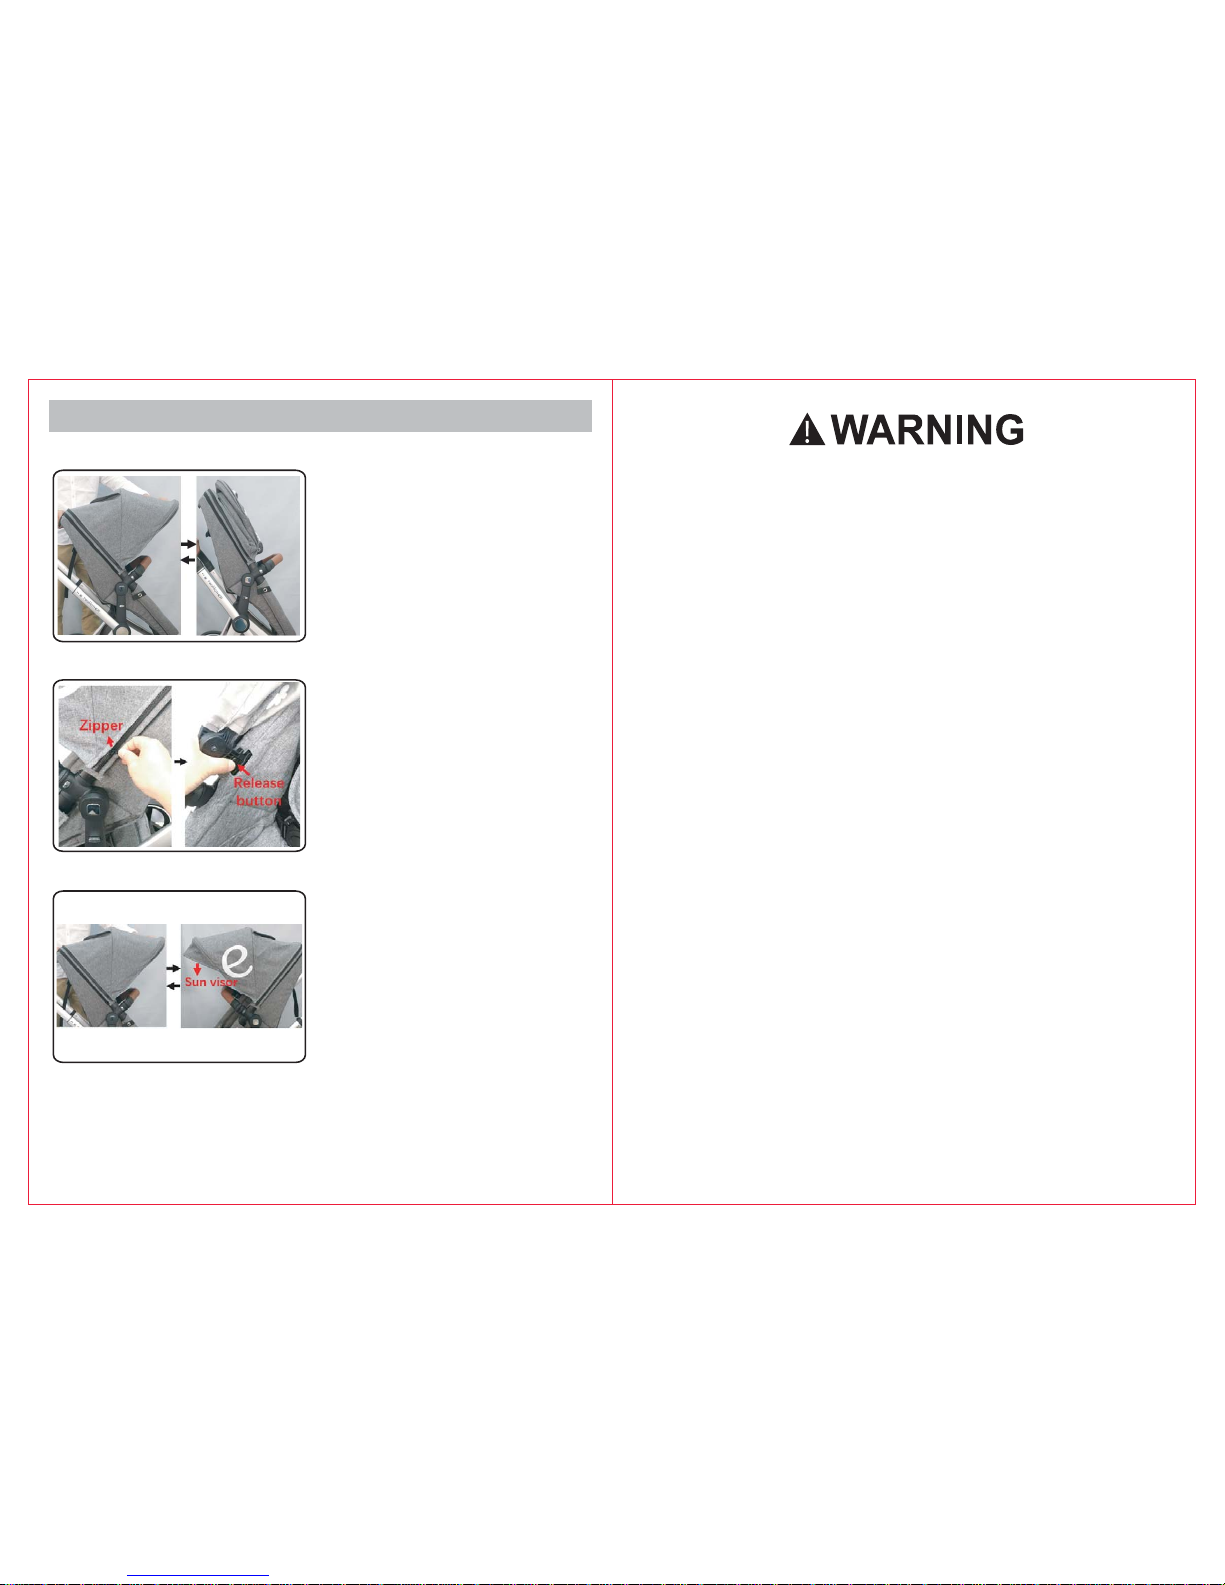
FUNCTIONS-CANOPY
P12 P1
Push to close or open the
canopy as shown.
Unzip canopy cover and
press the release button (as
shown) to remove the
canopy (if required).
The sun visor can be
extended and retracted as
shown.

Failure to follow these warnings and the
assembly instructions increase the risk of serious injury or death.
PLEASE FOLLOW ALL INSTRUCTIONS AND KEEP USER
GUIDE FOR FUTURE USE. ADULT ASSEMBLY REQUIRED.
DO NOT use storage basket to carry a child.
NEVER LET A CHILD stand on any part of the stroller.
Child could fall and be injured.
Regular care and maintenance help contribute to the safety
and longevity of your product.
Environmental influences and out door storage could cause
corrosion. Therefore, always store your stroller indoors.
Do not keep the stroller in a damp, cold, or hot place.
We recommend regular maintenance of the frame and fabrics.
Should the frame and fabrics become soiled, use a damp cloth
and mild detergent to wipe away the dirt.
Do not use abrasives or solvents.
Ensure that all locking dev i c e s ar e correctly engaged before
use.
Never force any folding of adjustable parts.
Regularly check the unit to ensure that no parts a r e loose or
broken.
Care & Maintenance
AND REAR
Press the release button to
pull out the rear wheel
Press the release button to
pull out the front wheel.
Pushing the button upwards
allows the wheel to swivel
360 degrees. Pushing the
button downwards locks the
direction and the wheel.
Press the buttons on both
sides to remove the bumper.
P2 P11

Please check that you have all the parts shown before
assembling product.
If the stroller is missing any parts, please contact
Customer Service at 732 752 7220.
PARTS LIST:
Frame
Back wheel*2
Front wheel*2
front bumper
Seat body
with canopy
Open the canopy as shown.
Press the button to separate
front leg and rear leg.
Unlock the folding hook
with one hand. Press the
button to pull the
handlebar up to the
highest position.
FUNCTIONS- HOW TO OPEN
P10 P3

FUNCTIONS- HOW TO FOLD
ASSEMBLY-SETTING UP FRAME:
P4 P9
Close the canopy as shown.
Step on the rear connecting
tube and push the handle
towards the seat and canopy
until you hear a "click".
Place flattened carton down
on floor to protect surface and
before assembling stroller.
Press the button to open the
front and rear legs as shown.
Unlock the folding hook
with one hand, keep
pressing the button located
in middle of handle and pull
the handle bar up to open
the frame completely.
Keep pressing button A with
one hand and keep pressing
button B with another hand to
push the handlebar to the
lowest position, as shown.
CHECK TO MAKE sure the
metal pin comes out before
using.
DO NOT use the stroller if
the metal pin does not
come out.

ASSEMBLY-INSTALL FRONT AND REAR WHEELS:
FUNCTIONS- HANDLE ADJUSTING
INSTALLING SEAT:
FUNCTIONS- HOW TO FOLD
P8 P5
Keep pressing the button
shown to move the handlebar
upwards or downwards to
adjust its height. You have
the option of choosing from 3
different positions.
Close the canopy as shown.
Keep pressing button A by one
hand, keep pressing button B
and push handle bar to be
bottom postion as shown.
Install front and rear
wheels as shown, until you
hear a "click" sound to
indicate that the wheel is
installed in the right
position.
Pull the seat top adjusting
button (Fig. A) and swivel the
connecting bar to be in an
upright position (Fig. B) at the
same time.
Install the seat on the frame
(as shown) until you hear a
"click" sound.
D
E

FUNCTIONS - HOW TO CONVERT IT TO A BASSINET MODEL:
FUNCTIONS- REVERSIBLE SEAT:
FUNCTIONS - HOW TO CONVERT IT TO A BASSINET:
P6 P7
Press the release button on
both sides to take down the
seat and install facing in, as
shown.
Press the buckle and move
it to the end of the webbing
in order to flatten it down.
Press the top lever to adjust
the recline to be in a
horizontal position (as
shown)
Facing out
Facing in
Unlock the ring hook at both
sides as shown.
Release the flap-buttons as
shown, and push the bottom
downwards.
Finished bassinet model for
sleeping as shown.
 Loading...