

Page 1
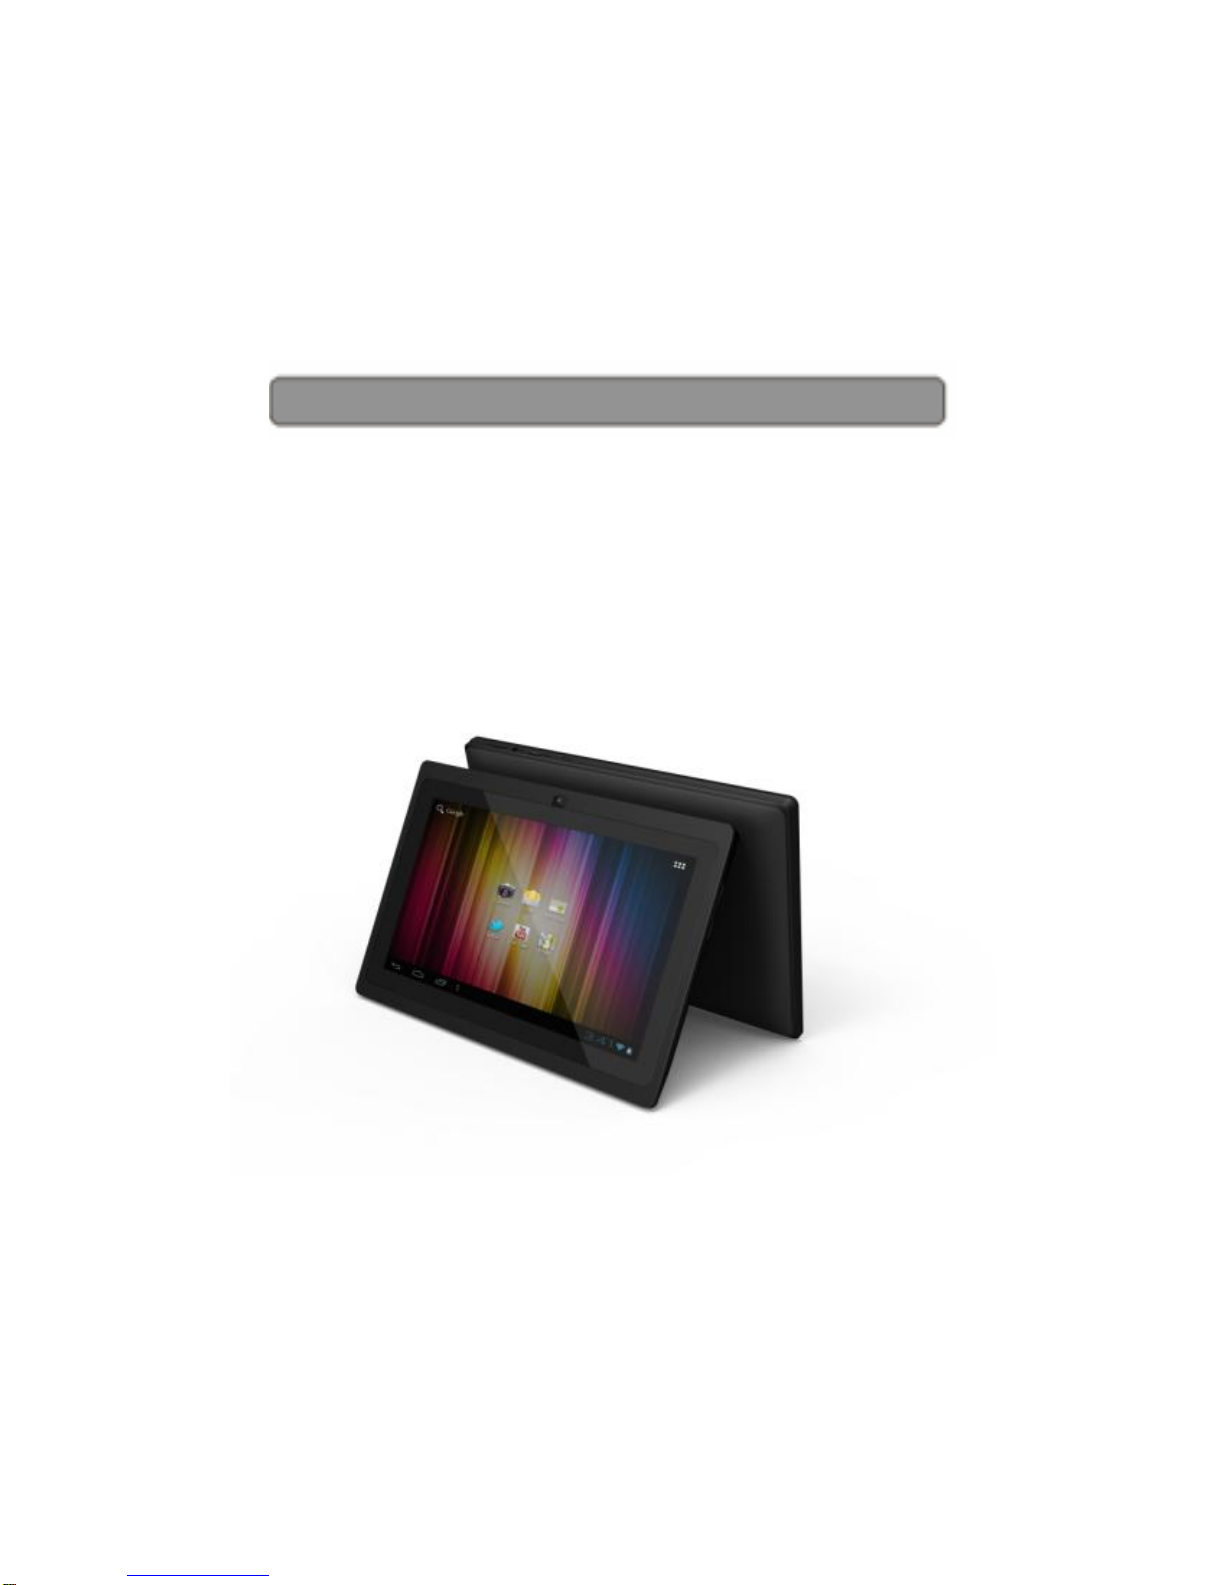
EVOTAB 4 TABLET
USER MANUAL
Page 2

EVOTAB 4
i
Safety Precautions
On Battery
Charge the battery only in temperature that ranges
from 0℃ to 35 ℃.
Do not charge Tablet PC if the battery is found
damaged or leaking.
On Operation
Never subject Tablet PC to extremes of light,
temperature, moisture or vibration.
Do not use or store Tablet PC in a location subject:
A. Extreme high temperature, such as in a sun-heated
car.
B. Direct sunlight.
C.High humidity or places with corrosive
substances.
D. Sub-zero condition, especially during winter.
On Micro SD card
After inserted a Micro SD card, if the device has no
response, please take out and insert again.
Do not remove Micro SD card or turn off Tablet PC
during data writing or reading to prevent damage to
data and to the device.
Make sure the Micro SD card is unlocked before
writing or deleting data in the card.
Backup your files and data before formatting the
Micro SD card. Please format the Micro SD card in
FAT.
Page 3

EVOTAB 4
ii
Contents
SAFETY PRECAUTIONS .................................................... I
CONTENTS.............................................................................. II
CHAPTER 1 BASICS ................................................................. 1
PARTS AND CONTROL ......................................................... 1
PACKET CONTENTS ............................................................ 2
POWER ON AND OFF THE DEVICE................................ ........ 2
CHARGING THE DEVICE ...................................................... 2
TRANSFERRING CONTENTS ................................................. 3
STAND BY /WAKE UP MODE ................................................ 5
HOME SCREEN .................................................................... 6
MAIN MENU........................................................................ 8
TOUCH SCREEN OR BUTTONS .............................................. 9
ONSCREEN KEYBOARD ..................................................... 10
CONNECTING TO THE INTERNET ........................................ 10
SWITCHING SCREEN ORIENTATION ................................... 11
CHAPTER 2 GETTING STARTED .......................................... 12
WEB BROWSER ................................................................. 13
WATCHING VIDEOS .......................................................... 16
PLAYING MUSIC ............................................................... 18
VIEWING PHOTOS ............................................................. 21
USING CAMERA ................................................................ 23
SOUND RECORDING .......................................................... 24
GMAIL ................................................................ .............. 26
FILE MANAGER ................................................................ 27
MANAGING THIRD PARTY APPLICATIONS .......................... 32
Page 4

EVOTAB 4
iii
CHAPTER 3 SETTINGS ......................................................... 32
ALARMS ........................................................................... 33
WIRELESS & NETWORKS................................................... 35
SOUND ............................................................................. 37
DISPLAY ........................................................................... 37
STORAGE .......................................................................... 37
BATTERY .......................................................................... 37
APPS................................................................................. 37
ACCOUNTS & SYNC ................................ .......................... 37
LOCATION SERVICE .......................................................... 37
SECURITY ......................................................................... 38
LANGUAGE & INPUT ......................................................... 38
BACKUP & RESET ................................ ............................. 38
DATE& TIME .................................................................... 38
ACCESSIBILITY ................................................................ . 38
DEVELOPER OPTIONS ........................................................ 38
ABOUT TABLET ................................................................ 38
CHAPTER 4 TROUBLESHOTTING ........................................ 38
CHAPTER 5 APPENDIX ..................................................... 39
MAINTENANCE ................................................................. 40
PRODUCT SPECIFICATIONS................................................ 40
CERTIFICATION INFORMATION .......................................... 42
COPYRIGHTS AND TRADEMARK NOTICE ........................... 43
DISPOSAL AND RECYCLING INFORMATION ....................... 44
DISCLAIMER ................................................................ ..... 44
Page 5
Chapter 1 Basics
1
EVOTAB 4 is a Tablet with touch screen. It supports
Wi-Fi. camera function and third party software, Users
can get access to over 450,000 apps and enjoy TV
shows, movies, music and much more.
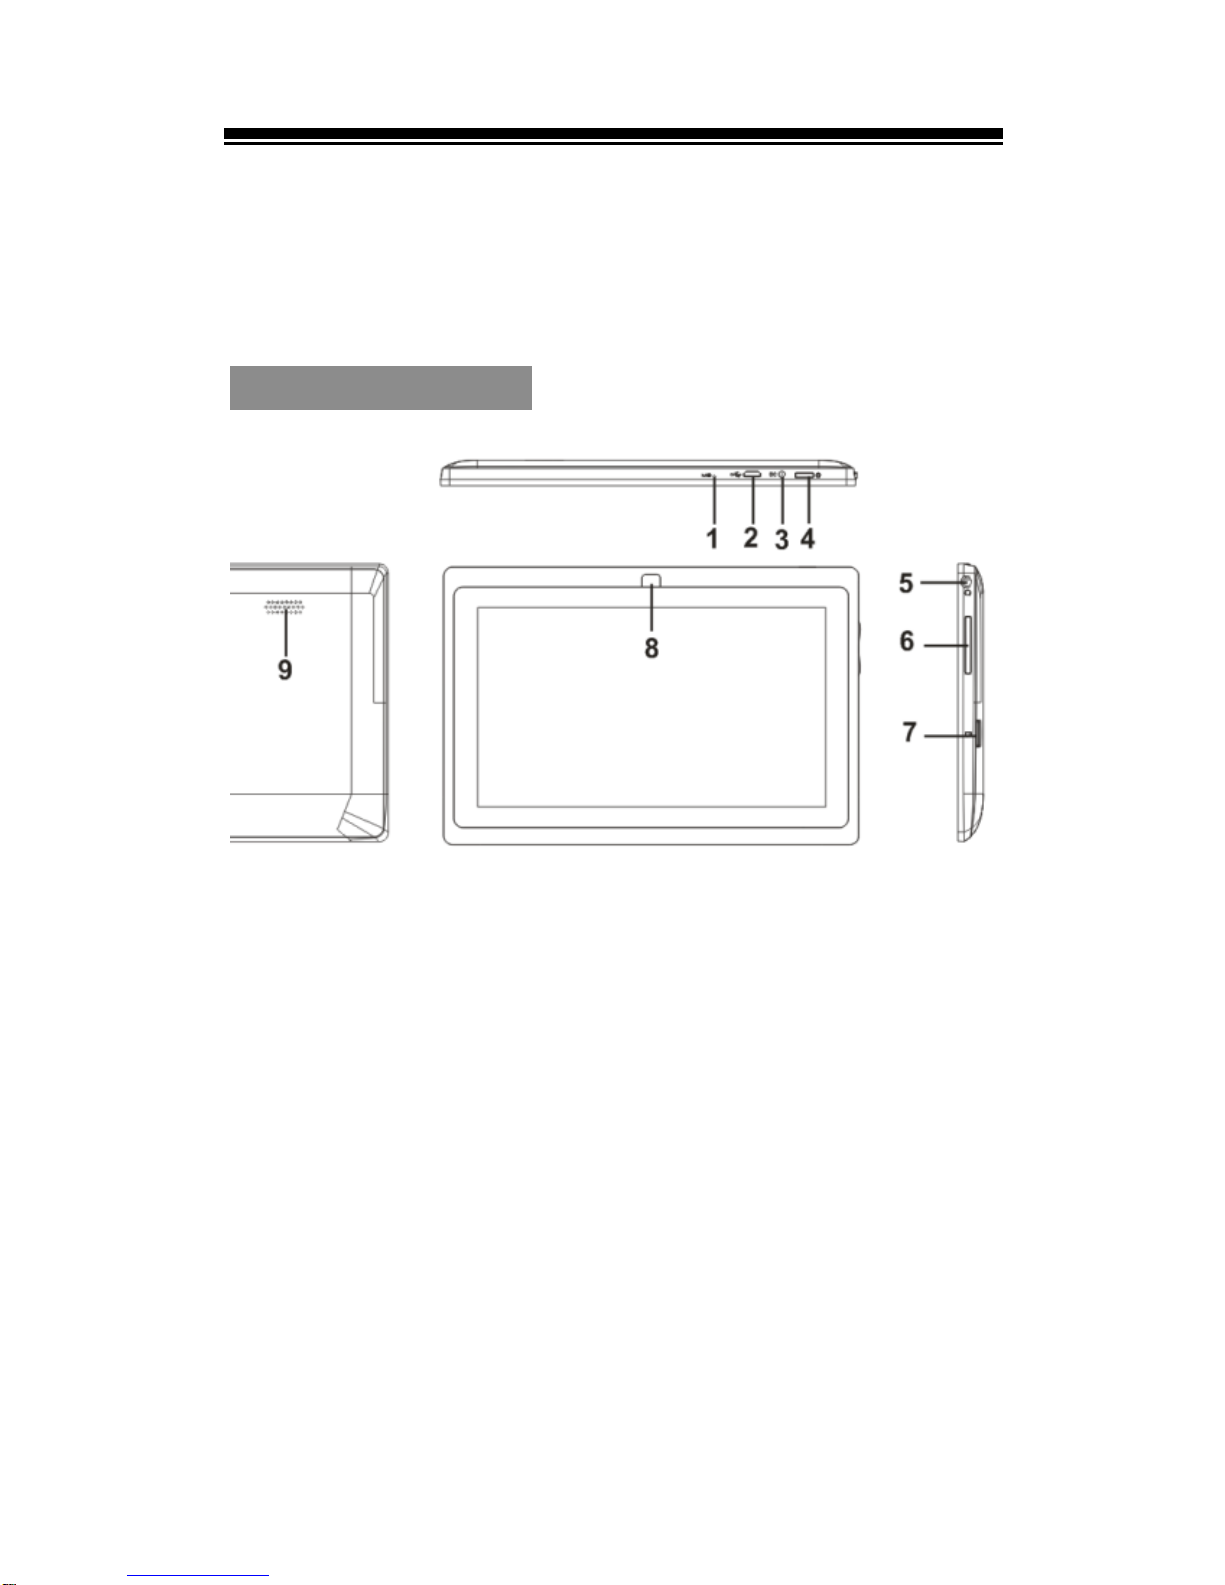
Parts and Control
1. Microphone
2. Micro USB jack – for charging or data transfer.
3. DC-in jack – connect to AC power adapter for
charging
4. Power button – press and hold for 3 seconds to
turn on and off. Press and hold the Power button
for 8-10seconds to reset the reader.
5. Earphone jack
6. Volume +/- button – press to adjust volume
level.
7. Memory card slot
8. Front Camera
9. Speaker
Page 6

Chapter 1 Basics
2
Packet Contents
1x Tablet PC
1x USB cable
1x User Manual
Power On and Off the device
Press and hold the Power button for 3 seconds to
turn the device on.
It may take a moment for the device to turn on and
load.
Press and hold the Power button for 3 seconds to
select Power off, then it will appear a confirmation
window, tap OK to turn off the device.
Charging the device
You need to charge the device prior to use it for the
first time or when battery power is low.
Charge the device using AC adapter with output 5V,
1.5A.
Charging through PC may not be able to fully
charge the device due to the low output charging
current from PC USB port.
Please turn the device to standby mode to shorten
the charging process.
It will take about 4 hours to fully charge the device
in standby mode (LCD off).
When the power cable is connected to the device
for charging, the device will enter into standby
Page 7
Chapter 1 Basics
3
mode after remains idle for 60s. Press the [Power]
button to wake up the device.
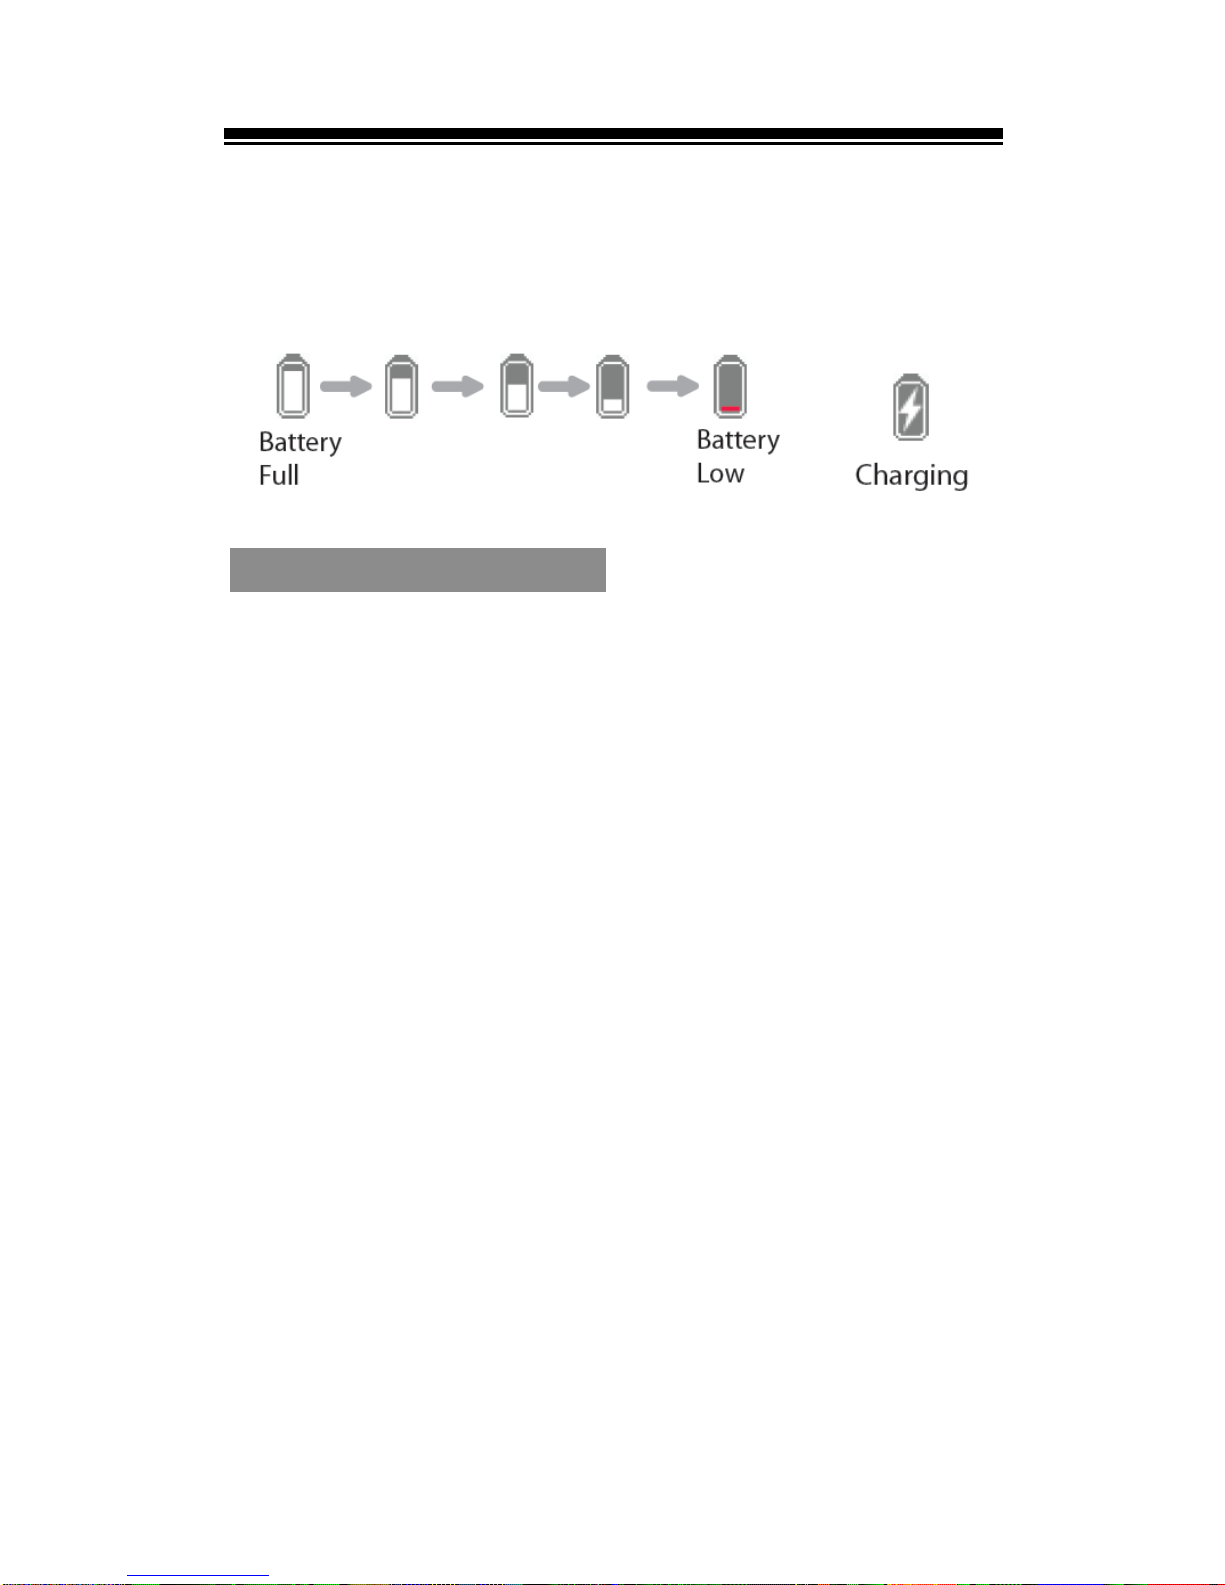
The battery status is displayed at the lower right of
the screen.
Transferring Contents
From Computer
The device supports USB Mass Storage Device
function.
To import contents (ebooks, video, audio, photo etc)
into the device, connect the device to PC via the
supplied USB cable.
Upon successful connection to PC, turn to the
EVOTAB 4, on the status bar, flick upwards to
display an ongoing list.
Select “USB connected”, then tap on “Turn on
USB storage” to enter USB mode and all operation
will be halted.
Go to [My Computer], double click on the device’s
disk to open.
Perform normal file management operation like
other USB device.
Page 8
Chapter 1 Basics
4
From memory card
This unit supports Micro SD card up to 32 GB
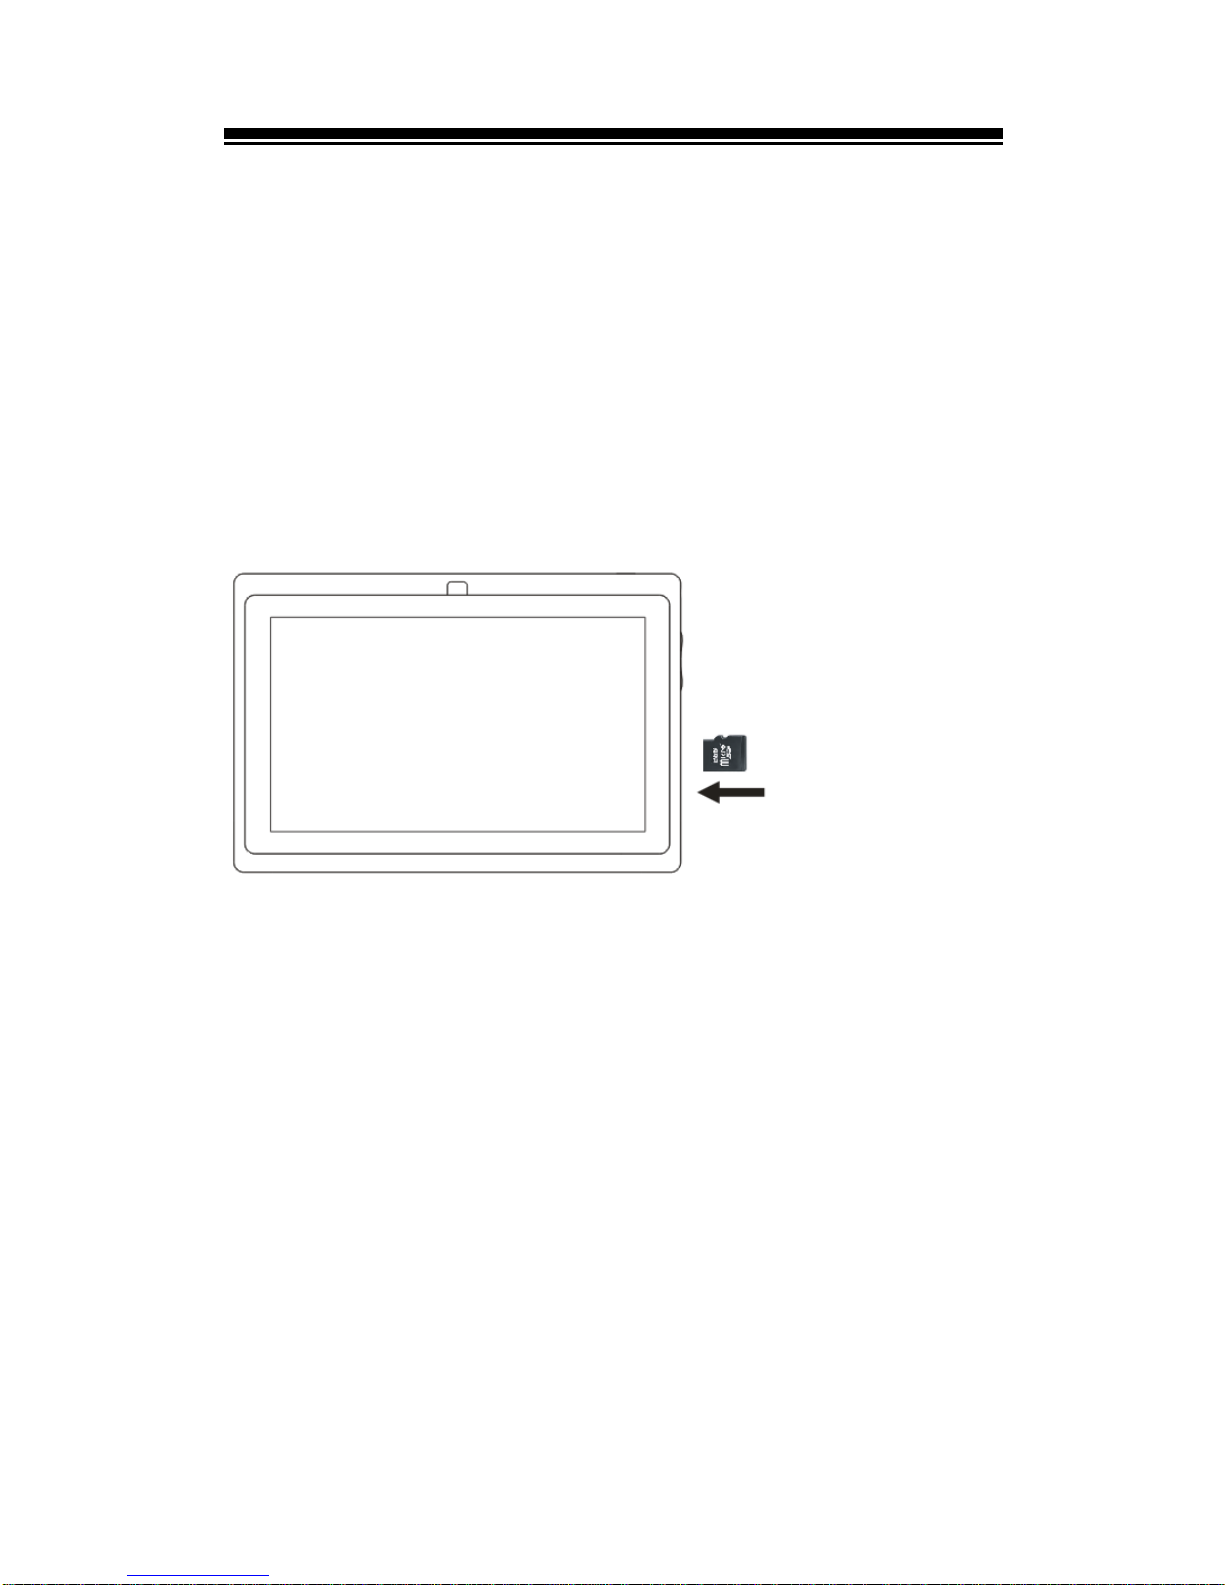
To insert a Memory card
Insert the card correctly with the contact pin facing
downwards as illustrated below. Pushing the card into
Memory card slot, then you should hear a click when
the card is seated correctly. You may damage the
card and the device if Micro SD card is not inserted
correctly.
To remove
Micro SD
card, push
the card
once again
until it clicks.
When a
Micro SD
card is inserted in or ejected from the device, it may
take few seconds for the device to update the content.
Please avoid inserting or ejecting Micro SD card when
other operation is running as this may cause the
system hang.
Do not remove the card if the content inside the
card is being played. This will halt the operation of
the device and cause the device to restart.
If the system is not responding, press Power
button for 6 seconds to reset.
Page 9
Chapter 1 Basics
5
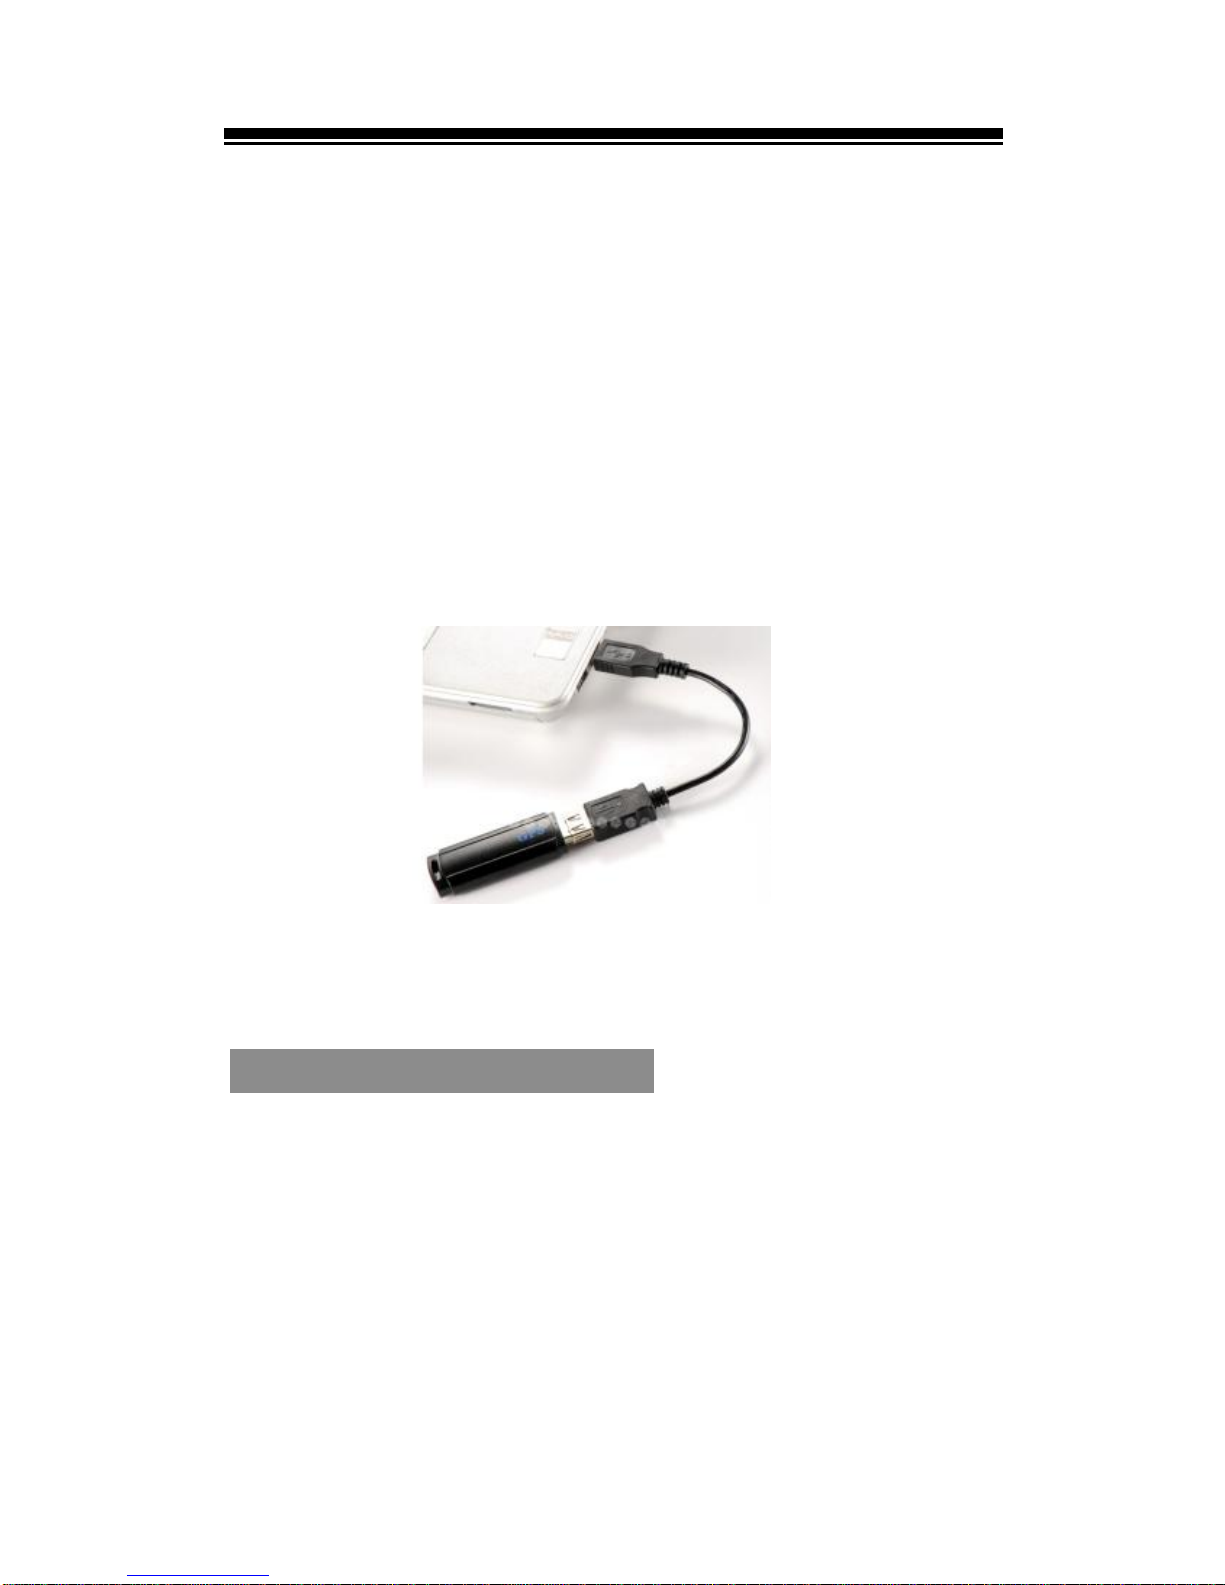
Note: you can also transfer contents to
EVOTAB 4 through USB dongle (not
included). Insert a USB storage device or
memery card into the USB dongle, then
connect the dongle to EVOTAB 4 via the
USB cable.
USB dongle and USB cable
Stand by /Wake up mode
Press Power button to enter Stand by mode, then the
device locks automatically.
Locking the device turns off the display to save your
battery and to prevent unintended operation of the
device.
To wake up the device, press Power button again,
then press the Lock button and drag the slider.
Page 10
Chapter 1 Basics
6
Home screen
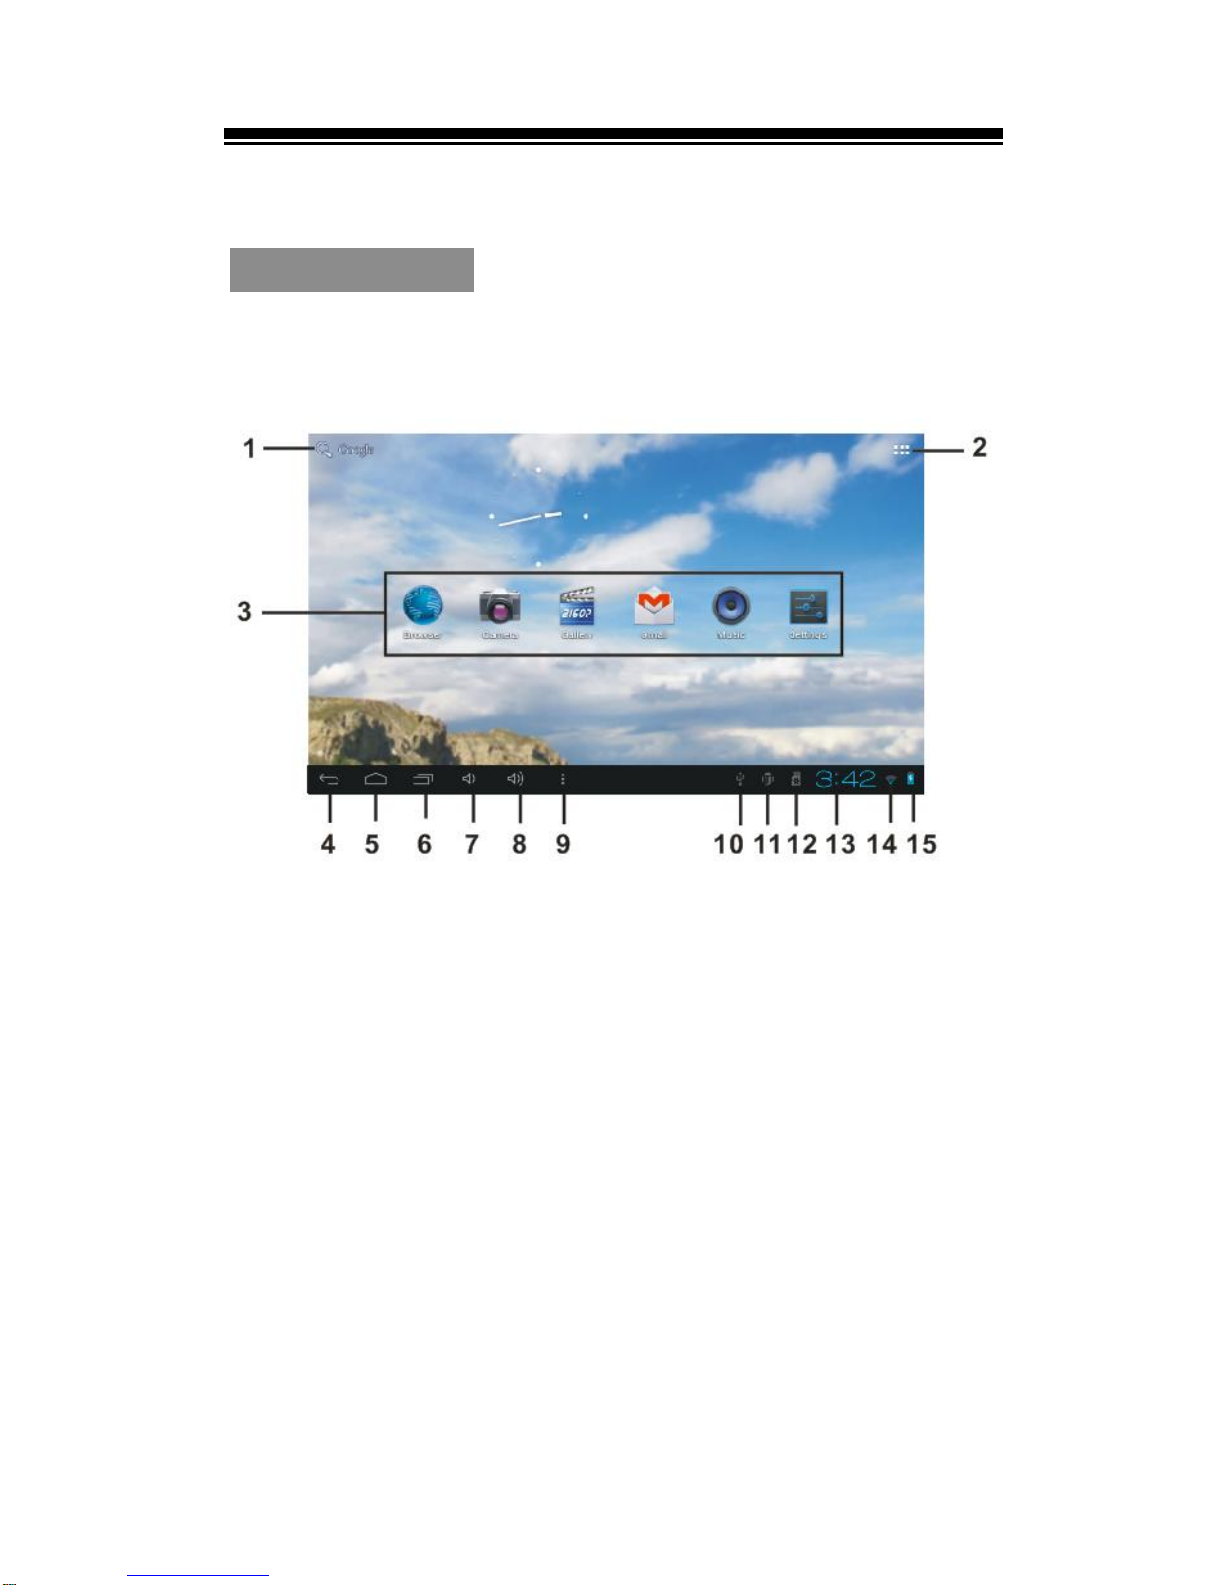
When the device is turned on, it will enter into the
Home screen.
Menu bar
1. Search bar for web browser
2. Main menu button
3. Widget & Shortcut button
4. Return button
5. Home button
6. Running application
7. Volume - button
8.Volume + button
9. Option Menu button
Page 11
Chapter 1 Basics
7
Status bar
10. USB connection
11. USB debugging
12. Memory card indication
13. Time Display
14. Wi-Fi connection
15. Battery indicator
Flick upwards at the status bar to display an ongoing
list, tap to display more status information.
Customizing Home screen
Adding icons on homescreen
You can add shortcuts, widgets or folders to home
screen.
To add icons on screen, tap to enter Main
menu, press and hold on the desired options to go to
homescreen, then drag the icon to the desired place.
Moving icons on the home screen
1. Touch and hold an icon to be moved until you
hear a vibration sound.
2. Drag the icon to the desired place.
Removing icons on home screen.
Touch and hold the desired icon to be removed until it
appear a “X” at the top screen, then drag the icon on
Page 12
Chapter 1 Basics
8
“X”, when the icon turns red, release it to remove.
Setting wallpaper for homescreen
Tap Wallpaper, select the desired picture as
wallpaper.
About the additional home screen
You can use up to five screens. Flick left or right to go
to other home screen.
Go to the first Home screen: press the Home button.
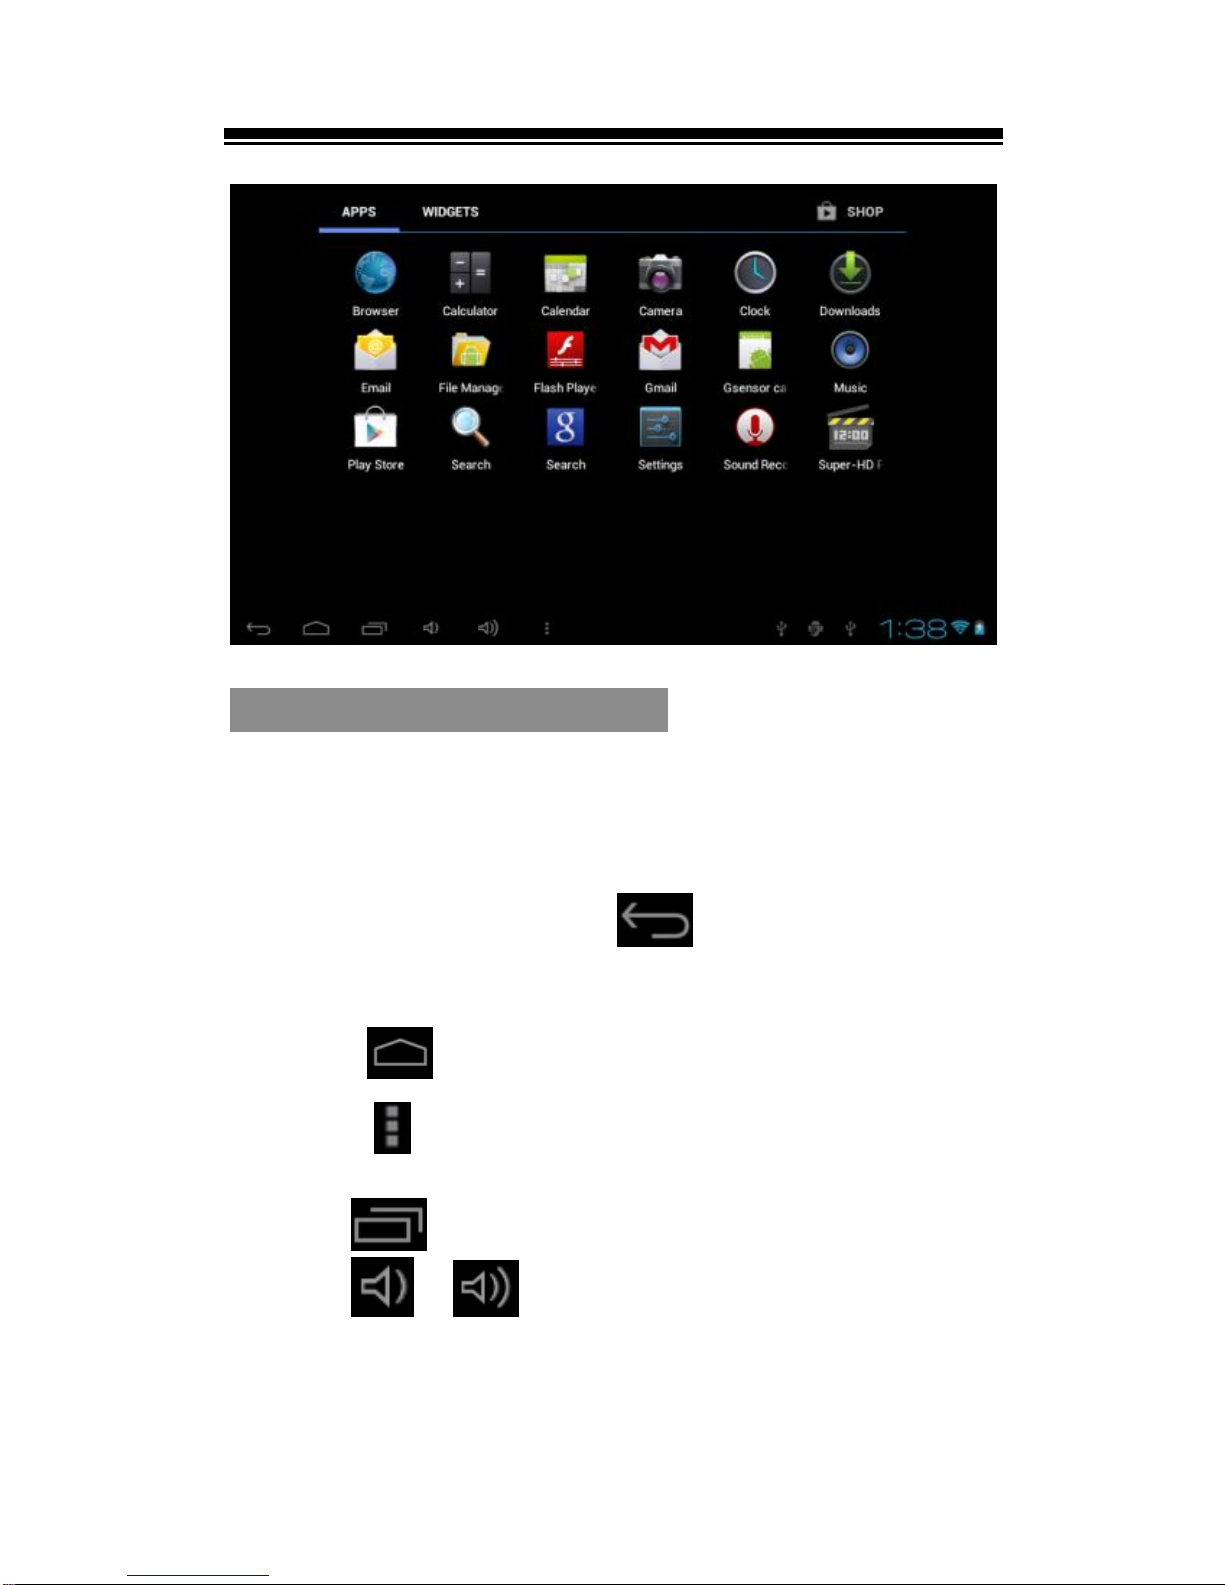
Main menu
All application icons are on the Main menu.
On homescreen, tap to show the Main menu.
Tap APPS tab, then tap an icon on the Main menu to
open the desired application.
Tap WIDGETS tab, then touch and hold on a widget
to quick bring your favorite content and services.
Page 13
Chapter 1 Basics
9
Touch screen or buttons
Tap an icon to open an application.
Tap at the bottom of the screen to display the
menu bar.
At the Menu bar, tap anytime to return to
previous screen, press and hold to return to Home
screen.
Tap anytime to return to Home screen.
Tap on the screen anytime to display the
option menu.
Tap to show the running application.
Tap / to adjust volume level.
Scrolling
Drag your finger up and down to scroll file list.
Page 14
Chapter 1 Basics
10
Flick to scroll quickly.
On webpage, drag up and down to scroll around
the page(be care for so as not to click the link).
Tap or touch anywhere on the screen to stop it
immediately.
Onscreen keyboard
Use the onscreen keyboard to enter text, such as
text messages, or web addresses.
Tap a text field to bring up the keyboard.
Touch and hold on the text field to select an input
method.
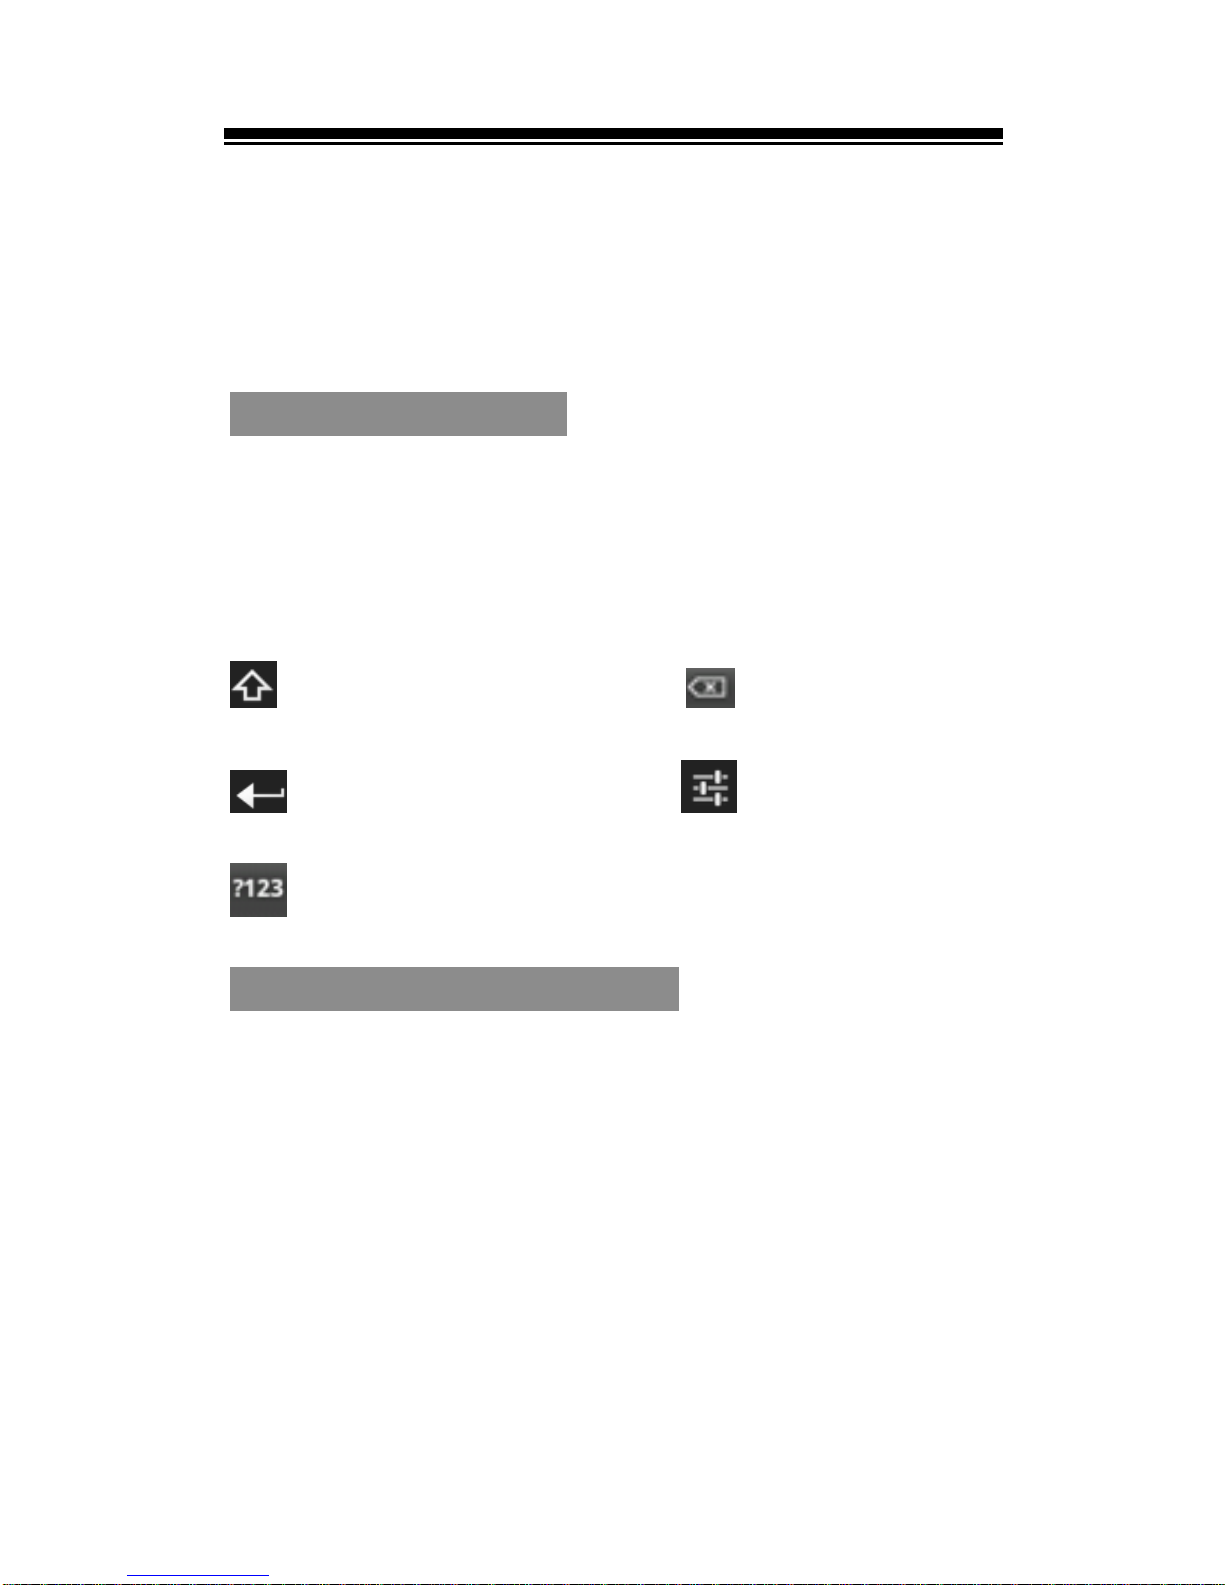
Uppercase key Backspace key
Enter key Input options
Numeric/punctuation/symbol key
Connecting to the internet
Turn on Wi-Fi: From Main menu choose Settings
Wireless&networksWi-Fi, and tap the other end
next to “OFF”. Then “ON” will appear when you have
turn on the Wi-Fi.
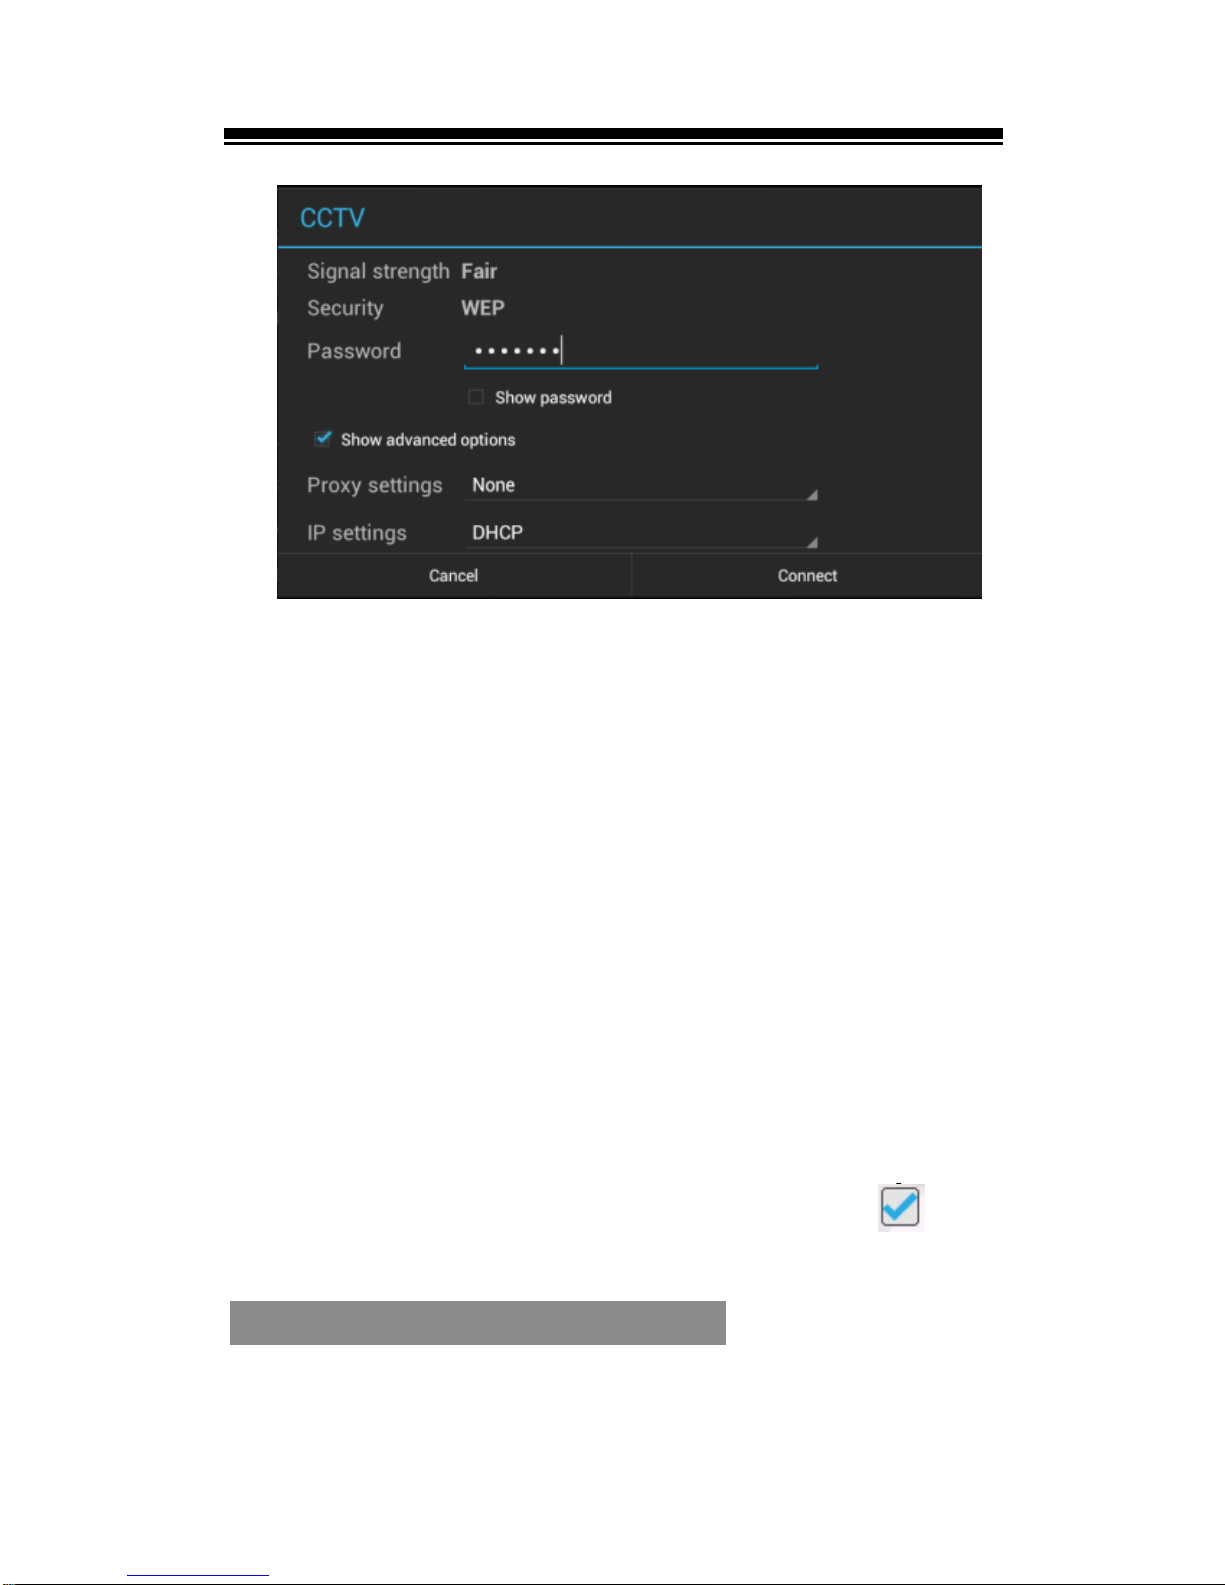
Join a Wi-Fi network: From the detected network list,
select a network, if necessary, enter a password and
tap "Connect" to save the settings for the encrypted
connection and connect to Wi-Fi. (Networks that
require a password appear with a lock icon).
Page 15
Chapter 1 Basics
11
Select “show advanced option” to show more
options.
Once you’ve joined a Wi-Fi network manually, it
automatically connects to it whenever the network is in
range.
Using a mobile data connection
Insert a 3G mobile data card into the 3G dongle(not
included), and connect the 3G dongle to EVOTAB 4
via the USB cable, then turn EVOTAB 4 tablet on, to
enable data access over mobile network, from Main
menu choose Settings Wireless&networks
More Mobile networks Data enabled, then
will appear on the right.
Switching Screen orientation
Screen orientation can be set to vertical or horizontal
Page 16

Chapter 1 Basics
12
via the built-in G sensor.
From Main menu, tap Settings Display, select
Auto-rotate screen.
Rotate the unit and the screen rotates too,
automatically adjusting to fit the screen.
Page 17
Chapter 2 Getting Started
13
Web browser
Voice search
Voice search enables you to speak instead of typing
for the web searching.
From Main menu or Home screen, tap on to
display voice search box.
Say your search term when it appear “speak
now”(If not, tap on the top right), it will
automatically recognize the voice and search
the internet.
The search results show up just as if you had typed
the search term.
Note: Voice Search is not available in all languages.
View a webpage
From Main menu, tap Browser to open web
browser.
Tap the address bar at the top of the screen.
On address bar, type the web address and tap
Enter.
Page 18
Chapter 2 Getting Started
14
Tap the link on the webpage to open a new
webpage.
Drag up and down to scroll around the webpage.
Double tap or pinch on the webpage to zoom in or
zoom out.
In zoom mode, drag left, right, up,down to move
the webpage.
The multiple webpage windows opened at a time
are shown on the top screen. Tap on the desired
window to enlarge to full screen mode.
To return to the previous page, tap the
button.
Notice:
To switch screen orientation, rotate the unit.
Browser start page always defaults to Google
home page.
Add bookmark
Tap to add the current visited webpage as
bookmark.
Bookmarks List
Tap to show bookmarks list, tap a bookmark to
open the webpage. Touch and hold the bookmark to
display the option menu for bookmark.
History
Page 19
Chapter 2 Getting Started
15
Access to view history lists. To remove these lists,
tap , then select Clear history.
Settings
Tap to use more available function, including
Privacy & security, Accessibility and so on.
Refresh/Stop
Tap to refresh on the current page, tap X to stop
loading the current page.
Forward
Tap ←/→ to go to previous/next webpage screen.
Using the option menu
Tap to display the browser option menu. Tap
on the desired item to use webpage viewing control.
Page 20
Chapter 2 Getting Started
16
Watching Videos
Playing videos
On the Home screen or Main menu, tap
Super-HD PlayerVideo folder to open video
player.
Drag up and down to scroll through the file list.
Tap to select a video file for playback.
Touch and hold on the selected video file to delete
it.
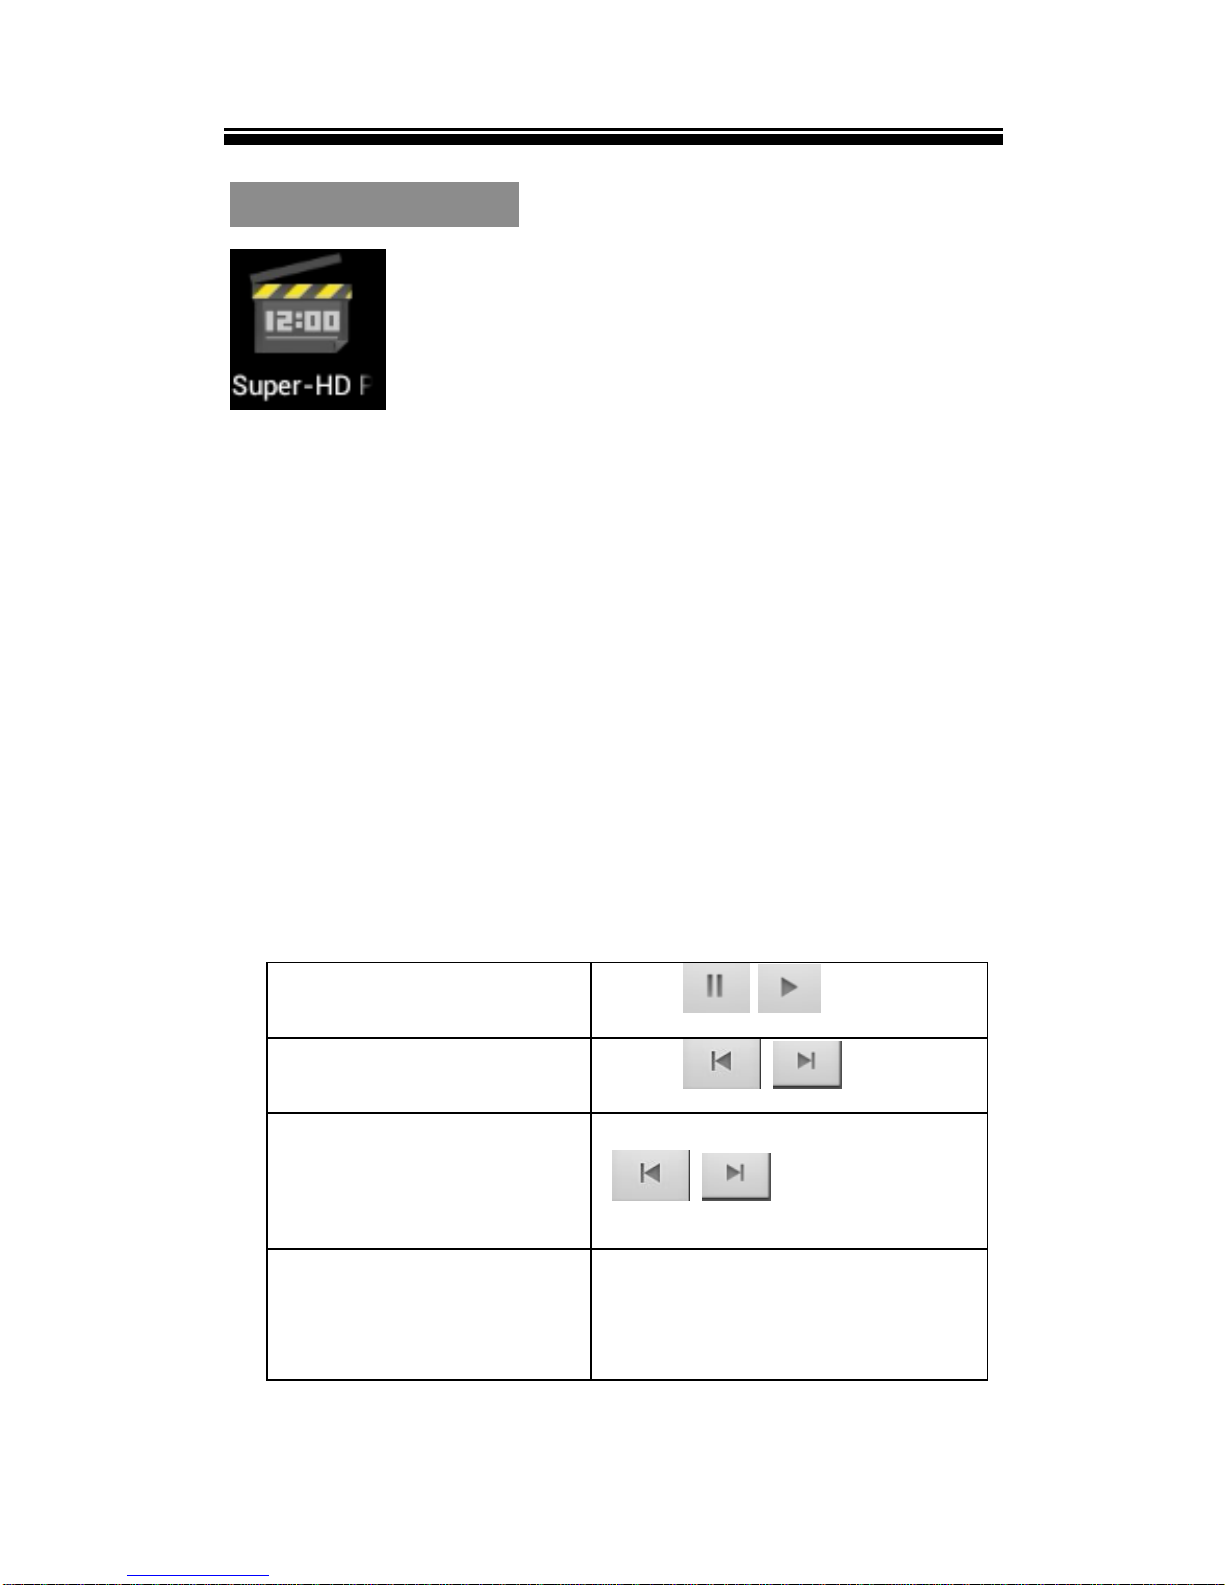
Controlling Video Playback
When playing video, tap on the screen to pop up
control toolbar.
Play or Pause a
video
Tap / .
Play previous/next
video
Tap /
Fast rewind or fast
forward
Touch and hold
/ .
Skip to any point in
a video
Tap anywhere or drag
the playhead on the
progress bar.
Page 21
Chapter 2 Getting Started
17
Adjust the volume
level.
Tap / or
use the buttons on the
side of EVOTAB 4.
Display video menu
Tap .
Return to the video
browser screen
Tap .
Notices:
If a bookmark is added, it allows you to continue
playing from the bookmark when you open the
video file next time.
Video player supports subtitle file, please load the
subtitle file to be displayed on the current video,
unless the subtitle is integrated into the video itself.
The Tablet PC supports subtitle of sub, ssa, srt, lrc
format,encoded in UTF8 format.
The file name of the subtitle must be identical to
that of the video file. The subtitle will be loaded
automatically during video playback.
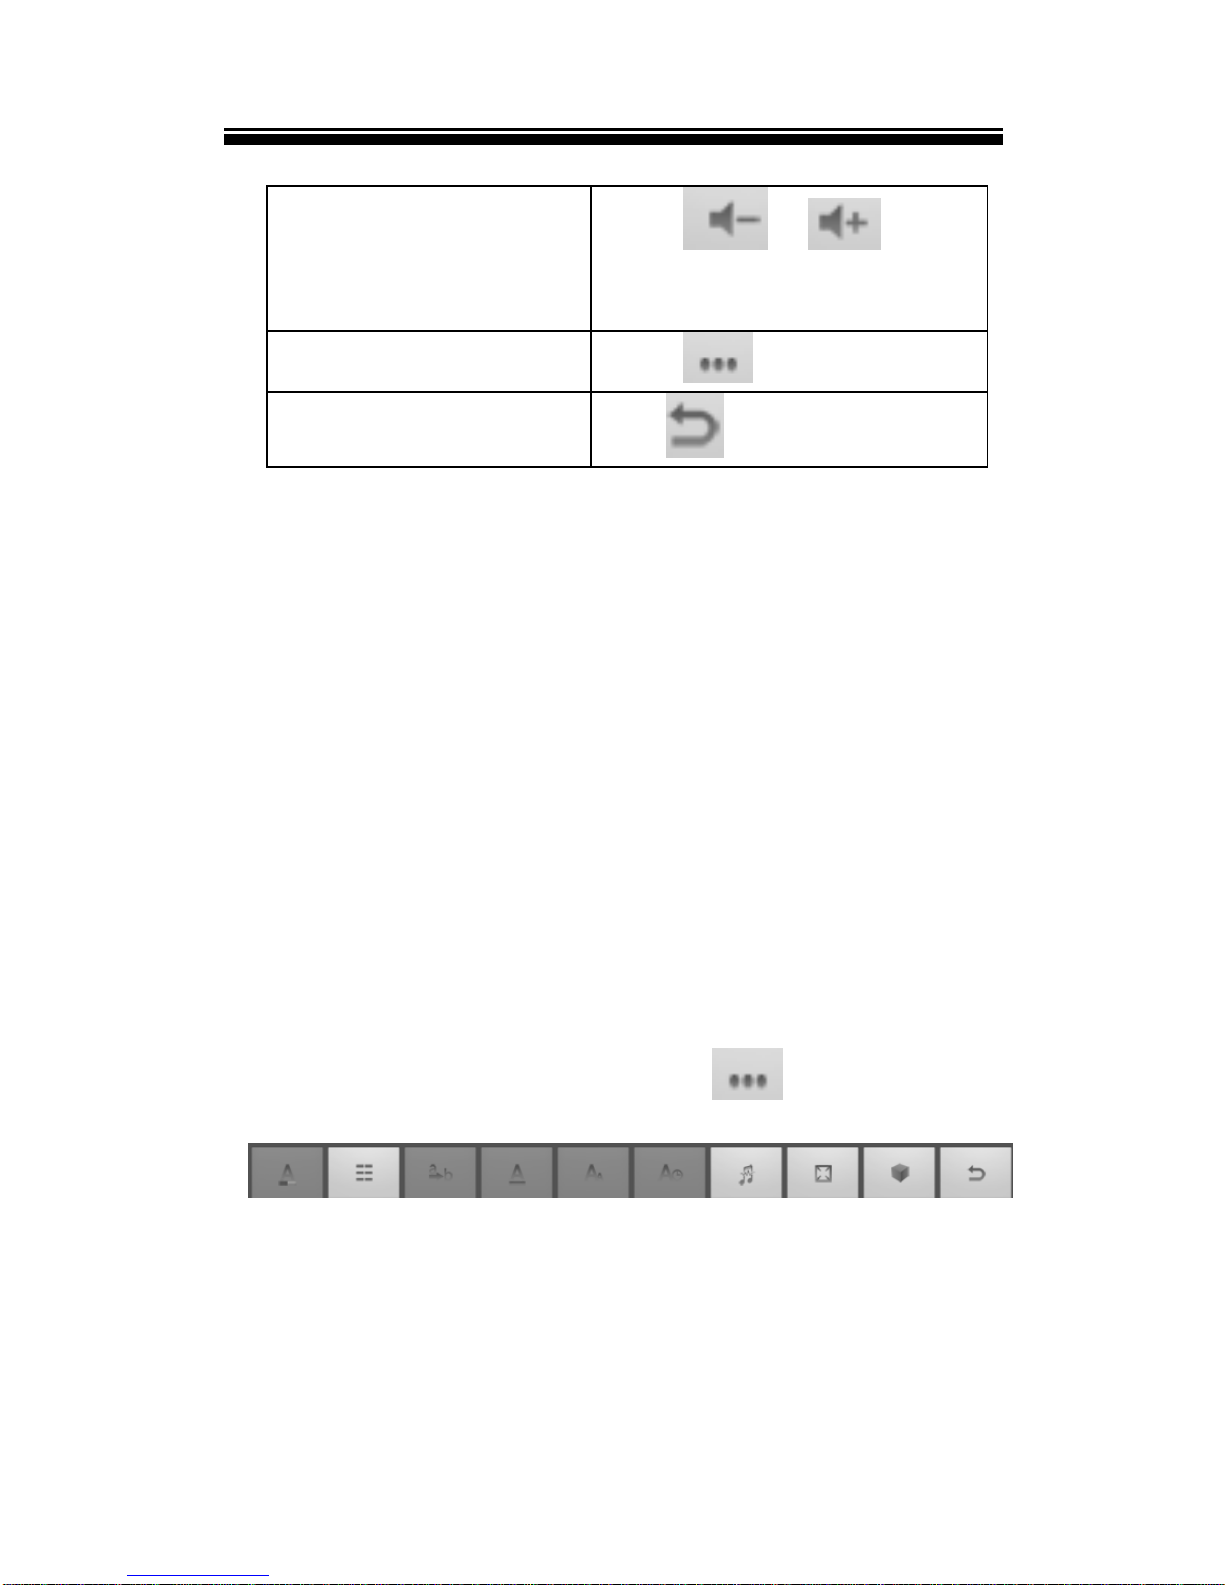
Using video playback menu
During the video playback, tap to display the
Playback menu.
Tap on the option icon to use more video playback
control, such as set full screen ratio, Subtitle, 3D
mode and so on.
Page 22
Chapter 2 Getting Started
18
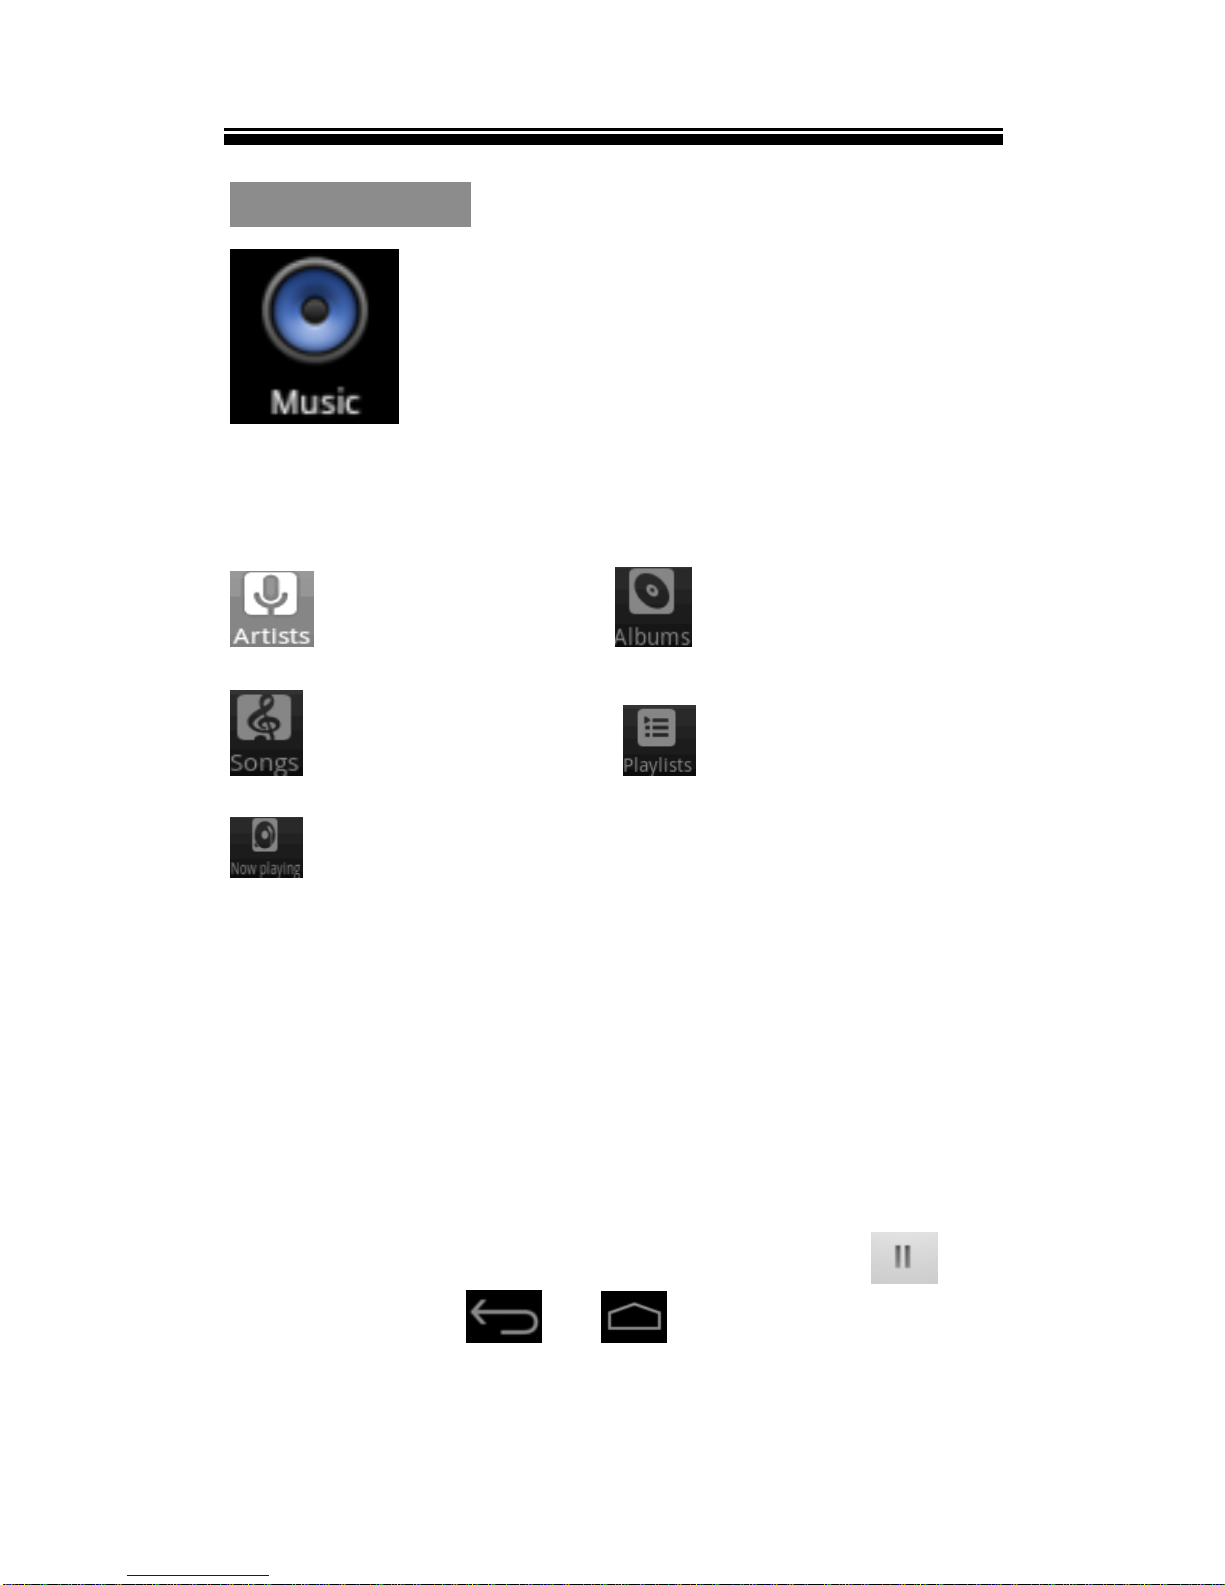
Playing Music
About music library
From Main menu, tap Music to enter into music
library.
Sorting by artist Sorting by album
All songs Sorting by Playlist
Return to Now playing screen
Playing songs
1. From Home screen or Main menu, tap Music to
enter music library.
2. Tap on a desired tab to enter song list.
3. Drag up and down to scroll the song list.
4. Tap the desired songs to start playing.
Note: If you want to exit music mode, tap to
pause, then tap or .
Page 23
Chapter 2 Getting Started
19
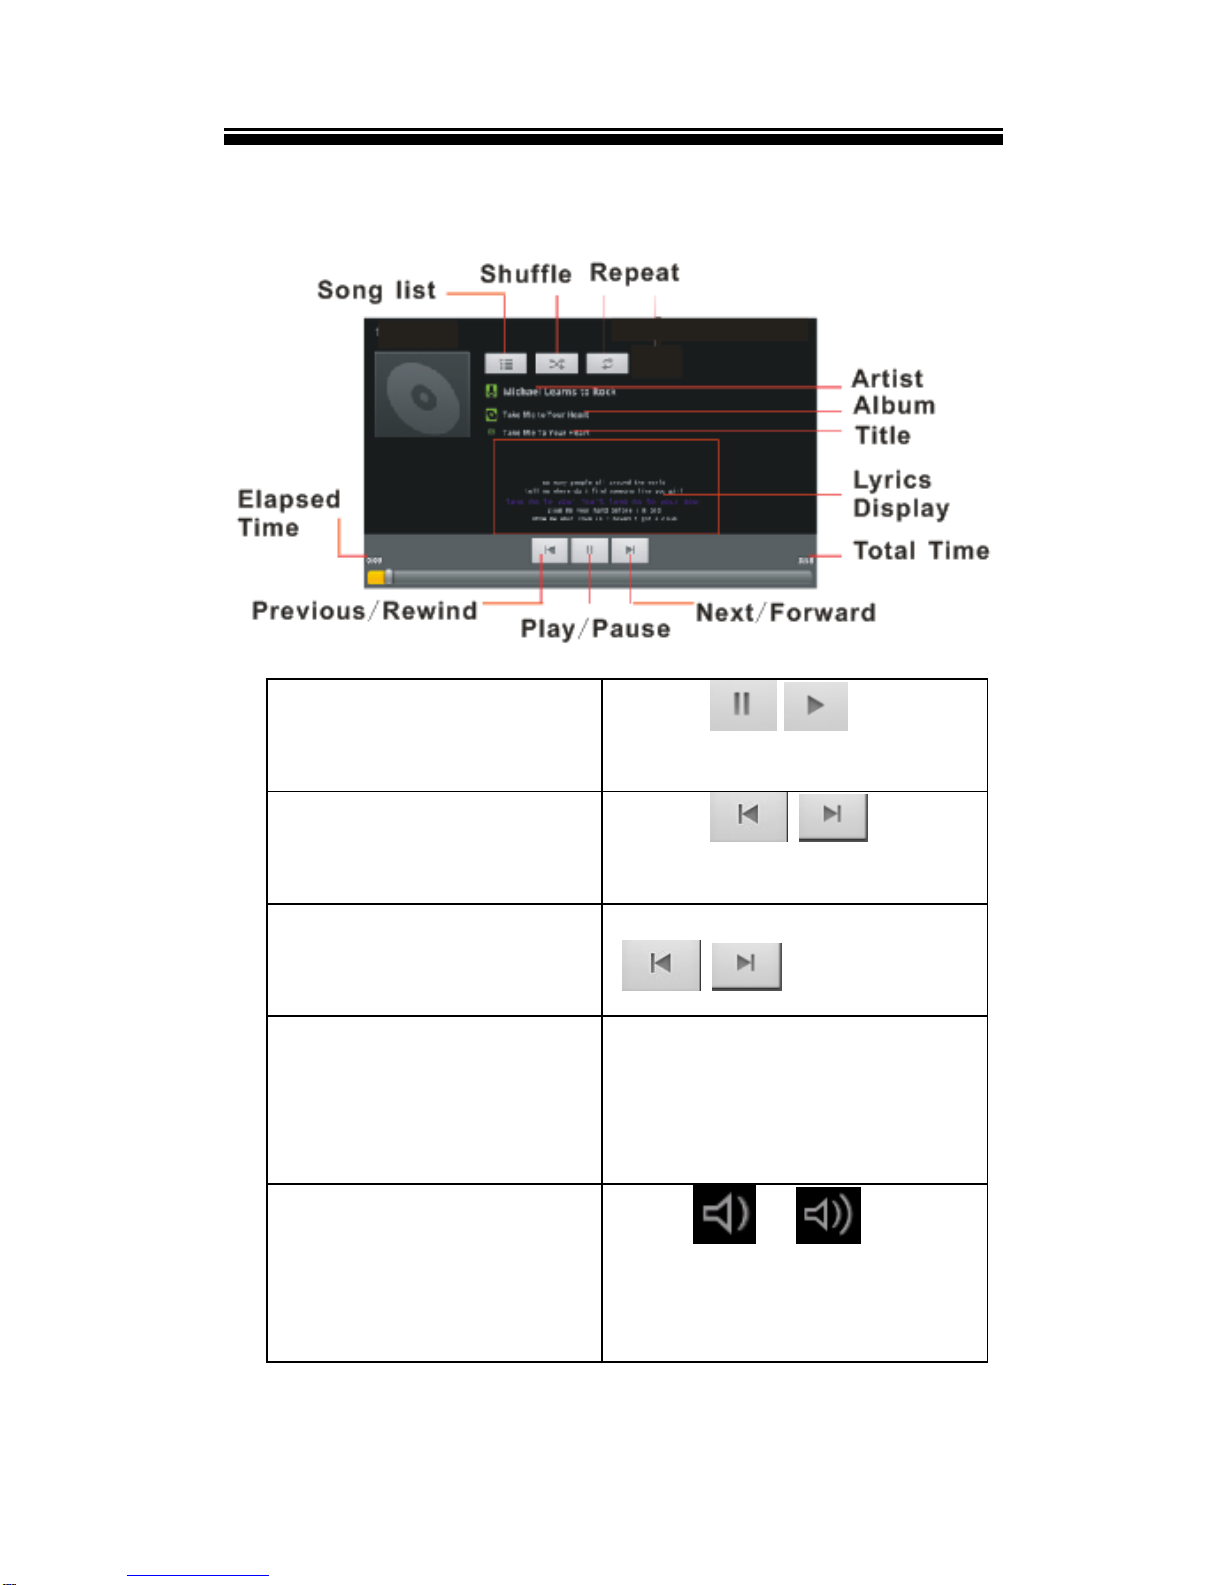
Controlling Song Playback
Pause or play
songs.
Tap / .
Play previous or
next song.
Tap / .
Fast rewind or fast
forward
Touch and hold
/ .
Skip to any point in
a song
Tap anywhere or Drag
the playhead on the
progress bar.
Adjust the volume
level.
Tap /
button or use the
volume buttons on the
unit.
Page 24
Chapter 2 Getting Started
20
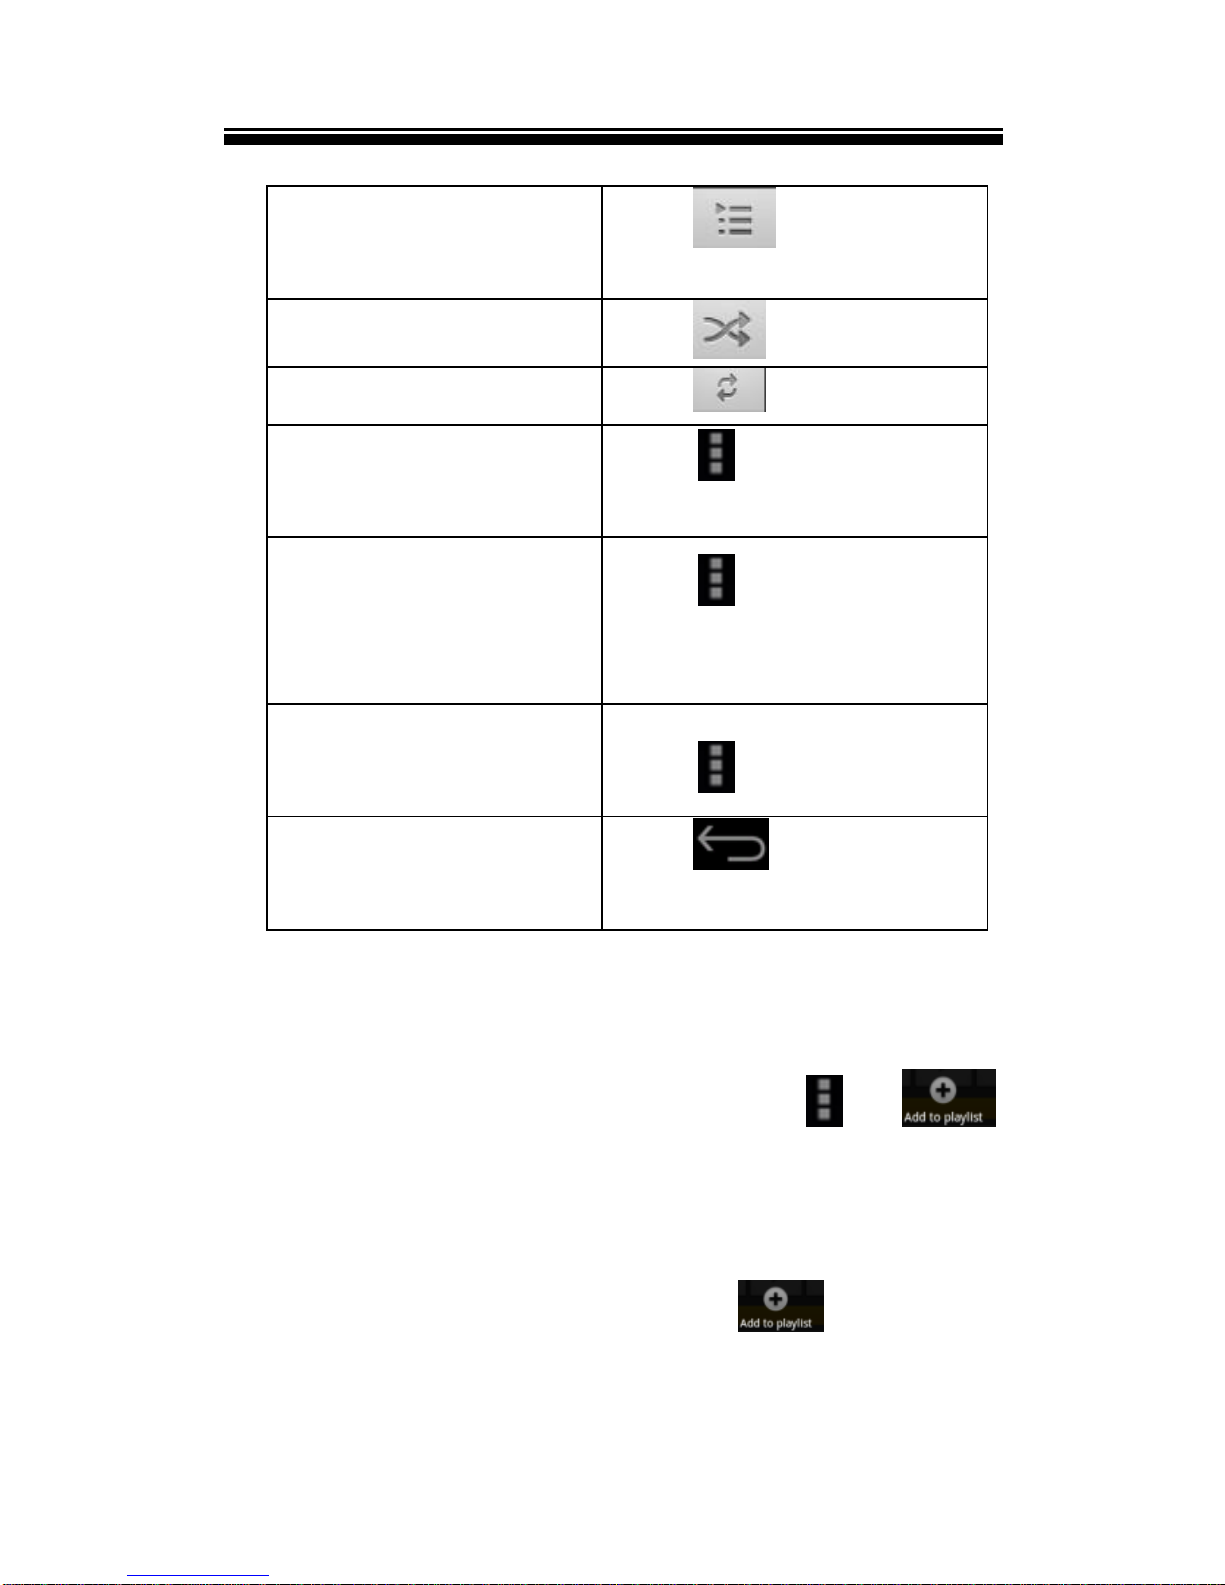
Display the current
song list
Tap .
Set shuffle mode
Tap .
Set Repeat mode
Tap .
Display the music
playback menu
Tap .
add the current
playing song to
playlist
Tap Add to
playlist.
Delete the current
song
Tap Delete.
To return to the
Media Library
Tap .
Using the playlist
Use the playlist to manage the songs in the library
Creating a new playlist
In the music playback screen, tap
New, and enter the name for the new playlist, then
tap Save.
Adding the current song into playlist
In the music playback screen, tap .
Page 25
Chapter 2 Getting Started
21
Tap on a desired playlist, then the current song has
been added into the selected playlist.
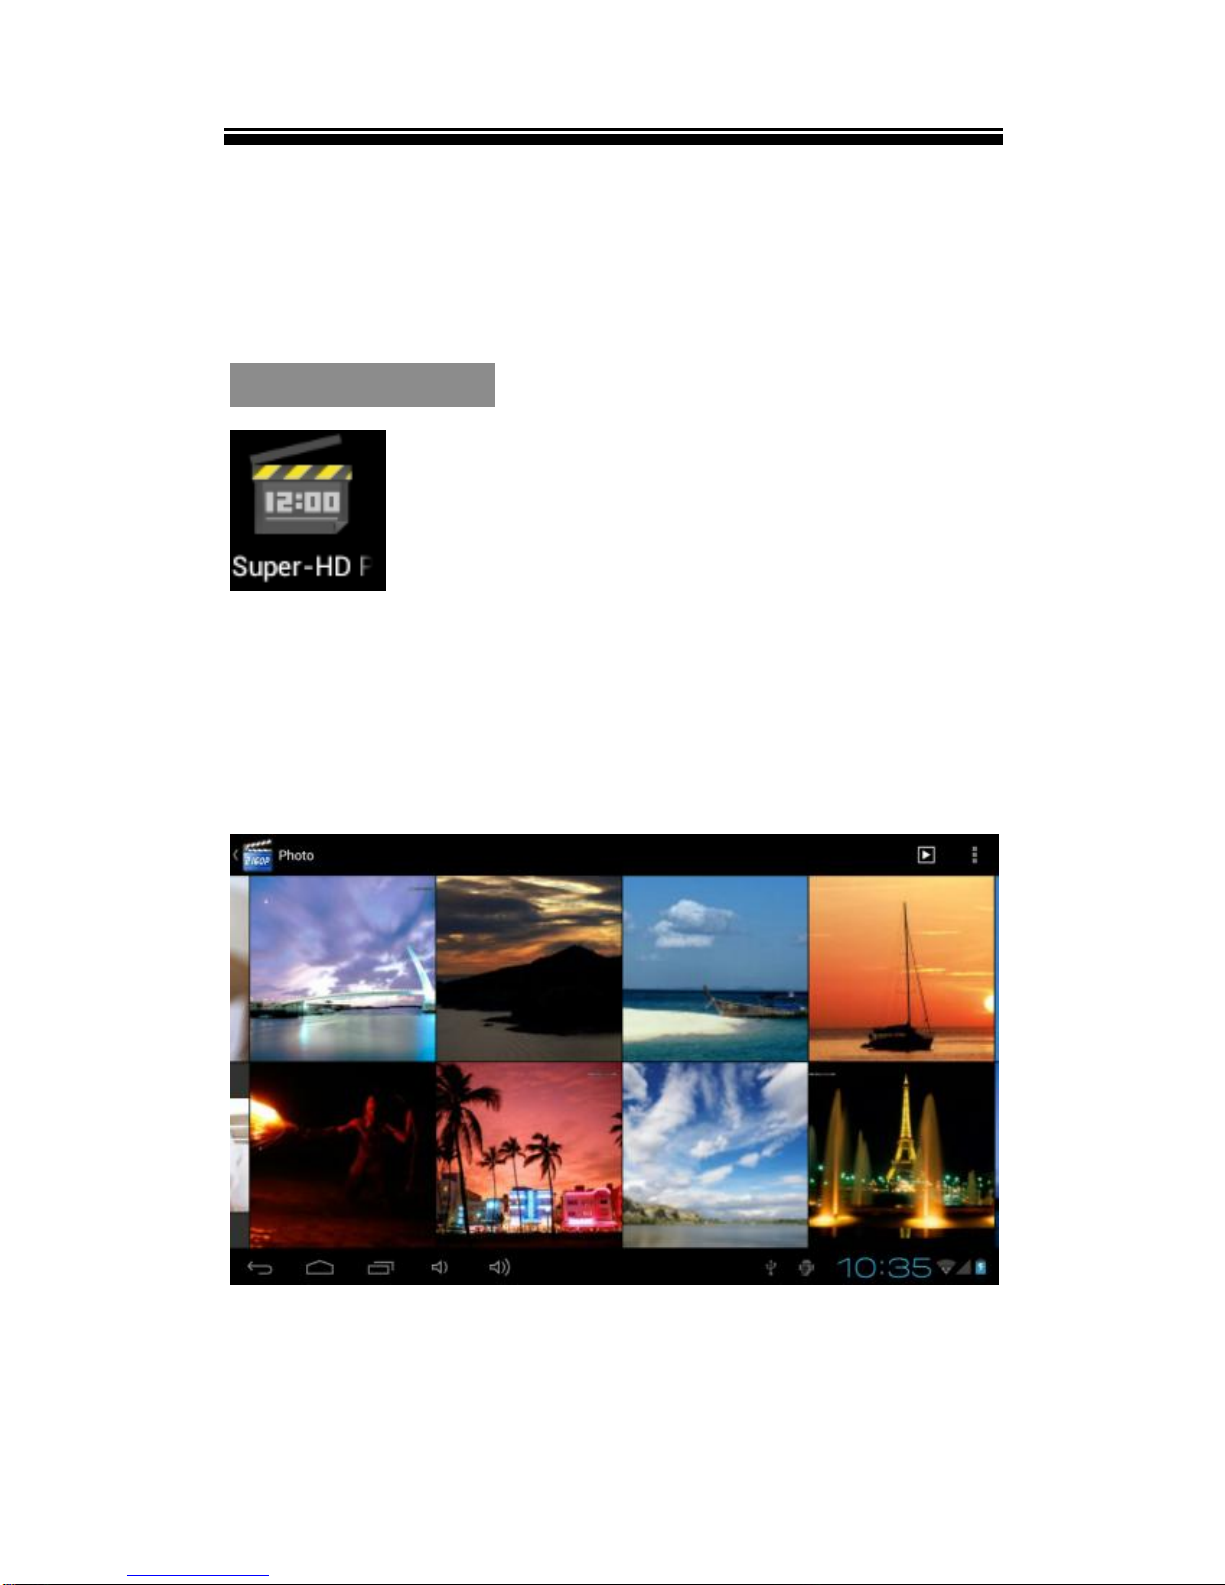
Viewing photos
On the Home screen or Main menu, tap Super-HD
PlayerPhoto folder to view photo.
Thumbnail View
Thumbnail view displays the catalog as a table of
thumbnail images in adjustable sizes.
Tap on the desired photo to full screen view.
Page 26
Chapter 2 Getting Started
22
In full screen mode, tap to return to
thumbnail view mode.
Start to view photo
Tap on the screen to show / hide the control bar.
View the previous /
next photo.
Flick Left/Right on the
screen.
Zoom in or zoom out
Use two fingers to
pinch on the viewing
screen.
Set slide show effect
Tap Slideshow
Edit the picture
Tap Edit
Rotate the photo by
90 degrees clockwise,
counterclockwise
Tap Rotate
left/Rotate right .
Crop the picture
Tap Crop.
Set the photo as
wallpaper
Tap Set
picture as
wallpapter.
Display photo
informaiton
Tap Details
Share the photo with
others.
Tap .
Delete or save photo
Tap .
Page 27
Chapter 2 Getting Started
23
Return to thumbnail
mode.
Tap .
Notes:
In zoom in /out mode, drag your finger up, down,
left or right to move photo.
Rotate the unit to switch screen orientation.
Using Camera
From Main menu, tap Camera to enter camera mode.
Tap to select Camera mode, tap to
switch to Camcorder mode
Tap to preview on taking photo or recording
video.
Press to take photo or record video, and
photo/video file will be saved automatically.
Tap to display setting menu.
Tap the thumbnail icon at top right to view the
photo or play back the video.
Press the Return button to exit from the camera
Page 28
Chapter 2 Getting Started
24
mode.
Camera settings
Tap to set White balance.
Tap to set Exposure.
Tap to set Store location/ Picture size.
Camcorder settings
Tap to set White balance.
Tap to set Time lapse interval.
Tap to set Store location.
Sound Recording
From Main menu, tap Sound Recorder to enter
sound recording mode.
Page 29
Chapter 2 Getting Started
25
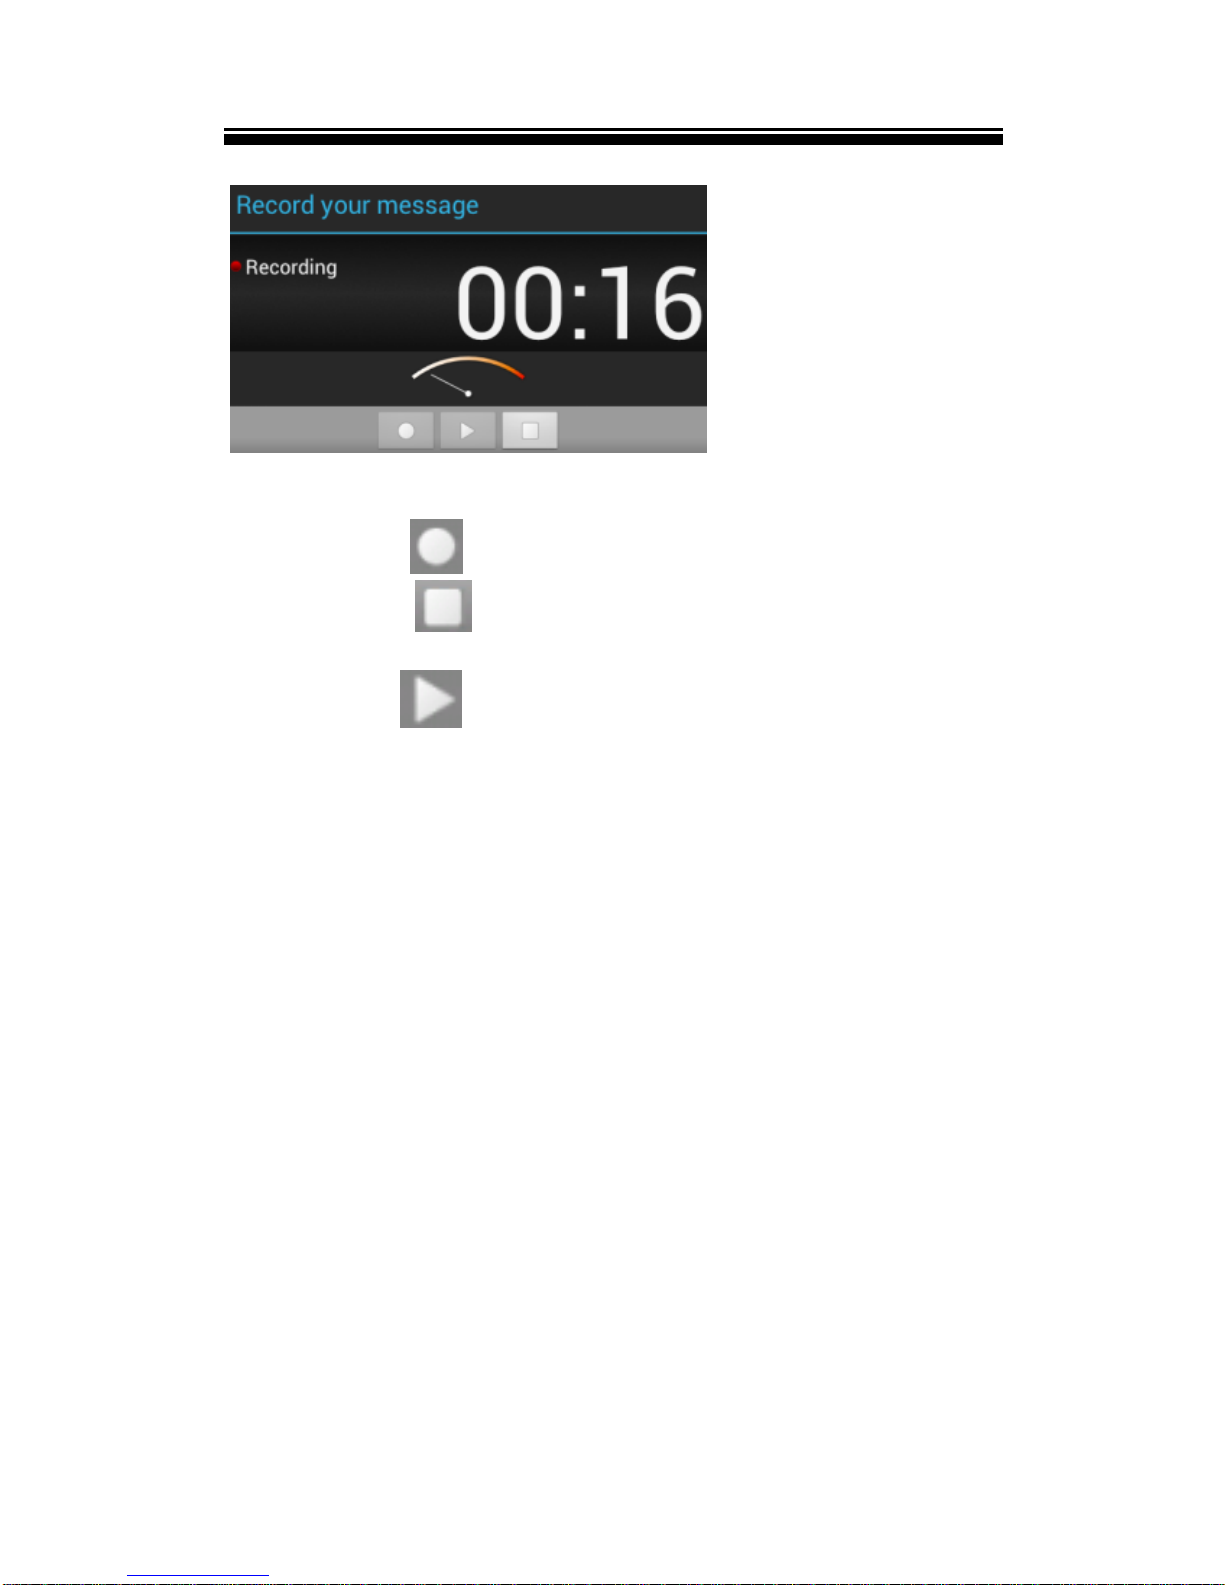
Recording a voice file
Press to start recording a voice file.
Press to stop recording.
Press to play back the current recorded
voice file.
It will display a message window to choose
“Done” or “Discard”, choose “Done” to save the
voice file; choose “Discard” to discard the voice
file.
A recording time indicator will appear during the
recording.
Repeat the above steps to record more voice
files.
Play back the voice file
Page 30
Chapter 2 Getting Started
26
The record is saved in Record folder, open
“Explore”,then open Record folder, tap on the
desired recorded file to be played .
Gmail
Setting up Gmail Accounts
Prior to the use of e-mail, you need to set up the
mailbox account.
1. From Main menu, tap GmailSign In.
2. Enter your user name and password, tap Sign In to
continue.
3. Set P03/IMAP server (If necessary, obtain the
required information from your network administrator,
then tap Next to check server setting.
Using the mailbox
In the mailbox, drag up and down to scroll the mail
list.
Tap to open the mail you want to read.
On the mail list, touch and hold on the mail to
display option menu.
Page 31
Chapter 2 Getting Started
27
Use the option menu, the available options are:
Read, Archive, Mute, Mark read, Delete, Add
bar,Change labels.
About the Mail menu
In the mail list, tap to display a mail menu.
Refresh:Refresh Mail
Compose:Write a new mail
Account:View all e-mail accounts
Go to labels: go to home screen of the Gmail
Search: Search for the desired mail
Setting: Set email account
Delete mail account
1. In the mail list, tap to display a mail menu.
2. Tap Accounts to display email account.
3. Tap to display a option menu, select Account
settings.
4. Tap on the mail to be deleted to go to next screen,
then tap on Remove account.
Notice:
You can set multiple mail accounts, tap Add
account.
Each time you use mail, the system will
automatically jump to the default account.
File Manager
Page 32
Chapter 2 Getting Started
28
From Main menu, tap File Manager.
Tap to select Internal / Micro SD card
memory/USB at the top bar to enter.
Drag up and down to scroll through the file list to
select the desired folder or file.
Touch and hold the selected file or folder show the
edit menu. If there is no response on the
To open a file or folder, tap on the file or folder.
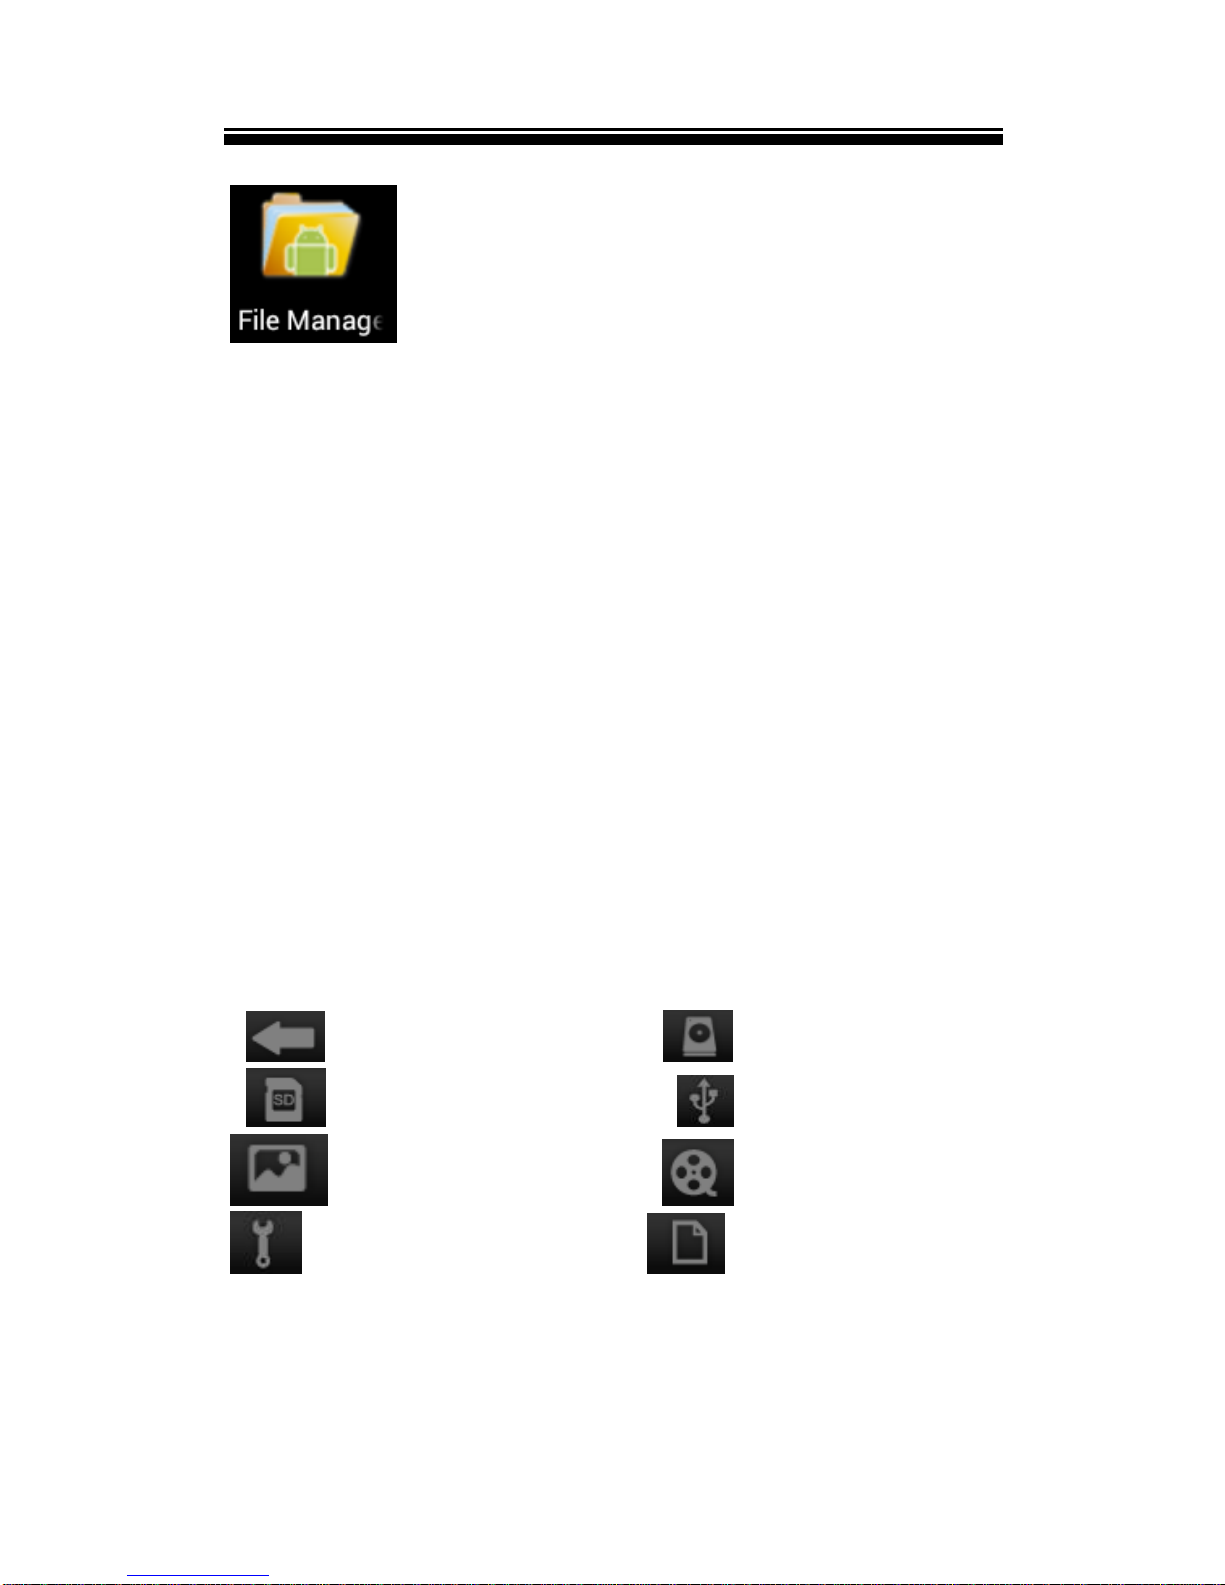
About the tool bar and the Edit menu
Tool bar
back Internal memory
SD card memory USB storage
Sort by picture Sort by video
Tool box Multiple selection
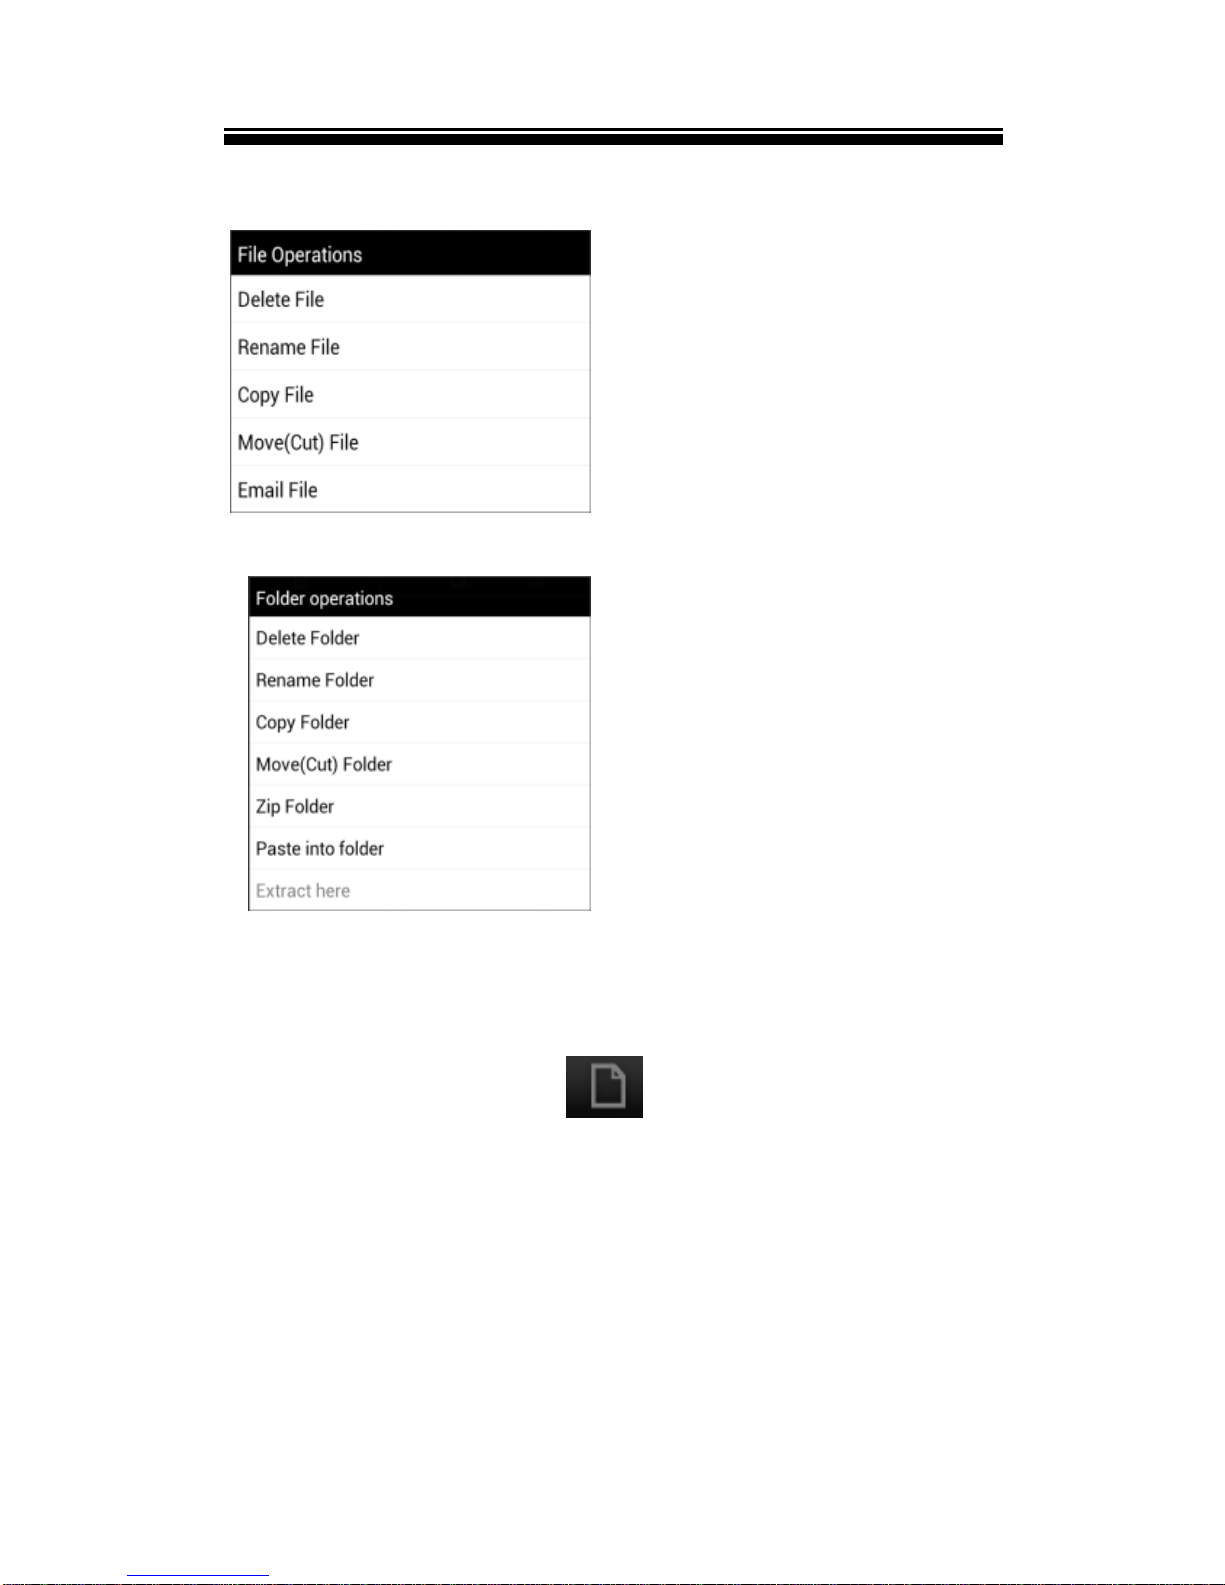
Edit menu
Touch and hold on the selected file or folder to show
the Edit menu.
Page 33
Chapter 2 Getting Started
29
File Edit menu
Folder Edit menu
Select multiple files or folders
You can select multiple files or folders at the same
time.
1. On the Tool bar, tap .
2. Tap the desired files/folders to be selected, then
they will be marked with a “√”. To cancel the
selected items, tap on them again.
Copy / move files or folders
Page 34
Chapter 2 Getting Started
30
1. From the file list, tap to select the desired
files/folders to be copied or moved, then select
Move or Copy.
2. Go to the target folder that you want to put the
selected file or folder, touch and hold to show the
folder Edit menu.
3. Select “Paste into folder”.
Note: it may take longer time to paste files/folder with
big file size.
Rename the file or folder
1. From the file list, touch and hold the desired file
or folder to show the edit menu, select Rename
Folder/file
2. In file name field, use Onscreen keyboard to
enter a new file name.
3. Tap Rename to confirm.
Delete files or folders
1. From the file list, tap to select the desired
files/folders to be copied or moved, then they will
be marked with a “√”.
2. Select Delete to display a message window..
3. Select Delete to confirm the deletion.
Page 35
Chapter 2 Getting Started
31
Note: if only copy/move/delete one file/folder, you can
touch and hold the desired file or folder to show the
Edit Menu, then follow the above steps to do.
Attach file/folder via email
1. From the file list, tap to select the desired
files/folders to be copied or moved, then they will
be marked with a “√”.
2. Select Attach.
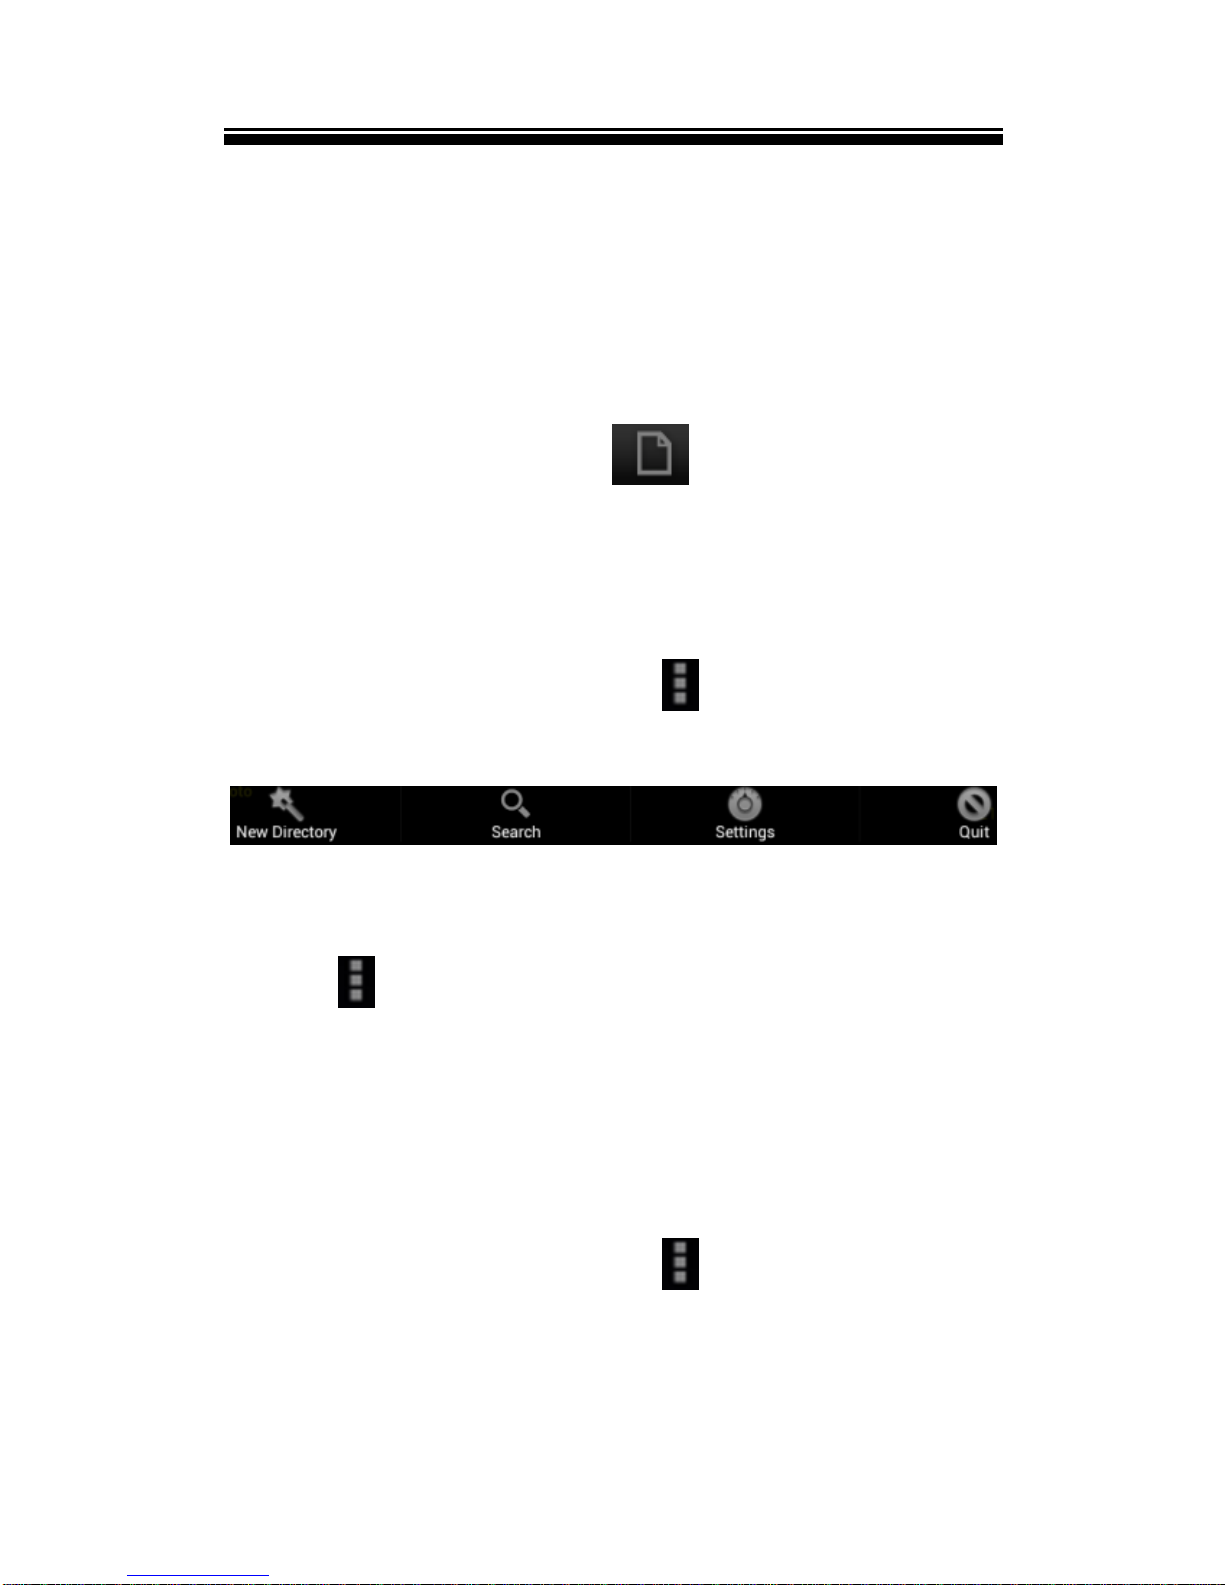
Using the option menu
In file manager screen, tap to show the option
menu.
Creating a new folder
1. Go to the desired mother directory.
2. Tap New Directory.
3. In file name field, use Onscreen keyboard to enter a
new directory name.
4. Tap Create to confirm.
Searching for a file
1. On file manager screen, tap to show the option
menu.
Page 36
Chapter 2 Getting Started
32
2. In file name field, use Onscreen keyboard to enter
the desired file name.
3. Tap Search to start searching for the desired file.
Configuring the settings for file manager.
1. On file manager screen, tap Settings.
2. Choose the desired item on Display and Sorting to
start setting.
Managing third party applications
This unit support third party applications (such as
MSN, etc.), you can install or uninstall applications for
the system.
Download and install the application
1. Download the desired applications into your
computer.
2. Copy the downloaded applications to the unit (you
can also download the desired applications from the
brower in your EVOTAB 4 Tablet.).
3. Disconnect this unit from the computer.
Note: The system only supports XXX.apk format
applications to be installed.
4. From Main menu, tap
SettingsSecurityunknown source.
5. In Explorer, find the directory where the application
is placed to tap to start the installation.
6. After finishing the installation, you will see the
Applications on the Main menu.
Page 37
Chapter 2 Getting Started
33
Uninstall application
1. From the Main menu, then tap SettingsApps.
2. Select the application you desire to uninstall, then
tap Uninstall.
Note: The default applications can’t be uninstalled
from the unit.
Alarms
From Main menu, tap Clock Set alarm to start
clock alarm setting.
Set an alarm:
On clock setting screen, tap “Add alarm” to start to
alarm setting.
Note: You can set multiple alarms.
Adjust any of the following settings:
Tap Time to set the alarm time, tap + or - button to
adjust the desired hours and minutes.then tap Set
to confirm.
Tap Ringtone to choose the ringtone that sounds
when the alarm goes off.
Tap Vibrate to enable vibrate mode.
Tap Repeat and choose the days to set the alarm
to repeat on certain days.
Tap Label to give the alarm a description. It
displays the label when the alarm sounds.
Page 38

Chapter 2 Getting Started
34
If at least one alarm is set and turned on, it will appear
“Alarm set:Time” on home clock screen.
Turn an alarm on or off: tap the next to the
desired alarm to turn the alarm on or off. If an alarm is
set to sound only once, it turns off automatically after it
sounds. You can turn it on again to reenable it.
Change settings for an alarm: tap the time of the
desired alarm to be changed.
Delete an alarm: tap the time of the desired alarm to
be deleted, select Delete to delete the alarm.
Page 39
Chapter 3 Settings
35
From Home screen or Main menu, choose Settings,
then tap the desired items to be configured to start the
Setting.
Wireless & networks
The Wi-Fi settings allow you manage networks, such
as turn Wi-Fi on and join Wi-Fi networks.
Turn on Wi-Fi: From Main menu choose Settings
Wireless & networksWi-Fi, and tap the other end
next to “OFF”. Then “ON” will appear when you have
turned on the Wi-Fi.
Join a Wi-Fi network: From the detected network list,
select a network, if necessary, enter a password and
tap "Connect" to save the settings for the encrypted
connection and connect to Wi-Fi. (Networks that
require a password appear with a lock icon).
Select “show advanced option” to show more
network control options.
If more than one previously used network is in range,
EVOTAB 4 joins the one last used.
When EVOTAB 4 is connected to a Wi-Fi network, the
Wi-Fi icon at the top of the screen shows connection
strength.
Page 40

Chapter 3 Settings
36
Data usage
This item allows you to enable/disable the mobile data
and set mobile data limit and view the data usage
status.
Data usage
This item allows you to view the data usage status.
Sharing a Data Connection as a Portable Wi-Fi
Hotspot
1. From home screen or Main menu,tap Settings
More portable hotspot.
2. If you select Portable Wi-Fi hotspot to share a data
connection, you can tap Set up Wi-Fi hotspot to
configure portable Wi-Fi hotspots.
More
Tap More to use more wireless network control
including setting Ethernet & Portable hotspot, VPN,
Wi-Fi direct, mobile networks and GPRS transfer
prefer mode.
Airplane Mode
Airplane Mode disables the wireless features of
EVOTAB 4 to comply with airline regulations.
Turn Airplane Mode on or off: From home screen or
Main menu, tap Settings More Airplane Mode.
to turn it on or off.
Using a mobile data connection
Insert a 3G mobile data card into the 3G USB
dongle(not included), and connect the 3G USB dongle
to EVOTAB 4 via the USB cable, then turn EVOTAB 4
tablet on, to enable data access over mobile network,
Page 41

Chapter 3 Settings
37
from Main menu choose Settings
Wireless&networks More Mobile networks
Data enabled, then will appear on the right.
Sound
Customize the sound settings, including the settings
for Volumes, Default notification, Touch sounds,
Screen lock sound.
Display
Customize the display settings, including the settings
for Brightness, Wallpaper, Auto-rotate screen, Sleep,
Font size, Accelerometer coordinate system and
screen adaption, Smart backlight.
Storage
View the memory status of Micro SD card and internal
storage, format internal storage.
Battery
View the battery status of EVOTAB 4.
Apps
Allows you to manage the applications sorted by
Download, On SD card, Running and All.
Accounts & sync
Allows you to add new account and sync all the
accounts.
Location service
Let apps use data from sources such as Wi-Fi and
mobile networks to determine you approximate
location. Moreover, let Google use your location to
improve search results.
Page 42

Chapter 3 Settings
38
Security
Allows you to set Screen security, Encryption,
Passwords, Device administration and Credential
storage.
Language & Input
Set region and language, keyboard, text input
methods, speech, Mouse/Track pad.
Backup & reset
Allows you to backup account, app data, Wi-Fi
passwords, and other settings to Google servers.
Additionally, you can erase all data on EVOTAB 4 and
reboot into the system in Recovery mode.
Date& Time
Set date, time, time zone and display format.
Accessibility
Allows you to install web scripts, set large text,
auto-rotate screen feature, speak passwords, touch
and hold delay.
Developer options
Helps you manage the EVOTAB 4 system, such as
USB debugging, Stay awake, HDCP checking and so
on.
About tablet
Display the information about EVOTAB 4, such as
product status, model number, firmware version, Build
number and so on.
Page 43

Chapter 4 Troubleshooting
39
If the device does not function as it is expected,
please try the following steps.
The device is not responding or can’t be turned
on.
Reset the device by pressing the Power button
for 6 seconds. The device will be forced
shutdown if it is on and you are required to
restart the device again.
Battery has been fully depleted. Please charge
the device via USB or USB AC Adapter.
Battery Life seems short
The operating temperature is below 5℃, this is
due to the characteristics of battery and not a
malfunction.
The battery is not used for prolonged period.
Please recharge the battery of the device again
The battery is not fully charged. Please charge
the device for 4 hours.
The battery needs to be replaced. Please consult
the authorized dealer for service.
The device can not be operated during USB
connection
The device cannot be operated while it is
connected to PC.
At status bar, flick upwards to display a Ongoing
list, then select “Turn off USB storage” to
resume operation.
21
Page 44

Chapter 5 Appendix
40
Maintenance
If Tablet PC does get wet, turn off Tablet PC
immediately. Wait for Tablet PC to dry
completely before turning on again.
Clean the screen with a soft cloth; be careful not
to wipe it with anything abrasive. When carrying
your Tablet PC in bag, keep Tablet PC in the
protecting case supplied to avoid scratches.
If Tablet PC needs service, please consult the
authorized dealer through the contact information
provided in the warranty card. Faulty service may
void the warranty.
Product Specifications
Display
7 inch TFT-LCD Display, 800x480 pixels
High resolution capactive multi-touch screen
Wifi
802.11 b/g
System Properties
Processor :A13
Architecture :ARM Cortex A8 (1GHz)
RAM Memory :DDR3 512M
Operating System:Android 4.04
Page 45

Chapter 5 Appendix
41
Storage memory
Built in memory: 4 GBGB
Supports Micro SD card up to 32GB.
Media File Format supported
Audio: MP3, WMA, APE, FLAC, AAC, WAV, OGG
Photo: JPG, PNG, BMP, GIF, TIF
Video: Support up to HD2160P: AVI, MPG, MKV, RM,
RMVB, MP4, MOV, VOB, DAT, FLV, TS, 3GP, WEBM
(VP8) etc. 1080P decoder
Connectivity
Data transfer: Micro USB 2.0 High Speed, USB
dongle
Audio: 3.5mm audio jack
Record : Microphone
Storage: Micro SD Card
Miscellaneous
Built in speaker
G sensor
Web Camera (0.3 million pixel)
Voice recording
Vibration actuator
Clock / Date
Real time battery indication
Battery life
Reading – more than 6.5 hours
Music – up to 10 hours( with backlight off)
Video- more than 5.5 hours
Web browsing : more than 4.5 hours
Standby time : 7 days
Page 46

Chapter 5 Appendix
42
Charging
Power: DC 5.0V, 1.5A
Duration: 4 hours (approx)
Physical properties
Dimension: 182.4*121.8*11.2mm
Weight: 299g (approx)
※ Design and specifications are subject to change
without prior notice
Certification information
On FCC
This equipment has been tested and found to comply
with limits for a Class B digital device, pursuant to Part
15 of the FCC rules. These limits are designed to
provide reasonable protection against harmful
interference in residential installations.This equipment
generates, uses, and can radiate radio frequency
energy, and if not installed and used in accordance
with the instructions, may cause harmful interference
to radio communications. However, there is no
guarantee that interference will not occur in a
particular installation.
If this equipment does cause harmful interference to
radio or television reception, which can be determined
by turning the equipment off and on, the user is
encouraged to try to correct the interference by one or
more of the following measures:
Reorient or relocate the receiving antenna.
Increase the separation between the equipment
and receiver.
Page 47
Chapter 5 Appendix
43
Connect the equipment into an outlet on a circuit
different from that to which the receiver is
connected.
Consult the dealer or an experienced radio/TV
technician for help.
WARNING: THE MANUFACTURER IS NOT RESPONSIBLE
FOR ANY RADIO OR TV INTERFERENCE CAUSED BY
UNAUTHORIZED MODIFICATIONS TO THE DEVICE. ANY
SUCH MODIFICATIONS COULD VOID THE USER'S
AUTHORITY TO OPERATE THE EQUIPMENT.
On CE
The symbol means that the unit complies with
European safety and electrical interference directives.
Copyrights and Trademark Notice
Copyright laws prohibit copying the data of this
product or the contents of this manual (illustrations,
related documents, etc.) in whole or in part without the
permission of the copyright holder. Additionally, use of
the data of this product or the contents of this manual
is not allowed without vendor’s permission except for
personal use.
All the brand and product names are trademarks of
their respective companies.
Page 48
Chapter 5 Appendix
44
Disposal and Recycling Information
Your Tablet PC must be disposed of properly
according to local laws and regulations.
Because this product contains a battery, the product
must be disposed of separately from household waste.
When your Tablet PC reaches its end of life, contact
your local authorities to learn about recycling options.
Battery Replacement:
The rechargeable battery in it should be replaced only
by an authorized service provider.
This symbol on the product or in the instruction
means that your electrical or electric equipment
should be disposed at the end of its life separately
from your household waste. There are separate
collection systems for recycling in the EU,For more
information, please contact the local authority or your
retailer where you purchased the product.
Disclaimer
All the information, design and specifications
contained in this manual were correct at the time of
publication. However, as the product is under
continuously upgrading, the final device may have a
slightly difference in appearance or modified
functionality than presented in this manual.
 Loading...