

Page 1
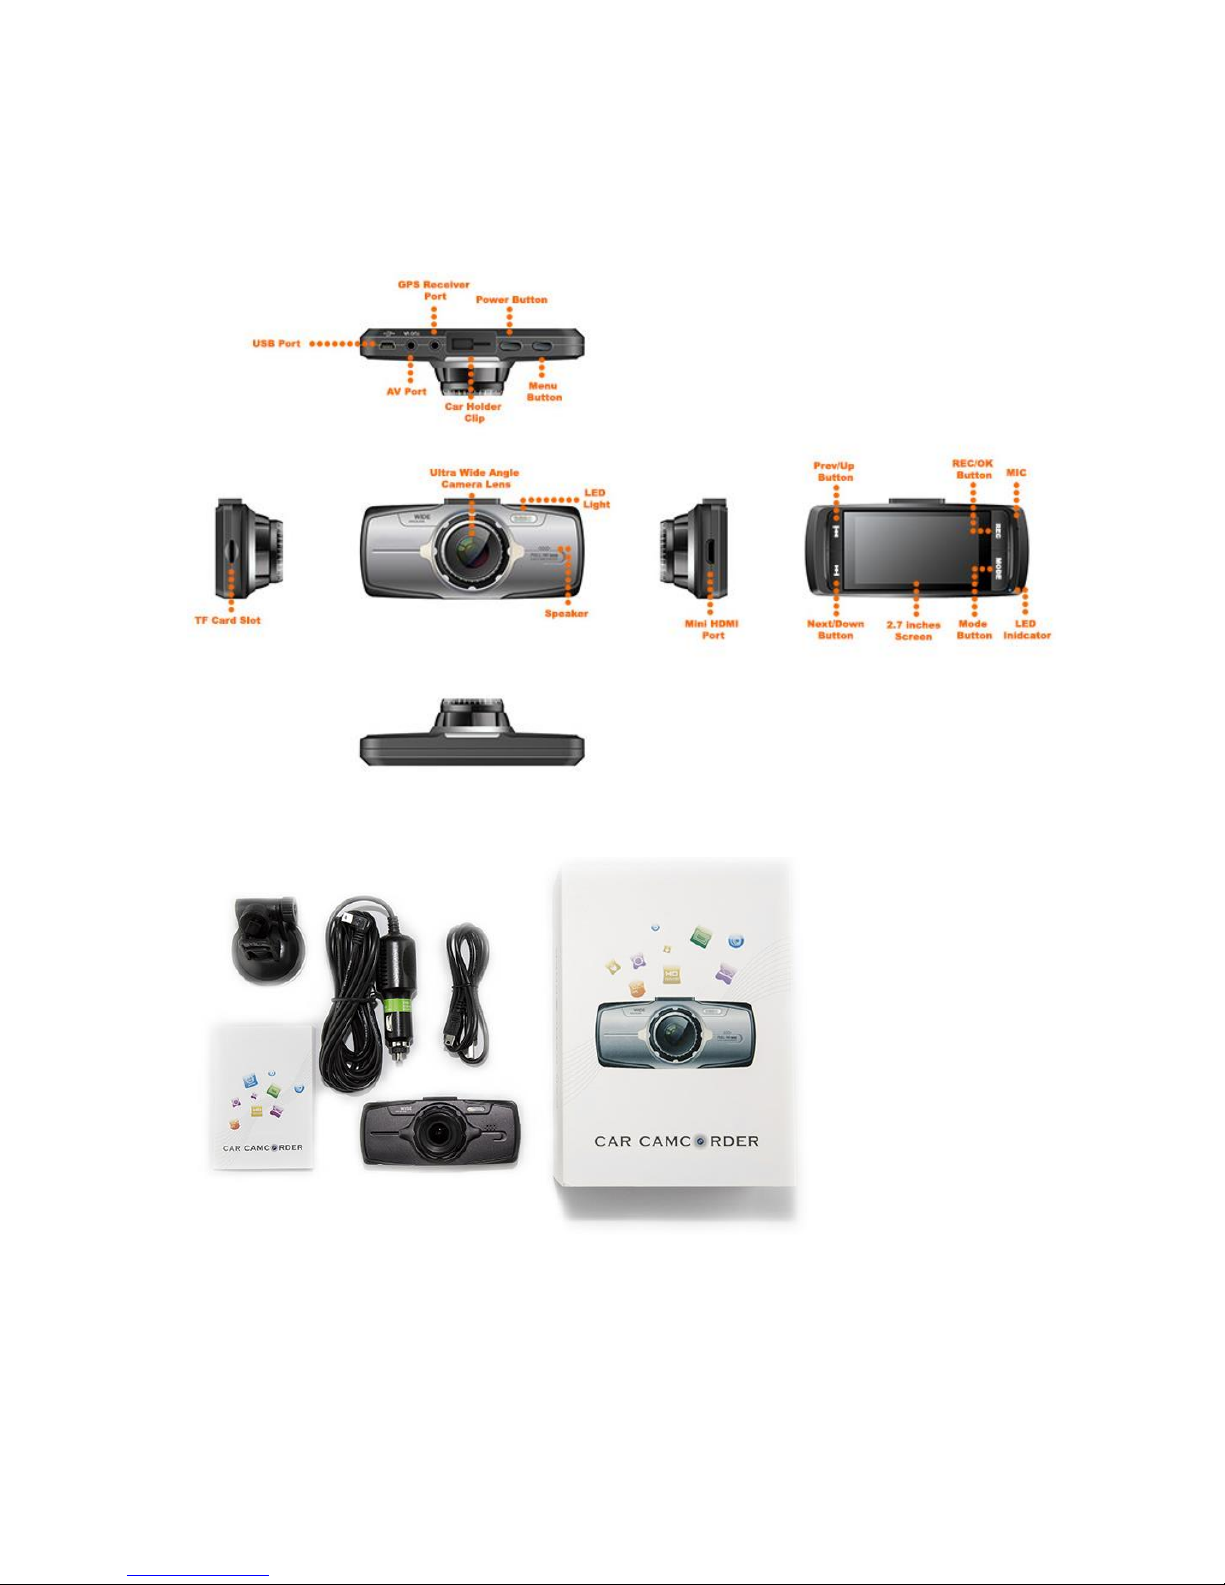
EG33-Quick Start Guide
What’s in the package?
Initial set up:
Page 2
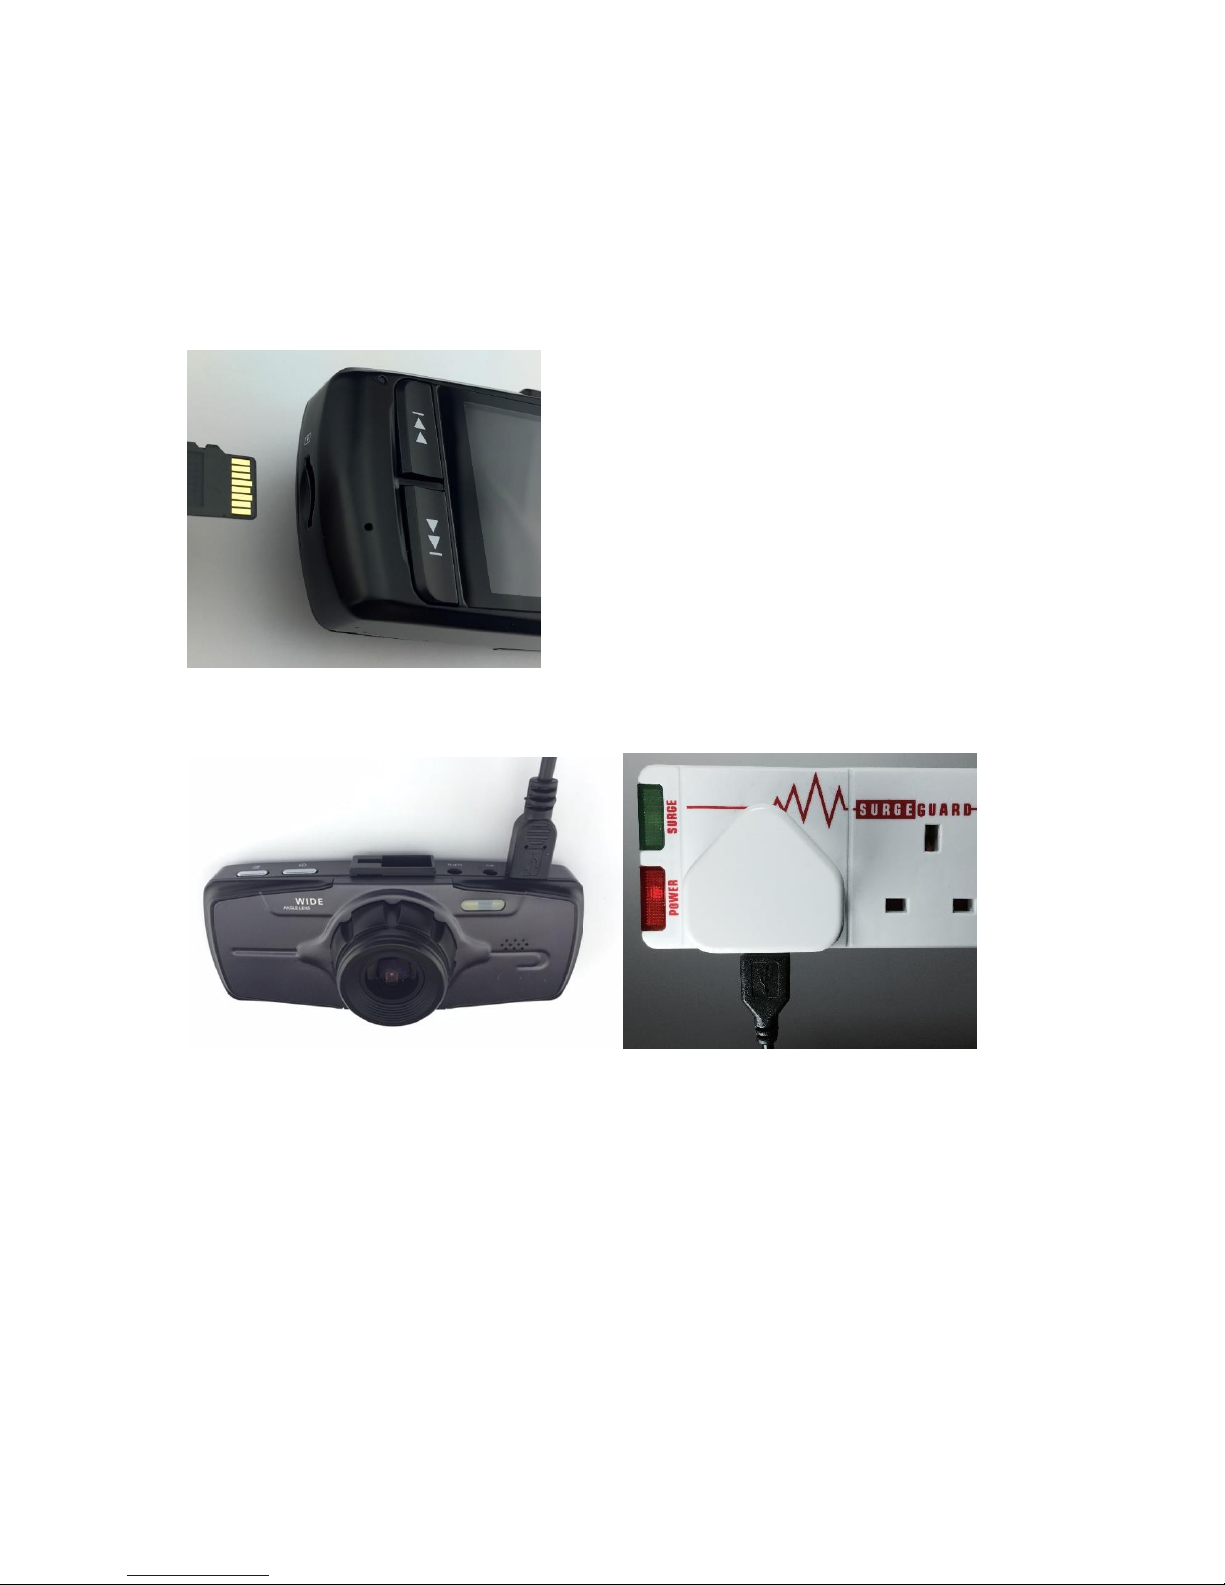
The device uses a TF (Micro SD) memory card, maximum size allowed is
32GB.
*Make sure the memory card is empty first time use.
Insert the Memory Card into the card slot:
If you have a USB power socket, connect the device to a USB Power
Socket to power up the device. (Socket is not provided with the purchase):
If you do not have a USB power socket, connect the device to the Car
Cigarette lighter to power the device (remember to turn on the car
ignition):
Page 3
* When the device is connected to USB charging cable or Cigarette Lighter, the camera will
switched on automatically, and will start recording if the memory card is inserted.
* Please press OK button to stop the recording.
Basic Configuration – when device is powered on, press menu button to
enter the configuration menu. Carry out below basic configuration:
If the Memory card is inserted, the device will start recording when connect
to a USB power cable.
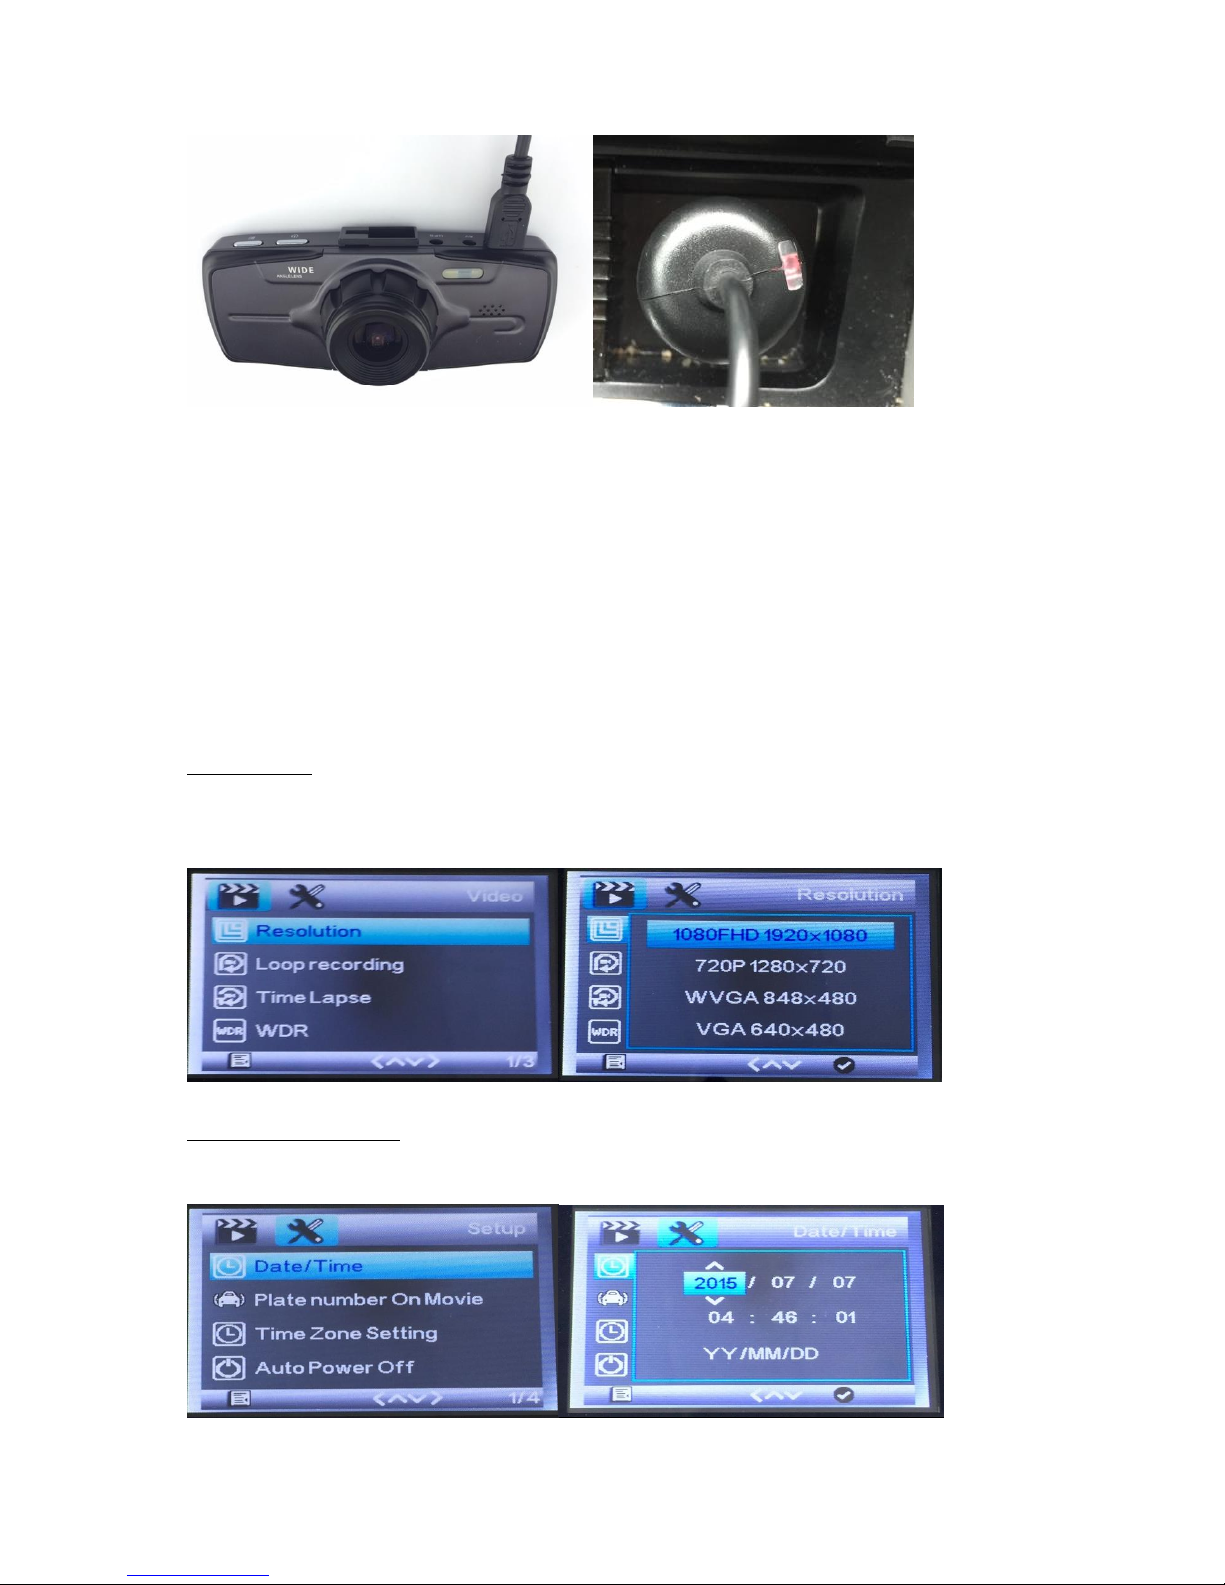
Resolution – to select the recording resolution
Press Menu Button —> Down Button —> Resolution.
Setting Date/Time:
Press Menu Button twice —> Down Button -> Date/Time
Operation:
Page 4
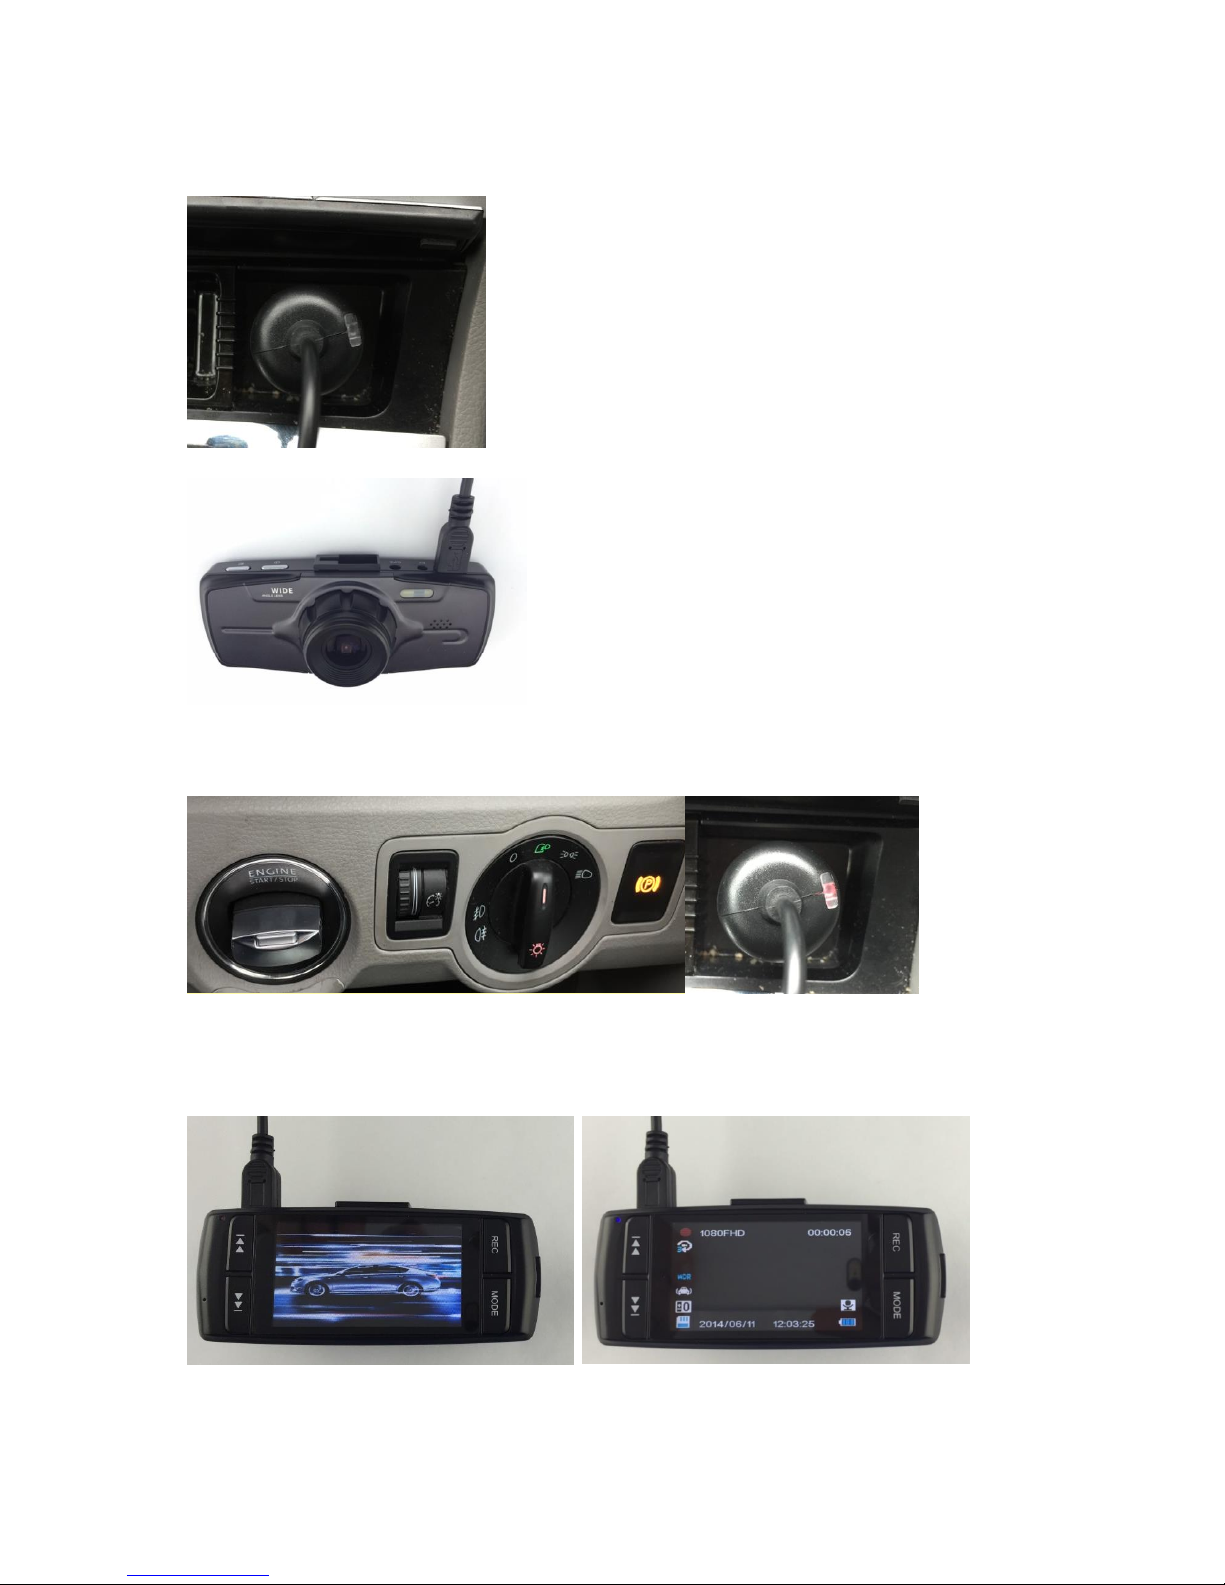
Connect the cigarette light charger into the cigarette lighter slot.
Connect the charging cable to the camera.
Turn on the Ignition, cigarette lighter start to supply power (you can see
camera car charger red indicator will lights up.)
Camera will turn on automatically and will start recording in default,
unless you have disable this
Page 5

When your switch off the ignition, cigarette lighter will
stop supplying power, the device will detect this and automatically stop the
recording and switch itself off.
Operation quick tips:
While recording, you can press OK button to stop recording, and
Press it again to start recording.
When the camera is powered, Press and hold the power button will
switch off the camera, the camera will stop recording when it
switched off. When the camera is switched off, press the power
button will switch on the camera.
While Recording:
Pressing Up button will zoom-in
Pressing Down button can zoom out, if it reach the maximum zoom
out, press down button will disable audio recording, press again will
enable audio recording.
Press Menu button can lock the current recording file.
Press OK button will stop recording, press it again will start
recording.
Change device Mode (Press and Hold the Menu Button):
While the device is not in the recording mode. Press and hold the Menu
button will change the device mode, there are three mode: Video/Standby
mode, Photo/Camera Mode and Playback mode. Here is the detail:
From Video/Standby Mode (when you start the device)
Press and hold the Menu button will switch to Photo/Camera mode, this
mode allow you to take still photos.
Under this mode, press the OK button to take still photos. You can
press the up and down button to zoom in and zoom out. Press the
menu button can change photo setting.
Page 6
Press and hold the Menu button from the Photo mode will switch to
playback mode, you can playback all the recorded Video or preview all the
taken photo.
Up/Down button to navigate among videos/photos.
Pressing the menu button, you can Delete/Protect the selected
video/photo or do slide show (video will slideshow as photos)
Pressing the OK button to select the video/photo file, once you have
selected the video file press OK button you can playback the video.
From Video Playback mode, press and hold the Menu button will go back to
Video/Standby mode.
Connect to a PC:
Please make sure that your device is fully charged because you connect
the device to a PC via USB cable.
Device allow you to a PC direct via a USB cable to transfer the videos.
When it connect the device will be recognise as a MSD (Mass Storage
Drive) in your PC and you can browse the video file like a hard drive.
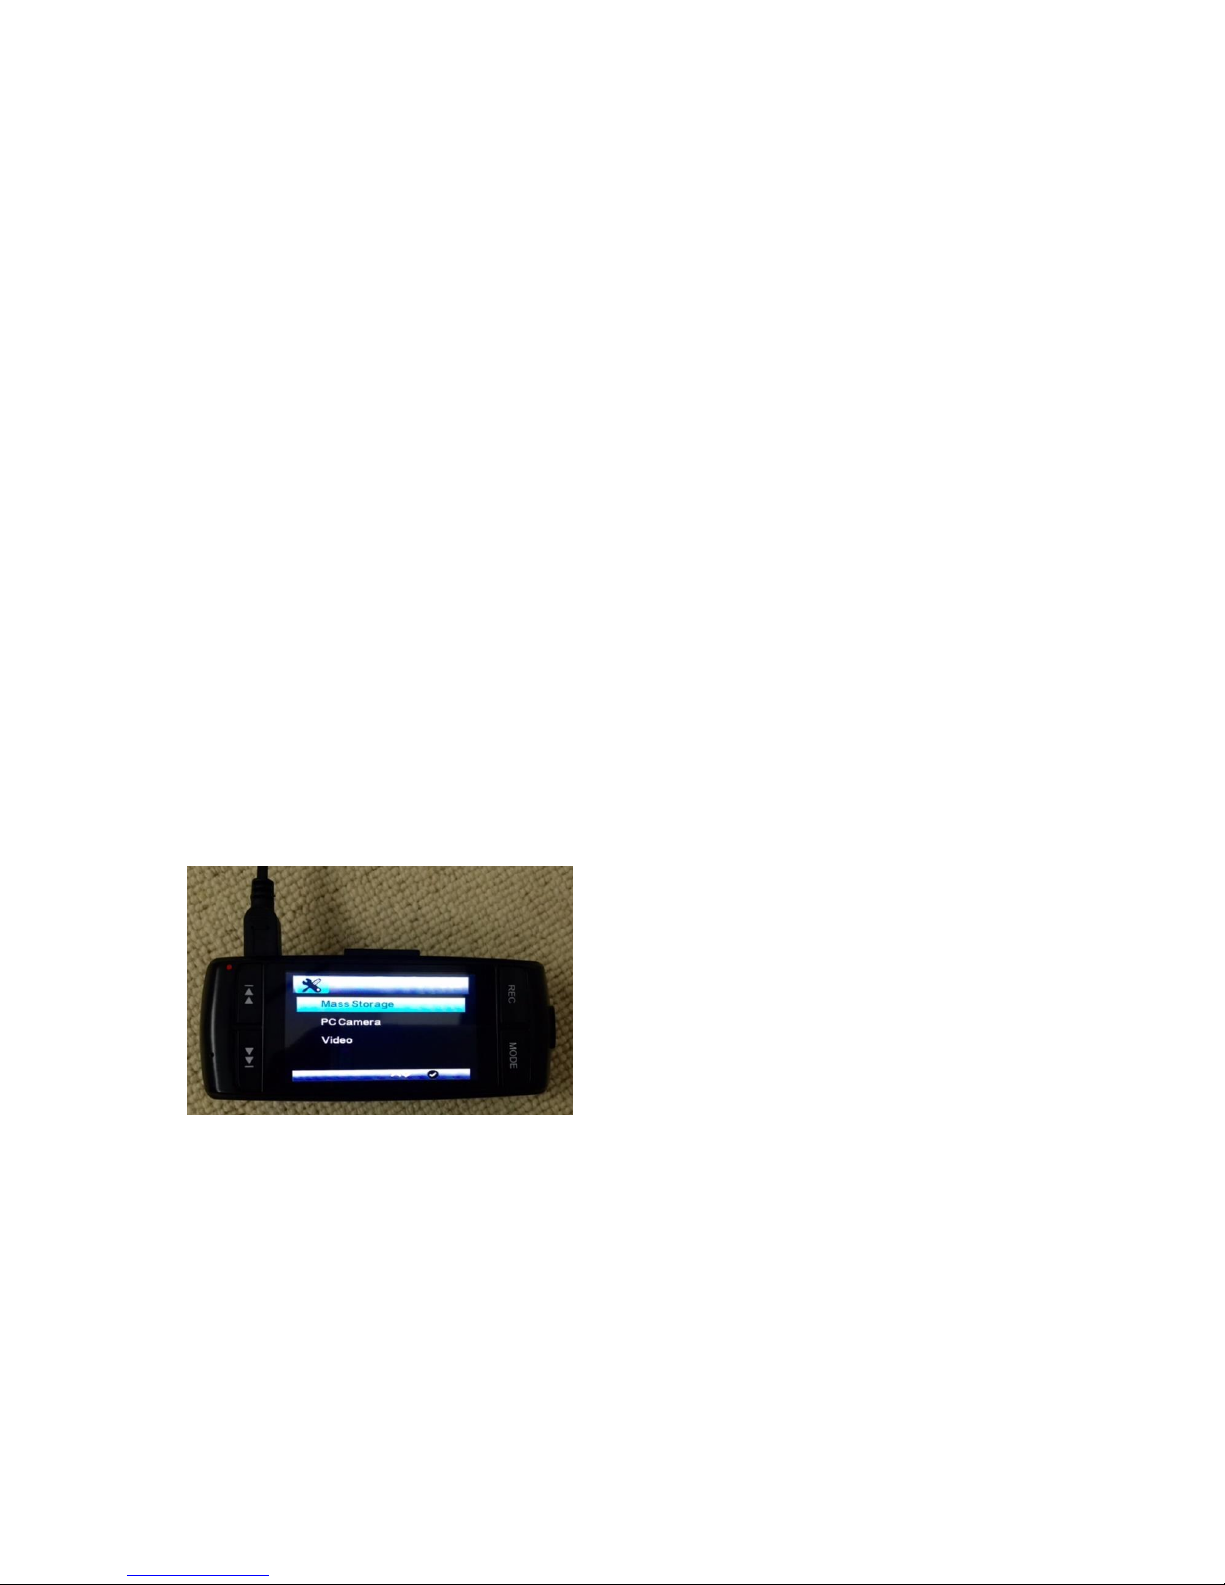
When connect to the PC, please select Mass Storage option. (Other options
are reserve for future functionality only)
LED Indicator:
Solid red indicates power source is connected, and the device is charging
the temporary battery, when the temporary battery is fully charged, the
red indicator will be turned off.
Solid blue indicates the device is switch on.
Page 7

Flashing blue indicates the device is in recording mode.
You will normally see both solid red and flashing blue, this mean the device
is in recording mode and the device is charging the temporary battery.
Quick tips on the setting:
Resolution: This options allows you to select the resolution for the recording video
Loop recording: This option allows you to choose the time length for each of the recording
video.
Time Lapse: This option allow the device to record in a low FPS to create the time lapse
affect.
WDR: This is manufacture technology enable the camera to have better recording quality in
day and night, please enable this option.
Motion Detection: This option allows the device to only record a video if there is a movement
detected.
Power off delay: please set this option to off.
Power on delay: This option allows device to wait for certain time to switch on the device
after user press the power button to turn on the device.
Record Audio: You can enable/disable the audio recording for the video.
Date Stamp: You can enable/disable the device to display the date stamp on the video.
GSENSOR SET: This option allows you to set the sensitive level of the GSENSOR.
Date/Time: set the date/time
Plate number On Movie: You can set a number plate to be display on the video,
current version only support 8 digits
Time Zone Setting: This option allow you to set the time zone setting.
Auto Power Off: You can set the auto power off time when the device is idle (not recording)
Beep sound: You can enable/disable the beep sound.
Language: This option allows you to select the available menu language
TV Mode: This option allows you to change the TV output mode "NTSC/PAL"
Frequency: This option allows you to change the display frequency “50Hz/60Hz"
Exposure: This option allows you to set the exposure
White Balance: This option allows you to select the white balance.
Format: This option allows you to format the TF card
Default Setting: This option allows you to go back to default setting
Image Rotation: This option allow you to rotate the recording image.
Version: This option shows the current firmware version
Page 8

Important:
Battery On the device - Please be advised the battery that is installed in the device is for
saving the device setting only and it is not designed for Standalone recording. The device
will need to always connect to a power source for it to function.
Video playback on a Windows PC or MAC. Because there is some version of Window/MAC
does not in default support the video format that the device created. We have recommend
to install a free video player called VLC player all you to play the video. Download Link is
“http://www.videolan.org/”
Laptop USB port cannot be used for charging the device, it does not have enough current to
charge up the device.
If you are connecting the device to your PC or MAC with a USB cable to copy the video
directly from the device, please make sure the device is fully charged before connecting,
otherwise the device will keep rebooting because the electric current from the PC or MAC
USB port is not enough to power the device. Battery icon on the device screen indicates
the % of the battery charged.
 Loading...