

Page 1
ConnectLED
Reference Guide
Android Tablet v2.2
PN 100478-001 Rev A02 © Evluma
Page 2

Contents
Introduction 1
New Site License 2
Upgrading v2.1 to v2.2 2
Android Tablet Overview & General Operation 3
To Turn on the Tablet... 3
Navigation Bar... 3
To Turn Off the Tablet... 3
To Initialize ConnectLED GPS ... 3
To Connect to a WiFi Source... 4
To Start Google Maps... 4
To Turn Off ConnectLED... 4
System Updates... 4
App Updates... 4
ConnectLED Operation Overview 5
Licenses and Security 5
User License Types... 5
License Renewals... 5
Functionality Overview 6
To Start ConnectLED... 6
Find Lamps 6
Fautlcast™... 7
The CONNECTION screen 7
The Confi g Screen - BASIC license 8
The Confi g Screen - ENTERPRISE & PROMO license 8
Lamp Owner... 8
Model... 9
Serial Number... 9
Software Version... 9
Page 3

Lamp Mode (Failsafe/Classic)... 9
Maximum Intensity ... 9
Connected? (Yes/No)... 9
Location... 9
Time Zone ... 10
Observe DST? (Yes/No)... 10
Dimming Schedule (None/Show)... 10
Remove All Dimming... 11
Utility Data 1 & Utility Data 2... 11
Miscellaneous Functions 11
Profi le... 11
User Agreement ... 11
System Info ... 11
Sign Out... 11
View Event History 12
Pause/Resume... 12
Save/Send... 12
ConnectLED.csv... 12
Send to Evluma 12
Common Tasks 13
How to Connect to WiFi... 13
How to Disconnect AreaMax or OmniMax... 13
How to Connect AreaMax or OmniMax... 14
How to Set the Maximum Intensity ... 15
How to Set a Dimming Schedule... 15
Troubleshooting 16
For More Information 18
Page 4

Page 5

1
Introduction
ConnectLED™ is a software application that communicates with the Evluma
AreaMax™ LED luminaire for street and area lighting, and the OmniMax™
decorative luminaire retrofi t via BLE (Bluetooth Low Energy). ConnectLED
operates up to 150 feet from the luminaire. The app is available on Google
Play.
The following functionality is available in Android Tablet v2.2:
• connect and disconnect the lamp from service
• view lamp status and set confi guration parameters
• set up to 4 custom dimming schedules with individual brightness levels
• set overall maximum brightness
• create custom data fi elds.
ConnectLED reads FaultCast™ status transmissions from both the AreaMax
and the OmniMax and verifi es Photocontrol Failsafe™ conditions. ConnectLED
is also available for Windows 7, 8.1 and 10 laptops and for Apple iOS 8 or
higher. Please contact Evluma for more information or see www.evluma.com.
Compatible Android T ablets
V2.2 is compatible with most devices with a 7 inch or larger screen running
Android OS version 4.4(KitKat) and above, including models by Asus,
Lenovo, Nextbook, Sony, Panasonic, Toshiba and the Samsung Galaxy Tab
series. Evluma has tested the following devices and can recommend them for
purchase:
Samsung Galaxy Tab S2 (8”)
Asus ZenPad (7”)
Evluma lamps use a Bluetooth low energy profi le and not all tablets are
guaranteed to be confi gured to work with all Bluetooth profi les. Tablets
provided by Evluma during the 2016 v2.1 release are compatible with v2.2.
Uninstall any earlier version of ConnectLED prior to installing v2.2. A tablet
is not included with the v2.2 release. ConnectLED Android is not compatible
with Android phones.
Page 6
2
New Site License
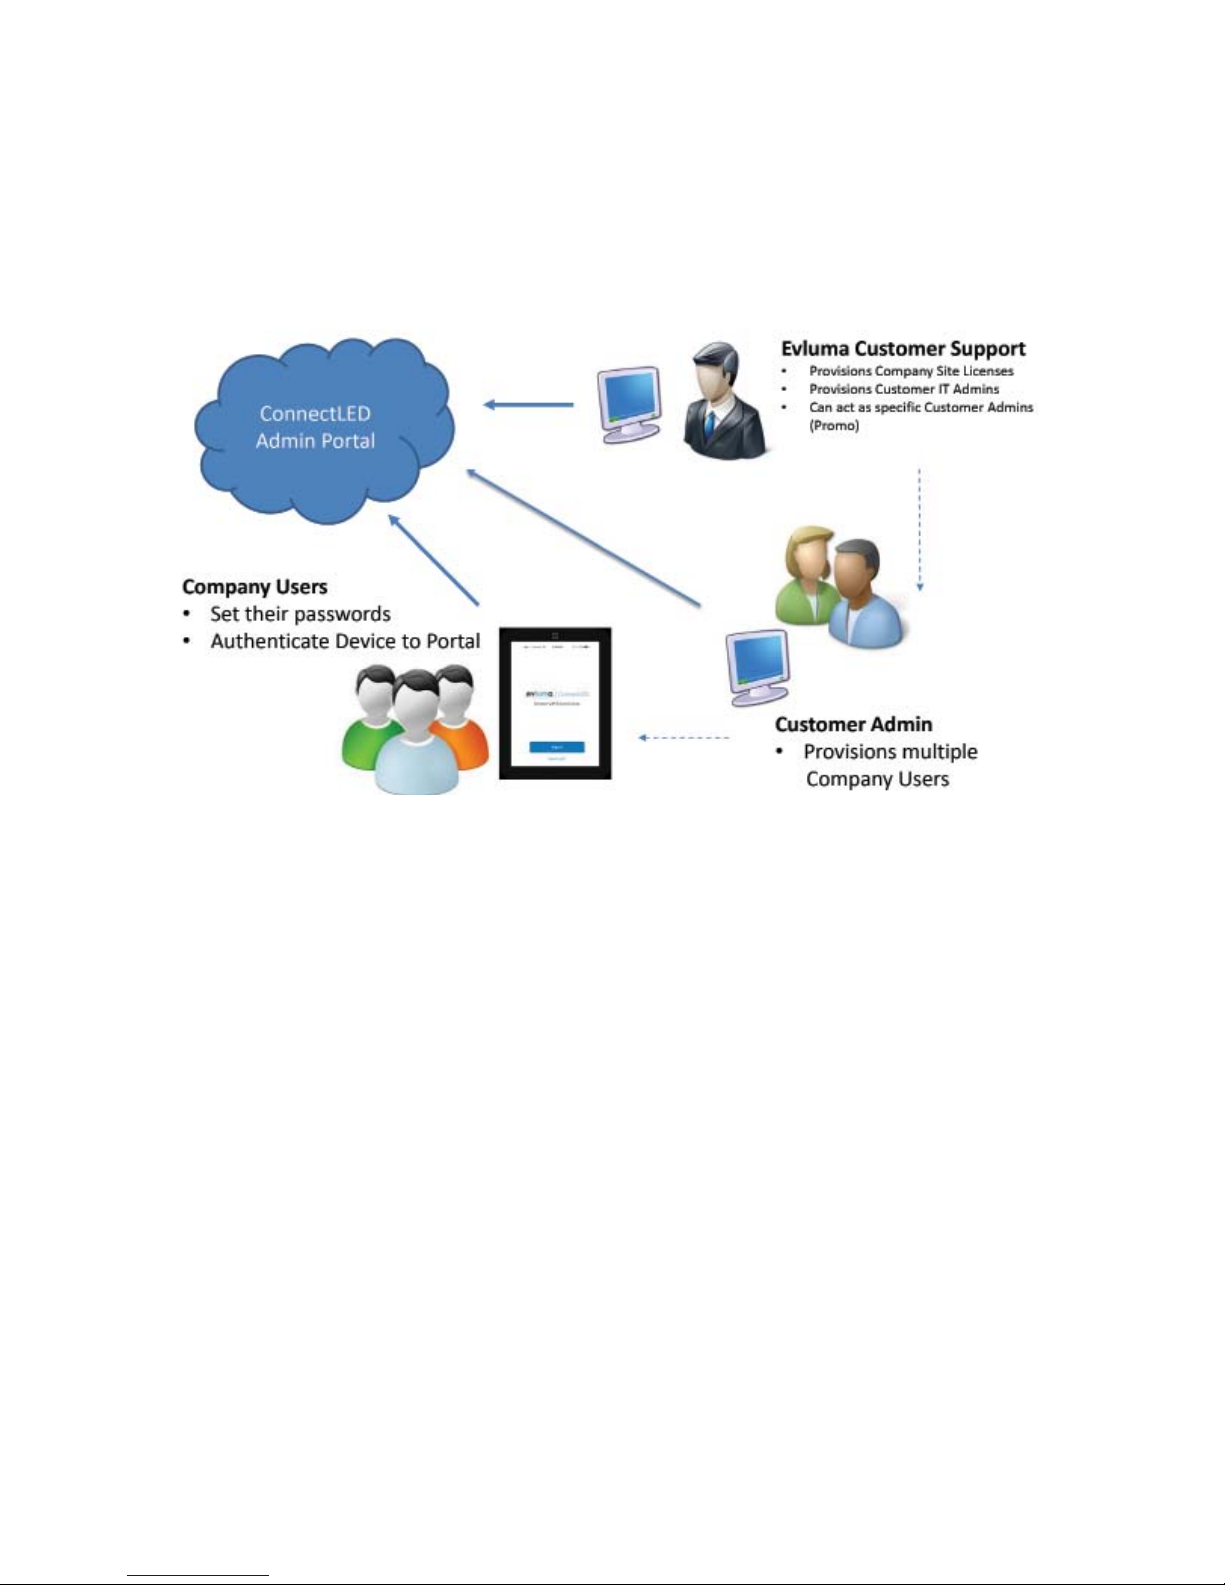
ConnectLED Android v2.2 is offered as a single Site license under which
multiple Users are provisioned. All Users are provisioned and managed
through the ConnectLED Admin Portal (CAP) by the Company IT Admin.
The Company IT Admin is assigned when a license is ordered from Evluma.
CAP portal link: https://connectled.evluma.com/#/login
The number of BASIC and ENTERPRISE User types is indicated at the time
the Site license is ordered from Evluma. The Company IT Admin then assigns
the pre-ordered license types to the Users in the ConnectLED portal. To set
their password, Users follow instructions sent in an email from “NoReply@
evluma.com. After setting password, Users then log on through the app. For
more details see the ConnectLED Customer Admin Guide on evluma.com/
connectled.
Upgrading v2.1 to v2.2
Uninstall ConnectLED from your tablet prior to installing the new version
from the Google Play Store.
Companies licensed to use ConnectLED Android v2.1 can upgrade to v2.2 by
contacting Evluma Customer Support. With v2.1 Evluma provided a factoryprovisioned tablet with ConnectLED installed and the license was associated
with the specifi c Android device. Android v2.2 is available on the Google
Play Store and may be downloaded and installed on any Android tablet with
a 7 inch or larger screen. The license structure has changed from individual,
device-specifi c licensing to a Site license managed by your IT Admin.
Overview of ConnectLED Licence Management.
Page 7
3
Android Tablet Overview & General Operation
ConnectLED Android v2.2 works on Android tablets with a 7 inch or larger
screen. Charge the tablet and connect to the Internet prior to use. See the user
guide from the tablet manufacturer for more specifi c instructions.
To Turn on the Tablet
Press and release the smaller On/Off button on the right-hand side of the
tablet. When you fi rst power the tablet on, the Lock screen should appear.
Swipe the screen to the left to unlock it, revealing the Home screen.
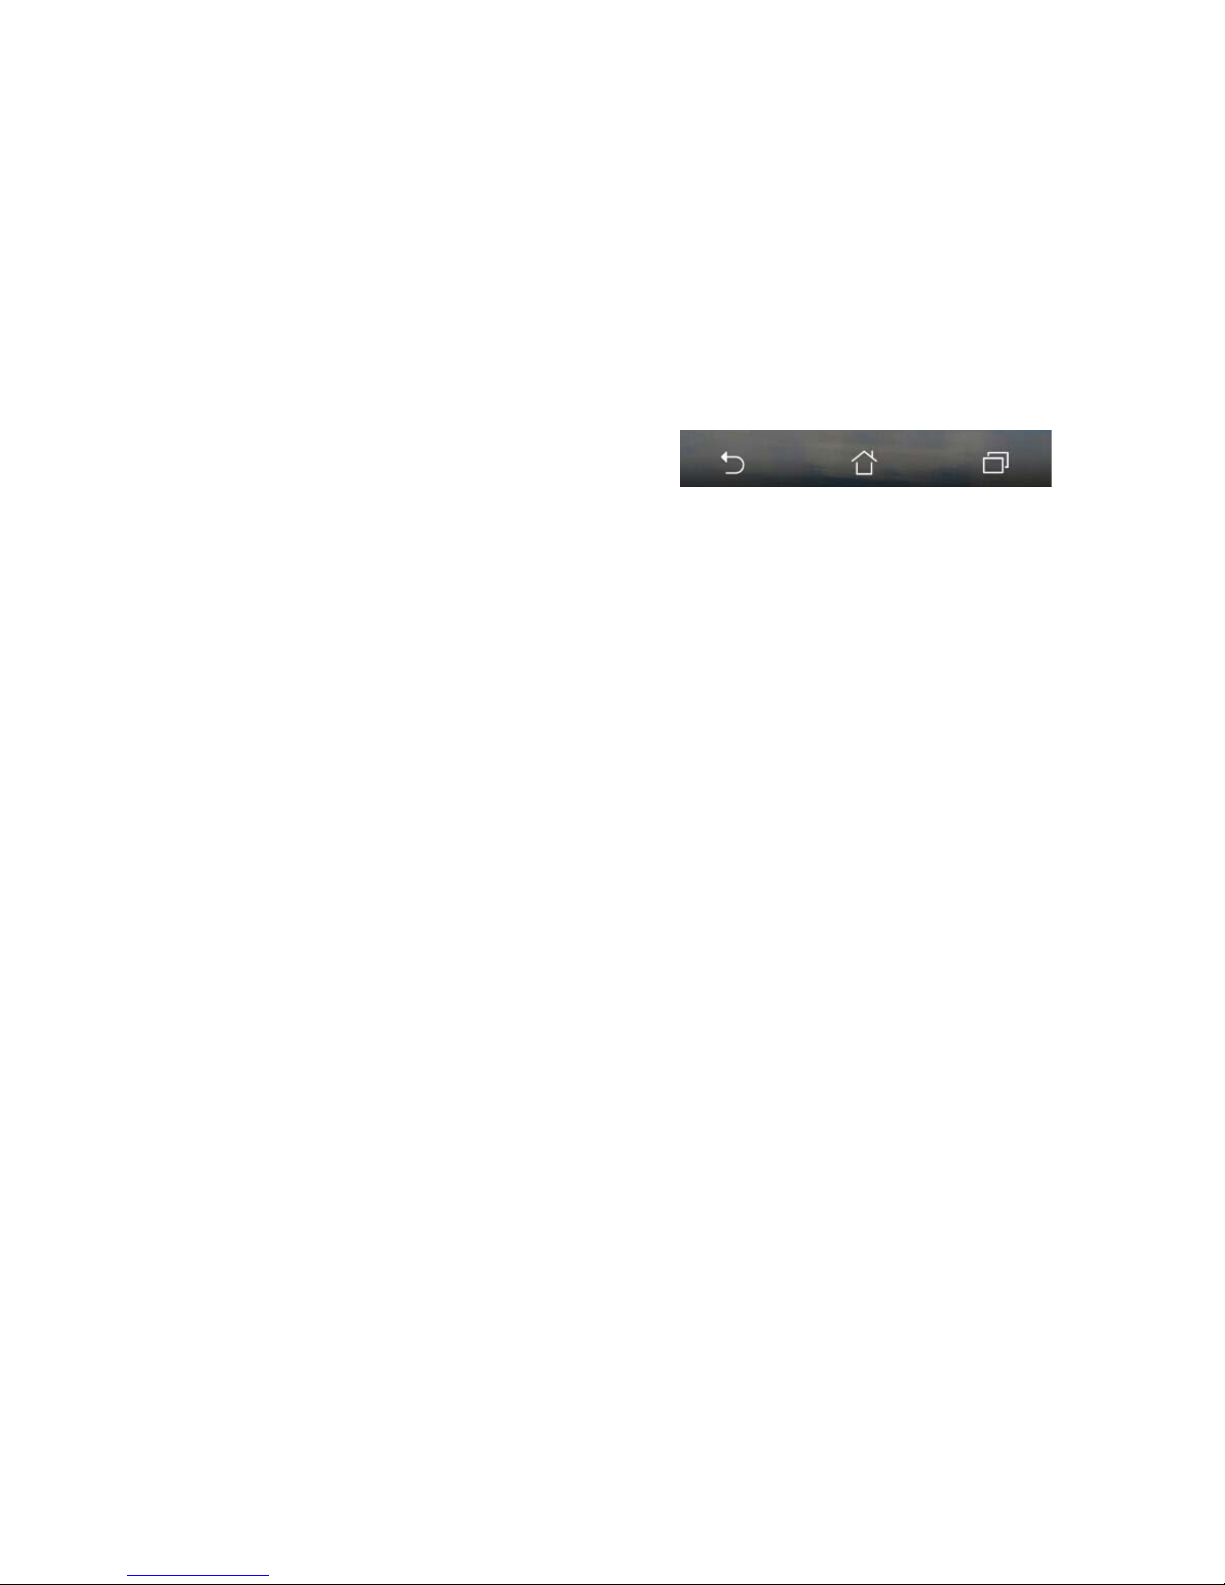
Navigation Bar
Three buttons appear at the bottom of the
screen as shown. They are Back, Home and
Active Program List.
The center button is Home. Press to return to the Home screen. The Home
screen toolbar contains the featured programs installed on the device.
Touching an icon will open that program. Above the Home button is a small
array of six boxes. Touch to view all the applications available on the device.
The Back button is on the left. Press to return to the previous screen
when inside an operation. Pressing Back may be required to end a current
operation.
The Active Program List button is on the right. This is a list of current
programs being used and allows a quick way to switch between applications.
The Active Program List also provides a means of terminating a program if it
hangs or becomes unresponsive. Swiping an application to the left will close it.
To Turn Off the Tablet
To power the device off, press and hold the On/Off button. Follow the prompt.
To Initialize ConnectLED GPS - WiFi/Google Maps
Initialize ConnectLED over WiFi and run Google Maps before you use the
tablet. If operating a new tablet, or an Evluma factory provisioned tablet
(v2.1), verify that the tablet location has been updated from the factory
default and refl ects your true location.
Setting luminaire location with ConnectLED is optional. The factory settings
for latitude and longitude for the luminaire are the baseline for Photocontrol
Failsafe calibration. After three weeks at the installed location Photocontrol
Failsafe has received enough dusk-till-dawn data to make in situ refi nements.
See also, the
Confi g screen, Location. For more information on Photocontrol
Failsafe see TB20121214.2.
The Navigation Bar
Page 8
4
Recommended Practice: Initialize ConnectLED GPS prior to heading out
in the fi eld as there may not be an accessible WiFi hotspot at the pole. If there
is no WiFi hotspot at the pole and you are attempting to set the location of the
luminaire, ConnectLED will use the last known GPS location of the tablet
when installing a lamp. Keep the tablet charged.
To Connect to a WiFi Source
Touch the Settings icon to open the Settings screen. At the top of the Settings
screen touch the WiFi toggle to turn it to the On position. Select the account
you wish to use and follow the password prompt. Once you have successfully
connected to a WiFi source, touch the Home button to return to the Home
screen. See How to Connect to WiFi on your Android Tablet.
To Start Google Maps
Touch the Google Maps icon to open Google Maps. You will see a map
with your current location indicated. You have successfully initialized
ConnectLED GPS and enabled it to retrieve the current GPS location of
tablet.
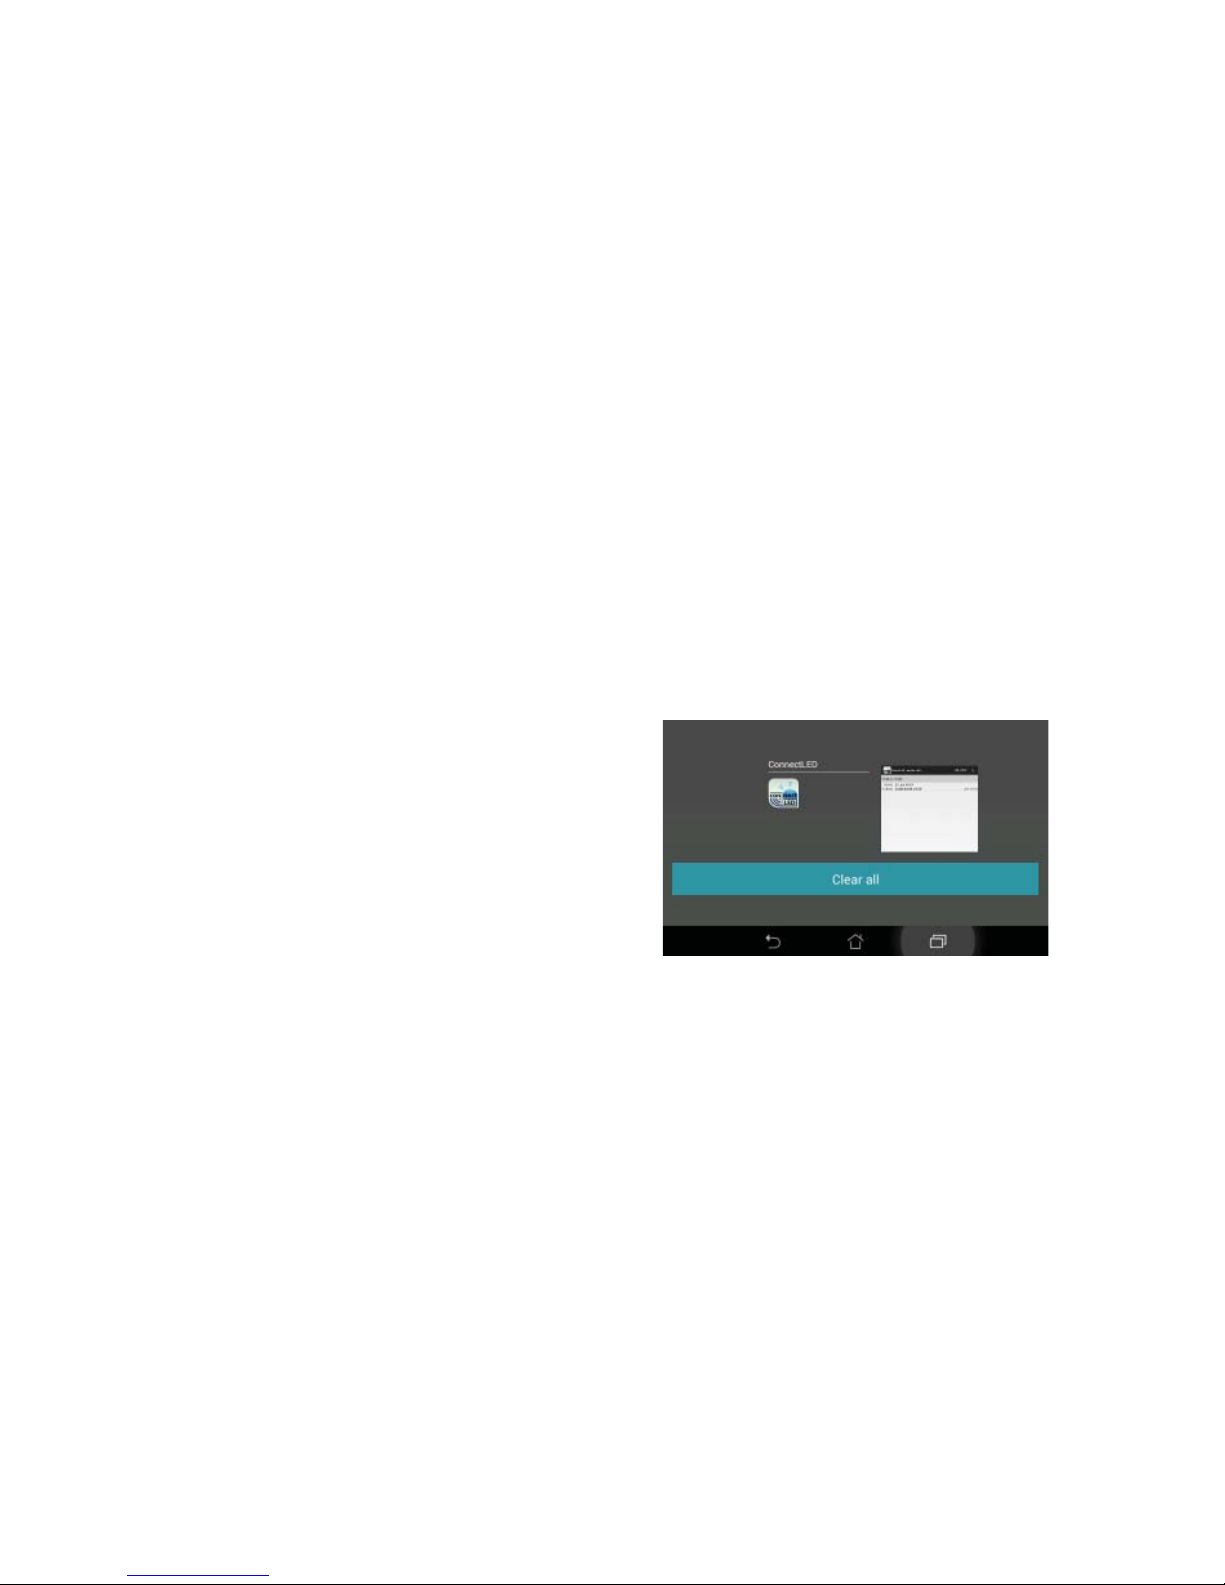
To Turn Off ConnectLED
To turn off ConnectLED, touch the
Active Programs button and swipe the
ConnectLED application to the right. You
may also press the Clear All button.
System Updates
Android will periodically release updates
for your tablet. These updates are
unrelated to ConnectLED but are part of
the standard operation of the tablet. The tablet will receive an alert message
letting you know an update is available. Updates require WiFi and can take
time to download and install.
Recommended Practice: Periodically check for and install updates in
advance of operation to avoid connectivity delays. You can manually check for
updates. In Settings, choose About. If there is a new update available you may
choose to Cancel, Postpone or Install. Installs typically take 10 minutes.
App Updates
Should there be any updates issued for ConnectLED v2.2 they will be
delivered to your device directly through the Play Store. You will receive an
alert message that an update is available or that the app was updated. Evluma
may issue updates to add new features or improve functionality.
Open Applications List. Swipe right to clear.
Page 9
5
ConnectLED Operation Overview
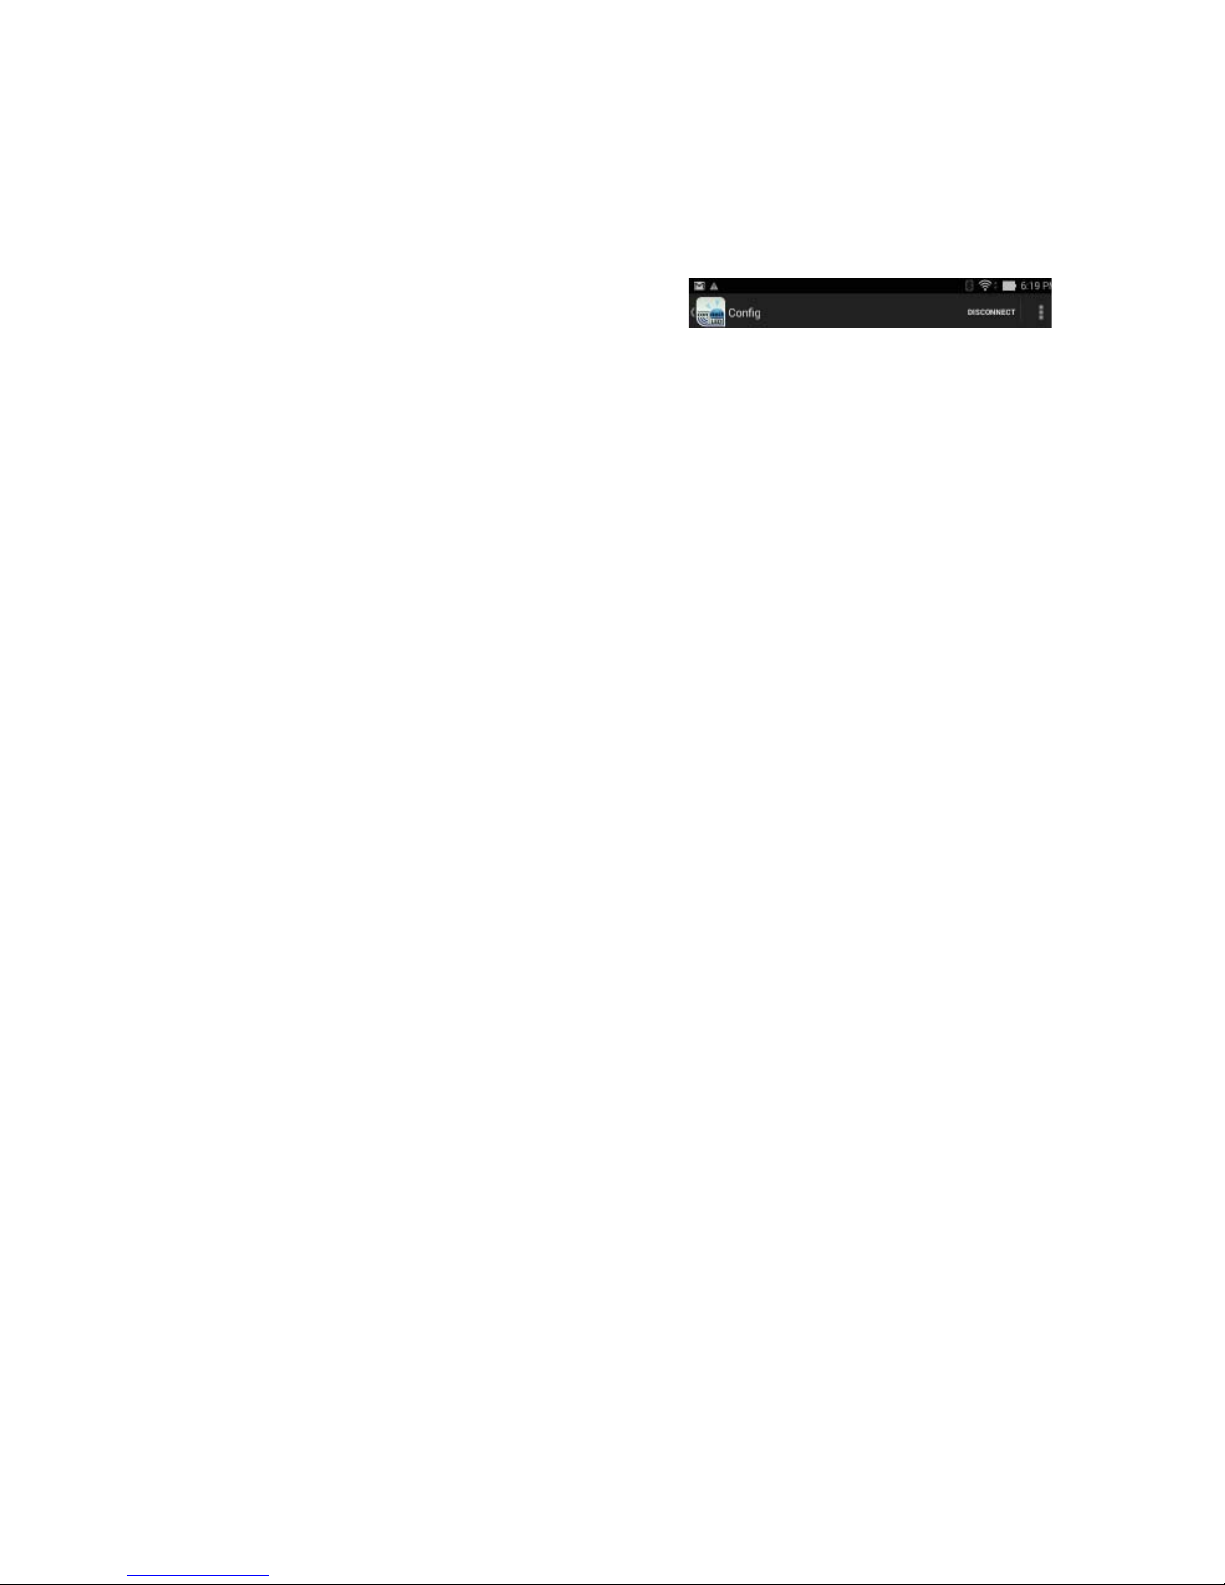
FIND LAMPS is the main screen. It displays all lamps within range of the
tablet. Select a lamp to initiate a secure connection to the lamp. Once
connected, you may view or change the operating confi guration of the lamp
in the Confi g screen.
The ConnectLED logo and screen name
appears on the left of the action bar . In the
example provided, the screen name is
Confi g. Touch the logo to return to the FIND LAMPS screen at any time.
The 3 vertical squares to the right mean “more actions” and provide additional
commands if available. See
Miscellaneous Functions for more information.
Licenses and Security
Customers are issued a unique Site license for a registered number of BASIC
or ENTERPRISE User types. The Site license is managed by the Customer
IT Admin. The User license type controls the functionality available within
ConnectLED.
When ConnectLED fi rst connects to an Evluma lamp the unique customer
Site license assignment takes ownership of an Evluma lamp, becoming the
Lamp Owner, regardless of the User type.
User License Types
There are three types of User licenses available for ConnectLED: BASIC,
ENTERPRISE and PROMO. The BASIC license has restricted functionality;
ENTERPRISE has full functionality. A BASIC license allows you to Connect
and Disconnect an unlimited number of Evluma lamps from service, send
event history and system information to Evluma with an RMA, and view
lamp information. Additionally, a User with an ENTERPRISE license type
may set Dimming and Maximum Brightness.
A PROMO license provides full functionality to a restricted number of lamps.
Evluma is the IT Admin for all PROMO licenses as a PROMO license is
limited to the individual performing the evaluation and may be installed on
a personal device. Once a PROMO license is upgraded to a Site license, the
Company IT Admin manages the license, User types and all devices.
License Renewals
Your license may have a time limit. ConnectLED will notify you when your
license is about to expire. All PROMO licenses have an expiration period
as indicated when the application starts. Should you wish to extend your
license, please contact Evluma Customer Support.
The Action Bar
Page 10
6
License Expiration Alerts
Upon your fi rst log on to the tablet you will be notifi ed of any pending
license expiration. You will receive weekly and daily reminder messages only
when the license has an expiration date. These messages are commonly seen
if you have a PROMO license.
Weekly reminder messages if <=60 days remaining.
Daily reminder messages if <= 1 week remaining.
1 Day Extension Message
If your license should expire, you will automatically receive an optional
1-day extension. This one time extension gives you the option to contact
Evluma when you return to the offi ce without interrupting the current project
or workday.
Functionality Overview
Start the application, log on and fi nd lamps. Currently, all Android devices
are WiFi only. You will need to be connected to the Internet the fi rst time
you log on to ConnectLED. Logon credentials are permanently cached as an
internet connection may not be available at the pole. However, Users must
authenticate every day against cached credentials.
App goes out to server for authentication
if network is available during logon
operation.
To Start ConnectLED
Touch the ConnectLED icon on the Home
screen to start the application. Log on.
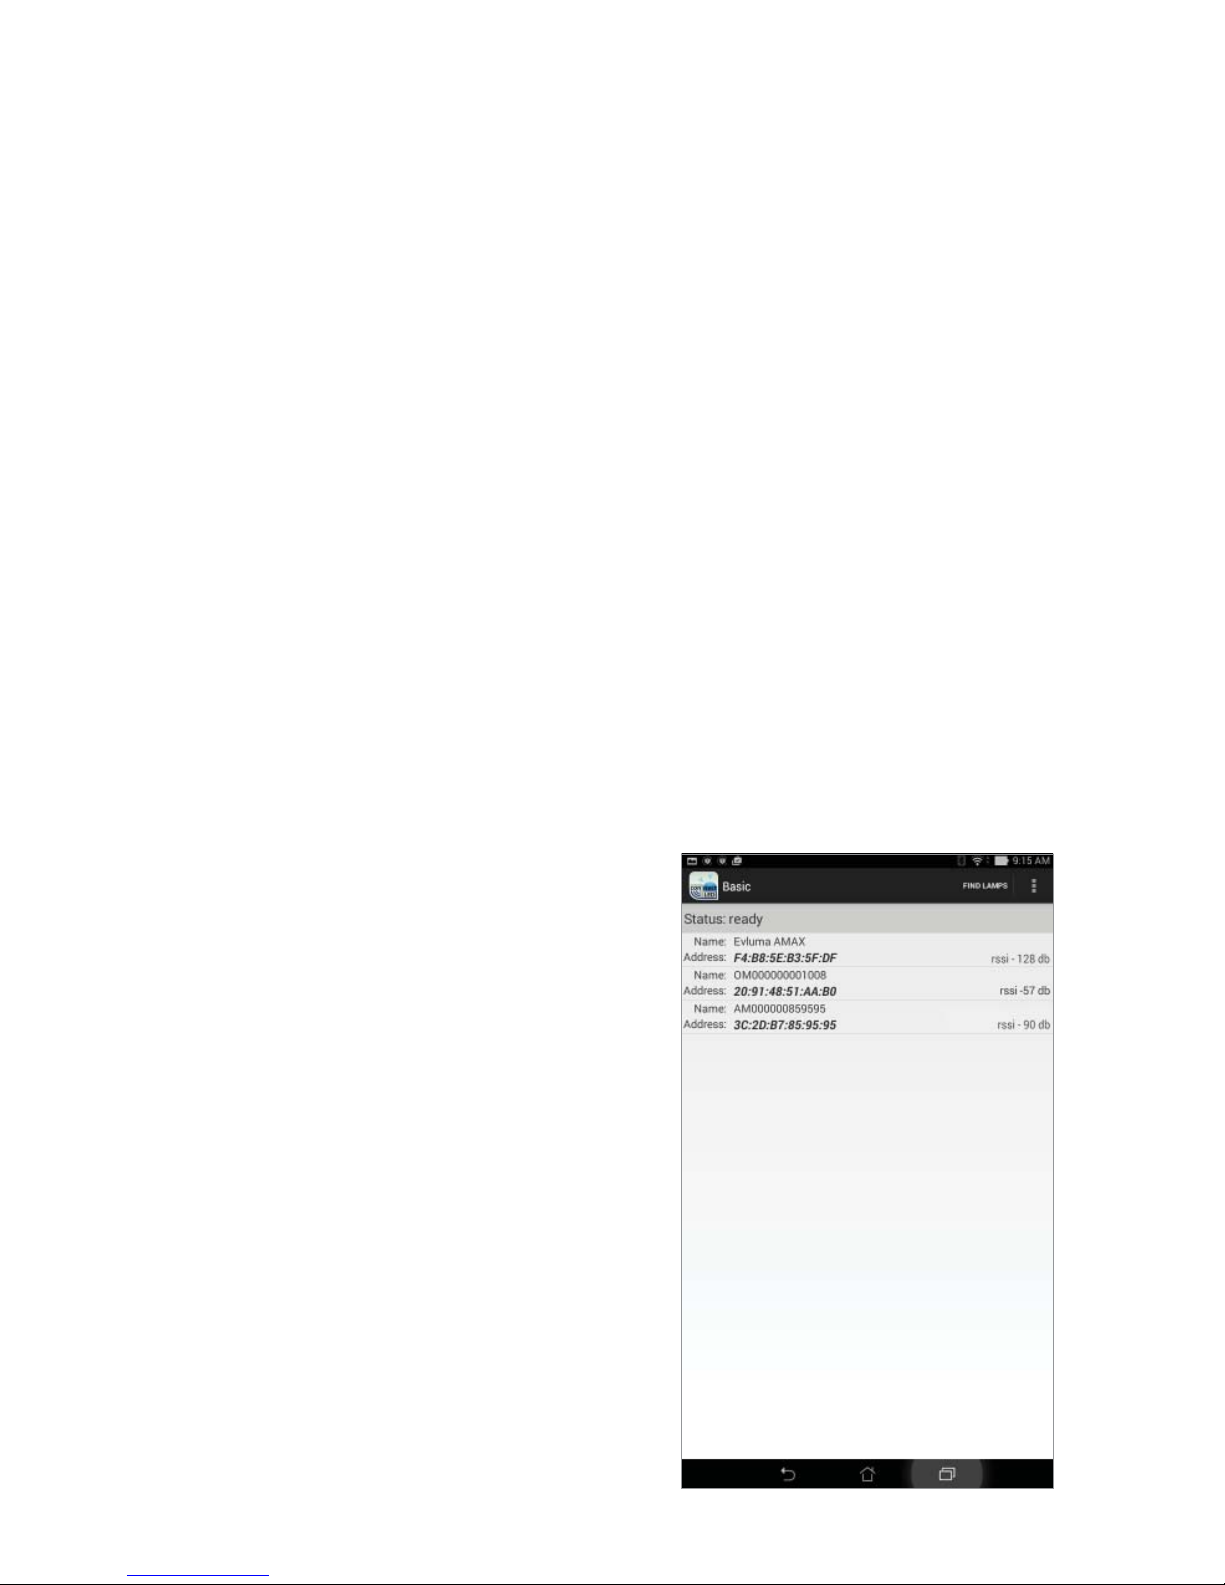
Find Lamps
After you log on, the fi rst screen will be FIND
LAMPS. ConnectLED will automatically
search for lamps. Status will be: Finding
devices. Any AreaMax or OmniMax found
within range will be displayed. Status will
change to Status: ready when the search has
fi nished.
If no lamp is nearby and powered up, the
screen will be blank. Move the tablet to a
location near a powered lamp. Touch FIND
LAMPS in the upper right action bar to
The FIND LAMPS screen
Page 11
7
initiate a search of nearby lamps. Any lamps within range will appear with
their unique Bluetooth address and RSSI value (signal strength). If multiple
lamps are detected, the larger the RSSI number the closer the lamp (-60db is
closer than -80db).
Note: Name: Evluma AMAX will appear for AreaMax lamps with an
internal version earlier than FW14.
Fautlcast™
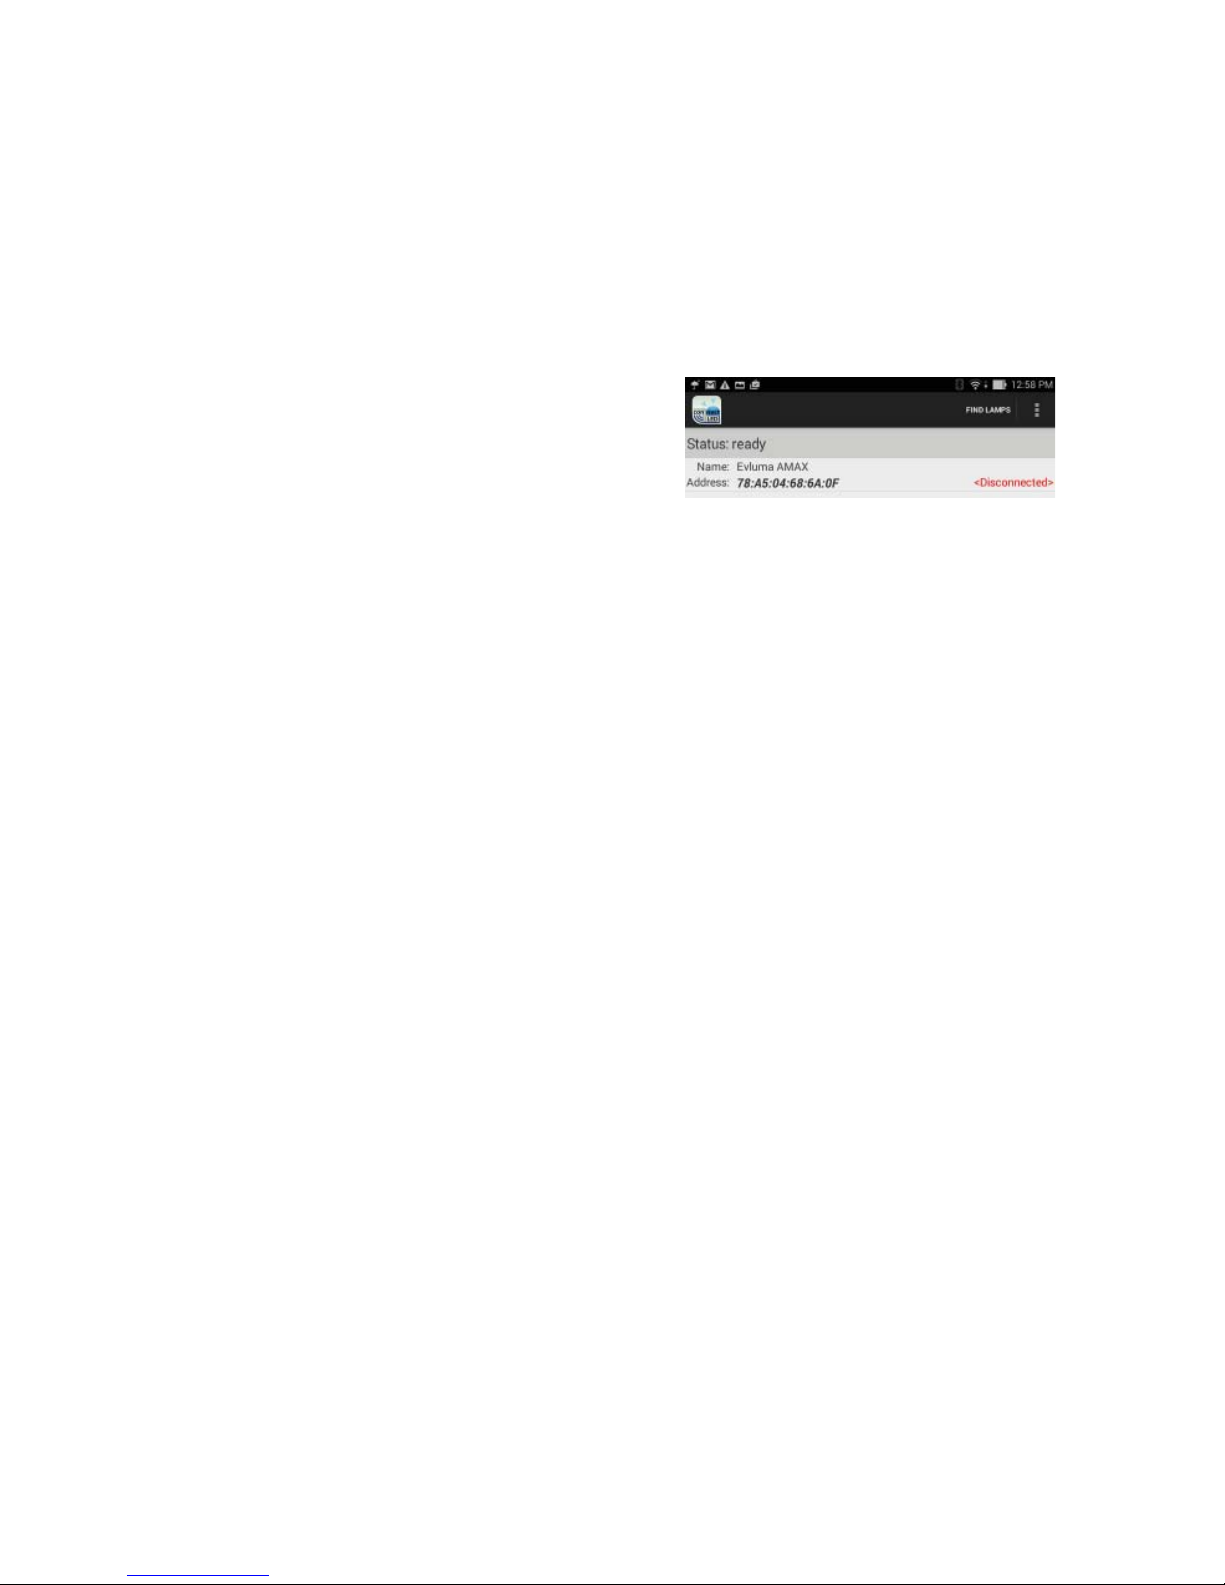
The RSSI message can also be replaced by
an error or status message from the lamp.
<disconnected> means that the lamp you
have found is in a disconnected state. This
is helpful if you are trying to troubleshoot
a lamp during the daytime. <sensor failure> is the error message if the lamp
misses 3 dawn to dusk events indicating that either no sensor is installed, or it
has failed.
Note: The OmniMax must be connected to power during the day if
attempting to troubleshoot during the daytime. Depending on how your
decorative street fi xtures are switched on/off, power may not be continuous
during the day.
Select one of the available lamps to initiate a connection. The selected lamp
will blink 6 times to confi rm connection.
Once the tablet connects to the selected lamp, the
Confi g screen will be
presented and the DISCONNECT/CONNECT command will appear on the
action bar.
The CONNECTION screen
Connect or Disconnect the lamp using the CONNECTION screen. This
controls the service state of the lamp. Touch CONNECT or DISCONNECT in
the action bar to open the CONNECTION screen.
A Connected lamp operates normally, turning on at dusk and off at dawn.
A Disconnected lamp remains off at all times.
If the lamp is currently in a Connected state, the
DISCONNECT item
will appear in the action bar, upper right. If the lamp is currently in a
Disconnected state, the CONNECT item will appear.
Press the large button in the center of the
CONNECTION screen to initiate
AreaMax with <disconnect> status message
Page 12
8
either a Connect or Disconnect command
as displayed. Lamps will visibly respond
to commands from ConnectLED in the
following manner:
• Disconnect – lamp fl ashes 3 times plus
1 quick fl ash
• Connect – lamp will turn on. It will
remain on at night, or turn off after
10 minutes during the day.
Caution: The AreaMax is still connected
to a live power source even if it is in a
Disconnected service state. The AreaMax
continues to draw a small amount of
power, between 1-5W, in the Disconnected
state.
The Confi g Screen - BASIC license
The information displayed in this view
cannot be edited if you have a BASIC license type and is for information
purposes only. Dimming is not included in BASIC; however, the Dimming
button is active, allowing you to view the
option.
The Confi g Screen - ENTERPRISE &
PROMO license
ENTERPRISE and PROMO license
types may change the lamp’s operational
parameters using the Confi g screen. Select
CONFIG from the action bar, upper right.
Parameters are outlined below.
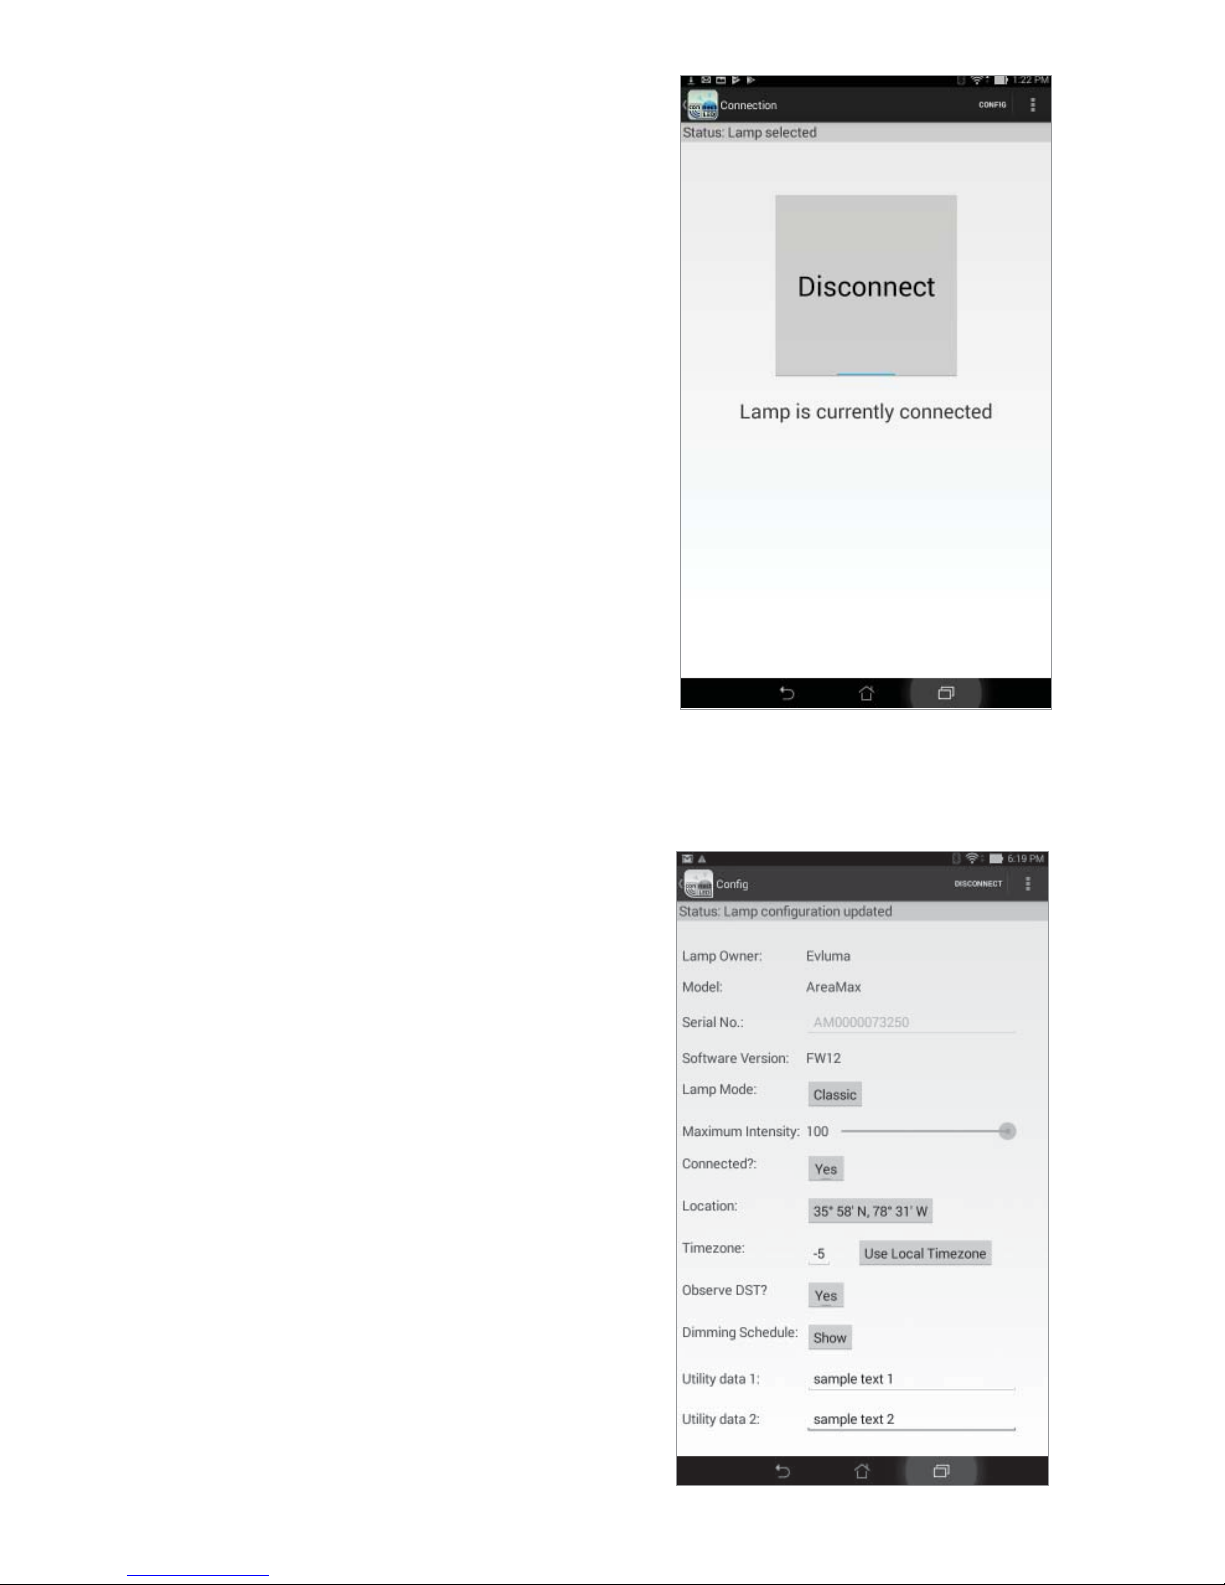
Lamp Owner
The Lamp Owner fi eld displays the name
of the ConnectLED Site licensee holder.
ConnectLED writes the Lamp Owner
to the Evluma lamp once a User has
connected to it. Field is read only.
The Confi g screen
The Connection screen
Page 13

9
Model
ConnectLED works with both the AreaMax and the OmniMax. This fi eld
indicates the Evluma product model. Field is read only.
Serial Number
This is the serial number of the connected lamp: AreaMax, or OmniMax. Rev
A12 AreaMax and later will populate this fi eld with a unique serial number,
as will Rev A07 and earlier. Otherwise, the fi eld is empty. Field is read only.
Software Version
This is the software version of the connected Evluma lamp.
Lamp Mode (Failsafe/Classic)
Select between Failsafe and Classic. Photocontrol Failsafe™ is an Evluma
proprietary feature in both the AreaMax and the OmniMax lamp that monitors
the state of the photocontrol and takes over operation if the photocontrol fails.
In Classic mode, the lamp will follow the state of the photocontrol, regardless
of its operational state.
Maximum Intensity
Drag to reduce default brightness level (and corresponding power level). The
adjustment range is 100% to 20%.
If the Maximum Intensity is set, the light output of the lamp will never
exceed this setting. This establishes the overall maximum brightness of the
lamp. A dimming schedule may be created to further lower the lamp output,
however, a return to 100% brightness in the dimming schedule will return the
lamp to the % specifi ed by the Maximum Intensity.
Connected? (Yes/No)
Change the default service state of the lamp. Press Yes to connect, or No to
disconnect the lamp. See also the CONNECTION screen. Yes means the light
will operate normally . No means the light will remain of f at all times.
Location
Setting luminaire location is optional. The factory settings for latitude and
longitude are the baseline for Photocontrol Failsafe calibration. After three weeks
at the installed location, Photocontrol Failsafe has received enough dusk-tilldawn data to make in situ refi nements. For more information on Photocontrol
Failsafe see TB20121214.2.
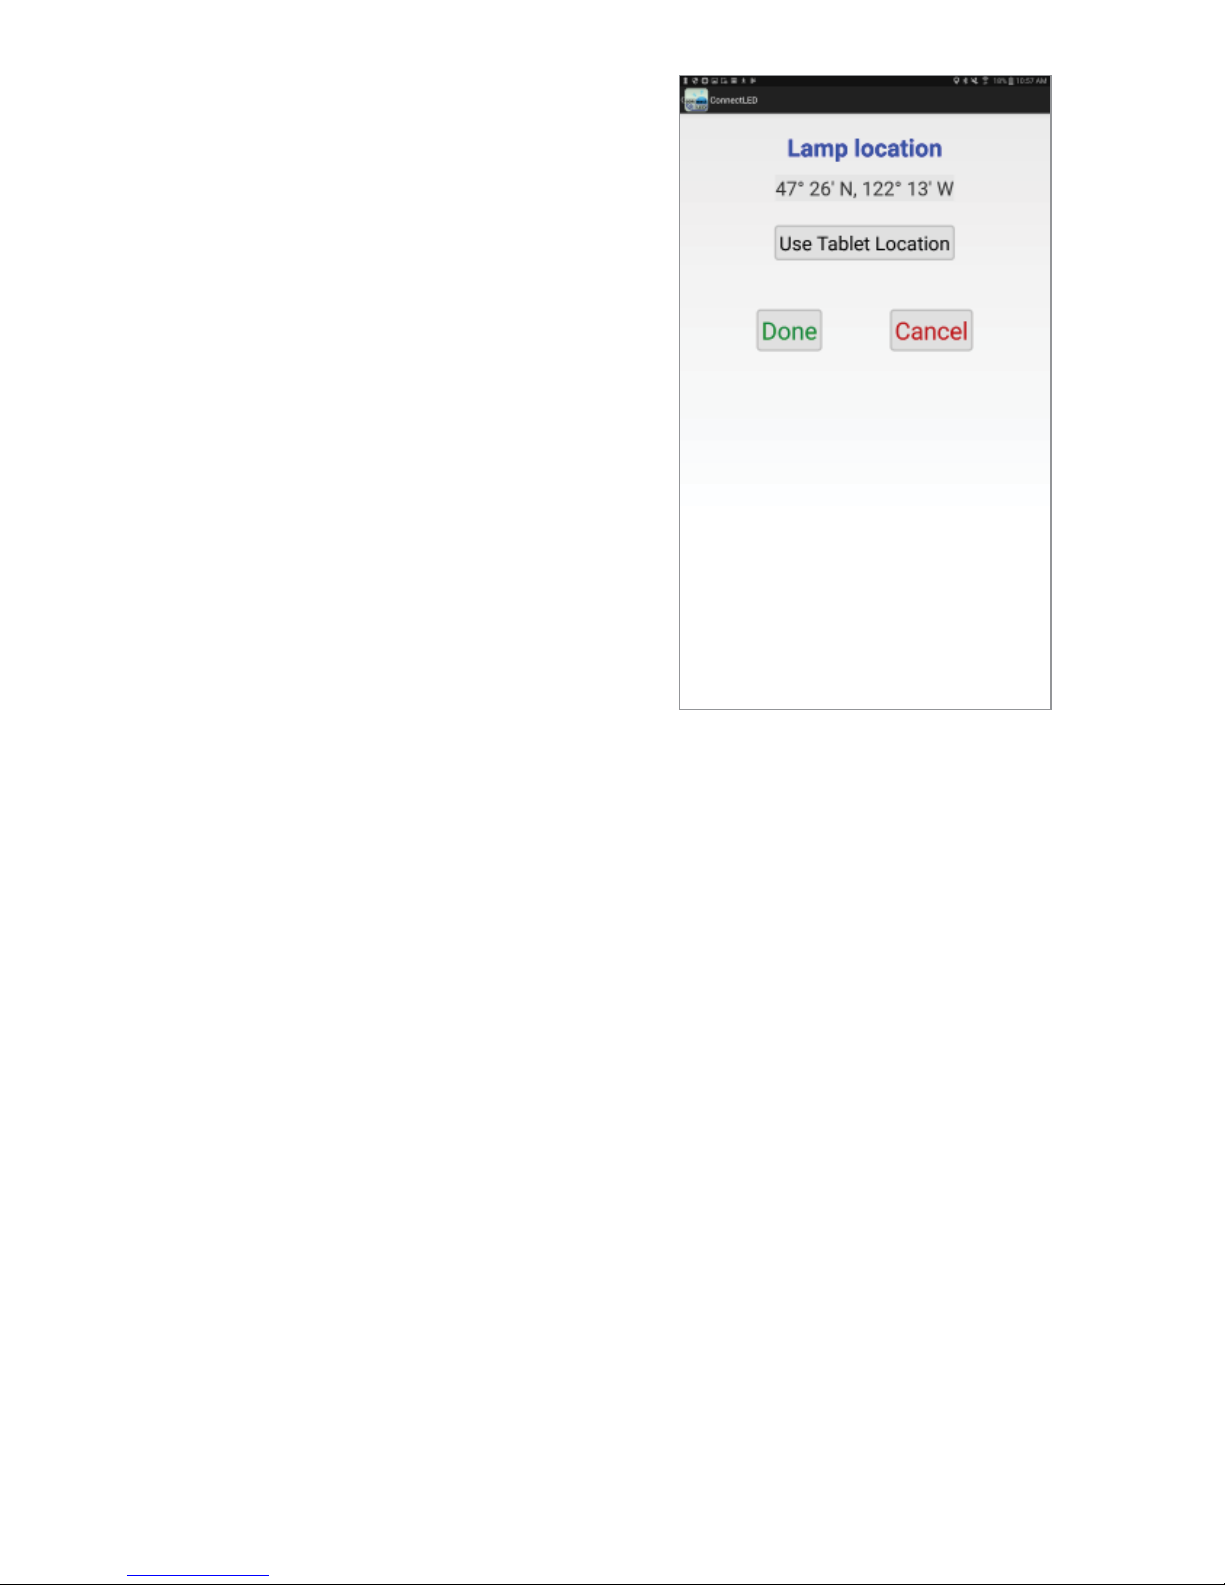
T ouch the Use Tablet Location Button to use the current location of the tablet to
update the location of the lamp. This is an option if there is WiFi at the pole. Touch
Page 14
10
Cancel to return to the Confi g screen without
saving your changes. Touch Done to save
your changes and return to the Confi g screen.
Time Zone
T ouch Use Local Time zone to update the
time zone. Updating the time zone is only
necessary if the tablet has traveled outside
the factory set time zone and the time zone
was updated by Google Maps, or otherwise
directed by Evluma Technical Support. The
time zone is used by the dimming schedule.
If the time zone is incorrect, the dimming
schedule may not perform accurately for
the lamp’ s real location. See also, To Initialize
ConnectLED GPS - WiFi/Google Maps.
Observe DST? (Yes/No)
Press Yes to enable, or No to disable DST
(Daylight Savings Time). Disabling DST
may effect the dimming schedule.
Dimming Schedule (None/Show)
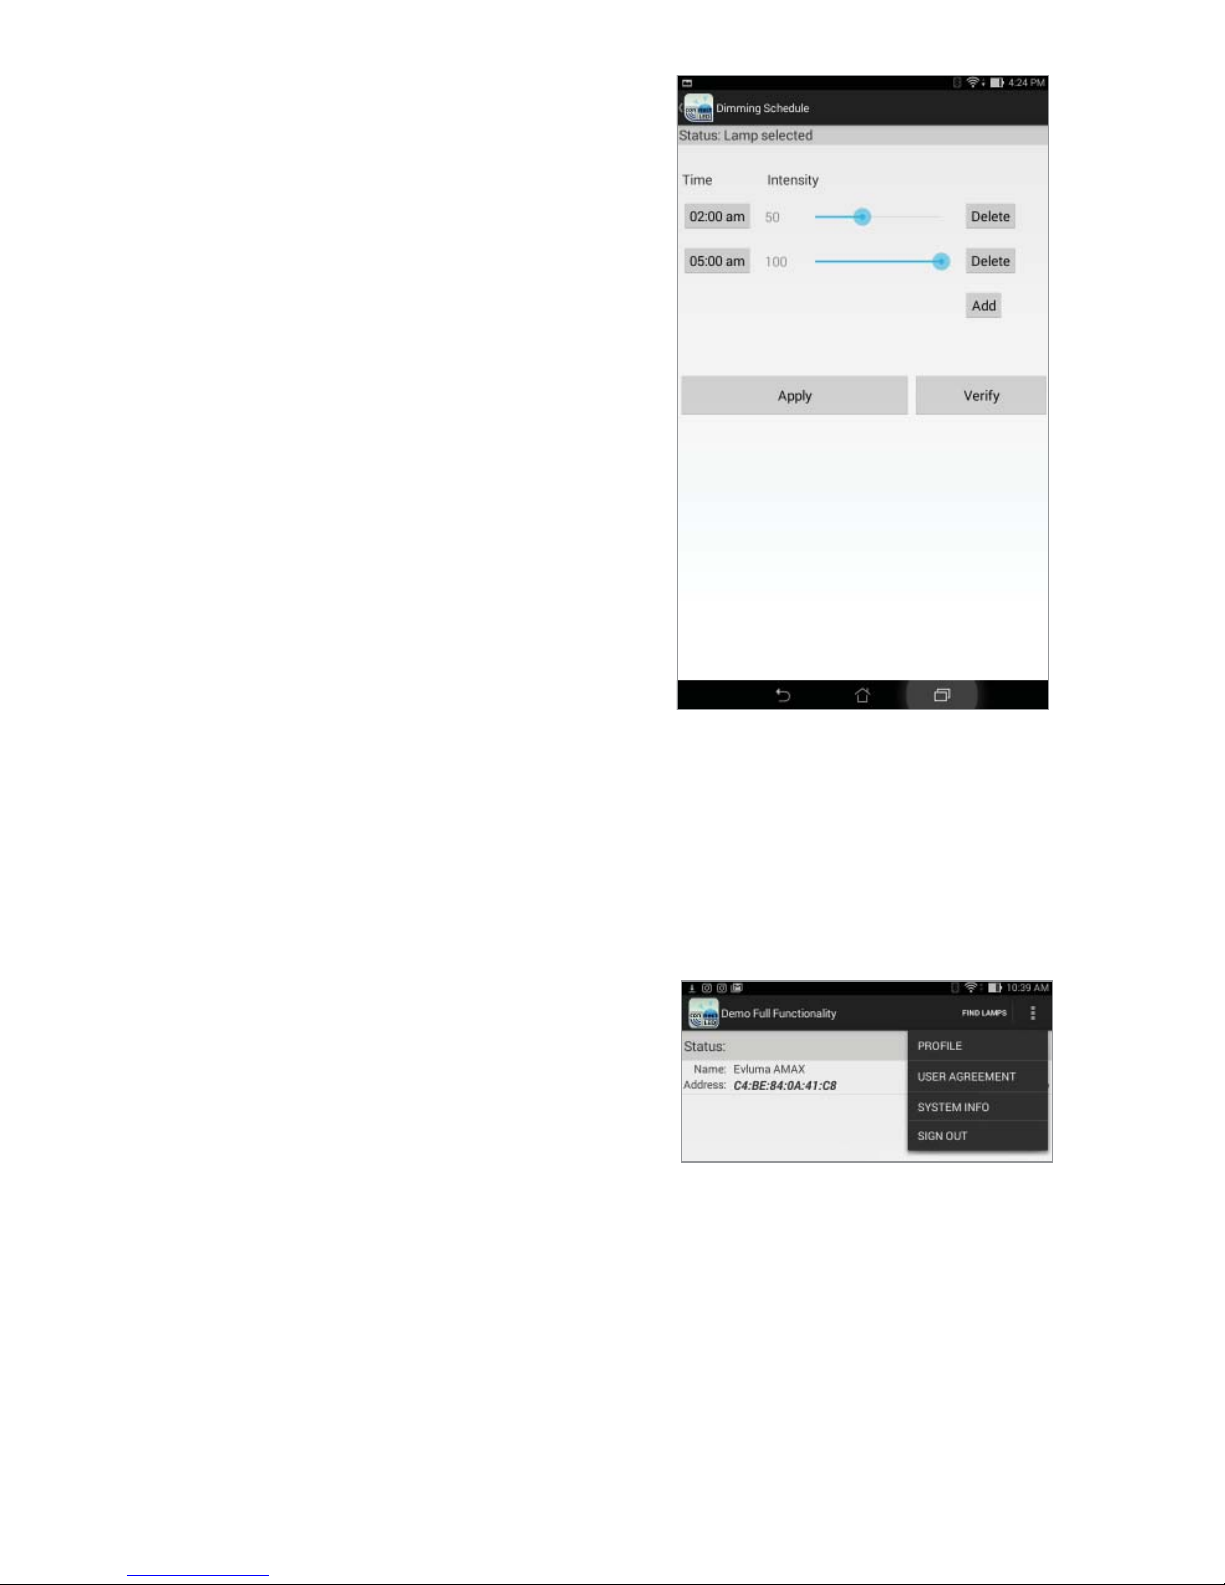
Activate up to 4 separate time periods and brightness levels for the lamp to deliver .
Pressing the None or Show button will open the Dimming Schedule screen.
If no dimming schedules have been set, the screen will initially be blank. Press
the
Add button to bring up a default time and intensity . Adjust appropriately.
Press Add to add more time periods. The last entry must return the lamp to 100%
ensuring that when the lamp turns on at sunset, it returns it to the Maximum
Intensity set for the lamp.
Press
Verify to test whether a valid set of schedules has been chosen.
Press
Apply to write the schedule to the lamp.
Note: The dimming schedule brightness levels are relative to the lamp’s full
illumination capability at 40W, 55W or 70W respectively. If the Maximum
Intensity level is set, dimming settings remain a % of the lamp’ s full capability
for all settings below the Maximum Intensity. The Maximum Intensity caps the
light output. At no time will the lamp exceed the Maximum Intensity setting.
Press the back arrow at the bottom of the screen to return to the Confi g screen
or the upper left of the action bar to return to FIND LAMPS.
Select Location: Use Tablet Location
Page 15
11
Remove All Dimming
Access from the Confi g screen on the
action bar via “more actions.”
Touch this menu item to quickly reset and
remove all dimming settings including
the Dimming Schedule and the Maximum
Intensity.
Utility Data 1 & Utility Data 2
Utility Data 1 & Utility Data 2 are
editable fi elds that can be used to write
important data to the lamp. Limit 32
characters. Tap the text fi eld to open a
keyboard. When you are fi nished typing,
tap Done. Entry will save upon exiting
the screen. This data will be visible in the
ConnectLED.csv. See View Event History,
ConnectLED.csv.
Miscellaneous Functions
Additional functions are available from the
FIND LAMPS screen. Touch the 3 vertical squares to the right on the action
bar to open menu.
Note: To return to the FIND LAMPS screen at any time, touch the
ConnectLED icon on the upper left.
Profi le
Select Profi le to display User Info and the
Access Level of the User, including the
limitations on lamp access, the customer
ownership identifi er and license duration.
User Agreement
Select User Agreement from the drop down
menu to display the licensing terms. Tap OK to Close.
System Info
Touch to display the app version and the Android device data.
Sign Out
Typically, the Android device is Company owned and may be used by more
than one User. As Users may have different User license types it may be
mandatory to log out at the end of a shift.
The Dimming Schedule screen
Miscellaneous Functions
Page 16
12
View Event History
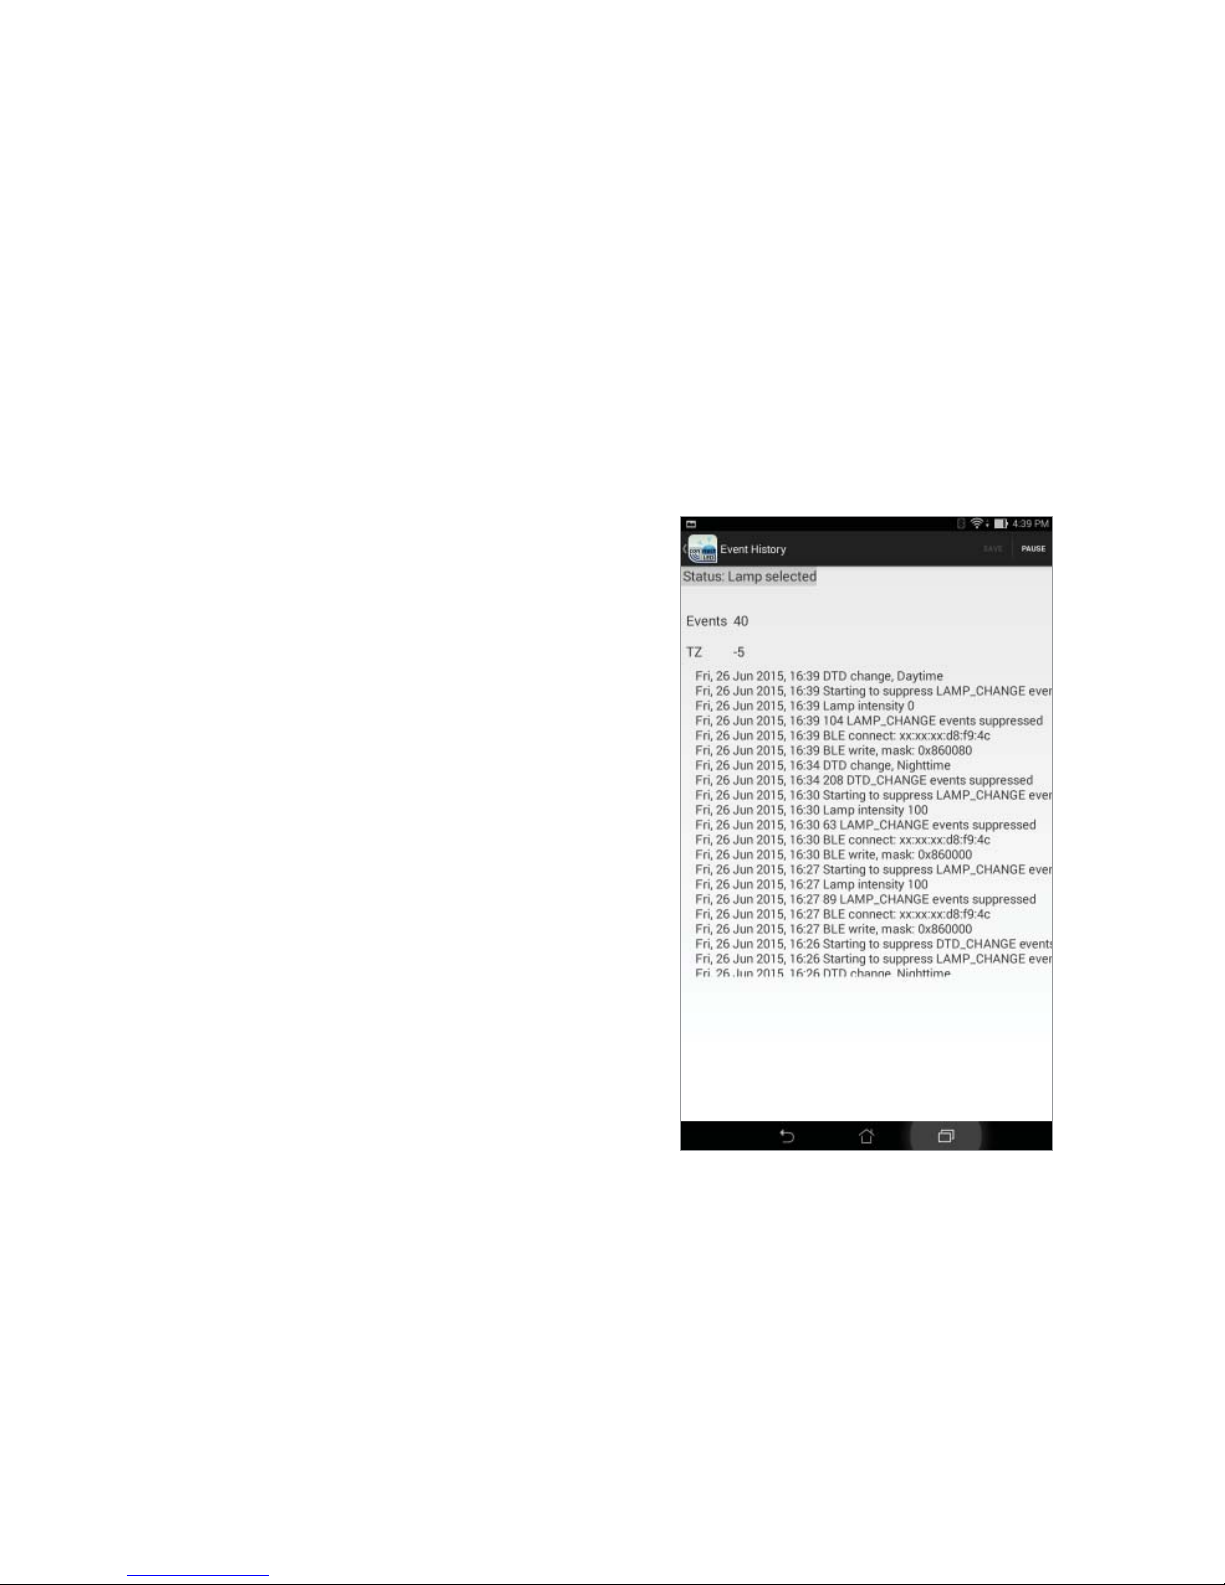
Each lamp maintains an event history, a tool designed to assist the RMA
process. This log can be retrieved using ConnectLED. Access from the
CONNECTION screen on the action bar via “more actions.” This will display
all of the past events that have occurred within the AreaMax or the OmniMax
to which you are connected.
Pause/Resume
Retrieving all of the lamp events may take a moment or two depending on
the number of events in the history of the lamp. Touch Pause/Resume at any
time during retrieval to pause or resume the list of events. Once ConnectLED
is Done retrieving lamp events you may Save the event history and/or Send
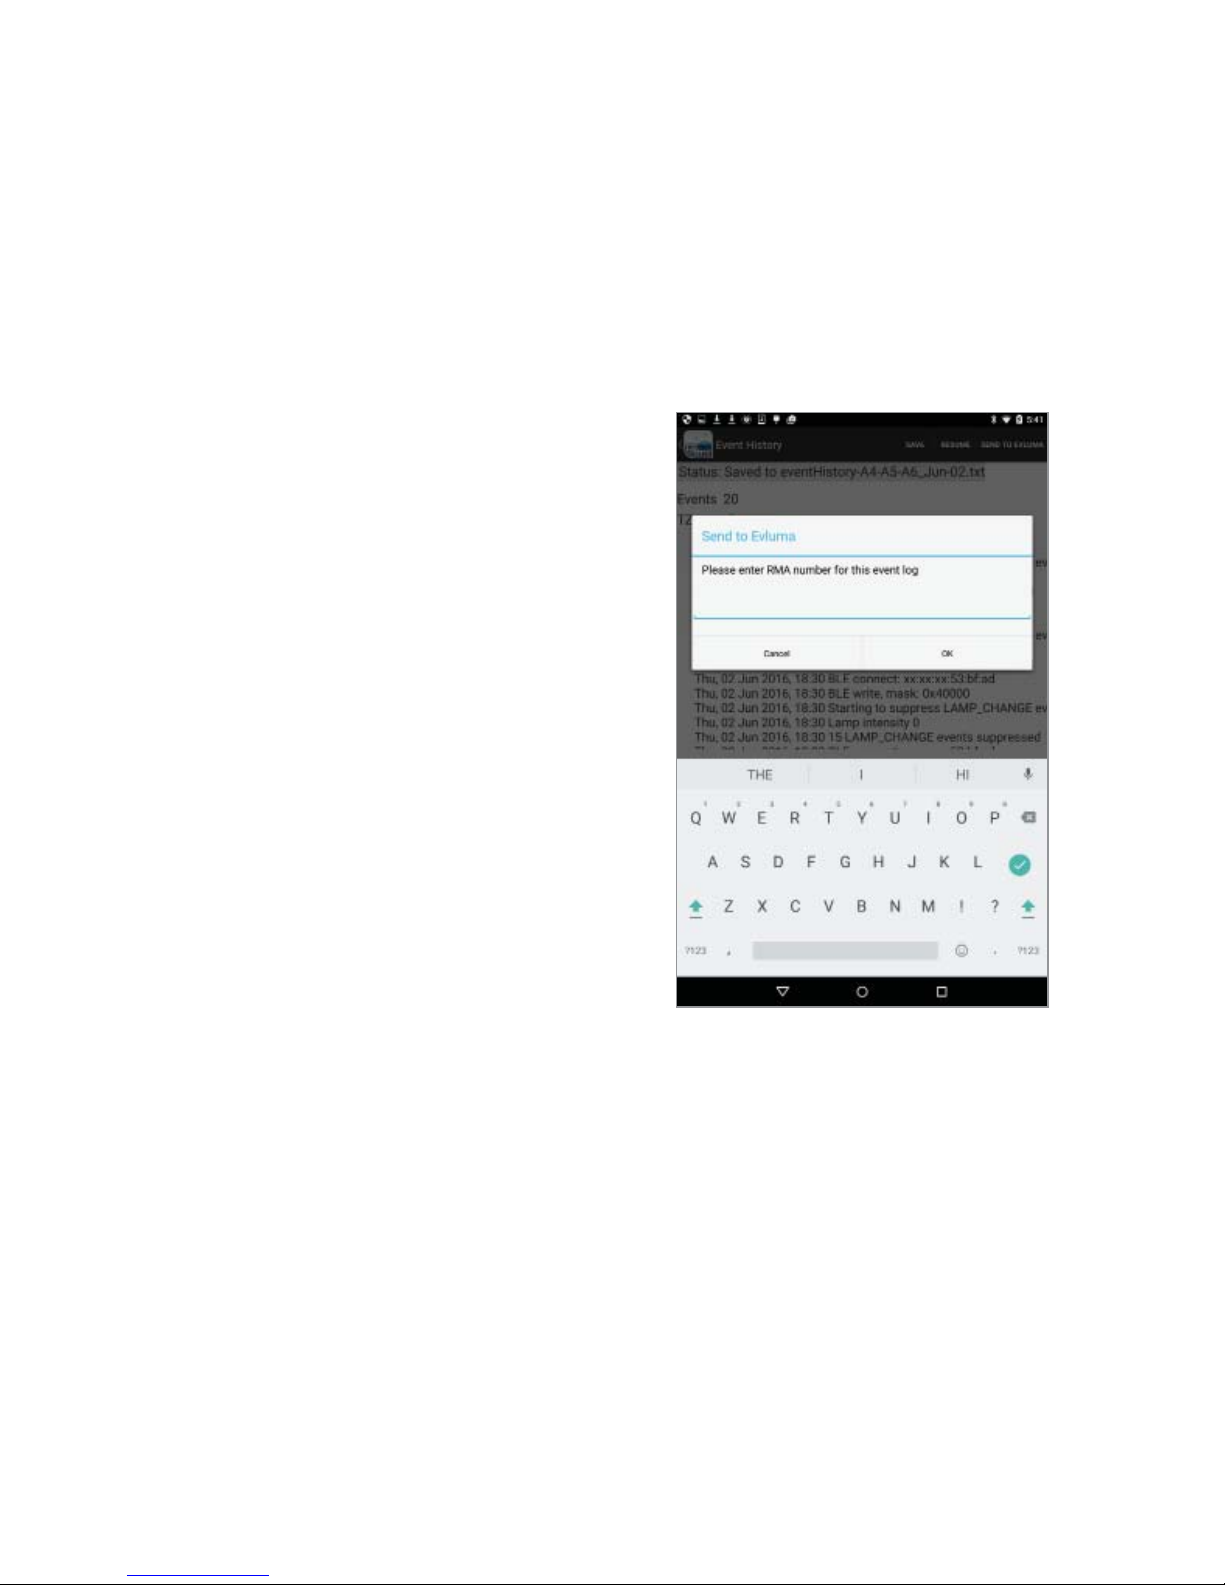
to Evluma. ConnectLED will prompt you
for an RMA number prior to sending the
event history to Evluma.
Save/Send
The Event History will be saved as a
text (.txt) fi le to UniqueDeviceName\
Internal storage\Evluma. Connect the
tablet to a PC using a USB cable to
view this fi le. This event log fi le can be
emailed to Evluma should you require
troubleshooting assistance. An RMA
number must accompany the event
log. As part of lamp event history,
app also attaches ConnectLED user
account information (login information)
identifying which User and Customer is
reporting the issue.
ConnectLED.csv
The ConnectLED.csv fi le contains a
record of all program parameters sent to
each lamp to which you have connected, listed by mac address. A record is
created whenever a parameter is changed. There may be multiple records for
a lamp depending on the actions that have been taken. Connect the tablet to a
PC using a USB cable to view this fi le in Excel as a spreadsheet.
Send to Evluma
ConnectLED is designed to make communication with Evluma Technical Support
and Service easy . You may use any method or account to email the event history
from the tablet. An RMA (Return Material Authorization) number is required
The Event History screen
Page 17
13
prior to sending an event history to Evluma.
Event History
The AreaMax event history is stored in a text (.txt) fi le that may be sent to Evluma
for analysis if there are conditions to diagnose. This fi le is unique to the lamp to
which you are currently connected. The event history should not be sent to Evluma
unless an RMA number has been assigned specifi cally to the lamp. From the Event
History screen, touch Save and then Send to Evluma to send the event history log
to Evluma.
Common Tasks
The following section outlines the most
common tasks performed in ConnectLED.
Steps, functions, or settings may vary
depending on the model of your tablet.
How to Connect to WiFi on your
Android Tablet
Connect to WiFi to use Google Play,
receive software updates, send emails
for RMA/event histories, or to set lamp
location (optional). See also, To Initialize
ConnectLED GPS - WiFi/Google Maps.
1. Touch the Settings icon to open the
Settings screen.
2. Under “Wireless & Networks,” touch
WiFi.
3. Touch the WiFi switch to turn it to the
On position. You’ll see a list of
saved and available networks.
4. Select the account you wish to use and follow the password prompt.
5. Once connected, your device will say “Connected” under the network
name, and it will show up in your saved networks list. Your device will
automatically connect when in range. Touch the Home button to
return to the Home screen
How to Disconnect an AreaMax or OmniMax
When connecting to an AreaMax or OmniMax for the fi rst time, the lamp
will always be in a Connected state. By default, all Evluma lamps are in a
Connected state and ready to install when they are shipped from the factory.
1. Tap the logo on the Home screen to launch ConnectLED. Log on.
2. ConnectLED will automatically search for lamps. Any AreaMax or
Enter an RMA to send an Event History.
Page 18

14
OmniMax found within range will be displayed. If no lamp is found,
move closer, or point the tablet in the direction of the lamp you
wish to connect to and touch Find Lamps prompting ConnectLED to
search again.
3. Select the lamp you wish to disconnect from service. A popup will
appear as Connecting to: mac address if connecting to an AreaMax. If
connecting to an OmniMax, the serial number will appear. The lamp will
fl ash 3x.
4. Press the Disconnect button to disconnect the lamp from service. A
warning message will pop up.
5. Press Disconnect to confi rm that you wish to disconnect the lamp from
service. The lamp will fl ash 3x. The Disconnect button will change to a
Connect button to facilitate future re-connection.
6. Press the Return button or tap the logo to return to the FIND LAMPS
screen.
How to Connect an AreaMax or OmniMax
You may wish to connect or re-connect an AreaMax or OmniMax to service
if it has previously been disconnected.
1. Tap the logo on the Home screen to launch ConnectLED. Log on.
2. ConnectLED will automatically search for lamps. Any lamp found within
range will be displayed. If no lamp is found, move closer, or point the
tablet in the direction of the lamp you wish to connect to and touch Find
Lamps prompting ConnectLED to search again.
3. Select the lamp you wish to connect to service. A pop-up will appear as
Connecting to: mac address if connecting to an AreaMax. If
connecting to an OmniMax, the serial number will appear. The lamp will
fl ash 3x.
4. Press the Connect button to connect the lamp to service. ConnectLED
connects the lamp to service immediately, and the will light come on.
If it is daytime the light will come on for 10 minutes then turn off.
If it is nighttime the light will come on and stay on.
5. Press the Return button or tap the logo to return to the FIND LAMPS
window.
Page 19

15
How to Set the Maximum Intensity
For details on the Maximum Intensity setting see Confi g screen (ENTERPRISE
and PROMO licenses only), Maximum Intensity.
1. View Lamp Confi guration. Midway down the screen is a blue slider to
set Maximum Intensity. By default, this is set to 100.
2. Drag the blue set point from right to left along the slider. The number
to the left of the slider will change to refl ect the new setting. Adjust to
preference and leave. Setting automatically saves.
3. Press the return button or tap the logo to return to the FIND LAMPS
screen.
How to Set a Dimming Schedule
For more details on the Dimming Schedule, see Confi g screen (ENTERPRISE
and PROMO licenses only), Dimming Schedule.
View Lamp Confi guration.
Towards the bottom of the screen you will see the button to Show the
Dimming Schedule.
1. Press the Show button. The Dimming Schedule screen will open.
2. Press the Add button to activate the fi rst entry. You may create up to
4 entries.
Note: The Dimming Schedule may not consist of a single entry. The
last setting must return the lamp to 100%.
3. Tap the Time button to open a popup window where you may set the
time for the fi rst dimming period to begin.
4. Roll the wheels forward or backward to set hour, minute and AM or
PM.
5. Tap Done when you are fi nished.
6. Slide the blue set point along the slider from right to left to set the
dimming level for this fi rst time period.
7. Repeat steps 3 through 7 to add two more dimming periods. The
fourth and fi nal setting must return the lamp to 100%.
8. Press the Verify button to verify that your dimming schedule is valid.
9. Tap Apply to apply the dimming schedule to the lamp.
10. Press the Return button or the Back button to return to the Confi g
screen, or tap the logo to return to the
FIND LAMPS window.
Page 20

16
Troubleshooting
If you experience any trouble with the application, or the application freezes,
try restarting the application. To turn off ConnectLED, touch the Active
Programs List button and swipe the ConnectLED application to the right. You
may also tap the Clear All button. Tap the ConnectLED logo on the Home
screen to start ConnectLED again.
How to Upgrade your License
Please contact your Distributor to purchase a Site license once your
PROMO license has expired. If you are a BASIC User type and wish to
upgrade to ENTERPRISE please contact your Company IT Admin. If you
are a Company IT Admin looking to increase the number of BASIC or
ENTERPRISE User types under your Site license, please contact Evluma
Customer Support.
User Authentication Alerts
There are three types of Authentication Alerts indicating that you are either
unable to authenticate your logon because of a lack of internet connection, or
an issue with your license.
“Sign in Failed. No internet connection. Please check your network
connection and try again.”
“Sign in Failed. Your License expired. Please contact your ConnectLED
admin.”
“Sign in Failed. Authentication failed. Please try again. If the problem
persists, Please Contact Evluma Support 425-336-5800.”
Service Bulletin SB20170606.1
Hardware Errors in ConnectLED Related to Android Tablet Time Setting
Connecting to an AreaMax with ConnectLED Android Tablet v2.1 or v2.2
updates the time and location of the AreaMax with the time and location of
the tablet. If the tablet time is off by too great a degree, the AreaMax will
immediately determine it cannot correct itself and return either a Hardware
Error Related to Time Setting (HW Error), a Clock Drift Error, or both.
Consult SB20170606.1 for more information.
Page 21

17
Service Bulletin SB20160519.1
AreaMax Dimming Parameters and Electronic Noise.
Potential electronic noise defect effecting 1.5% of AreaMax shipped
between 12/13 and 06/16 and dimmed below 100% power. Please see
SB20170606.1 for more information.
Legacy Lamp Error
“The selected lamp is a legacy lamp. ConnectLED app cannot write to this
lamp.” ConnectLED Android is only able to read, and not write to, AreaMax
with fi rmware A07 and earlier. If you must write to a legacy lamp please
contact Evluma Customer Support. ConnectLED Windows writes to legacy
lamps.
Hardware Error Related to Time Setting
“This lamp has a hardware error related to the time setting. The lamp
should be returned to Evluma.” SB20170606.1 outlines the most common
cause behind this error message. Follow the instructions in SB20170606.1
Appendix A Android. If you have attempted to restore the Time Setting and
you still receive the error message please contact Evluma Customer Support.
Dimming Error – SB20160519.1 (Clock Drift Error)
“ConnectLED has detected that you have set a dimming level less than 100%
and it is creating clock drift per Service Bulletin SB20160519.1.What would
you like to do?” Choose from the options presented. If resetting the dimming
levels does not clear this message, please contact Evluma Customer Support
for assistance.
Time not set
“Time setting on the lamp is incorrect. Please Disconnect and Connect your
lamp with ConnectLED. If the problem persists, please replace the lamp and
contact Evluma Support 425-336-5800.” Please contact Evluma Support
immediately.
Lamp Malfunction
“Lamp is not operating properly. Please replace the lamp and contact
Evluma Support 425-336-5800.“ Please contact Evluma Support
immediately.
Page 22

18
For More Information
For More Information, or for Technical Support please contact your regional
Evluma salesperson, or call:
425-336-5800, Option 2.
http://www.evluma.com/contact.html
Warranty: V2.1 tablets provisioned by Evluma warrantied for 6 months from
the date of shipment.
Evluma, AreaMax, OmniMax, ConnectLED, FaultCast and Photocontrol Failsafe are trademarks
of Express Imaging Systems, LLC. All rights reserved.
 Loading...