

EV Global Motors MINI-E-BIKE Owner's Manual

MINI-E-BIKE™


4. Riding Safely and Responsibly 19
The Basics 19
Rules of the Road 20
Wet Weather Riding 21
Night Riding 22
5. How Things Work 22
Removing/Installing the Wheels 22
Brakes 24
Shifting 27
Tires and Tubes 30
6. Service and Maintenance 32
Service and Maintenance Schedule 33
Getting Home When Something Breaks 35
Upgrading Your Bike and Equipment 36
About Your Dealer 38

1
inspect your Mini-E-Bike™. Many of the Warnings and
Cautions say "you may lose control and fall". Because any
fall can result in serious injury or even death, we do not
repeat the warning of possible injury or death whenever the
risk of falling is mentioned.
IMPORTANT SAFETY INFORMATION
Your Mini-E-Bike™ can provide many years of ser vice, fun
and fitness - if you take responsibility for your own safety.
Understand the features of your Mini-E-Bike™ and become
aware of the challenges that you will meet on the road.There
is much that you can do to protect yourself while riding. We
will offer many recommendations and safety tips throughout
this manual. The following are those that we feel are most
important.
Always Wear A Helmet!
Helmets significantly reduce the number and severity of head
injuries. Always wear a helmet that complies with your state
laws when riding the Mini-E-Bike™. Check with your local
police department for requirements in your community. Do
not wear loose fitting clothing that can become tangled in the
moving parts of the Mini-E-Bike™. Wear sturdy shoes and
eye protection. Also check your state laws concerning other
protective gear that may be required when riding the Mini-EBike™.

2
Ride Within Your Limits!
Take it slow until you are familiar with the riding conditions
that you encounter .Be especially careful in wet conditions as
traction can be greatly reduced and brakes less effective.
Never ride faster than conditions warrant or beyond your
riding abilities. Remember that alcohol, drugs, fatigue and
inattention can significantly reduce your ability to make good
judgements and ride safely.
Keep Your Mini-E-Bike™ In Safe Condition
Follow the inspection and maintenance guidelines beginning
on page 3. Check critical safety equipment before each and
every ride.
Know The Law
Cyclists are required to follow the rules of the road.
Additionally, some communities regulate the use of
motorized bicycles regarding minimum age requirements and
necessary equipment. Check with your local police
department for specific details.
Offroad Riding
Offroad riding is not recommended because the Mini-EBike™ tires are for street use only.Dust and extreme impacts
from offroad riding can cause electrical system problems.

3
Your Mini-E-Bike™ should be returned to your servicing
dealer at least once a year for a complete and thorough
inspection and tune up. If a problem arises that is not
described below, discontinue riding the Mini-E-Bike™ and
return it to your servicing dealer immediately. For more
information about service and maintenance, please refer to
page 32.

*Every 5 to 10 rides depending on length and conditions of the ride.
4

5
• Keep the battery compartment lid closed and locked
during use.
• Always remove the key from the battery compartment
lid before operating the Mini-E-Bike™. Never ride the
Mini-E-Bike™ with the key in the lid lock.

6
RIGHT HAND CONTROLS
Power On/Off
• Turn the power knob (A, Figure 1) on the throttle control
clockwise to the ON position.
• The three state-of-charge LEDs cycle four times in
sequence to indicate the system and controls are ready
for operation.
7
• Green (or full) indicates the battery is 100% to 84%
charged.
• Yellow (or half) indicates the battery is 84% to 16%
charged.
• Red (or empty) indicates the battery is less than 15%
charged.
The motor automatically shuts off when the battery is below
a preset limit to help extend battery life.The red LED flashes
to signify the motor is off and the battery must be recharged.
Recharge the battery pack immediately after use. Failure
to do so may damage the battery.
LEFT HAND CONTROLS
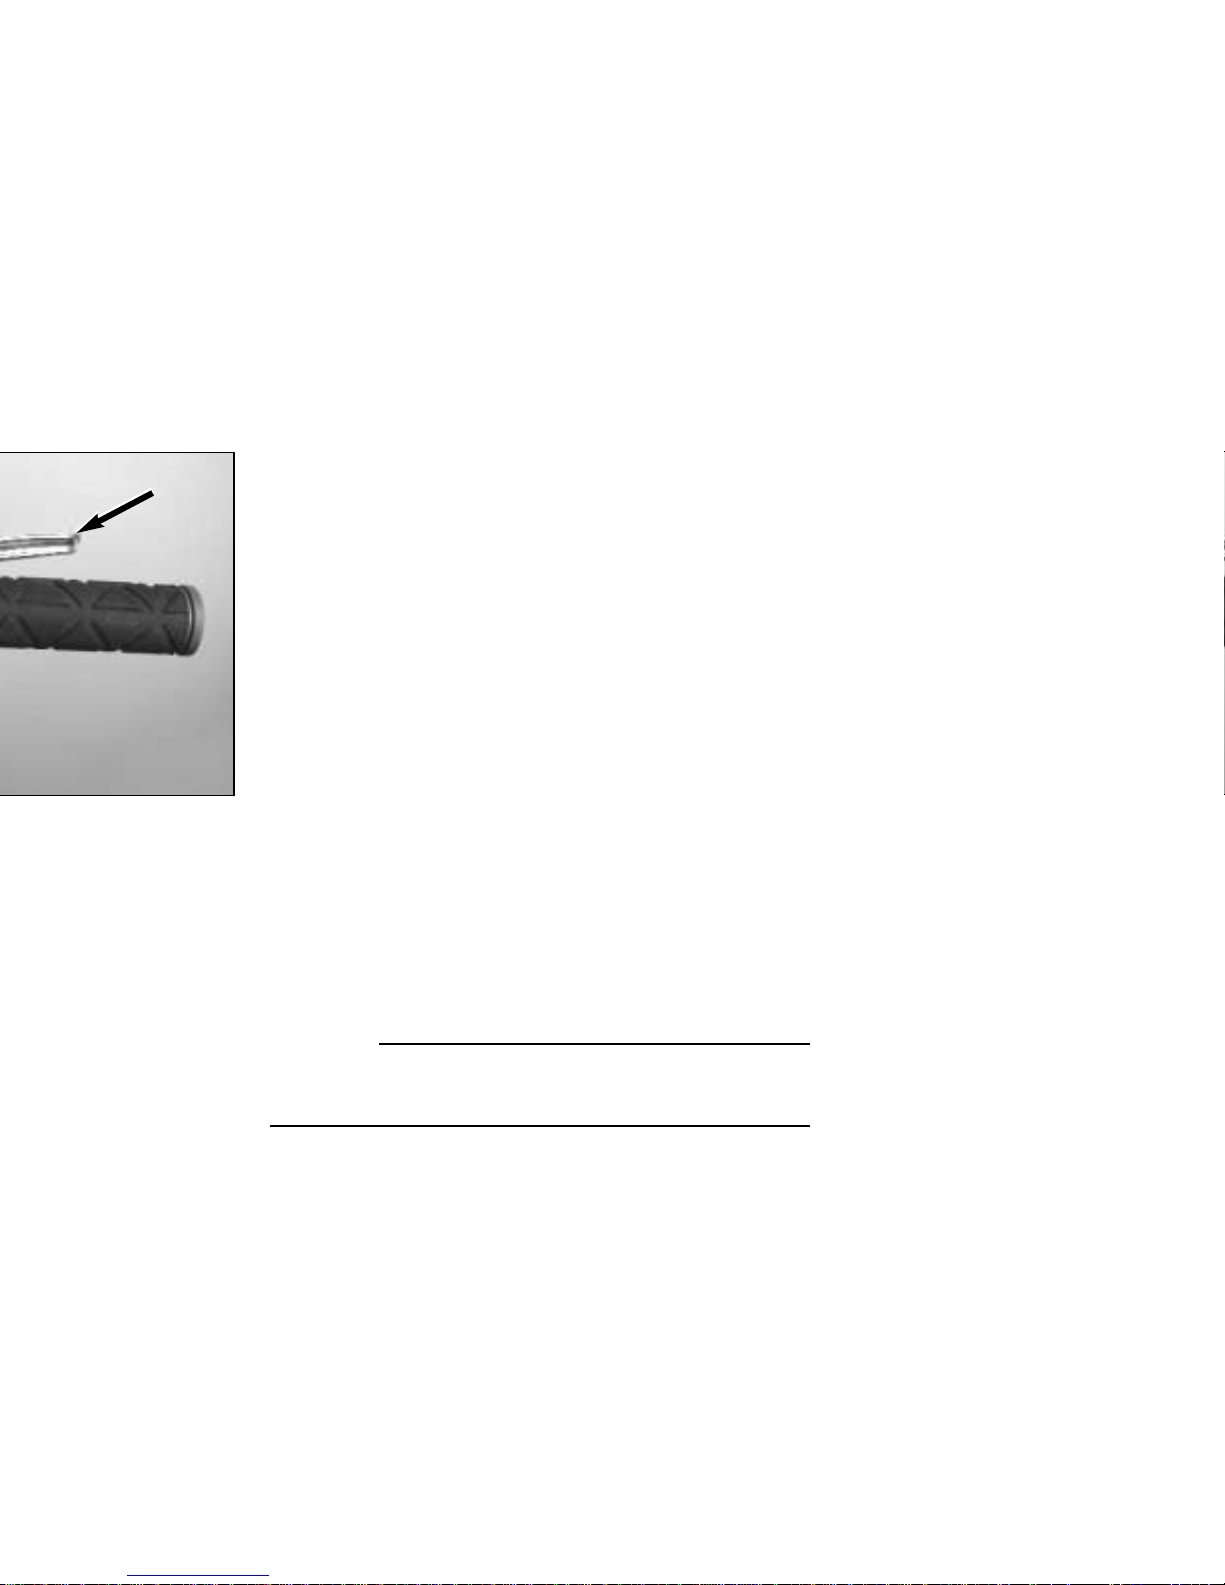
Twist Grip Gear Selector
By twisting this grip (A, Figure 2) while pedaling, you can
select any one of five gears on the rear wheel. The grip is
labeled with the corresponding gear selection.
Front Brake Lever
The front brake is activated by squeezing the left brake lever
(B, Figure 2).
WARNING:
Sudden or excessive application of the front brake may pitch
the rider over the handlebars, causing serious injury or
death.
C
8
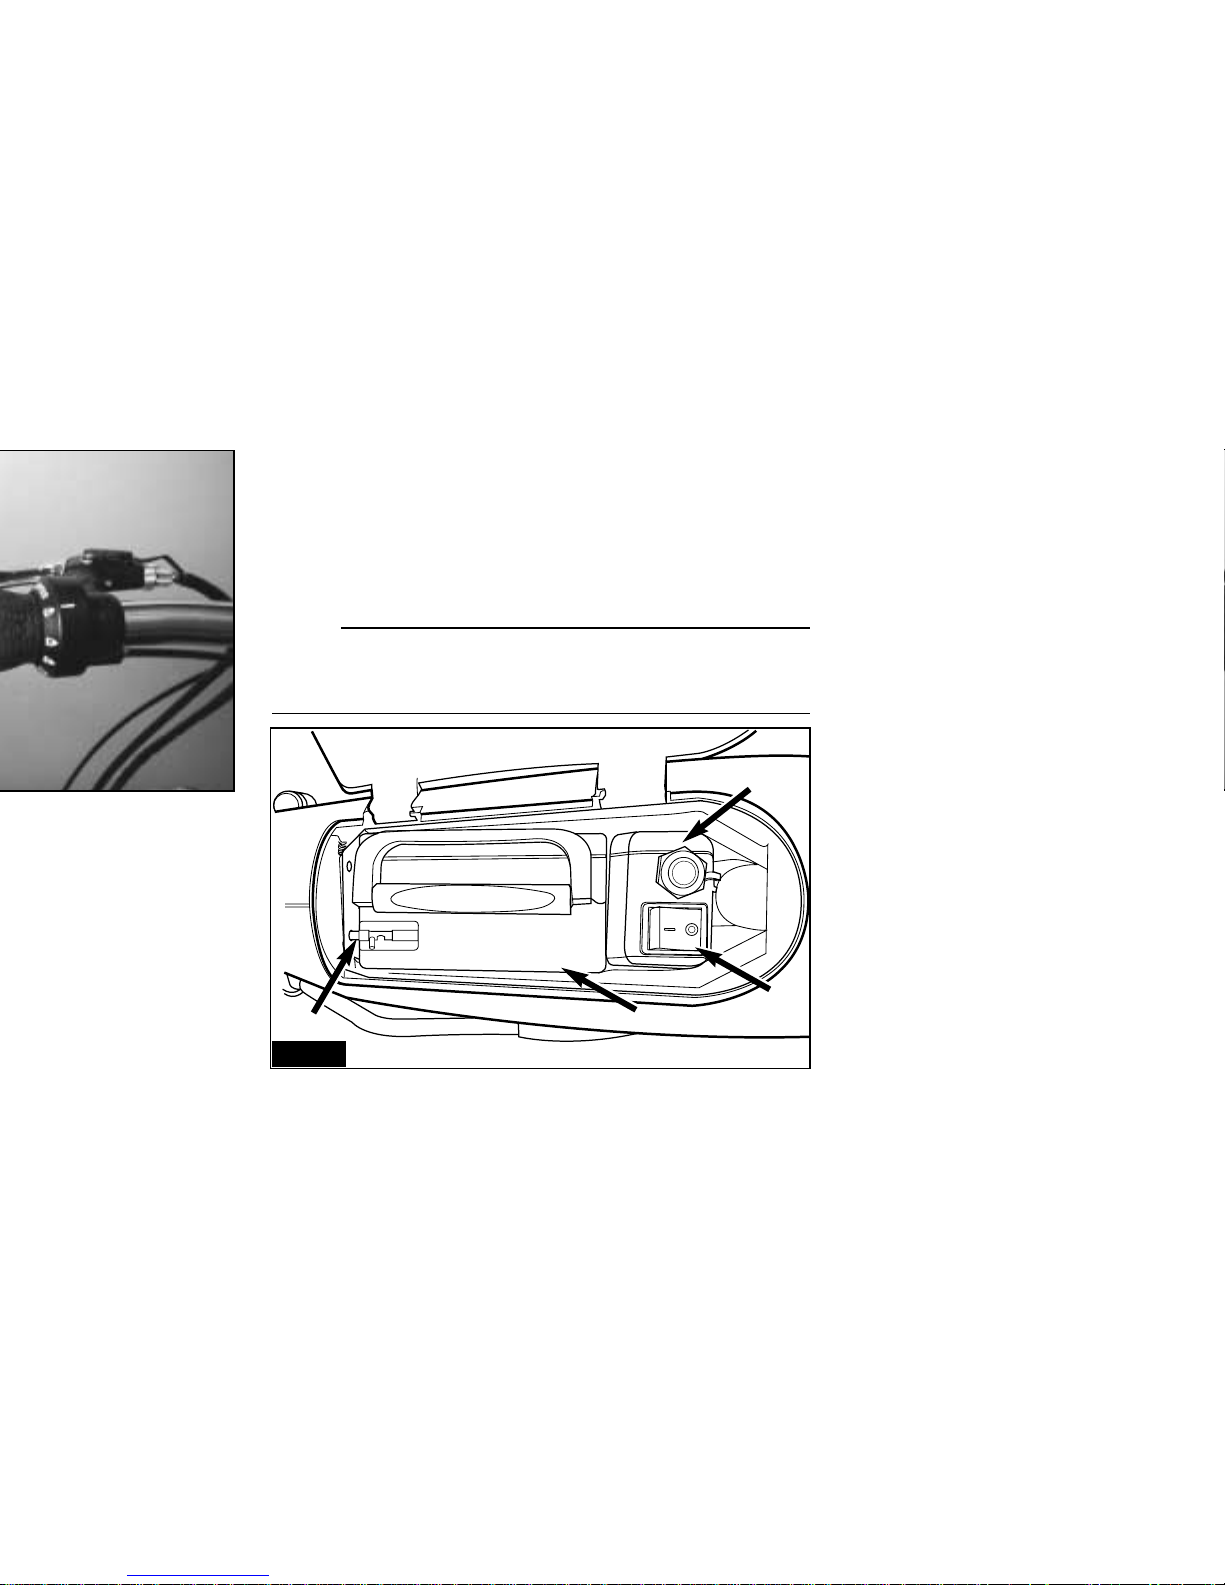
2. Turn the master switch (A, Figure 3) to the OFF (O)
position.
3. Release the battery latch (B, Figure 3).
4. Grasp the batter y pack handle (C, Figure 3) and pull the
battery pack straight up and out of the battery
compartment.
NOTE:
If the seat is set low on the frame, the tip of the seat could
interfere with battery removal. If this is the case, open the
seatpost quick release and rotate the seat 90 degrees.
C
B
D
A
FIG. 3

9
NOTE:
If the battery pack protrudes above the top of the battery
compartment, the battery has been installed backwards.
Remove the battery pack, rotate the battery pack 180
degrees, and reinsert it so the contacts on the bottom of the
battery pack engage the terminals at the front of the battery
compartment.
3. Secure the battery in place with the battery latch (B, Figure 3).
4. Close and lock the batter y compar tment lid.
Charging the Battery
The battery can be charged while it is on-board the Mini-EBike™ or when removed from the battery compartment.
1. Remove the cap (D, Figure 3) from the charge port on the
battery.
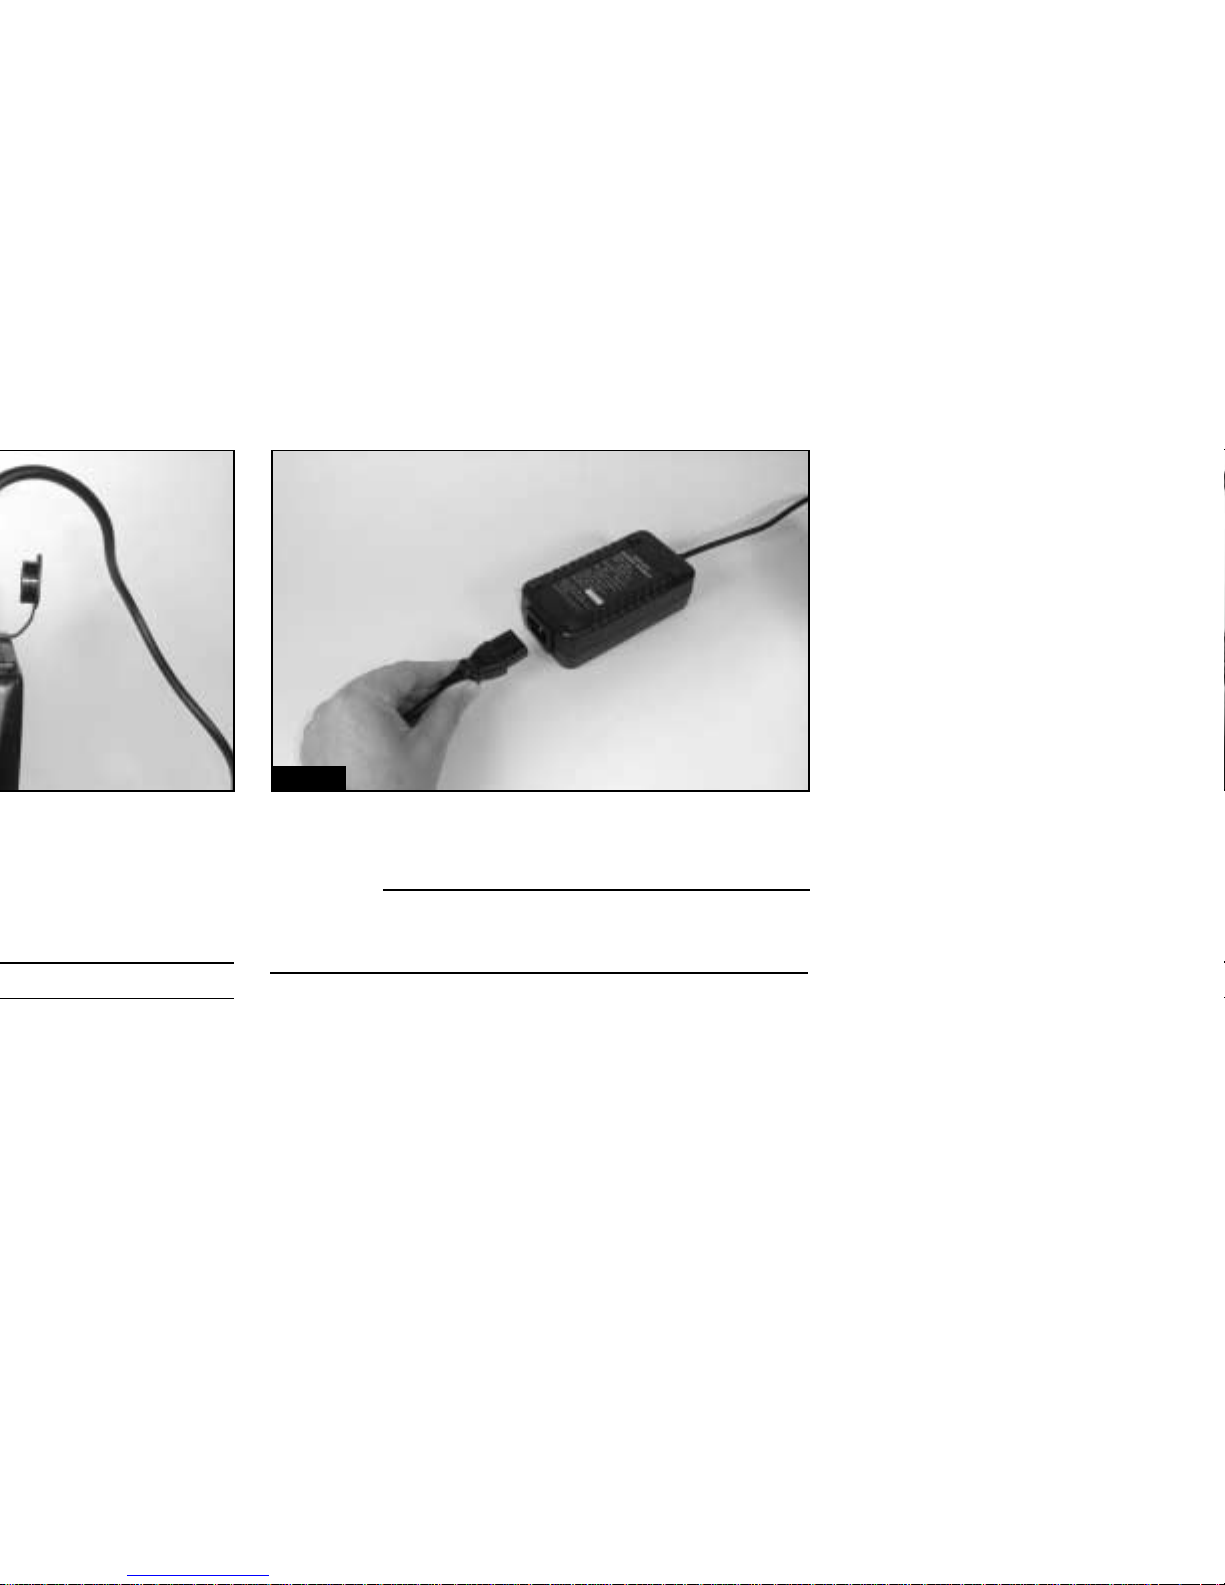
2. Plug the 3-pin charge cord (A, Figure 5) into the charge
port on the battery pack. Press the lock bezel (B, Figure
5) down onto the port and rotate the bezel clockwise until
it locks into place.
3. Plug the female end of the power cord into the charger
(Figure 6), and plug the male end of the cord into a
standard U.S.110/60 cycle wall socket.
7. Fit the cap back onto the charge port, and reinstall the
battery into the battery compartment.
WARNING:
Keep the charger and battery pack away from water to
prevent electrical shock and shorting. The charger is
intended for indoor use only.
OPERA TING THE MINI-E-BIKE™
1. Unlock the batter y compar tment and open the lid.
2. Tur n the master switch (A, Figure 3) to ON. The master
switch uses the international symbols for on and off.The line
10
FIG. 6
 Loading...