

Page 1
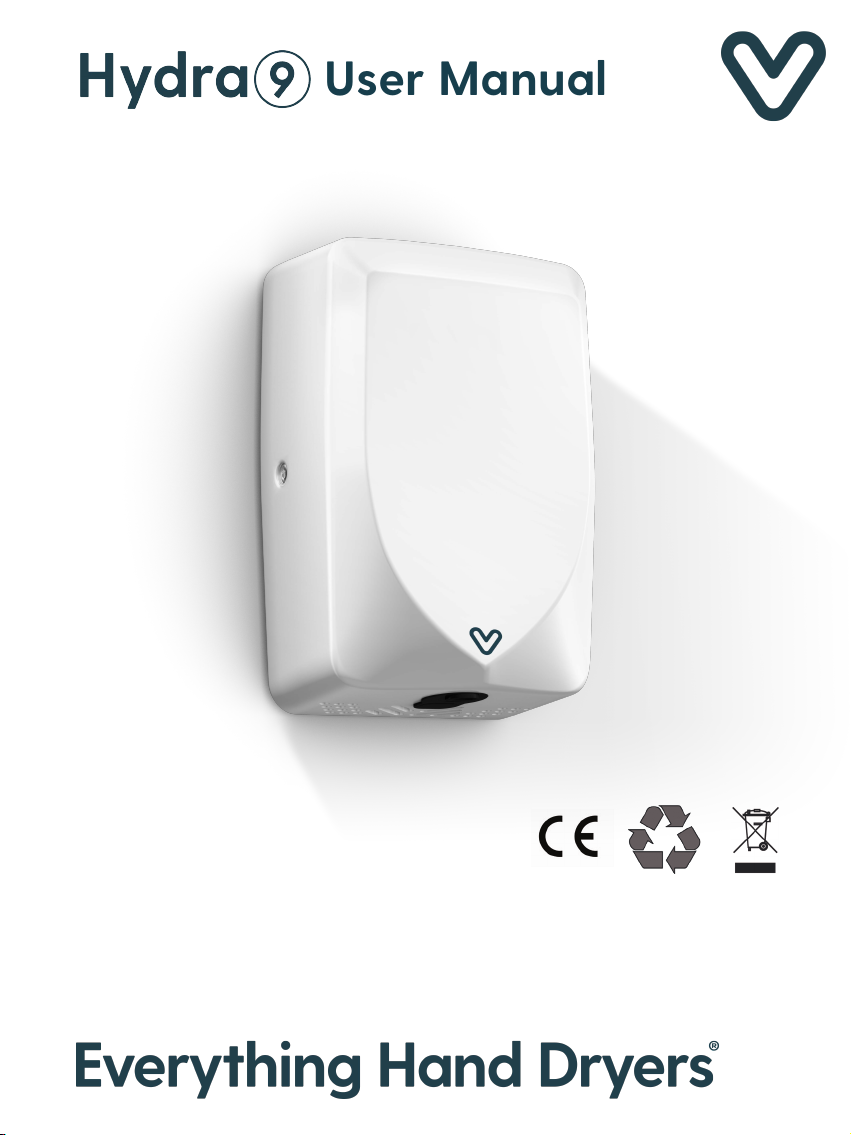
User Manual
Page 2
PLEASE READ CAREFULLY THROUGH THIS MANUAL BEFORE USING THE
PRODUCT, OBSERVING ALL SAFETY INFORMATION, WARNINGS.
1. WARNING
. This product is intended for installation by a
qualified service person.
. Disconnect power at the service breaker
before installing or serving.
. Failure to properly ground unit could result in
severe electrical shock.
. All units must be supplied with a 3-wire
service. The ground wire must be connected to
the dryer’s backplate.
2. NOTE
Do not install dryer over washbasin.
If the power supply cord is damaged, it must
be replaced by the manufacturer or its
service agent or similar qualified person in
order to avoid a hazard. Means for
disconnection must be incorporated in the
fixed wiring in accordance with the current
wiring regulations.
3. SPECIFICATION
Voltage:
Air Temperature:
Air Velocity:
Air Flow:
Drying Time:
Sensor Range:
Protection Level:
Electric Isolation:
Brush Motor:
Noise(at 1M):
Cabinet Material:
Dimension Vertical:
Dimension Horizontal: W255×D150×H173MM
220V-240V 50/60Hz,1150W-1350W(Hot)/500W-510W(Cold) 40℃
(D=10CM,Room Temp.=25℃)
100M/S
130M3/H
10-12S
5-15CM
IPX1
CLASS 1
22000R/M
74dB
Stainless Steel 304
W174×D100×H256MM
4. INSTALLATION
1. Installation must be carried out in accordance
with the current edition of the local wiring
regulations code having jurisdiction.
2. Installation should be performed only by a
qualified electrician.
3. Place template against wall at desired
height(see mounting height recommendations)
and mark locations of 4 mounting holes Dia.
8mm(5/16").
4. Remove and retain 2 side security hex cover
screws and cover. Then mount the hand dryer
base on the wall. Before replacing cover, there
is an option to run the dryer heater on
(1150-1350W) or heater off(500-510W). The
switch is clearly marked.
5. Replace cover. Do not over-tighten
screws.
6. Connect the hand dryer plug to the
power supply.
a. Connect the live wire(Coloured
Brown, Red, or Black) to the terminal
block marked “L”.
b. Connect the neutral wire(Coloured
Black, Blue) to the terminal block
marked “N”.
c. Connect the ground wire(Coloured
Green or Yellow) to the terminal block
marked “E”.
5. OPERATION
No-touch operation.
There is a blue LED light to guide user to
the air flow.
Shake excess water from hands.
Place hands under the outlet to start
operation.
Rub hands lightly and rapidly. Stops
automatically after hands are
removed.
Page 3
6. MAINTENANCE
Periodic cleaning of the unit is
recommended.
Remove cover and clean dryer dust lint.
Wipe the cover with a damp cloth and
mildcleaning solution. Do not soak. Never
use abrasives to clean the cover.
8. DIAGNOSIS & REMEDIES
Symptom Corrective Action
If the dryer will not
run
If the dryer cycles
by itself, runs all the
time, or is not
sensitive enough.
Ensure the breaker supplying the dryers is operational. If it is,
disconnect the power and remove the dryer cover. Taking
suitable precautions to avoid shock hazard, reconnect the power
and check for voltage at the terminal block. If there is power and
the dryer will not run, replace the Electric Circuit Boar (large one)
and/or Microcomputer Board (middle one) and/or Sensor Board.
Turn the blower wheel several times by hand to establish if it is
blocked.
Ensure that there is no obstruction on or in front of the infrared sensor.
Clean any dirt off the sensor lens. Try adjusting the sensitivity
potentiometer on the Microcomputer Board (blue knob).
Turn anti-clockwise to decrease the sensor range. If the problem
persists, replace the Microcomputer Board and/or Sensor Board.
7. PACKING
Hand dryer: 1 PC
User Manual: 1PC
Installation Template: 1 PC
Plug in Dia. 8x38mm: 4 PCS
Screw in Dia. 5x36mm: 4 PCS
Hex Screwdriver: 1 PCS
If the heat element
gets hot but the fan
motor does not turn
If the dryer runs but
makes a buzzing
sound
If the fan motor
runs but the
heating element
does not get hot
(dryer blows cold
air)
If the motor makes
a ticking/whining
noise when it
rotates
Disconnect the power. Remove the dryer cover and check for
obstructions in the fan housing. Damaged fans must be replaced. If
there are no obstructions, replace the motor or brushes.
Disconnect the power. Remove the dryer cover and check the fan for
rubbing on the housing as it rotates. Replace the fan if is does rub.
Disconnect the power. Remove the dryer cover. Check that the heat
on/off switch is switched on. Check loose and damaged wires.
Remove the blower housing. Check the heating element to see if it is
burnt or damaged. Damaged element must be replaced. If the
element does not appear damaged, disconnect it at the Electric Board
and check element wire continuity. Please check thermostat on the
heating element at the same time.
Disconnect the power. Remove the dryer cover and check the brushes
for worn condition, replace them if necessary.
Page 4
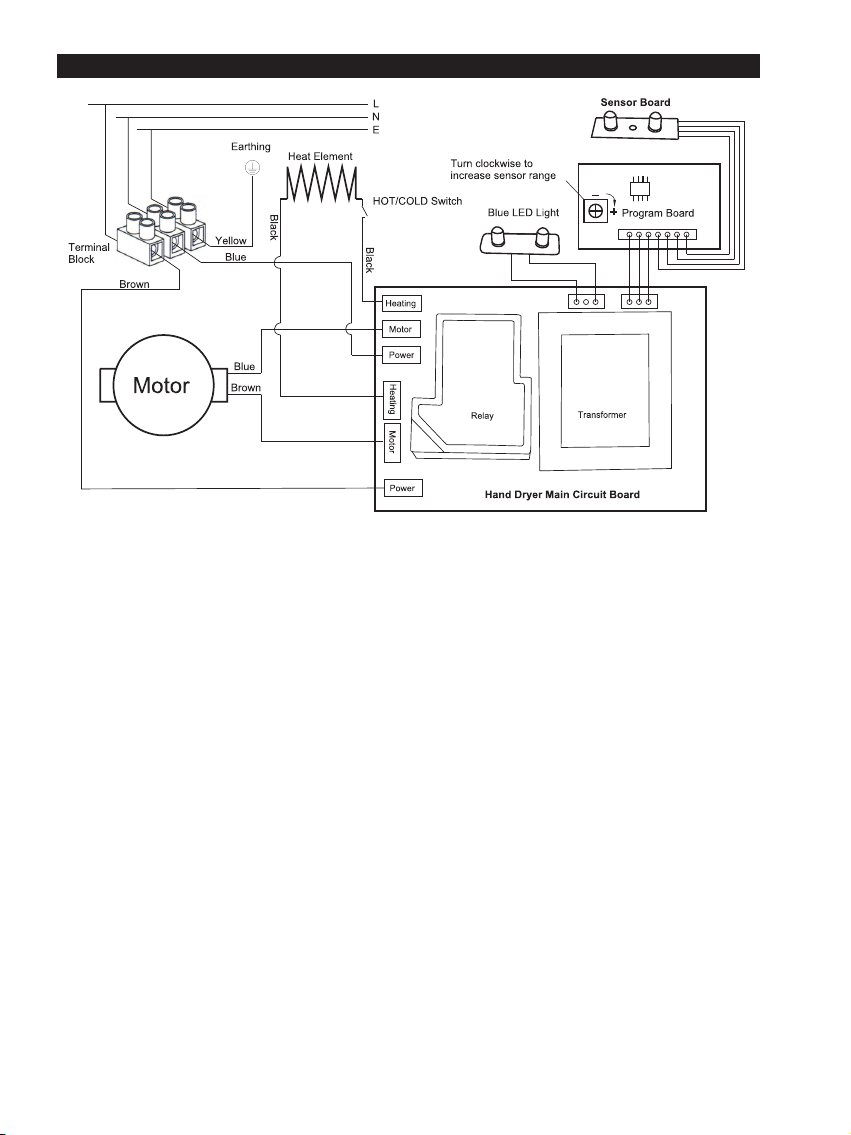
9. DIAGRAM
220V-2 40 V OR
110V- 12 0V
 Loading...