

Everspring Industry Co ST812 UserMan
ST812 FLOOD DETECTOR
These instructions should be read in conjunction with your System Installation
and Operating Manual and be retained for future reference.
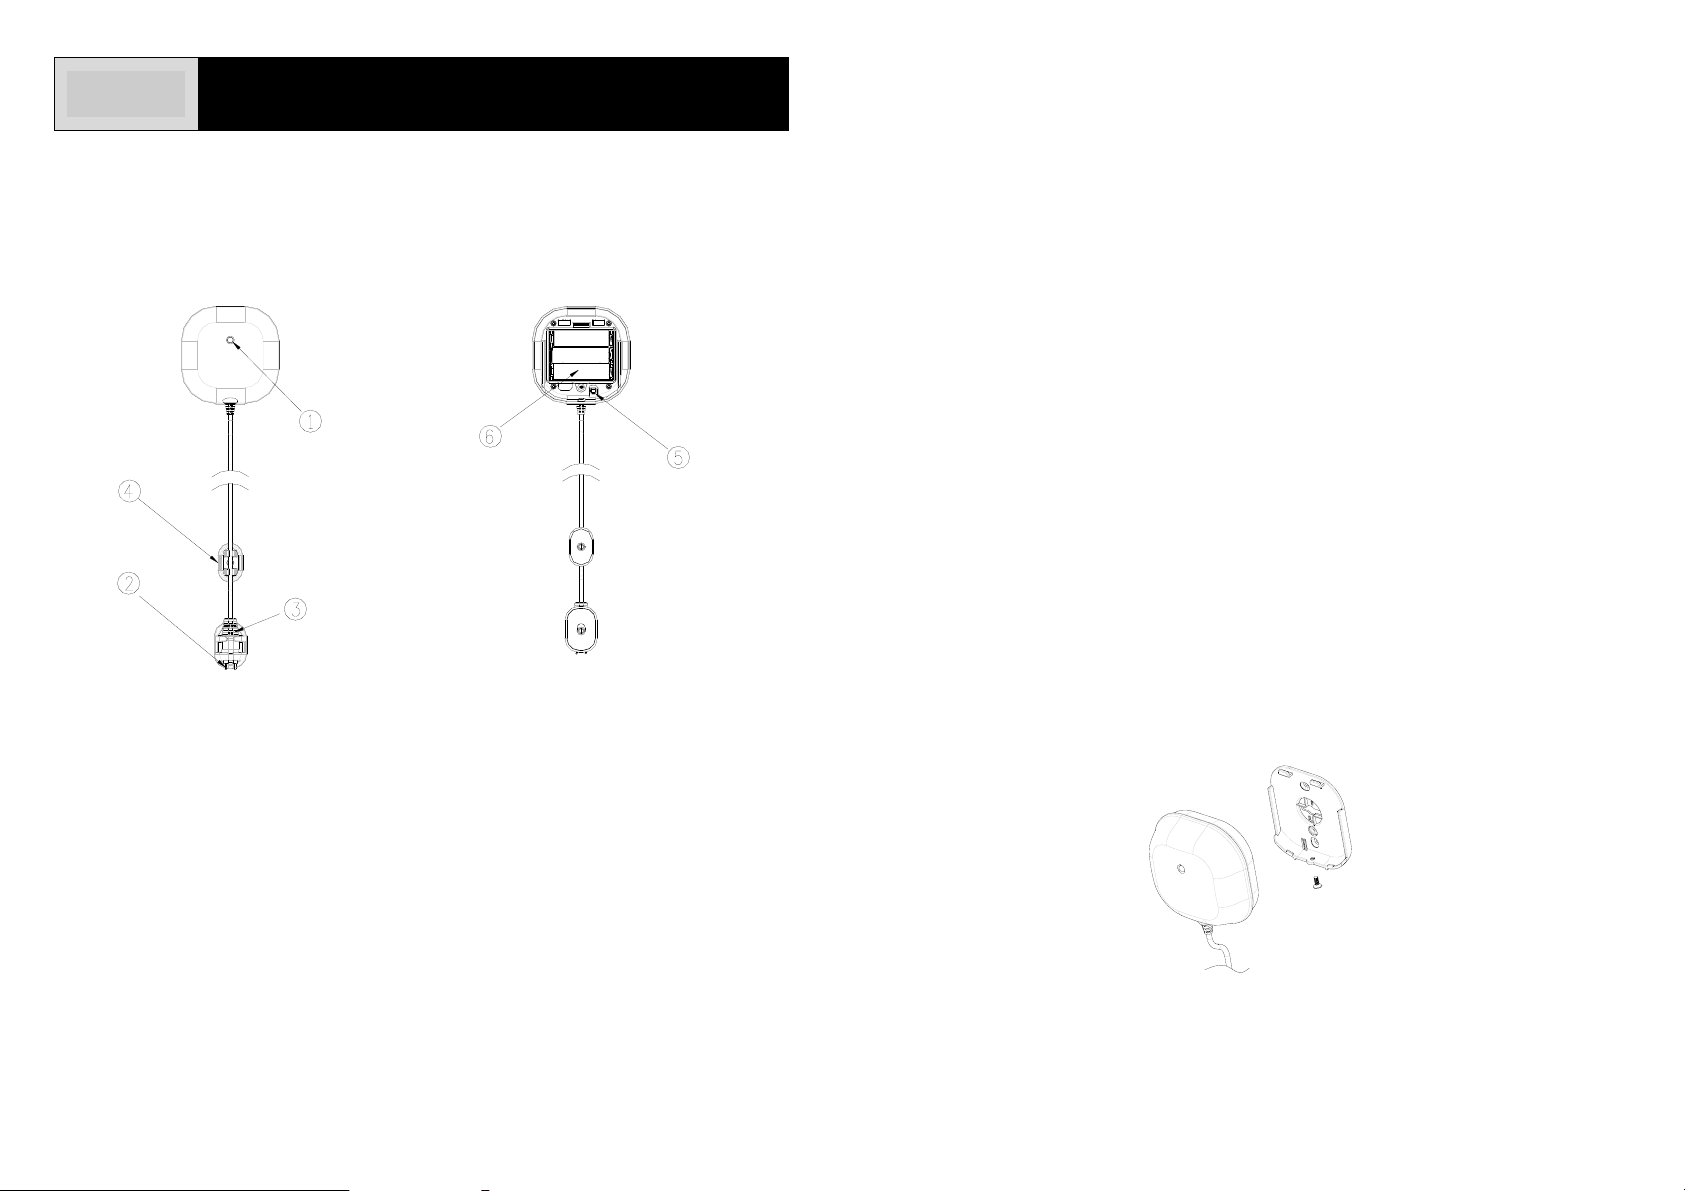
Product Layout
Z-WaveTM enabled network. Z-WaveTM enabled devices displaying the Z-WaveTM logo
can also be used with it regardless of the manufacturer, and ours can also be used in
other manufacturer’s Z-Wave
on other manufacturer’s Wireless Controller menu allows remote turn-on of connected
modules and their connected lighting when the Detector is triggered. Z-Wave
in the system also act as repeaters if they support that function.
The Flood Detector consists of a transceiver, flood sensor and 3-meter flood sensor
cable. Protect your property from water damage! The Flood Detector is designed to
sense the presence of water in basements, yachts and many others residential and
commercial applications, providing early warning of developing floods. The Flood
Detector is designed so that the transceiver is mounted on the wall and the flood
sensor is placed in a location where water presence, such as a result of leakage or
flooding, is probable.
report its status to the node ID. Once water is released, it will report to the node ID
as well.
The Flood Detector is powered by 3 x AA 1.5V alkaline battery. When battery level
drops below unacceptable level, the Detector flashe s red LED once every 30 second s
and reports low battery status to the node ID. When this occurs, the batteries should
be replaced as soon as possible.
Upon flood detection, the Detector will beep and flash and
TM
enabled networks. Inclusion of this Flood Detector
TM
nodes
Power Up
c Two-color Indication LED (red & green)
d Flood Sensor
e Sensor Rack
f Flood Sensor Cable Rack
g Link Key
h Battery Compartment
Introduction
The Flood Detector is a Z-Wave
TM
enabled device and is fully compatible with any
1. Undo and remove the screw from the bottom edge of the transceiver. Remove the
back cover.
2. Unscrew the screw from the battery cover and remov e the battery cover.
3. Fit 3 AA size 1.5V batteries to the battery spring.
1
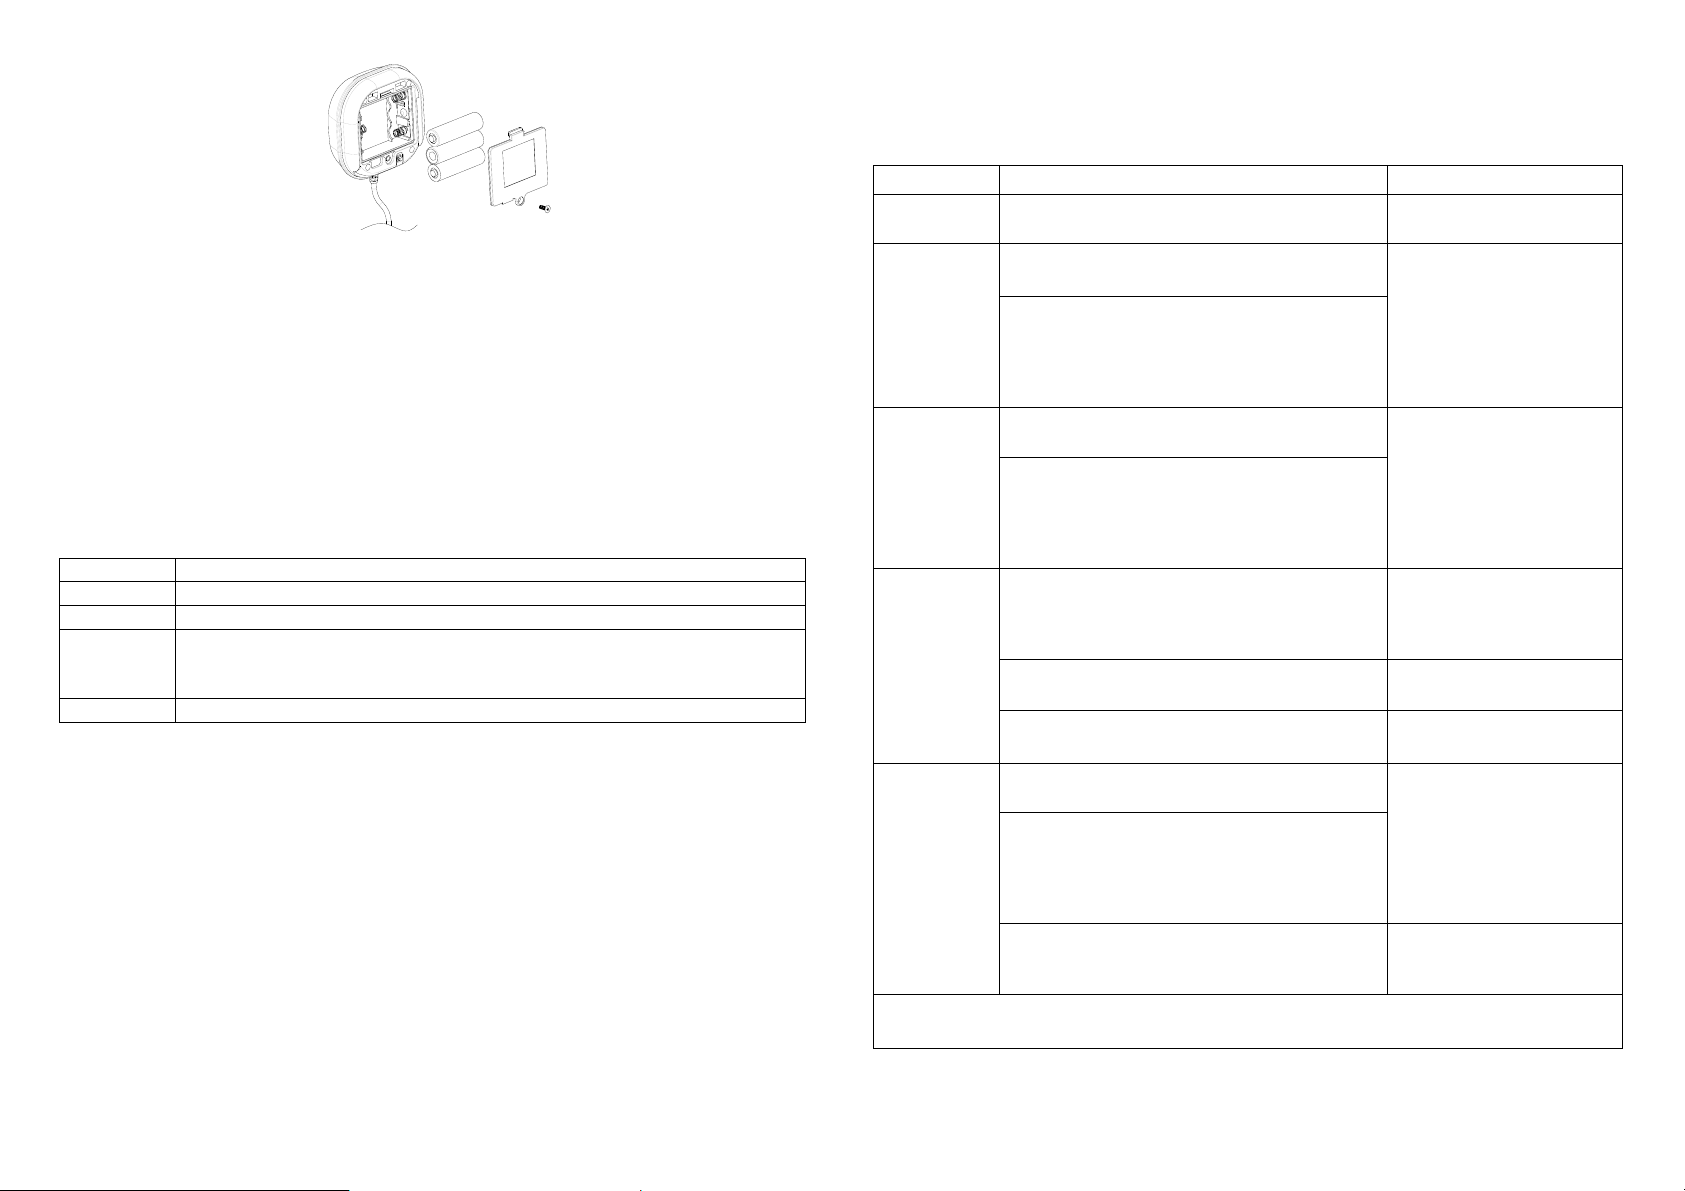
4. Refit the battery cover by fastening its screw.
Include to or Exclude from a Z-WaveTM Network
In the rear casing, there is a link key which is used to carry out inclusion, exclusion,
reset or association. When first power is applied, its two-color LED flashes on and off
alternately and repeatedly at 2-second intervals. It implies that it has not been
assigned a node ID and cannot work with Z-Wave enabled devices. The Detector
will stay “awake” for 10 minutes when power is first applied to allow time for
configuration. Please get familiar with the terms below before starting the
operations.
Function Description
Inclusion Add a Z-Wave enabled device (e.g. Flood Detector) to Z-Wave network.
Exclusion Delete a Z-Wave enabled device (e.g. Flood Detector) from the network.
Association After inclusion, you have to define the relationship between devices. Through
association, device can be assigned as master/slave, and specify which
slave is going to be controlled by which master.
Reset Restore Flood Detector to factory default.
The table below lists an operation summary of basic Z-Wave functions. Please refer
to the instructions for your Z-Wave
setup function, and to include/exclude/associate devices. The detector executes the
function of auto inclusion when…
Auto Inclusion
The function of auto inclusion will be executed as long as the Detector does not have
a node ID and in situations where…
1. The power is first applied.
2. The execution of exclusion/reset is successful where the stored node ID is cleared.
TM
Certificated Primary Controller to access the
Note: Auto inclusion timeout is 4 minutes during which the node information of
explorer frame will be emitted once every 5 seconds. Unlike “inclusion” function as
shown in the table below, the execution of auto inclusion is free from pressing the link
key on the Detector.
Function Description LED & Beep Indication
No node ID The Z-Wave Controller does not allocate a
node ID to the Detector.
Inclusion 1. Have Z-Wave Controller entered
inclusion mode.
2. Pressing link key three times within 1.5
second will enter inclusion mode. The
detector will stay “awake” for 10 minutes
to allow time for setting and device status
enquiring.
Exclusion 1. Have Z-Wave Controller entered
exclusion mode.
2. Pressing link key three times within 1.5
second will enter exclusion mode. The
detector will stay “awake” for 10 minutes
to allow time for setting and device status
enquiring.
Reset 1. Press link key three times within 1.5
second. The detector will stay “awake” for
10 minutes to allow time for setting and
device status enquiring.
2. Within 1 second, press and hold the link
key until beep tone stops.
3. IDs are excluded and all of preset
value will be reset to factory default.
Association 1. Have Z-Wave Controller entered
association mode.
2. Pressing link key three times within 1.5
second will enter association mode. The
detector will stay “awake” for 10 minutes
to allow time for setting and device status
enquiring.
3. There are two groupings - 1 and 2. Refer
to Z-Wave’s Groups as described on
page 3 & 4.
2-second on, 2-second off
Beep once whenever link
key is pressed once.
Beep once whenever link
key is pressed once.
Beep once whenever link
key is pressed once.
Long beep for 5 seconds
2-second on, 2-second off
Beep once whenever link
key is pressed once.
ÚIncluding a node ID allocated by Z-Wave Controller means inclusion. Excluding a node
ID allocated by Z-Wave Controller means exclusion.
2
 Loading...