

Page 1
Installation (See Figure 1 & Figure 2)
Before beginning installation, inspect the contents of the filtration system carton to
verify that the following items are present:
• Bracket-mounted system including two filter housing heads and filter bowls
(two clear for Model SC-1011; one white and one clear for Model SC-1021)
• CG5-10 10" (SC-1011) or CG5-20 20" (SC-1021) sediment/chlorine prefilter
cartridge
• SS-10 ScaleStick scale control cartridge
• Sump wrench
1. Shut off power to the oven.
2. Shut off the inlet water to the oven at the supply valve.
3. Attach the SC series system to a suitable structure in an accessible location.
Mounting holes are provided on the system back-plate. THE SC-1011 SYSTEM
WEIGHS 12 POUNDS IN SERVICE. THE SC-1021 SYSTEM WEIGHS 15
POUNDS IN SERVICE.
4. Attach the inlet water supply line to the inlet fitting on the SC Series system.
5. Remove the clear bowl from the prefilter housing by unthreading it from its head.
A sump wrench is provided to assist in loosening a tight bowl. Remove the
wrapping from the CG5 carbon prefilter cartridge and insert the cartridge into the
bowl aligning the hole in the bottom of the cartridge over the raised stub in the
bottom of the bowl.
6. Check to see that the O-ring is in place at the top of the bowl and that it is
lubricated with food grade silicone lubricant. Reinstall the bowl by aligning the
hole in the top of the cartridge with the stub extending down from the housing
head and threading the bowl onto the head. Hand tighten snugly. Do not overtighten the bowl.
7. Remove the clear bowl from the scale control housing by unthreading it from its
head. Remove the wrapping from the ScaleStick cartridge and insert the cartridge
up onto the stub extending down from the housing head. The friction fit between
the ScaleStick and the stub should allow the cartridge to remain suspended while
reinstalling the clear bowl.
8. Check to see that the O-ring is in place at the top of the bowl and that it is
lubricated with food grade silicone lubricant. Reinstall the bowl by threading it
onto its housing head. Hand tighten snugly. Do not over-tighten the bowl.
9. Prior to connecting the SC Series System outlet to the steamer/combi-oven, run
water through the unit and water lines to purge them of air and any particles or
debris.
10. Connect the inlet hose/piping of the steamer/combi-oven to the outlet fitting on
the SC Series System.
11. Follow the manufacturer's instructions for starting and operating your
steamer/combi-oven.
Review these important points before installing your
SC Series System
1. Always use a minimum 1/2" O.D. tubing, or equivalent, from the outlet of the
filtration unit to your steamer/combi-oven.
2. Use the water from the SC Series unit only on steamer/combi-oven feed and
make-up water. DO NOT USE TO TREAT CONDENSATE COOLING WATER.
3. For many years, Everpure has worked closely with all major foodservice equipment
manufacturers to assure the highest possible degree of compatibility and optimal
performance of its water filtration systems with their ovens and steamers. To
help ensure satisfactory operation, we recommend that you obtain and read the
equipment manufacturer's operating and maintenance instructions for your
specific model. Follow the manufacturer's instructions and procedures for
installation, maintenance and cleaning. Or consult with the manufacturer's
representative or technical service personnel for guidance regarding any
differences between their directions and those included with this system. Failure
to do so may affect equipment performance and/or manufacturer's warranty
coverage.
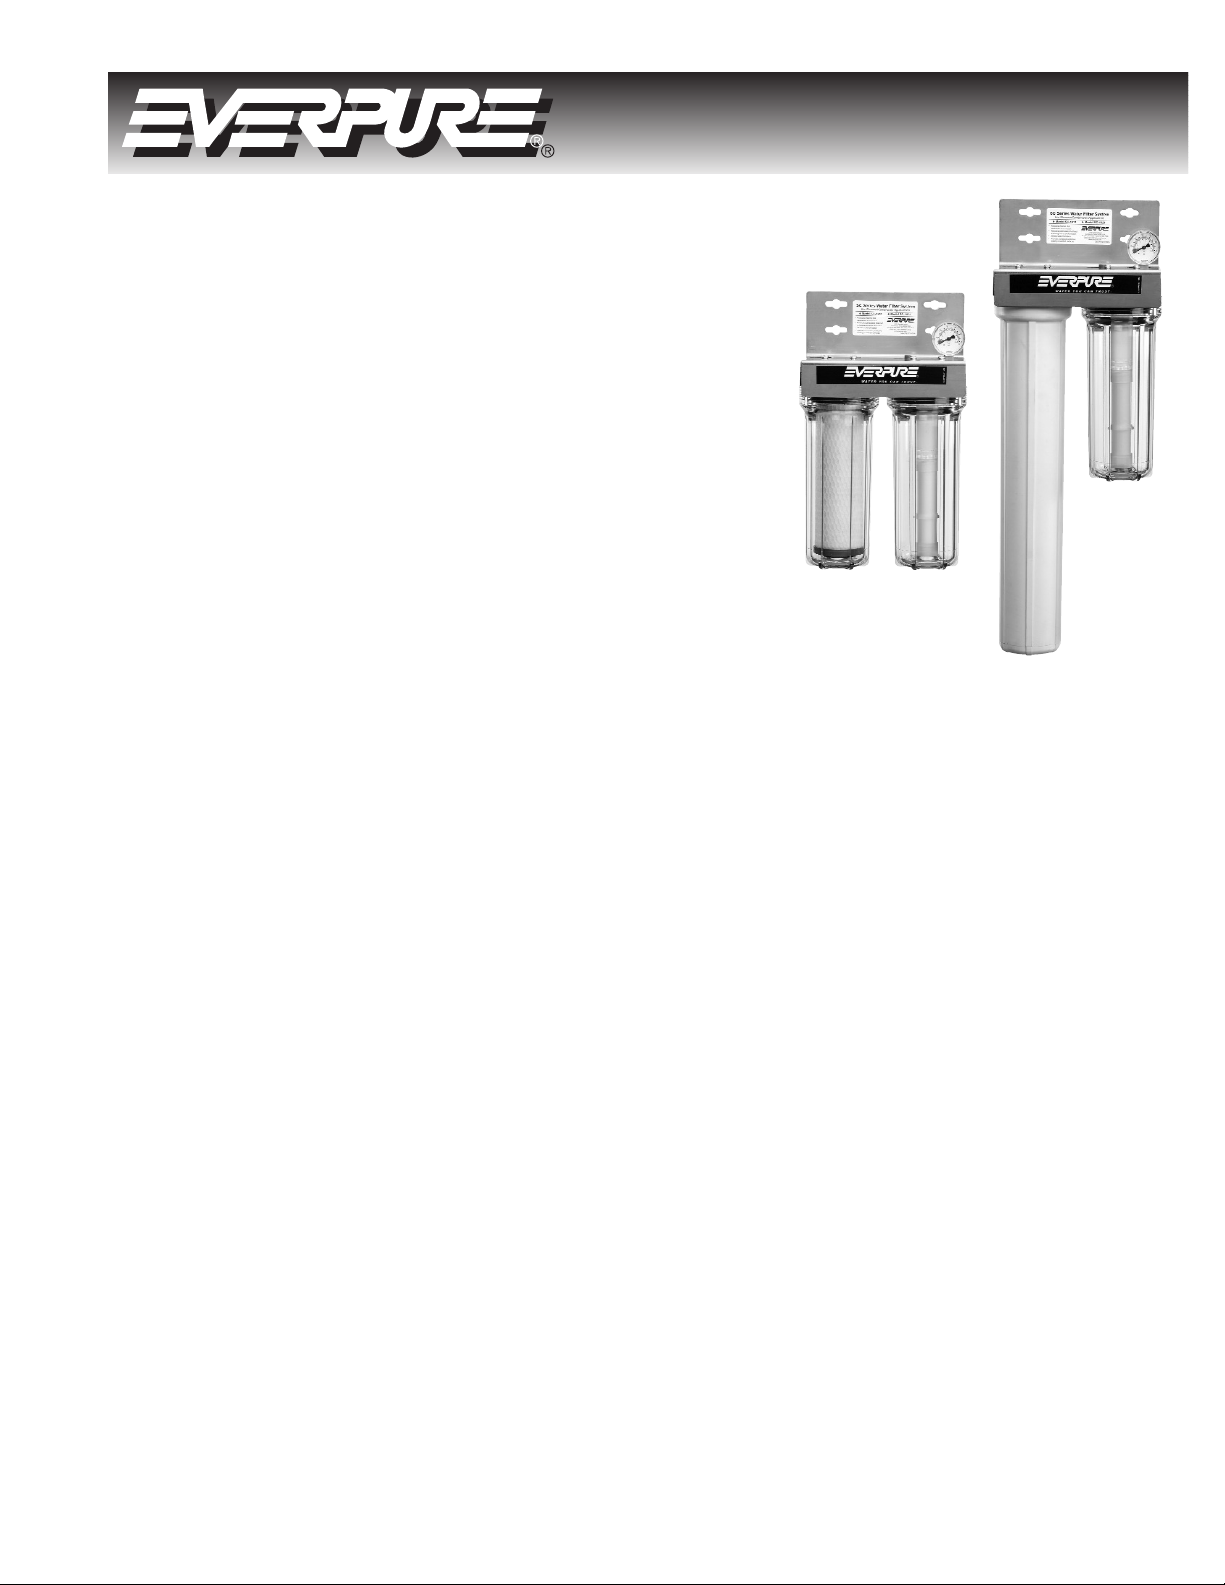
Figure 1 - SC-1011 System
Figure 2 - SC-1021 System
Installation and Operation Guide
SC Series Water Filter Systems
Cartridge Change Determination
Replace the carbon prefilter cartridge whenever its capacity is reached or when it
becomes excessively dirty (observed visually or by flow restriction).
The system outlet pressure gauge provides a quick, simple means of determining when
the filter cartridge should be checked. The gauge can be used to monitor dynamic
(flowing) pressure and static (line) pressure. The filter cartridge should be changed when
the gauge needle is in the red area while the oven is in operation.
The SS-10 ScaleStick cartridge should be changed when the product level in the
cartridge drops below 1/2" from the bottom of the bowl.
Cartridge Change Instructions
1. Shut off power to the steamer/combi-oven.
2. Shut off filter system inlet water supply and outlet hose to the steamer/combioven.
3. Momentarily depress the red pressure relief valve button on top of the scale
control cartridge head.
4. Disconnect the outlet hose from the filter system.
5. Unthread and remove the clear prefilter bowl and dump any water from the bowl.
A sump wrench is provided to assist in loosening a tight bowl. Remove and
discard the old carbon prefilter cartridge.
6. Rinse and clean the bowl with clean water. No special cleaners are needed.
7. Check and clean the bowl O-ring. If it is dry, lubricate it with a food grade silicone
lubricant. If it is cracked or deteriorated, replace it.
8. Remove the wrapping from the CG5 carbon prefilter cartridge and insert the
cartridge into the bowl aligning the hole in the bottom of the cartridge over the
raised stub in the bottom of the bowl.
9. Check to see that the O-ring is in place at the top of the bowl and that it is
lubricated with food grade silicone lubricant. Reinstall the bowl by aligning the
hole in the top of the cartridge with the stub extending down from the housing
head and threading the bowl onto the head. Hand tighten snugly. Do not overtighten the bowl.
10. Remove the clear bowl from the scale control housing by unthreading it from its
head and dumping any water from the bowl. Remove the wrapping from the
ScaleStick cartridge and insert the cartridge up onto the stub extending down
from the housing head. The friction fit between the ScaleStick and the stub should
allow the cartridge to remain suspended while reinstalling the clear bowl.
Page 2
Limited Warranty
Commercial Water Treatment Equipment
You have just purchased one of the finest water treatment units made. As an expression
of our confidence in Everpure products, this product is warranted against defects in
material and workmanship to the original end-user when installed in accordance with
Everpure specifications. The warranty period commences from the date of purchase and
is administered as follows:
For a period of ONE YEAR Replaceable elements
(i.e., filter & water treatment cartridges)*
For a period of FIVE YEARS The entire system (excluding replaceable elements)
*This is for material & workmanship, not filter or water treatment cartridge life.
The unit must be used in operating conditions that conform to Everpure’s recommended
design guidelines. This warranty will not apply if the unit has been modified, repaired or
altered by someone not authorized by Everpure.
If a part described above is found defective within the specified period, you should
notify Everpure technical service at the phone number listed below. Any part found
defective within the terms of this warranty will be repaired or replaced (at Everpure’s
discretion) by your local dealer or Everpure technical service. You pay only freight from
our factory and local dealer charges. Any repaired or replaced warranty item will be
incorporated under the original warranty terms of the existing system.
We are not responsible for damage caused by accident, fire, flood, freezing, Act of God,
misuse, misapplication, neglect, oxidizing agents (such as chlorine, ozone, chloramines
and other related components), alteration, installation or operation contrary to our
printed instructions, or by the use of accessories or components which do not meet
Everpure’s specifications. Refer to the specifications section in the Installation and
Operating manual for approved application parameters.
Our product performance specifications are furnished with each water treatment unit.
TO THE EXTENT PERMITTED BY LAW, EVERPURE DISCLAIMS ALL IMPLIED
WARRANTIES, INCLUDING WITHOUT LIMITATION WARRANTIES OF MERCHANTABILITY
AND FITNESS FOR PARTICULAR PURPOSE; TO THE EXTENT REQUIRED BY LAW, ANY
SUCH IMPLIED WARRANTIES ARE LIMITED IN DURATION TO THE PERIOD SPECIFIED
ABOVE FOR THE ENTIRE WATER TREATMENT UNIT. As a manufacturer, we do not know
the characteristics of your water supply or the purpose for which you are purchasing this
product. The quality of water supplies may vary seasonally or over a period of time, and
your water usage rate may vary as well. Water characteristics can also differ
considerably if this product is moved to a new location. For these reasons, we assume
no liability for the determination of the proper equipment necessary to meet your
requirements, and we do not authorize others to assume such obligations for us. Further,
we assume no liability and extend no warranties, express or implied, for the use of this
product with a non-potable water source or a water source which does not meet the
conditions for use described in the owner’s guide or performance data sheet for this
product.
OUR OBLIGATIONS UNDER THIS WARRANTY ARE LIMITED TO THE REPAIR OR
REPLACEMENT (AT EVERPURE’S DISCRETION) OF THE FAILED PARTS OF THE WATER
TREATMENT UNIT, AND WE ASSUME NO LIABILITY WHATSOEVER FOR DIRECT,
INDIRECT, INCIDENTAL, CONSEQUENTIAL, SPECIAL, GENERAL OR OTHER DAMAGES.
Some states do not allow the exclusion of implied warranties or limitations on how long
an implied warranty lasts, so the above limitation may not apply to you. Similarly, some
states do not allow the exclusion of incidental or consequential damages, so the above
limitation or exclusion may not apply to you. This warranty gives you specific legal
rights, and you may also have other rights which vary from state to state. Consult your
telephone directory for your local independently operated Everpure dealer, or write
Everpure for warranty and service information.
Cartridge Change Instructions (continued)
11. Prior to re-connecting the SC Series System outlet to the steamer/combi-oven,
turn on the inlet water supply and run water through the unit and water lines to
purge them of air and any particles or debris.
12. Re-connect the SC Series System outlet to the inlet hose/piping of the steamercombi-oven and restore the steamer/combi-oven to service.
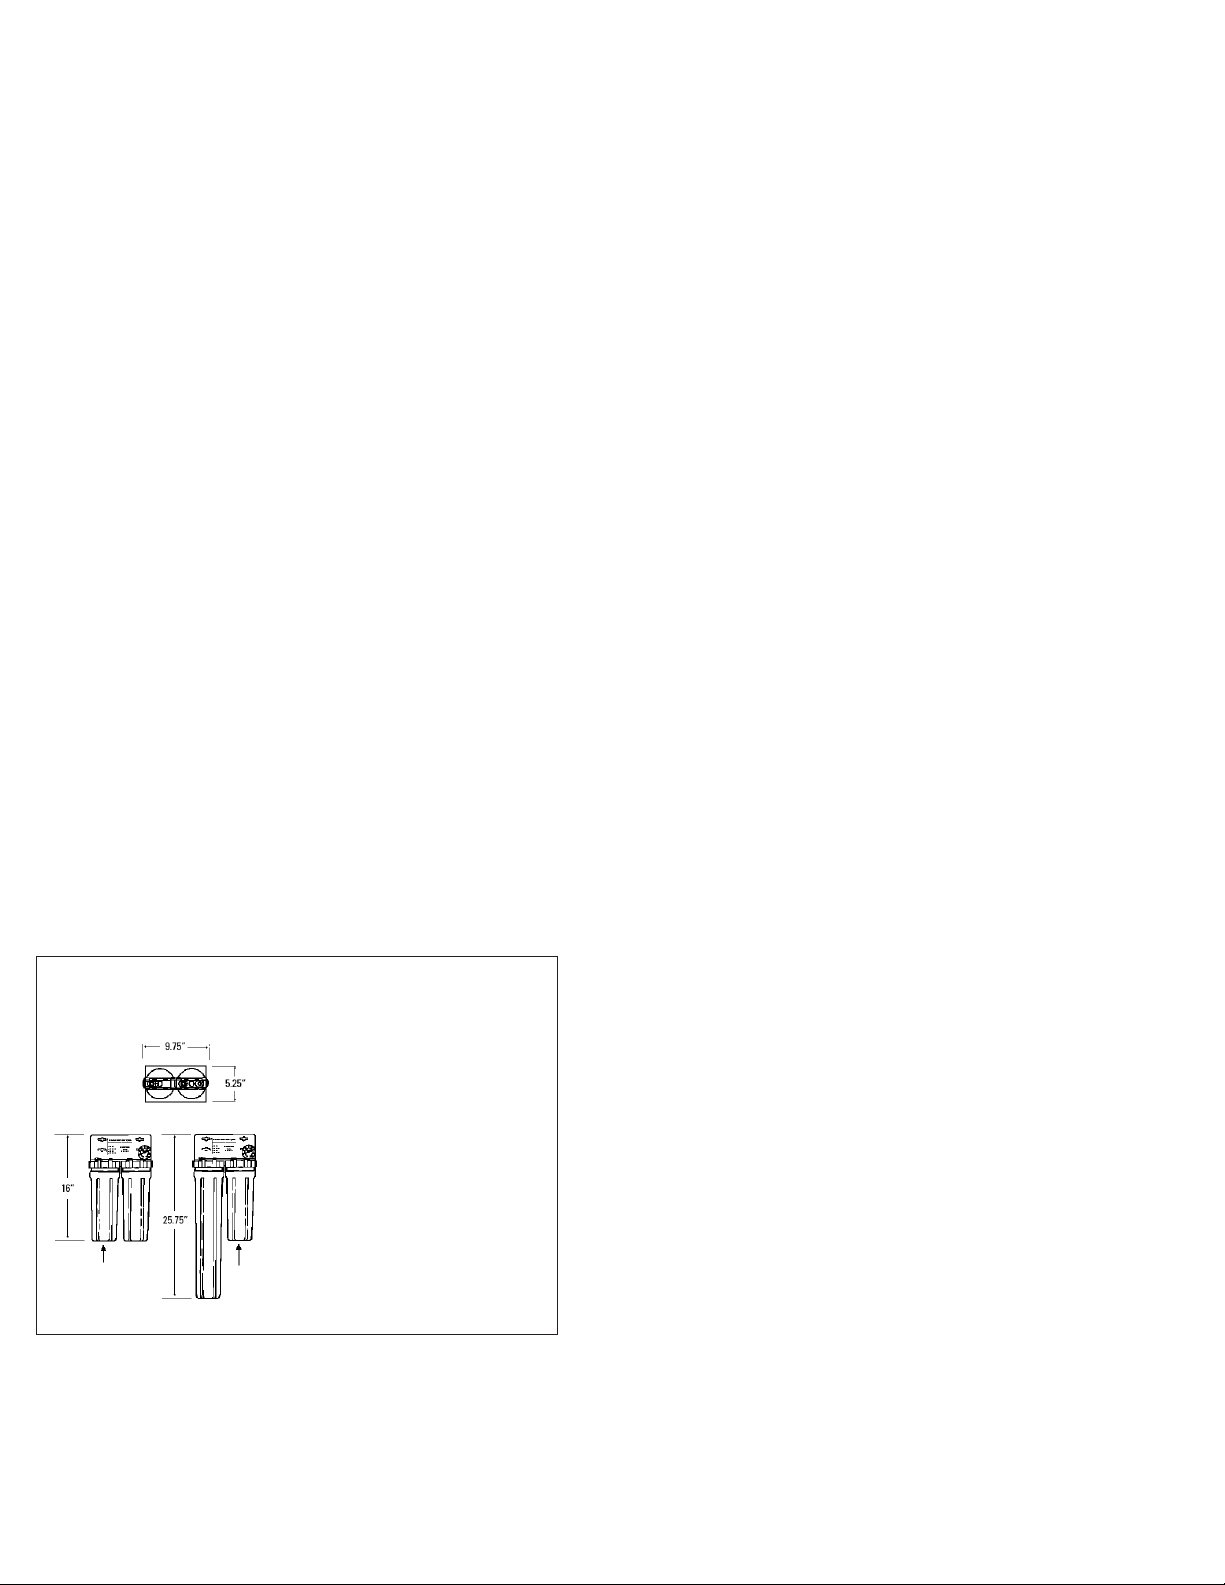
Dimensions and Specifications (See Figure 3)
SC-1011 SC-1021
Mounting plate width: 9.25" 9.25"
Overall width: 9.75" 9.75"
Overall height: 16" 25.75"
System depth: 5.25" 5.25"
Shipping weight: 8.5 lbs. 10 lbs.
Operating weight: 12 lbs. 15 lbs.
Inlet/outlet connections: 1/2" FNPT
Temperature: 35-100˚ F (2-38˚ C)
Pressure: 10-125psi (0.7-8.6 bar), non-shock
Water flow: 6 gpm maximum
For cold water use only.
Replacement Parts
Use only genuine Everpure replacement cartridges.
Contact your local Everpure dealer for filter cartridges or system replacement parts.
Description Part Number
CG5-10 10" Carbon Prefilter cartridge DEV9108-15 (12-pack)
CG5-20 20" Carbon Prefilter cartridge DEV9108-25 (6-pack)
SS-10 ScaleStick cartridge EV9799-02 (12-pack)
Outlet pressure gauge EV3114-09
Clear 10" bowl EV3092-58
White (opaque) 20" bowl EV3093-32
O-ring for bowls EV3112-40
Sump wrench EV800075
Figure 3 - Dimensions
For sales, replacement components, and service, contact your Everpure dealer or:
EVERPURE, Inc.: 1040 Muirfield Drive • Hanover Park, Illinois 60133 • (630) 307-3000
IN EUROPE: Research Park, Haasrode, B-3001 Heverlee, Belgium
IN JAPAN: 1-8-19, Tsumada, Kita • Atsugi-Shi, Kanagawa 243, Japan
Technical Service, 1-800-323-7873 ext. 5, www.everpure.com
P/N EV311590C
Everpure SC Series Water Filtration System
for Steamer Applications
System Characteristics
• Twin series header configuration
• Drop-in style filter bowl housings
• Filter system header assembly
installed onto formed stainless
steel wall-mounting back-plate
• 5-micron carbon block cartridge for
particulate and chlorine reduction
• SS-10 ScaleStick cartridge for
scale control
• Outlet pressure gauge pre-
assembled onto header assembly
Scale Control
Housing with
SS-10 ScaleStick
Prefilter Housing
with carbon
block prefilter
Page 3

LET CHANGE BY APRVD ECN DATE
A NEW ART CREATED LR GR 04-055 05/20/04
B CORRECT PART NAME LR GR 04-106 06/15/04
C Add SC-1021, Address/Font Change, Condense to 2pgs. JN GR 04-112 08/05/04
Materials & Description:
SC Series Installation and Operations Guide EV311590
Size: 8 1/2” x 11”, 2 pages
Color: Black, 2 Sided
Stock: 20# White
Coating:
Other:
This page contains materials and ECN information.
IT DOES NOT PRINT AS PART OF THE DOCUMENT!
 Loading...