

Everlast ev-90 Assembly Instructions Manual
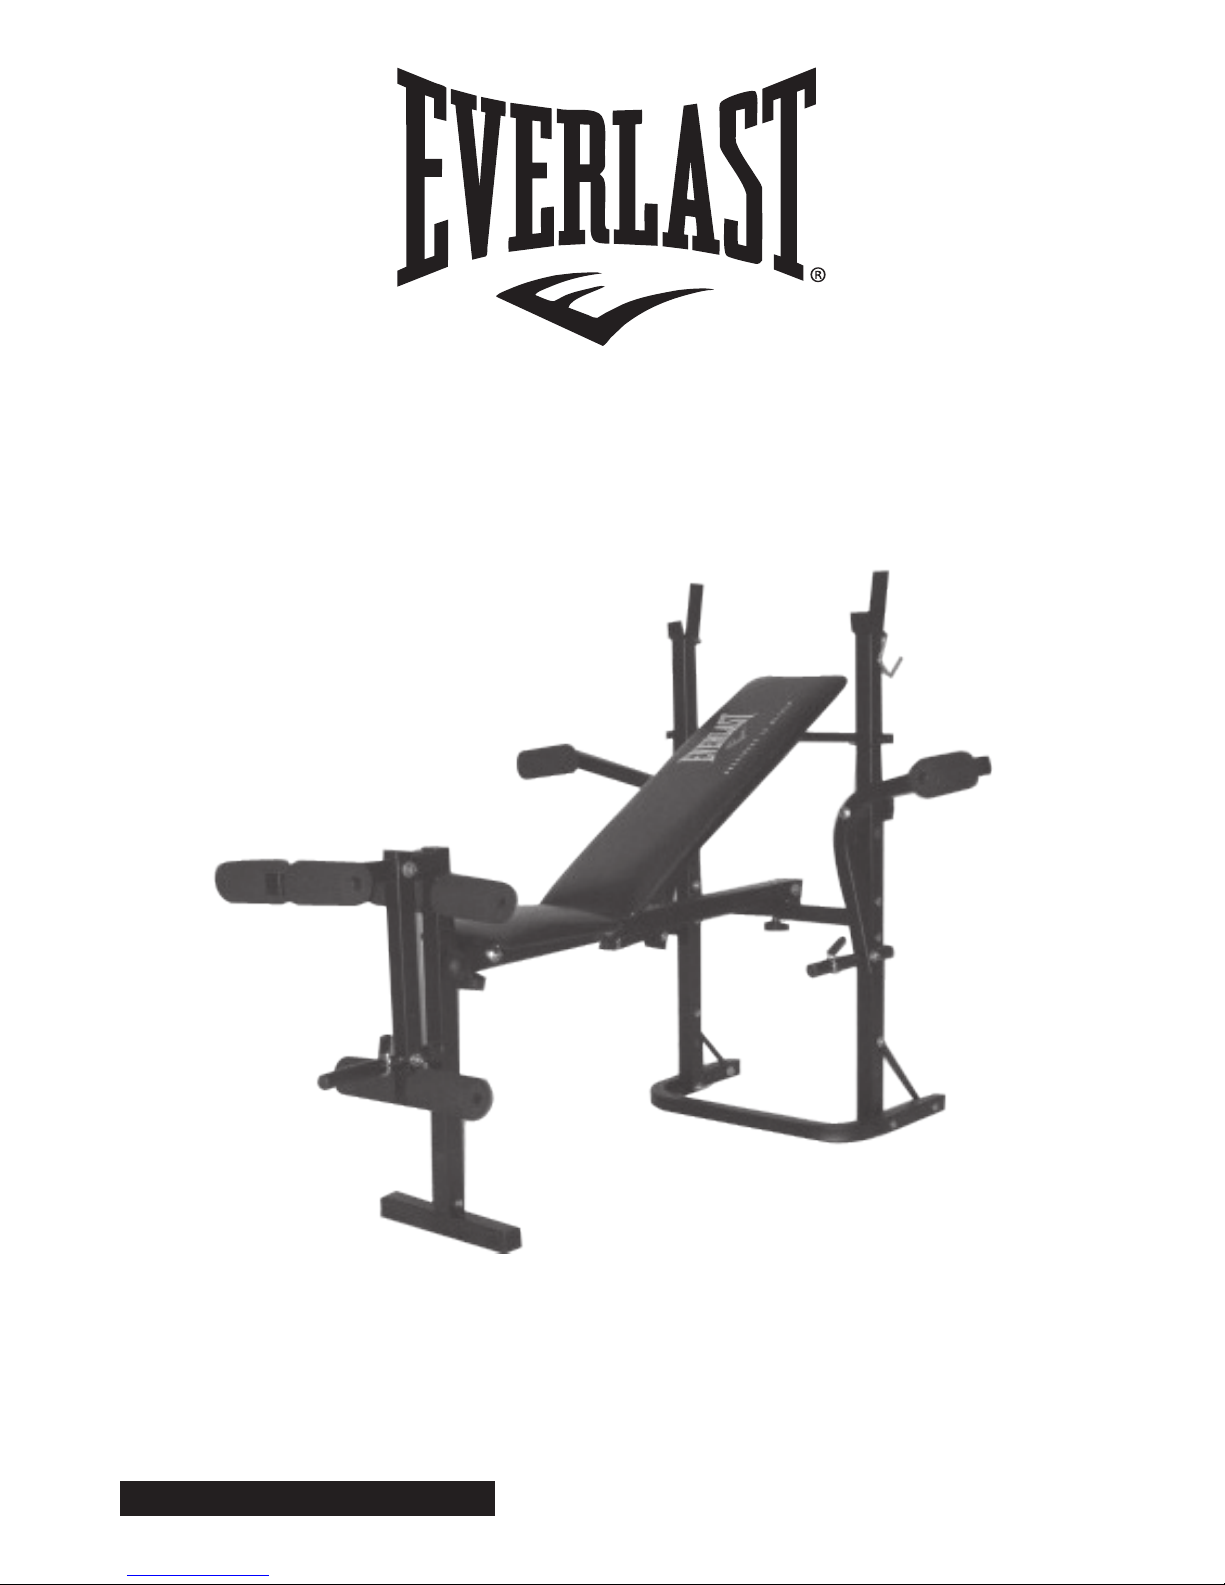
WEIGHT BENCH
FOLDABLE
CAUTION
BEFORE USING THIS EQUIPMENT,
CAREFULLY FOLLOW THE INSTRUCTIONS
AND READ ALL PRECATIONS, THEN RETAIN
FOR FUTURE REFERENCE.
Maximum User Weight : 110kg
ev-90

INDEX
SAFETY INSTRUCTIONS P.03
HARDWARE LIST P.04
ASSEMBLY STEPS P.06
FITNESS TIPS AND TECHNIQUES P.19
CONDITIONING GUIDELINES P.20
WARM-UP AND COOL-DOWN P.21
EXERCISE PROGRAM P.22
EXERCISE CHART P.23
EXPLODED DRAWING P.26
PARTS LIST P.27

SAFETY INFORMATION
WARNING
To reduce the risk of serious injury, read the following safety instructions before using the EVERLAST
WEIGHT BENCH.
IMPORTANT: THIS UNIT IS INTENDED FOR HOME USE ONLY
1. Read all the instructions in this manual before using the product. Keep this manual for the entire life
of the product.
2. This device must be assembled by an adult.
3. It is the responsibility of the owner to ensure that all users of this product are properly informed as to
how to use this product safely.
4. This product is intended for domestic use only. Do not use this product in any commercial, rental, or
institutional setting.
5. Use this product indoors in a dry, dust free environment, on a flat hard floor. Ensure there is
sufficient space to move around the equipment safely. Take precautions to protect vulnerable
flooring.
6. The user is responsible for ensuring proper care and maintenance of the equipment. After the
product has been assembled and prior to each use, check that the fasteners are properly tightened
and that none are protruding. Regularly check the condition of the parts that are most susceptible to
wear and tear.
7. Do not store this product in a damp place (e.g. edge of a pool, bathroom etc.).
8. Wear athletic shoes to protect your feet while exercising. Do not wear loose or baggy clothing, since
it may get caught in the equipment. Take off all jewellery.
9. Put your hair up so that it does not get in the way during exercise.
10. If you feel any pain or if you become dizzy while exercising, stop immediately, rest and seek medical
attention.
11. Keep children and pets away from the product at all times.
12. Before undertaking this exercise program, please be sure to consult with your doctor-particulary if
you have not participated in sports for several years.
13. Do not attempt to repair this product yourself.
14. Any assembly/disassembly of the product must be done with due regard to health safety.
15. Maximum user weight: 110 kg.
CARE AND MAINTENANCE:
Wipe surfaces dry following each training session.
Do not use any solvents-clean only with a damp cloth.
3
WEIGHT BENCH
HELP LINE NUMBER: 08456 400800
ev-90
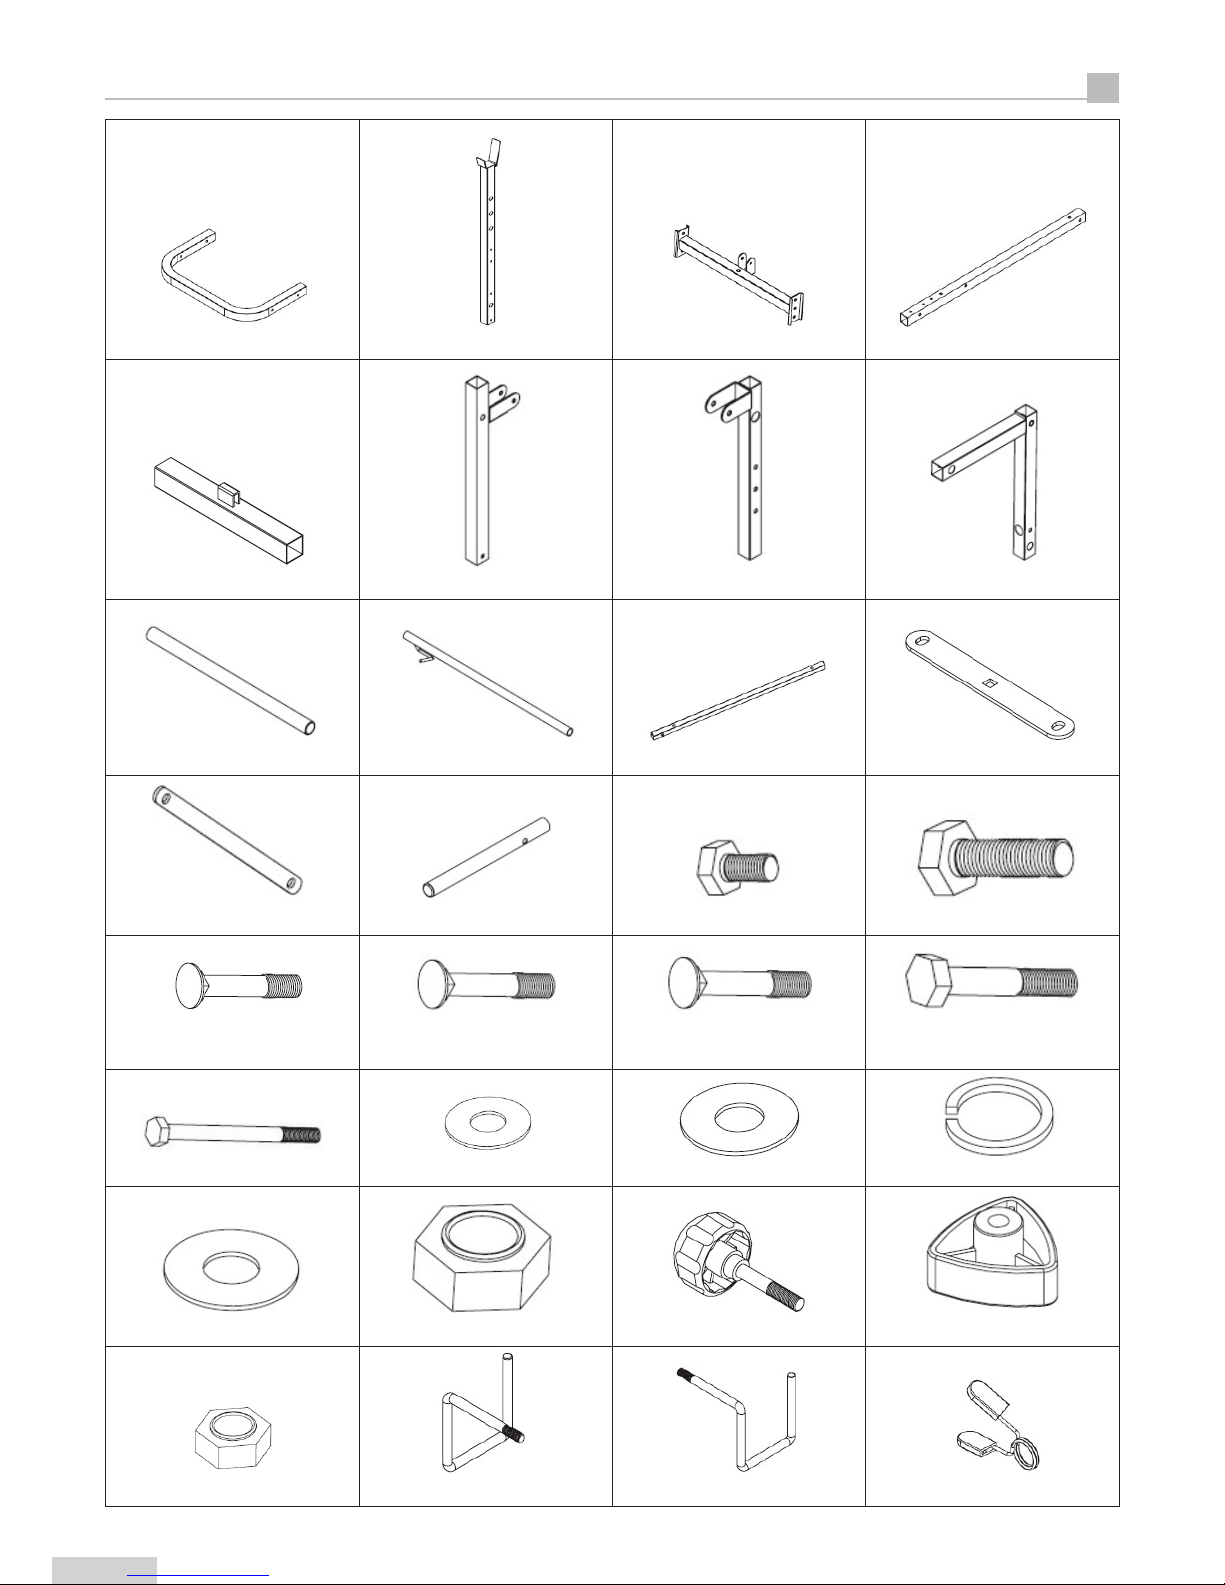
HARDWARE LIST
(1) Rear Stabilizer 1pc (2) Upright 2pcs (3) Cross Support 1pc (4) Main Frame 1pc
(5) Front Stabilizer 1pc (6)Leg Extension Upright 1pc (7) Leg Extension Support 1pc (8) Leg Extension 1pc
(9) Foam Roller Post 3pcs (10)Backrest Adjustment Rod 1pc (11) Backrest Support 2pcs (12) Seat Backrest 1pc
(13) Stabilizer Bracket 2pcs (14) Weight Disc Post 3pcs (15) Bolt (M6 x 14mm) 2pcs (16) Bolt (M6 x 40mm) 4pcs
(17) Carriage Bolt (M8 x 50mm)
8pcs
(18) Carriage Bolt (M8 x 55mm)
1pc
(19) Carriage Bolt (M8 x 90mm)
1pc
(20) Hex Bolt (M10 x 60mm)
1pc
(21) Hex Bolt (M10 x 130mm) 1pc (22) Flat Washer (M6) 6pcs (23) Flat Washer (M8) 21pcs (24) Spring Washer (M8) 2pcs
(25) Flat Washer (M10) 12pcs (26) Nylon Locknut (M8) 17pcs (27) Locking Knob (Male M8) 1pc (28) Locking Knob (Female M8) 2pcs
(29) Nylon Locknut (M10) 4pcs (30L) Safety Hook (Left side) 1pc (30R) Safety Hook (Right Side) 1pc (31) Spring Collar 3pcs
4
WEIGHT BENCH
HELP LINE NUMBER: 08456 400800
ev-90
HARDWARE LIST
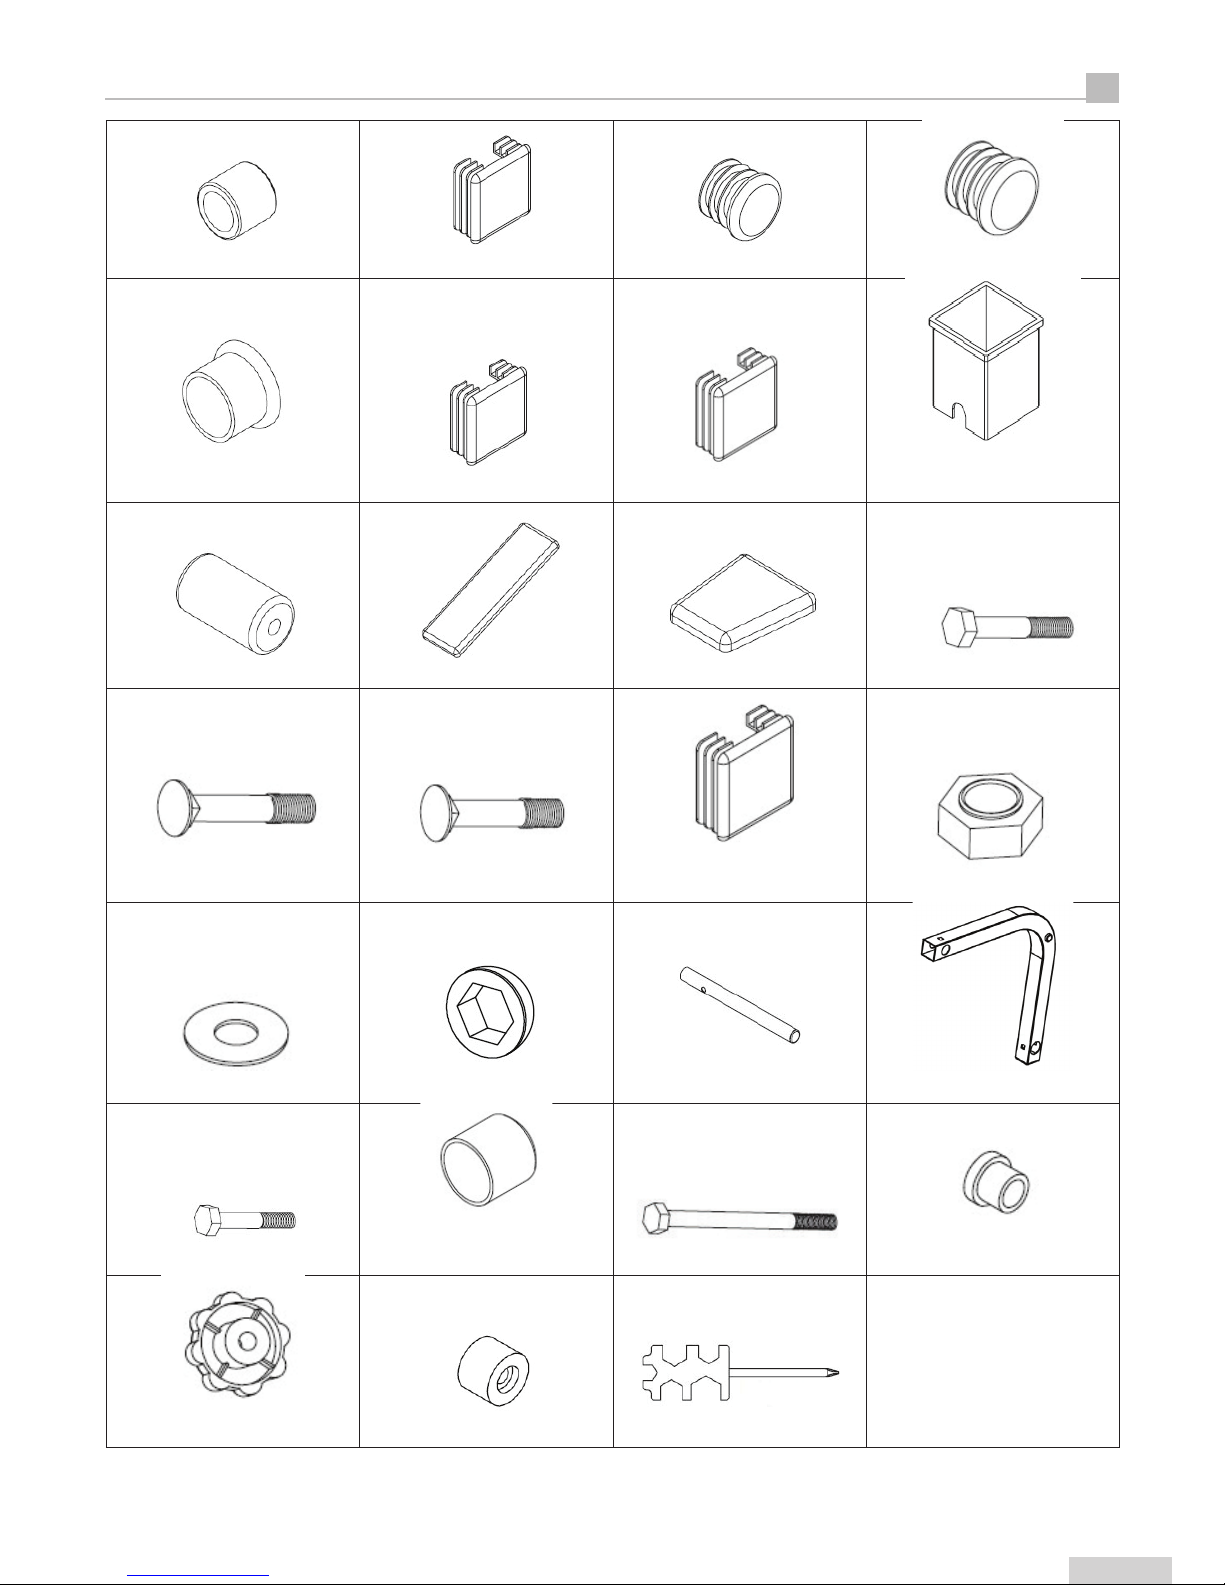
(32) Backrest Support Bushing 2pcs (33) Square End Cap (25mm) 4pcs (34) Round End Cap (ø19mm) 12pcs (35) Round End Cap (ø25mm) 3pc
(36) Round End Over Cap
(ø25mm) 1pc (37) Square End Cap (32mm) 2pcs (38) Square End Cap (38mm) 6pcs
(39) Square lnternal Bushing
(38mm) 1pc
(40) Foam Roller 8pcs (41) Backrest 1pc (42) Seat 1pc (43) Hex Bolt (M10 x 55mm) 2pcs
(44) Carriage Bolt (M8 x 85mm)
2pcs
(45) Carriage Bolt (M8 x 45mm)
7pcs
(46) Square End Cap (33.4mm)
9pcs (47) Lock nut (M6) 2pcs
(48) Washer (M6) 2pcs (49) Nut Cap (M10) 4pcs
(50) Butterfly Arm Foam Roller Post
2pcs (51) Butterfly Arm 2pcs
(52) Hex Bolts (M8 x 50mm) 2pcs
(53) Round End Over Cap (ø25mm)
2pcs (54) Hex Bolts (M10 x 125mm) 2pcs
(55) Butterfly Arm Support Bushings
4pcs
(56) Locking Knob (Male M10) 2pcs (57) Plastic Spacer 2pcs Tool 2pcs
5
WEIGHT BENCH
HELP LINE NUMBER: 08456 400800
ev-90
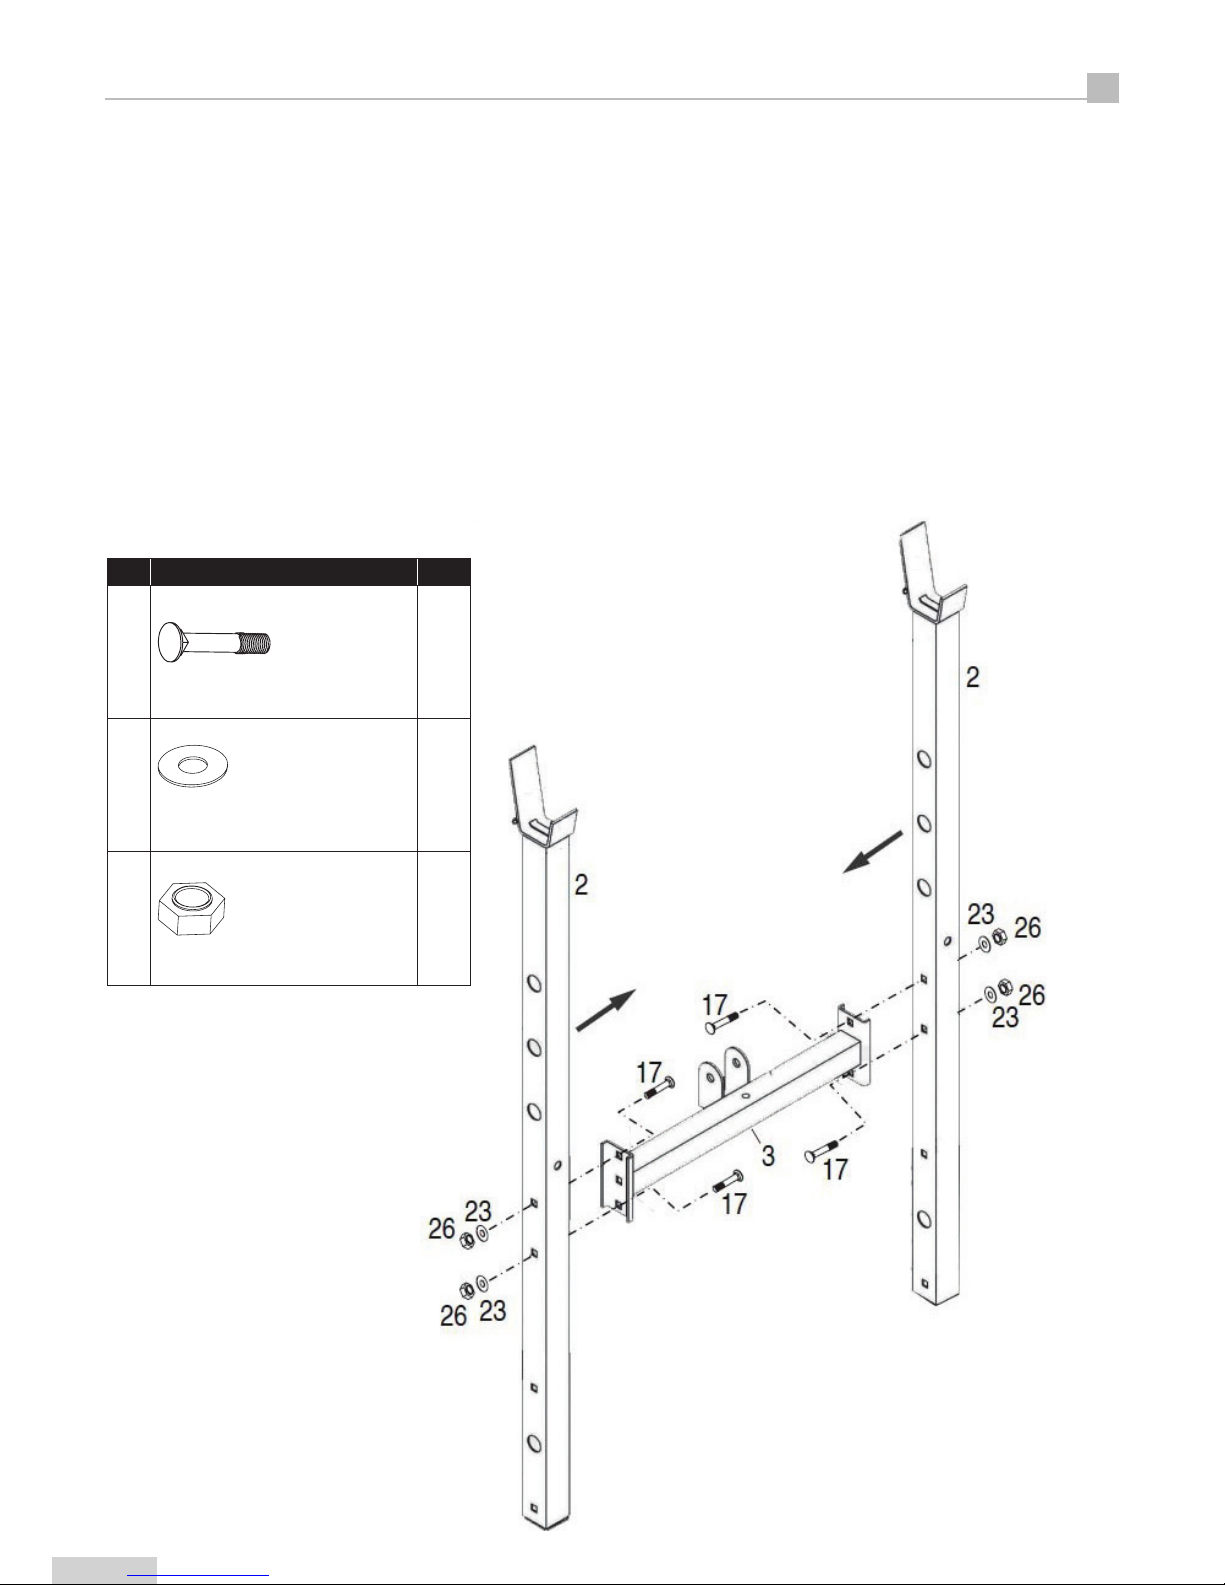
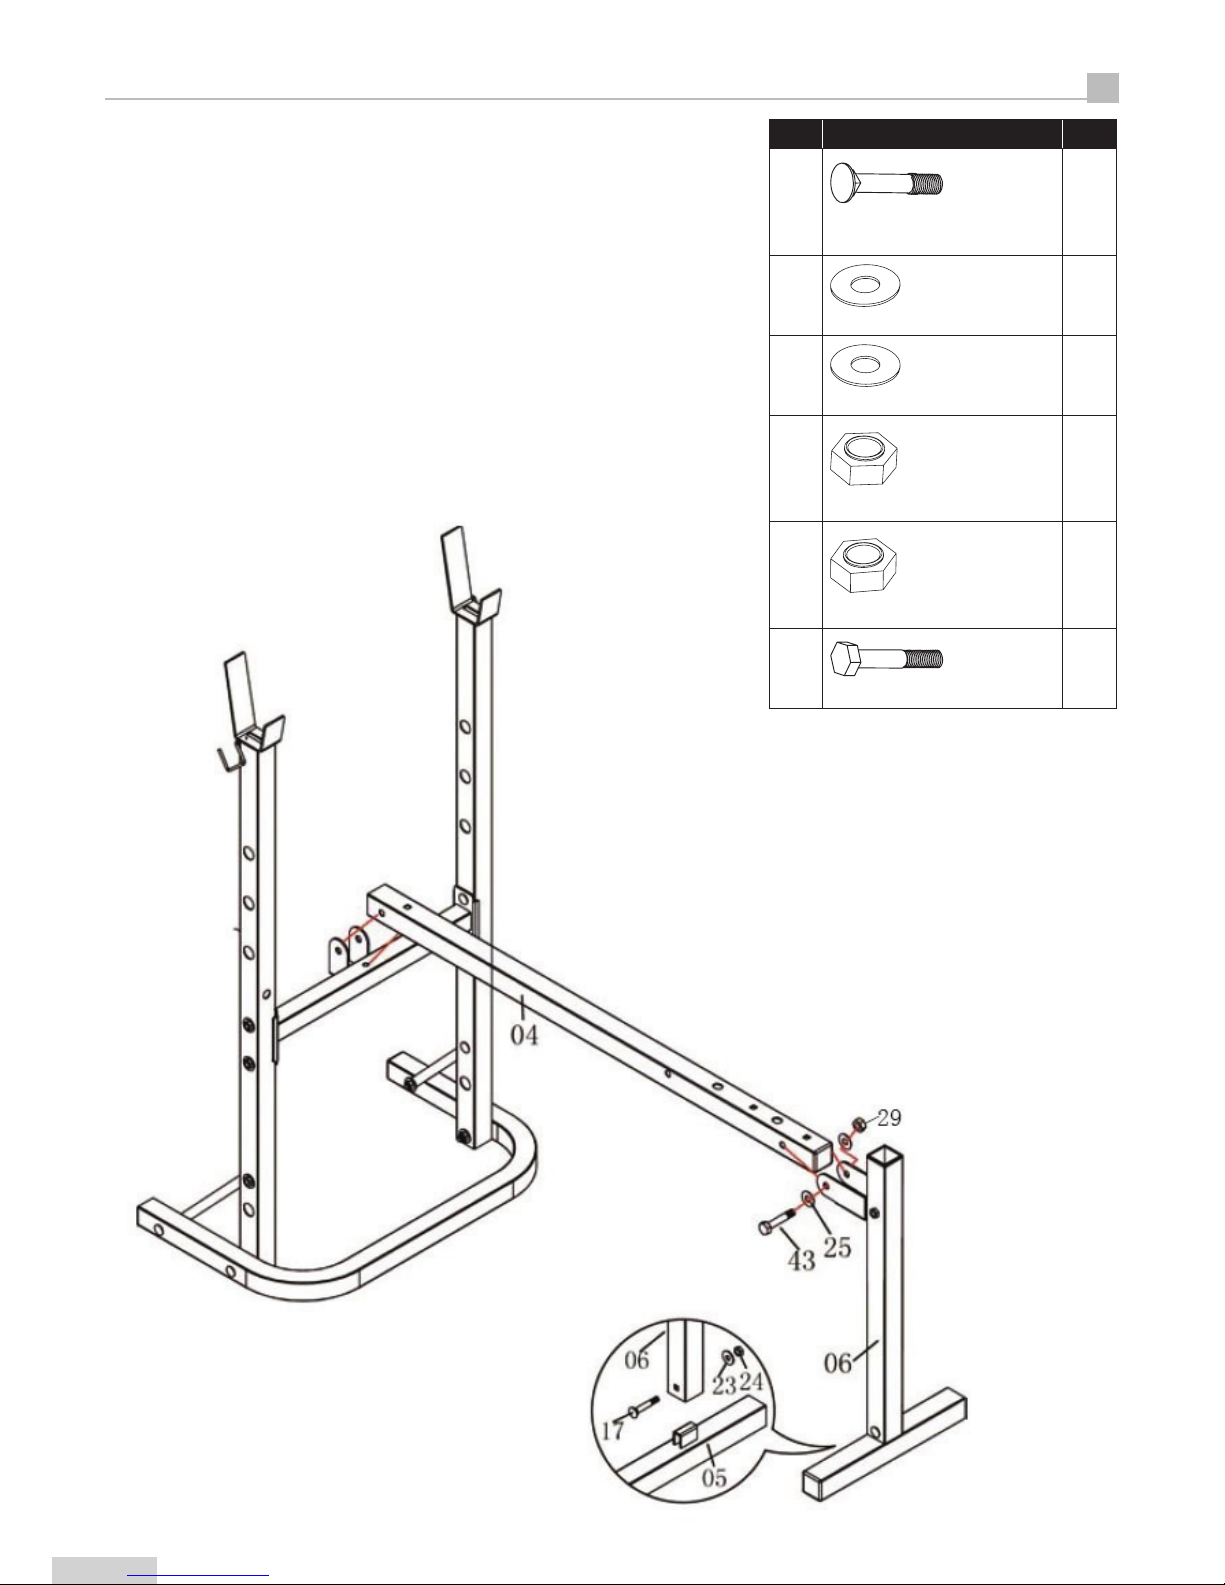
NO. DESCRIPTION QTY
17
CARRIAGE BOLT (M8 x 50mm)
4
23
FLAT WASHER (M8)
4
26
NYLON LOCKNUT (M8)
4
ASSEMBLY STEPS
Before commencing assembly, please ensure all parts are present.
If any parts are missing please contact the Help Line Number at the
bottom of the page.
STEP 1
COMPLETE EACH STAGE IN ORDER BEFORE ADVANCING ON TO THE NEXT.
ASSEMBLE WITH NUTS AND BOLTS LOOSE AT FIRST.
TIGHTEN ALL BOLTS AND NUTS AFTER COMPLETING ALL ASSEMBLY STEPS.
• Connect both Uprights (2) to the Cross Support (3) using four M8 x 50mm Carriage Bolts
(17), fitted from the inside as per illustration, four M8 Flat Washers (23) and four M8 Nylon
Locknuts (26).
6
WEIGHT BENCH
HELP LINE NUMBER: 08456 400800
ev-90

NO. DESCRIPTION QTY
17
CARRIAGE BOLT (M8 x 50mm)
2
23
FLAT WASHER (M8)
6
26
NYLON LOCKNUT (M8)
6
30R
SAFETY HOOK
1
30L
SAFETY HOOK
1
44
CARRIAGE BOLT (M8 x 85mm)
2
45
CARRIAGE BOLT (M8x45mm)
2
47
LOCKNUT
2
48
WASHER
2
STEP 2
• Place both Uprights (2) on the inside of the Rear Stabilizer (1) and secure in place using M8
x 85mm Carriage Bolts (44) fitted from the outside, M8 Flat Washers (23) and M8 Nylon
Locknuts (26).
• Now attach both Stabilizer Brackets (13) to the inside of the Rear Stabilizer (1) and to the
outside of both Uprights (2) using M8 x 50mm Carriage Bolts (17), and M8 x 45mm Carriage
Bolts (45), four M8 Flat Washers (23) and four M8 Nylon Locknuts (26).
• Attach the Safety Hook (30L & 30R) to the both Uprights (2). Using two Washers (48) and two
Locknuts (47). As shown.
ASSEMBLY STEPS
7
WEIGHT BENCH
HELP LINE NUMBER: 08456 400800
ev-90
NO. DESCRIPTION QTY
17
CARRIAGE BOLT
(M8 x 50mm)
1
23
FLAT WASHER (M8)
1
25
FLATWASHER (M10)
2
26
NYLON LOCKNUT (M8)
1
29
NYLON LOCKNUT (M10)
1
43
HEX BOLT (M10 x 55mm)
1
NOTE :
Be sure seat hole of MAIN
FRAME (4) toward front.
ASSEMBLY STEPS
STEP 3
• Fit the Front Stabilizer (5) to the Leg Extension Upright
(6) and secure with an M8 x 50mm Carriage Bolt (17), an
M8 Flat Washer (23) and an M8 Nylon Locknut (26).
• Connect the assembled Leg Extension Upright (6) to the
front of the Main Frame (4) using an M10 x 55mm Hex
Head Bolt (43), two M10 Flat Washers (25) and an M10
Nylon Locknut (29) bolted from the side.
8
WEIGHT BENCH
HELP LINE NUMBER: 08456 400800
ev-90
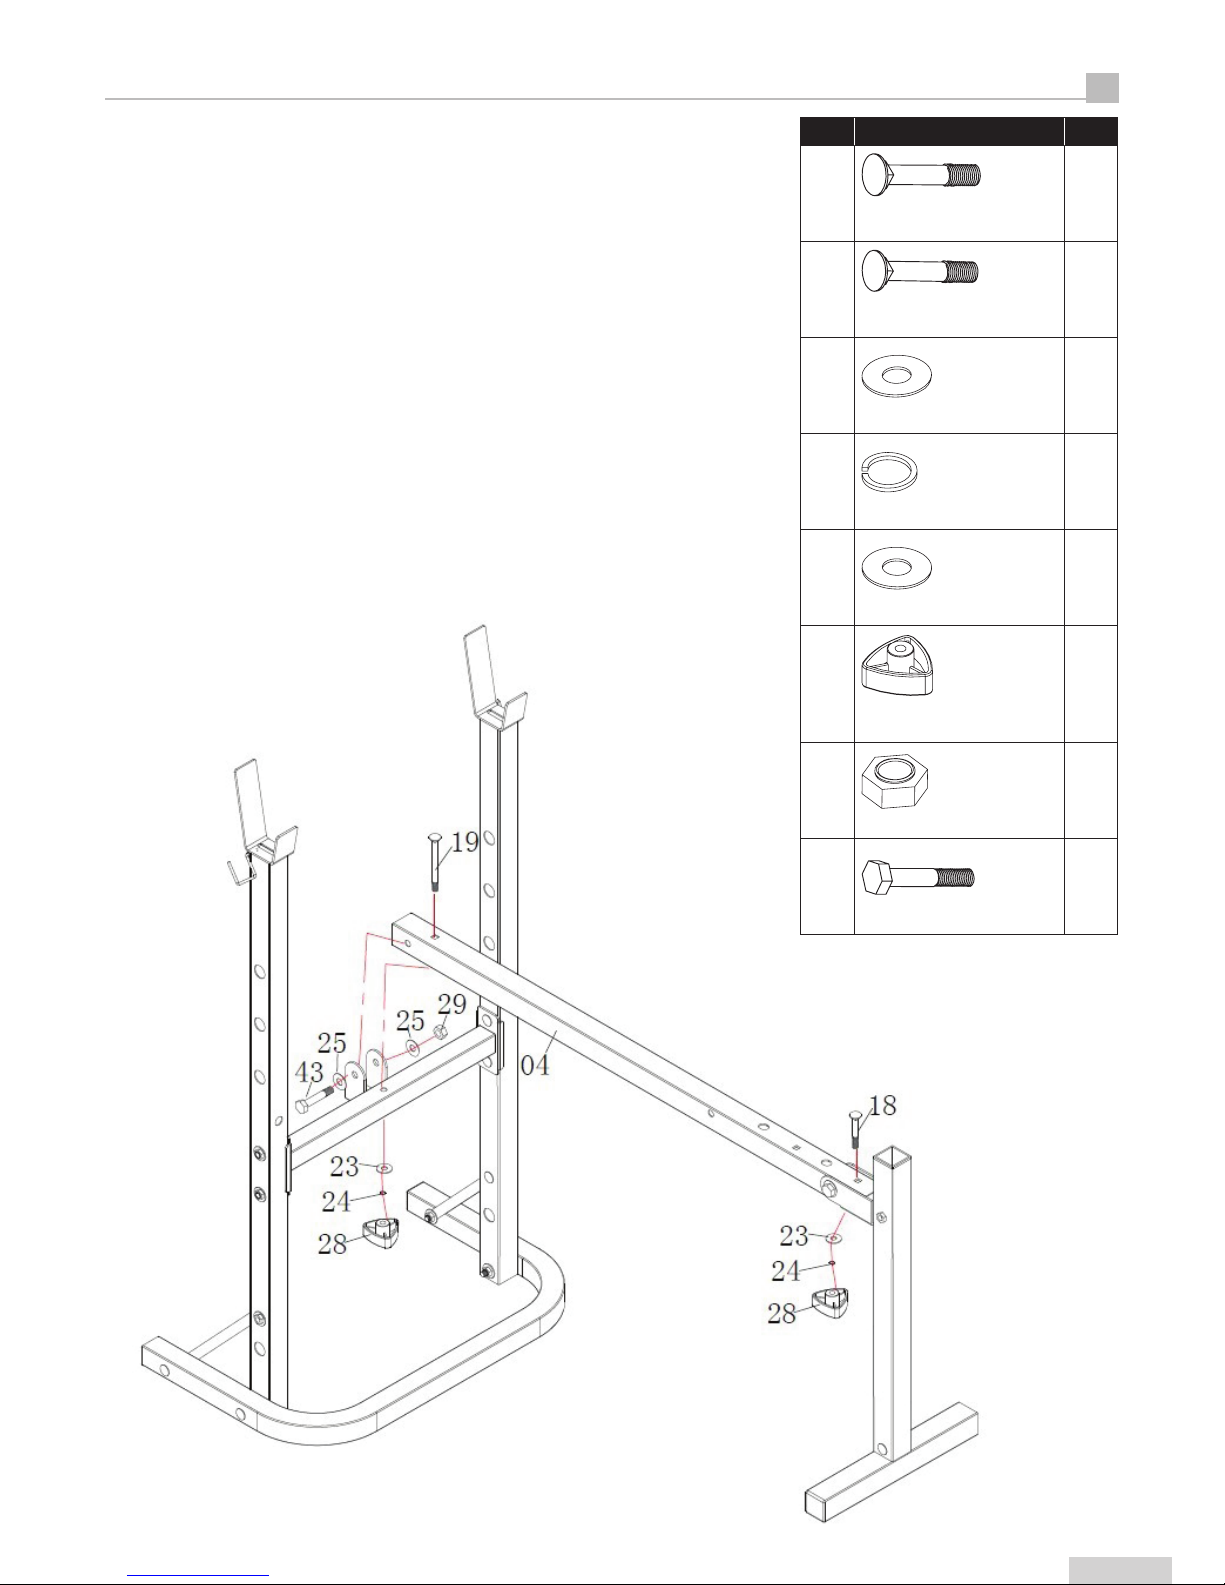
NO. DESCRIPTION QTY
18
CARRIAGE BOLTS
(M8 x 55mm)
1
19
CARRIAGE BOLTS
(M8 x 90mm)
1
23
FLAT WASHERS (M8)
2
24
SPRING WASHER (M)
2
25
FLATWASHERS (M10)
2
28
LOCKING KNOB
(FEMALE M8)
2
29
NYLON LOCKNUT (M10)
1
43
HEX BOLT (M10 x 55mm)
1
STEP 4
• Place an M8 x 55mm Carriage Bolt (18) in the UPPER hole
and secure in position using an M8 Flat Washer (23), an M8
Spring Washer (24) and an M8 Locking Knob (Female) (28).
Tighten securely to lock the frame in position.
• Connect the rear of the Main Frame (4) to the Cross Bar
(3) using an M10 x 55mm Hex Head Bolt (43), two M10 Flat
Washers (25) and an M10 Nylon Locknut (29) bolted from the
side.
• Place an M8 x 90mm Carriage Bolt (19) in the upper hole
and secure in position using an M8 Flat Washer (23), an M8
Spring Washer (24) and M8 Locking Knob (Female) (28).
Tighten securely to lock the Main Frame (4) in position.
ASSEMBLY STEPS
9
WEIGHT BENCH
HELP LINE NUMBER: 08456 400800
ev-90
 Loading...