

Everlast CARDIO TREADMILL, 10346 User Manual
IMPORTANT - PLEASE
READ THESE
INSTRUCTIONS FULLY
BEFORE ASSEMBLY OR
USE
These instructions contain
important information which
will help you get the best from
your equipment and ensure
safe and correct assembly, use
and maintenance.
If you need help or have
damaged or missing parts, call
the service centre on
087 997 0865
Please keep this manual for
future reference.
MODEL NO.
CARDIO TREADMILL
RONS CODE
10346
www.everlast.com
CARDIO TREADMILL
USER MANUAL

2
For queries or additional product information, please call our Service Centre on:
087 997 0865
Please have your model name on hand.
www.everlast.com
TABLE OF CONTENTS
SPECIFICATIONS FOR EVERLAST CARDIO TREADMILL
MOTOR 1.5HP
SPEED 1-16 KM/H
ELEVATION 13 Levels
PRODUCT SIZE L 1785 X W 785 X H 1425 mm
RUNNING DECK 460 x 1320 mm
MAXIMUM USER WEIGHT 130 kgs
SAFETY INFORMATION 3
COMPONENTS - PARTS 4
COMPONENTS - FIXINGS 5
ASSEMBLY INSTRUCTIONS 6-7
STORAGE 8
MAINTENANCE 9
CUMPUTER OPERATION INSTRUCTION 10-17
CARE AND MAINTENANCE 18
EXERCISING INFORMATION 19-21
PRE & POST STRETCHING EXERCISES 22-23
EXPLODED VIEW 24
PARTS LIST 25
SERVICE WARRANTY 26-27

3
For queries or additional product information, please call our Service Centre on:
087 997 0865
Please have your model name on hand.
www.everlast.com
SAFETY INFORMATION
ASSEMBLY
• Check you have all the components and tools listed,
bearing in mind that, for ease of assembly, some
components are pre-assembled.
• Keep children and animals away from the work
area, small parts could choke if swallowed.
• Make sure you have enough space to layout the
parts before starting.
• Assemble the item as close to its final position (in
the same room) as possible.
• Position the equipment on a clear, level surface.
• Dispose of all packaging carefully and responsibly.
• Only one person at a time should use the equipment.
• Keep hands away from all moving parts.
• Always wear appropriate workout clothing when
exercising. Do not wear loose or baggy clothing, since
it may get caught in the equipment. Wear athletic
shoes to protect your feet while exercising.
• Do not place any sharp objects around the
equipment.
• Disabled persons should not use the equipment
without a qualified person or doctor in attendance.
• Max user weight 130kgs.
• This product conforms to: (BS EN957) - PARTS 1.2
class (H) - Home Use - Class (C).
• This treadmill has passed the required IEC passed
the required IEC and South African LOA.
USE
• It is the responsibility of the owner to ensure that all
users of this product are properly informed as to how
to use this product safely.
• This product is intended for domestic use only. Do
not use in any commercial, rental, or institutional
setting.
• Before using the equipment to exercise, always do
stretching exercises to properly warm up.
• If the user experiences dizziness, nausea, chest
pain, or other abnormal symptoms stop the workout
and seek immediate medical attention.
IMPORTANT - PLEASE READ FULLY BEFORE ASSEMBLY OR USE
TO REDUCE THE RISK OF SERIOUS INJURY, READ THE ENTIRE MANUAL BEFORE YOU ASSEMBLE OR
OPERATE THE EVERLAST POWER GYM. IN PARTICULAR, NOTE THE FOLLOWING SAFETY PRECAUTIONS:
WARNING: Before beginning any exercise program, consult your Doctor. This is especially important for
persons over the age of 35 or persons with pre-existing health problems. You MUST read all instructions before
using any fitness equipment. The manufacturer and its associates and partners assumes no responsibility for
personal injury or property damage sustained by or through the use of this product.
PHYSICIAN WARNING: Not all exercise equipment and training programs are suitable for everybody.It
is recommended that you consult your physician before using this equipment or beginning this or any other
training program.

4
For queries or additional product information, please call our Service Centre on:
087 997 0865
Please have your model name on hand.
www.everlast.com
COMPONENTS - PARTS
NOTE: if you have damaged or missing components, call the service division on 087 997 0865
IMPORTANT - PLEASE CHECK YOU HAVE ALL THE PARTS LISTED BELOW
NOTE: SOME OF THE SMALLER PARTS MAY BE PRE- FITTED TO LARGER COMPONENTS. PLEASE CHECK
CAREFULLY BEFORE CONTACTING US REGARDING ANY MISSING PARTS.
No.1
Main Frame x 1
No.93
Right Decorative Cover x 1
No.94
Left Decorative Cover x 1
No.106
Left Handrail Cover x 1
No.107
Right Handrail Cover x 1
No.92
Emitter x 1
No.91
MP3 Sound Wire x 1
No.98
Safety Clip x 1
No.100
Slilcon x 1
5
For queries or additional product information, please call our Service Centre on:
087 997 0865
Please have your model name on hand.
www.everlast.com
COMPONENTS - PARTS
NOTE: if you have damaged or missing components, call the service division on 087 997 0865
IMPORTANT - PLEASE CHECK YOU HAVE ALL THE PARTS LISTED BELOW
NOTE: SOME OF THE SMALLER PARTS MAY BE PRE- FITTED TO LARGER COMPONENTS. PLEASE CHECK
CAREFULLY BEFORE CONTACTING US REGARDING ANY MISSING PARTS.
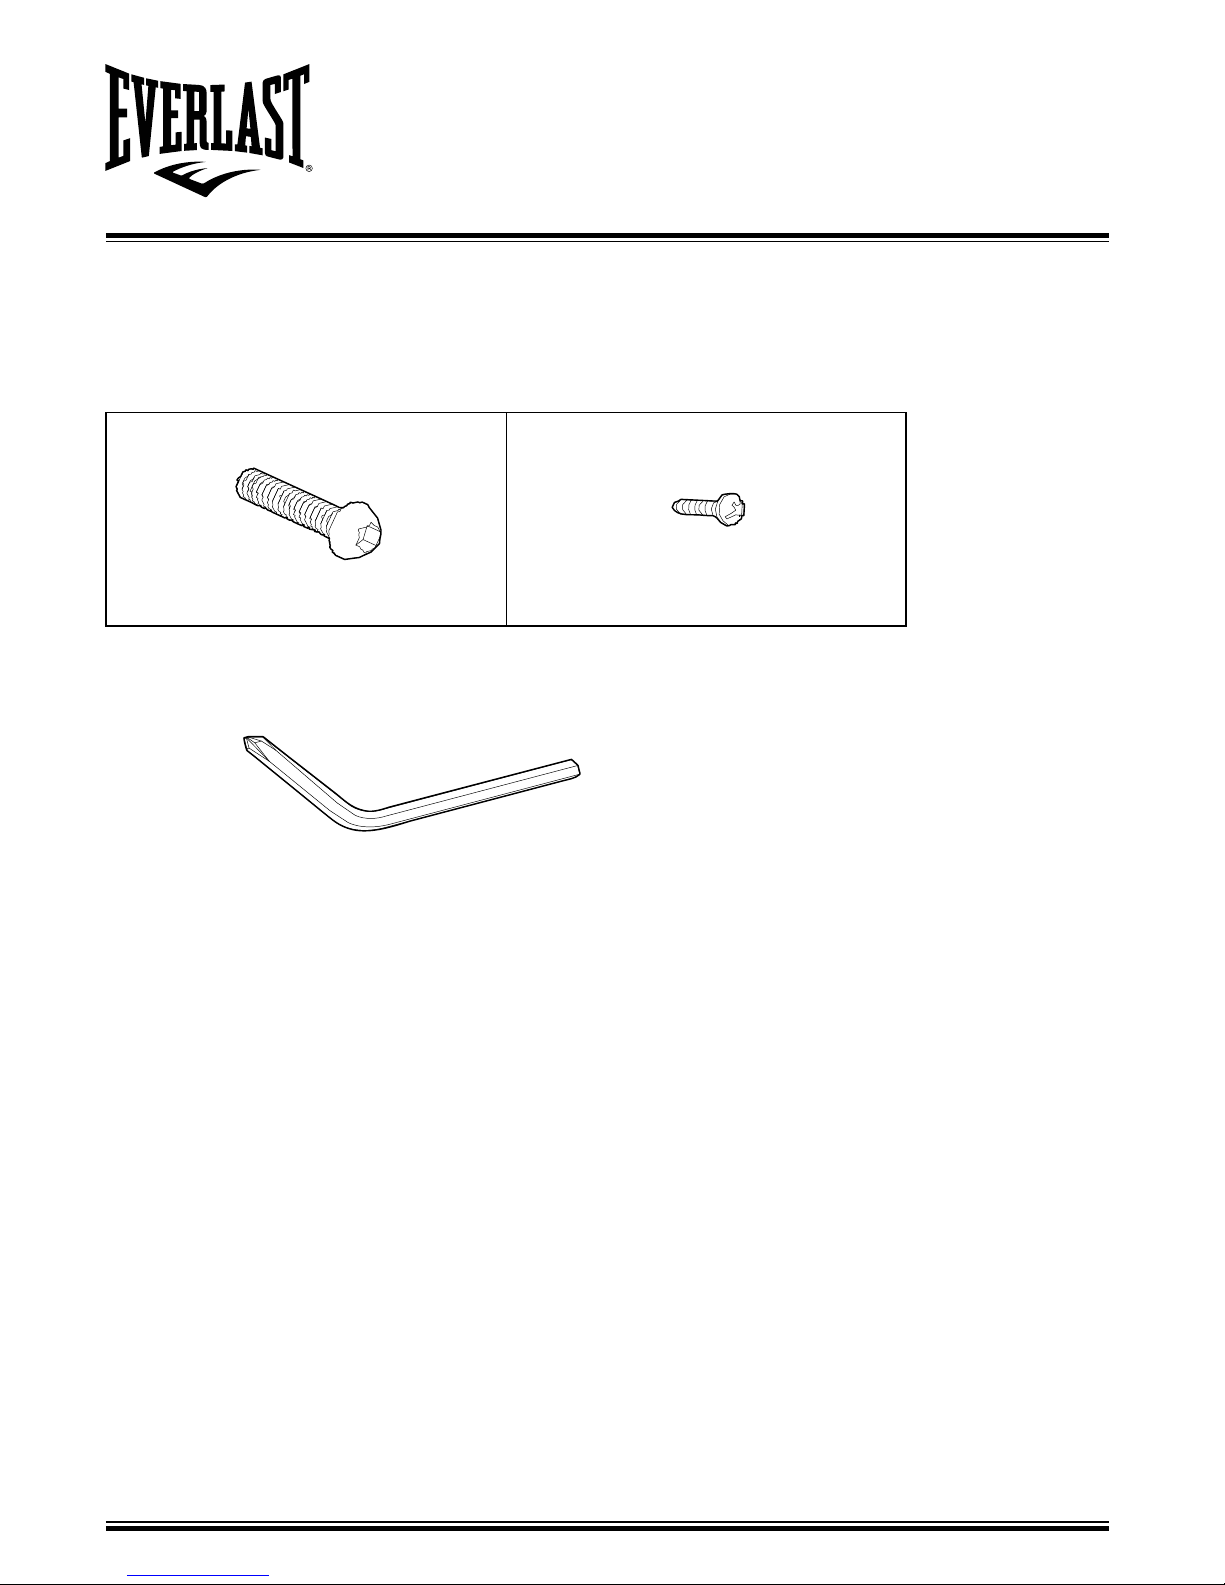
No.102
(M8xP1.25x20) Truss Hex Screw x 6pcs
No.103
(M5xP0.8x15) Truss Cross Screw x 6pcs
Tool Request
No.99
(5mm / 70mmx70mm) Hex Wrench / Cross Screwdriver x 1pc
102
96
102
102
102
80
79
1
6
For queries or additional product information, please call our Service Centre on:
087 997 0865
Please have your model name on hand.
www.everlast.com
ASSEMBLY INSTRUCTIONS
IMPORTANT - ASSEMBLE WITH ALL NUTS AND BOLTS LOOSE AT FIRST, ONLY TIGHTEN AFTER
COMPLETING ALL ASSEMBLY STEPS.
1. UNPACK THE CARTON AND PLACE ALL PARTS ON THE FLOOR.
2. CAREFULLY REMOVE ALL PACKING MATERIAL AND CHECK EACH PART WITH THE MANUAL FIRST.
3. REMEMBER SOME PARTS ARE PRE-FITTED TO LARGER COMPONENTS.
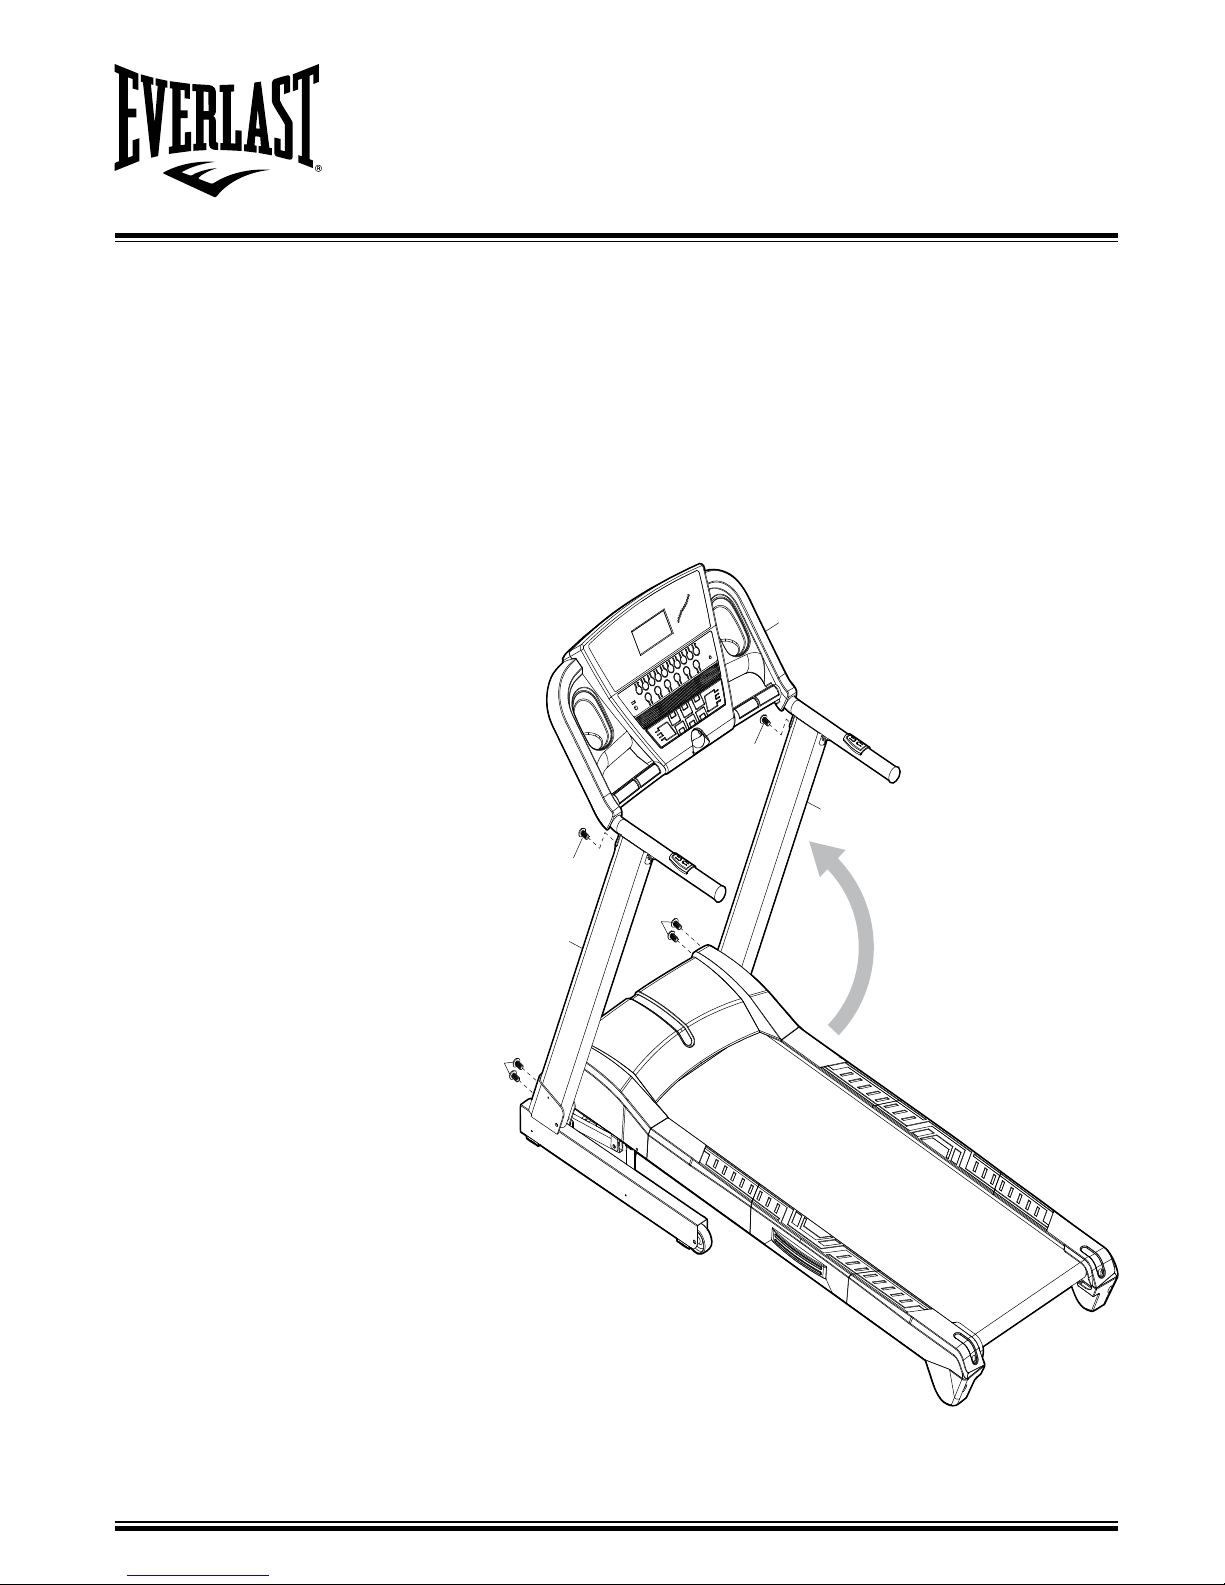
STEP 1
WARNING: After assembling the treadmill the loincloth can be untied. If you untie the loincloth first, it may result
in injury
1. Raise the Upright Tube (79 / 80) (as per the
diagram), tighten with 4 x Hex Screw (102)
and then untie the loincloth.
2. Attach the console (96) to the Upright Tube
(79 / 80) and tighten with 2 x Hex Screw
(102).
To avoid injury, please assemble the treadmill
with at least two people. Please do not assemble
it by yourself.

93
94
106
107
103
103
80
79
96
1
7
For queries or additional product information, please call our Service Centre on:
087 997 0865
Please have your model name on hand.
www.everlast.com
ASSEMBLY INSTRUCTIONS
STEP 2
1. Tighten the Left/Right Decorative Cover (93 / 94) with 6 x Screw (103).
2. Cover Left/Right Handrail Cover (106 / 107) on the computer shelf.
To avoid injury, please assemble the treadmill with at least two people. Please do not assemble it by yourself.
27
27
1
8
For queries or additional product information, please call our Service Centre on:
087 997 0865
Please have your model name on hand.
www.everlast.com
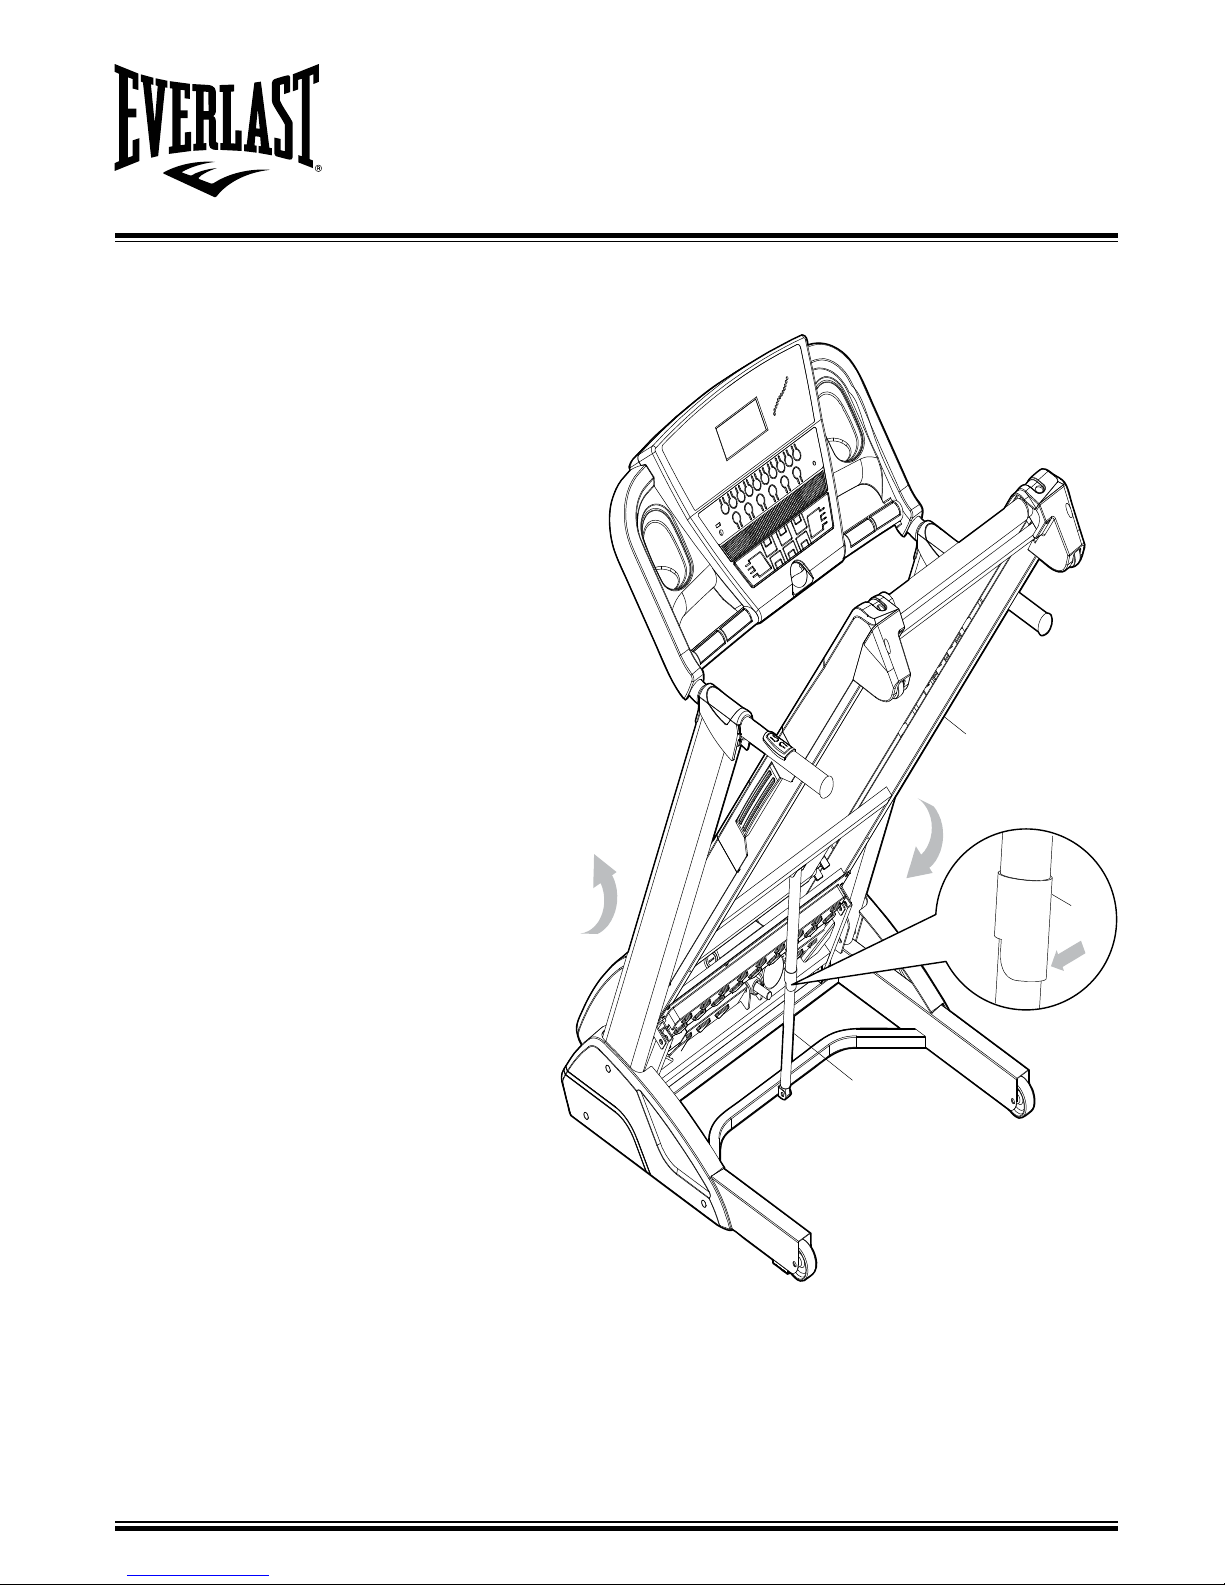
STORAGE
FOLDABLE / UNFOLDABLE
This treadmill has a foldable mechanism for
storage. Stop all moving parts (including the
treadmill belt) and remove the power cord from
the electric outlet. Lift the frame until it clicks into
place. The frame should remain in an upright
position when released. When the treadmill is
required again the user should place their foot
in the middle of the storage tube (as seen in the
diagram), place hands securely on the treadmill
frame (to ensure balance) and press down. If
the user is finding it difficult to lower the treadmill
they should administer a light rocking motion and
slowly lower the treadmill to the ground.
In order to relocate the treadmill the user should
place their hands on the rail from the front of the
machine. It should then be pulled and guided into
the desired position.
The treadmill should never be placed or moved
onto uneven ground.
The user should never stand under the treadmill
when it is being taken down from the upright
position.
Note: The Cylinder contains high pressure gas.
Please avoid contact with other objects to avoid
danger.
Note: If the Cylinder is damaged, it could cause
the treadmill to vibrate while using it. It also
may result in it collapsing when it is in a upright
position.
99
100
9
For queries or additional product information, please call our Service Centre on:
087 997 0865
Please have your model name on hand.
www.everlast.com
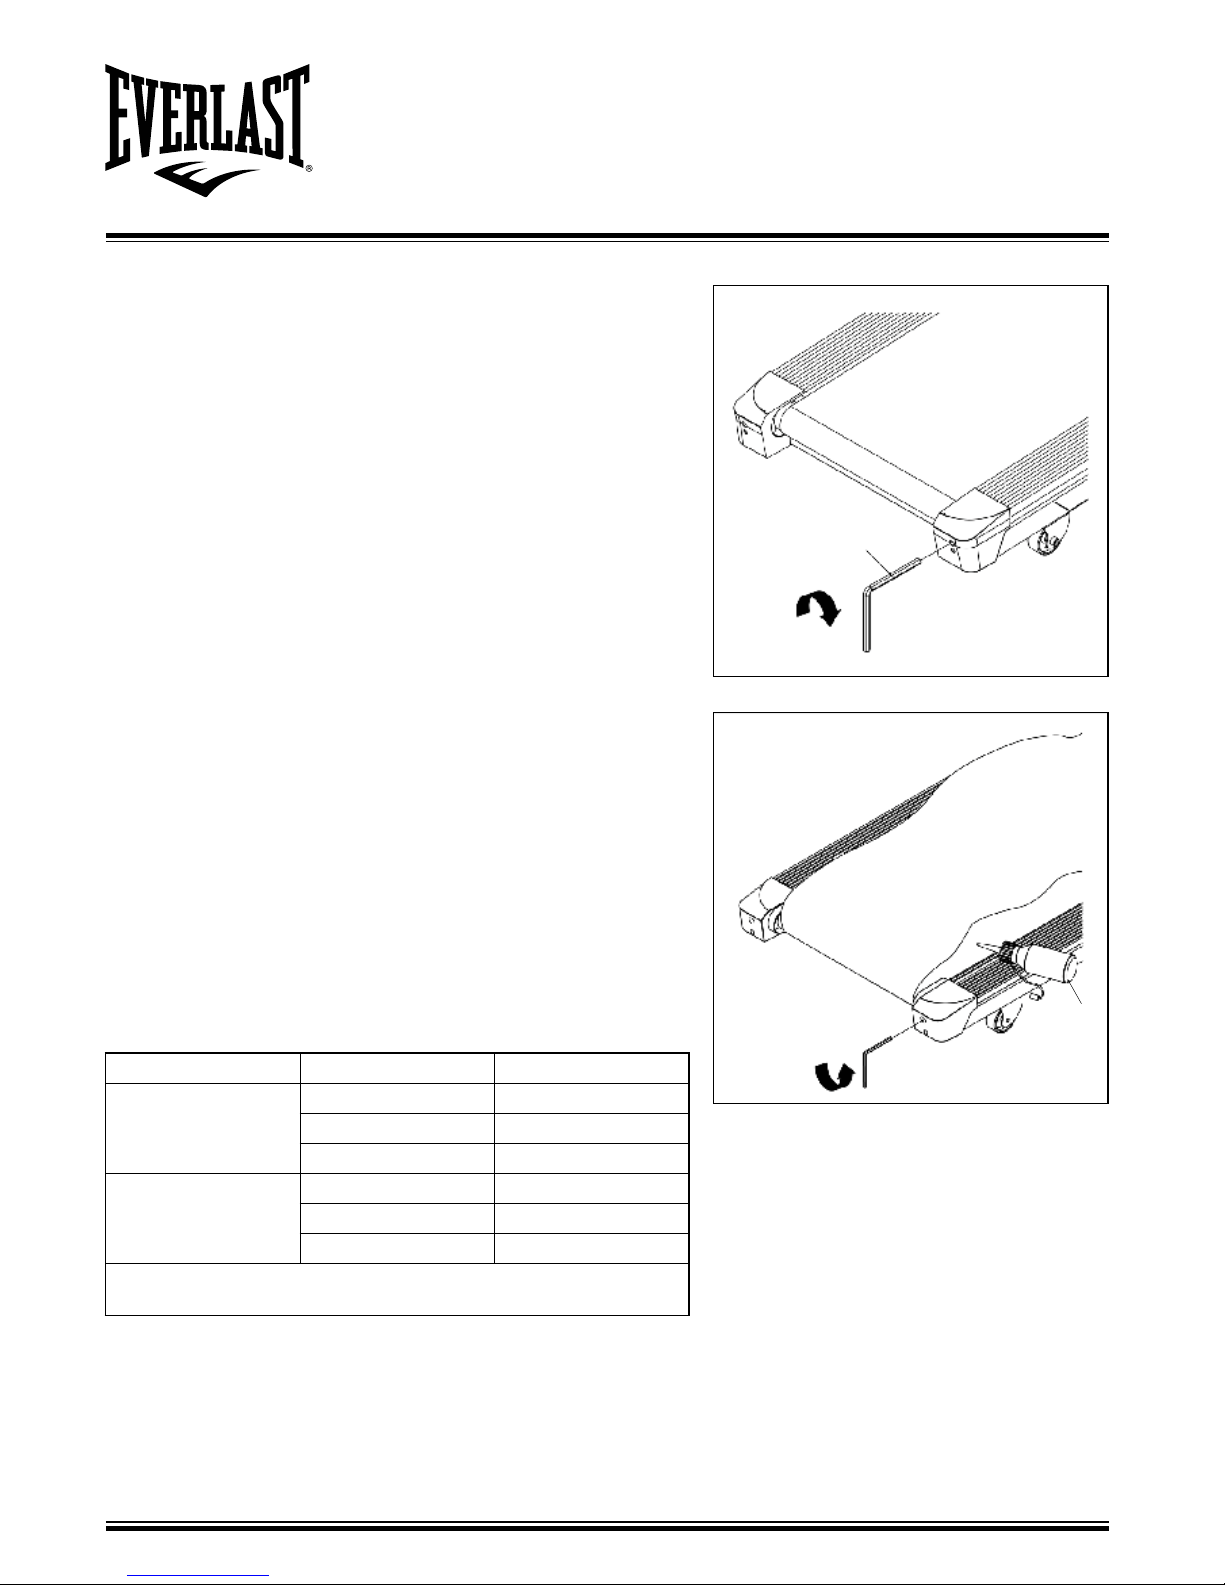
MAINTENANCE
BELT ADJUSTMENT
If the treadmill belt is off center it should be stopped. Using the
5 mm Hex Wrench adjust the Screw in the Rear End Cap. If the
treadmill belt is moving towards the left side, tighten the left Hex
Screw about 1/4 turn
(clockwise). If the treadmill belt is moving towards the right side,
tighten the right Hex Screw about 1/4 turn (clockwise). Once the
adjustment is complete turn the treadmill on and observe the
treadmill belts position. If it is still incorrect repeat the same steps
until is moving in the center.
This action is very important, if the belt is not in the center, be sure
to follow above steps.
The position of the running belt might not stay precisely in the
center. It could run slightly towards the left or right sides, The
situation varies with how end-users use the equioment and the
weight of end-users.
Depending on the usage of the product, please apply Silicon (100)
on the board according to the below chart. Use the Hex Wrench to
unscrew the bolt inside the Rear Roller. Then pull the belt up and
daub some
SILICON to the center of the board. After that, adjust the belt to the
center of the deck, followed by tightening the screw to the original
set.
If the treadmill belt is slipping please follow the lubrication method
described above.
KGS/LBS Speed Time
KGS
6 KM/hr below 1 year
6~12 KM/hr 6 months
12 KM/hr above 3 months
LBS
4 mile/hr below 1 year
4~8 mile/hr 6 months
8 mile/hr above 3 months
Note: This maintenance is intended for household use.
If used for business, suggest one examine every other month.
 Loading...