

Page 1
Users Manual
ENS2000
EVERFOCUS NAVIGATION ACCESS CONTROL
MANAGEMENT SOFTWARE
VER 3.0
Page 2

EverFocus Electronics Corporation
ENS2000
Instruction Guide
2009~2012 EverFocus Electronics Corp
All rights reserved. No part of the contents of this manual may be reproduced or transmitted in any form or
by any means without written permission of the EverFocus Electronics Corporation.
Page 3

EverFocus Navigation Access Control Management Software
Table of Contents
1Introduction of the Software .............................................................................................................. 1
1.1 Overview of the system ............................................................................................................ 1
1.2 Requirements and composition of the system ......................................................................... 1
1.2.1 Hardware requirements ............................................................................................... 1
1.2.2 Software requirements: ................................................................................................ 1
1.2.3 Composition of the system software ............................................................................ 1
1.3 Installation and uninstall of the software .................................................................................. 1
1.3.1 Install the Apache and Mysql server ............................................................................ 2
1.3.2 Uninstall “Apache” and “mysql” .................................................................................... 5
1.3.3 Install the web pages and main program ..................................................................... 5
1.3.4 Uninstall the web pages and main program ................................................................. 6
1.3.5 Set the authority of database ....................................................................................... 7
1.3.6 Install the database ...................................................................................................... 8
1.3.7 Install the COM+ controller component ...................................................................... 10
1.3.8 Install the desktop reader driver ................................................................................. 10
1.4 Use the software for the first time .......................................................................................... 12
2 Operation instructions of the software ........................................................................................
2.1 Quick start .............................................................................................................................. 13
2.1.1 Add and configure the access system controller ........................................................ 13
2.1.2 Set the rules of the access system ............................................................................ 13
2.1.3 Multiple methods for adding card ............................................................................... 14
2.1.4 Setting of department and personnel ......................................................................... 15
2.1.5 Setting and management of attendance .................................................................... 16
2.1.6 Live monitoring .......................................................................................................... 17
2.1.7 Running of the program ............................................................................................. 17
2.2 Introduction of main page....................................................................................................... 17
3 System ............................................................................................................................................ 19
3.1 Change password .................................................................................................................. 19
3.2 Site (Node server) setting ...................................................................................................... 19
3.2.1 Add a node server...................................................................................................... 19
3.2.2 Modify a node server ................................................................................................. 20
3.2.3 Delete a node server .................................................................................................. 20
3.2.4 Export node server records ........................................................................................ 21
3.2.5 Print node server recordss ......................................................................................... 21
3.2.6 Search a node server ................................................................................................. 21
3.3 User group management ....................................................................................................... 22
3.3.1 Add a user group ....................................................................................................... 22
3.3.2 Modify a user group ................................................................................................... 22
3.3.3 Delete a user group ................................................................................................... 22
3.4 User management ................................................................................................................. 23
3.4.1 Add a user ................................................................................................................. 23
3.4.2 Edit a user .................................................................................................................. 24
3.4.3 Delete a user ............................................................................................................. 24
3.4.4 Export user records .................................................................................................... 24
3.4.5 Print user records....................................................................................................... 24
..... 13
Page 4

EverFocus Navigation Access Control Management Software
3.4.6 Search a user ............................................................................................................ 25
3.5 Configure a server for node server ........................................................................................ 25
3.6 Department setting ................................................................................................................. 26
3.6.1 Add a department ...................................................................................................... 26
3.6.2 Modify a department .................................................................................................. 26
3.6.3 Delete a department .................................................................................................. 26
3.7 Basic information of cardholder .............................................................................................. 27
3.7.1 Modify a cardholder ................................................................................................... 33
3.7.2 Delete a cardholder .................................................................................................... 34
3.7.3 Upload fingerprint ...................................................................................................... 34
3.7.4 Download ................................................................................................................... 34
3.7.5 Cardholder query area ............................................................................................... 35
3.8 Import cardholder records ...................................................................................................... 36
3.9 Live monitoring ....................................................................................................................... 36
3.9.1 Live events ................................................................................................................. 36
3.9.2 Operation of resources & equipment ......................................................................... 37
3.10 Edit the electrical map ............................................................................................................ 37
3.10.1 Add electrical map ..................................................................................................... 38
3.10.2 Edit the electrical map ................................................................................................ 38
3.11 Reports .................................................................................................................................. 39
3.11.1 Search the cardholder information ............................................................................. 39
3.11.2 System Event Report ................................................................................................. 40
3.12 Database Maintenance .......................................................................................................... 41
3.12.1 Backup database ....................................................................................................... 41
3.12.2 Restore database ....................................................................................................... 42
3.12.3 Purge Out-of-date data .............................................................................................. 43
4 Access Rule ..................................................................................................................................... 44
4.1 Controller management ......................................................................................................... 44
4.1.1 Controller setting ........................................................................................................ 44
4.1.2 Add a controller .......................................................................................................... 44
4.1.3 Modify the controller information ................................................................................ 45
4.1.4 Delete a controller ...................................................................................................... 45
4.1.5 Advanced Setting ....................................................................................................... 45
4.1.6 Elevator setting (for elevator controller) ..................................................................... 51
4.1.7 Download setting to controller .................................................................................... 52
4.1.8 Upload setting to computer ........................................................................................ 52
4.1.9 Export controller records ............................................................................................ 53
4.1.10 Print controller records ............................................................................................... 53
4.1.11 Data downloaded to controller ................................................................................... 53
4.2 Access management ............................................................................................................. 54
4.2.1 Date setting ................................................................................................................ 54
4.2.2 Access group schedule setting .................................................................................. 55
4.2.3 Access group setting .................................................................................................. 58
4.2.4 Door schedule setting ................................................................................................ 60
4.2.5 Door setting ............................................................................................................... 62
4.3 Card management ................................................................................................................. 63
4.3.1 Card setting ............................................................................................................... 63
4.3.2 Import cards ............................................................................................................... 67
Page 5

EverFocus Navigation Access Control Management Software
4.3.3 Visitor card group ....................................................................................................... 68
4.3.4 Visitor card setting ..................................................................................................... 69
4.4 Reports .................................................................................................................................. 70
4.4.1 Card information ........................................................................................................ 70
4.4.2 Card events ............................................................................................................... 71
4.4.3 Events unrelated to card ............................................................................................ 72
5 Patrol ............................................................................................................................................... 74
5.1 Patrol route management ...................................................................................................... 74
5.1.1 Patrol point setting ..................................................................................................... 74
5.1.2 Patrol route setting ..................................................................................................... 75
5.1.3 Export patrol route records ........................................................................................ 77
5.1.4 Live status .................................................................................................................. 78
5.2 Patrol crew management ....................................................................................................... 79
5.2.1 Add a patrol group ..................................................................................................... 79
5.2.2 Modify a patrol group ................................................................................................. 79
5.2.3 Delete a patrol group ................................................................................................. 79
5.2.4 Add a patrol crew ....................................................................................................... 79
5.2.5 Modify a patrol crew ................................................................................................... 80
5.2.6 Delete a patrol crew ................................................................................................... 80
5.2.7 Export patrol crew records ......................................................................................... 80
5.2.8 Print patrol crew records ............................................................................................ 81
5.2.9 Search the patrol crews ............................................................................................. 81
5.2.10 Temporary patrol crew ............................................................................................... 81
5.2.11 Add temporary patrol crew ......................................................................................... 82
5.2.12 Delete temporary patrol crew ..................................................................................... 82
5.2.13 Export temporary patrol crew records ........................................................................ 82
5.2.14 Print temporary patrol crew records ........................................................................... 82
5.2.15 Search a temporary patrol crew ................................................................................. 83
5.3 Patrol Routine management .................................................................................................. 83
5.3.1 Patrol routine setting .................................................................................................. 83
5.3.2 Add a patrol routine .................................................................................................... 83
5.3.3 Modify a patrol routine ............................................................................................... 84
5.3.4 Delete a patrol routine ................................................................................................ 84
5.3.5 Export patrol routine records ...................................................................................... 85
5.3.6 Print patrol routine records ......................................................................................... 85
5.3.7 Search a patrol routine ............................................................................................... 85
5.4 Reports .................................................................................................................................. 85
5.4.1 Original patrol Report ................................................................................................. 85
5.4.2 Personal Patrol report ................................................................................................ 86
5.4.3 Group patrol report ..................................................................................................... 87
6 Attendance ...................................................................................................................................... 91
6.1 Login to attendance system ................................................................................................... 91
6.2 Basic Setting .......................................................................................................................... 92
6.2.1 Change password ...................................................................................................... 92
6.2.2 Attendance parameter setting .................................................................................... 92
6.2.3 Set holiday types ....................................................................................................... 93
6.2.4 Attendance device setting .......................................................................................... 95
6.2.5 Attendance employee setting ..................................................................................... 95
Page 6

EverFocus Navigation Access Control Management Software
6.3 Schedule ................................................................................................................................ 97
6.3.1 Setting of time section ................................................................................................ 97
6.3.2 Shift setting .............................................................................................................. 100
6.3.3 Rotating shift setting ................................................................................................ 102
6.3.4 Weekly schedule ...................................................................................................... 104
6.3.5 Daily schedule ......................................................................................................... 104
6.4 Attendance issues ................................................................................................................ 106
6.4.1 Non-card-swiping registration .................................................................................. 106
6.4.2 Time-Off registration ................................................................................................ 108
6.4.3 Overtime working registration ................................................................................... 110
6.4.4 Temporary shift exchange ......................................................................................... 112
6.5 Reports ................................................................................................................................. 114
6.5.1 Original record .......................................................................................................... 114
6.5.2 Detail report .............................................................................................................. 115
6.5.3 Department report ..................................................................................................... 116
6.5.4 Off-duty time ............................................................................................................. 118
6.5.5 Exceptional report ..................................................................................................... 119
6.5.6 Overtime report ........................................................................................................ 120
7 Software environment setup .......................................................................................................... 122
7.1 IE Browser setup .................................................................................................................. 122
Page 7

EverFocus Navigation Access Control Management Software
1 Introduction of the Software
1.1 Overview of the system
ENS2000 EverFocus Navigation Access Control Management Software is a management system
that operates the access system based on WEB pages, thus realizing the cross-network &
cross-region operation and management through LAN or WAN (Internet).
1.2 Requirements and composition of the system
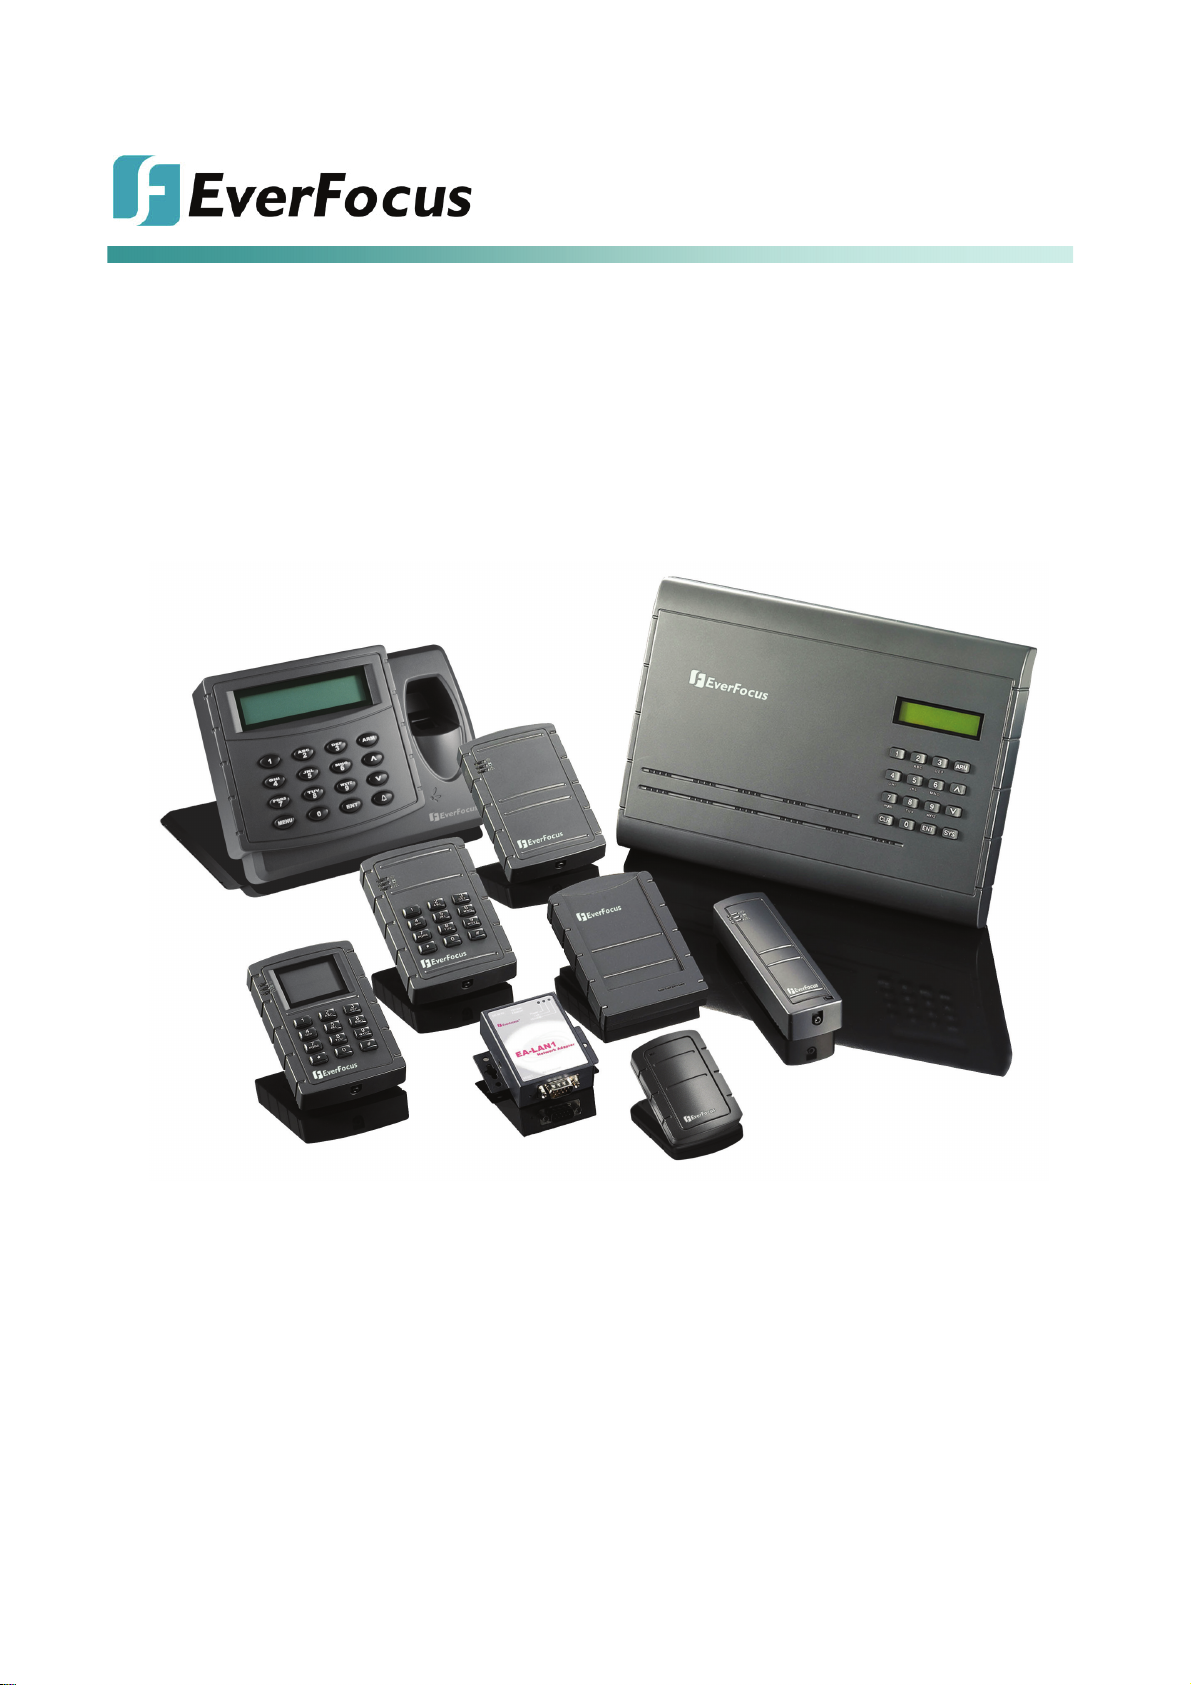
1.2.1 Hardware requirements
RF ID card
Card reader
Controller
Network adapter
Desktop card reader
PC with serial port and network port
Network switcher
1.2.2 Software requirements:
PHP + APACHE + Mysql
Windows2000 series, XP series, VISTA
The server must have a fixed IP address; it should not be configured dynamic, such as use
DHCP to get address.
1.2.3 Composition of the system software
Node server: multiple node servers can be installed in the whole software system, and the
node servers can either work separately or be controlled by a center server. The node
servers are responsible for managing the access system resources such as local controller
and cards, providing the Web service, the remote management of the access system
resources and the remote real-time monitoring.
access data to the center server at any given time so as to realize the data synchronization,
and provide the report function for attendance record.
Central server: only one central server can be provided for the whole software system, the
central server can either work separately or manage more than one node server.
central server provides the whole access system and data query as well as the attendance
report function to the users.
The central server and node servers may be selected as per the requirement when
installing the system.
Upload the transaction card data and
Chapter
1
The
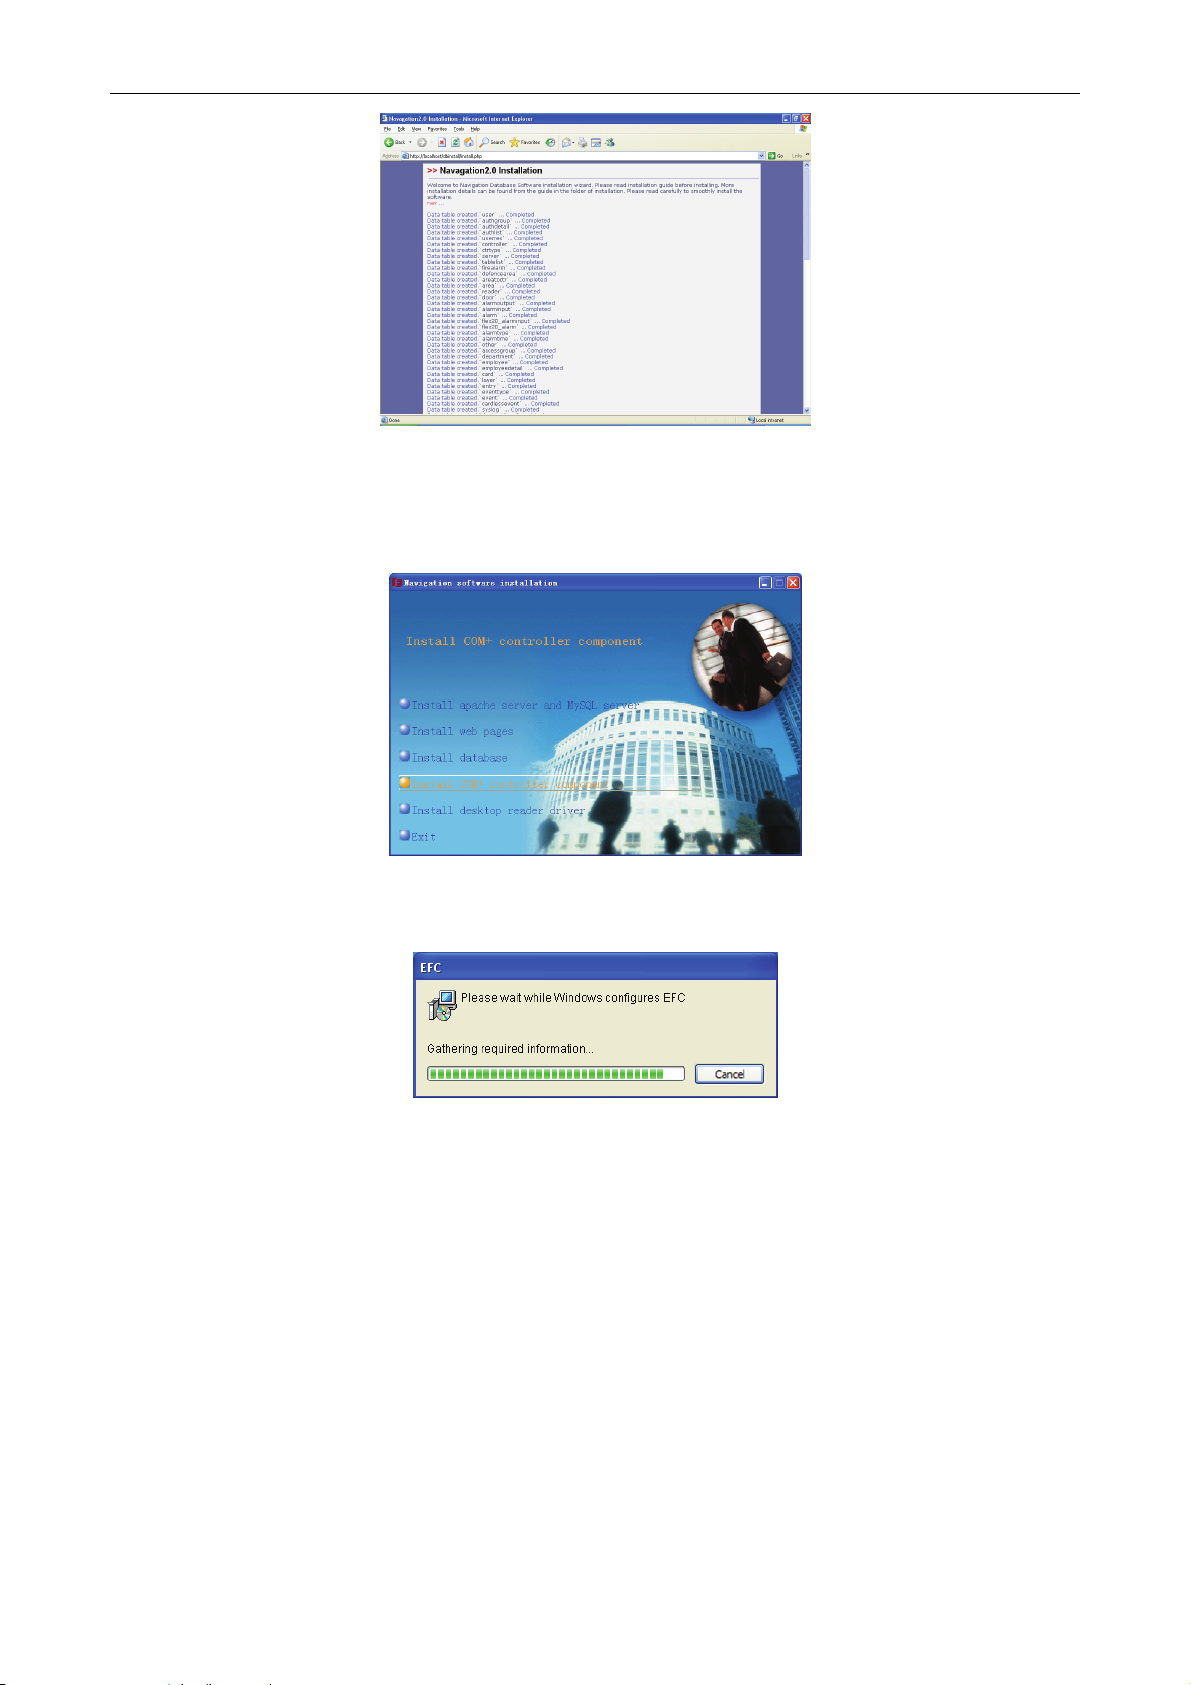
1.3 Installation and uninstall of the software
The installation of the software includes 5 steps, namely, put the CD into a DVD-driver,
double-click the DVD-driver, and then the system will run the setup program, the window is as
shown in the figure below:
1
Page 8
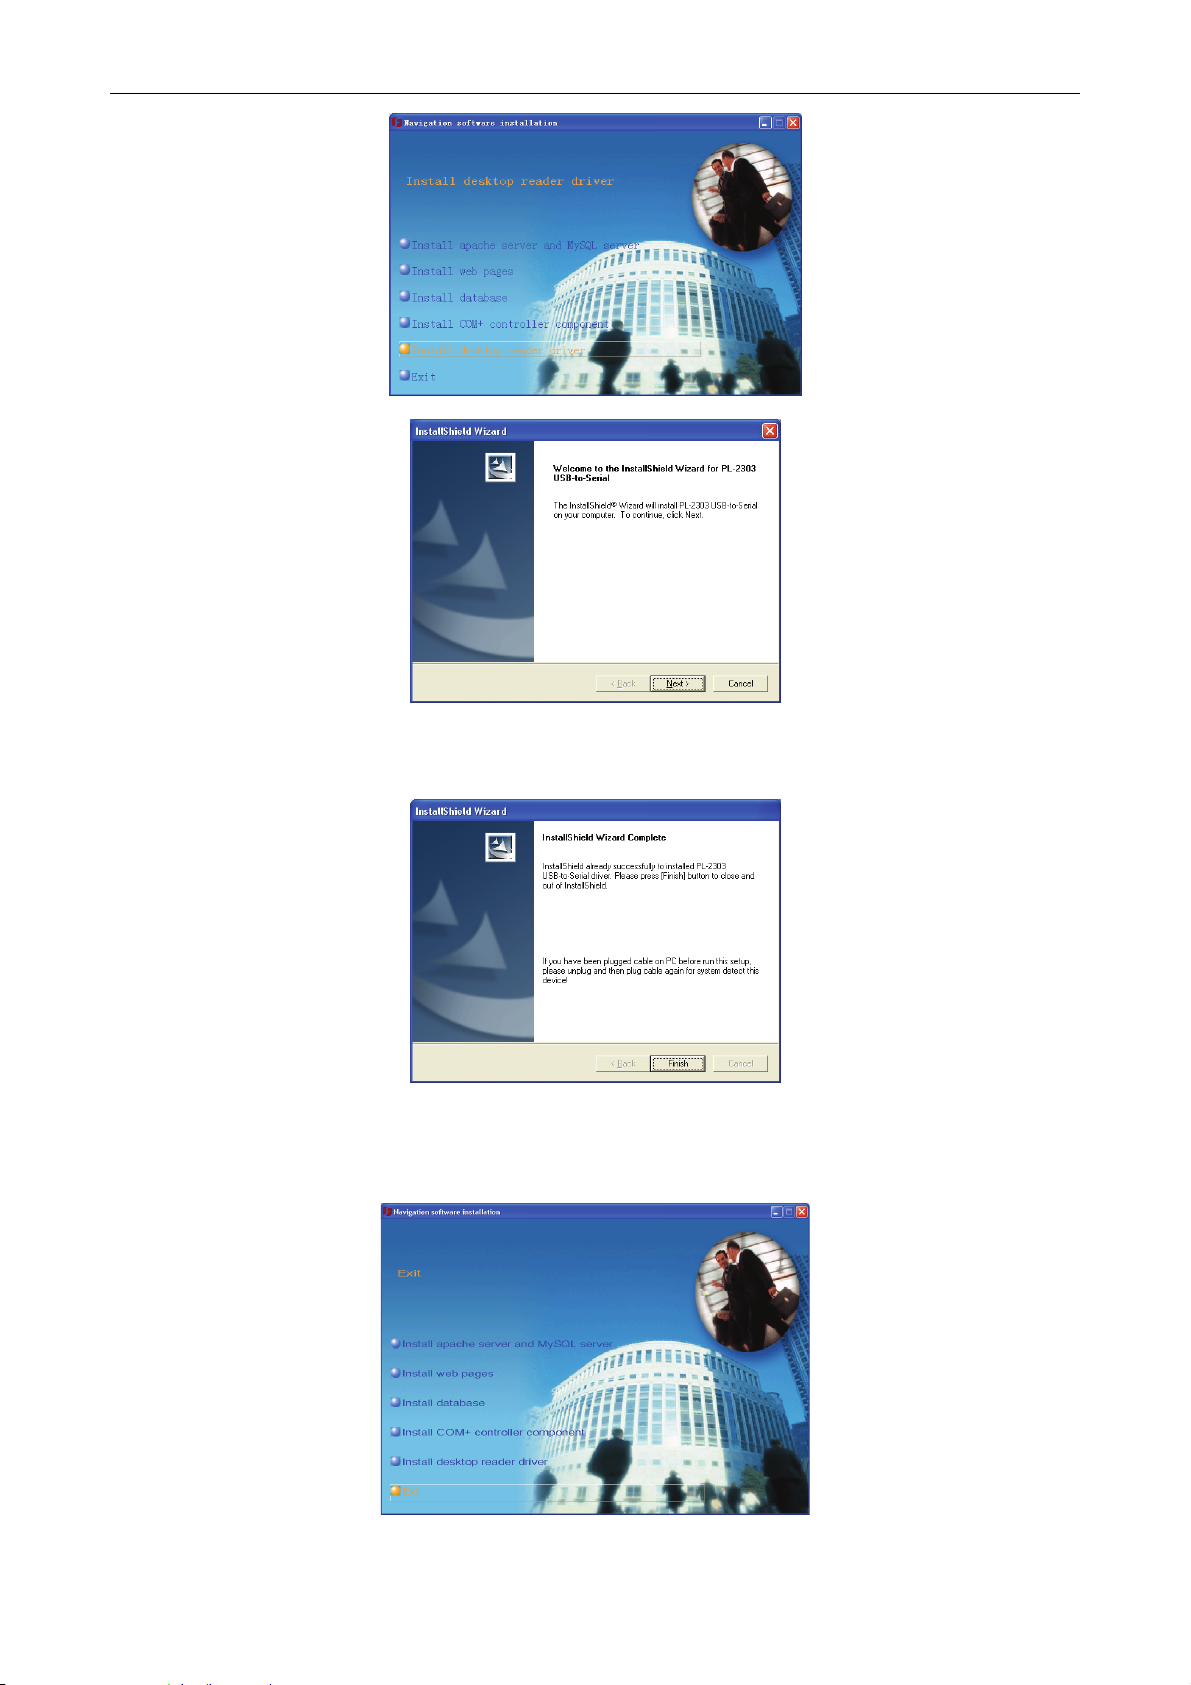
EverFocus Navigation Access Control Management Software
Install the Apache and Mysql server
Install the web pages and main program
Install the database
Install the COM+ controller component
Install the desktop reader driver
1.3.1 Install the Apache and Mysql server
Before installation, ensure that the Port 80 of the computer is not occupied, check whether the
port 80 is occupied in the aa.txt file through “start” “run” “CMD” console of the windows
system and inputting the command: “netstat –a –n –o | more” or “netstat –a –n –o >> c:\aa.txt”.
If it is occupied, find the process in the windows task manager through “PID” process number
(“view” in the windows Task Manager select the “PID”(process identifier)(p) in the “select list”
of the windows task manager) and close it, afterwards, install the software.
Click the "Install Apache server and Mysql server” button in the main installation window shown
in the figure below:
Select “I accept the agreement” and click “Next”.
2
Page 9
EverFocus Navigation Access Control Management Software
Select the installation location of “Apache” and click “Next”.
Name the program shortcut in the windows program group and then click “Next>”.
Select whether it will automatically start when Windows starts. Please select automatic start here
and then click “Next>”.
Click “Install>” to start the installation.
3
Page 10
EverFocus Navigation Access Control Management Software
During the installation, the window shown in the figure above will pop up. Please Click “Confirm”
as per the default selection.
Please click “open” as per default explorer.exe when another window pops up.
Select the “Launch WAMP5 now” item here and then click “Finish” to complete the installation.
The sign
appears in the lower right corner of the computer at this time.
Left-click this icon.
4
Page 11

EverFocus Navigation Access Control Management Software
Click “Put Online”, the icon changes to
been fully started. The normal running of “Apache” and “mysql” is the necessary condition to
continue other installation and run the access system software.
1.3.2 Uninstall “Apache” and “mysql”
In Windows system, click “start” on the lower left corner of the desktop “all programs”
“wampserver” “uninstall wampserver”, click this item to realize the uninstallation of “Apache"
and “mysql”.
Or select “wamp5” for uninstallation through system “control panel” “add or remove programs”
“wamp5”. It can also realize the uninstallation of “apache" and “mysql”.
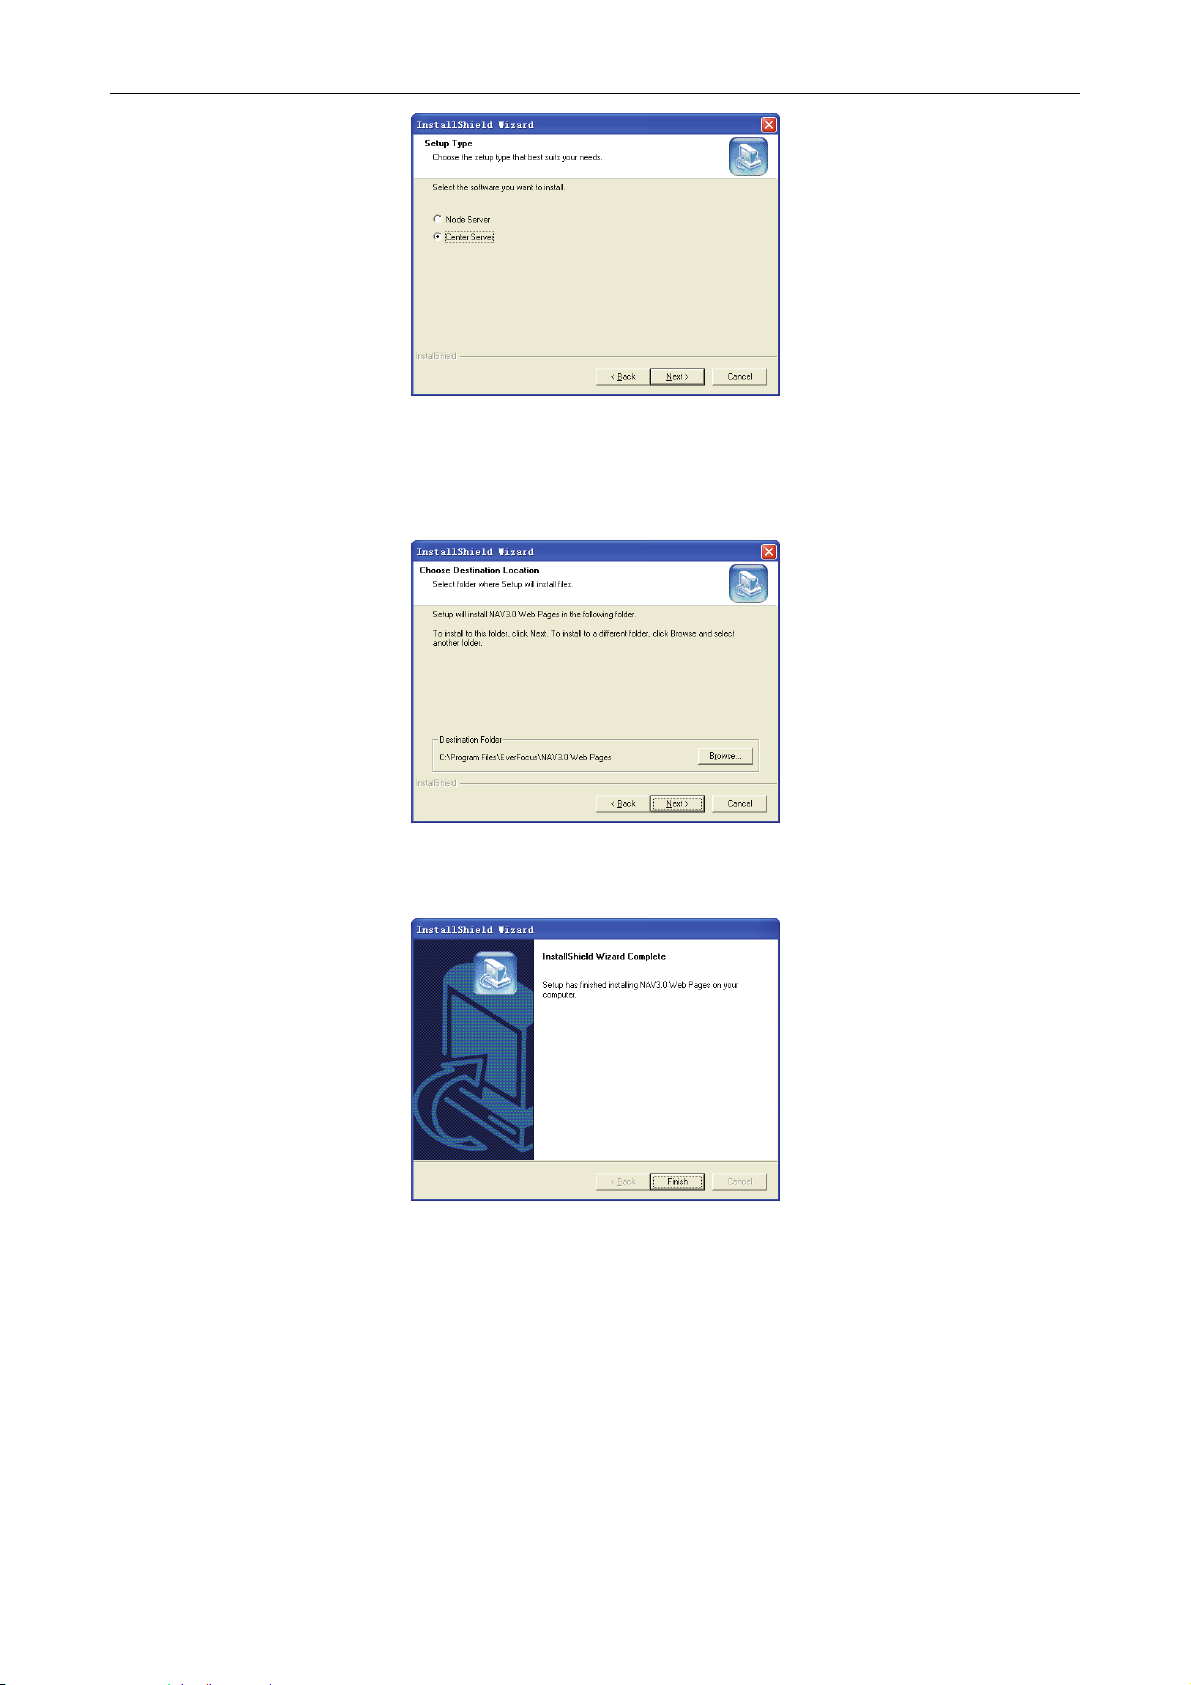
1.3.3 Install the web pages and main program
, which means that the “Apache” and “mysql” have
Click the “install web pages” button in the main installation window as shown in the figure above.
Click “Next>” in the pop-up window, the install shield wizard prompts to select the software type
will be as shown in the figure below.
5
Page 12
EverFocus Navigation Access Control Management Software
Select the software setup type:
Select “Node Server” to install the node (substation) server.
Select “Center Server” to install the center server.
First select install the center server here.
Select the installation directory of software or use the default directory, click “Next>” to start the
installation.
Click “Finish” button to complete the installation.
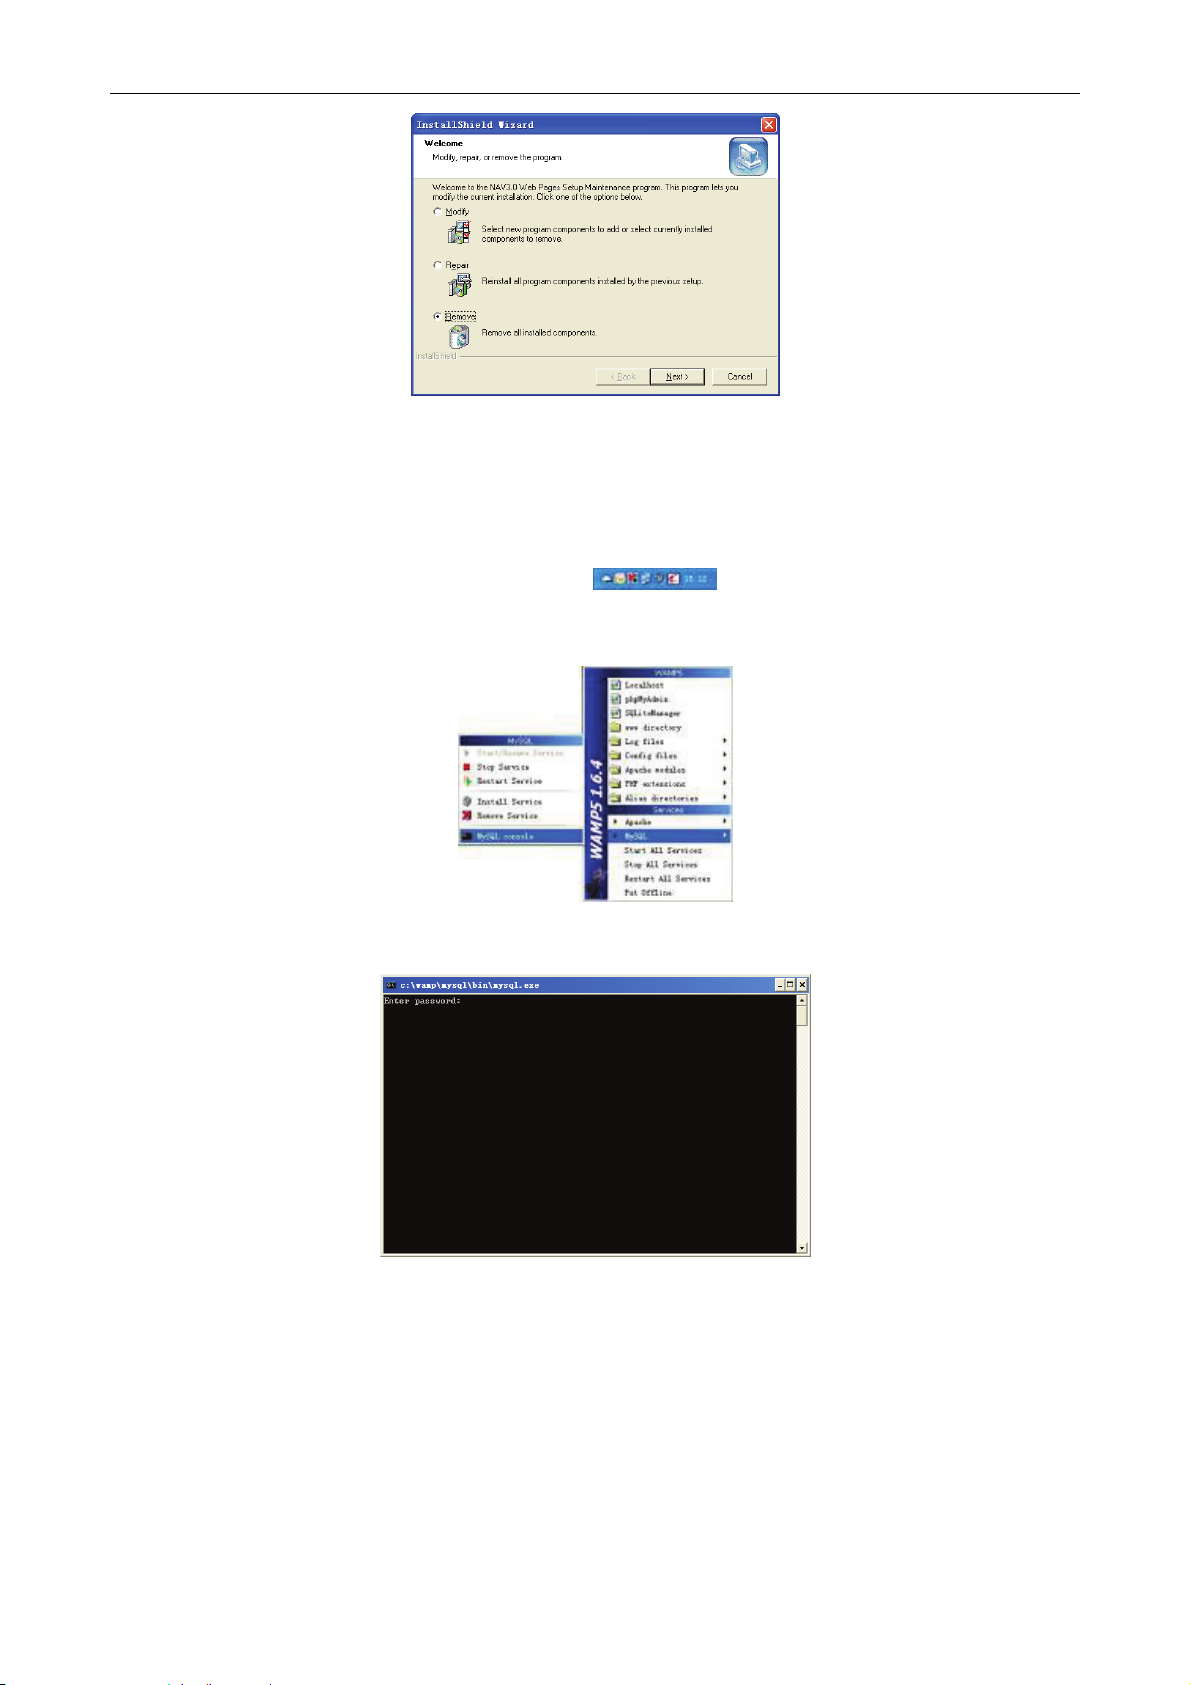
1.3.4 Uninstall the web pages and main program
Reselect the “install web pages”, the window now is different from the window of installation, as
shown in the figure below:
6
Page 13
EverFocus Navigation Access Control Management Software
Select “Remove”, click “Next” to complete the uninstallation of web pages and main program.
1.3.5 Set the authority of database
In the status bar in the lower right corner of the Windows desktop, left-click the white
hemispherical icon, as shown in the figure:
Select the MySQL MySQL console in the pop-up menu, as shown in the figure below:
After clicking to select it, a window as shown in the figure below will pop up:
.
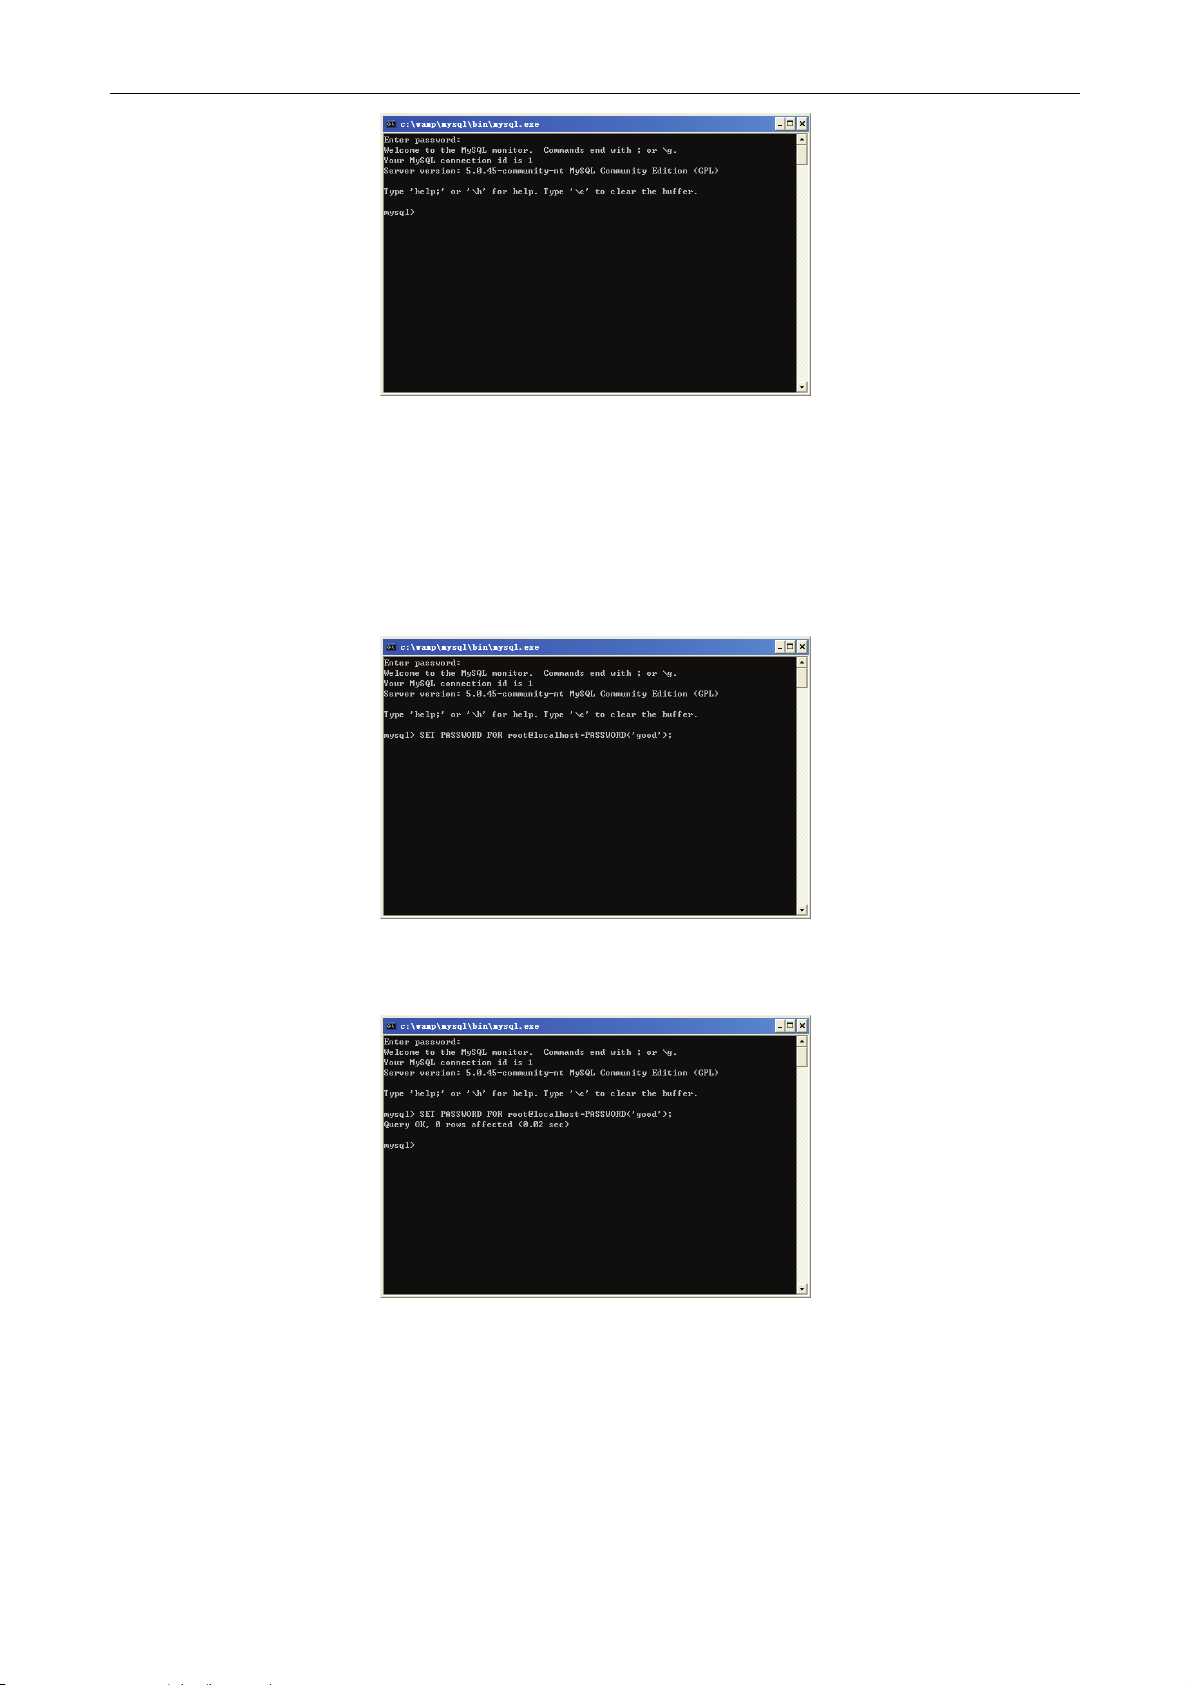
This is a command line window of mysql. At the beginning of access, the system will show a
prompt “enter password”. After inputting the password, press the ENTER button (the initial
password is null, press the ENTER button for access for the first time) to enter into the command
line window as shown in the figure below:
7
Page 14
EverFocus Navigation Access Control Management Software
The syntax to modify the password is: SET PASSWORD FOR root@localhost=PASSWORD(‘*').
Wherein * stands for the password to be set.
If you want to set “good” as the password of mysql database system, the operation method is as
below: input the “SET PASSWORD FOR root@localhost=PASSWORD(‘good’)” behind the
prompt of mysql> .
Afterwards, press the ENTER button, do remember to input a semicolon (;) behind the command
line.
System will show the prompt of successful operation (Query OK); click “close” button to quit from
this textual window.
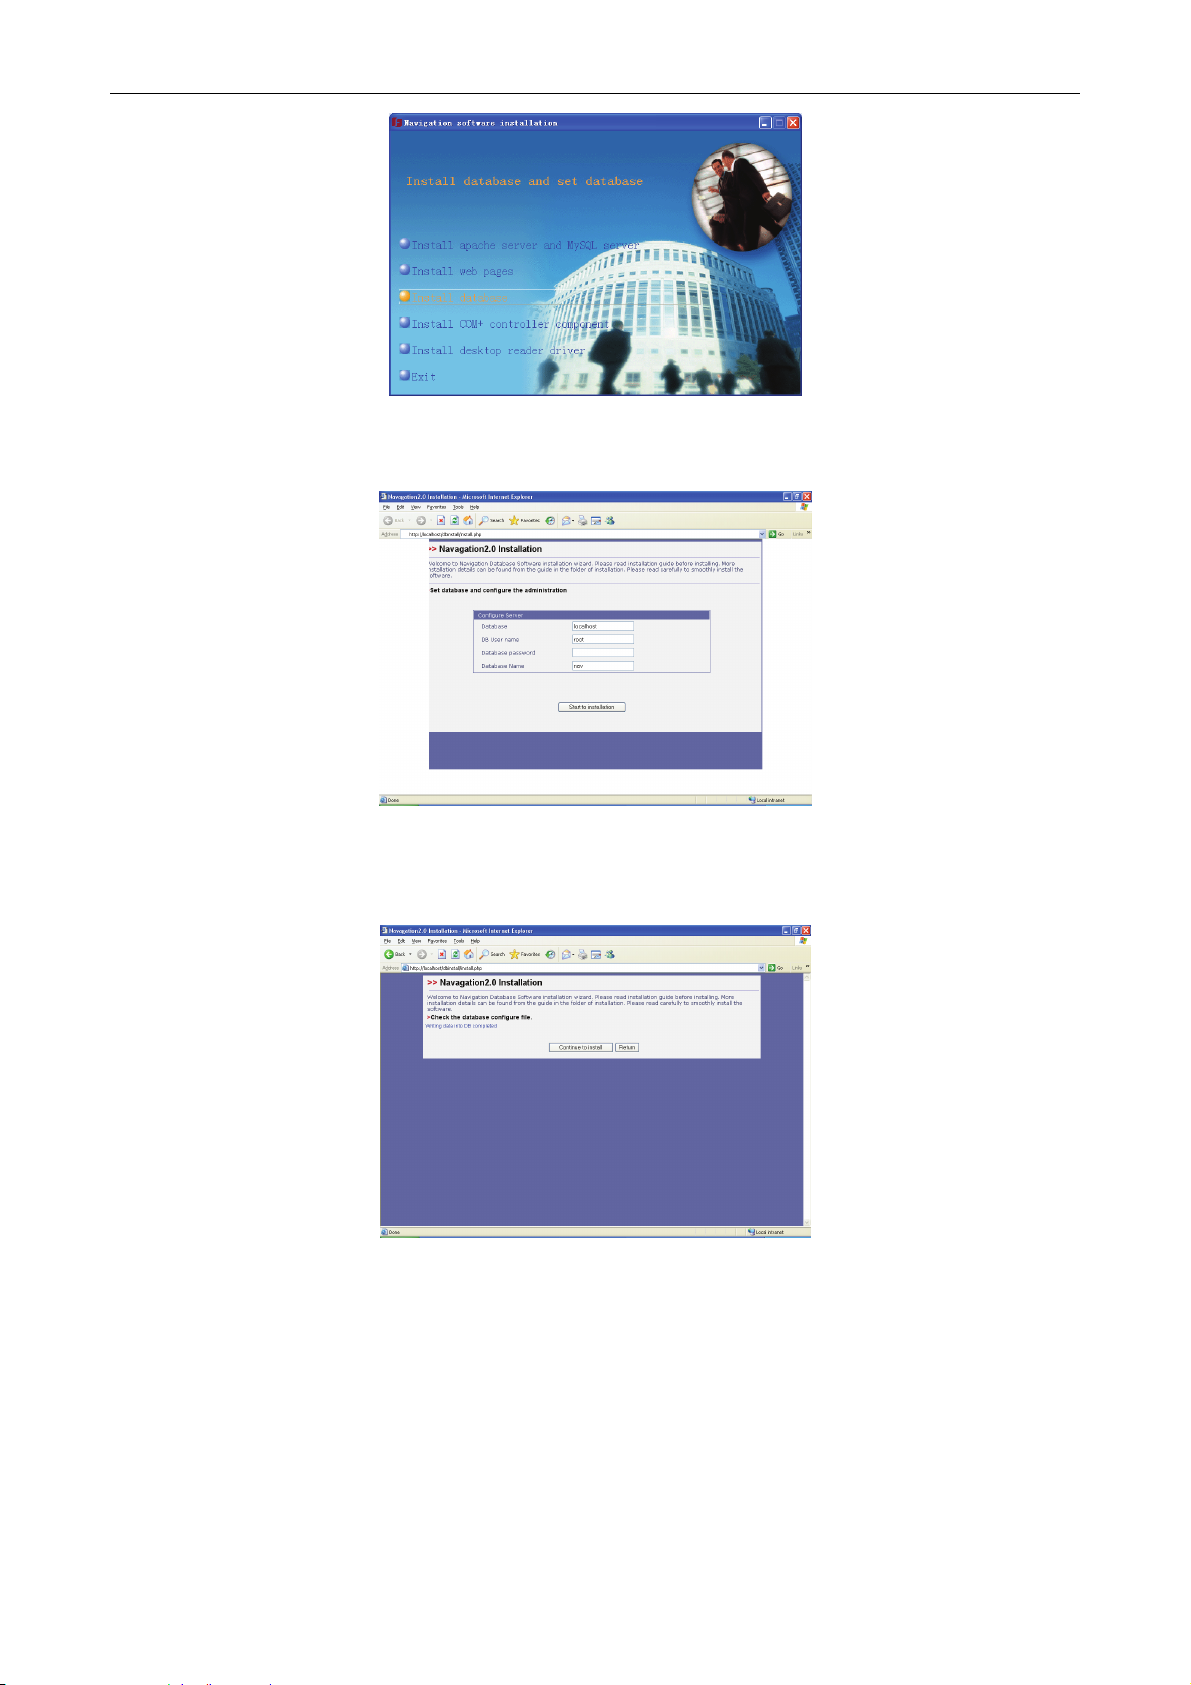
1.3.6 Install the database
8
Page 15
EverFocus Navigation Access Control Management Software
Click the “install database” button in the main installation window to enter into the database
installation page, as shown in the figure below:
Input the host name, database name, user name and password, and select default if the data
authority has not been set herein previously. After confirming the related settings of the database,
click “start to installation” button, the page will switch to the window as shown in the figure below.
Click “Continue to installation”, the database will establish a datasheet and the page will direct to
the page as shown in the figure below.
9
Page 16
EverFocus Navigation Access Control Management Software
A prompt indicating the completion of the establishment of each datasheet pops up. Click the
“Exit ” button at the bottom of the page to close the page.
1.3.7 Install the COM+ controller component
Click the “install COM+ controller component” button in the main installation window; a window
as shown in the figure below appears:
After the controller component has installed, no other prompt will pop up.
!NOTE: if the user uses a software installation packet to install the software rather than
the software CD, please do not save the installation file on the desktop of Disk C,
otherwise the COM+ controller component will unable to be installed normally.
1.3.8 Install the desktop reader driver
When requiring the use of the desktop card reader of EverFocus, this driver must be installed.
Click the “install desktop reader driver" button in the main installation window, the installation
process is as shown in the figure below:
10
Page 17
EverFocus Navigation Access Control Management Software
Click “Next” button to complete the installation, the installation window will switch to the window
as shown in the figure below:
Click “Finish” button to complete the installation of the desktop reader driver.
The above-mentioned is the whole installation process of the software.
After installation, click the “exit” to quit the installation program.
After installation of the software, please restart the computer.
11
Page 18
EverFocus Navigation Access Control Management Software
1.4 Use the software for the first time
Before using this software, set a fixed IP address for the door access server rather than use a
dynamic IP address (refer to the help of the pages for the setting of the IP address).
After setting the IP address, input the URL of the software in the IE address bar (For example:
http://ServerIP/nav).
As shown in the figure below: input http://192.168.0.191/nav/ in the IE address bar, and then the
system will enter into the log-in page.
Login name: the user's name registered in the system software which is used to log into the
system software; a non-repeating log-in name can be assigned for each user.
Password: a group of numbers or codes used to protect the user’s information and authority
when the user logs into the system.
Verification code: composed of 6 numbers generated by the system randomly.
After inputting the log-in name assigned by the system, password and temporary additional code,
click the “log-in” button to log into the system. Both the initial log-in name and log-in password of
the system are “admin”. For the security of the system, please remember to modify the password
of log-in name “admin” through “system” “basic management” “modify the password” after
logging into the system for first time.
If you want to set the station name and mysql database, after inputting the log-in name of
administrator, password and Ve rification code, click the “setup” button to enter into the set-up
page as shown in the figure below:
The user can set the site name, database parameter and apache server parameter.
After the modification of each item, click the “setting” button to save the settings, and then a
“modification successful” dialogue box will pop up. Click the “return” button to return to the log-in
page.
12
Page 19

EverFocus Navigation Access Control Management Software
2 Operation instructions of the software
This chapter will guide you how to quickly set up a controller through the software as the identity of
a Super Admin and use this controller to open the door by using this card and record the
attendance. Please familiarize yourself with this software according to the procedure below. For a
more comprehensive understanding of the usage of the software, please refer to the introduction of
the related functions in corresponding chapters.
2.1 Quick start
2.1.1 Add and configure the access system controller
Click the menu bar “Access Rule” “Controller Management” “Controller Settings” to enter into
the controller Setting page. The contents below will show you how to add a controller (refer to P42,
4.1.2 “Add a controller” for the detailed settings) to the system.
Operating procedure:
1) Click the “Add” button, fill in the information of controller address, port, type and its location.
2) Please confirm that the controller to be added has been already online firstly.
3) Click the “Add” button, then the software starts to “search” the controller and add to system.
2.1.2 Set the rules of the access system
2.1.2.1 Date setting
Click the menu bar “Access Rule” “Access Management” “Date Setting” to enter into the date
setting page. The contents below will show you how to add a date (refer to P524.2.1.1 “Add a date”
for the detailed settings).
Operating procedure:
1) Click “Add” button.
2) Select the recurrent type, date and date type, and click the “save” button.
3) If the controller is not online now, the setting will be saved in the database. After the controller
gets online, you need to download the setting to the controller manually.
2.1.2.2 Door schedule setting
Please set the door schedule setting firstly, and then enter into the door setting to assign the
schedule for each door. Click the menu bar “Access Rule” “Access Management” “Door
Schedule Setting” to enter into the setting page of door schedule setting. The contents below will
show you how to add a door schedule (refer to P58, 4.2.4.1 “Add door schedule” for the detailed
settings).
Operating procedure:
1) Click the “Add” button.
2) Input the name of the new schedule in the pop-up dialog box, and click the “Save” button to
generate a new schedule.
3) Click the “Door control schedule setting” button in the operation column, set the time section
and door authentication method in this page, save the setting and then close this page.
2.1.2.3 Door setting
Click the menu bar “Access Rule” “Access Management” “Door Setting” to enter into the door
setting page. The contents below will show you how to set a schedule for a door (refer to P60, 4.2.5
13
Chapter
2
Page 20

“Door setting” for the detailed settings).
Operating procedure:
1) Select a door in the left door list.
2) Assign a door schedule for this door on the right.
3) Click the “OK” button, then door schedule setting will be downloaded to the controller.
2.1.2.4 Access group schedule setting
Please set the access group schedule setting firstly, and then enter into the access group schedule
setting for each door. Click the menu bar “Access Rule” “Access Management” “Access Group
Schedule Setting” to enter into the setting page. The contents below will introduce how to add a
access group schedule (refer to P53, 4.2.2.1 “add a access group schedule” for the detailed
settings).
Operating procedure:
1) Click the “Add” button.
2) Input the name of new schedule in the pop-up dialog box, and click “save” button to generate a
new plan.
3) Click the “schedule setting” button in the operation column, set the time section and door
authentication method in the page, save the setting and then close this page.
2.1.2.5 Access group setting
Click the menu bar “Access Rule” “Access Management” “Access Group Setting” to enter into
the setting page. The contents below will show you how to add a access group (refer to P56,
4.2.3.1 “Add a access group setting” for the detailed settings).
Operating procedure:
1) Click the “Add” button.
2) Input the name of the new access group in the textbox, and click “Add” button to generate a
new access group.
3) Click the “schedule setting” button in the operation column, and then the access group setting
page will pop up.
4) Select a door area in the left door list.
5) Authorize a group on the corresponding controller.
6) Assign the control method, control plan and unlock level for this door.
7) Click the “OK” button, and then the settings of the access group will be downloaded to the
controller.
2.1.3 Multiple methods for adding card
The software provides multiple methods for adding cards into the system. The card addition
function can be realized by any one of the methods. The contents below will show you how to add a
card and assign corresponding access group.
2.1.3.1 Add a card by card swiping
When the controller has been added into the software and shown in the equipment list on the left of
the main page, swipe the card on the controller, then the card swiping record will be shown in the
table of event records. Finish card registration by swiping the card on the controller at this time.
Operating procedure:
1) Enter into the controller setting page and add the controller, then the controller will be shown in
the equipment list on the left of the main page in case of successful addition.
2) Swipe the card to be added onto the reader on the controller.
3) Record card swiping behaviors into the table of event records, and copy the card number.
4) Select card format according to card number, click “save” button to complete addition.
EverFocus Navigation Access Control Management Software
14
Page 21

EverFocus Navigation Access Control Management Software
2.1.3.2 Card Setting
Click the menu bar “Access Rule” “Cards Management” “Cards Setting” to enter into the card
setting page. The contents below will show you how to add a card and assign the access group
(refer to P61, 4.3.1.1 “Add a card” for the detailed settings).
Operating procedure
1) Click the “Add” button to enter into the card adding page.
2) Select card format and fill in various blanks.
3) If cardholder are available in the system, this card can be assigned to a cardholder.
4) Select the access group for the card from the “access group” pull-down menu.
5) Or click “Card Schedule” to assign a special control plan for the card.
applied to a card, the plan is used for verification when entry into the door and the control
priority is the highest.
6) Click the “OK” button to finish addition.
2.1.3.3 Import card by means of the Excel file
Edit card data in Excel (without card number limit), save it as an Excel file, complete card
registration into the software and related controller by importing card function into the software
(whether the card is registered into the related controller depends on the access group setting of
the card; if access group option is not selected, then the default access group “Full Granted”
applies) (See P64, 4.3.2 “Card Importation” for the detailed information).
Click the menu bar “Access Rule” “Card Management” “Import Cards”.
Operating procedure:
1) Click the “Browse” button and select the Excel file to be imported.
2) Select the value corresponding to related line name.
3) Click the “Import” button, select card format and fill in various blanks.
4) Click the “Save” button to finish addition.
2.1.3.4 Upload the data of controller card
Log into the card registration in the controller, complete card registration into the software by
uploading data function (default delegated authority group is “admin”; see P63, 4.3.1.5“upload
card” for the detailed information).
Click the menu bar “Access Rule” “Card Management” “Cards Setting” to enter into the card
setting page.
Operating procedure:
1) Click the “Upload card” button, and then the controller selection dialog box will pop up.
2) Select the controller for uploading the card.
3) Click the “Confirm” button to upload the card from the controller to the software.
2.1.4 Setting of department and personnel
2.1.4.1 Department setting
Click the menu bar “System” “Cardholder Management” “Department Settings” to enter into
the department setting page. The contents below will show you how to add a new department (refer
to P25, 3.6.1 “Add a department” for the detailed settings).
Operating procedure:
1) Select the superior department.
2) Fill in the department name.
3) Click the “Add” button to finish the addition.
When a “card plan” is
15
Page 22

EverFocus Navigation Access Control Management Software
2.1.4.2 Cardholder setting
Click the menu bar “Cardholer Management” “Cardholder Basic information” to enter into the
cardholder setting page. The contents below will show you how to add a new cardholder (refer to
P26, 0 “Add a cardholder” for the detailed settings).
Operating procedure:
1) Click the “Add” button to enter into the cardholder setting page.
2) Fill in cardholder job number, name, department and so on, and upload the photo and
fingerprint.
3) Add a new card to the cardholder at this location.
4) Click the “Confirm” button to finish addition.
2.1.5 Setting and management of attendance
2.1.5.1 Setting of time section
Click the menu bar “Attendance” “Schedule” “Timesection Setting” to enter into the time
section setting page. The contents below will show you how to add an attendance time section
(refer to P104, 7.3.1.1 “Add a time section” for the detailed settings).
Operating procedure:
1) Click the “Add” button in the time section setting page to enter into the time section adding
page.
2) Set the time section parameters of various items.
3) After setup, click the “Add” button to add the time section into the attendance system.
2.1.5.2 Shift setting
Click the menu bar “Attendance” “Schedule” “Shift Setting” to enter into the shift setting page.
The contents below will show you how to add a shift (refer to P106. 7.3.2.1 “Add a shift” for the
detailed settings).
Operating procedure:
1) Fill in the shift name.
2) Select a shift from the “optional time section”, click “>” to add the shift to be selected into the
“selected time section” box.
3) Fill in the shift description.
4) Click the “Add” button to add shift in the new to the attendance system.
2.1.5.3 Weekly scheduling
Click the menu bar “Attendance” “Schedule” “Weekly Schedue” to enter into the weekly
scheduling page. The contents below will show you how to set up the weekly scheduling (refer to
P109, 7.3.4 “Weekly schedule” for detailed settings).
Operating procedure:
1) Click a certain department in the list line.
2) Select the item for each day respectively from the shift box below.
3) Click the “Modify” button to modify the weekly scheduling information of the department
selected.
2.1.5.4 Daily scheduling
Click the menu bar “Attendance” “Schedule” “Schedule” to enter into the daily scheduling page.
The contents below will show you how to set up the daily scheduling (refer to P110, 7.5.5 “daily
scheduling” for detailed settings).
Operating procedure:
16
Page 23
1) Select certain shift from the pull-down box behind the “shift”.
2) Check the work overtime option or not.
3) Select the starting date and the deadline.
4) Fill in the description information.
5) Click the “Add” button to add the new daily scheduling into the attendance system.
2.1.6 Live monitoring
Click the menu bar “System” “Live Monitoring” “Live Events”, then the upper part of the page
will show the live status of the electrical map in the current system, click the “electrical map” list on
the left to view their states respectively.
The “live event box” at the bottom reflects the live status of the system currently.
2.1.7 Running of the program
Before using the software, set a fixed IP address for the computer rather than use a dynamic IP
address. After completion, input the URL of the software into the IE address bar (for example:
http://192.168.0.191/nav/).
2.2 Introduction of main page
The main page will be as shown in the figure below after software login:
EverFocus Navigation Access Control Management Software
The main page of the software is composed of two parts: the menu bar on the top and the live
monitoring page (including the operation bar on the left, the page bar on the right and the live event
bar at the bottom).
The space on the left of the top menu bar is used to display the company’s logo. The five functional
menu modules including the system, access rule, CCTV, patrol and attendance are shown in the
middle. The login user name, the station name and type information are displayed on the right.
The operation bar on the left exhibits the detailed electrical map and resource equipment in the
form of tree view. The tree menu displays different items according to the user’s authority and the
login server type (the node server or the center server) (refer to “user group” and “user setting” for
the user authority).
The detailed contents for the menu item selected will be displayed in the right page bar. And various
resources, controllers and others in the system can be managed through the right page bar.
17
Page 24

The live event bar at the bottom records the live operation events of the current system, including
the card swiping for entrance and exit, system information modification and so on.
The page bar displays the live monitoring page when access to the system (please refer to “live
monitoring” for real-time monitoring details).
2.2.1.1 Tree of electrical map
This tree shows the electrical map structure set in the software. See P35, 3.10 “edit electrical map”
for the addition, deletion, modification and other settings of the electrical map.
EverFocus Navigation Access Control Management Software
2.2.1.2 Device tree
This tree displays the list of valid controllers, dvrs, views which configured in software, wherein a
valid device indicates the device having ever been searched by the software.
18
Page 25
3 System
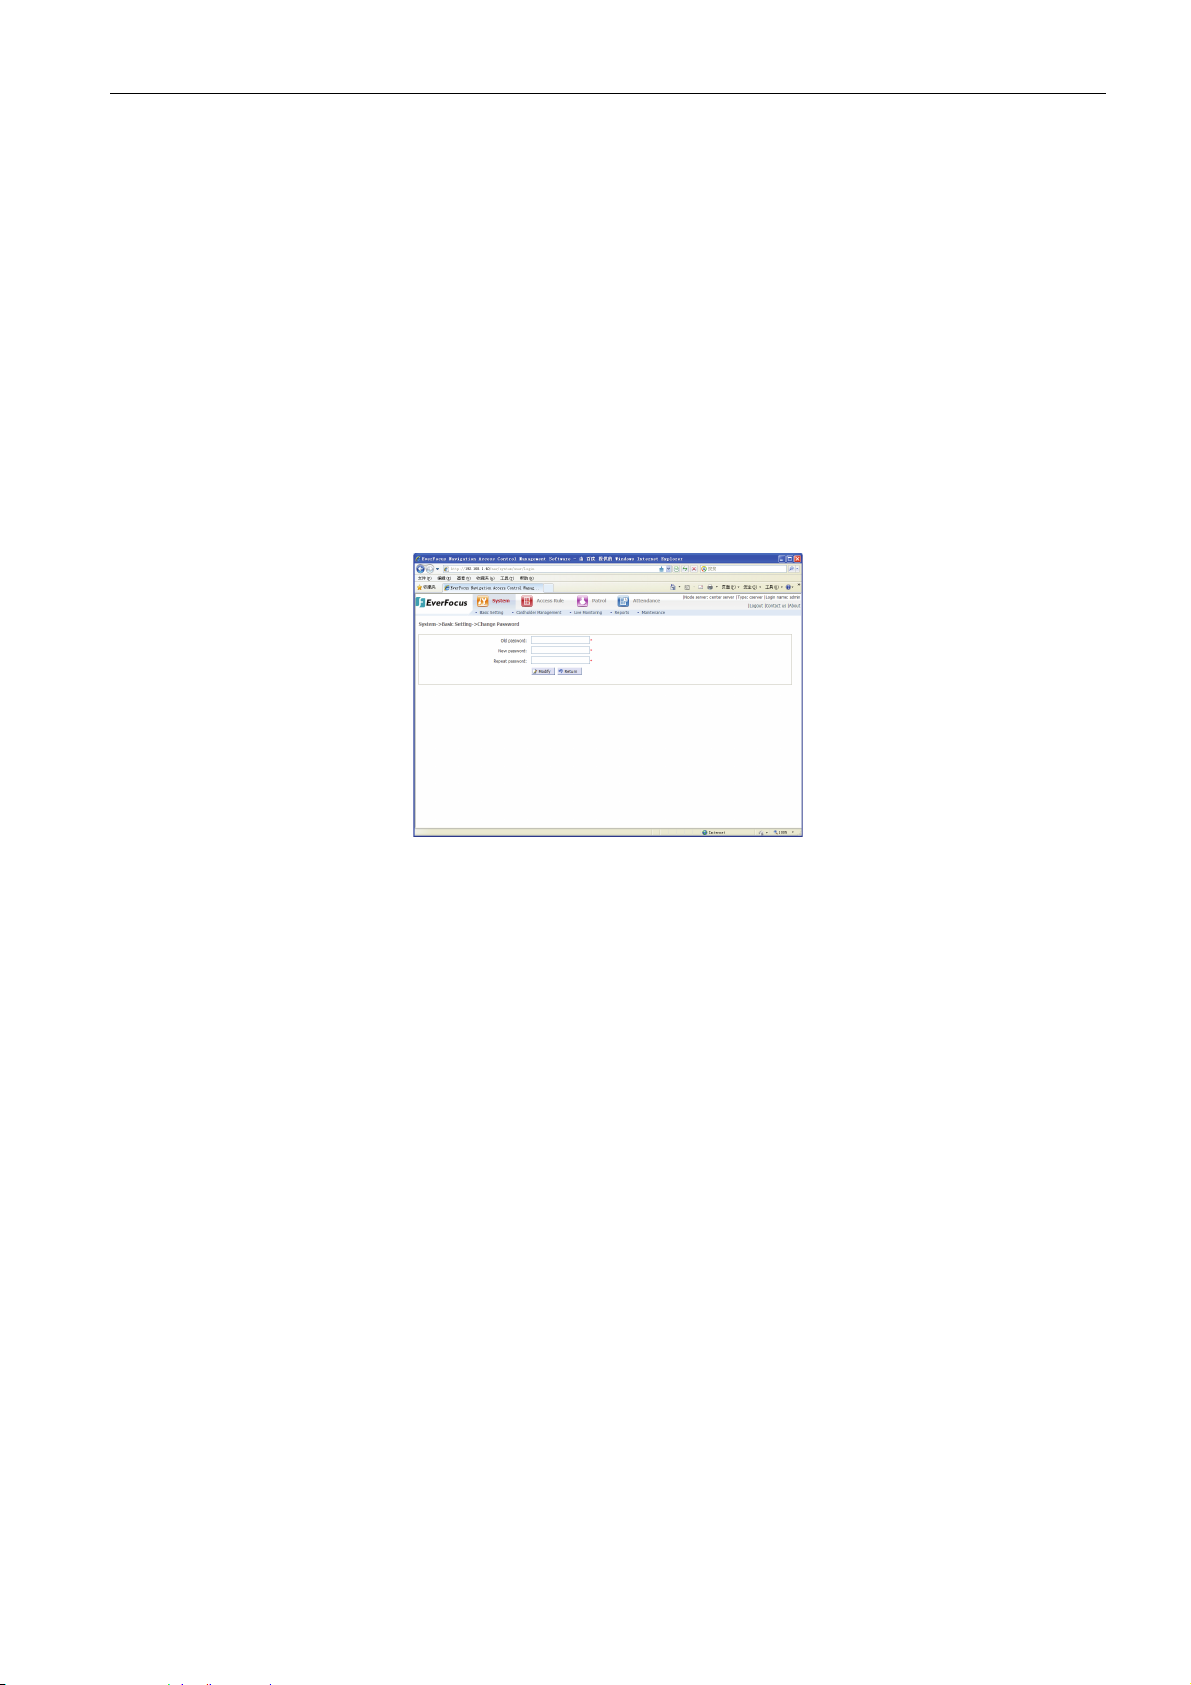
3.1 Change password
Select the menu bar “System” “Basic Management” “Change Password” to enter into the
password changing page, as shown in the figure below:
EverFocus Navigation Access Control Management Software
Chapter
3
Operating procedure:
1) Input the user’s old password.
2) Input the new password and repeat it. The both inputs must be the same.
3) Click “Modify” button, and then the dialog box “change login password successful” will pop up
from the system.
!Note:
1) Password changing only aims at the login password the user is using currently.
2) The system will verify whether the old password is consistent with the current user
password saved. In case of discrepancy, the dialog box “password error” below will
appear.
3) Click “Return” button to return to previous page.
3.2 Site (Node server) setting
Site (Node server) setting is the specific function of the central server. A Web access system is
allowed to have one central server only which can manages multiple node servers. When the node
server registration is done in the central server, the central server can set the access system
authority for the card by cross-networking mode to monitor the access system information in live.
Select the menu bar “System” “Basic Management” “Site Setting” to enter into the site setting
page, as shown in the figure below:
The operations such as addition, revision, deletion, exportation, printing and search node server
can be completed in this page.
3.2.1 Add a node server
Click the “Add” button to enter into the node server adding page, as shown in the figure below:
19
Page 26
EverFocus Navigation Access Control Management Software
The node server information includes site name, site address (URL) and login password.
Operating procedure:
1) The site name is the name of the node server. See the upper right corner “Node server:
xxxxx” after access to the node server.
2) Site address is the URL address beginning with http://
3) There are two types of “Regular” and “Controller” available for selection according to the
actual situations.
4) The password herein is used for the node server to configure servers. The password and the
repeated password must be the same.
5) After filling in the required information, click “Add” button to save it. If you want to add other
node server, fill in the address of the new node server and then click the “Add” button without
the need of returning to the previous page.
6) After all completed, click the “Return” button to return to the previous page.
3.2.2 Modify a node server
Select a node server requiring modification from the node server list of node server registration
page, click the “Modify” button to enter into the node server modification page, as shown in the
figure below:
.
The user may change the site name, site address (URL) and login password of the node server.
The password and the repeated password must be required and the same. After modification, click
“Modify” to save it, then the system will return to the dialog box of successful modification.
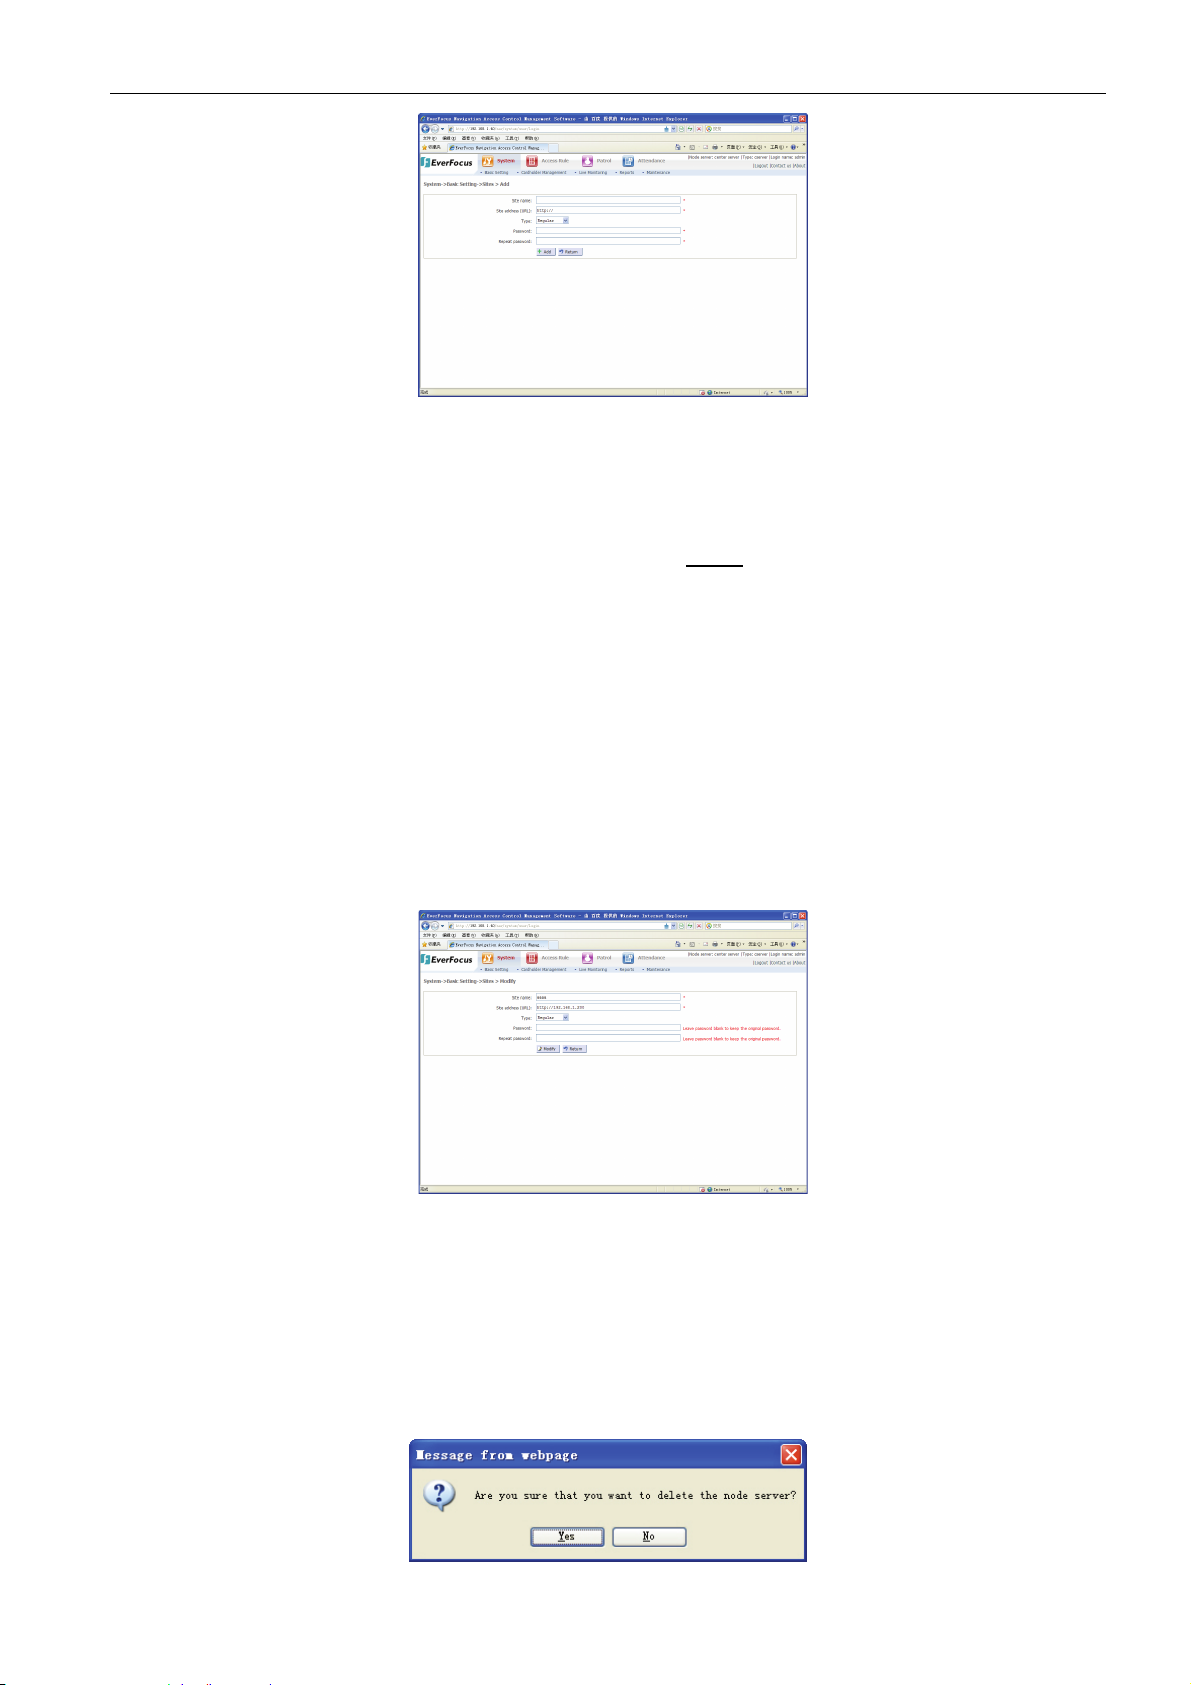
3.2.3 Delete a node server
Select a node server to be deleted from the node server list. If you want to delete several node
servers, select these node servers and then click the “Delete” button, then the confirmation dialog
box will pop up, as shown in the figure below:
20
Page 27
EverFocus Navigation Access Control Management Software
Click the “Confirm” button to delete the node server, otherwise click the “Cancel” button.
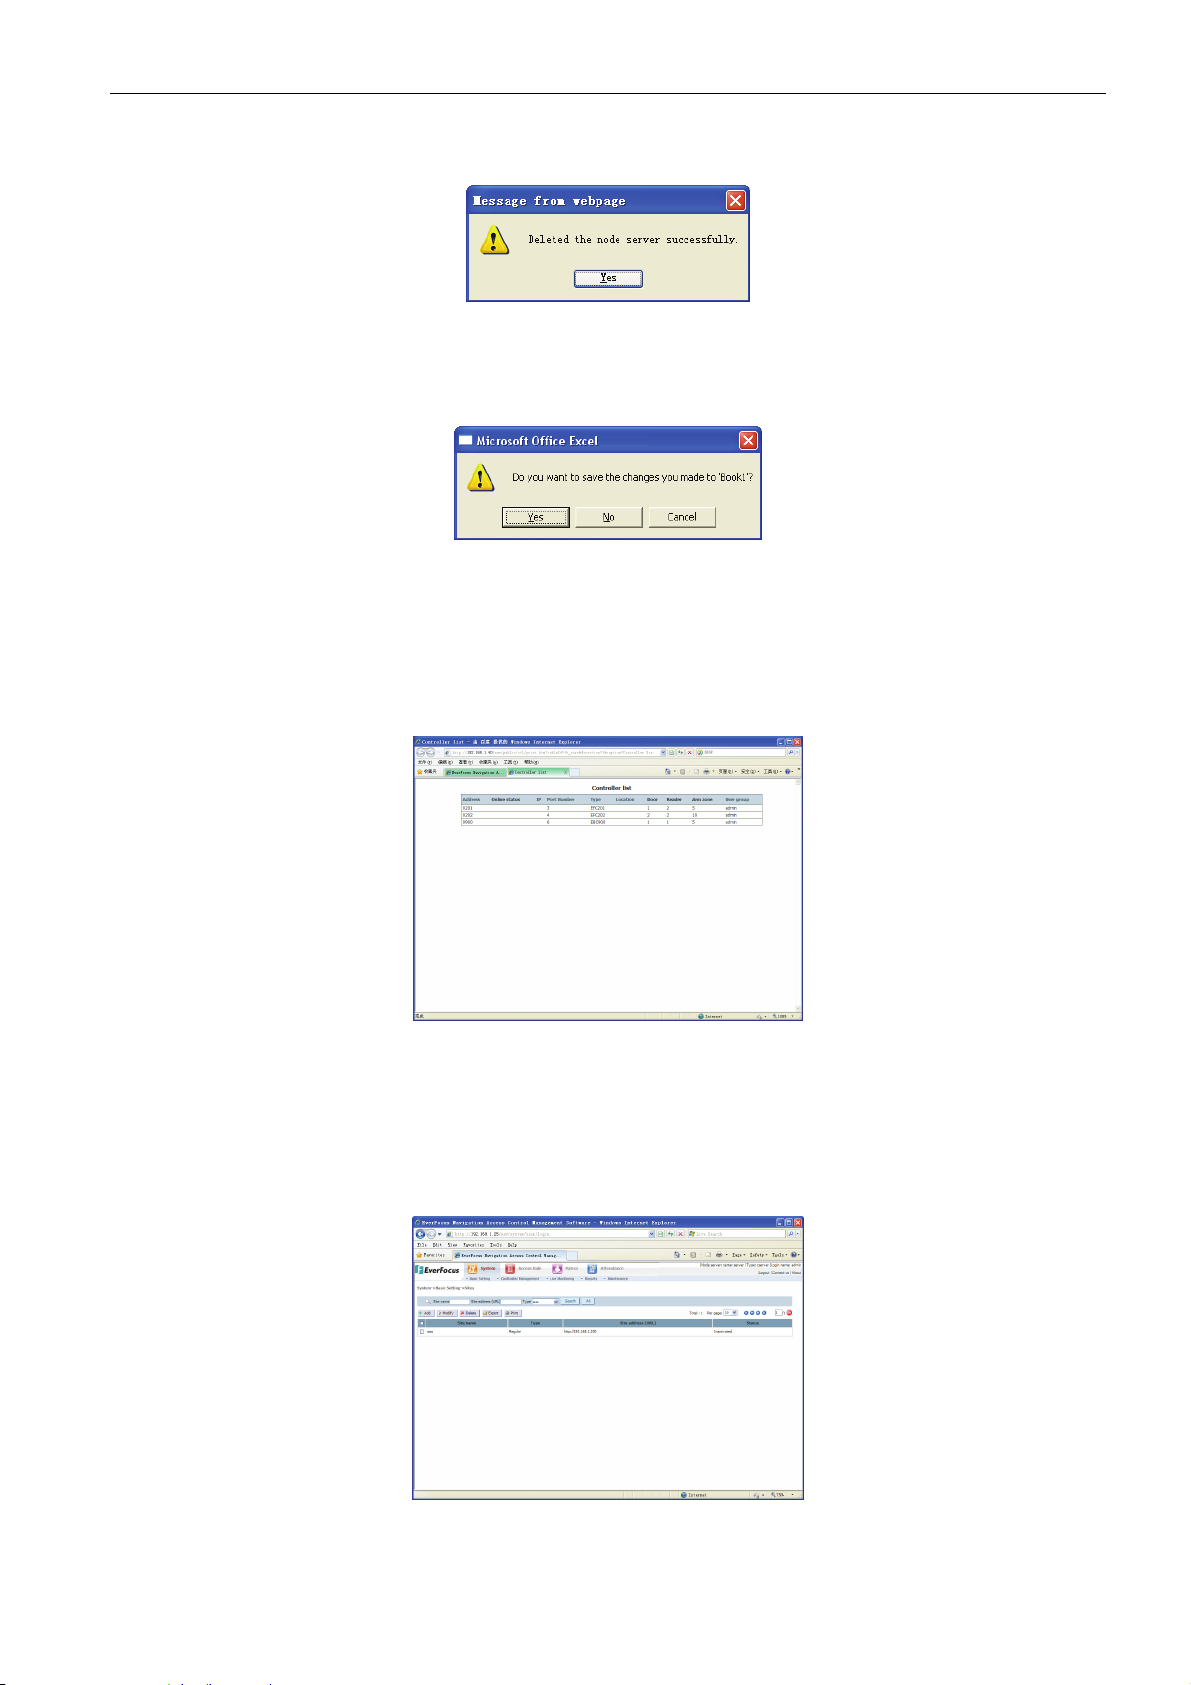
After successful deletion, the prompt box showing successful deletion will pop up.
3.2.4 Export node server records
The node server list information in the current system is exported in the form of Excel sheet. Click
the “Export” button, then the dialog box shown below will pop up:
Click the “Yes” button, then the node server information is saved in the form of Excel sheet;
otherwise click “No” to cancel the node server information saving.
3.2.5 Print node server recordss
Click the “Print” button, then the printing page will pop up. The node server information list is shown
on this page, as shown in the figure below:
If a printer has been ready, click the print icon of the IE window to print the node server information.
3.2.6 Search a node server
The user may input “site name” or “site address” for node server query. Add query conditions, and
then click the “Search” button. The node server information conforming to the query conditions will
be displayed in table at the bottom of the page, as shown in the figure below:
The inquiry here is fuzzy search, namely, input part of information for query, for example, the
system contains “Beijing Company” and “Haidian Branch of Beijing Company”, then input “Beijing”
21
Page 28
in the site name, the query result will list the node servers with “Beijing”.
Click the “All” button to list all node server information in the system.
3.3 User group management
Select the menu bar “System” “Basic Management” “User Group” to enter into the user group
setting page, as shown in the figure below:
EverFocus Navigation Access Control Management Software
User group means the assemblage of all authorities such as the operation of menu setup,
management of departments and DVR for the user managing the EverFocus Navigation Access
Control Management SYSTEM. The users under a user group has equal rights. One user belongs
to one user group only.
The default user group in the system is: admin which has the topmost authority incapable of being
deleted and revised.
The phase “delegated user group” which is associated with user group can be seen in many pages
of the system. If there is a record on a page of the system whose delegated user group is admin,
then the user log into the system by the user group admin can see and manage the record only.
3.3.1 Add a user group
Input the new user group name to be added in the “user group name”, check the operation authority
for the user group in the three items of “system”, “department” and “DVR” and click the “Add” button,
then the dialog box of successful addition of user group will pop up.
If the name is input only without the selection of any authority when adding a user group, the
system will show a prompt to let the user to select operation authority.
The “All” button is provided in the upper right corner of the page to facilitate the user to select all
items rapidly when selecting authority.
3.3.2 Modify a user group
Select the user group requiring modification from the left user group list, and modify the information
in the three items of “system”, “department” and “DVR”. After completion, click the “Save” button,
and then the dialog box of “save user group successfully” pops up, which indicates the completion
of the modification.
3.3.3 Delete a user group
Select the user group requiring deletion from the left user group list, click the “Delete” button on the
right, and then the dialog box for confirming the deletion will pop up:
Click the “Confirm” button, then the system will return to the dialog box of successful deletion;
otherwise select “Cancel” button.
22
Page 29
3.4 User management
Select the menu bar “System” “Basic Management” “User Setting” to enter into the user
setting page, as shown in the figure below:
EverFocus Navigation Access Control Management Software
In the system software, a user is the person operating the software. The users may use different
interfaces and functions due to different authority attributes. Each user is defined by four attributes:
login name, user name, password and user group.
Login name: the identity of the user entering the system.
User name: the user’ s real name.
Password: used to prevent the unauthorized user to enter into the system software illegally. Input
the login name and password when access to the system.
User group: define the restricted level of the user to operate the software; different user group has
diversified software operation authorities.
! Note: the “user” is different from the “cardholder”. The user is, the software user, namely
the person monitoring or configuring the access control system through operating the
software, while the cardholder is the person using the access control system to pass
through the door (such as a employee of the company).
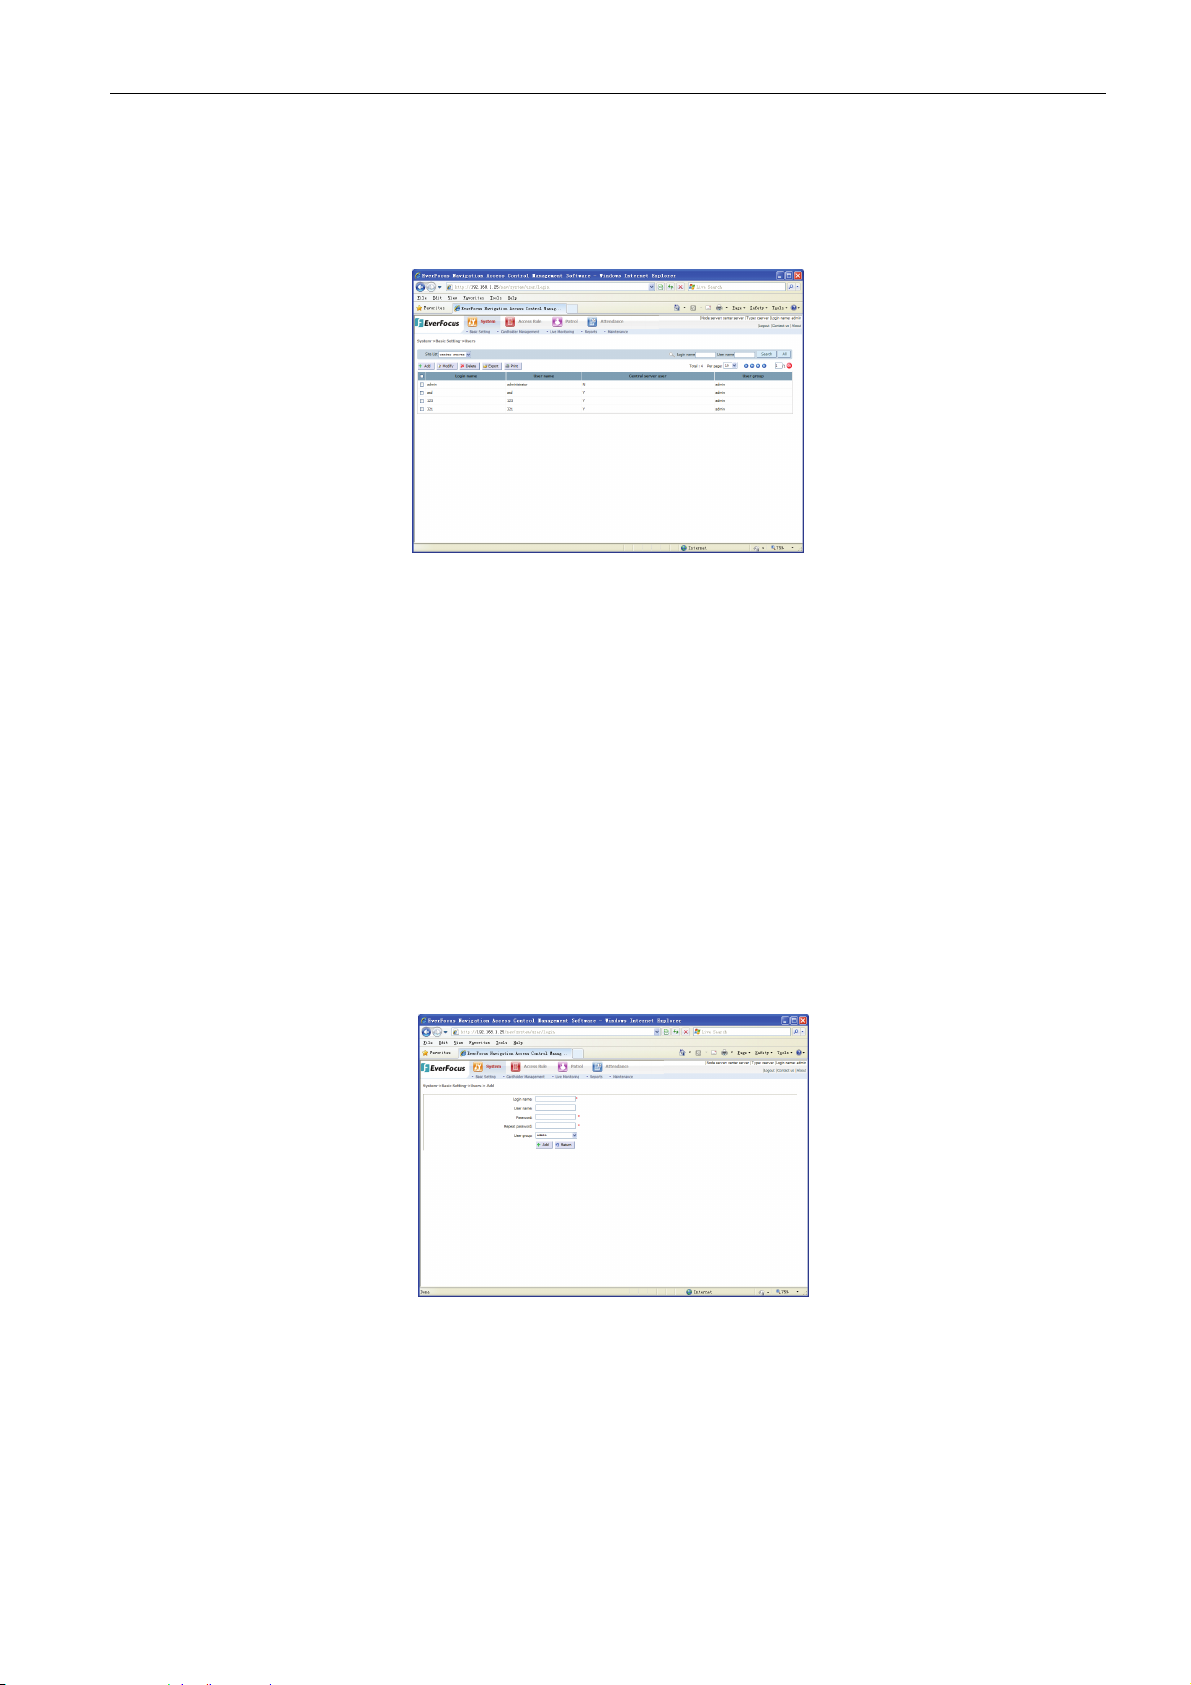
3.4.1 Add a user
Click the “Add” button in the user setting page to enter into the new user adding page:
Operating procedure:
1) Fill in the login name and the user name in the user information box.
2) Input the password and repeat it. The both inputs must be the same.
3) Select the user group for the new user.
4) Click the “Add” button.
!Note 1: the password and the repeated password must be the same, otherwise a dialog box
of “password discrepancy” will pop up.
!Note 2: the “user name” box can be blank, but the “login name” box must be filled since the
user may use it to log into the system. If the “login name” box is not filled, click “confirm”,
23
Page 30
EverFocus Navigation Access Control Management Software
then the dialog box below will pop up:
After the user is successfully added, the dialog box of successful addition will pop up and the user
will be shown in the user list.
3.4.2 Edit a user
Select the user to be edited from the list, click the “Modify” button to enter into the edition page:
Operating procedure:
1) Fill in various attributes of the user in the user information zones.
2) Click the “Modify” button to change the user’s attribute.
3.4.3 Delete a user
Operating procedure:
1) Select the user name to be deleted from the user list.
2) Click the “Delete” button, then the dialog box indicating “confirm to delete the user?” below
will pop up.
3) Click “Confirm” to complete deletion; Click “Cancel” to cancel the deletion operation to the
user.
3.4.4 Export user records
The user information in the current system can be exported in the format of Excel sheet. Click the
“Export” button, then the dialog box as shown in the figure below will pop up:
Click the “Yes” button to save the user information in the form of Excel sheet; otherwise click “No” to
cancel the exportation operation of the user information.
3.4.5 Print user records
Click the “Print” button, then the printing page will pop up. The user information list is shown in the
system, as shown in the figure below:
24
Page 31
EverFocus Navigation Access Control Management Software
3.4.6 Search a user
Input “login name” or “user name” for user query. Select the query conditions and click “Search”,
then the user information conforming to the query conditions will be displayed at the bottom of the
page, as shown in the figure below:
The inquiry here is fuzzy search, namely, input part of information for query, for example, the
system contains “one, ree”, then input “e” in the user name, the query result will list the users with
“e” in the name.
Click the “All” button to list all user information in the system.
3.5 Configure a server for node server
Select the menu bar “System” “Basic Management” “Server configuration ” to enter into the
server config page, as shown in the figure below:
Operating procedure:
1) Server URL is the URL address beginning with http://.
2) The authentication password here is reserved by the user when adding an node server onto
the central server.
3) After inputting, click “Configuration” button, then the dialog box of successful configuration
may pop up.
25
Page 32

EverFocus Navigation Access Control Management Software
3.6 Department setting
Select the menu bar “System” “Cardholder Management” “Department Settings” to enter into
the department setting page, as shown in the figure below:
On the left of the page shows the tree view structure of the organization, and on the right displays
the direct node list for the node selected. Perform adding, modifying and deleting operations on the
right of the interface. After completion, the system will automatically save the operations.
The organizational structure of the company is classified into three levels.
3.6.1 Add a department
Select a parent node, fill in the department name in the “name” box at the bottom and then click the
“Add” button, as shown in the figure below:
If the department newly added has the same name with the department under the node, a prompt
indicating “the department has existed” will pop up!
If no repeated name, display the prompt “added successfully”.
3.6.2 Modify a department
Select one item in the list, modify the name in the editing box, click the “Modify” button, and then
display the prompt “modified successfully”!
3.6.3 Delete a department
Select a department in the list, click the “Delete” button to delete the department in the list and the
corresponding node in the tree structure.
To delete all departments under a node, enter the superior list for selection, and then click the
“Delete” button to delete the node and all departments under the node.
26
Page 33

EverFocus Navigation Access Control Management Software
3.7 Basic information of cardholder
Select the system menu bar “System” “Basic Management” “Cardholder Basic Information” to
enter into the cardholder information page, as shown in the figure below:
The upper part of the page is query zone, the middle line is operation zone and the lower part
shows the list of cardholder information.
The number of pieces of cardholder information showing on each page can be set in the operation
zone in the upper right corner of the page. Moreover, page up/down button and jump button are
available for the user to access to the page the user wants to see rapidly, as shown in the figure
below:
If you want to add a cardholder, click the “Add” button to enter into the page of cardholder basic
information registration.
This page has four information bars: personnel information, access rule information, fingerprint
enrollment and attendance authority.
1) Personnel information: this item is used to set up the basic information of the cardholder.
Employee NO: it can be any characters capable of being printed; it is the unique code of the
cardholder in the system. If the employee number for new cardholder is consistent with a former
one, the system will show a prompt indicating “the employee number has existed”.
Name: after filling in the “Last name” and “First name”, three types of the name generated under
the pull-down box of the “name” may be available, select the proper one.
Gender: the system default is “male”.
Department: the default is the department ranking in the first place of the system.
Employment start/end: when clicking the input box by the mouse, the date selection box will pop
up, and then select the employment date: select the year and month from the top, select date in the
middle and time at the bottom.
27
Page 34

EverFocus Navigation Access Control Management Software
Photo: click “Photo” button, then the window of photo uploading pops up, do as indicated in the
procedure, as shown in the figure below:
Operating procedure:
a) Select the photo to be uploaded: click “Browse” button to find the photo you want to upload
with the file no more than 2M.
b) Upload the file: after the photo is select, click “Upload the file” button.
c) Check the file uploaded: after the file is uploaded, the file name and size will be listed here.
d) Confirm: if the file uploaded is checked correct, Click “Confirm” button to complete photo
uploading.
After filling in all personal information of the cardholder, click “OK” button.
!Note: Employee No. is required; the system default sex is “male”; the default department is
the department ranking in the first place of the system; other parameters may be left blank,
but we recommend you to complete them all for more visually displaying the required
information when inquiry.
2) Access Rule information: via this item, you may add one or several cards rapidly for the
personnel under adding operation and set the attributes of the card.
3)
The card information is mainly used to link the cardholder with the card. You may directly input the
code on the card to be linked (a series of numbers or characters printed on the surface of most
cards), or read the card number by swiping the card through connecting the ERU series USB desk
28
Page 35

EverFocus Navigation Access Control Management Software
card reader (please refer to the ERU series hardware operation manual).
Card format: the software provides three card formats as below: ddddd-ddddd ... (the zoned
decimal system), ddd... (Multi-digit decimal system) and HHH... (Multi-digit hexadecimal system).
Add a card: select proper card format, input card series number, click “Add”
to add the
card number into the card list. If the card to be registered has the same number with the card in the
system, a prompt indicating “This card exists in the card database” will pop up. A user can have one
or several cards.
Delete a card: check the card to be deleted in the card list, click “Delete”
to delete the
card.
Free-access opening: indicates that the card held by the cardholder is a free-access card used to
set up normally-open function or opening function of triggered area. If the controller 0001 sets the
normally open state of the door during 9:00—11:00, the cardholder holding the card with free
access attribute can activate the normally-open state of the corresponding door area by swiping the
card on the card readers controlled by the controller.
PIN_EN: indicates whether personal password is used. Select the password using check box to
activate the password settings of the cardholder.
Card_EN: whether to activate the registered card or not. Select this item to activate this card. Other
attributes of the card may become valid after the card is activated. The card remains invalid if this
item is not checked.
Arm_EN: indicates whether the cardholder has the right to set arming/disarming and re-set alarm
function on the controller to be selected. Check this item to activate the card arming function so that
the cardholder has an arming right.
APB_EN whether to activate the anti-Pass-Back (prevent tracking) to the cardholder. After
anti-Pass-Back valid is checked and the controller has activated overall anti-Pass-Back function,
the card anti-Pass-Back setup becomes valid.
Card expire time select the period of validity of the card using, indicates that the card can be used
only within the valid period and cannot be used to enter into any door areas after maturity.
Card PIN: the cardholder can set 4-8 digits of numbers as opening password. ELA82x and ELA85x
series controllers support 4-digit opening password. If the opening password set in the software is a
6-digit number, the system may automatically take the former 4-digit numbers when the password
is downloaded to the ELA82x and ELA85x series controllers. Flex II series controller supports
8-digit opening password. If the opening password set in the software is a 6-digit number, the
system may automatically fill with zeros after the 6-digit password when downloading the password
to the Flex II series controller; if the opening password set in the software is a 8-digit number, the
system may automatically take the former 6 digits when the password is downloaded to the
EFC1XX controller.
Panic PIN: the duress password is used for the cardholder to give an alarm when opening the door
under duress; it is valid only when a door area is set to be password opening. Duress password is a
2-digit number aim at the Flex II series controller. When using the duress password, input the
former 6 digits of the normal password, and then input the duress password, Click “Confirm” to
generate the alarm and the open the door. The duress password of other series controllers is any
2-digit number. For duress alarm, input the normal password and then input the randomly selected
2-digit number, confirm it to generate an alarm and open the door at the same time.
Card expire time: when the mouse clicks the input box, time selection box will pop up with the valid
period accurate to minute.
Delegated authority group: select the authority group of the cardholder from the pull-down box,
set the authority group for the newly added card; when the login user has no the related authority
any more, he/she cannot see the card.
Control mode: the system provides two management modes of control group and card plan setup.
In addition to FLEX II series controller that supports “card plan setup”, other controller supports
“control group” setup only.
Control group: ACCESS SYSTEM control authority setup. The system assigns 01-64 groups of
ACCESS SYSTEM control authority for all cardholders and sets different ACCESS SYSTEM
control rules for different authority groups.
Card schedule setup: card schedule means the access priority rules of the current card in various
controller door areas. In the three kinds of rules for the card, the priority levels are as below: card
plan > control group plan > door plan from high to low level. After the check box before the card
plan setup, the card plan can be set, as shown in the figure below:
29
Page 36
EverFocus Navigation Access Control Management Software
The controllers shown on the page of the figure are all Flex II series controllers. Different door
areas of the various controller can use diversified control plans. Different control plans may be
designated for one kind of door area access rules for the card.
!Note: The cards in a group can be assigned with different authority groups on different
controllers. Card schedule setup is valid only on Flex II series controller.
After completing all information and card setup, click the “Add” button, then the system returns to
the “add successfully” box. If the controller has been set in the system and the control group plan
has been authorized on the controller, when the controller is not connected with the computer
during saving, a dialog box of “controller operation timeout” will pop up. If re-connecting the
controller, click “yes”; otherwise click “No”.
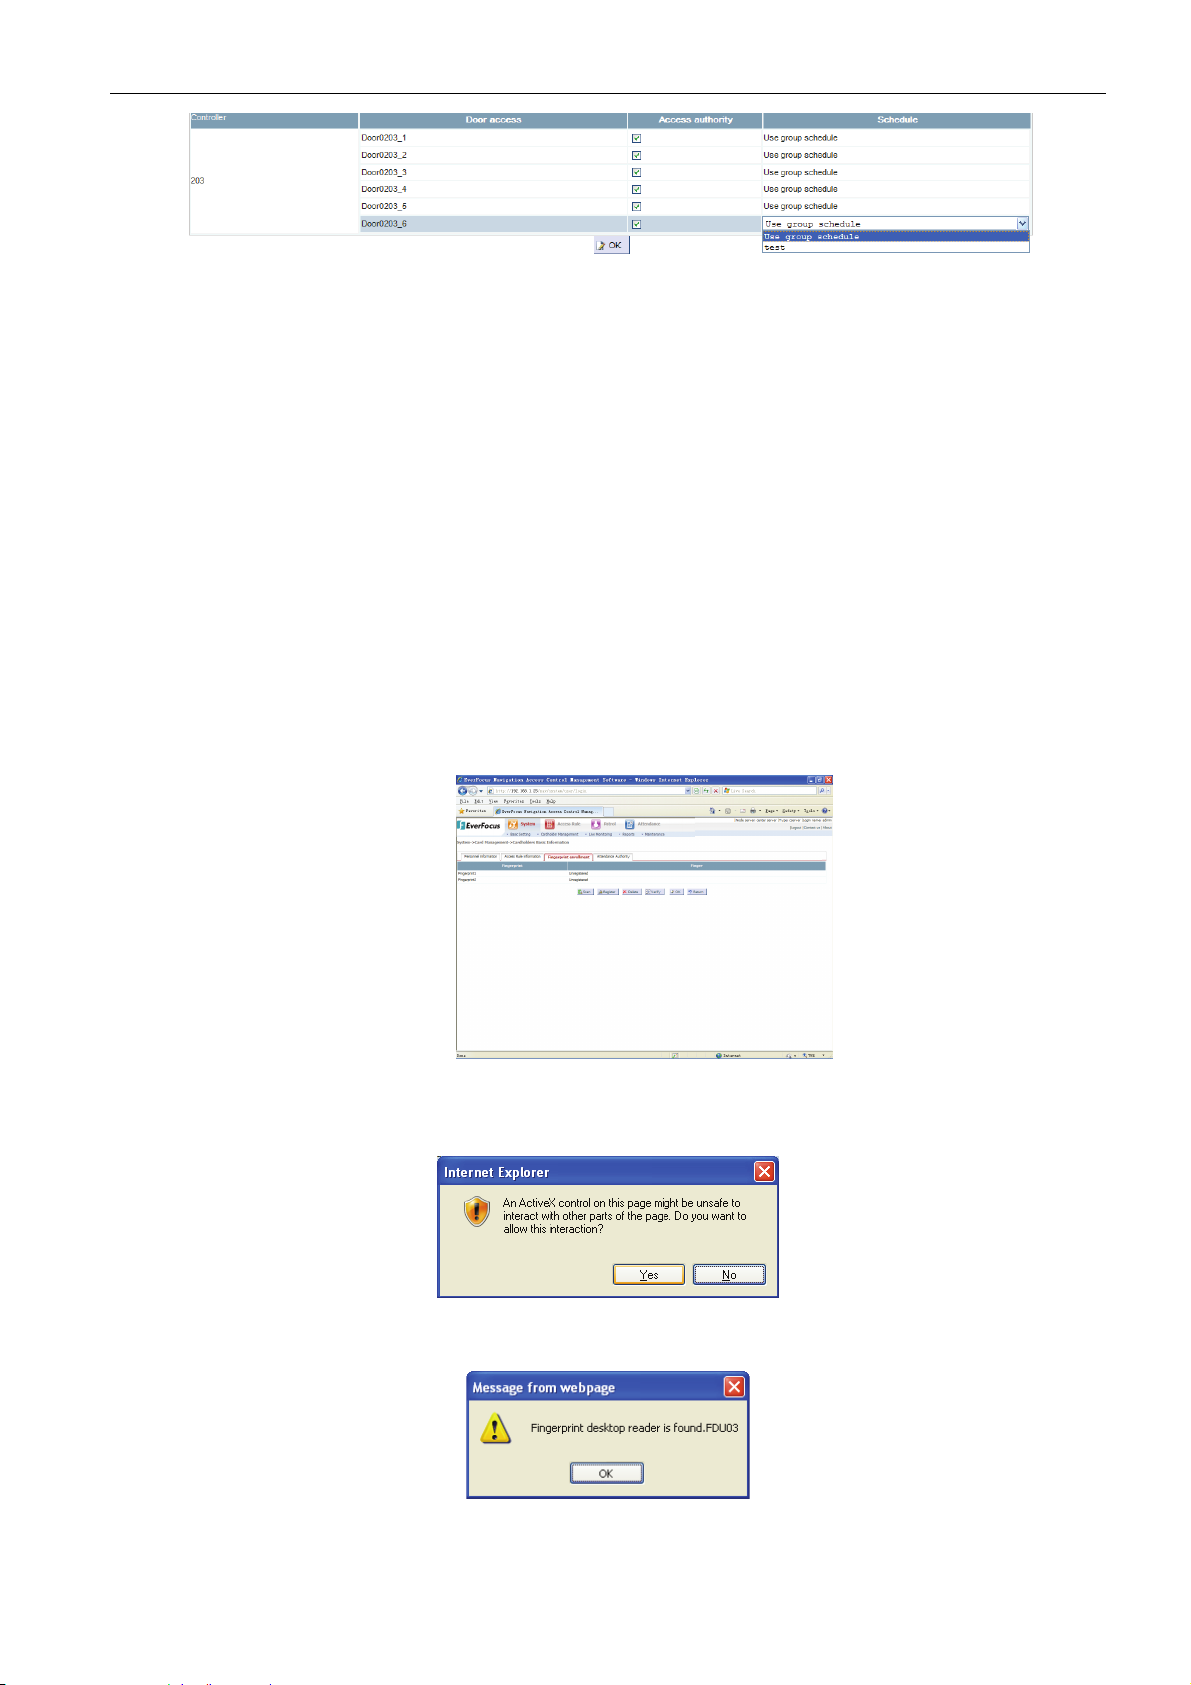
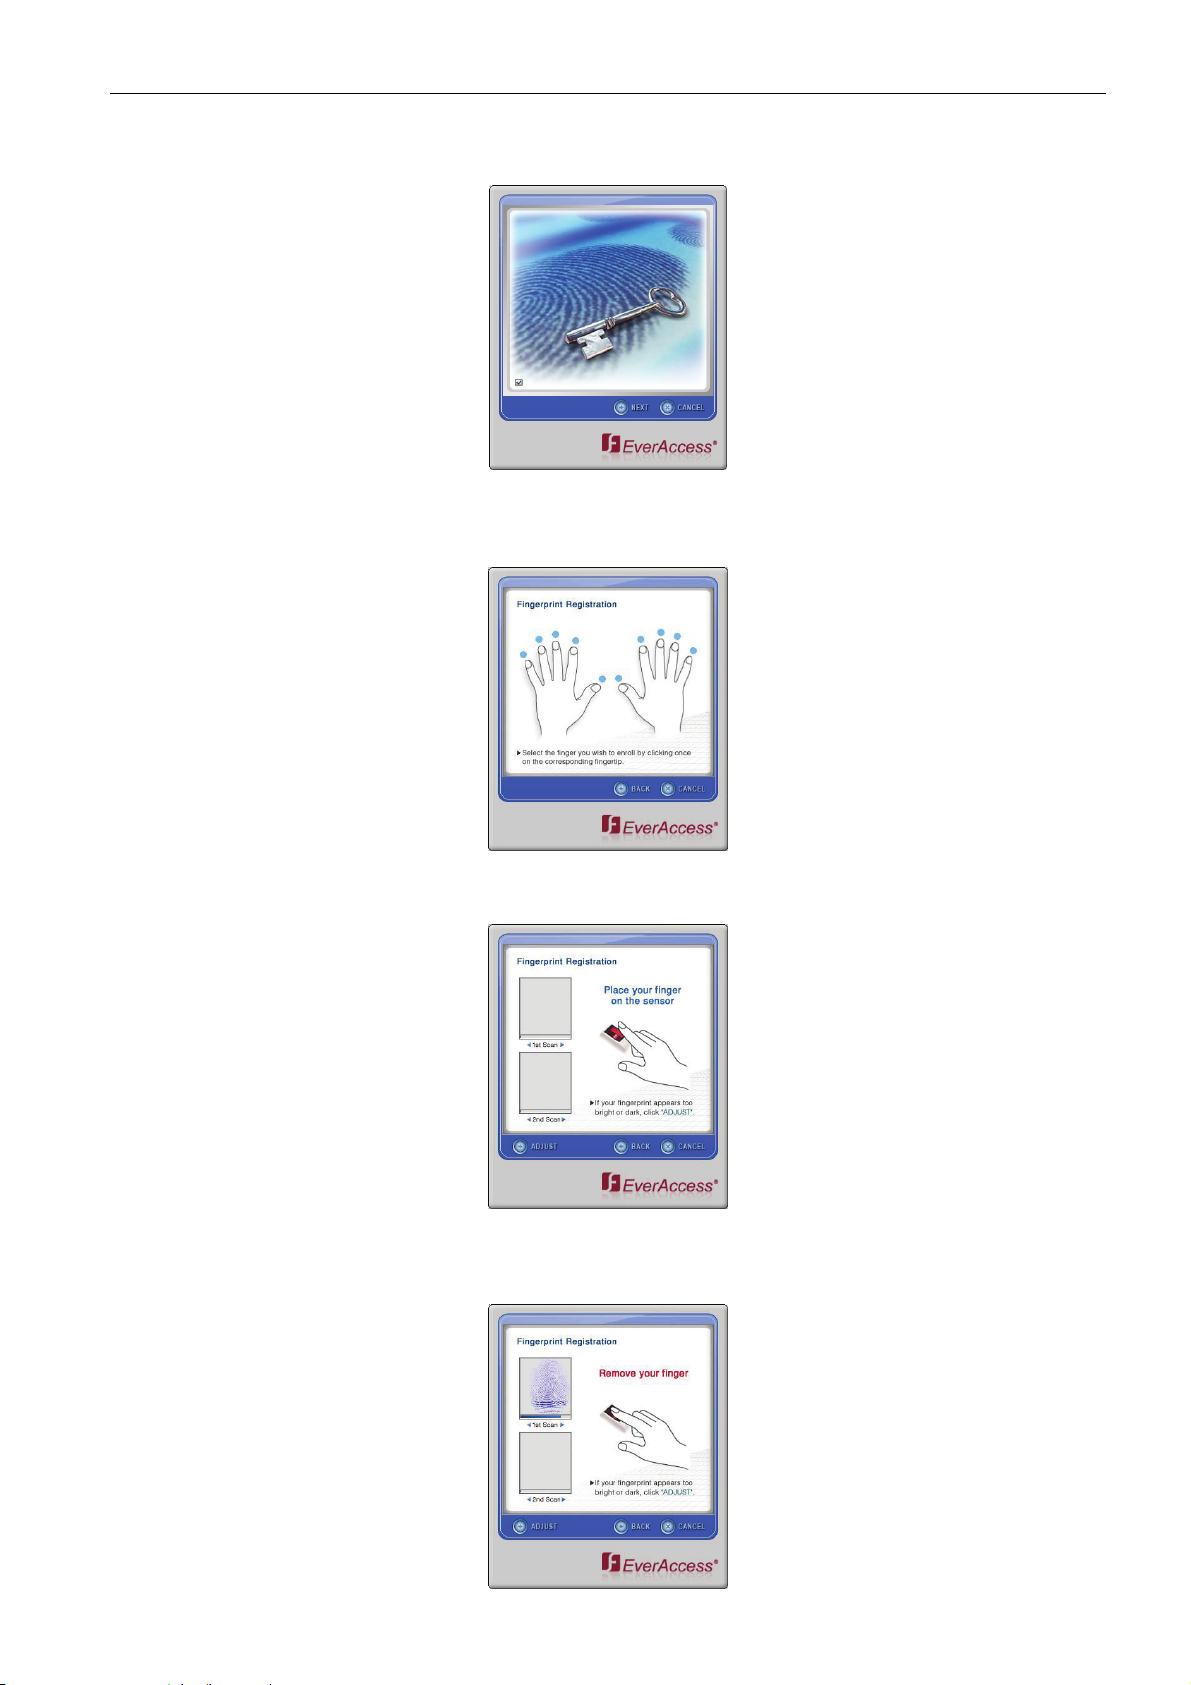
Fingerprint enrollment: if the user uses a fingerprint controller, add fingerprint information for the
user herein. Please confirm if the system is connected to a fingerprint scanner before fingerprint
enrollment.
Click “fingerprint enrollment” to enter into the fingerprint management page as shown in the figure
below. Each user in the EverAccess Flex series fingerprint machine has two fingerprints which can
be the same or different.
!Note: to use this function, ActiveX must be opened. See P125,0.1 IE Browser setup.
Scan: used to detect whether the user’s computer is connected with a fingerprint scanner. Click the
“detection” button, then a dialog box of data interaction prompt will pop up on the browser, Click
“Confirm” button.
If a fingerprint scanner has been connected, a dialog box indicating "Find the setup" will pop up, as
shown in the figure below:
Registration: fingerprint registration for the user is completed through fingerprint scanner
connected.
30
Page 37
EverFocus Navigation Access Control Management Software
Select the fingerprint to be registered (such as Fingerprint 1), click “Register” button to enter into
the fingerprint collection interface, as shown in the figure below.
Click “next” button to enter into the finger selection interface, click the round mark above the finger
to be added.
Then, go to the fingerprint registration interface automatically, as shown in the figure below:
Put the finger on it to complete the first fingerprint collection, and then the user may move away the
finger, as shown in the figure below:
31
Page 38

EverFocus Navigation Access Control Management Software
After the finger is taken away, a prompt indicating the user to put the finger again will be displayed,
as shown in the figure below:
When the second fingerprint collection is completed, the prompt for establishing fingerprint
characteristics may appear, as shown in the figure below:
When data establishment is completed, return to fingerprint registration interface, as shown in the
figure below:
Click the “next” button to complete fingerprint registration. The interface is as shown in the figure
below:
Click the “end” button to return to the fingerprint management interface, then the fingerprint
registered will be shown on the interface. Repeat the procedure above, register the second
fingerprint of the user.
Delete: delete the fingerprint registered. Select the fingerprint to be deleted, click the “Delete”
button to delete the fingerprint.
Verify: used to verify whether the fingerprint registered is correct.
Select the fingerprint to be verified (such as Fingerprint 1), click the “Verify” button to enter into the
fingerprint verification interface, as shown in the figure below.
32
Page 39

EverFocus Navigation Access Control Management Software
Operate as per the prompt text on the page. After fingerprint verification, the page may return to the
dialog box of “verify successfully” or “verify failed”.
OK: after fingerprint registration, click the “OK” button to save the fingerprint information of the
cardholder.
Return: return to the cardholder list page.
4) Attendance authorization: to set the password for access to the attendance page for the
cardholders and the authority capable of operation.
Authority group is classified into three levels: personal user, department user and super user.
Personal user: can revise personal login password and Search personal attendance information
only.
Department user: can Search and set the attendance information of all cardholder of the
department.
Super user: can Search and set the attendance information all cardholders.
3.7.1 Modify a cardholder
To revise the information of a cardholder, select the name of the cardholder, click the button
the right of the cardholder recorded to enter into the “basic data of the person” of the cardholder, as
shown in the figure below:
on
33
Page 40

The modification of cardholder information is similar to the addition of cardholder information. After
the cardholder information is modified according to demand, click “Modify” button to complete the
modification of cardholder information.
3.7.2 Delete a cardholder
Return to “cardholder list”. To delete the information of a cardholder, select the name of the
cardholder, click the “Delete” button, and then the dialog box indicating successful deletion will pop
up.
To delete the information of all cardholders on one page, click the check box before the “card
number” to select all cardholders on the page, click “Delete” to delete the information of all
cardholders selected.
3.7.3 Upload fingerprint
The fingerprint of a cardholder registered in the fingerprint machine may be transferred to the
software system by uploading the fingerprint.
Select the cardholder to be uploaded on the personnel information page, click “Upload fingerprint
data”
Result set selected: to upload one or several users’ fingerprints, select this item after the
corresponding users are selected.
Search result set: results obtained by inputting the query conditions in the query area; select this
item when performing fingerprint uploading.
EverFocus Navigation Access Control Management Software
, and then the dialog box may pop up.
Click the “next” button to enter into the controller selection page:
Select the targeted controller requiring cardholder fingerprint, click the “Confirm” button. After
completing data transmission, the dialog box of “successful transfer” may pop up.
3.7.4 Download
The option can download the information of the cardholder selected into the designated target
substation(site), share the cardholder information and perform corresponding management.
Select the cardholder to be downloaded, click the “
shown in the figure below may pop up:
” button, and then the dialog box as
34
Page 41

EverFocus Navigation Access Control Management Software
Result set selected: to download one or several cardholders’ data to other substation, select this
item after the selection of the corresponding users.
Search result set: results obtained by inputting the query conditions in the query area; select this
item when performing cardholder data downloading.
Click “next” button to enter into the substation selection page:
Select the substation requiring the downloaded cardholder information, and click the “Confirm”
button. After completing data transmission, the dialog box of “successful transfer” may pop up.
3.7.5 Cardholder query area
Multiple kinds of query methods are available in the query area on the upper part of the interface.
Field: four kinds of query conditions: job number, name, department and post.
Query rules: classified into “=” equal to, “>” greater than, “<” less than, “<>” unequal to, “like”
including and “not like” excluding.
Key words: the key words related to the fields.
After inputting query conditions, click the “Search” button, then the system will list the results
conforming to the conditions. Click the “All” button to list all cardholder information in the system.
35
Page 42

3.8 Import cardholder records
Select the menu bar of the system “System” “Cardholder Management” “Import Cardholders”,
then the system will switch to the cardholder information importation page, as shown in the figure
below:
EverFocus Navigation Access Control Management Software
Operating procedure:
1) Upload the Excel file, click the “Browse” button to find the file to be uploaded. The file to be
imported must be .xls format (Excel 97-2003) and less than 1M. Reed through the
precautions on the interface before importation.
2) Click the “Next” button to enter into the importation selection page, as shown in the figure
below:
3) Click each data-attribute pull-down box, select the corresponding data type, check the
corresponding data list on the top, and then click the “import” button at the bottom of the
interface to complete the personnel information importation.
3.9 Live monitoring
3.9.1 Live events
Select system menu bar “System” “Live Monitoring” “Live Events” to enter into the live events
interface, as shown in the figure below:
36
Page 43

EverFocus Navigation Access Control Management Software
The live event monitoring page can be classified into 3 basic areas, as shown in the figure.
The electrical map and resources & equipment are on far left list where all electrical maps,
controllers, DVRs, CAMs and view preview are displayed; control the controllers, door area
defence zone, DVR and CAM by a right-click so as to realize remote control of the controllers such
as remote control defence, remote alarm, remote opening and closing.
The electrical map located in the middle-upper part displays different states of the equipment
through the real-time state icon of various equipment. For example: opening, closing, alarm or not.
The records of real-time events of the controller in the lower part automatically receives the
scroll-display event information of the controller in real time. For the first access to the interface,
various controller events are listed according to the receiving sequence. When a new event is
received, the latest event will be automatically shown on the first line. Click the “
upper right corner of the area, then the bar of real-time event records may extend upwards, click
” button in the upper right corner, then the bar of real-time event records may restore to the
the “
original state.
The cardholder’s information located in the lower right side is used to display the information of the
cardholder triggering the controller events. When clicking to select an event record, if the event
selected includes the cardholder’s information, the relation information of the cardholder may be
displayed on the cardholder’s information list on the right, such as the cardholder’s photo, name,
sex and department. If there is no cardholder’s information, this list shows nothing.
!Note: since the node server only caches part of live records, the live records cached in
each node server are shown only when first access to the live event page. To Search the
previous records, please go to query & print page.
3.9.2 Operation of resources & equipment
1) Operate the controller
When right-clicking the names of controller nodes or door area nodes on the left resource tree
view, corresponding function menu may pop up according to the node types. Right-click the
controller node to realize the operations such as controller arming, disarming, alarm, alarm
reset and adding to map. Right-click the door area to realize the operations such as door area
opening, closing and adding to map.
2) Operate DVR and view
When right-clicking the names of DVR nodes, views or CAM nodes on the left resource tree
view, corresponding function menu may pop up according to the node types. Right-click DVR
node to realize the functions of DVR preview and adding to map; right-click view node to
realize the functions of view preview and adding to map; right-click CAM node to realize the
functions of CAM preview and adding to map.
” button in the
3.10 Edit the electrical map
Select a map from the left electrical map lists, click “Edit map” to enter into the page of editing the
electrical map, as shown in the figure below:
37
Page 44

EverFocus Navigation Access Control Management Software
There are 4 buttons on the electrical map for operation, as shown in the figure below:
They are: add a submap, delete, save and back respectively.
Each map may have several submaps to be added so that the administrator can directly locate
the required submap in the complicated map. !Note: the submaps shall not exceed 3 levels.
It is used to delete the equipment icon on the map.
After any operation of electrical map edition, click the “save” button to save the operations.
When completing map edition, click to return to live monitoring state.
3.10.1 Add electrical map
Click the “Add a submap”
Click “Confirm” to add the submap to the map, drag the submap icon to proper location by pressing
the left key of the mouse.
3.10.2 Edit the electrical map
To modify the name of the electrical map, change the name in the text box after the map name and
click the “Save”
button to complete electrical map name modification.
button, input the name of the submap in the pop-up dialog box and
To modify the background picture, click the “Map”
button, then the picture uploading
window may pop up, as shown in the figure below:
Click “Browse” to select the picture to be added, click the “Upload the file” button after selection,
check to confirm the name of the file uploaded is correct after uploading, and then click the
“Confirm” button to complete background picture uploading.
!Note: the map file shall be no more than 2MB.
38
Page 45
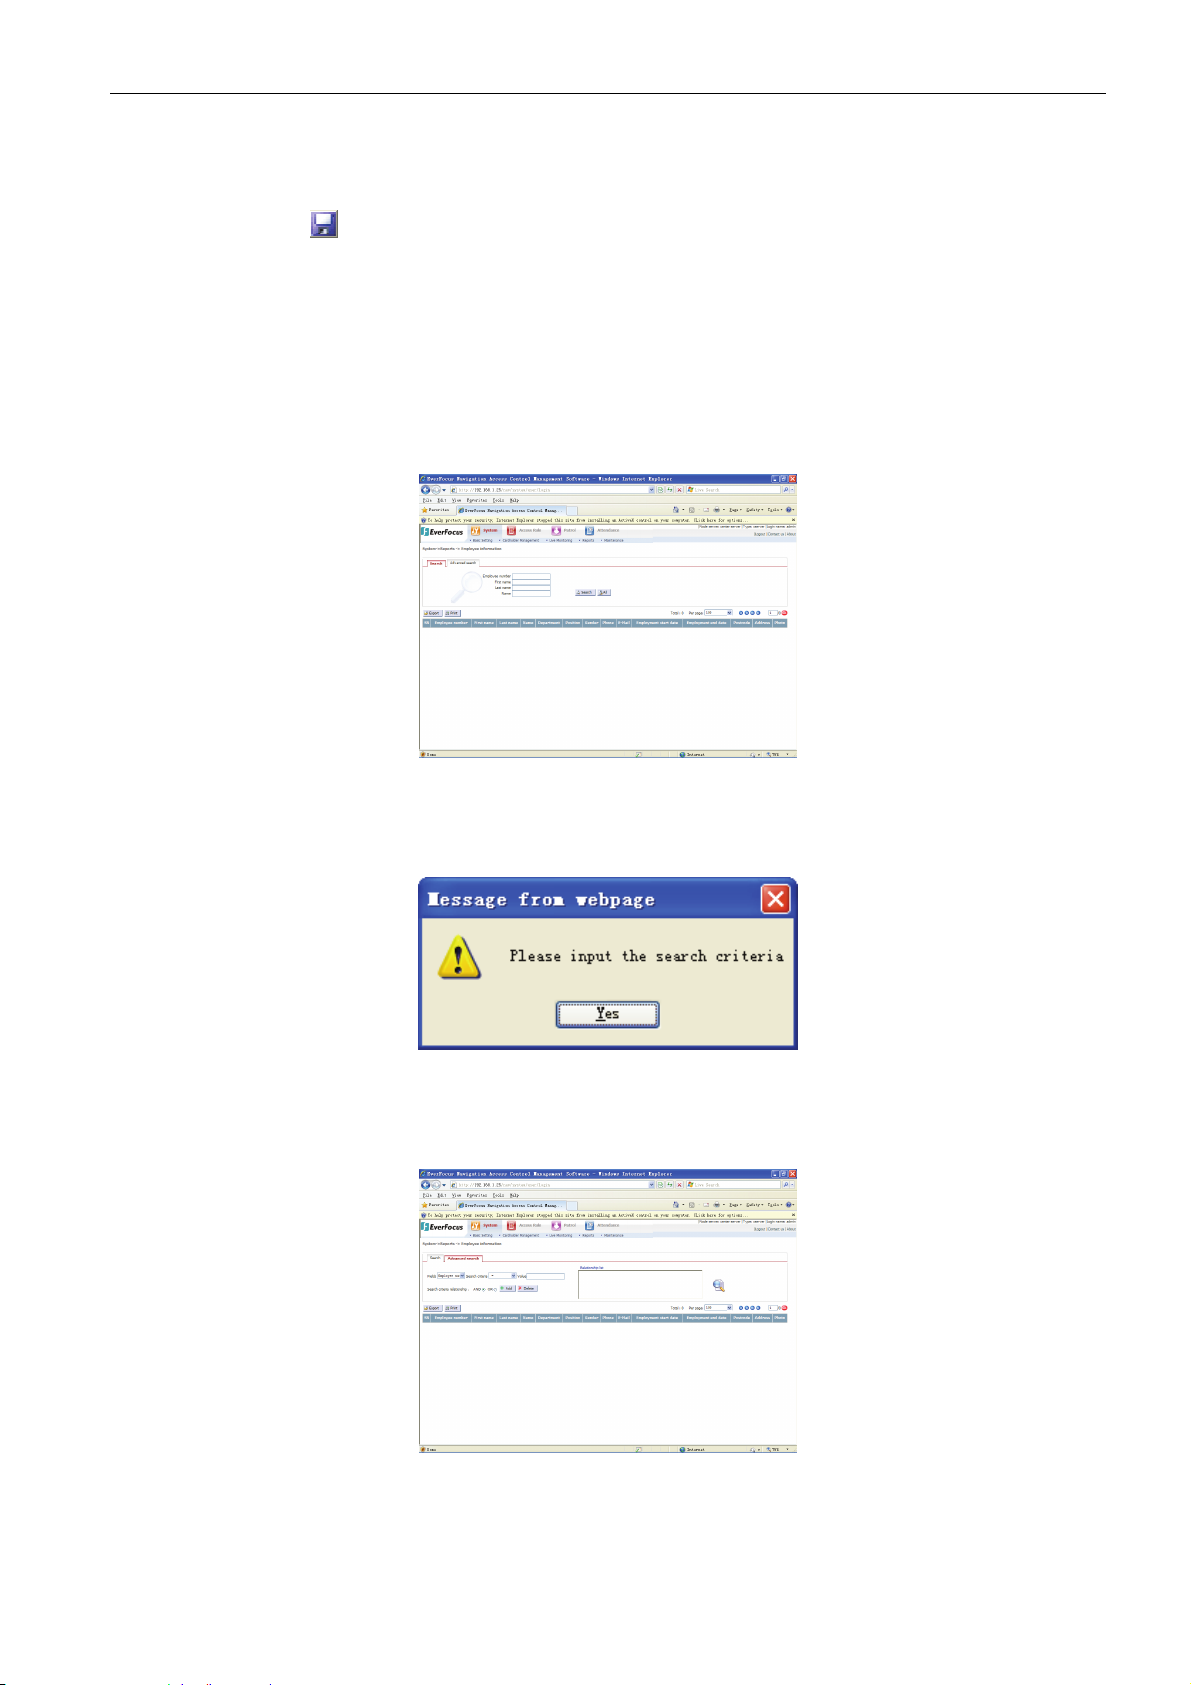
In the left resources & equipment area, right-click the equipment icon to be added, select “Add to
map” from the pull-down menu, then the equipment icon appears in the map, drag the icon to
proper location by pressing the left key of the mouse.
Click “Save”
button after all operations are completed.
3.11 Reports
3.11.1 Search the cardholder information
Select the system menu bar “System” “Reports” “Cardholder Report”. The cardholder
information is classified into two query types: “simple query” and “advanced query”, as shown in the
figure below:
EverFocus Navigation Access Control Management Software
Simple query: it is an accurate query mode that allows accurate query by inputting any one or
multiple items. The Searched results completed are equal to the key words of query conditions.
If there is no result conforming to the query conditions, the dialog box below may pop up:
For example: EmployeeNO “ef-001” and “ef-002” exist in the system; to Search “ef-001”, input
“ef-001” in the EmployeeNO and then click “Search” button; the user cannot be Searched in case of
lack of any character.
Advanced query: it is a multi-condition query mode to allow multi-condition query by inputting
fields, rules, query valve and other query conditions, as shown in the figure above.
Query field: classified into EmployeeNo, name, department, post, sex, phone number,
employment time and departure time, etc.
39
Page 46

EverFocus Navigation Access Control Management Software
Query rules: classified into “=” equal to, “<>” unequal to, “like” including, “<” less than, “>” greater
than and so on.
Query words: the key words related to the fields.
Relations between conditions:
And: the result satisfying each query condition.
Or: the result satisfying any one of query conditions.
For example: the EmployeeNO “ef-001”, “ef-002” and “ef-003” exist in the system; to Search the
cardholder with EmployeeNO containing “ef” and department belonging to Research &
Development, follow the following steps for query:
1) Select “EmployeeNO” for query field, "like" for rules and input “ef” for query words.
2) Click the “Add” button to add the first query condition into the list of conditions.
3) Select “department” for query field, "=" for rules and input “R&D department” for query words.
4) Select “and” for relations between conditions.
5) Click the “Add” button to add the second query condition into the list of conditions.
6) Click the “Query” button on the right of the list of conditions to list the query results.
Export: export the query results in the format of EXCEL.
Print: to print the query results, click “Print” button, then the print window will pop up.
3.11.2 System Event Report
Select the system menu bar “System” “Reports” “System Event Report”. The system event
is classified into two query types: “simple query” and “advanced query”, as shown in the figure
below:
Simple query: it is an accurate query mode that allows accurate query by inputting the login name
and description. Or click the “All” button to list all system event without inputting any conditions.
40
Page 47

EverFocus Navigation Access Control Management Software
Advanced query: it is a multi-condition query mode to allow multi-condition query by inputting
fields, rules, query valve and other query conditions, as shown in the figure above.
Query field: classified into time, login name and description.
Query rules: classified into “=” equal to, “<>” unequal to, “like” including and so on.
Query words: the key words related to the fields.
Relations between conditions:
And: the result satisfying each query condition.
Or: the result satisfying any one of query conditions.
Please refer to the advanced query of cardholder information for this advanced query.
Export: export the query results in the format of EXCEL.
Print: to print the query results, click the “Print” button, then the print interface will pop up.
3.12 Database Maintenance
3.12.1 Backup database
Click “System” → “Maintenance” menu, select “Backup database” to enter into the backup
database page. The database backup includes three options: manual backup, automatic backup
and incremental backup, as shown in the figure below:
3.12.1.1 Manual backup
The user may perform manual backup settings here according to actual needs.
Operating procedure:
1) Select the node server requiring backup from the pull-down menu of the site list, as shown in
2) Select the contents for backup. The related contents include system, access rule, attendance,
CCTV and event records.
3) Select backup data table structure and data.
4) Select the target location for backup, in server or local computer. If backup to a server,
confirm whether split backup is required. For split backup, input the size of each split portion.
.
41
Page 48

5) Click the “Backup” button to start data backup.
!Note: Split backup is valid only when backup to server is selected.
3.12.1.2 Automatic backup
Either manual backup or automatic backup can be selected. Automatic backup is detailed as below:
Automatic backup page is as shown in the figure below:
EverFocus Navigation Access Control Management Software
Operating procedure:
1) Select the node server requiring backup from the pull-down menu of the site list.
2) Select the date, time, split size and server or FTP server for automatic backup. The server
here means local server. FTP server here means remote server.
3) Select whether to clear expired backup files; select whether to compress the backup files.
4) Click the “Setting” button to complete automatic backup settings.
3.12.1.3 Incremental backup:
Incremental backup means that the increment is added to the original backup files. Increment
backup does not increase new files, but supplement the backup files with the records not added.
Increment backup is available for selection only when automatic backup is set. The page is as
shown in the figure below:
Operating procedure:
1) Select the node server requiring automatic and increment backup.
2) Select increment backup period.
3) Click the “Setting” button to complete increment backup settings.
3.12.2 Restore database
Click “System” “Maintenance”, select “Restore database” to enter into the database restoration
page, as shown in the figure below:
42
Page 49
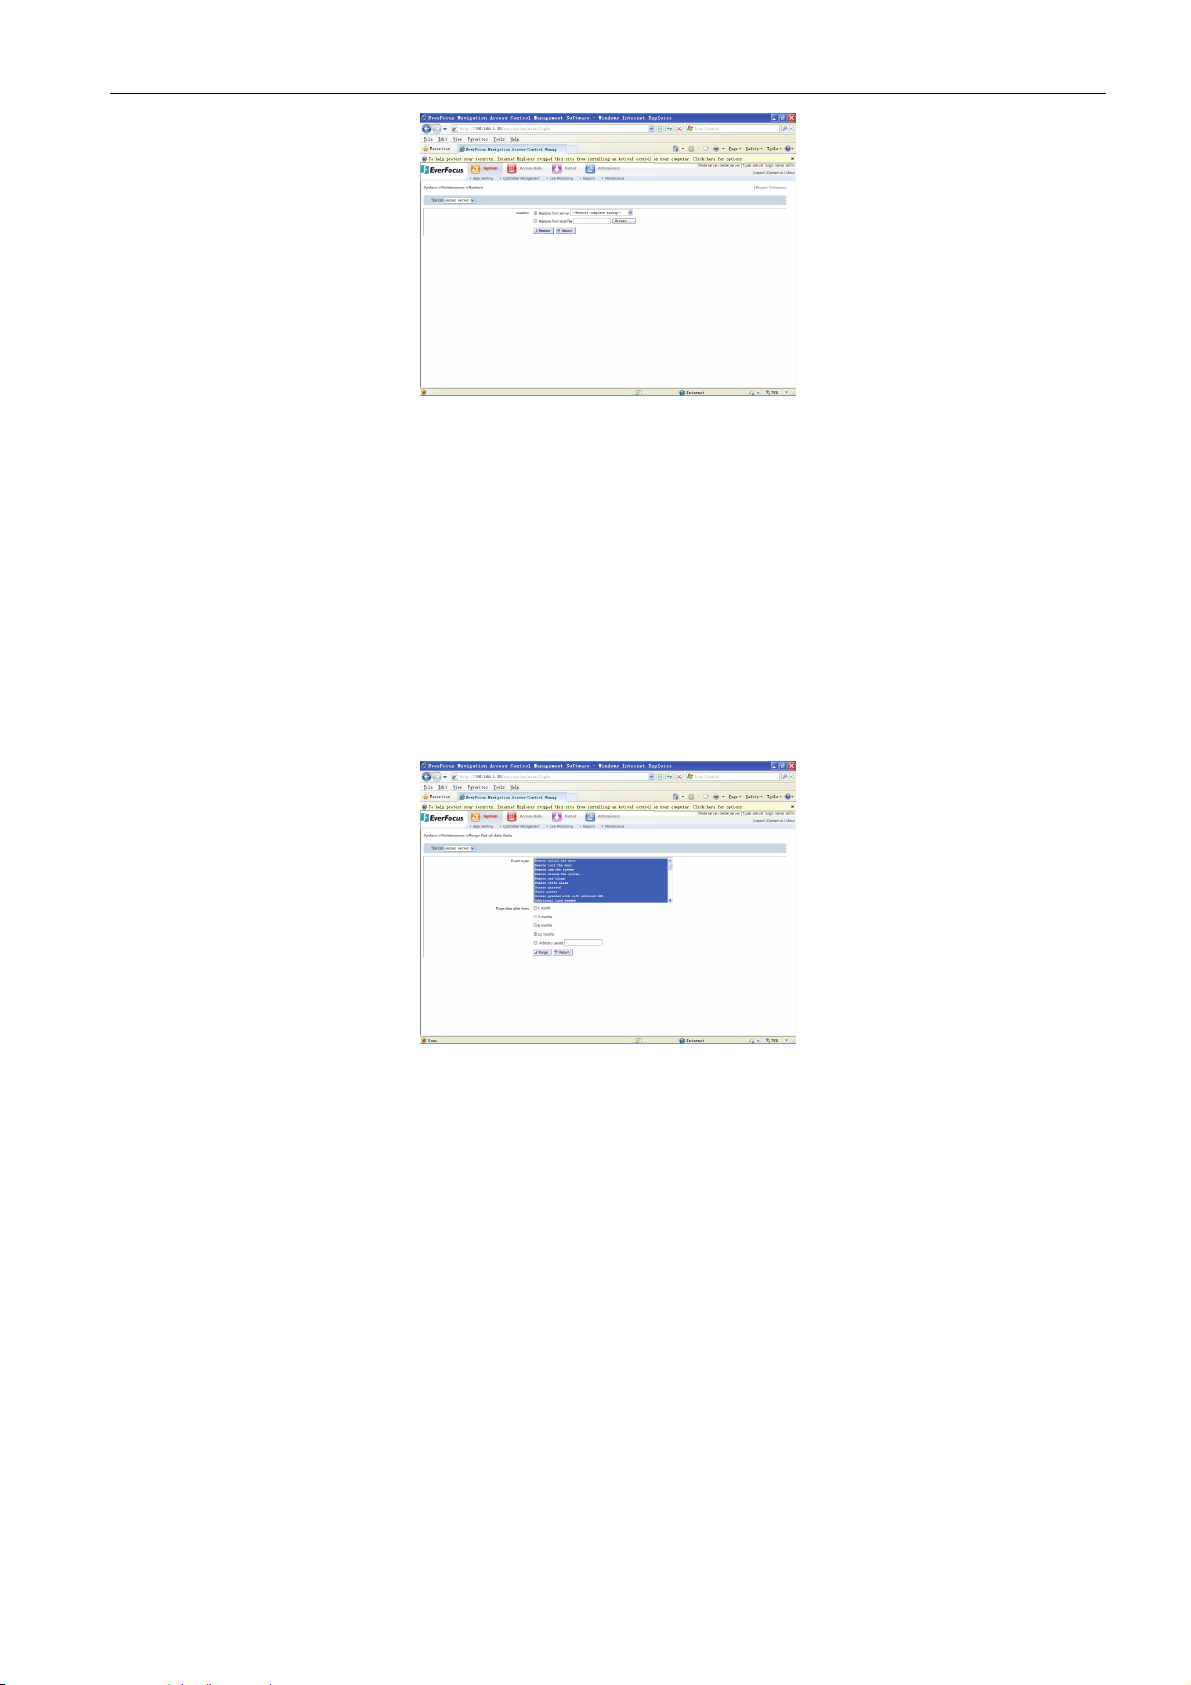
EverFocus Navigation Access Control Management Software
Operating procedure:
1) Select the node server to be restored.
2) Select the location for the file to be restored, from server backup file or local file.
3) Select the file for restoration.
4) Click the “Restore” button to start database restoration.
!Note: when restoration is conducted from server file, if multiple split portions are contained,
select the first split portion, then the software will automatically restore the split portions
rest.
3.12.3 Purge Out-of-date data
Click “System” “Maintenance”, select “Purge Out-of-date data” to enter into the purge out-of-date
data page, as shown in the figure below:
Operating procedure:
1) Select the node server for purge out-of-date data.
2) Select event type of data and deadline, if selecting the remote opening, normal access,
anti-Pass-Back access or all saved 3 months ago, the designated data saved 3 months ago
will be deleted.
3) Click the “Purge” button.
!Note: The event records, operation control records and others in the software system are
cleared only through expired data clearing without the removal of the configuration
information of the system software; for deadline, select any time, but this time selection
mode does not include currently selected time.
43
Page 50

4 Access Rule
4.1 Controller management
This section will introduce how to set the controller. Through this section, you may know:
How to add, delete and configure controller in the system software.
How to download data to the controller.
4.1.1 Controller setting
Click “Access Rule” “Controller Management” menu, select “Controller Setting” to enter the
controller management setting page.
EverFocus Navigation Access Control Management Software
Chapter
4
The controller setting page is classified into the operating button bar on the top and controller list
bar at the bottom.
Operating button bar:
The operating button bar includes 8 operating buttons: add, modify, delete, advanced, download,
upload, export and print to perform the operations of adding, modifying, deleting, configuring
controllers.
Controller list bar:
The controller list bar displays the basic information of the controller such as the RS485 address
of the controller, the online state, serial port occupied, controller type, controller location, door
area quantity, card reader quantity, defence area quantity and the authority group.
!Note: the controller setting is valid only when it is online; the off-line controller is not
allowed to be set.
4.1.2 Add a controller
Click the “Add” button in the operating button bar, then the page of controller adding will pop up,
as shown in the figure below:
44
Page 51

EverFocus Navigation Access Control Management Software
Operating procedure:
1) Input the controller address in “address” (4 digits).
2) Select the serial port connected in the “serial port” pull-down menu.
3) Select the series name of the controller in “series” option box.
4) Select the user group of the controller in the “user group” pull-down menu.
5) Input the location of the control in “location”, such as “hall”.
6) Click the “Add” button to allow the system software to search the controller on Internet
according to the address and serial port completed. After searching, this controller will be
displayed in the controller list.
!Note: off-line controller cannot be added to the system software, so please confirm the
controller to be added has been online.
4.1.3 Modify the controller information
To modify a controller, firstly select the controller in the controller list, click the “Modify” button to
enter the controller revision page to modify the serial port of the controller, user group, location
information, afterwards, click the “Modify” button.
Operating procedure:
1) Select the serial port location of the controller modified in the serial port editing box.
2) Select the user group of the controller modified in the user group option box.
3) Input the controller location in the location editing box.
4) Click the “Modify” button to complete controller information modification.
4.1.4 Delete a controller
To delete a controller, select the controller in the controller list, click “Delete” button in the
operating button bar, the dialog box indicating “are you sure to delete this controller” will pop up.
Click “Confirm” to delete the controller, or Click “Cancel” to retain this controller.
4.1.5 Advanced Setting
Select the controller, click the “Advanced” button in the operating button bar to enter into the
controller advanced setting page, as shown in the figure below. All configuration information of
the controller is listed in the operating page.
45
Page 52

EverFocus Navigation Access Control Management Software
4.1.5.1 Door setting
On the door setting page, the user can set the door of corresponding controller, including:
location of door, door opening time and door opening expiration time.
Location of the door: indicates the location of the door, the user may name as desired.
Door opening time: indicates the duration of the door in opening state when a door access is
permitted.
Door opening timeout: indicates the delayed time to trigger the timeout alarm event when the
door in opening state exceeds the set time, the delayed time is the door opening timeout time.
Operating procedure:
1) Click door tab.
2) Select the door to be set in the door list.
3) Input the door information in the door information box, including: door location, opening
time, opening timeout and interlocking and so on. Interlocking means the interlocked door
cannot be opened when a door is opened. For example: set door to interlock with door 4, 5,
6, 7 and 8, then No. 1 cannot be opened when any of the door 4, 5, 6, 7 and 8 is in open
state.
4) Click the “Modify” button to change the related information of the door.
4.1.5.2 Setting of reader
The user may configure the reader of the controller selected on the reader setting page. Reader
settings include: door location, keyboard reader, system reader, input/output reader and so on.
Keyboard reader: indicates whether this reader is a keyboard reader. When a reader requires
password function, it must be set to a keyboard reader.
Input/outlet: indicates that the reader is an input reader or an output reader.
System reader: used to identify whether the reader is a system reader.
Source area: used to define the source area corresponding to the reader. Used for
anti-Pass-Back of the controller door.
Destination area: used to define the destination area corresponding to the reader. Used for
anti-Pass-Back of the controller door.
Operating procedure:
1) Click the reader tab.
2) Select the reader to be set from the reader list.
46
Page 53

3) Select the reader information in the reader information box, including: door location,
keyboard reader, system reader, input/output reader and so on.
4) Click “Modify” button to change the related information of the reader.
4.1.5.3 Alarm input setting
FLEX II series controller has alarm input setup options. On the alarm input setup page, the user
can configure the alarm input of the main modules and alarm modules of the controller,
respectively set the name of each input, fire alarm or not, input mode, output mode, delay time,
alarm duration, door action when a fire alarm appears and alarm output of various alarm relays
when an alarm appears. The corresponding alarm output settings include door alarm and alarm
output. When a door alarm takes place, door relay works. During alarm output, the main, slave
relays and defence relay work.
EverFocus Navigation Access Control Management Software
Name: 10 alarm input names that can be any names desired.
Fire alarm: designate whether an alarm input of certain number is fire alarm input.
Input mode: alarm input mode, disabled: the defence alarm input is invalid. Normally open: this
input opened in normal state, alarm input enabled after closing. Normally closed: this input
closed in normal state, alarm input enabled after being opened.
Output mode: the mode that the alarm output responds to the input after an alarm is input.
Straight-through: with an alarm input, the alarm output is activated at once; after alarm input
stops, the alarm output stops immediately. At this time, alarm duration does not work. Latching:
with an alarm input, the alarm output is activated at once; no matter the alarm input stops or not,
alarm output continues until the alarm duration is over.
Delay time: the duration between the time when the alarm input of certain number is armed and
the time when the alarm input works.
Alarm time: indicates the time of various alarm relays output when the alarm of certain number
is with an input.
Door alarm: indicates whether various door relays respond to the alarm input when the alarm of
certain number is with an input.
Alarm output: indicates whether various defence area relays respond to the alarm input when
the alarm of certain number is with an input.
Door behaviour under file alarm: indicates the opening actions of various doors when there is
a fire alarm input.
Operating procedure:
1) Click alarm input tab.
2) Select the alarm input of certain number to be set from the alarm input list.
3) Select the name, fire alarm or not, input mode, output mode, delay time, alarm time, door
action when a fire alarm appears and alarm output of various alarm relays when an alarm
appears in the alarm input information box.
4) Click the “Modify” button to change the related information of the alarm input.
4.1.5.4 Alarm setting
The FLEX I series controller and FLEX II series controller have different contents in alarm setting,
wherein FLEX II series controller performs alarm input and output of the main modules and
alarm modules in “alarm input” separately. Take the FLEX I series controller as an example. On
the alarm setup page, the user may configure the alarm output of the designated controller.
Alarm output settings include: main module output, slave module output, door module output,
47
Page 54
EverFocus Navigation Access Control Management Software
alarm module output and so on of various alarms.
The basic alarm of the controller is composed of two parts: main modules and slave modules. An
additional 3 door modules and 1 alarm module can be further set. Therefore, a maximum of 3
kinds of alarm modules are available: main modules, door modules and alarm modules.
The 3 modules are all equipped with alarm functions. The main modules have 2 ways of alarm
input to respond to fire alarm and tamper alarm; and another 2 ways of alarm outputs which are
main alarm output and slave alarm output respectively.
Each door module has 2 ways of alarm outputs. They can be set to alarm event output of
corresponding door area or other alarm event output. The alarm output of door module can be
connected to external alarm devices of at most 5A.
The alarm module has 8 ways of alarm inputs and 8 ways of alarm outputs, wherein the 8 ways
of alarm inputs can be connected to external alarm input devices such as PIR motion sensor and
glass break sensor, the 8 ways of alarm outputs can be connected to external alarm devices of
at most 2A.
No matter if the system is in a normal state, or permitted or not, the controller can track all events
of the ACCESS SYSTEM control system. For example, the access card using events and illegal
card using events are all recorded.
Some events (such as alarm input and defence area alarm input) are urgent and alarm output
must be triggered; some other events (such as illegal card use in invalid period) is not urgent and
the alarm output triggering is not necessary. These settings all depend on the user’s demands.
The controller records all events possibly triggering alarm outputs and provides the maximized
capacity to activate or inhibit the alarm output of these events.
The user may want to assign a specific event to certain alarm output or assign the alarm output
of certain area to multiple alarm outputs sometimes. Flex series controller can provide these
functions. The user can define whether certain events can trigger an alarm and can further
designate which alarm outputs the event shall be assigned to.
Defence Area 1 ~ 8: indicates the relations of all alarm outputs and the alarm inputs of Defence
Area 1 ~ 8, to select the related items indicates that alarm input of the defence area may trigger
corresponding alarm output.
Fire alarm: in case of a fire alarm, the controller will generate a fire alarm output according to the
settings of the “fire alarm” box.
System password error: when the user tries to enter into the system for three times but still
fails due to the wrong password, a “system password error” event will be generated, and the
controller will give out an alarm according to the settings of the “system password error” box.
Defence area password error: when the wrong defence area password is input for three times,
a “defence area password error” event will be generated, and the controller will give out an alarm
according to the settings of the “defence area password error” box.
Tamper alarm: in case of a tamper input, a “tamper alarm” event will be generated, and the
controller will give out an alarm according to the settings of the “tamper alarm” box.
Remote alarm: when the system administrator discovers an abnormity through monitoring the
system, he/she can send alarm signal via the control software directly, and the controller will give
out an alarm according to the settings of the “remote alarm” box.
Unknown card: an unknown card indicates a card incapable of being recognized by the system.
When an unknown card is used on the card reader, an “unknown card” event will be generated,
and the controller will give out an alarm according to the settings of the “unknown card” box.
Expired card
: in the system, each card can be set for a period of validity. After the valid period,
48
Page 55

the controller will automatically set this card to be an expired card. An expired card is not
permitted for access to the ACCESS SYSTEM, but if it is used on the card reader, an “expired
card” event will appear, and the controller will give out alarm output according to the settings of
the “expired card” line.
Invalid card: to disable a card, set it to be an invalid card. An invalid card is not permitted for
access to the ACCESS SYSTEM, but if it is used on the card reader, an “invalid card” event will
appear, and the controller will give out alarm output according to the settings of the “invalid card”
box.
Invalid door area: each card is subject to a control level. For each level, the system
administrator can assign the control prerogative for certain door areas for certain time sections. If
the card is not used in the door area with an access right, an “invalid door area” event will be
generated, and the controller will give out alarm output according to the settings of the “invalid
door area” box.
Invalid time section: each card is subject to a control level. For each level, the system
administrator can assign the control prerogative for some door areas in some time sections. If
the door area has no release right in a certain time section and a card is used in this door area,
an “invalid time section” event will be generated. The controller will give out alarm output
according to the settings of the “invalid time section” box.
Anti-Pass-Back (APB): a control function to prevent the cardholder from repeatedly using the
card for entry into the same area without leaving. To perform anti-Pass-Back, two card readers
for entrance/exit can be designed. The cardholder must swipe the card on the entrance and exit
card readers alternately.
When the card is set to have anti-pass-back function, if the cardholder attempts to enter by using
the card on the card reader for twice successively, the access right will be refused and the
system will generate an illegal event.
When the door of the ACCESS SYSTEM has the card reader on one side only, if anti-pass-back
function is set, the cardholder will be incapable of passing the door.
If the card is set to have anti-pass-back attribute, when the card is used over twice successively
on the entrance card reader or exit card reader (can be different card readers), a card
anti-pass-back event will be generated, and the controller will give out alarm output according to
the settings of the “anti-pass-back” box.
Card password error: when a card with password is used on a card reader but fails to pass for
the password input error of three times successively, a “card password error” event will be
generated, and the controller will give out alarm output according to the settings of the “card
password error” box.
Door opening timeout: when the time of a door in open state exceeds the allowed time set by
the system administrator, an “opening timeout” event will be generated, and the controller will
give out alarm output according to the settings of the “door opening timeout”.
Missing of card reader: when the controller detects that the card reader is not connected with
the system, a “missing of card reader” event will appear, and the controller will give out alarm
output according to the settings of the “missing of card reader” box.
Duress opening: in case of an illegal card use and failure to perform a leaving request, but the
magnetic sensor of a door shows to the controller that the door has been opened, a “duress
opening” event will be generated, and the controller will give out alarm output according to the
settings of the “duress opening” box.
Main: main output on the Mainboard.
Slave: slave output on the Mainboard.
Door 1 ~ Door n: output of Door n modules.
Alarm 1~Alarm 8: alarm output 1 to alarm output 8.
N: this type of alarm input has no alarm output.
L: alarm output can be triggered by the same type of alarm for the same module.
A: this kind of alarm of any module can trigger an alarm output.
Operating procedure:
1) Click alarm tab.
2) Select or click alarm output settings in the alarm output information box.
3) Click the “Modify” button to change the related information of the alarm output.
4.1.5.5 Alarm time setup
On the alarm time setup page, the user may configure the alarm time of the designated controller.
EverFocus Navigation Access Control Management Software
49
Page 56

EverFocus Navigation Access Control Management Software
The alarm time setup is used to set the time period of the alarm.
Operating procedure:
1) Click alarm time tab.
2) Modify the alarm time in alarm duration information box.
3) Click the “Modify” button to change the related information of the alarm time.
4.1.5.6 Anti-pass-back setting
On the anti-pass-back setting page, the user may configure the overall anti-pass-back enabled
for the designated controller and process anti-pass-back settings of various areas when the
anti-pass-back appears.
Overall anti-pass-back enabled: used to enable or disable all anti-pass-back settings. The
anti-pass-back in an area becomes valid only when the overall anti-pass-back enabled and the
anti-pass-back of the area enabled. After the overall anti-pass-back disabled, the anti-pass-back
in all areas under the controller becomes invalid.
Processing in case of an anti-pass-back: when an anti-pass-back appears, the action for
corresponding door is to open or close the door.
External area: indicates whether the area is an external area, to select this item means it is an
external area, otherwise it is not an external area.
Operating procedure:
1) Click anti-pass-back tab.
2) Modify the settings of the anti-pass-back in the anti-pass-back information box.
3) Click the “Modify” button to change the related information of the anti-pass-back.
4.1.5.7 Other settings
On the page of other settings, the user may configure the time zone of the designated controller,
defense delay time, alarm delay time, valid defense area, date format, alarm input 0 type,
actions in case of a fire alarm, time synchronous server, normally open free-access opening
activation, automatic summer time, time section mode and welcome and so on.
50
Page 57

EverFocus Navigation Access Control Management Software
Time zone: the time zone where the controller is.
Defence delay time: when the cardholder tries to enter into the door area, the system gives out
an alarm after a delayed period so that the cardholder can disarm the trouble, the delayed time is
called defence delay time. The text box on the right of the “defence delay time” allows the user to
change the defence delay time.
Alarm delay time: indicates the period of alarm lasting, applied to ELA82X and ELA85X series
controller, it is set in the alarm duration for FLEX series controller.
Valid defence area: indicates which defence areas are active (enabled) and which are inactive
(disabled). To select the item indicates the function enabled, otherwise disabled.
Date format: allow the user to change date format. Click radio button to change the date format.
YYYY-MM-DD: 2009-01-01 or MM-DD-YYYY: 01-01-2009
YYYY: represent the year
MM: represent the month
DD: represent the date
Alarm input 0 type: indicates the alarm triggering mode of alarm input 0 is normally ON or OFF.
Actions in case of a fire alarm: indicates which doors are opened and which are closed in case
if a fire alarm; to select it indicates the opening of the door, otherwise closing the door.
Time synchronous server: indicates whether it is a time synchronous server. When a controller
is set to be a time synchronous server, the controller can synchronize other controllers on line
485 based on its time.
Normal open free-access opening activation: when the door is opened by a free-access card,
the door keeps a normal state or keeps a normally open state.
Automatic daylight savings time: (not commonly used in Mainland China) allow the user to
activate or deactivate the automatic daylight savings time, select: “No”, represent the
cancelling of daylight savings time; “Yes”, represent the activation of automatic daylight savings
time, at this time further set daylight savings time.
Time section mode (for fingerprint machine only): to select opening indicates the use of
software to set time section mode, not to select this time indicates the use of the time section
mode of the fingerprint machine, the time section mode of the fingerprint machine can be set
after “opening” option box when this item is not selected.
Welcome: set the welcome displayed on the LCD in the operating state of the fingerprint
machine. This item is only for FLEX II single-door split device and FLEX II fingerprint machine.
Operating procedure:
1) Click other tab.
2) Modify the information of other settings in other information box.
3) Click the “Modify” button to change the related information of other settings.
4.1.6 Elevator setting (for elevator controller)
Elevator controller has an elevator setting option only. On the elevator setting page, the user can
set the name of the elevator floor location.
51
Page 58
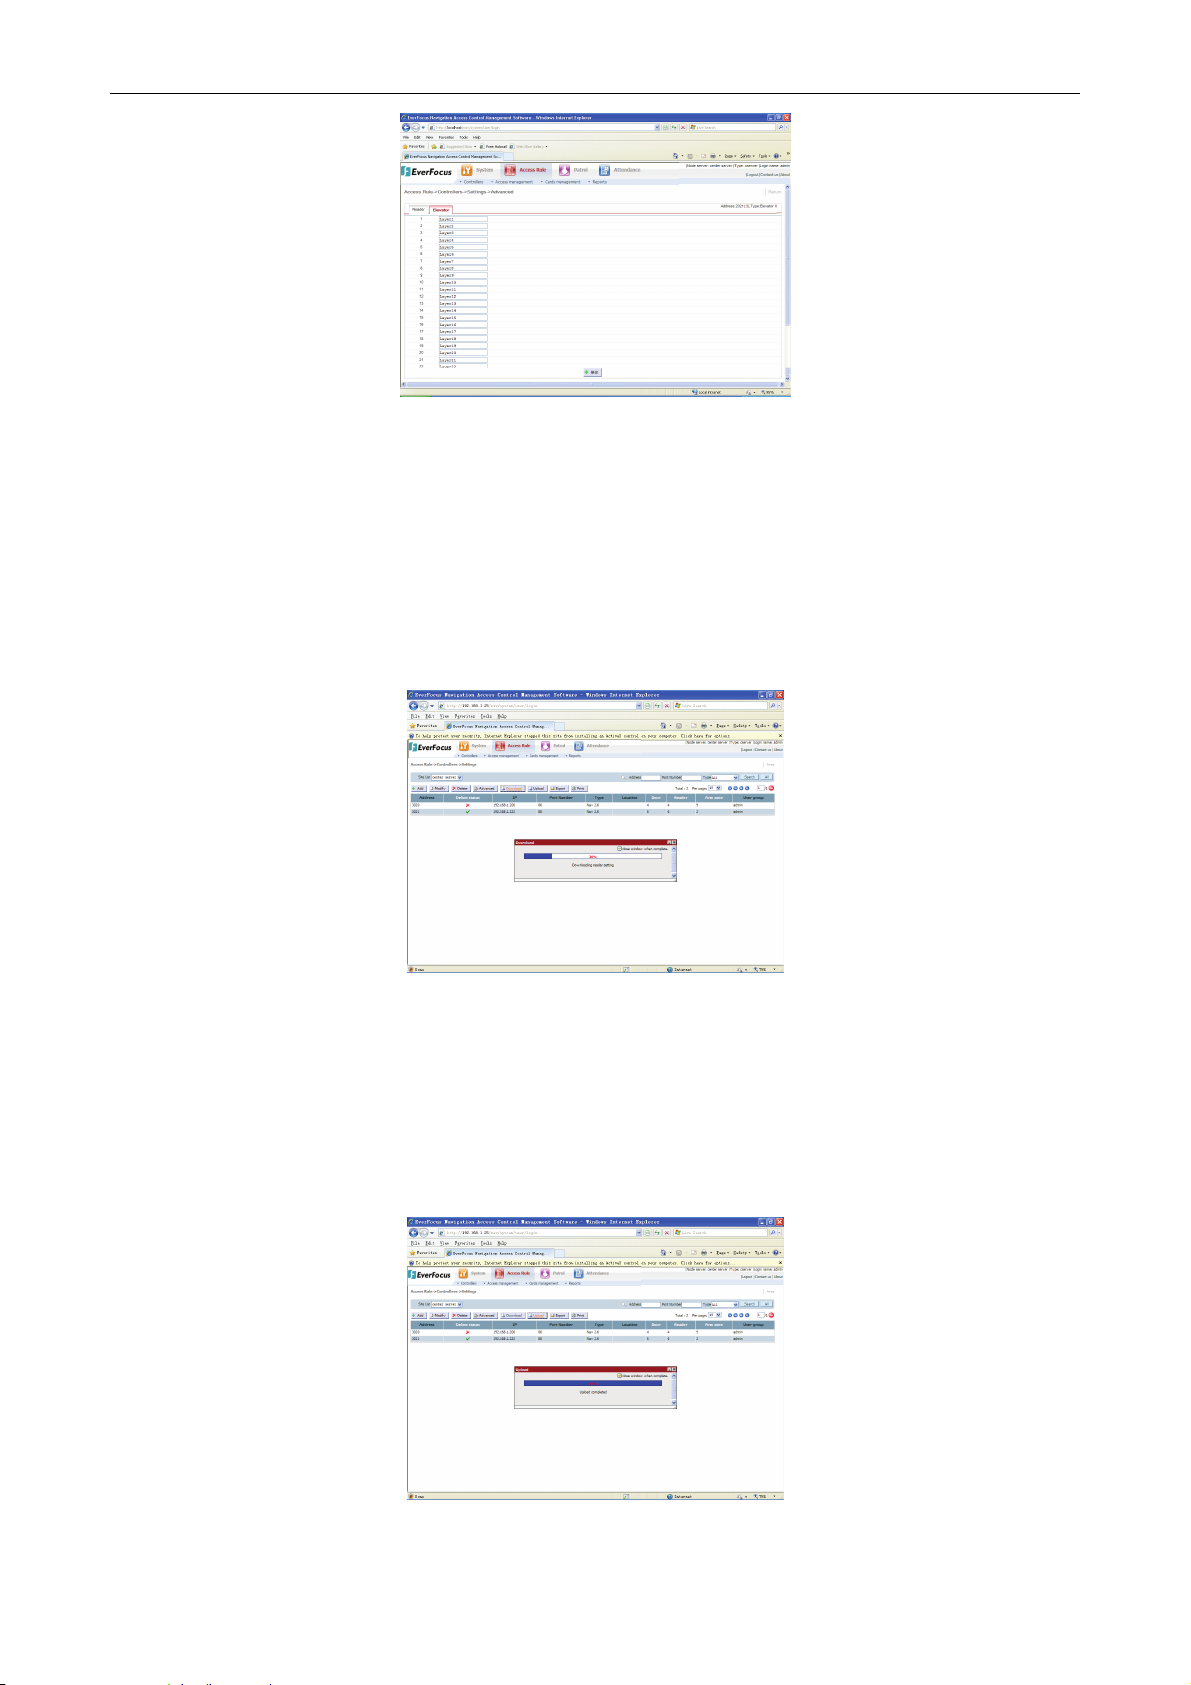
EverFocus Navigation Access Control Management Software
Operating procedure:
1) Click to select the elevator controller requiring edition in controller list.
2) Click “Advanced” button in the operating button bar.
3) Click elevator tab.
4) Modify the floor location information in the elevator floor information box.
5) Click the “Modify” button to change the related information of elevator floor location.
4.1.7 Download setting to controller
After a controller is configured on the computer software end, it can be selected to transfer
configuration information to this controller. The download page is as shown in the figure below:
Operating procedure:
1) Select the controller to be downloaded in the controller list.
2) Click “Download” button in the operating button bar, then the download progress bar will
pop up to indicate the download percentage.
4.1.8 Upload setting to computer
After configuration on the controller end, it can be selected to upload configuration information to
computer software end. The upload page is as shown in the figure below:
Operating procedure:
52
Page 59
1) Select the controller to be uploaded in the controller list.
2) Click “upload” button in the operating button bar, then the upload progress bar will pop up
to indicate the download percentage.
4.1.9 Export controller records
Click “Export” button in the operating button bar, then the dialog box indicating the exportation of
controller list file will pop up.
EverFocus Navigation Access Control Management Software
Operating procedure:
1) Click “Yes” button.
2) Select the exporting path (or default).
3) Modify the name of the file to be exported (or default).
4) Click “save”. The file exported will be saved as the file name in the designated path.
4.1.10 Print controller records
Click “Print” button in the operating button bar, then the interface below will pop up:
Click IE browser window “Print” button. Select printer to print the page.
Note: the operations of other “Export” and “Print” buttons of the software are similar to the
procedure above.
4.1.11 Data downloaded to controller
Click “Access Rule” “Controller Management” menu, select “Download data to controller” to
enter into the operation page of download data to controller, as shown in the figure below:
As shown in the figure, the page of download data to controller is the data option box on the left
and the station list box on the right.
53
Page 60
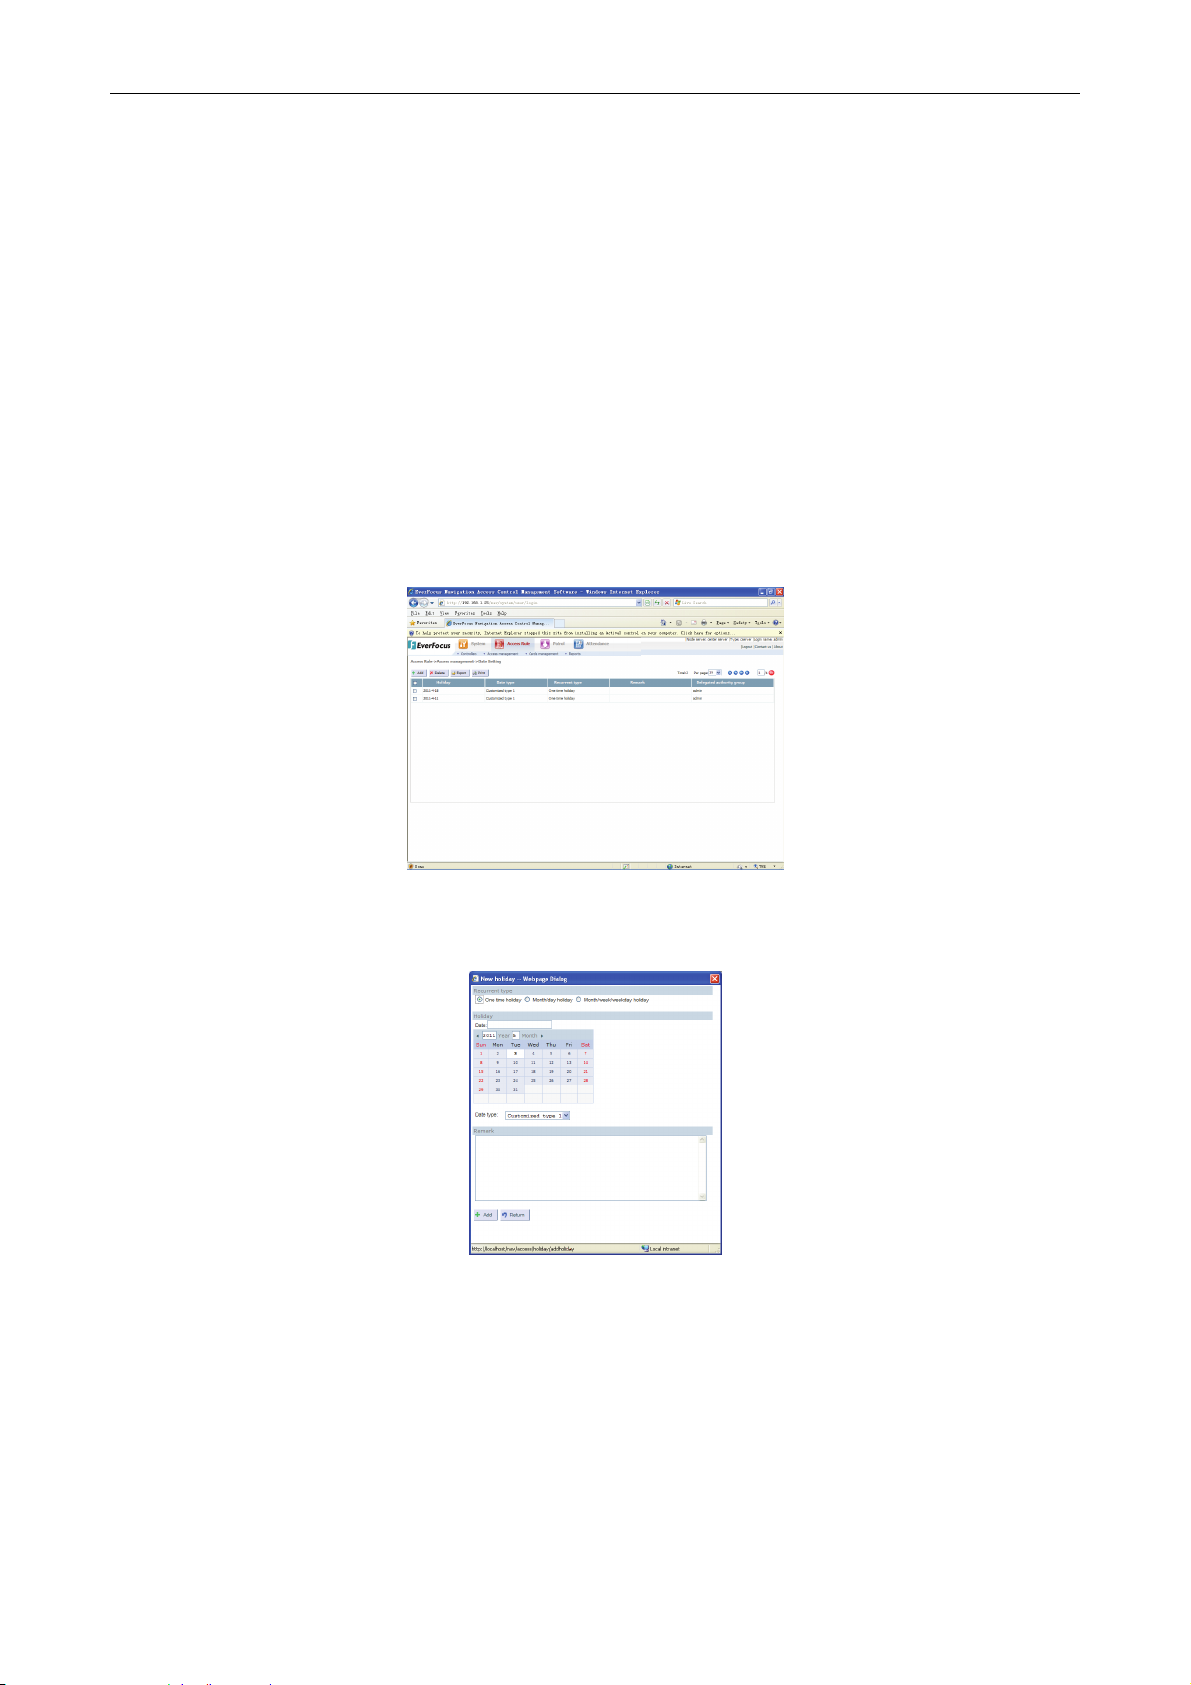
Data option box:
The left part is data option box including card data, access group setting, holiday setting and
door verification setting.
Site list box:
The right part is station list box that shows all node server. (including central server and node
server)
Data downloading means the downloading of card data, access group setting, door verification
setting and other data to designated node server controller.
Operating procedure:
1) Select the data and node server to be downloaded.
2) Click “Upload data” to begin data transfer. Display progress bar indication.
3) Complete transfer, no prompt box pops up.
4.2 Access management
4.2.1 Date setting
Click “Access Rule” “Access Management” menu, select “Date Setting” to enter into the page
of date setting, as shown in the figure:
EverFocus Navigation Access Control Management Software
4.2.1.1 Add a date setting
Click the “Add” button in the operating button bar, then the dialog box “New holiday” will pop up.
The controller supports 10 kinds of date type settting, they are: Sunday to Saturday (7 types),
customization 1, customization 2 and customization 3. Wherein Sunday to Saturday is
automatically set according to calendar. The user can use customization 1, customization 2 or
customization 3 according to the demand.
In this manual, the customization 1~3 are as holidays. Holiday setting indicates the three date
types. EverAccess Flex controller supports as more as 255 holiday settings.
Recurrent type
The software allows the user to flexibly set holidays according to three different criteria. The
three recurrent types are as below:
One-time holiday
One-time holiday indicate the holiday that will be generated once and will not take place in the
54
Page 61

EverFocus Navigation Access Control Management Software
future. For example: unfixed holiday.
Month/day holiday.
Month/day holiday indicates the holiday that may take place on this date each year. For example:
New Year's Day, January 1 of each year.
Moth/week/weekday holiday
Month/week/weekday holiday are another kind of periodic holidays that indicates the date of a
week in a certain month, this is commonly seen in the western countries. For example:
Thanksgiving, the fourth Thursday of December each year. With weekday holiday, the user does
not need to change the holidays of such kind each year.
!Note: these holidays shall be set when the system is initializing, and check them again at
the beginning of each year.
Operating procedure:
1) Select a recurrent type.
2) Select a date in the calendar.
3) Select the date type in the date types.
4) Input the remarks in the date (not a must herein).
5) Click the “Add” button to add a date in the list.
The control rules used by the controller may select the access rules in the date types of
corresponding control group plan and door plan according to the holiday type of holidays preset.
For example: set October 1 as an annual holiday, namely October 1 will be a holiday each year,
set holiday type to customization 2, when the control group plan as shown in the figure below is
used, then the plan used for normal working days is marked as green bar with week
corresponded, when the date is October 1, no matter what day it is, the plan used is forced to be
customization 2 type plan marked as red bar in the figure. The door plan is as what is introduced
above.
4.2.1.2 Delete a date setting
Operating procedure:
1) Select the date to be deleted in the date list (one, several or all).
2) Click “Delete”, then the prompt box of “delete successfully” will pop up, click confirm to
delete the control date deleted.
!Note: After adding or deleting a date setting, the system will automatically “save” the
revised information.
4.2.2 Access group schedule setting
Access group schedule is the rule used by different controllers and in door of access group.
Through it, the access group can define one or several cards belonging to a access group in a
door under a controller, define whether access to the door on certain date from Monday to
Sunday and even a customized date is permitted or how to pass the door.
Click “Access Rule” “Access Management” menu, select “Access Group Schedule Setting” to
enter into the page of access group schedule setting, as shown in the figure:
55
Page 62

EverFocus Navigation Access Control Management Software
4.2.2.1 Add a access group schedule
In the access group schedule setting page, click “Add” button to enter into the schedule adding
page.
After inputting plan name, click “Add” to add the schedule into the schedule list.
4.2.2.2 Delete a access group schedule
Operating procedure:
1) On access group schedule setting page, select the schedule to be deleted (one, several or
all);
2) Click “Delete” button;
3) “Delete successfully” prompt will pop up, then click confirm to delete the access group
schedule selected.
4.2.2.3 Modify the name of the access group schedule
On the access group schedule setting page, click “Modify” icon
in the operating bar of
control plan to be modified, then the dialog box of schedule modification will pop up.
Operating procedure:
1) Input the name of the plan modified in the plan name box.
2) Click the “Modify” button, then prompt box of “modify successfully” will pop up, click
confirm to display the name of the plan modified in the plan list.
Set the time section of a day in the access group schedule
Various dates are default to be free access. To set the time section of a day in various access
group schedule, select and click the “schedule setup” icon
56
in the operating bar of the
Page 63
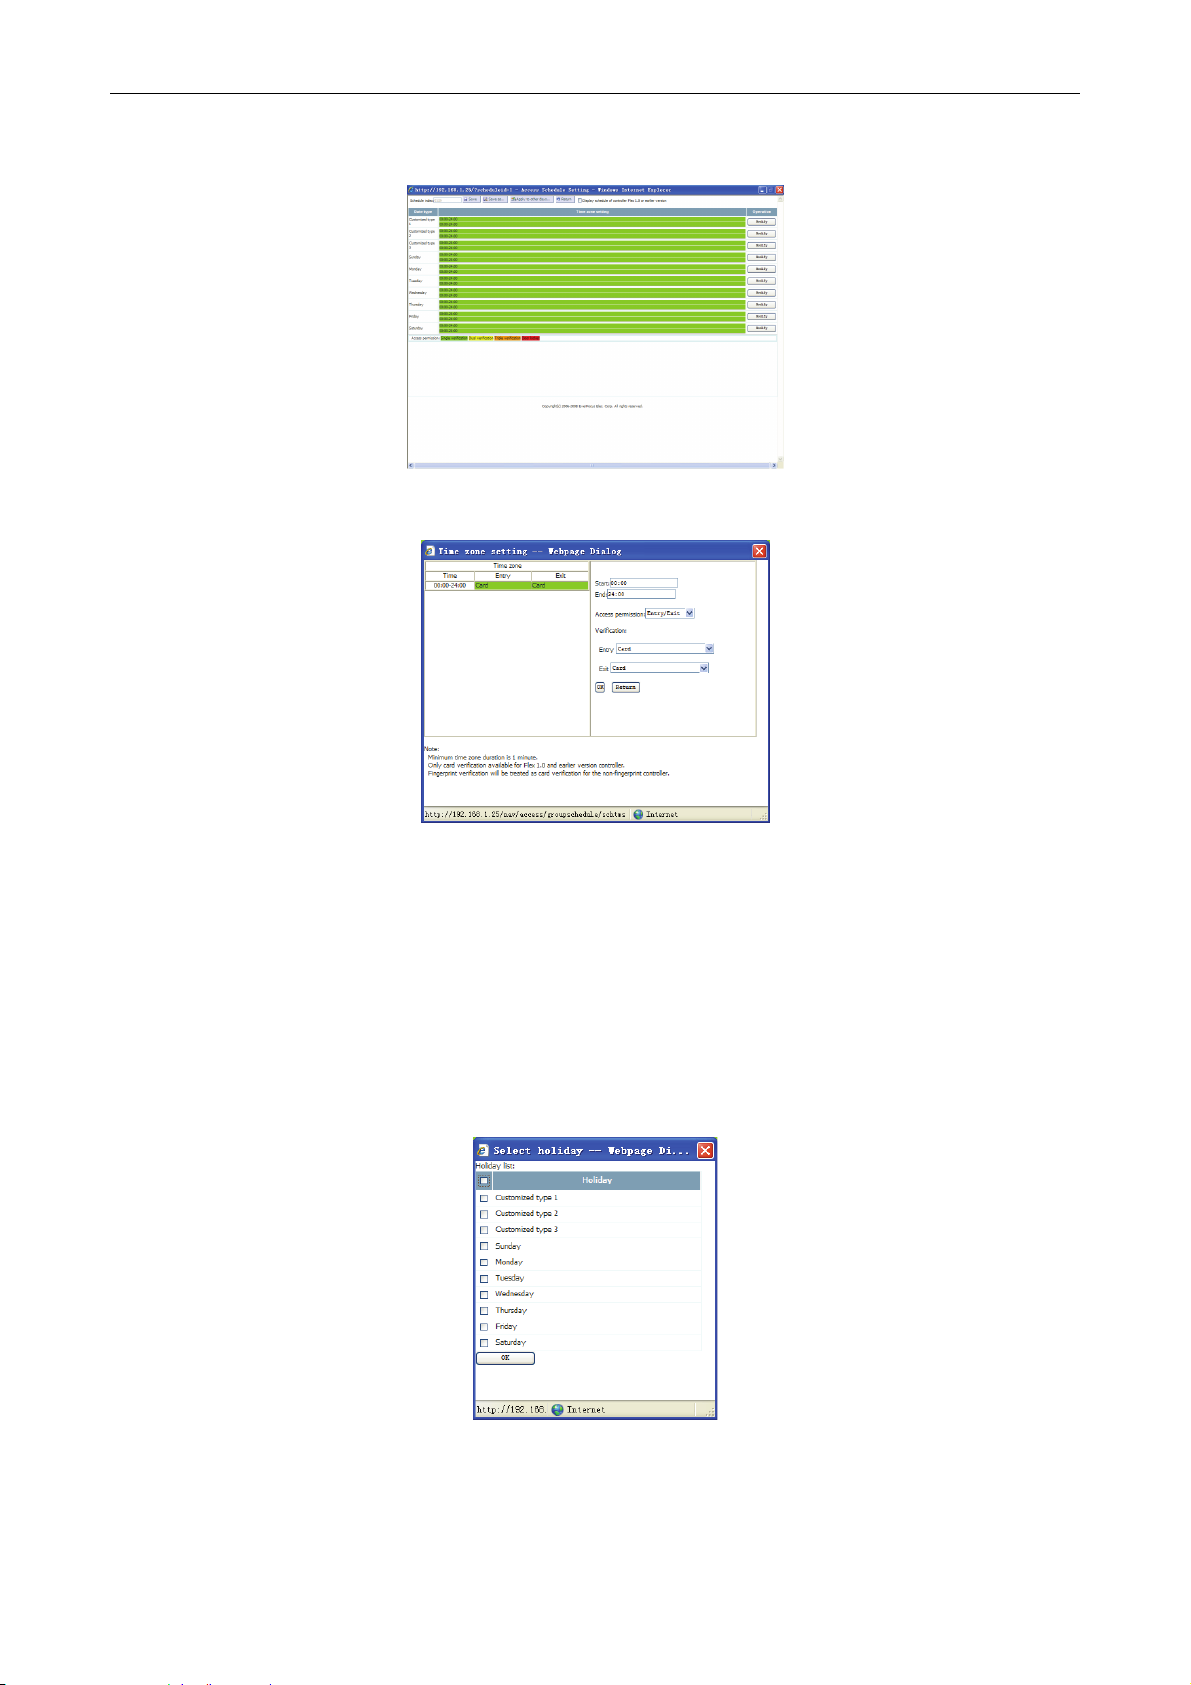
EverFocus Navigation Access Control Management Software
schedule to be set on the access group schedule setting page. Enter into the access group
schedule setting page as below:
Click the “Modify” button in the date type selected, then the time section setup window pops up.
Various dates are default to be free access. To modify, select other authority types, wherein the
authority has four types: access prohibited, entry permitted only, exit permitted only, access
permitted.
Input time in the starting time and ending time, Click “Confirm” to change the time section on the
left, after modification, click “Back” button to display the corresponding state on the access group
schedule setting page.
After setup of schedule dates, click “save” to save the setup of access group schedule date time
section.
When a date setup is completed and other date setup is the same, select the date set on the
access group schedule setting page, click the “apply to other date” button to get the dialog box of
date selection:
1) Select the date type to be set (one, several or all).
2) Click the “Confirm” button to modify and display the corresponding date time section on the
access group schedule setting page.
After the access group schedule setup of various dates is completed, click the “Save” button on
57
Page 64

EverFocus Navigation Access Control Management Software
the access group schedule setting page to display the progress bar of downloading setting to
controller, and then a prompt box for confirmation pops up after completion to complete access
group schedule setup.
The access group schedule set may be saved as a new schedule. Click “Save as” button on the
access group schedule setting page to display the prompt box as shown in the figure below:
Input new schedule name, Click “Confirm” button to indicates “save as successfully”, then the
new access group schedule is completed.
4.2.3 Access group setting
The access group is one of cardholder’s card attributes. It is used to associate the card and
controller, door as well as access group schedule. For example, Card A has Access Group A
attribute, then the cardholder will be limited by Access Group A when access to the door.
Whether the Card A holder has the right for access to a door depends on the schedule of the
door used by Access Group A. Access Group A can either use a access group schedule preset
or a door plan in this door. Please refer to 4.2.3.4 Set Access Group Rules for details.
Click “Access Rule” “Access Management” menu, select “Access Group Setting” to enter into
the access group setting page, as shown in the figure below:
4.2.3.1 Add a access group
Click the “Add” button in “Access Group Setting” to enter into the page of adding a access group.
Enter into the page of adding a access group. After inputting a access group name, click “Add” to
add the access group into the access group list.
4.2.3.2 Delete a access group
Select the access group to be deleted in the record list of the access group setting page (one,
several or all), click the “Delete” button to get a prompt box indicating “delete successfully” on
the page, Click “Confirm” to complete access group deletion.
58
Page 65

4.2.3.3 Modify a access group
EverFocus Navigation Access Control Management Software
To modify a access group name, click “Modify a access group” icon
the access group to be set, then the page of modifying the access group pops up.
Input the access group name changed, click the “Modify” button to get the prompt box indicating
“delete successfully”.
4.2.3.4 Set the rules of the access group
To preset the rules of the access group, select the access group to be set on the access group
setting page, click the “Modify a access group plan” icon
of the access group setting pops up:
in the operating bar of
in the operating bar, then the page
Operating procedure:
1) Select the groups of various controllers, access authorization, control mode, schedule of
corresponding door and unlocking levels.
2) After setup of various controllers, click the “Confirm” button, then the prompt box as shown
in the figure below pops up:
Continue to click the “Confirm” button to display the progress bar for sending access group, and
then display “send successfully” after completion.
If unable to send a access group to a controller, the prompt will be as below:
4.2.3.5 Modify elevator authority (for elevator controller only)
To preset elevator (for elevator controller only) control management, select the access group
to be set on the access group setup page, click “modify elevator authority” icon
operating bar, then the access group setting page of elevator controller pops up:
59
in the
Page 66

EverFocus Navigation Access Control Management Software
Operating procedure:
1) Select the elevator control authority corresponding to the access group, set whether a
password is used or not and whether access to a floor is permitted.
2) Click the “Confirm” button to display the progress bar for sending access group, and then
display “send successfully” after completion.
4.2.4 Door schedule setting
The door schedule is just the door rules selectively used by various door in the door setting to be
described in the next section. Through it, the door setting can define whether access to the door
on a certain date from Monday to Sunday or even a customized date is permitted, or how to pass
the door for all cardholders in a door under a controller. The access group schedule mainly
restricts how the cardholder passes various door in different time sections, while the door setting
limits how all cardholders pass a door in various time sections.
Click “Access Rule” “Access Management” menu, select “Door Schedule Setting” to enter into
the setting page of door schedule.
4.2.4.1 Add a door schedule
On the setting page of door schedule, click the “Add” button to get the page of adding a door
schedule as shown in the figure below:
After inputting door schedule name in the dialog box, click the “Confirm” button to add the
schedule to the door schedule list.
60
Page 67

4.2.4.2 Delete a door schedule
Select the door schedule to be deleted on the setting page of door schedule (one, several or all),
click the “Delete” button to get a prompt box indicating “delete successfully” on the page, Click
“Confirm” to complete deletion.
4.2.4.3 Modify a door schedule
To modify a door schedule name, select the door schedule to be modified on the setting page
EverFocus Navigation Access Control Management Software
door schedule, click “Modify” icon
modification page, as shown in the figure below:
Input the door schedule name modified in the web page dialog box, click the “Modify” button to
get a prompt indicating “modify successful!” on the page.
4.2.4.4 Set a door schedule
To modify the settings of a door schedule, select the door schedule to be set on the setting page
of door schedule and click “door schedule setup” icon
schedule, as shown in the figure below:
in the operating bar to enter into the door schedule
to enter into the setting page of door
Click the “Modify” button
in the operating bar in the date type selected, then the setting
page of door schedule below pops up, as shown in the figure:
Operating procedure:
1) Input starting time and ending time.
2) Select opening state: normal, normally ON (default normal state).
61
Page 68

3) Select access mode (including 13 access modes of fingerprint machine, default card
mode).
4) Click the “Confirm” button to confirm the addition of a time section.
5) Select a time section on the left to change the access mode preset.
6) Return after addition.
After setting of door schedule of door, click the “Save” button to save the settings of door
schedule of door.
4.2.4.5 Apply to other date
When a date schedule setting is completed and other date schedule setting is the same, click
EverFocus Navigation Access Control Management Software
the “Apply to other date” button
setting page, then the page of date selection dialog box below pops up:
Operating procedure:
1) Select the date type set on the door schedule setting page.
2) Click the “Apply to other date” button in the operating bar.
3) Select the date type to be set (one, several or all).
4) Click the “Confirm” button to modify and display the corresponding date time section on the
door schedule setting page.
!Note: after verification setting of door schedule, click “save” button to save the modified
information.
4.2.5 Door setting
Door setting means an overall setting of access rules for all controllers and all door in the
ACCESS SYSTEM. The rules used in door setting are just the settings in the door schedule
described in the section above. The access rules of Flex1.0 controller are set here, but Flex II is
not set here unless the access group designates the controller to use the door setting.
Click “Access Rule” “Access Management” menu, select “Door Setting” to enter into the page
of door setting, as shown in the figure below:
in the operating bar of date type set in the door schedule
Operating procedure:
1) Select proper door schedule for each door.
62
Page 69
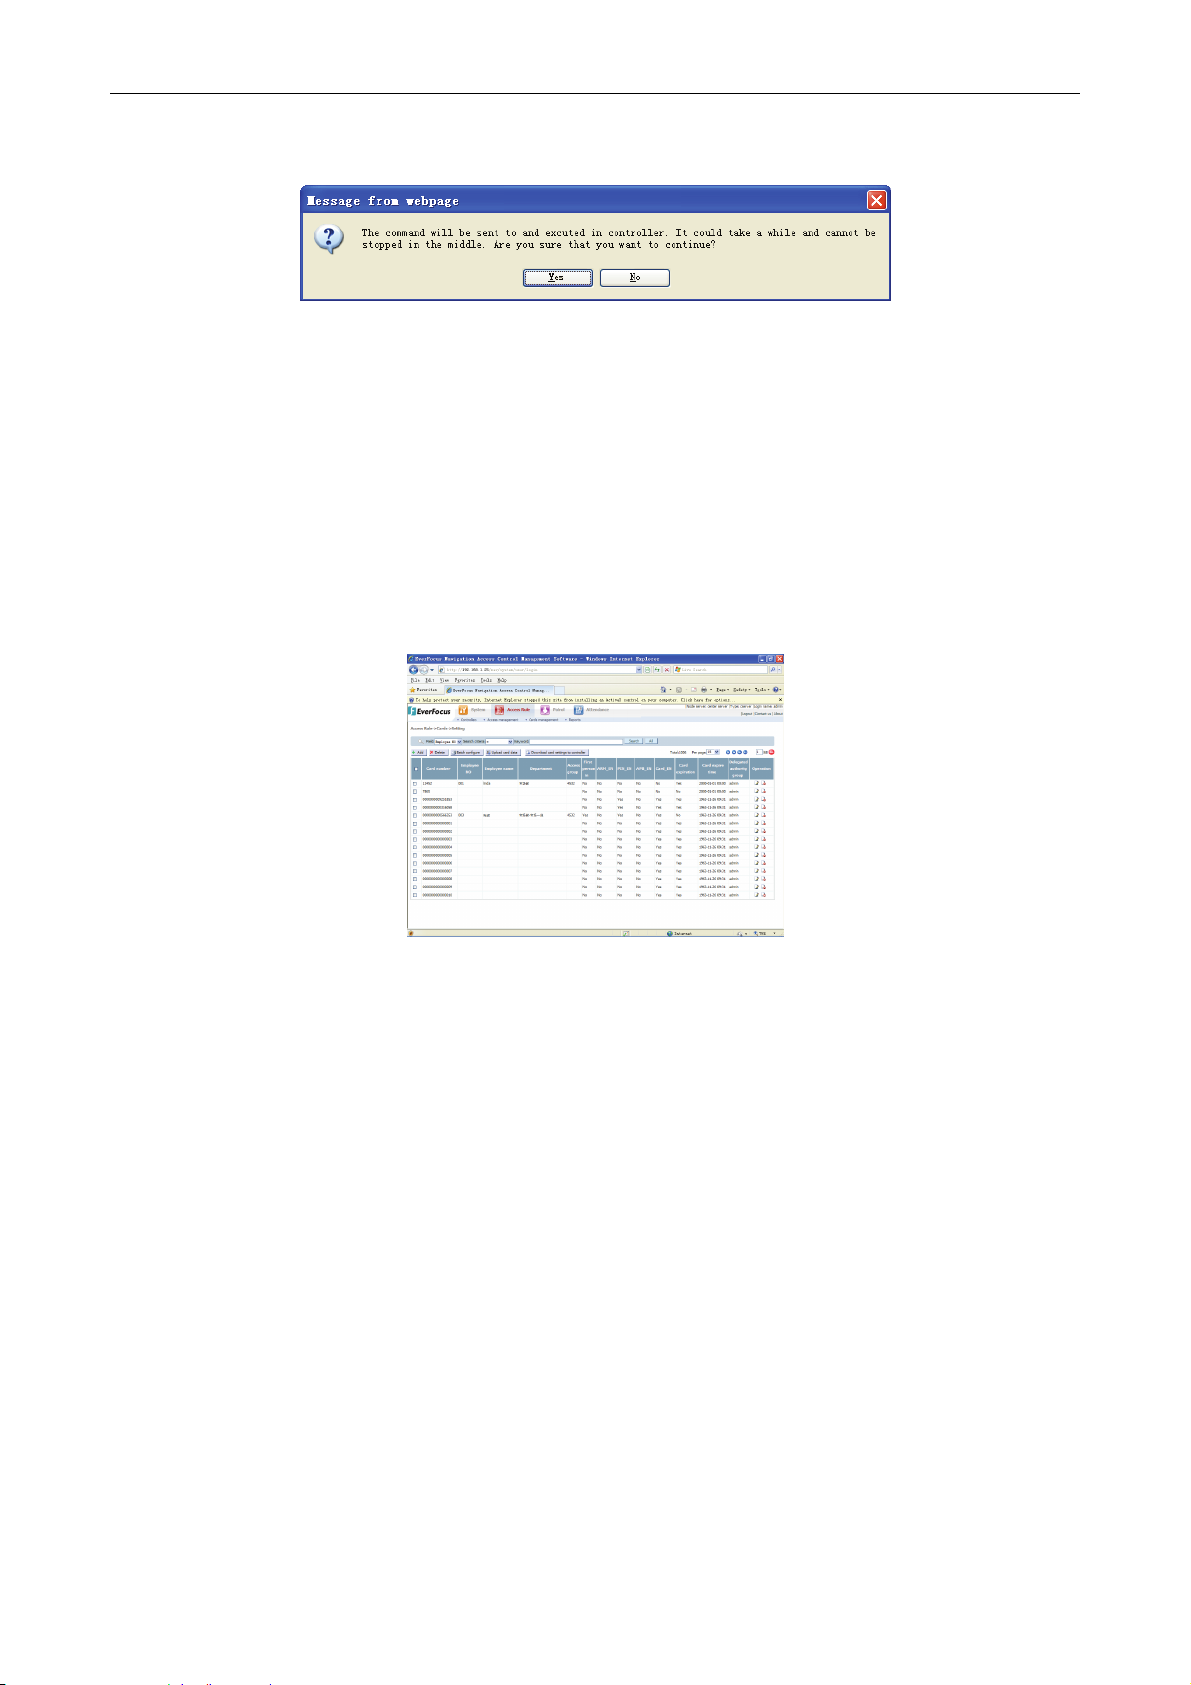
EverFocus Navigation Access Control Management Software
2) After setup of door schedule for all doors, click the “Confirm” button, then the prompt box
pops up on the page:
Continue to click the “Confirm” button to display the progress bar of door setting saving on the
page, then the prompt box indicating “modify successful!” pops up after completion. Click the
“Confirm” button to complete door setting.
4.3 Card management
The contents below will show you how to add, delete and set cards, and how to manage visitor
cards.
4.3.1 Card setting
Click “Access Rule” “Card Management”, select “Card Settings” to enter into the card setting
page, as shown in the figure below:
As shown in the figure, the card setting page includes the operating button bar on the top and
card list bar at the bottom.
Operating button bar:
The operating button bar on the top includes five operating buttons: add, delete, set in batch,
upload cards and download, used for the adding, deleting, setting and sending cards operations.
Upload cards: upload the card in the controller to the current system.
Download: download the selected card to the controller that the current system connects to.
Card list bar
The card list bar at the bottom shows the basic information of the card, such as the card number,
card series number, employee number, name, department, access group, card attribute and
delegated authority group.
4.3.1.1 Add a card
On the card settings page, click the “Add” button to enter into the card registration page as
shown in the figure below:
63
Page 70

EverFocus Navigation Access Control Management Software
Card attributes:
A access group: required attribute. Only the card chooses the access group can it download the
controller which the access group has the authority. Cardholder can pass through the door under
this controller by swiping the card.
B card schedule: card schedule works only in Flex II controller and it is used in preference to
access group schedule (access group schedule have preference to door setting). Supposing
that card A is restricted to enter into door A in the access group plan, we should set card
schedule to this card. In card schedule, we set that this card can enter into door A, then card A is
permitted to pass door A after the modification of attributes.
Operating procedure:
1) Select the card format and input the corresponding card number. If it needs to add several
cards with consecutive numbers, please select add several cards and the amount, and
input the starting card number.
2) Input employee number or name, click “Search”,the name bar will show the name of the
person with the employee number, or the employee number bar will show the employee
number of the name.
3) Select card attributes such as free-access, arm valid, password state; input password and
duress password; select the period of validity of the card; select delegated authority group
and access group; if the card needs to set card schedule, please select card schedule
settings.
4) After selecting card attributes, Click “Confirm” button, then cards will be added to the card
list.
Initial card number: the code on the card is an eight-digit decimal number. If it is less than eight
digits, add 0 in the front.
ID card’s code format is Wiegand 26, that is, 26 digits. Except the first and the last digit that are
used for even-odd check, the remaining 24 digits are the real code of the card, when converting
to decimal system; it becomes the code of the card.
The user can read the card number through the silk-screen on the card.
By swiping the card on the card reader in online controllers, the user can read the card
number in illegal card-swiping records.
Card number can be obtained by adding a card onto the system card recorder of the
controller and then downloading the card data of the controller.
As to cards whose numbers are progressively increasing, we can input starting card number and
the amount of card to add in batch.
4.3.1.2 Delete a card
On the card setting page, select the card to be deleted (one or more), click the “Delete” button,
then a dialogue box showing ”Are you sure to delete the selected card?” will pop up:
64
Page 71

EverFocus Navigation Access Control Management Software
Click the “Confirm” button, a prompt indicating “deletion successful” will pop up.
4.3.1.3 Modify cards in batch
On the card setting page, select the card to be set, click the “Batch configure” button to enter into
set card in batch page, as shown in the figure below:
Click ”next”:
Note: selection box before each attribute is the selection box showing whether the attribute is
valid or not; selection box after each attribute is the selection box showing whether to modify the
attribute or not.
Select the node server and card authority, and click "Next" button to display the confirmation box
of transferring on the page.
Click the “Confirm” button, the page shows a progress bar of uploading the card to node servers.
There is no other obvious prompt when modification in batch finishes.
4.3.1.4 Modify a card
On the card setting page, click the “Modify” icon
card, the page switches as shown in the figure below:
in operating bar on the right of the selected
65
Page 72

EverFocus Navigation Access Control Management Software
Modify corresponding attributes of the card. Select and click the “Modify” button, and then a
prompt displaying “modification successful” will pop up when finished.
If the modified card fails to be downloaded to a controller, display:
On the card setting page, click the “display card authorization” button in the operating bar of the
selected card, a page pops up as shown in the figure below:
Display card authorization page shows the card’s station, control method and access group
information, click “back” button to return to card setting page.
4.3.1.5 Upload cards
On the card setting page, the software system can receive cards added from the controller, and
the cards will be shown in the card list.
On the card setting page, click the “Upload card data” button, a selection box of controller list will
pop up as shown in the figure below:
66
Page 73

Select the controller to be used to upload card, Click “Confirm” button, the card setting page will
show an uploading progress bar. When finished, the cards will display in card record list.
4.3.1.6 Download cards
On the card setting page, select the cards to be downloaded, and click “Download” button to
download the selected cards from the software system to the controller corresponding to this site.
At the bottom of the card setting page, a progress bar will show the card downloading.
4.3.2 Import cards
The card importing function can import edited Excel card information file to the database of the
software.
Click ”Access Rule” menu ”Card Management”, select “Import cards” to enter into the card
importing page, as shown in the figure below:
EverFocus Navigation Access Control Management Software
Click “Browse” button in the figure above, select the directory where the source excel file is and
open the source file. Select the excel file and click “Next” button, if the source file is not correct, a
prompt will pop up:
If the format of the selected file is correct, the page will switch to the page as shown in the figure
below:
Select import number according to card attributes and select each data attribute, that is, the
name of the field (all or part); select whether the first line is to be imported, and then click
“Import” button, the page prompts to import fields:
67
Page 74
EverFocus Navigation Access Control Management Software
Click “Confirm” button, the page will switch to the importing result prompt:
When it finishes, click “Back” button to return.
4.3.3 Visitor card group
Click “Access Rule” ”Card Management”, choose “Visitor card Group” to enter to visitor card
group setting page, as shown in the figure below:
4.3.3.1 Add a visitor card group
On the visitor card group setting page, click the “Add” button, the page will switch to the adding
page, as shown in the figure below:
Operating procedure:
1) Input the name of the visitor card group.
2) Fill in the description (optional).
3) Select the access group associated.
4) Select the authorized door according to door rules. (only applied for FLEX I series
controller).
5) Click the “Add” button, a prompt box showing “successful operation” will pop up.
6) Click the “Confirm” button to finish visitor card group addition.
68
Page 75
4.3.3.2 Edit a visitor card group
In the visitor card group list, select the visitor card group to be edited, click the “Modify” button,
the page will switch to the page shown below:
EverFocus Navigation Access Control Management Software
Modify the corresponding authority, description and control management of the visitor card group,
and then click the “Modify” button, a prompt box showing “successful operation” will pop up.
Then click the “Confirm” button to finish the modification of the visitor card group.
4.3.3.3 Delete a visitor card group
When the visitor card group is out of action, please delete it.
In the visitor card group list, select the visitor card group to be deleted (one, part or all), click the
“Delete” button, a confirmation box showing “Are you sure you want to delete the selected
group?” will pop up:
Click the “Confirm” button to delete the visitor card, Click “Cancel” to return to the visitor card
group page.
4.3.4 Visitor card setting
Click “Access Rule” “Card Management”, select “Visitor Card Setting” to enter into the visitor
card setting page, as shown in the figure below:
4.3.4.1 Add a visitor card
On the visitor card setting page, click the “Add” button, a visitor card addition page will pop up as
shown below:
69
Page 76

EverFocus Navigation Access Control Management Software
Operating procedure:
1) Select the format of the input card.
2) Input the card number.
3) Input the name and code of the cardholder.
4) Select the ending time of the visitor card.
5) Fill in the remarks (optional).
6) Select the visitor card group it belongs to.
7) Select the authorized door according to the door access rules. (only applied to FLEX I
series controller).
8) Click the “Add” button, the page prompts “successful addition”. If it fails to add, the page
will prompt “operation failed”.
4.3.4.2 Write off a visitor card
When the visitor card is written off, the card will be deleted in the corresponding controller, but
the software will still keep the card information. The state bar of card information will show
“invalid”.
In the visitor card list, select the visitor card to be written off (one or more), click the “Logout”
button, after the confirmation pops up, Click “Confirm” button to perform the write-off operation. If
it is not to be written off, please click the “Cancel” button.
4.3.4.3 Delete a visitor card
When the visitor card is deleted, the card will be deleted completely in the corresponding
controller and the software system. In the visitor card list, select the visitor card to be deleted
(one or more), click “Delete” button, after the confirmation pops up on the page, click the
“Confirm” button to confirm the deletion of the visitor card.
4.4 Reports
The contents below will introduce how to Search, print card information and card swiping for
entrance and exit corresponding records of cardholders.
4.4.1 Card information
Click “Access Rule” “Reports”, select “Card Information” to enter into card information query
page, as shown in the figure below:
70
Page 77
EverFocus Navigation Access Control Management Software
Operating procedure:
1) Select card number, employee number, name and access group information (all or part).
2) Click “Search”, the results will be displayed in the list below.
3) Click “all”, all the results will be displayed in the list below.
Click “advanced query" tab, the interface is as shown below:
Operating procedure:
1) Select query fields such as card number and employee number.
2) Select the query rules (=, <>, like).
3) Input query value, click “add”, the condition list box will list the query condition A.
4) Select a different condition B (the method is the same as step 1-3).
5) Select the relation between the query condition and query condition A (“and” or “or”).
6) Click “Add”, the condition list box will list the query condition B.
7) Select the query condition in the condition list box, click “Delete” button to delete the query
condition.
8) Operate like this, multi-conditions can be set.
9) Click the “Search” button, the query result will be displayed in the list below.
4.4.2 Card events
Click “Access Rule” ”Reports”, select “Card Events” to enter into card related event query
page, as shown in the figure below:
71
Page 78
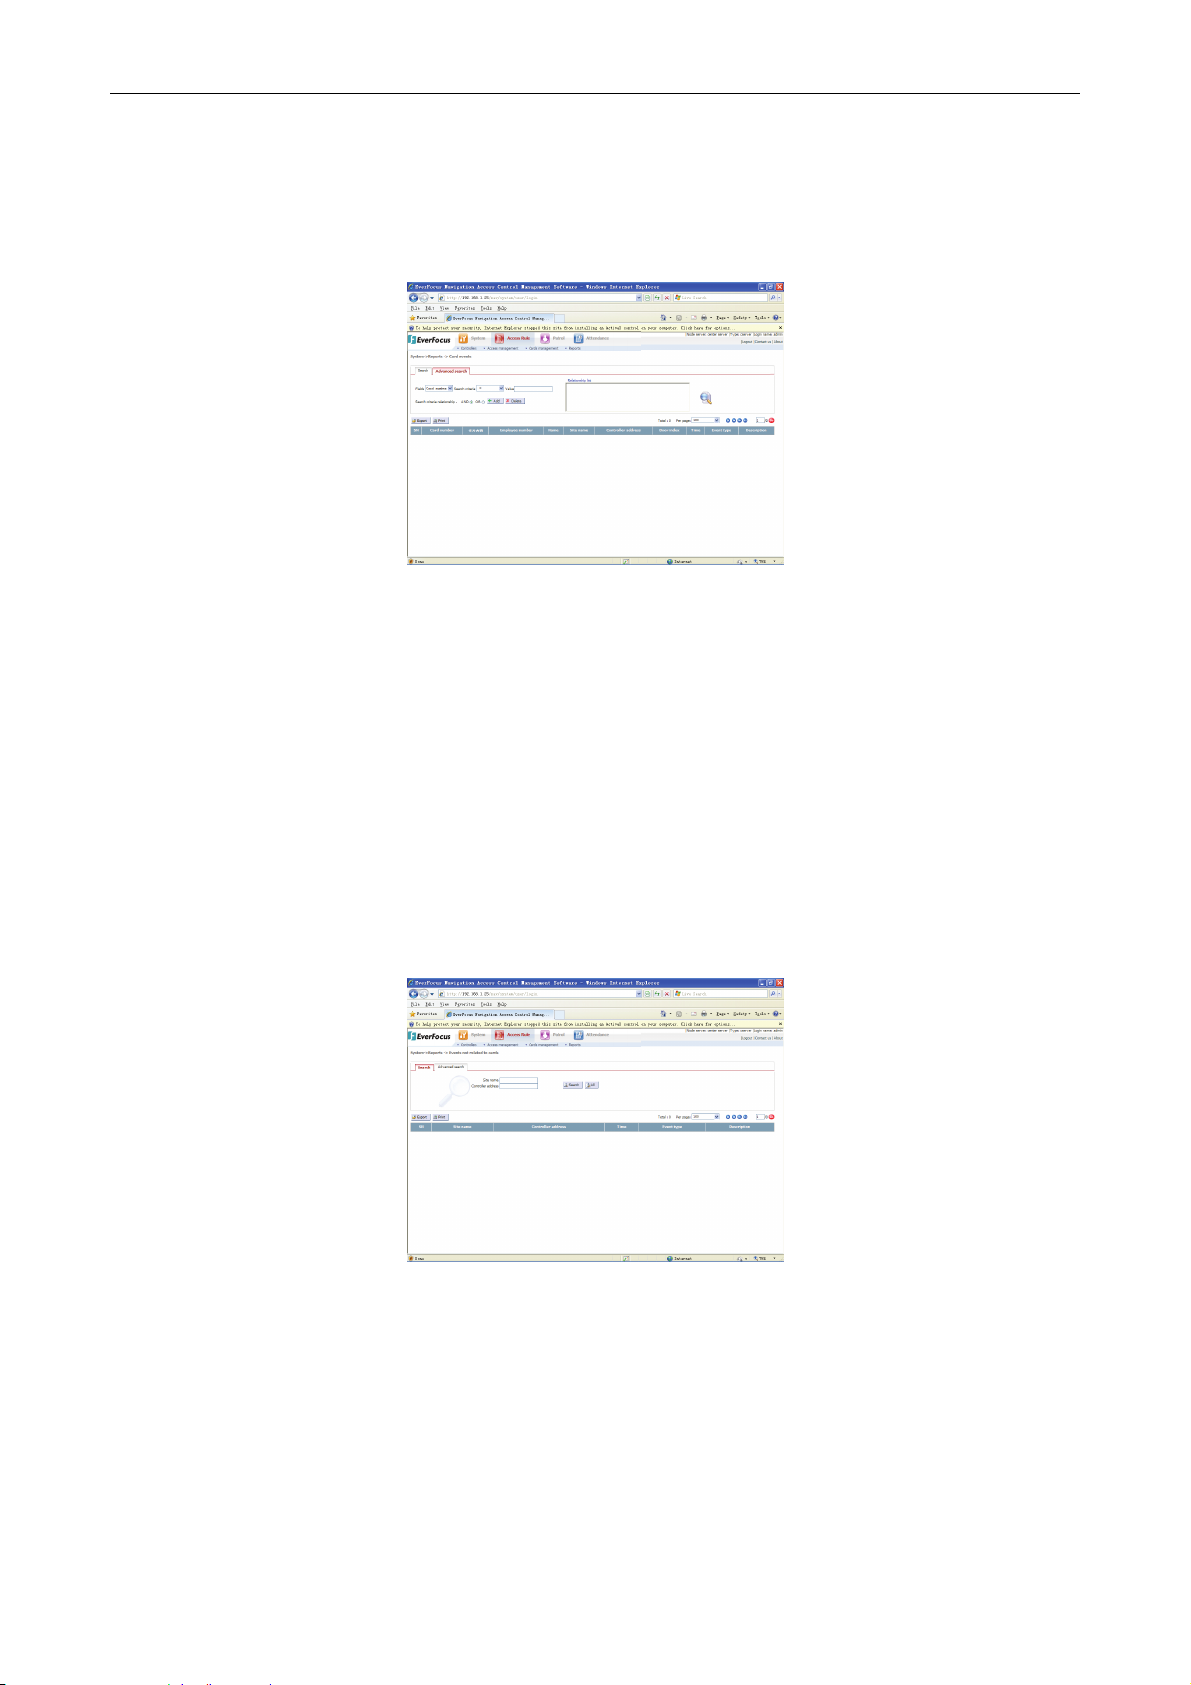
EverFocus Navigation Access Control Management Software
Operating procedure:
1) Select card number, employee number, name, (all or part).
2) Click “Search”, the query results will be displayed in the list below.
3) Click “all”, all the results will be displayed in the list below.
In the “advanced query” tab, the page is as shown in the figure below:
Operating procedure:
1) Select query fields such as card number and employee number.
2) Select the query rules (=, <>, like).
3) Input query value, click “add”, the condition list box will list the query condition A.
4) Select a different condition B (the method is the same as step 1-3).
5) Select the relation between the query condition B and query condition A (“and” or “or”).
6) Click “Add”, the condition list box will list the query condition B.
7) Select the query condition in the condition list box, click the “Delete” button to delete the
query condition.
8) Operate like this, multi-conditions can be set.
9) Click the “Search” button, the query result will be displayed in the list below.
4.4.3 Events unrelated to card
Click “Access Rule” ”Reports”, select “Events Not Related to Cards” to enter into card
unrelated events query page, as shown in the figure below:
Operating procedure:
1) Select site name, controller address (all or part).
2) Click “Search”, the query results will be displayed in the list below.
3) Click “all”, all the results will be displayed in the list below.
In the “advanced query” tab, the interface is as shown in the figure below:
72
Page 79
EverFocus Navigation Access Control Management Software
Operating procedure:
1) Select query fields such as site name and controller address.
2) Select the query rules (=, <>, like).
3) Input query value, click “add”, the condition list box will list the query condition A.
4) Select a different condition B (the method is the same as step 1-3).
5) Select the relation between the query condition B and query condition A (“and” or “or”).
6) Click “Add”, the condition list box will list the query condition B.
7) Select the query condition in the condition list box, click “Delete” button to delete the query
condition.
8) Operate like this, multi-conditions can be set.
9) Click the “Search” button, the query result will be displayed in the list below.
73
Page 80
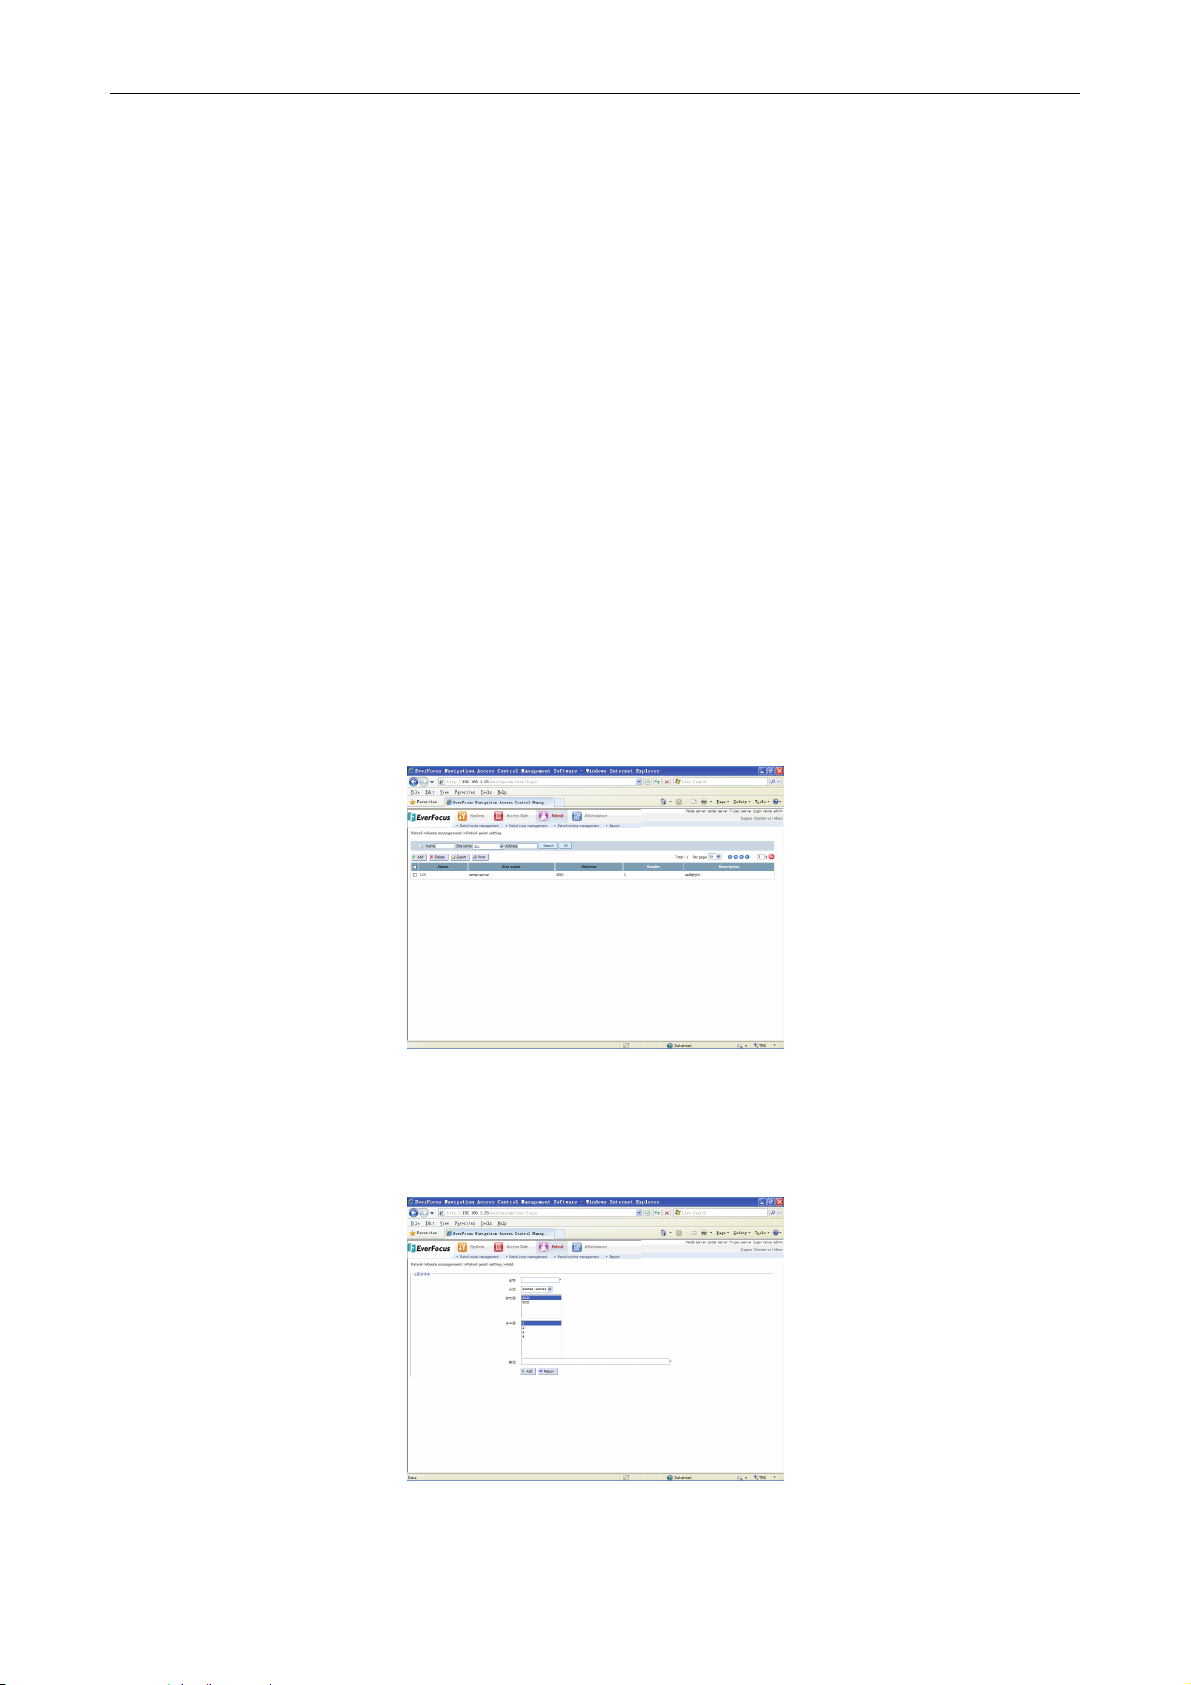
5 Patrol
This chapter will introduce how to set, manage the patrol spot, time and route of patrollers, how
to control patrollers, and how to Search patrol records and output statements of patrollers.
The patrol system achieves the patrol function on the basis of the current ACCESS SYSTEM.
The patrol route consists of several patrol spots (i.e. readers), patrollers finish patrol by swiping
their card on the card reader. The method will show the patrol route and movements of patrollers,
it is easy and convenient, without any extra hardware equipments, raising the utilization ratio of
ACCESS SYSTEM.
5.1 Patrol route management
5.1.1 Patrol point setting
Click main menu “Patrol” ”Patrol Route Management” “Patrol Point Setting” item, the
system page will switch to patrol point setting page, as shown in the figure below:
EverFocus Navigation Access Control Management Software
Chapter
5
5.1.1.1 Add a patrol point
A patrol point is the card-swiping spot where the patroller must arrive at a certain time.
Click the “Add” button, the patrol point setting page will switch to the adding page, as shown in
the figure below:
Name: add the name of a patrol point.
Node server: the station where the reader is corresponding to the patrol point.
74
Page 81

Controller, card reader: ACCESS SYSTEM equipment corresponding to the patrol point to be
added.
Select site, controller, reader, input the name and description of the patrol point, and then click
“Add” button, system will show the prompt of “successful addition”, the addition of a patrol spot is
finished. Click the “Return” button, the page will switch from the patrol point addition to the
setting page.
5.1.1.2 Delete a patrol point
On the patrol point setting page, select the patrol point record to be deleted, click the “Delete”
button, a confirmation prompt of “Are you sure you want to delete the patrol point?” will pop up. If
you want to delete the selected patrol point, click the “Confirm” button, the page will show the
prompt of “successful deletion!”, if you do not want to delete the selected patrol point, please
click the “Cancel” button.
5.1.1.3 Export patrol point records
Click “Export” button on the patrol point setting page, a selection box will pop up on the page:
EverFocus Navigation Access Control Management Software
Click the “no” or “Cancel” button, it will quit the patrol point record exportation. If you want to
export, please click the “yes” button, a saving dialogue box of exporting files will pop up. Select
the saving directory and file name, click the “save” button, it will finish the exportation of a patrol
point record.
5.1.1.4 Print the records of patrol points
Click “Print” on the patrol point setting page, a printing window will pop up, as shown in the figure
below:
Click the “Print” button in the window of the IE browser, all the patrol point records in the patrol
point list will be printed.
5.1.1.5 Search a patrol point
If there are too many records in the patrol point list and it is not convenient to browse the records,
please use the query on the page.
The patrol point query can Search with one or more conditions such as the name, address,
station name. Input query conditions in the input box, click “Search” button, the query results will
be shown in the record list. If you click “All” button, the record list will show all the patrol point
records.
5.1.2 Patrol route setting
Click main menu “Patrol” ”Patrol Route Management” “Patrol Route setting” item, the
system page will switch to patrol route setting page, as shown in the figure below:
75
Page 82

EverFocus Navigation Access Control Management Software
5.1.2.1 Add a patrol route
A patrol route is a route that consists of several patrol points that a patroller arrives at a certain
time during a particular period (no more than 24 hours, but it can span the days).
Click the “Add” button in the figure above, the patrol route setting page will switch to the adding
page:
Route name: the name of the patrol route to be added.
Patrol point information: this refers to all the patrol points information that can be added to the
patrol route, including all the patrol points, all the patrol period within one day and the permitted
error time that a patroller arrives at a patrol point. Click the “Add to route” button in the patrol
point information area to add the patrol point to the patrol route.
Route information: this refers to one or more patrol point list information, including all the patrol
points of the route. Click “turn up”, “turn down” and “delete” icon, it can turn up or turn down the
records of the patrol point or delete it.
Cross day: this refers to whether the starting time and the ending time of a patrol route are in the
same day, if they are not in one day, the route is crossing day.
Input patrol route name and description in the patrol points selected, click “Save” button to
display the prompt of “add successfully” of the system, then the patrol routine adding is
completed. Click the “Return” button, the page will switch from the patrol route addition to the
setting page.
5.1.2.2 Edit a patrol route
On the patrol route setting page, select the patrol route to be modified, click the “Modify” button
on the page, the page will switch from patrol route setting page to patrol route editing page, as
shown in the figure below:
76
Page 83

EverFocus Navigation Access Control Management Software
The editing process and the adding process are basically the same. When editing the patrol
route, please refer to the addition of patrol route.
5.1.2.3 Delete a patrol route
On the patrol route setting page, select the patrol route record to be deleted, click the “Delete”
button, the page will show a confirmation prompt of “Are you sure you want to delete the
selected route?” If you are sure you want to delete the patrol route, click the “Confirm” button, the
page will show the prompt of “successful deletion”, if you are not sure, please click “Cancel”.
5.1.3 Export patrol route records
Click the “Export” button on the patrol route setting page, the page will show a exporting
selection box:
Click the “no” or “Cancel” button, to quit the patrol route record exportation. If you are sure you
want to export, please click the “yes” button, a saving dialogue box of exporting files will pop up.
Select the saving directory and file name, click the “save” button, it will finish the exportation of a
patrol route record.
5.1.3.1 Print patrol route records
Click “Print” on the patrol route setting page, a printing window will pop up, as shown in the figure
below:
Click the “Print” button in the window of IE browser, all the patrol route records in the patrol route
list will be printed.
5.1.3.2 Search a patrol route
If there are too many records in the patrol record list and it is not convenient to browse the
records, please use the query on the page.
77
Page 84

Input query conditions in the input box, click “Search” button, the query results will be shown in
the record list. Click the “All” button, the record list will show all the patrol route records.
5.1.4 Live status
Click main menu “Patrol” “Patrol Route Management” ”Live Status” item, system will switch
to the live status browse page, as shown in the figure below:
EverFocus Navigation Access Control Management Software
The patrol live status page will show the recent three patrol situations of all the patrol plans in
live.
Click any patrol point of a certain patrol plan, the patrol situation of the patroller corresponding to
the patrol point will pop up:
Click the “Detail” icon on the right side of a certain patrol plan, the page will show all the patrol
situation of all the patrollers corresponding to the patrol plan, as shown in the figure below:
78
Page 85
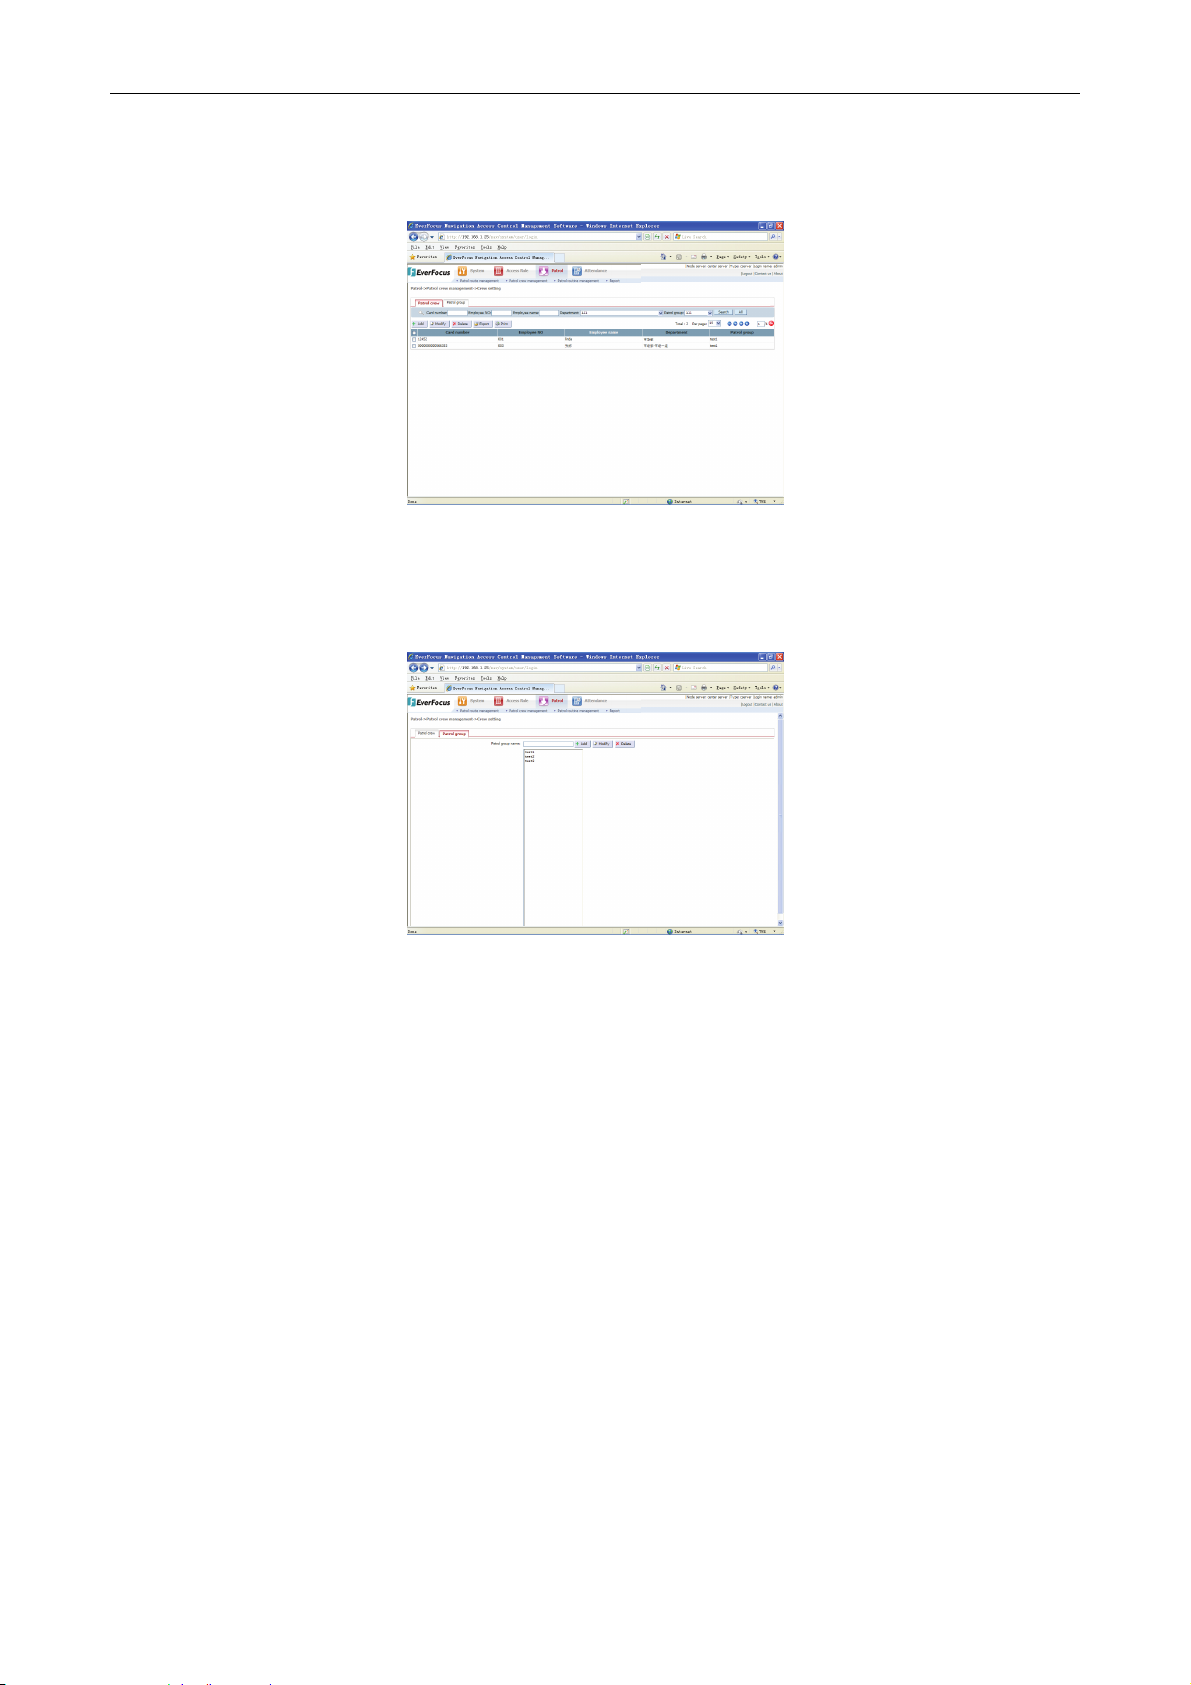
5.2 Patrol crew management
Click main menu “Patrol” “Patroller Crew Management” ”Patrol Crew Setting” item, system
will switch to the patrol crew setting page, as shown in the figure below:
EverFocus Navigation Access Control Management Software
5.2.1 Add a patrol group
Before adding patrol crew, you need to appoint a patrol group to the patrol crew.
Click the “Patrol group” tab, the patrol crew setting page will switch to patrol group setting page,
as shown in the figure below:
Add a patrol group: Input the name of the patrol group in the patrol group name input box, click
the “Add” button in the figure above, the page will show the prompt of “successful addition of a
patrol group”.
5.2.2 Modify a patrol group
Click the name of the patrol group to be modified, input the new name of the patrol group in the
patrol group name input box, click “Modify” button, the page will show a confirmation box of “Are
you sure you want to modify the patrol group?” If yes, please click the “Confirm” button, a prompt
of successful modification will pop up; otherwise, click the “Cancel” button to quit the operation.
5.2.3 Delete a patrol group
Click the patrol group to be deleted, and then click the “Delete” button, the page will show a
confirmation box of “Are you sure you want to delete the patrol group?” If yes, please click the
“Confirm” button, a prompt of successful deletion will pop up; otherwise, click the “Cancel” button
to quit the operation.
5.2.4 Add a patrol crew
Click the “Add” button on the patroller crew setting page, the patrol crew setting page will switch
to the patrol crew adding page, as shown in the figure below:
79
Page 86

EverFocus Navigation Access Control Management Software
As shown in the figure above, the record that can be added to patrol crew must be the card
record that has assigned to a certain cardholder. The card record must have the corresponding
employee number, name, department, etc. Each patrol crew can have only one patrol card.
If there are too many card records to be added to patrol crew and it is not easy to browse the
card record clearly, please use the record query. The query can be done according to conditions
such as card number, employee number, name and department.
Click the “Export”, “Print” button, the card records which are being browsed will be exported as
EXCEL files or be printed on papers.
Select the card record of the patroller to be added and the patrol group the patrol crew belongs
to, click the “Add” button, the page will show a prompt of “successful addition of patrollers”.
Click the “Return” button, the page will switch from patrol crew adding to patrol crew setting .
5.2.5 Modify a patrol crew
The attribute that can be modified of the patrol crew is only the patrol group it belongs to.
On the patrol crew setting page, select the patrol crew to be modified, click the “Modify” button, a
modifying page will pop up:
Select the new patrol group that the patrol crew belongs to, click “Modify” button, the page will
show a prompt of “successful modification of patrol crew”.
5.2.6 Delete a patrol crew
On the patrol crew setting page, select the patrol crew record to be deleted, click the “Delete”
button, the page will show a confirmation of “Are you sure you want to delete the patroller?” If
yes, please click the “Confirm” button, the page will show a prompt of “successful deletion”. If not,
please click the “Cancel” button to cancel the delete operation.
5.2.7 Export patrol crew records
Click the “Export” button on the patrol crew setting page, the page will show an exporting
selection box:
80
Page 87

EverFocus Navigation Access Control Management Software
Click the “no” or “Cancel” button, it will quit the patrol crew record exportation. If you want to
export, please click the “yes” button, a saving dialogue box of exporting files will pop up. Select
the saving directory and file name, click the “save” button, it will finish the exportation of a patrol
crew record.
5.2.8 Print patrol crew records
Click “Print” on the patrol crew setup page, a printing window will pop up, as shown in the figure
below:
Click the “Print” button in the window of IE browser, all the patrol crew records in the patrol crew
list will be printed.
5.2.9 Search the patrol crews
If there are too many records in the patrol crews list and it is not convenient to browse the
needed records, please use the query on the page.
Patrol crew query can Search with one or more conditions such as card number, employee
number, department and patrol group. Input query conditions in the input box, click the “Search”
button, the query results will be shown in the record list. If click “All” button, the record list will
show all the patrol crew records.
5.2.10 Temporary patrol crew
Click main menu “Patrol” “Patrol Crew Management” ”Temporary Patrol Crew” item, system
will switch to the temporary patrol crew change interface, as shown in the figure below:
Temporary patrol crew change refers to a situation where, on a certain date, there is a change of
crew of one patrol group to another, or there is a temporary rest for one crew, and another crew
will do the job according to the new patrol group.
81
Page 88

5.2.11 Add temporary patrol crew
Click the “Add” button on the temporary patrol crew setting page, the temporary patrol crew
setting page will switch to the temporary patrol crew adding page, as shown in the figure below:
EverFocus Navigation Access Control Management Software
As shown in the figure above, the record that can be changed can be all the patrol crews.
If there are too many patrol crew records to be changed and it is not easy to browse the card
record clearly, please use the record query. The query can be done according to conditions such
as card number, employee number, name and department.
Click “Export”, “Print” button, the patrol crew records which are being browsed will be exported
as EXCEL files or be printed on papers.
Select the patrol crew record to be changed and the target patrol group, the change period,
whether to rest and description, click “Add” button, the page will show a prompt of “successful
addition of temporary cardholder change”.
Click the “Return” button, the page will switch from temporary patrol crew adding to temporary
patrol crew setting .
5.2.12 Delete temporary patrol crew
On the temporary patrol crew setting page, select the temporary patrol crew record to be deleted,
click the “Delete” button, the page will show a confirmation of “Are you sure you want to delete
the temporary patrol crew?” If yes, please click the “Confirm” button, the page will show a prompt
of “successful deletion of temporary cardholder change”. If not, please click the “Cancel” button
to cancel the delete operation.
5.2.13 Export temporary patrol crew records
Click the “Export” button on the temporary patrol crew setting page, the page will show a
exporting selection box:
Click the “no” or “Cancel” button, it will quit the patroller record exportation. If you want to export,
please click the “yes” button, a saving dialogue box of exporting files will pop up. Select the
saving directory and file name, click the “save” button, it will finish the exportation of a temporary
patrol crew record.
5.2.14 Print temporary patrol crew records
Click “Print” on the temporary patrol crew setting page, a printing window will pop up, as shown
in the figure below:
82
Page 89

EverFocus Navigation Access Control Management Software
Click “Print” button in the window of IE browser, all the temporary patrol crew records in the
temporary patrol crew list will be printed.
5.2.15 Search a temporary patrol crew
If there are to many records in the temporary patrol crew list that it is not convenient to browse
the records, please use the query on the page.
Temporary patrol crew query can Search with one or more conditions such as card number,
employee number, department, patrol group and the starting and ending time. Input query
conditions in the input box, click “Search” button, the query results will be shown in the record list.
Click the “All” button, the record list will show all the temporary patrol crew records.
5.3 Patrol Routine management
5.3.1 Patrol routine setting
Click main menu “Patrol” “Patrol Routine Management” ”Patrol Routine Setting” item,
system will switch to the patrol routine setting page, as shown in the figure below:
Simply speaking, patrol routine is the periodical combination of patrol group and patrol route.
Only by designing routine for each patrol group can make it more convenient to assign patrol
work to them.
5.3.2 Add a patrol routine
Click the “Add” button on the patrol routine setting page, the patrol routine setting page will
switch to the patrol routine adding page, as shown in the figure below:
83
Page 90

EverFocus Navigation Access Control Management Software
Schedule type: it can be classified into two types: one is routine schedule, i.e., the schedule that
is used in common situations, and it is time span is usually longer; another one is temporary
schedule, it is used for temporary changes. One patrol group can use one routine schedule or
temporary schedule during the same period. The priority level of temporary schedule is higher
than routine schedule, that is to say, if a patrol group has both a routine schedule and a
temporary schedule during the same period, it will comply with temporary schedule.
Schedule name: the name of a schedule can symbolize a schedule; the use of name is out of
any particular requirements.
Schedule cycle: it refers to the period of the schedule from beginning to the end.
Patrol group: the patrol group that the schedule is used to put into effect.
Start and end time: it refers to the time of the schedule from beginning to the end.
Description: special symbols and records of the schedule that is used for the distinction of the
schedule.
The arrangement of the schedule cycle: it refers to the arrangement of different patrol route
on different date during a cycle of the schedule.
Select and add each attributes for the patrol schedule to be added, click the “Add” button, the
page will show a prompt of “successful operation”.
Click the “Return” button, the page will switch from the patrol routine addition to the setting page.
5.3.3 Modify a patrol routine
On the patrol routine setting page, select the patrol routine to be modified, click the “Modify”
button, the page will show the modifying page:
Select and add each attributes for the patrol routine to be modified, click the “Save” button, the
page will show a prompt of “successful operation.”
5.3.4 Delete a patrol routine
On the patrol routine setting page, select the patrol routine record to be deleted, click the
“Delete” button, the page will show a confirmation of “Are you sure you want to delete the
selected patrol routine?” If yes, please click the “Confirm” button, the page will show a prompt of
“successful deletion”. If not, please click the “Cancel” button to cancel the delete operation.
84
Page 91

5.3.5 Export patrol routine records
Click the “Export” button on the patrol routine setting page, the page will show an exporting
selection box:
EverFocus Navigation Access Control Management Software
Click the “no” or “Cancel” button, it will quit the patrol plan record exportation. If it is sure to
export, please click the “yes” button, a saving dialogue box of exporting files will pop up. Select
the saving directory and file name, click the “save” button, it will finish the exportation of a patrol
routine record.
5.3.6 Print patrol routine records
Click “Print” on the patrol routine setting page, a printing window will pop up, as shown in the
figure below:
Click the “Print” button in the window of the IE browser, all the patrol routine records in the patrol
routine list will be printed.
5.3.7 Search a patrol routine
If there are too many records in the patrol routine list and it is not convenient to browse the
records, please use the query on the page.
Patrol routine query can Search with one or more conditions such as name, type, patrol group
and the starting and ending time. Input query conditions in the input box, click “Search” button,
the query results will be shown in the record list. Click the “All” button, the record list will show all
the patrol routine records.
5.4 Reports
5.4.1 Original patrol Report
Click main menu “Patrol” “Reports” ”Original Patrol Report” item, system will switch to the
original patrol report page, as shown in the figure below:
85
Page 92
EverFocus Navigation Access Control Management Software
Original patrol report can Search all the original card-swiping data of patrol crew.
Original patrol report can Search with one or more conditions such as patrol point, patrol group,
patrol crew employee number, patrol crew name and the starting and ending time. Input query
conditions in the input box, click “Search” button, the query results will be shown in the record
list.
5.4.1.1 Export original patrol
Export original patrol will export all the card-swiping data on the current page with the format of
EXCEL files.
Click the “Export” button on the original data query page, the page will show an exporting
selection box:
Click the “no” or “Cancel” button, it will quit the patrol crew record exportation. If you want to
export, please click the “yes” button, a saving dialogue box of exporting files will pop up. Select
the saving directory and file name, click the “save” button, it will finish the exportation of original
data record.
5.4.1.2 Print original patrol
Click “Print” on the original patrol query page, a printing window will pop up, as shown in the
figure below:
Click the “Print” button in the window of IE browser, all the original card-swiping data in the
original patrol query list will be printed.
5.4.2 Personal Patrol report
Click main menu “Patrol” “Reports” ”Personal Patrol Report” item, system will switch to the
personal patrol report page, as shown in the figure below:
86
Page 93

EverFocus Navigation Access Control Management Software
Personal patrol can Search a certain cardholder’s detailed patrol during a certain period.
Personal patrol can Search with one or more conditions such as employee number, patrol crew
name and the starting and ending time. Input query conditions in the input box, click “Search”
button, the query results will be shown in the record list.
5.4.2.1 Export personal patrol records
Export personal patrol will export all the personal data on the current page with the format of
EXCEL files.
Click the “Export” button on the personal patrol page, the page will show an exporting selection
box:
Click the “no” or “Cancel” button, it will quit the personal patrol exportation. If you wish to export,
please click the “yes” button, a saving dialogue box of exporting files will pop up. Select the
saving directory and file name, click the “save” button, it will finish the exportation of a personal
patrol.
5.4.2.2 Print personal patrol records
Click “Print” on the personal patrol report page, a printing window will pop up, as shown in the
figure below:
Click the “Print” button in the window of IE browser, all the personal patrol in the personal patrol
list will be printed.
5.4.3 Group patrol report
Click main menu “Patrol” “Reports” ”Group Patrol Report” item, system will switch to the
group patrol report page, as shown in the figure below:
87
Page 94

EverFocus Navigation Access Control Management Software
Group patrol report can generate all the detailed patrols and statistical of all the patrol crews.
Group patrol report generates according to patrol group and the starting and ending time. Select
the query conditions and click the “Generate Report” button, the group patrol report will be
shown in the record list.
5.4.3.1 Detailed patrol
Select all the group patrol report records generated from a certain patrol group page, click the
“Details” button, the page will show the detailed report:
5.4.3.2 Export detailed patrol records
Export detailed patrol will export all the patrol group data on the current page with the format of
EXCEL files.
Click the “Export” button in the figure above, the page will show an exporting selection box:
Click the “no” or “Cancel” button, it will quit the patrol group detailed patrol exportation. If you
wish to export, please click the “yes” button, a saving dialogue box of exporting files will pop up.
Select the saving directory and file name, click the “save” button, it will finish the exportation of a
patrol group detailed patrol.
5.4.3.3 Print detailed patrol recrods
Click “Print” on the detailed patrol page, a printing window will pop up, as shown in the figure
below:
88
Page 95
EverFocus Navigation Access Control Management Software
Click the “Print” button in the window of IE browser, all the group detailed data in the detailed
patrol list will be printed.
5.4.3.4 Statistical report
Select group patrol report records generated from a certain group patrol report page, click the
“Statistics” button, the page will show the statistical report:
5.4.3.5 Export a statistical report
Export statistical report will export all the group patrol on the current page with the format of
EXCEL files.
Click the “Export” button in the figure above, the page will show an exporting selection box.
Click the “no” or “Cancel” button, it will quit the statistical patrol exportation. If you wish to export,
please click the “yes” button, a saving dialogue box of exporting files will pop up. Select the
saving directory and file name, click the “save” button, it will finish the exportation of a
statistical patrol.
5.4.3.6 Print a statistical patrol
Click “Print” on the statistical patrol page, a printing window will pop up, as shown in the figure
below:
89
Page 96
EverFocus Navigation Access Control Management Software
Click the “Print” button in the window of IE browser, all the patrol detailed data in the statistical
patrol list will be printed.
5.4.3.7 Delete a group patrol report
Select the group patrol report to be deleted, click the “Delete” button on the group patrol report
page, the page will show a prompt “successful deletion”.
5.4.3.8 Print group patrol reports
Click the “Print” button on the group patrol report page, a printing window will pop up, as shown
in the figure below:
Click the “Print” button in the window of the IE browser, all the group patrol report in the patrol
group patrol report list will be printed.
90
Page 97
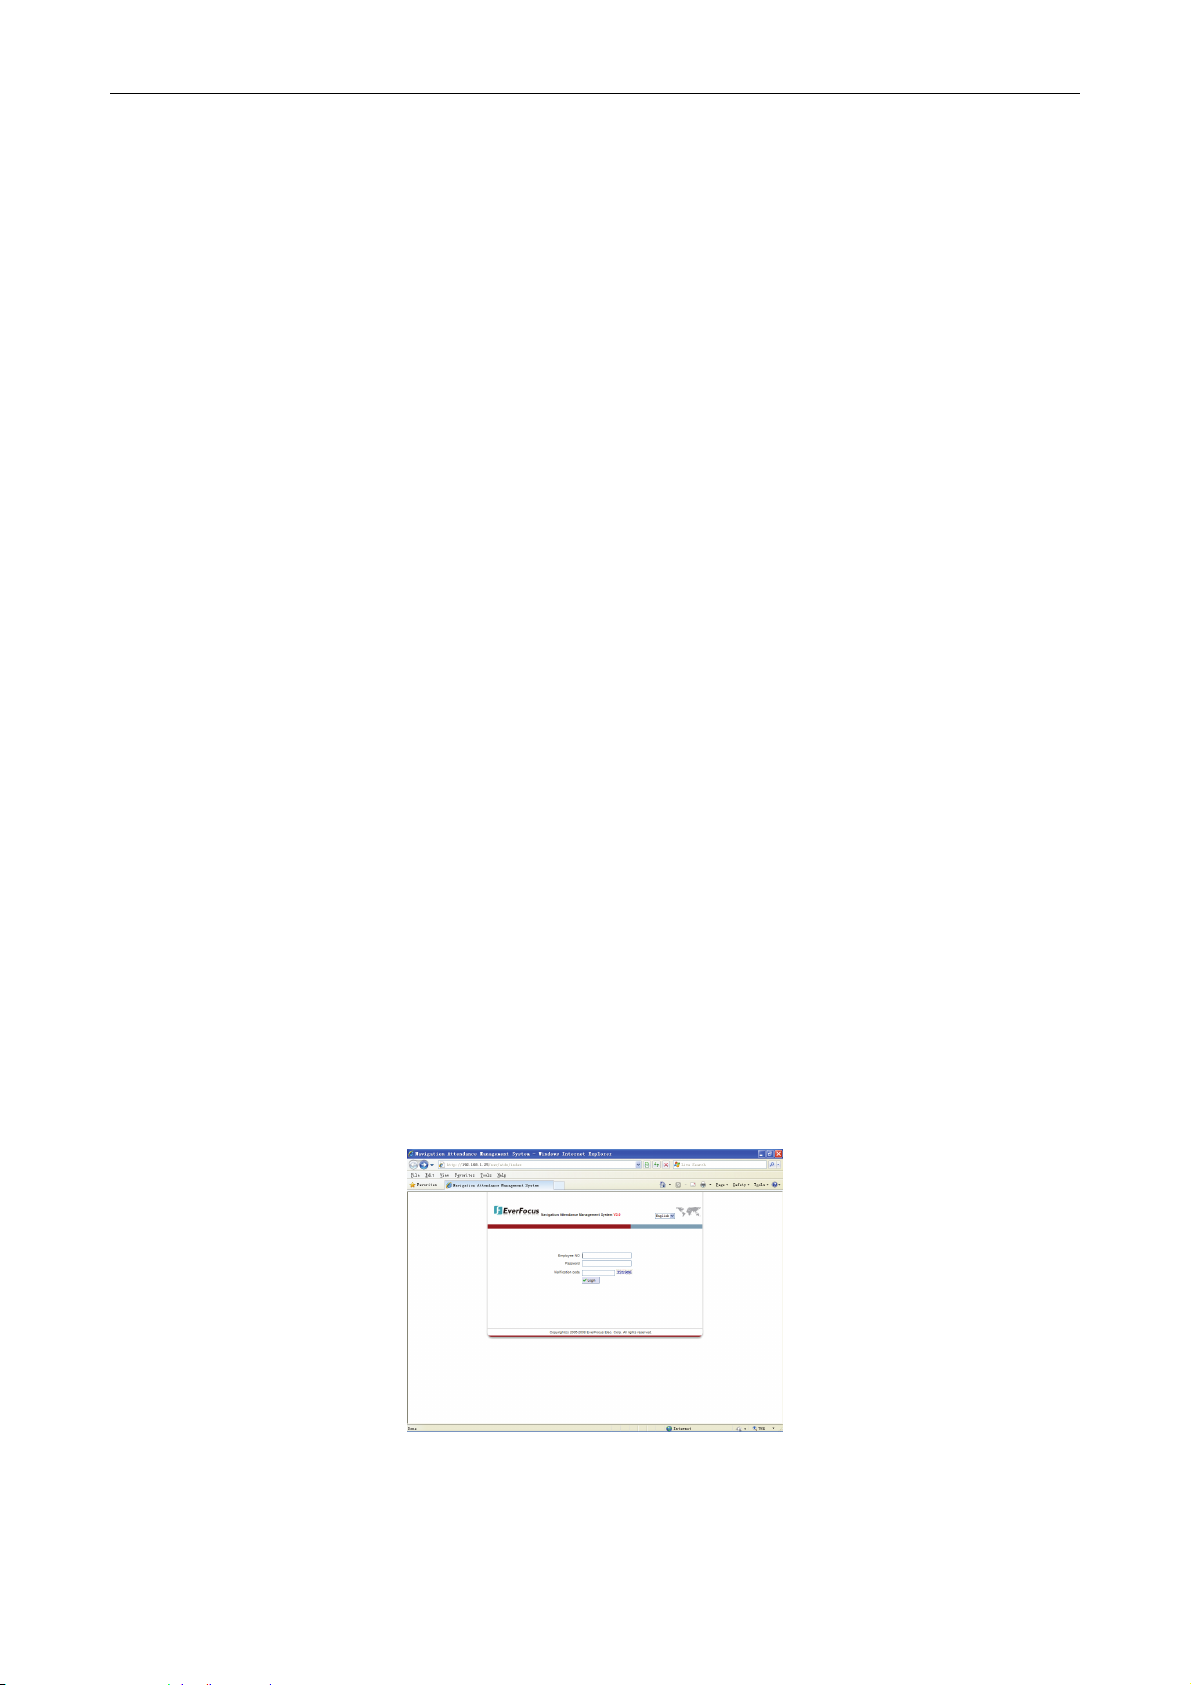
6 Attendance
Different from other systems, attendance has a set of independent login systems with the
employee number as the account name for login. It is required to assign a login password for
each cardholder and perform separate authorization.
Attendance authority is set in “System” “Cardholder Management” “Cardholders Basic
Information” “Attendance Authority”. Attendance authority setting is possible during
cardholder addition and cardholder modification. Each cardholder in the system has
independent attendance authority and attendance system login password.
Personnel attendance authority is classified into three types: regular user, department head and
manager.
Regular user authority is limited to browse the cardholder own attendance data and
conduct simple settings such as password change.
In addition to the rights of the regular user, department head authority also has the right to
browse the initial card using records of the personnel of the department, perform
department summary statement operation and management of the departmental affairs.
Manager authority is the top authority of attendance that allows all attendance operations
and settings. The introduction below shows the attendance system log in as a super user
identify.
EverFocus Navigation Access Control Management Software
Chapter
6
6.1 Login to attendance system
Login to the attendance system by the following two methods:
1) Click the “Attendance” button in the main menu of the system, then the attendance login
page will pop up.
2) Input URL of the attendance system in the IE address bar (such as http://ServerIP/nav/atdx)
for login, which is the login mode for common cardholders. For example: input
http://192.168.0.241/nav/atdx in the IE address bar to enter into the attendance login page. The
page is as shown in the figure below:
Input the employee number and password of the login user on the page, click “login” button to
log into the personnel attendance page as shown in the figure:
91
Page 98

EverFocus Navigation Access Control Management Software
We will take the manager user as an example to introduce the attendance hereinafter. The
operations of the regular user and department head are the same as the manager user but the
authority is not as high as the manager user. The repeated contents will not be further given
herein.
The main menu of the attendance page mainly includes four operations: “Basic Setting”,
“Schedule”, “Attendance Issues” and “Report”.
“Basic Setting” option mainly involves the operations like change password , on-duty time setup,
setup of weekly rest days and management of special days.
“Scheduling” option mainly aims at the management and operation of time section, division, shift,
weekly scheduling and daily scheduling.
“Attendance Issues” option mainly aims at the operation of registration without card using,
registration for asking for a leave, work overtime registration and so on.
“Report” mainly aims at the operations of query statistics of various statements such as initial
card swiping record, detailed personal statement, personal statistic statement and department
statistic statement.
6.2 Basic Setting
6.2.1 Change password
Click the main menu options on the attendance page “Basic Setting” “Change Password”,
then the change password page will pop up.
Input the old password and the new password to be set in various text boxes and click “Modify”
button, then the system will prompt “complete login password changing”.
Password changing only aims at the changing of the login password of the employee number in
use. For example: the login employee number of the cardholder in use is ef001, after password
changing, the cardholder needs to use modified password to log into the attendance page next
time.
6.2.2 Attendance parameter setting
Click the “Basic Setting” menu, select “Attendance Parameter Setting” to enter into the page of
attendance parameters setting.
92
Page 99

EverFocus Navigation Access Control Management Software
The option of the setting of attendance parameters allows the minimum units of the attendance
statistics report: minute, 0.5 hour or 1 hour. To modify this setting may change the accuracy of
attendance statistics result. Select the option required and click the “Modify” button, then the
system will return to the prompt whether the modification is successful.
6.2.3 Set holiday types
Click the main menu option on the attendance page “Basic Setting” “Holiday type” to enter
into the page of holiday type setting, as shown in the figure below.
The user may set several holiday types as needed for easy management and statistics. Each
holiday type can be set to confirm whether attendance is required or whether it is reckoned as a
holiday.
6.2.3.1 Add a holiday type
Click the “Add” button in the upper left corner to enter into holiday type adding page, as shown in
the figure below:
Name: name the new holiday type added.
Same as attendance: “Yes” indicates the holiday type is taken as valid attendance, “No”
indicates the holiday type is taken as leave of absence.
Holiday in effect where rest: “Yes” indicates that rest days included are counted as leave of
93
Page 100

absence for a leave of consecutive days. By taking annual leave of consecutive 7 days as an
example, the weekends contained are taken as rest days.
“No” indicates that the rest days are not counted as a leave of absence for a leave of
consecutive days. By taking annual leave of consecutive 7 days as an example, the weekends
contained are not considered as rest days.
Description: the user fills in a detailed description of the holiday type for easy management and
view.
Operating procedure:
1) Add a name for the new holiday type.
2) Select "Same as duty” or not.
3) Select Holiday in effect when rest or not.
4) Fill in description information.
5) Click “Add” button to generate a new holiday type.
6.2.3.2 Modify a holiday type
Select the holiday type option to be modified, click the “Modify” button in the upper left corner to
enter into the holiday type modification page, as shown in the figure below:
EverFocus Navigation Access Control Management Software
Modify other items other than holiday type name on the page, click “Modify” button after finishing
to complete modification. Click "Return" button if modification is not required.
6.2.3.3 Delete a holiday type
Select the holiday type option to be deleted, click the “Delete” button in the upper left corner,
then the dialog box for confirming deletion pops up, click the “Confirm” button to delete the
holiday type, otherwise click “Cancel”.
6.2.3.4 Export holiday type records
Export the holiday type data settings of the current page in the format of EXCEL files.
Click “Export” button on the page, an exporting selection box will pop up:
Click the “no” or “Cancel” button, it will quit the exportation. If you want to export, please click the
“yes” button, a saving dialogue box of exporting files will pop up. Select the saving directory and
file name, click the “save” button to finish the saving of exportation of files.
6.2.3.5 Print holiday type records
Click the “Print” button on the page, a printing window will pop up, as shown in the figure below:
94
 Loading...