

Page 1

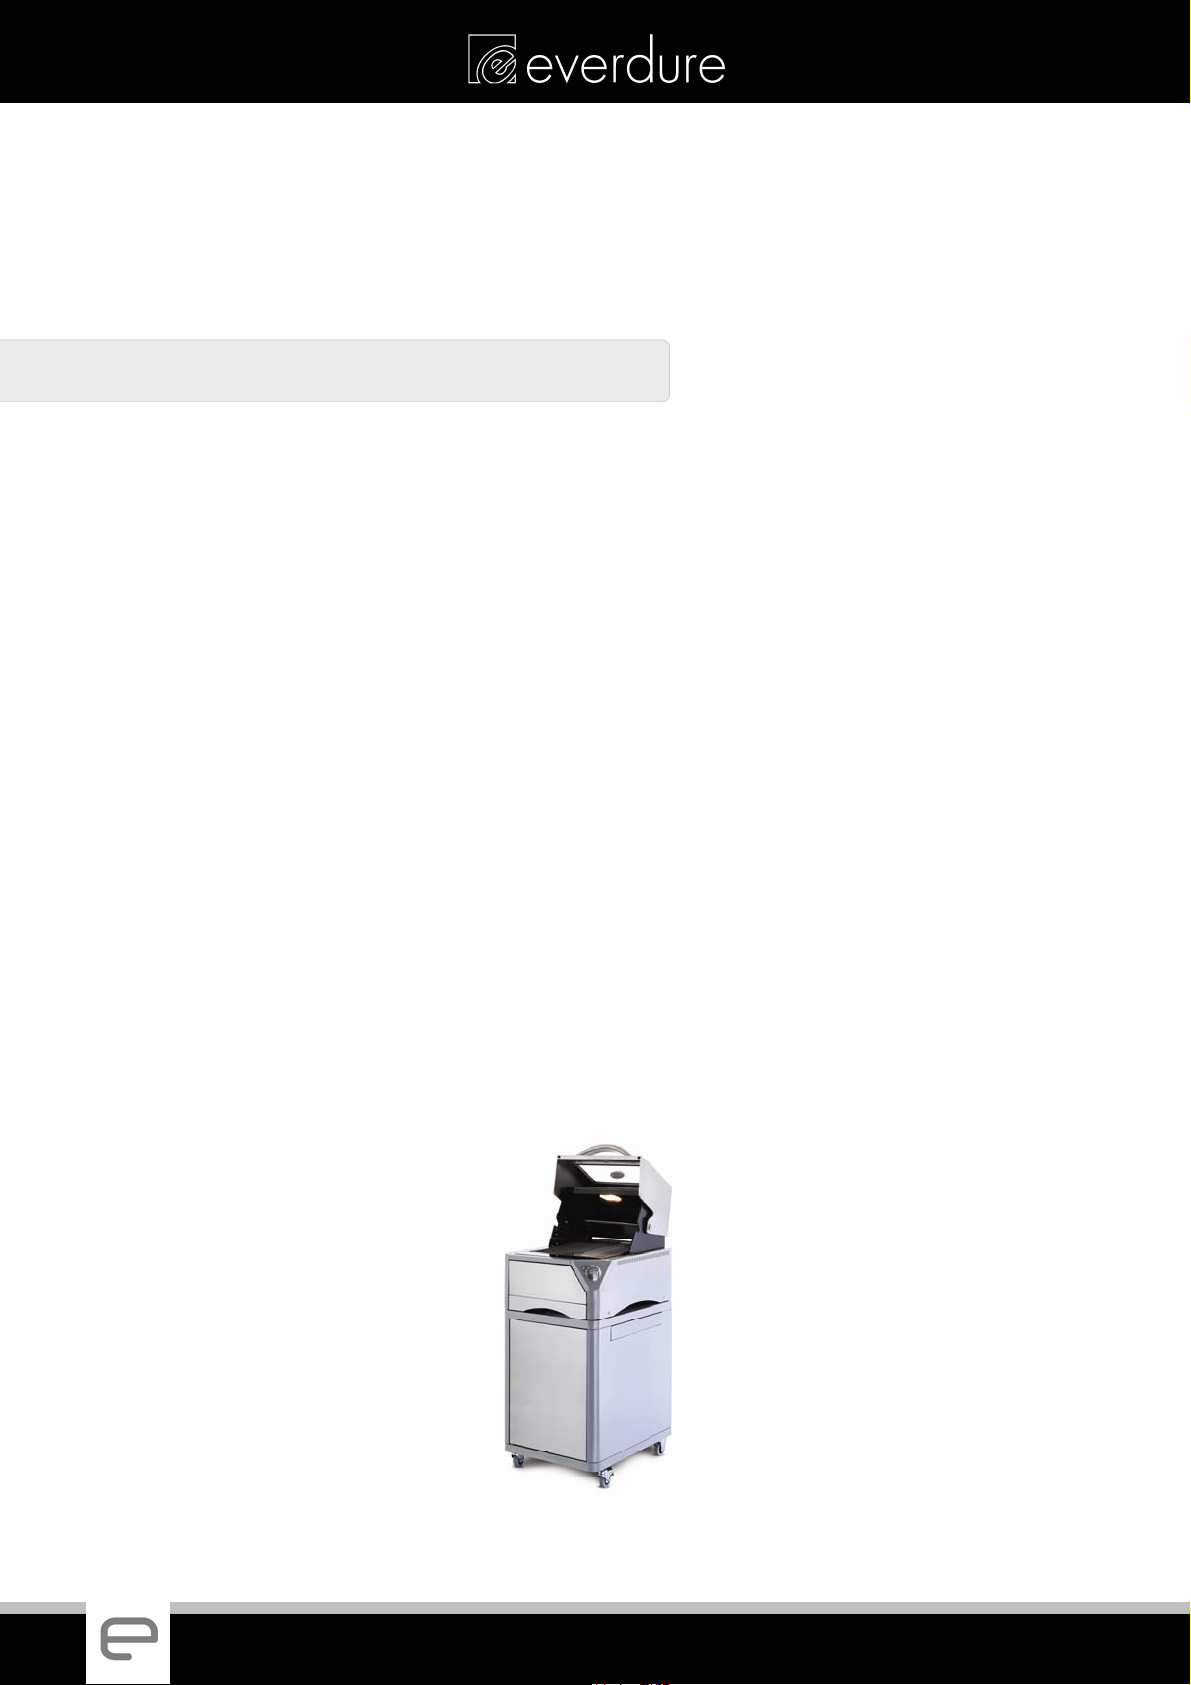
OPERATION & MAINTENANCE
FOR EVERDURE E2 GAS BARBECUES WITH FLAME SAFEGUARDS
Models Included:
INSTRUCTIONS
E2SSFLPC-08
E2SPFLPC-08
E2PCFLPC-08
THE EVOLUTION OF HEALTHY OUTDOOR COOKING
Page 2

THE EVOLUTION OF HEALTHY OUTDOOR COOKING
Page 3
OPERATION AND MAINTENANCE INSTRUCTIONS
FOR EVERDURE E2 GAS BARBECUE RANGE
E2SSFLPC-08, E2SPFLPC-08 & E2PCFLPC-08 OUTDOOR BARBECUES
CONTENTS
SECTION PAGE NO.
Important Safety Instructions Gas ……… 3-4
Important Safety Instructions Electrical …. 4
Appliance Details ………………………… 5
Gas Connections …………………………. 5
Outdoor Installation Guide ……………… 6
Operating Instructions …………………… 7-8
Lighting Procedure ……………………….. 8
Lighting System …………………………… 9
Cleaning & Storage …………………….… 9
Troubleshooting ………………………….. 10
Barbecue Assembly ……………………….. 11
Maintenance ……………………………… 12
Barbecue Accessories ……………………. 12
Warranty ………………………………….. 12
Parts List: Barbecue Hood Assembly …... 13
Parts List: Barbecue Chassis Assembly … 14
Parts List: Cooking Surfaces & Utensils ... 15
Parts List: Barbecue Trolley Assembly ..... 16
It is important that you retain these instructions, proof of purchase as well as
other important documents about this product for future reference.
E2
2
THE EVOLUTION OF HEALTHY OUTDOOR COOKING
Page 4

IMPORTANT SAFETY INSTRUCTIONS (GAS)
IMPORTANT: Read the safety precautions of this booklet carefully before removing the barbecue from its
carton or connecting the barbecue to its gas supply. If you are unsure about anything
regarding your barbecue, please contact Everdure on 1300 766 066 before operating your
appliance.
1. This barbecue is intended for OUTDOOR USE ONLY. This appliance must NOT be used indoors.
2. For your safety and enjoyment, read all operating instructions before lighting.
3. Ensure that all gas connections are tight before operating this appliance (refer to leak testing procedure in this
manual). Always check for leaks when a gas cylinder is replaced or reconnected.
4. Unsupervised children or pets should not be near a barbecue while cooking or during warm up or cool down.
Ensure children or pets are kept a distance well away from the barbecue whilst it is in use. Ensure that young
children do not play with the appliance. This appliance is not intended for use by young children or infirm
persons.
5. Particular care must be taken when removing the fat tray and the disposable foil trays. Mishandling of hot oil
and fats can cause serious injury.
6. Turn all gas valves/controls off including gas cylinder after use. Do not allow build up of unburned gas.
7. Do not use this appliance for any purpose other than what it is intended for.
8. Do not move this barbecue while in use as accessible parts may be very hot. Ensure that your barbecue is in a
level position and that the wheels are locked when the barbecue is in place to minimize movement of your
barbecue.
9. People with flammable clothing such as nylon etc. should keep well away from the barbecue when it is
operating.
10. Never leave burners on high for more than 10 minutes unless actually cooking.
11. In case of fat fire turn cylinder off. Fat drip trays should be cleaned and checked before using the barbecue.
Disposable foil trays should either be replaced before using the barbecue. Regular cleaning should reduce the
build up of fat and food residues which is combustible and can result in a fat fire. Fat fires can be prevented
with diligence in cleaning your fat tray and regular replacement of foil trays. Do not allow the foil tray to
overflow. Damage as a result of fat fire is not covered by your warranty and voids it. Do not use sand, fat
absorbents or kitty litter in the fat tray; line the fat tray with aluminium foil for easy cleaning.
12. Ensure that the product has adequate clearance from combustible materials. The appliance is designed so that
heat will not affect the trolley. All combustible materials must be kept more than 250mm from the sides of the
trolley and more than 1500mm above the cooking surface of the barbecue.
13. If the burner makes a hissing sound when lit, it may be burning inside. Turn the burner off, allow to cool and try
ignition again. Keep your barbecue protected against strong wind – if this cannot be avoided, always check that
the burners remain alight if operating the barbecue in windy conditions.
14. Do not run this appliance with the front control panel door closed.
15. Do not carry out any servicing on the gas manifold of the barbecue yourself – this must only be done by
authorised technicians.
16. We recommend that you regularly maintain your barbecue and keep it in good condition. This can be achieved
by following the cleaning and maintenance suggestions in this booklet.
17. When purchasing a gas cylinder for use in this appliance, please be aware of the height restrictions on the size
of the gas cylinder. Gas cylinders that do not conform to these sizes may not fit within the barbecue trolley.
Refer to the diagram on the next page showing the correct gas cylinder size.
18. This appliance is not suitable for mounting in a movable vehicle (boat, trailer etc). The appliance should be on a
solid surface (ground, concrete etc) when in use.
19. Do not use or store this appliance in areas of high salt content (a marine environment) or an area with caustic
fumes or liquids (such as a domestic pool), as these chemicals can cause the appliance materials to deteriorate
(and void the warranty). Regular cleaning and covering with an Everdure barbecue cover can help can help to
reduce this.
20. This appliance is fitted with flame safety devices which detect the absence of a flame at a burner and shut down
the supply of gas to a burner by turning the gas valve supplying the burner off. High winds, blocked burner
ports and miss-aligned thermocouples can all cause the valves to shut off.
2
THE EVOLUTION OF HEALTHY OUTDOOR COOKING
3
Page 5

Correct gas bottle dimensions:
40 MAX
440 MAX
DO NOT PLACE ARTICLES ON OR AGAINST THIS APPLIANCE
DO NOT STORE CHEMICALS OR FLAMMABLE MATERIALS OR SPRAY AEROSOLS NEAR THIS APPLIANCE
DO NOT OPERATE THIS APPLIANCE INDOORS
DO NOT ENCLOSE THIS APPLIANCE. THE MINIMUM CLEARANCE FOR THIS UNIT IS 1500mm ABOVE THE
COOKING SURFACE AND 250mm FROM ANY SIDE
DO NOT LIGHT WITH HOOD DOWN
DO NOT OPERATE THIS APPLIANCE BEFORE READING THE INSTRUCTION BOOKLET
IMPORTANT SAFETY INSTRUCTIONS (ELECTRICAL)
IMPORTANT: Read the safety precautions of this booklet carefully before removing the
barbecue from its carton or connecting the barbecue to an electrical supply.
1. Do not immerse any part of the power pack or cables in water.
2. Do not connect or use the lighting system in the rain.
3. The lighting system should be turned off and disconnected from the main power source whenever it is not in
use, or when changing light globes.
4. Only replace globe with one of equivalent wattage (20W, 12Vac). Using higher rated globes could damage
the globe housing, wiring or power pack. Replacement globes are available from Everdure.
5. All electrical cables should be stowed within the barbecue trolley when the barbecue is not in use.
6. The supply cord plug should be removed from the socket-outlet before any cleaning is done.
7. Do not place cord extension sockets or portable power boards where they may be splashed or where
moisture may get in.
8. Check periodically for damage to the supply cord and power pack. Do not use a damaged appliance and
do not attempt to fix any electrical faults.
9. If the supply cord or plug is damaged, contact the Service Agent to have them replaced. Only replace the
power pack with an equivalent unit via the Service Agent.
10. This appliance should be maintained in order to ensure a long, useful life and protect the operator against
electric shocks.
11. A safety switch can enhance electrical safety when using this appliance. If in doubt, speak to a local
licensed tradesperson.
3
4
THE EVOLUTION OF HEALTHY OUTDOOR COOKING
Page 6

APPLIANCE DETAILS
Gas Type: Propane N.G
Burner Pressure: 2.75 kPa 0.95 kPa
Injector Diameter: Ø0.95 mm Ø1.65 mm
Heat Input: 24 MJ/ hr 24 MJ/ hr
Note: The size of the injector diameter is stamped on one of the hexagon faces (e.g. ‘165’ for Ø1.65mm injector).
Combustion air is admitted at the underside at the front and rear of the combustion chamber, and through the
outer chassis via the venting holes on the sides and rear, and above the control panel.
The lighting system requires a 240Vac supply (via a standard Australian socket outlet). The supplied power pack
is rated to IP64, and supplies 12Vac with a maximum output of 20VA. This transformer complies to Australian
Standards AS/NZS 3108 (Safety) and AS/NZS 1044 (EMC).
Barbecue only
Barbecue, Hood
and Trolley
LENGTH (mm) WIDTH (mm) HEIGHT (mm)
508 650 240
508
(Servery extended 908)
650 1250
GAS CONNECTIONS
LOCAL AUTHORITY REQUIREMENTS
Check Gas Type and specifications plate on the inside of the left-hand side trolley door. All gas fitting work,
service and repairs can only be performed by an authorized person in accordance with AS5601 / AG601 and
local gas regulations.
NATURAL GAS
E2 barbecues with flame safeguards can be converted to use natural gas ONLY with an E2 with flame
safeguards NG conversion kit. Fit the NG manifolds, regulator and NG hose following the supplied instructions.
Conversion of any barbecue from ULPG to NG (or vice versa) must be done by a licensed gas fitter/technician.
Please contact Shriro for further information.
FOR PROPANE CYLINDER CONNECTION
1. To achieve the optimum performance from your Everdure Barbecue, an approved gas cylinder (POL fitting) of
9kg capacity must be used.
2. Do not connect gas to a barbecue that is not secured in a trolley.
3. Pull out the gas galley (inside the trolley on the left hand side) and place the gas cylinder inside the provided
hole.
4. Connect the cylinder to the barbecue, via the hose and regulator. Firmly tighten joints, but do not over-
tighten. Take care not to damage the regulator fitting. Check that ALL gas control knobs/valves are in the
Off position before opening the gas cylinder.
5. Push the gas galley back into the trolley and lock in place with the latch provided.
NOTE: Only one gas cylinder should be stored in the trolley at any one time.
LEAK TESTING
1. Make sure gas control knobs are Off and turn the cylinder valve On.
2. Check for leaking joints by brushing with solution of half-liquid detergent and half water. If a leak is present,
bubbles will appear (or you may hear a hissing sound). Retightening connections can generally repair a
leaking joint. You must also check the gas hose and connection at the gas cylinder. If a leak cannot be
resolved, do not proceed.
DO NOT USE NAKED FLAME FOR LOCATING GAS LEAKS.
IF A LEAK PERSISTS CALL AN AUTHORISED GAS FITTER.
THE EVOLUTION OF HEALTHY OUTDOOR COOKING
5
Page 7

OUTDOOR INSTALLATION GUIDE
This Appliance shall only be used in an above ground open-air situation with natural ventilation, without
stagnant areas, where gas leakage and products of combustion are rapidly dispersed by wind and natural
convection.
This appliance must not
enclosed areas. The barbecue is not intended to be installed in or used on recreational vehicles (e.g. boats,
camping vans) and should not be placed close to or under any surfaces that will burn or are sensitive to heat.
Do not block/obstruct the flow of air and combustion around the barbecue housing while in use.
Any enclosure in which the appliance is used shall comply with one of the following:
• An enclosure with walls on all sides, but at least one permanent opening at ground level and no
overhead cover.
• Within a partial enclosure that includes an overhead cover and no more than two walls
• Within a partial enclosure that includes an overhead cover and more than two walls, the following shall
apply-
(i) at least 25% of the total wall area is completely open: and
4
(ii) at least 30% of the remaining wall area is open and unrestricted.
In the case of balconies, at least 20% of the total of the side, back and front wall areas shall be and remain
open and unrestricted.
be used indoors. Do not use your barbecue in garages, porches, sheds or other
Both ends open
OUTDOOR AREA – EXAMPLE 1
OUTDOOR AREA – EXAMPLE 2
Open side at
least 25% of
total wall area
30% or more in total of the
remaining wall area is open and
unrestricted.
Open side at
least 25% of
total wall area
30% or more in total of the
remaining wall area is open and
unrestricted.
6
THE EVOLUTION OF HEALTHY OUTDOOR COOKING
Page 8

OPERATING INSTRUCTIONS
GENERAL INSTRUCTIONS
A fairly protected location is desirable for pleasant and efficient cooking. Try to keep the barbecue sheltered from
strong winds as this will drastically reduce cooking efficiency. If this is unavoidable, position the length of the
barbecue to be parallel in the direction of the wind. Keep the barbecue level. Check frequently that the burners
remain alight when used in conditions of strong wind. Make sure the minimum distances of the barbecue to any
wall or combustible surface are met. For more specific (including set-up illustrations and diagrams) and up to date
cooking instructions, please visit the Everdure web site at www.everdure.com.
GAS TYPE AND CONSUMPTION
The barbecues are designed to operate on Universal LPG only (Propane and/or butane gas) and NG Gas (using a
conversion kit). Gas consumption, Pressure and Injector Orifice size are shown on the Data Plate found on the top,
inside panel of the barbecue trolley left hand door (see segment on locating your serial number in the warranty
section).
GAS CONTROL KNOBS
The gas control knob locks in both the Off and High positions. By depressing the knob and turning anti-clockwise,
gas flow will gradually increase until the High position is reached. Continue turning in this direction and gas flow will
decrease until a simmer level is reached at Low. To turn gas flow off the gas control knob must be turned clockwise
from Low, depressed at High and turned until the Off position is reached.
2B HEALTH-E-PLATE FLAME TAMER INSERT
Prior to using the barbecue, ensure the 2B Health-E-Plate flame tamer insert is in the correct position below the 2B
Health-E-Plate stainless steel grill insert (within the 2B Mult-E-Plate). The flame tamer serves two functions: to retard
flare ups and to impart a smoky flavour on food through the vaporizing of oils and marinades.
CURING YOUR COOKING PLATES (VITREOUS ENAMEL PLATES ONLY)
Prior to using the barbecue, it is advisable to cure the cooking surfaces on cast iron or matte vitreous enamel type
plates. Wash the 2B Mult-E-Plate & 2B Health-E-Plate insert, then cover with vegetable oil (Camellia tea oil is
recommended as it has a high smoke point), light all burners and leave on HIGH for 10 minutes, then wipe with a
dry cloth. To prolong the life of your cooking plates, please follow the maintenance procedures outlined in this
instruction manual and cooking instructions/recipes.
2B MULT-E-PLATE (Patent Pending)
The 2B Mult-E-Plate takes up the complete cooking area of the barbecue and is placed with the fat drainage
channel to the front. NOTE: When cooking on vitreous enamel surfaces, please ensure that metallic or sharp objects
are NOT used. Damage to plates and grills due to the use of metallic or sharp objects will not be covered under
warranty. It is recommended to use silicone cooking utensils as these are both hygienic and withstand high
temperatures. Any excess fat or liquid will flow forward into the fat collection channel and drip into the fat drainage
system below the front of the plate.
2B HEALTH-E-PLATE STAINLESS STEEL GRILL INSERT
The 2B Health-E-Plate stainless steel grill insert must be used with the 2B Health-E-Plate flame tamer insert on the
right hand side of the 2B Mult-E-Plate. The 2B Health-E-Plate flame tamer insert should be placed beneath it to
help disperse the heat and reduce the risk of burning the food.
2B HEALTH-E-PLATE INSERT
The 2B Health-E-Plate insert can be used in place of the open grill and flame tamer inserts, with the open edge to the front (allowing the fat to flow forward into the drainage channel).
FAT TRAY
Prior to use check that the fat tray is clean and lined with aluminium foil. Fit a disposable foil tray into the front centre
section of the fat tray assembly. Use only foil trays supplied for the barbecue, as trays of an incorrect size or height
could cause problems when fitting the fat tray under the barbecue, or spillage of fats. Make sure the fat tray
assembly is fully installed into the barbecue before operating the appliance.
UNDER NO CIRCUMSTANCES MUST SAND, KITTY LITTER OR FAT ABSORBENTS BE USED IN THE FAT TRAY
OR FOIL TRAY. USE OF SUCH SUBSTANCES CAN VOID YOUR WARRANTY.
THE EVOLUTION OF HEALTHY OUTDOOR COOKING
7
Page 9

ROASTING
To set up the barbecue for roasting, leave the 2B Health-E-Plate stainless steel grill insert & 2B Health-E-Plate
flame tamer insert in the 2B Mult-E-Plate.
When running the barbecue with the hood down, the maximum cooking conditions are with the 2 burners on
medium. This is most important as severe overheating and spoilt food can result if this is exceeded.
COOKING USING A ROTISSERIE (Optional)
The optional rotisserie is an excellent addition to your barbecue. To set up your rotisserie, fix the rotisserie
mounting brackets to the sides of the hood rear panel (note that the rotisserie motor can be fixed to either side
of the barbecue), and then place the motor on the larger of the two brackets. Place the 2B Mult-E-Plate with
the 2B Health-E-Plate stainless steel grill insert & 2B Health-E-Plate flame tamer insert into the barbecue (refer
to set up for roasting) and position the food on the rod so that no oil or fat can drip onto the burners. Note:
Make sure that the power lead from the motor does not touch any part of the barbecue or hood. The
rotisserie rod can now be placed into the motor and bracket. Check that the rotisserie rotates freely and is
positioned above the plate. Start the rotisserie motor and then close the hood.
AFTER COOKING
1. When finished, make sure burner control knobs are turned OFF.
2. TURN OFF THE GAS SUPPLY AT THE CYLINDER.
3. After cooking and whilst the barbecue is still warm, remove scraps from the grill with a scraper.
4. Excess fat and meat scraps can be scraped off the flame tamer by removing the open grill to gain access.
WARNING: Some surfaces may still be hot – please use protective gloves.
5. Clean the fat tray and replace the aluminium foil and foil tray after or before each use of the appliance.
6. Once the barbecue is cool close the roasting hood and wipe off any fat splatter from the trolley with a
clean rag.
LIGHTING PROCEDURE
Read all operating instructions before lighting the appliance.
Open roasting hood before lighting.
Make sure all gas control knobs are in the ‘Off’ position and open cylinder
valve or connect natural gas supply.
Make sure all plates and grills are in their correct positions for cooking.
LIGHTING THE BARBECUE USING THE BUILT IN IGNITION ON THE CONTROL KNOBS
The Everdure E2 barbecues have a rotary ignition system built into every gas valve, accessed using the control
knobs at the front of the barbecue (behind the front control panel door). To ignite a burner, push the
appropriate control knob in and slowly rotate anti clockwise. This starts releasing the gas into the burner. As
the knob reaches the ignition symbol on the control panel, a spark will ignite the gas. The knob can then be
slowly rotated the rest of the way to “HIGH” and released, or adjusted to the appropriate temperature setting.
Rotating the knobs around too fast will cause the flame safeguards to shut the gas valves off, and the lighting
sequence would need to be restarted.
If the burner does not ignite, return the control knob to the “OFF” position and retry. If there is still no ignition
after 3 attempts, leave the barbecue off and retry again in 5 minutes time. After the initial rail burner is ignited,
adjacent rail burners can ignite via a cross over at the back of a chassis as well as with its internal rotary ignition
system.
For more detailed information on the operation of your appliance, log onto www.everdure.com
8
THE EVOLUTION OF HEALTHY OUTDOOR COOKING
.
Page 10

LIGHTING SYSTEM INSTRUCTIONS
Check that the barbecue wiring is connected to the power pack (screwed onto the top of the power
pack). Check that the lighting switch is off, and plug the power pack into the power supply. With the
power supply on, the lighting switch at the front right hand corner of the barbecue can be used to
turn the lights on and off. When not in use, the unit should be disconnected from the power supply
and all cords stored within the trolley.
CLEANING & STORAGE
EXTERNAL CLEANING
Before cleaning the barbecue exterior, ensure the appliance has cooled and is safe to touch. Painted surfaces
can be cleaned using a mild household detergent or cleaner and a clean cloth (do not use scourers or harsh
detergents). It is advisable to test cleaners on a small section of the appliance first. NEVER use paint thinners
or similar solvents for cleaning and NEVER pour cold water over hot surfaces. Over time, stainless steel will be
affected by “tea staining” or “bronzing” (brown discoloration of stainless steel). This is a natural reaction of
stainless steel with heat and is not a fault. This can be reduced by washing the surface with mild detergent and
warm water, followed by rinsing with clean cold water. Dry the surface afterwards. Always clean and dry the
slide out servery after use.
INTERNAL CLEANING
Before cleaning the internal parts of your barbecue, ensure the appliance has cooled and is safe to touch. The
back panel of the hood of the barbecue is slightly angled in to allow easy cleaning of splatters from cooking.
This can be cleaned by using some water, mild detergent and a sponge or mild scouring pad. Allow the
drippings to flow through the angled plates.
Vitreous enamel and stainless steel cooking surfaces only: For the best cleaning results, the plates should be
cleaned when warm. After heating, remove any excess food scraps using the Everdure multi purpose cleaning
tool. Spray the plate with a little water using a spray bottle. Leave the water to turn to steam for 15 to 30
seconds. Quickly wipe the plate down with a cotton cloth or paper towel. Repeat the procedure if required
(some marinades can leave a heavy residue on the plates).
WARNING! The surfaces of the plates will be hot. Please ensure protective gloves are worn.
STORAGE
When the appliance is not in use, the cylinder valve must be turned OFF, the appliance and the cylinder
together must be stored outdoors in a well ventilated area. However it is permissible to store the appliance
(but not the cylinder) indoors. Ensure a small amount of fat or oil is on the barbecue plates to prevent rust.
WARNING: STORE CYLINDER IN A WELL VENTILATED AREA OUT OF REACH OF CHILDREN
When the gas cylinder is disconnected, replace the plug or cap on the valve outlet.
For extended storage it is suggested that the primary air port of the burners be covered against the penetration
of insects or vermin. Spiders and small insects can spin webs or nest in the burner rails/tubes, which could
lead to obstruction in the gas and air flow, resulting in a fire in an around the burner rails/tubes. This type of
fire is called a flash-back and can cause serious damage to your barbecue and create an unsafe operating
condition. To prevent this, regularly inspect and clean the burners. An Everdure barbecue cover can be
placed over the appliance for extra protection, and to reduce this.
THE EVOLUTION OF HEALTHY OUTDOOR COOKING
9
Page 11

TROUBLESHOOTING
Burner will not ignite when using the igniter:
Cylinder valve is not on Turn cylinder valve on
Cylinder is empty Replace with a full cylinder
Igniter is not sparking Remove plate and visually check ignition box for a spark. Check that
the cable to the ignition point is not broken or disconnected. Also
check the alignment of the sparker. If there is no spark, contact
Everdure Service.
Injector is blocked Clean injector with a toothbrush. Do not drill out or use wire. Do not
remove injector. Contact Everdure Service.
Burners ignite but won’t stay on:
Flames are erratic Follow processes below.
Flame low around the
Check burners and clean any blockages (page 12).
thermocouple
Thermocouple misaligned Contact Everdure Service.
Burner flame is erratic:
Burner is blocked Remove burner and check for obstruction
Flame is burning inside
Turn off burner, allow to cool and re-ignite (page 8)
burner (hissing sound)
Regulator is faulty Contact Everdure Service.
Injector is partially blocked Clean injector with a toothbrush. Do not drill out or use wire. Do not
remove injector. Contact Everdure Service.
Gas is leaking from connections:
Connections are loose Tighten loose connections (do not over-tighten) and leak test under
pressure with soapy water solution (page 5)
Hose has deteriorated Replace hose (page 12)
Gas valve is faulty Contact Everdure Service.
Threads are damaged Contact Everdure Service.
Lights not working:
Power not on Check that the power cord from the power adaptor is connected
correctly and that the power is on at the main power board.
Transformer overheated Turn off main power for half an hour before re-trying.
Globe(s) broken Replace globes.
Switch or wiring damaged Contact Everdure Service.
10
THE EVOLUTION OF HEALTHY OUTDOOR COOKING
Page 12

BARBECUE ASSEMBLY
The barbecue, hood and trolley come pre-assembled in a single package, but a number of components need
fitting to their correct position. For pictures of parts see the parts lists near the end of this booklet. For more
details regarding set-up, refer to the Everdure website, www.everdure.com.
2B MULT-E-PLATE
Place the 2B Mult-E-Plate (large tab to the front) on the inner lip of the barbecue chassis. The Plate must be
used in conjunction with either the 2B Health-E-Plate stainless steel grill insert & 2B Health-E-Plate flame tamer
insert or the 2B Health-E-Plate insert.
2B HEALTH-E-PLATE INSERT
Place the Health-E-Plate (flat edge to the front) inside the hole on the right hand side of the 2B Mult-E-Plate.
When not in use, place within the trolley.
2B HEALTH-E-PLATE STAINLESS STEEL GRILL INSERT & 2B HEALTH-E-PLATE FLAME TAMER INSERT
Place the Health-E-Plate flame tamer insert (drainage hole to the front) inside the hole on the right hand side
of the 2B Mult-E-Plate, and place the 2B Health-E-Plate stainless steel grill insert on top. When not in use,
place within the trolley.
WARMING RACK
The warming rack can be fitted into the slots of the rear hood inner panel via two tabs at the rear of each rack.
When not in use, the warming rack can be placed in the trolley.
TOOL STORAGE BIN AND CONDIMENTS CADDY
The tool storage bin and condiments caddy (with towel rail attached below) can be fitted to the inside of the
door by clipping the tabs at the rear of the bins into the slots on the door inner panel.
FAT TRAY FOIL TRAY
Each appliance is supplied with three foil trays for the fat tray. One is placed into the front centre section of
the fat tray (positioned in front of the supporting bracket). The spare foil trays can be stored in the trolley.
PACKAGING
Remove the securing ties holding the fat drain assembly in place. Remove all internal cartons and packaging
from within the barbecue/hood assembly. Remove all external packaging and remove the appliance from the
packaging base before operation.
THE EVOLUTION OF HEALTHY OUTDOOR COOKING
11
Page 13

MAINTENANCE MAINTENANCE
It is recommended that, at the commencement of each barbecue season, the following maintenance be
It is recommended that, at the commencement of each barbecue season, the following maintenance be
conducted.
conducted.
RAIL BURNERS RAIL BURNERS
1. Remove the rail burners by removing the securing pins at the rear of the burners and inspect the port
1. Remove the rail burners by removing the securing pins at the rear of the burners and inspect the port
holes, primary air inlet and mixing throat for any signs of blockage. Clean out with compressed air or a
holes, primary air inlet and mixing throat for any signs of blockage. Clean out with compressed air or a
length of wire if necessary.
length of wire if necessary.
2. Brush the outside of the burners with a stiff brush to remove rust and dirt. 2. Brush the outside of the burners with a stiff brush to remove rust and dirt.
3. Replace the burners and fix in place with the securing pins. 3. Replace the burners and fix in place with the securing pins.
GAS SUPPLY GAS SUPPLY
1. Inspect the gas supply hose for any deterioration and replace it if necessary. 1. Inspect the gas supply hose for any deterioration and replace it if necessary.
2. Test the gas circuit for leaks and remedy any found. 2. Test the gas circuit for leaks and remedy any found.
TROLLEY TROLLEY
1. Check all fasteners for tightness and re tighten where necessary to ensure rigidity of the structure. 1. Check all fasteners for tightness and re tighten where necessary to ensure rigidity of the structure.
2. Wipe over barbecue trolley with a clean cloth. For stainless steel areas a good stainless steel cleaner is
2. Wipe over barbecue trolley with a clean cloth. For stainless steel areas a good stainless steel cleaner is
recommended.
recommended.
BARBECUE HOOD BARBECUE HOOD
1. Check all fasteners for tightness and re tighten where necessary, especially the hood axles. 1. Check all fasteners for tightness and re tighten where necessary, especially the hood axles.
2. Wipe over the hood with a clean cloth. For stainless steel areas a good stainless steel cleaner is
2. Wipe over the hood with a clean cloth. For stainless steel areas a good stainless steel cleaner is
recommended.
recommended.
3. Inspect the electrical cables for damage. Check that the lighting system is working correctly. 3. Inspect the electrical cables for damage. Check that the lighting system is working correctly.
EVERDURE BARBECUE ACCESSORIES (OPTIONAL) EVERDURE BARBECUE ACCESSORIES (OPTIONAL)
Everdure also offers a comprehensive range of essential barbecue accessories - everything that you need
Everdure also offers a comprehensive range of essential barbecue accessories - everything that you need
to turn your barbecue into a complete outdoor cooking system and also to prolong the use of your
to turn your barbecue into a complete outdoor cooking system and also to prolong the use of your
product. Accessories such as a weatherproof cover and BBQ rotisserie are readily available items. Visit
product. Accessories such as a weatherproof cover and BBQ rotisserie are readily available items. Visit
www.everdure.com for regular product updates.
www.everdure.com for regular product updates.
WARRANTY WARRANTY
IMPORTANT IMPORTANT Please keep your receipt, as this must be presented if making a claim under the terms of the Everdure
Please keep your receipt, as this must be presented if making a claim under the terms of the Everdure
warranty.
warranty.
9
9
All Service and Assembly Enquiries: 1300 766 066 www.everdure.com All Service and Assembly Enquiries: 1300 766 066 www.everdure.com
12
THE EVOLUTION OF HEALTHY OUTDOOR COOKING
Page 14

PARTS LIST: BARBECUE HOOD ASSEMBLY
REF PART NAME QTY
01 Warming Rack 1
02 Rear Hood Assembly 1
03 Light Mounting Bracket 2
04 Light Housing 1
05 Lamp Cable 1
06 Lamp Assembly 1
07 Rear Hood Inner Panel 1
08 Front Hood Assembly 1
09 Hood Axle 2
10 Hood Handle 1
11 Front Hood Inner Bracket 2
12 Front Hood Inner Panel 1
13 Hood Lining Support 2
14 Hood Glass 1
15 Glass Support 2
16 Temperature Indicator 1
THE EVOLUTION OF HEALTHY OUTDOOR COOKING
13
Page 15

PARTS LIST: BARBECUE CHASSIS ASSEMBLY
REF PART NAME QTY
01 Inner Carcass Rear Panel 1
02 Cross-over Tube 1
03 Rear Burner Support 1
04 Rail Burner & Clip 2
05 Inner Carcass Right Panel 1
06 Fat Drain Assembly 1
07 Switch & Switch Cable 1
08 EBQ Badge 1
09 Cable Rubber Bush 1
10 Outer Chassis Right Panel 1
11 Fat Tray Guide 1
12 Double Spring Magnet 1
13 Heat Shield 1
14 Control Panel Fascia 1
15 Control Knob & Bezel 2
16 Spring Door Axle 1
17 Fascia Door Front Panel 1
18 Disposable Foil Tray 1
19 Fat Tray Assembly 1
20 Fat Tray Fascia 1
21 Inner Carcass Left Panel 1
22 Ignition Box Assembly RH 1
23 Ignition Box Assembly LH 1
24 Thermocouple Bracket 2
25 Inner Carcass Front Panel 1
26 Outer Chassis Left Panel 1
27 Outer Chassis Rear Panel 1
28 Marble Top 1
29 Fat Tray Guide Bracket 2
30 Fat Tray Guide 1
31 Outer Chassis Front Panel 1
32
33 Fascia Door Guide 1
34 Fascia Door Rear 1
35 Fixed Door Axle 1
36 Hose & Regulator 1
Manifold Assy c/w
Thermocouples
1
14
THE EVOLUTION OF HEALTHY OUTDOOR COOKING
Page 16

PARTS LIST: COOKING SURFACES AND UTENSILS
THE EVOLUTION OF HEALTHY OUTDOOR COOKING
REF PART NAME QTY
01 2B Mult-E-Plate 1
02 2B Health-E-Plate Flame Tamer Insert 1
03 2B Health-E-Plate SS Grill Insert 1
04 2B Health-E-Plate Insert 1
05 Plate Lifter Tool 1
15
Page 17

PARTS LIST: BARBECUE TROLLEY ASSEMBLY
REF PART NAME QTY
01 Trolley Top 1
02 Single Spring Magnet 1
03 Servery Support 4
04 Double Magnet Bracket 1
05 Servery Assembly 1
06 Drawer Guide 2
07 Trolley Rear Panel 1
08 Power Adaptor Cable 1
09 Power Adaptor & Cord 1
10 Trolley Side Panel Right 1
11 Spring Door Axle 1
12 Door Assembly Left 1
13 Fixed Door Axle 1
14 Tool Storage Bin 1
15 Condiments Caddy 1
16 Towel Bracket 1
17 Gas Cylinder Gallery 1
18 Drawer Support 4
19 Trolley Bottom Panel 1
20 Bottom Frame Support 1
21 Fixed Castors 2
22 Chassis Support Bracket 4
23 Double Spring Magnet 1
24 Trolley Side Panel Left 1
25 Drawer Pin 1
26 Drawer Guide 2
27 Lockable Rotating Castors 2
16
THE EVOLUTION OF HEALTHY OUTDOOR COOKING
Page 18

THE EVOLUTION OF HEALTHY OUTDOOR COOKING
17
Page 19

NOTES
_________________________________________________________________
_________________________________________________________________
_________________________________________________________________
_________________________________________________________________
_________________________________________________________________
_________________________________________________________________
_________________________________________________________________
_________________________________________________________________
_________________________________________________________________
_________________________________________________________________
_________________________________________________________________
_________________________________________________________________
_________________________________________________________________
_________________________________________________________________
_________________________________________________________________
_________________________________________________________________
_________________________________________________________________
_________________________________________________________________
_________________________________________________________________
_________________________________________________________________
_________________________________________________________________
_________________________________________________________________
_________________________________________________________________
_________________________________________________________________
_________________________________________________________________
_________________________________________________________________
_________________________________________________________________
_________________________________________________________________
_________________________________________________________________
_________________________________________________________________
_________________________________________________________________
_________________________________________________________________
_________________________________________________________________
THE EVOLUTION OF HEALTHY OUTDOOR COOKING
Page 20

THE EVOLUTION OF
HEALTHY OUTDOOR COOKING
A division of Shriro Australia Pty Ltd
23-27 Chaplin Drive Lane Cove NSW 2066
1300 766 066
www.everdure.com
IM Ref: E2F24/2008/07
FOR OUTDOOR USE ONLY
THE EVOLUTION OF HEALTHY OUTDOOR COOKING
 Loading...