

Page 1
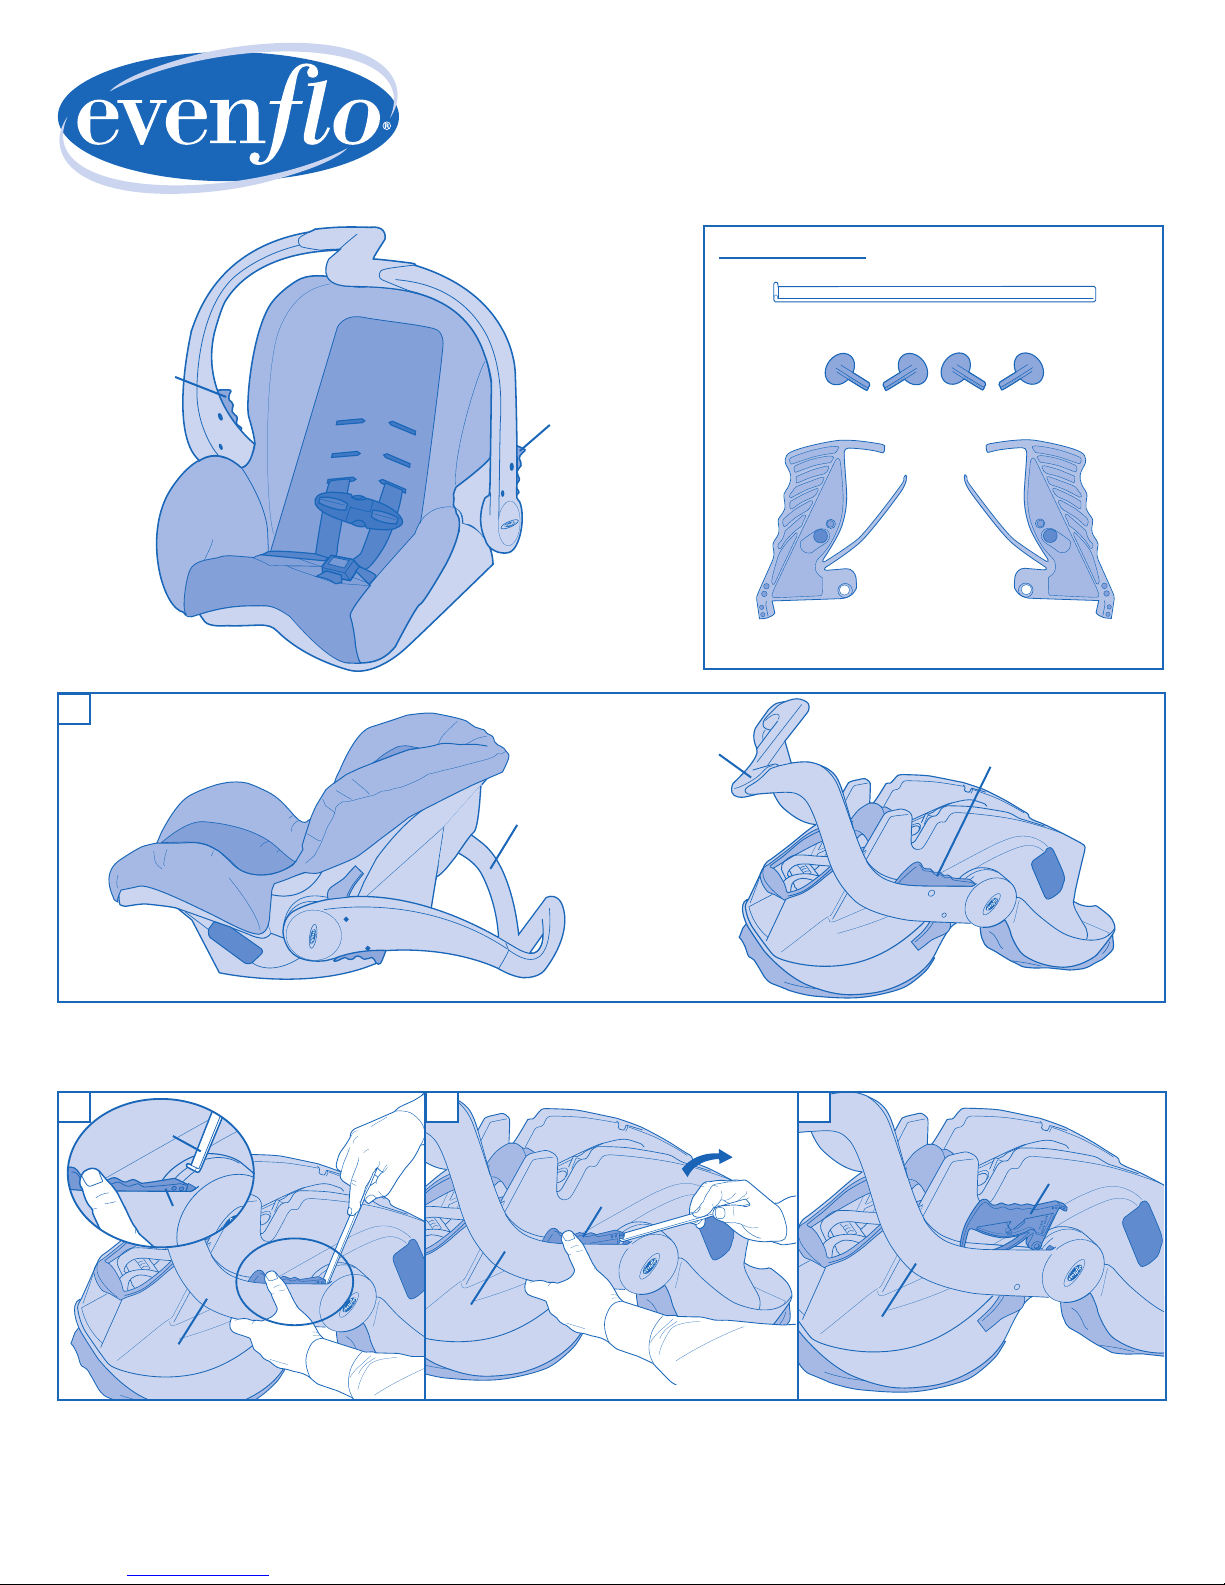
Fasteners (4)
Left Trigger (1)
2505-23
Right Trigger (1)
2505-24
Removal Tool (1)
2505-23
2505-2
4
Fasteners (4)
Removal Tool (1)
Right Trigger
Embrace™ Handle Trigger
Replacement Instructions
Para instrucciones en Español, llamar al: 1-800-233-5921.
Kit Contents:
Removal Tool (1)
1
Left Trigger
Handle
➚
Handle
Left Trigger (1)
2505-23
Fasteners (4)
Right Trigger (1)
2505-24
Left Trigger
1. Place and lock the handle in its lowest position then place the child restraint upside down with the handle pointing
to the left, as shown.
2
Removal
Tool
Left Trigger
Handle
➚
2. Squeeze the left trigger (on your near
side) of the Embrace™. Insert the hooked
tip of the removal tool (supplied)
beneath the bottom of the left trigger,
as shown.
3
Left Trigger
Handle
3. Hold the handle securely and
and out on the bottom of the trigger
until it pops free from the handle.
Note: You might have to use
some force to pop the trigger free.
pry up
4
➚
Handle
4. Remove the left trigger from the handle
and discard immediately.
Note:
Do not remove the right trigger
at this time.
Left Trigger
Page 2

2505-23
2505-24
5
THIS
SIDE OUT
Left Trigger
Right Trigger
6 7
Left Trigger
➚
New
Green Dot
2505-23 2505-24
5. This replacement kit comes with a
new left trigger (2505-23) and a
new right trigger (2505-24).
Locate the part numbers to make sure
you have the correct new triggers.
6. Insert the new left trigger (2505-23)
8 9
Handle
Handle
into the handle.
Note:
Make sure the side of the trigger
that says “THIS SIDE OUT” is facing to
the outside of the handle, as shown.
Handle
Handle
Handle and Trigger Holes
Aligned Here
7. Squeeze the trigger until the green dot
is aligned in the upper hole, and the
trigger hole is aligned with the lower
hole in the handle, as shown.
TIP
Removal
Tool
Fastener
Fastener
8. While holding the trigger in place,
insert one fastener through the inside
lower hole on the handle and into the
trigger, as shown.
Note:
Push the fastener until it is flat
against the handle.
Fastener
9. While holding the inside fastener
in place, as shown, insert a fastener
through the outside hole in the
handle and rotate the fastener slightly
until it locks into place with the inside
fastener. Squeeze the two fasteners
together until both are flush with the
handle.
Note:
You will hear an audible
“clicking” while the fasteners are
interlocking.
Important: Both fasteners should
be locked together, flat against the
handle. If they are, the installation is
complete. If there is a gap between
either fastener and the handle,
proceed to the TIP.
Place child restraint on its side then slide
the removal tool behind the handle and
beneath the fastener, as shown. While
holding the tool against the bottom
fastener, press the top fastener completely
into the hole with both thumbs.
Repeat steps 1 – 9 for the
right trigger (2505-24).
A video is available at
www.embracehandle.com.
25700139 5/07
 Loading...