

Evelo Quest One Assembly Instructions Manual
Assembly of EVELO Quest One Bicycle
The focus of this document is to assist with the assembly of your new EVELO
Quest One. The scope is intentionally narrow -- The “Owner’s Manual” that-
was included with your bike covers a much broader spectrum of topics: fit
adjustments, battery care, controls etc.
Our Team is here to help 7 days a week!
contact@evelo.com
877-991-7272
Feel Free to reach out!
Unboxing Your EVELO
1. Begin unboxing the bike by cutting the
banding then opening the box. Use caution
regarding the staples as they can be very
sharp.
2. Remove the small boxes and seat/seatpost
3. The easiest way to get the bike out of the
box is to lie the box down on its side and
then slide it out. See image ----->
4. Remove packaging including zip ties.
Caution: sometimes the zip ties are used to
hold cables or wires in place. A good indicator is if the zip tie is touching a painted
surface of the bike—those should remain in
place.
5. Empty all the boxes so you know what
you are working with.
6. Your Owner’s Manual is on the outside of
the box.
1

Prepare Bike for Assembly
Pull the fender off the top of the tire and set
aside. The crank is threaded through the
spokes of the front wheel. To easily get the
wheel disengaged, spin the cranks counterclockwise until the cranks point towards the
front of the bicycle instead of vertical/upwards. This will allow for the most amount of
space to pull the wheel out.
In the box, the fork and handlebar mast are
spun backward, which means you will need to
rotate the assembly clockwise to correctly orient them. If you spin counterclockwise you will
end up with the wires run the wrong way on
the bicycle. The picture here shows the correct
orientation of the fork.
The handlebars were also passed under the
frame to the other side of the bicycle. Notice
the light on the front side of the fork and the
handlebar mast on the right/drive side of the
frame.
When oriented correctly the fork angles towards the front and the brake caliper on the
fork is on the le/non drive side of the frame.
2
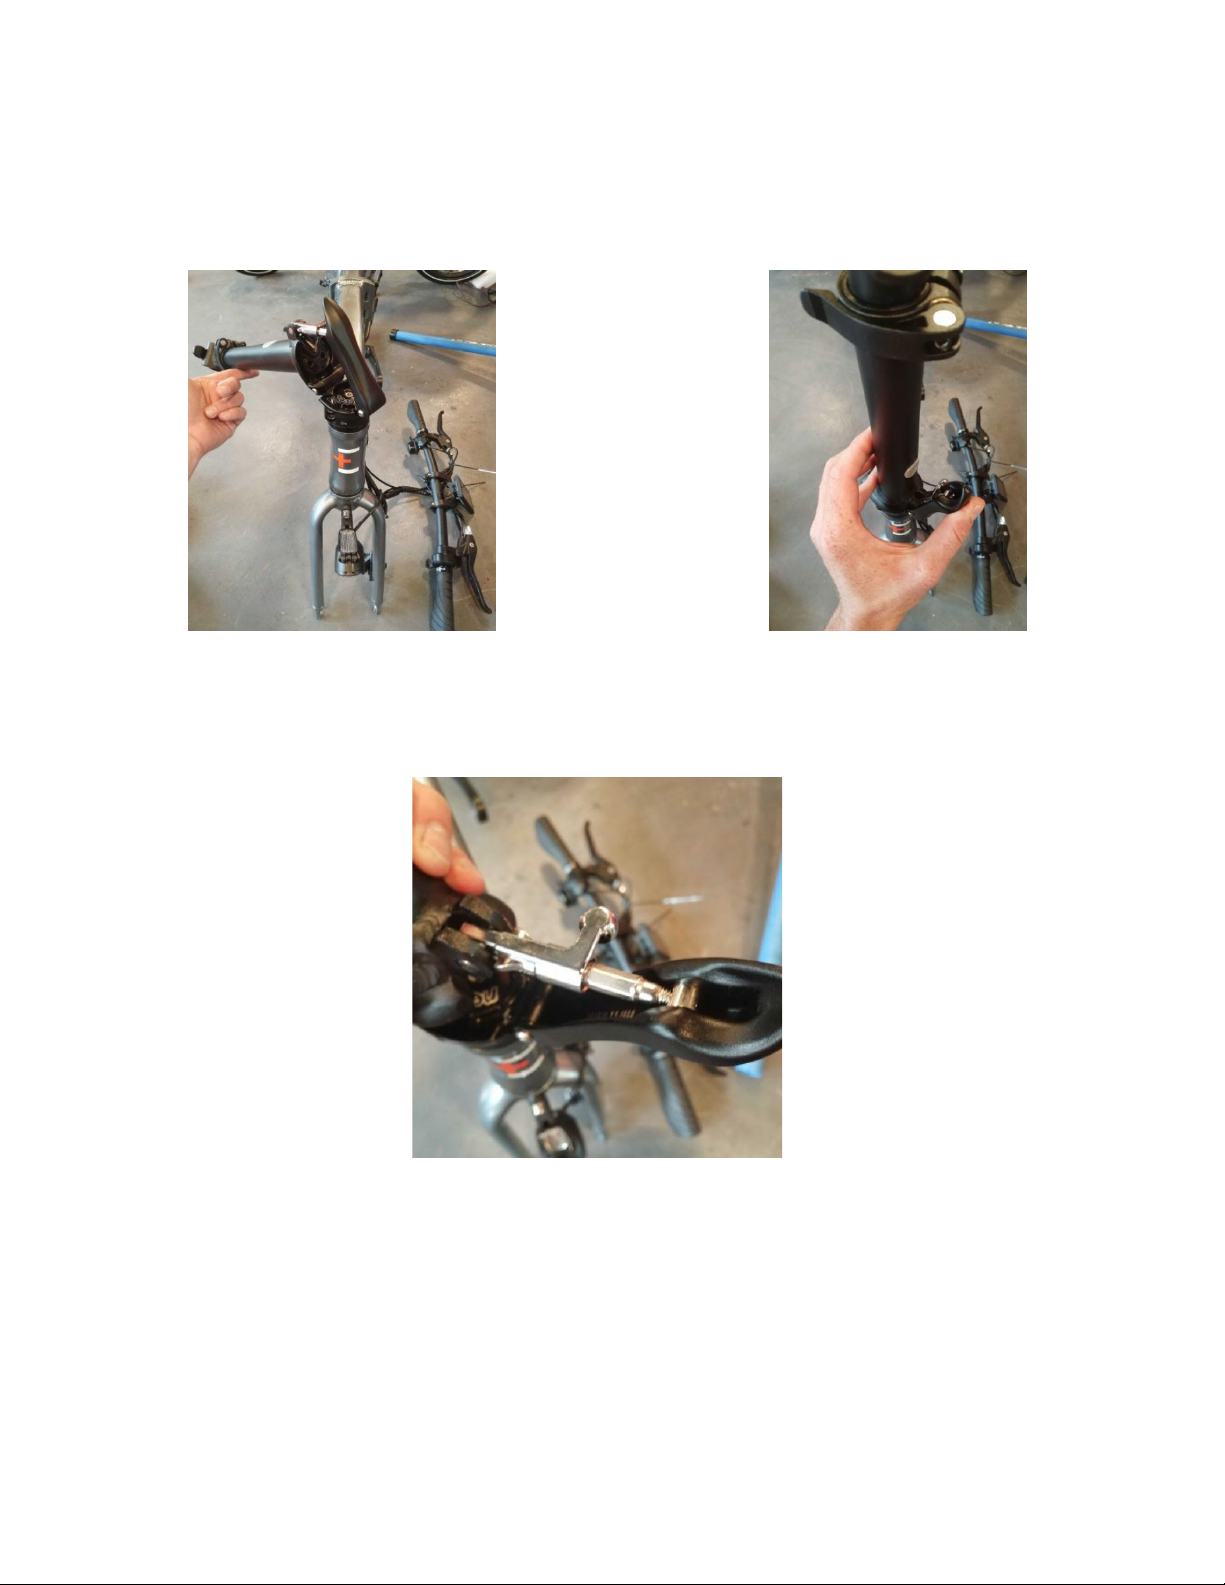
Prepare Handlebar Assembly
Li the handlebar mast into the vertical position and snap the closing lever shut. There should be
distinctive click when it is closed all the way.
If the closing lever is too tight or loose, the silver hexagonal linkage in the picture below is used to adjust the
proper tension on the closing latch.
3
 Loading...