

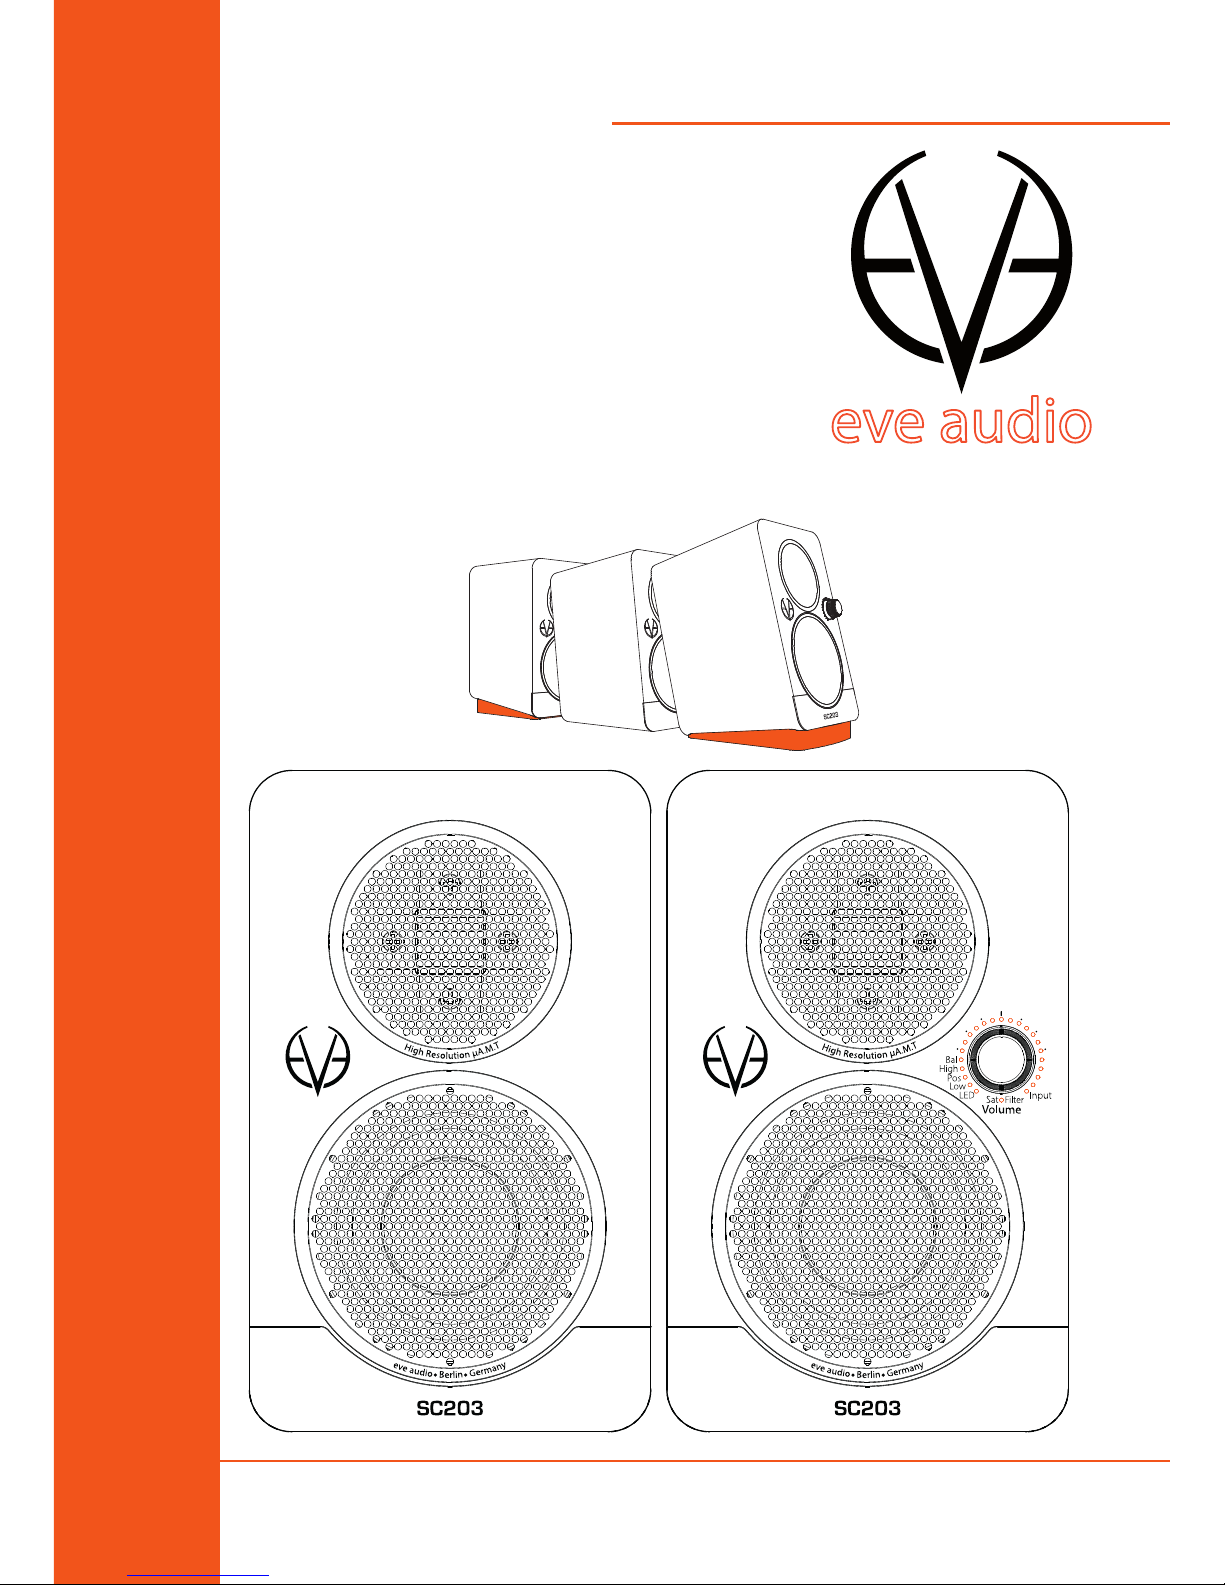
Eve A SC203 Product Manual
EVE AUDIO PRODUCT MANUAL
SC203
NOV 2015

SC203
2
SAFETY INSTRUCTIONS
1. READ these instructions.
2. KEEP these instructions.
3. HEED all warnings.
4. FOLLOW all instructions.
5. DO NOT use this apparatus near water.
6. CLEAN ONLY with dry cloth.
7. DO NOT block any ventilation openings. Install in accordance with the
manufacturers instructions.
8. DO NOT install near any heat sources such as radiators, heat registers,
stoves, or other apparatus (including ampliers) that produce heat.
9. DO NOT defeat the safety purpose of the polarized or grounding-type
plug. A polarized plug has two blades with one wider than the other. A
grounding type plug has two blades and a third grounding prong. The
wider blade or the third prong are provided for your safety. If the provided
plug does not t into your outlet, consult an electrician for replacement of
the obsolete outlet.
10. PROTECT the power cord from being walked on or pinched particularly at
plugs, convenience receptacles, and the point where they exit from the
apparatus.
11. ONLY USE attachments/accessories specied by the manufacturer.
12. USE ONLY with the cart, stand, tripod, bracket, or table specied by the
manufacturer, or sold with the apparatus. When a cart is used, use caution
when moving the cart/apparatus combination to avoid injury from tipover.
13. UNPLUG this apparatus during lightning storms or when unused for long
periods of time.
14. REFER all servicing to qualied service personnel. Servicing is required
when the apparatus has been damaged in any way, such as power-supply
cord or plug is damaged, liquid has been spilled or objects have fallen into
the apparatus, the apparatus has been exposed to rain or moisture, does
not operate normally, or has been dropped.

EVE Audio product manual
3
15. To reduce the risk of re or electric shock, do not expose this apparatus
to rain or moisture. The apparatus shall not be exposed to dripping or
splashing and that objects lled with liquids, such as vases, shall not be
placed on apparatus.
16. Where the MAINS plug or an appliance coupler is used as the disconnect
device, the disconnect device shall remain readily operable.
17. DO NOT overload wall outlets or extension cords beyond their rated
capacity as this can cause electric shock or re.
18. No naked ame sources, such as lighted candles, should be placed on the
apparatus.
19. Minimum distances around the apparatus for sucient ventilation.
20. The ventilation should not be impeded by covering the ventilation
openings with items, such as newspapers, table cloths, curtains, etc.
21. Correct Disposal of this product. This marking indicates that this
product should not be disposed with other household wastes
throughout the EU. To prevent possible harm to the environment or
human health from uncontrolled waste disposal, recycle it
responsibly to promote the sustainable reuse of material resources. To
return your used device, please use the return and collection systems or
contact the retailer where the product was purchased. They can take this
product for environmental safe recycling.

SC203
4
TABLE OF CONTENTS
1. INTRODUCTION ............................................................................5
2. QUICK START ................................................................................. 6
2.1. First Steps .............................................................................................................................6
2.2. Speakers Connection ....................................................................................................... 6
2.3. Powering On .......................................................................................................................6
3. OPERATION ...................................................................................7
3.1. First Steps .............................................................................................................................7
3.2. Operating Modes ..............................................................................................................8
3.3. Powering on/o: Standby Mode .................................................................................8
3.4. Volume Mode .....................................................................................................................8
3.5. Settings Menu ................................................................................................................. 10
3.6. Input ................................................................................................................................... 10
3.7. Position .............................................................................................................................. 11
3.8. Filters .................................................................................................................................. 11
3.9. Low Filter ........................................................................................................................... 12
3.10. High Filter.......................................................................................................................... 13
3.11. Low and High Filter Combinations .......................................................................... 13
3.12. Balance ............................................................................................................................... 14
3.13. LED Mode .......................................................................................................................... 15
3.14. Saving Your Settings ..................................................................................................... 15
3.15. Powering on/o .............................................................................................................. 15
3.16. DIP Switches ..................................................................................................................... 16
4. POSITIONING ..............................................................................17
4.1. Wall & Stand Mounting ................................................................................................ 17
4.2. FlexiPads ............................................................................................................................ 17
4.3. Speaker Positioning ...................................................................................................... 17
4.4. Listening position (Pos setting) ................................................................................ 18
4.5. Stereo Setup..................................................................................................................... 19
4.6. Stereo Setup + Subwoofer (2.1) ................................................................................ 19
4.7. Room Acoustics .............................................................................................................. 20
5. TECHNICAL SPECIFICATIONS .....................................................21
6. DECLARATION OF CONFORMITY ...............................................22
7. WARRANTY ..................................................................................23

EVE Audio product manual
5
INTRODUCTION
1. INTRODUCTION
Thank you for your time and interest in the EVE Audio product range.
EVE Audio is a loudspeaker manufacturer based in Berlin, Germany, that
specializes in the development and design of unique studio monitors.
The use of rst-class components is our highest priority because we rmly
believe this is the only way to manufacture rst-class products.
Our SC203 master/slave loudspeaker system is one of those few examples
where small also means powerful. With its compact size and small footprint,
it is the perfect solution for professional desktops with limited space and
also for discerning home and gaming users.
The SC203 uses a 3” multilayer woofer capable of handling long linear
excursions and our new μA.M.T. driver based on our famous Air Motion
Transformer. Since each driver is driven by its own 30W amplier, the
SC203 is a full-edged active system including four power amps. Both
loudspeakers are equipped with a rear passive radiator to allow the speaker
response to reach 62Hz without bass-reex wind noise. The system is
controlled by a high-resolution DSP as in all SC Series monitors.
The SC203 system provides you with three selectable inputs (analog
RCA, digital optical, USB up to 96kHz) and a subwoofer output to create
a powerful 2.1 surround system. It is sold with FlexiPads to decouple the
desktop loudspeakers from their base and angle them precisely at 0°, 7.5°
or 15°. The optional mounting adapter allows you to attach the SC203
directly to a microphone or speaker stand. Combined with our wall-mount
adapter, it also allows you to mount the speaker on a wall.
We wish you enjoy your new EVE Audio desktop loudspeaker system. If
you have any questions regarding our products, do not hesitate to contact
your nearest dealer or get directly in touch with us... We will be more than
happy to help you out!
All the best from Berlin.
The EVE Audio Team

SC203
Powering On
6
QUICK START
2. QUICK START
If you already have experience with studio monitors, the Quick Start guide
ought to be more than enough to get you started.
For unexperienced users we recommend reading the whole user’s manual
in order to prevent any misuse.
2.1. First Steps
Check the package components (Master & Slave loudspeakers, user’s
manual, two FlexiPads, external PSU, stereo link cable, USB cable, 1/8” TRS
audio cable).
For ergonomic reasons and proper balance control, we recommend you
to use the Master speaker as the right speaker of the Master/Slave system.
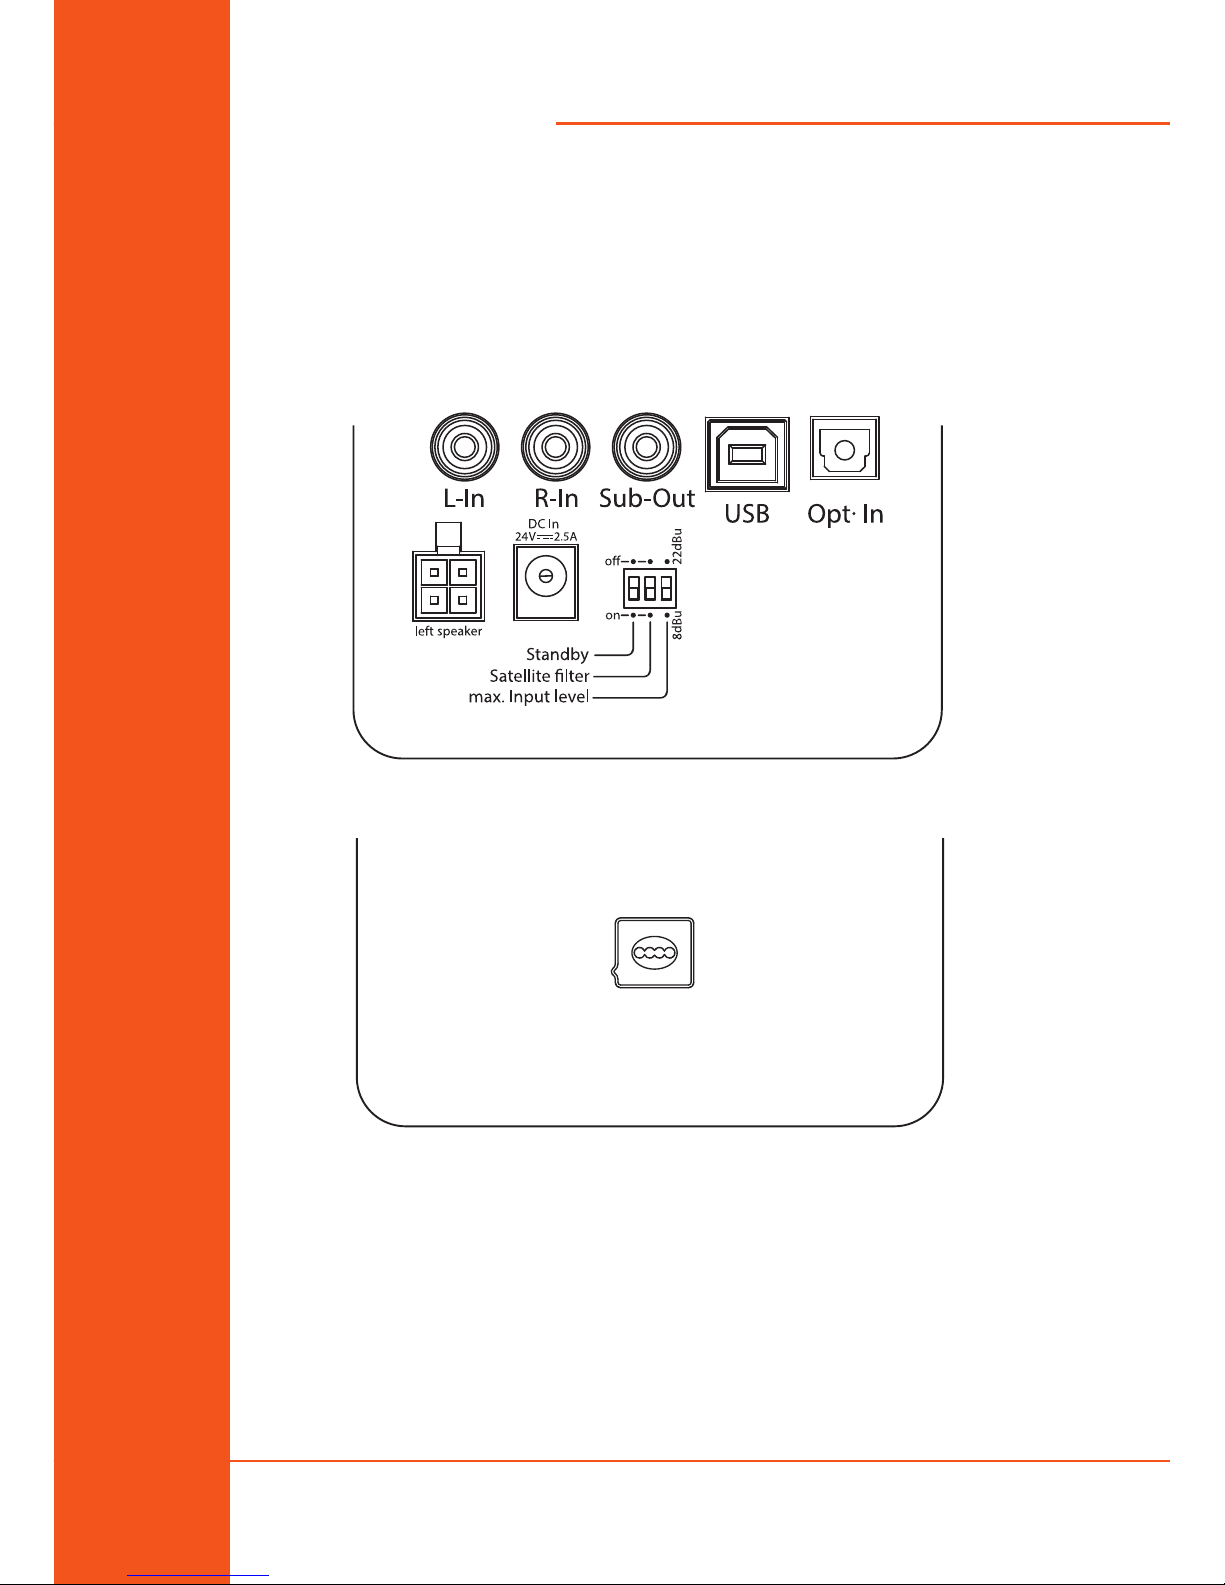
Check the setting of the Satellite Filter DIP Switch (O ).
2.2. Speakers Connection
Connect one of the Master loudspeaker rear inputs (analog L/R, digital
optical or USB) to the output of a playback source, for instance an audio
interface, a mixer, a synth, a media player or a computer. Choose the input
connection matching the output format of your signal source. The output
level should be as low as possible.
Link both Master and Slave loudspeaker using the provided 4-pin
connection cable.
2.3. Powering On
Connect the Master loudspeaker (right speaker) to AC mains power using
the provided external PSU.
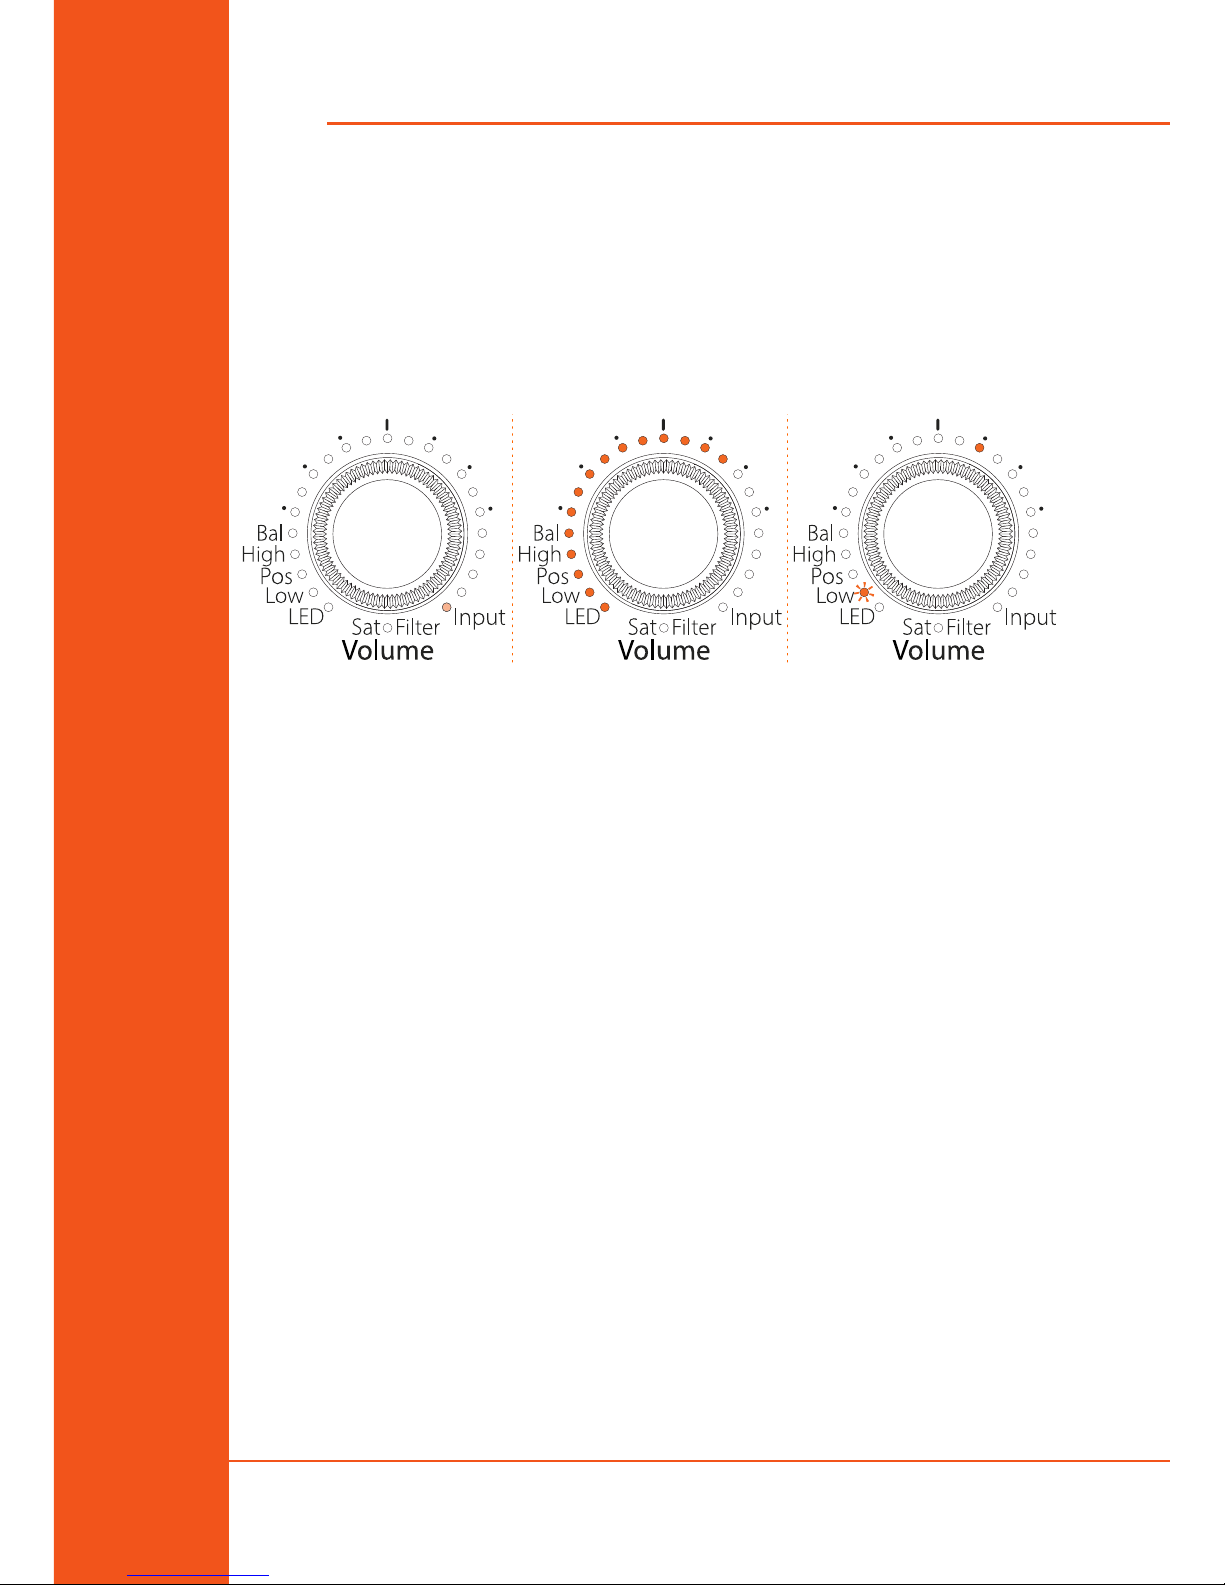
The LEDs around the Volume control on the Master speaker front panel
will light up counterclockwise. If the LED on the right end is dimly lit, this
indicates that the System is in Standby Mode. Press the Volume control to
turn the loudspeakers on. If you turn the Volume control counter clockwise
until the LED on the left end lights up dimly the loudspeakers will be muted.
In case the source signal is analog, use the Max. Input Level DIP switch
on the Master speaker rear panel to set the maximum input sensitivity
of the system (8dBu or 22dBu) according to the nominal output level of
the source. Then increase the output level on the source device until the
LED ring starts to blink, then reduce the output level a bit. The maximum
operating level for the input (i.e. the analog to digital converter) is now
EVE Audio product manual
First Steps
7
OPERATION
set optimally. To set the desired listening volume use the Volume control
on the Master loudspeaker. The LED ring indicates the volume setting. It
blinks when the input voltage is too high and overloads the AD converter.
3. OPERATION
3.1. First Steps
Master loudspeaker (right): Rear connections & DIP switches
Slave loudspeaker (left): Rear connector
Check the package components (Master & Slave loudspeakers, user’s
manual, two FlexiPads, external PSU, stereo link cable, USB cable, 1/8” TRS
audio cable).
Check the setting of the DIP Switches (Standby and Satellite lter: O
position; Max. Input Level: see “2.3. Powering On” on page 6).
Signal connections: three dierent input formats are available on the rear
side of the Master loudspeaker for dierent source signals.
SC203
Volume Mode
8
OPERATION
• L-In & R-In RCA connectors: for analog unbalanced line-level signal sources.
• Opt. In connector: optical TOSLink for digital signal sources.
• USB port: Type B connector for digital USB signal sources.
Depending on the position of the rear Max. Input Level DIP switch, the
maximum level of the analog source signal should not exceed 8 dBu or
22dBu. If the input is overloaded the LED ring will start blinking.
3.2. Operating Modes
Standby Mode | Volume Mode (-10dB) | Setting Menu (Low lter @ +1dB)
3.3. Powering on/off: Standby Mode
Press and hold the control three seconds in order to put the system in
Standby Mode. The volume will decrease gradually while the LED ring
lights up once around the Volume control. Afterwards, the LED on the right
end will light dimly and the power consumption is reduced to 1watt.
! To exit the Standby Mode press briey the Volume control once again. The
level will increase gradually.
! With the rear Standby DIP switch in On position, the system automatically
switches to standby mode when no input signal was detected for 10mn
(available only for the analog input).
3.4. Volume Mode
• Level adjustment
The maximum input level for analog signal sources is 8 dBu (consumer
level) or 22dBu (professional studio level), depending on the position of
the rear Max. Input Level DIP switch (see “2.3. Powering On” on page 6).
Higher levels produce distortion due to the overloading of the analog to
digital converter.
After you set the proper input sensitivity, the LED ring might start blinking
whenever the AD converter is overloading. If that is the case, the output
level of the source should be reduced.
 Loading...