

Page 1
Tec hno lo
gyM
adeEa
sy...
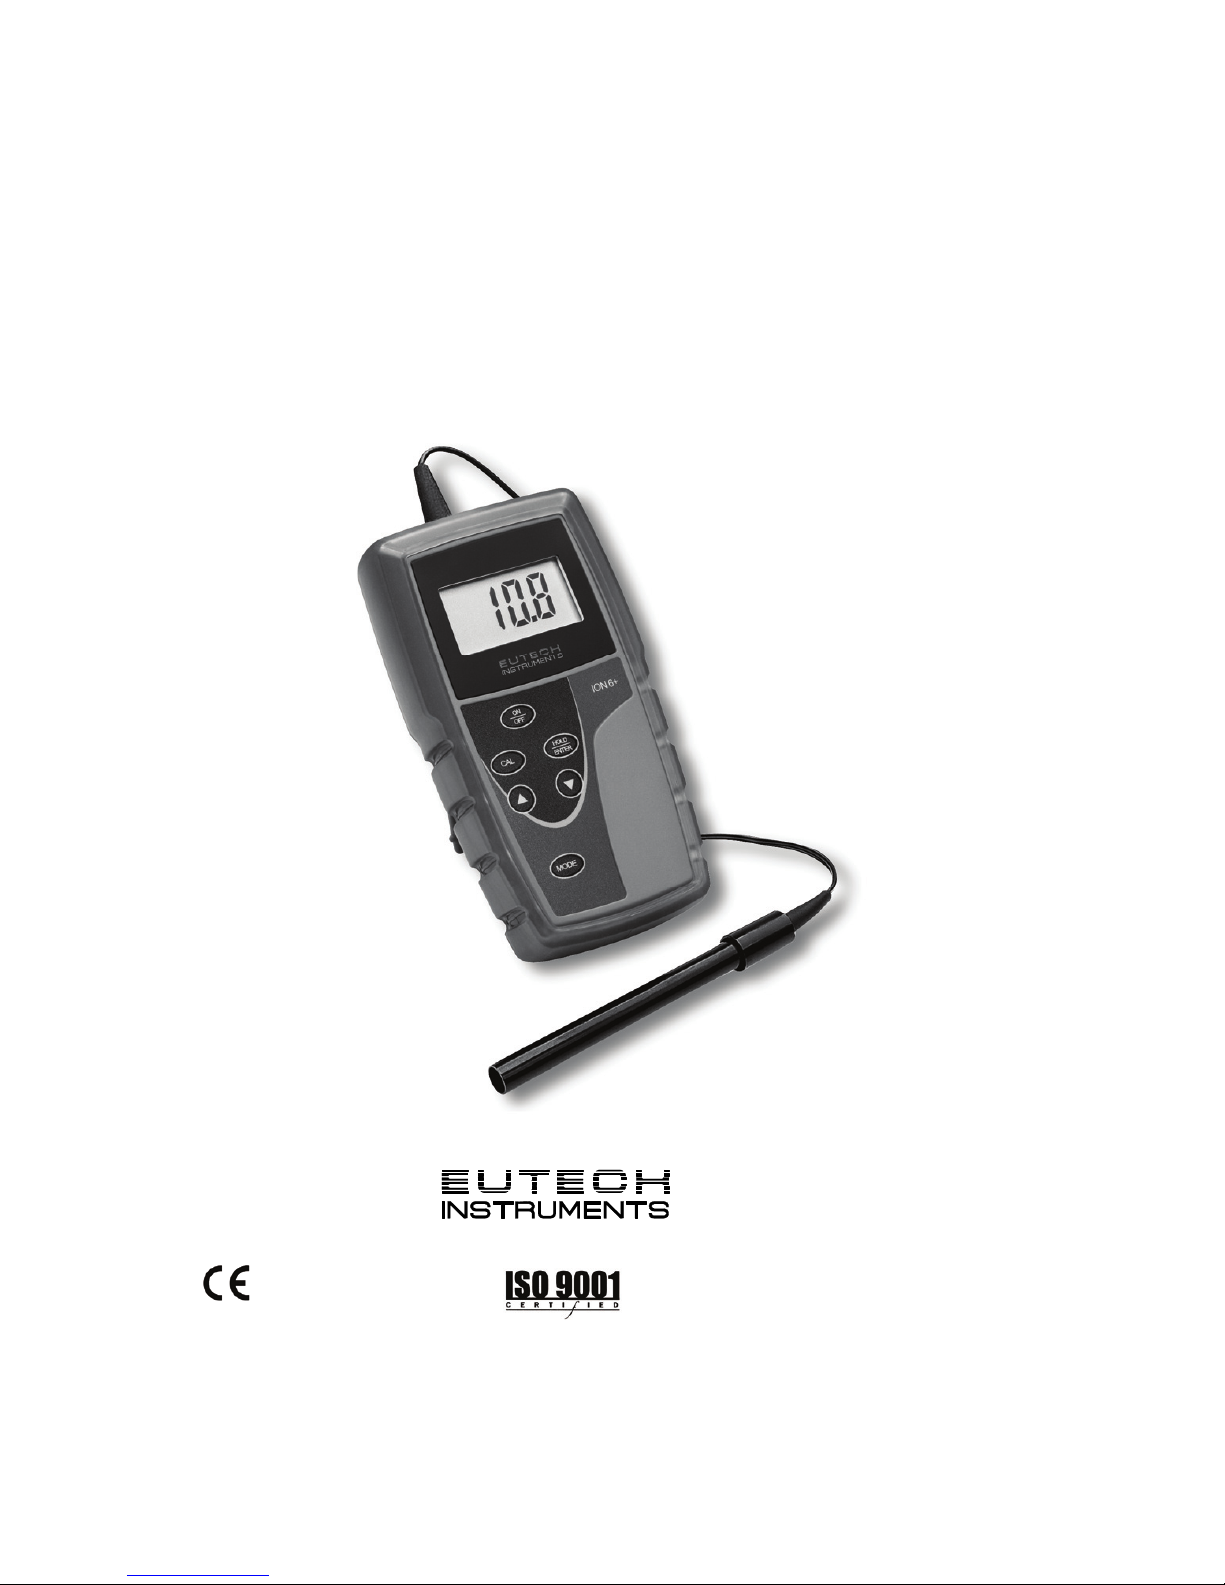
Instruction Manual
pH 5+ pH/Temp
pH 6+ pH/mV/Temp
Ion 6+ pH/Ion/mV/Temp
68X243633
Rev 1 12/08
Part of Thermo Fisher Scientific
Page 2

Page 3

Preface
This instruction manual serves to explain the use of the pH 5+, pH 6+ and Ion 6+
meters.
It functions in two ways: first as a step by step guide to help you operate the meter;
second, it serves as a handy reference guide.
This manual is written to cover as many anticipated applications of the pH 5+, pH6+ and
Ion 6+ meters as possible. If there are doubts in the use of this meter, please do not
hesitate to contact the nearest Eutech Instruments Authorized Distributor.
Eutech Instruments will not accept any responsibility for damage or malfunction to the
meter caused by improper use of the instrument.
The information presented in this manual is subjected to change without notice as
improvements are made, and does not represent a commitment on the part of Eutech
Instruments Pte Ltd.
Copyright © 1999
Eutech Instruments Pte Ltd
Rev. 1 12/08.
Page 4

Instruction Manual pH 5+, pH 6+, Ion 6+
-1-
Table of Contents
1. INTRODUCTION ......................................................................... 2
2. GETTING STARTED................................................................... 3
2.1 Description of Keypad Functions ....................................................................3
2.2 Description of LCD Annunciators....................................................................4
2.3 Inserting & Removing the Rubber Armor / Stand............................................4
2.4 Inserting New Batteries ..................................................................................5
2.5 Battery Replacement......................................................................................5
2.6 Connecting the Electrode and Temperature Sensor.......................................5
2.7 Conditioning the pH Electrode........................................................................6
2.8 Switching the Meter On ..................................................................................6
3. CALIBRATION............................................................................ 7
3.1 pH Calibration.................................................................................................7
3.1.1 pH Calibration Procedure............................................................................7
3.1.2 Changing the pH Buffer Group....................................................................8
3.1.3 Resetting User Calibrated Values ...............................................................9
3.2 Ion Calibration (Ion 6+)...................................................................................9
3.2.1 Ion Calibration Procedure .........................................................................10
3.3 Millivolt (mV) Calibration (pH 6+ only)...........................................................12
3.4 Temperature Calibration...............................................................................13
3.4.1 With Temperature Probe...........................................................................13
3.4.2 Without Temperature Probe (no ATC) ......................................................14
4. MEASUREMENT ...................................................................... 15
4.1 Taking Measurements..................................................................................15
4.2 Millivolt (mV) Reference Check (Ion 6+ only)................................................15
4.3 Holding a Reading........................................................................................15
4.4 Releasing a Held Reading............................................................................15
5. ELECTRODE CARE AND MAINTENANCE ............................. 16
6. TROUBLESHOOTING .............................................................. 16
7. SPECIFICATIONS .................................................................... 17
8. REPLACEMENTS AND ACCESSORIES ................................. 18
9. WARRANTY.............................................................................. 19
10. RETURN OF ITEMS.................................................................. 19
Page 5

Instruction Manual pH 5+, pH 6+, Ion 6+
-2-
1. INTRODUCTION
Thank you for purchasing the pH 5+, pH 6+, or Ion 6+ meter. These microprocessorbased handheld meters are economical and easy to use. It has a large custom LCD
(Liquid Crystal Display) for clear and easy reading.
The pH 5+ measures pH and temperature (
o
C). The pH 6+ and Ion 6+ meters measure
pH, mV (ORP) and temperature.
Additionally, the Ion 6+ allows direct ion concentration measurement of various ions
(mono and divalent). The mV mode is also useful for diagnosis of ion selective
electrodes (ISE).
Meters include 4 alkaline “AAA” batteries, a rubber armor / stand, instruction manual,
and warranty card. Please refer to Section 8 Replacements and Accessories for
information on additional accessories and calibration solutions.
Page 6
Instruction Manual pH 5+, pH 6+, Ion 6+
-3-
2. GETTING STARTED
2.1 Description of Keypad Functions
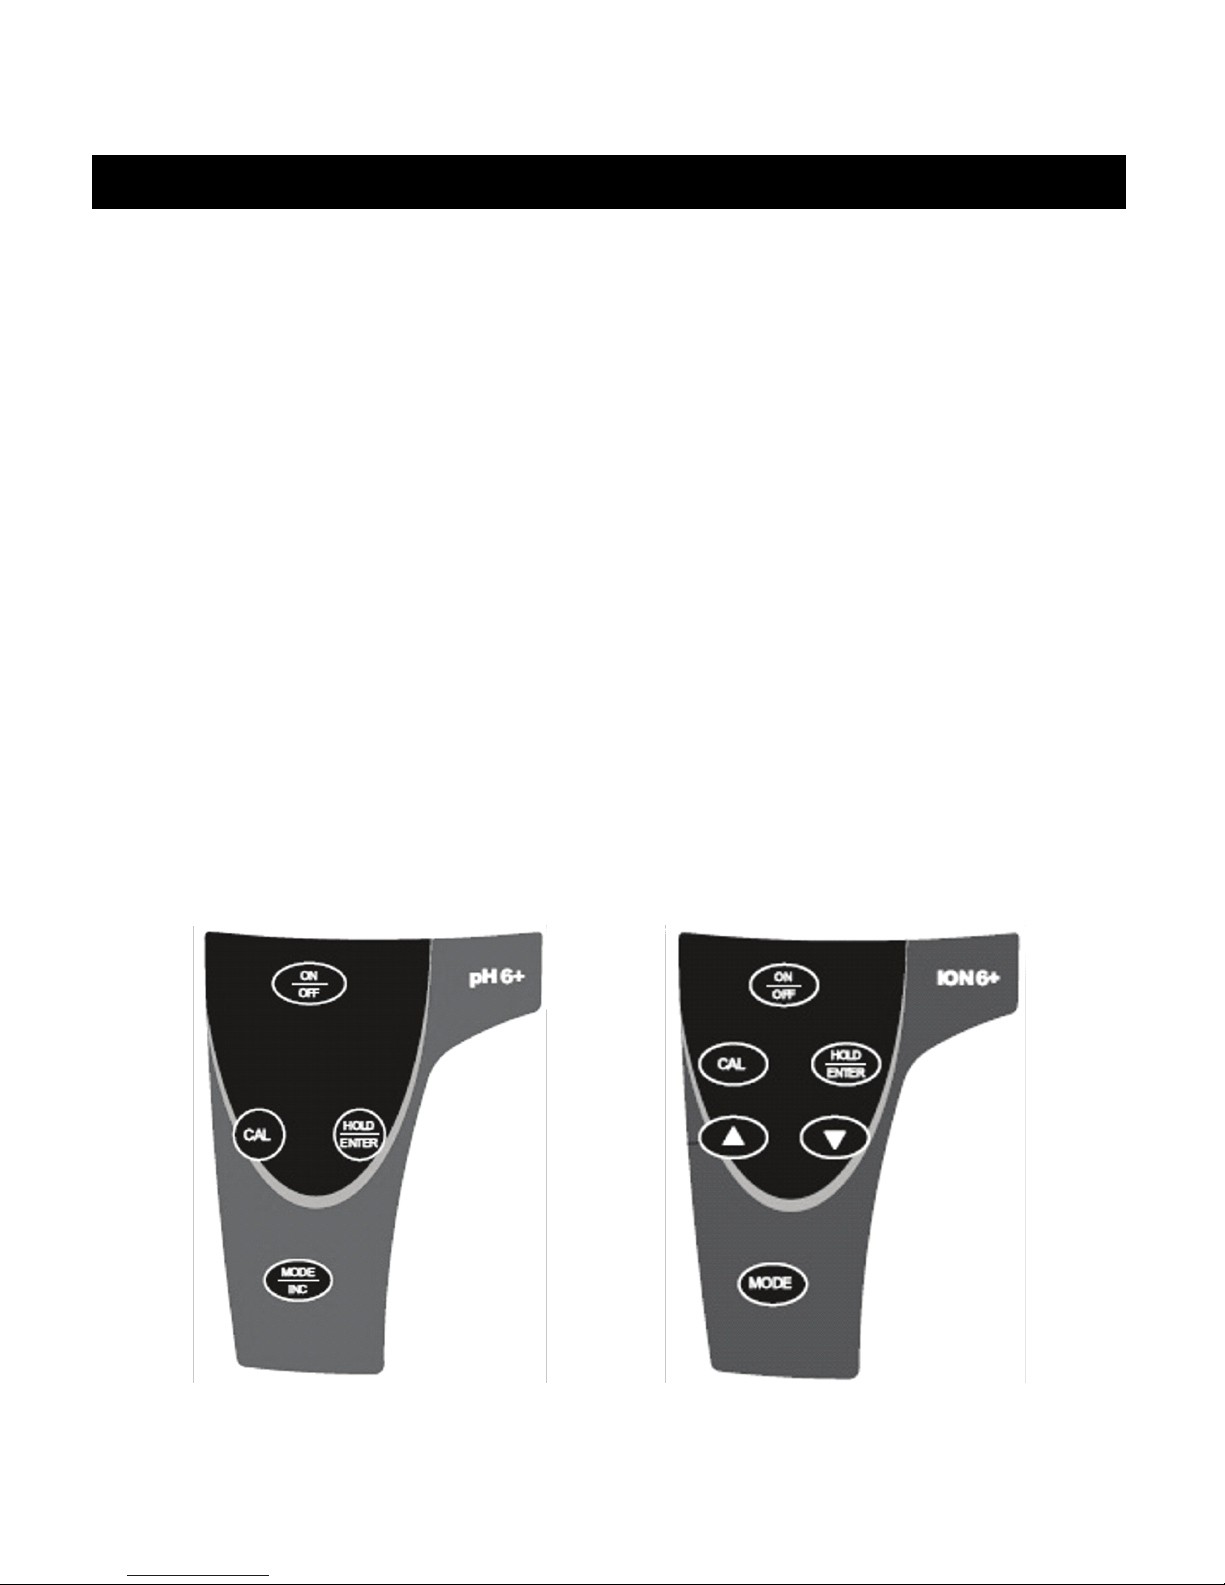
The pH 5+ and pH 6+ have four keys while the Ion 6+ meter has six keys on its splashproof keypad. The common keys are ON/OFF, HOLD/ENTER, CAL and MODE. The
Ion 6+ meter adds S and T keys.
ON/OFF: Powers meter on and off. Meter starts up in the mode that you last switched
off from.
MODE/INC: Selects measurement mode for Ion, mV, pH and Temperature. Increment
button for mV calibration (pH 6+ only).
CAL: Allows calibration for Ion, pH, mV or Temperature, or to abort calibration and
return to measure without confirming a value.
S (Ion 6+ only): Increment values during calibration mode.
T (Ion 6+ only): Decrement values during calibration mode.
HOLD: Freezes the measured reading for easy viewing.
ENTER: Confirms calibration value.
pH 5+ and pH 6+
Ion 6+
Page 7

Instruction Manual pH 5+, pH 6+, Ion 6+
-4-
2.2 Description of LCD Annunciators
The large custom LCD consists of 3½-digit segments which uses annunciators for pH,
mV or
o
C (Temperature). No annunciator is shown in Ion mode. Other annunciators
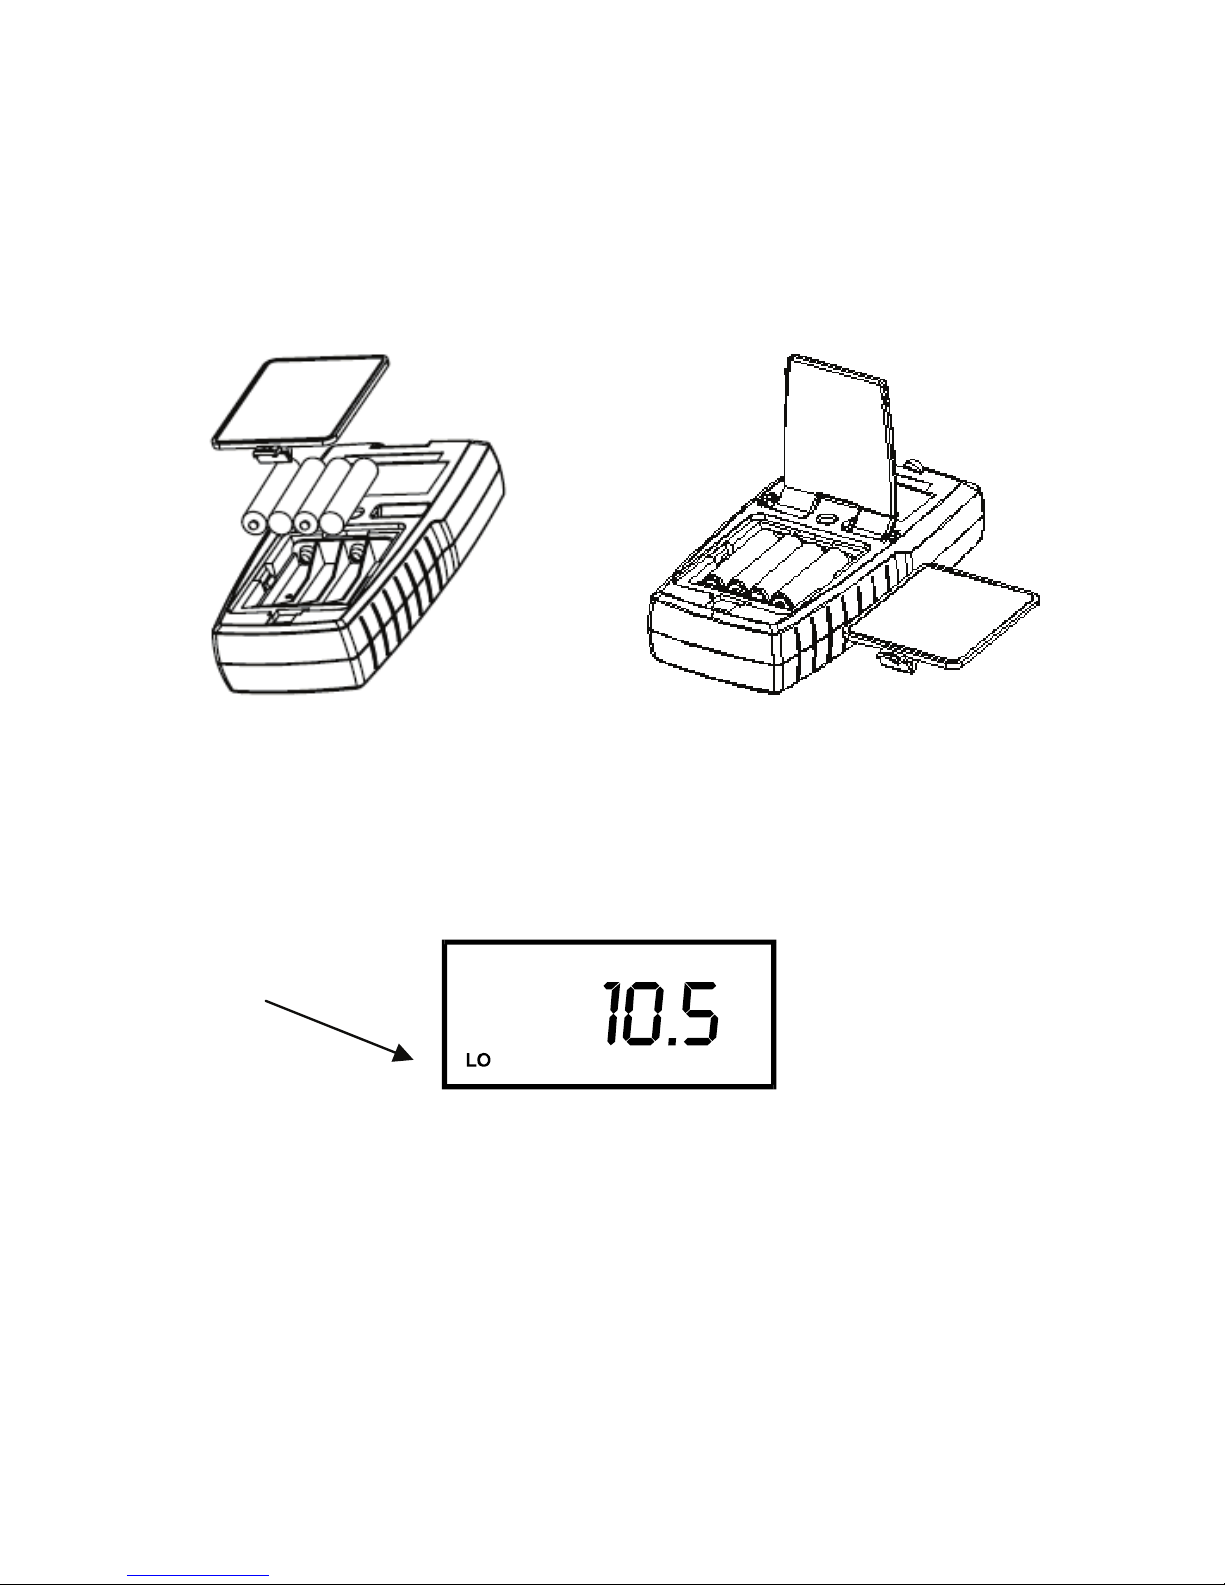
include “HO” (when HOLD function is activated) and “LO” (low battery condition).
2.3 Inserting & Removing the Rubber Armor / Stand
1. To remove meter from rubber armor, push out from the bottom edges of meter until
it is completely out of boot. Ensure that cables of ISE/pH electrode or temperature
probe are not connected. Figure A.
2. To insert meter into armor, slide in from the top of meter before pushing the bottom
edges of meter down to set it into position. Lift up the stand at the back of meter for
bench top applications if necessary. Figure B.
Figure A Figure B
Page 8
Instruction Manual pH 5+, pH 6+, Ion 6+
-5-
2.4 Inserting New Batteries
The battery compartment is found at the back of instrument. To open the battery
compartment, push in the direction of arrow and lift up the cover. Note the polarity of
battery before inserting into position. After replacement, place cover back and press
down until it locks.
2.5 Battery Replacement
The “LO” annunciator of the LCD alerts you when battery power is running low.
Caution: Power off the meter before changing battery.
2.6 Connecting the Electrode and Temperature Sensor
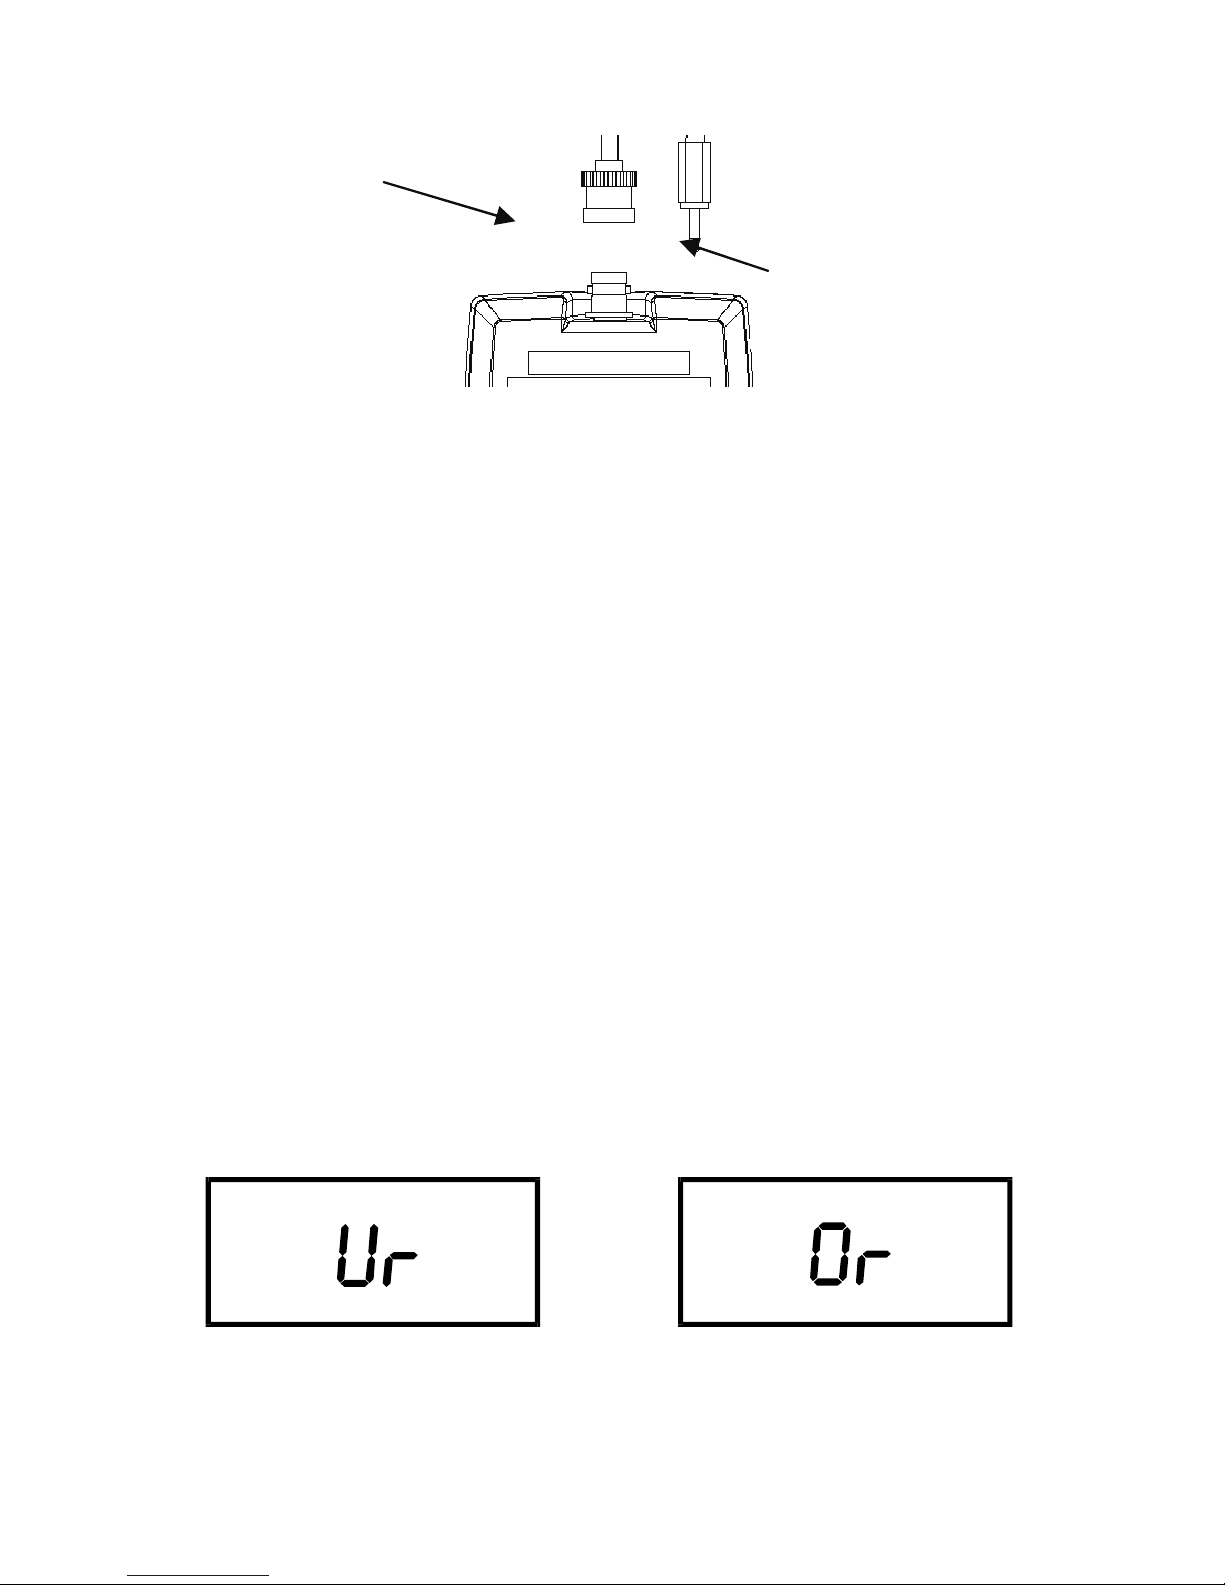
To connect the electrode into meter, align the BNC connector slots with the posts of
meter’s socket and rotate connector clockwise until it locks. Do not force when
connecting. To remove, simply rotate the connector in counter-clockwise direction until it
unlocks, and slide the connector off the socket.
Page 9
Instruction Manual pH 5+, pH 6+, Ion 6+
-6-
Insert the mini phono jack of temperature sensor into the socket on the meter. Unplug
the phono jack when not in use or you measure pH without any temperature
compensation.
2.7 Conditioning the pH Electrode
For best results condition the pH electrode before use or if it has not been in use for a
long time by soaking it into a container filled with pH 4 buffer solution for at least 1 hour
and rinse before use.
2.8 Switching the Meter On
1. Press ON/OFF key. All LCD segments will display momentarily as the meter
performs a self-diagnostic test. The Ion 6+ will display “- - -“ if the meter has not
been calibrated or if the meter has been reset.
2. Press MODE key to choose the desired measurement mode.
If a temperature probe is not connected, either 25.0
o
C (factory default) or the last
calibrated temperature value is displayed. If a temperature probe is connected, the
current measured temperature is displayed.
3. “Or” (Over range) indicates the reading exceeds the maximum.
“Ur” (Under range) indicates the reading is under minimum measurement range
(see Section 7 Specifications).
2.5 mm Phono plug
for temperature
measurement
BNC connector of
pH, ORP, or Ion
electrode
Page 10

Instruction Manual pH 5+, pH 6+, Ion 6+
-7-
3. CALIBRATION
3.1 pH Calibration
The meter is capable of calibrating up to 3 pH values using USA or NIST (nSt) pH buffer
standards or 2 pH values with Low Ionic (Pb) pH buffer standard. All new calibration
values will automatically override existing data.
USA group 4.01, 7.00, 10.01
NIST group 4.01, 6.86, 9.18
Pb group 4.10, 6.97
For best results perform at least a 2-point calibration at room temperature (25 oC) using
standard buffers. Begin with pH 7.00 (USA group), pH 6.86 (NIST group) or pH 6.97 (Pb
group).
For a 1-point calibration, calibration should be performed with a pH buffer value closest
to the expected sample value being measured.
The meter has automatic buffer recognition that identifies the correct pH buffer values
during calibration. The meter will accept calibration values that are within +/-1.0 pH units
of the expected value, otherwise the LCD will flash “Er1” and the value will not be
accepted. Press CAL to abort calibration and resume measurement.
Always use new pH buffer solutions for calibration. Do not reuse buffer solutions as it
may be contaminated and affect the calibration and accuracy of measurements.
Promptly seal containers and store solutions in a dark, dry, cool environment.
Before use, remove the plastic protective cap of pH electrode and condition the glass
bulb by soaking it in tap water or pH buffer (preferably pH 4) for 1-2 hours. This hydrates
the glass bulb if the electrode is too dry or has not been used recently. Always rinse the
probes with clean water before and after each calibration/sample measurement to avoid
cross-contamination. For details refer to section 5 on Electrode care and maintenance.
3.1.1 pH Calibration Procedure
1. Pour known pH buffer calibration standard solution into a clean, dry container, e.g.
pH 7.00. Turn on meter and select pH mode by pressing MODE key if necessary.
2. Dip the pH electrode and temperature probe into the solution. Swirl gently and wait
for reading to stabilise (approx. 30 seconds depending on your electrode condition).
Page 11
Instruction Manual pH 5+, pH 6+, Ion 6+
-8-
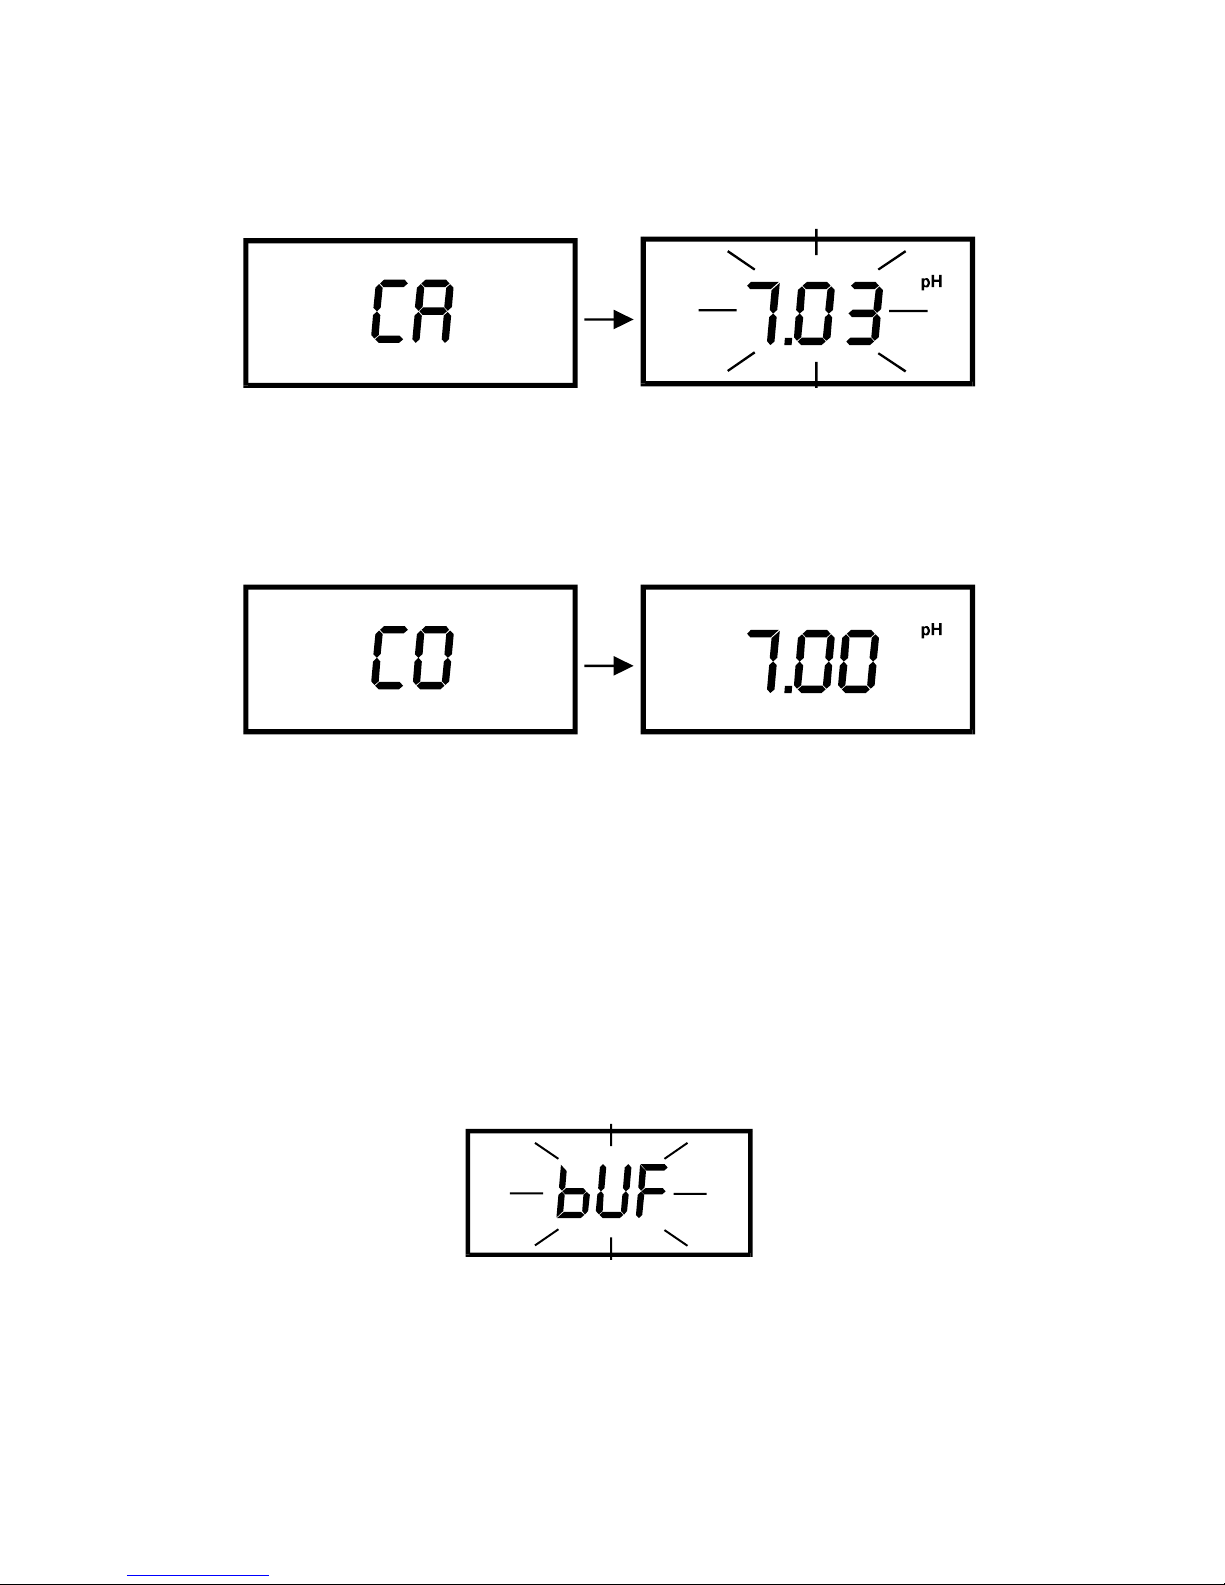
3. Press CAL to enter pH calibration mode. “CA” displays momentarily before the
display flashes the current un-calibrated reading.
4. To abort or cancel calibration without accepting the new value, press CAL key. The
meter will automatically revert to pH measurement mode.
5. Allow reading to stabilise if necessary. Press ENTER key to confirm calibration.
“CO” displays momentarily before reverting to pH measurement mode.
6. For highest accuracy, perform a multiple-point calibration. Repeat step 1 with
additional pH buffer calibration standard solutions.
3.1.2 Changing the pH Buffer Group
You can calibrate with pH standards of either USA, NIST (nSt) or Low Ionic (Pb) pH
buffer groups. The factory default is USA. To abort buffer group selection press CAL to
revert to pH measurement mode.
1. Press and hold MODE while switching the meter on using the ON/OFF key. The
display shows “bUF” blinking.
2. Press ENTER key to begin buffer group selection mode. Use the MODE key to
toggle between USA, NIST or Pb as shown below.
Page 12

Instruction Manual pH 5+, pH 6+, Ion 6+
-9-
Press ENTER key to confirm your selection. The meter will automatically revert to pH
measurement mode. The meter will save the selected group indefinitely until changed.
3.1.3 Resetting User Calibrated Values
The calibrated pH/mV/Ion values can be reset to factory default using the procedure
below. Temperature offset will not be reset using this procedure. To abort press CAL to
revert to measurement mode.
1. Press and hold CAL while switching the meter on using the ON/OFF key. The LCD
shows “rSt” blinking.
2. Press ENTER key to confirm. The meter automatically clears all stored pH/Ion
calibration or mV offset values and reverts to measurement mode.
3.2 Ion Calibration (Ion 6+)
The Ion 6+ meter is capable of 2 or 3 point ion calibration with standard solutions. The
Ion 6+ will display “- - -“ if the meter has not been calibrated or if the meter has been
reset.
To abort ion calibration press CAL to revert to measurement mode.
Ion calibration values are not stored into the meter’s non-volatile memory. Ion calibration
data is lost once the meter is reset and when the batteries are being removed and
replaced.
Error message “Er2” is displayed after a single point calibration is completed.
Recalibrate using minimum of 2 points.
Calibration values are successfully stored if the ISE (Ion Selective Electrode) slope is
within the specified tolerance of 15-90mV/decade, otherwise an error message “Er3” is
displayed.
If any of calibration points are not within 1 decade of each other, an error message “Er4”
will be shown at the end of calibration process. The ion calibration options
Page 13
Instruction Manual pH 5+, pH 6+, Ion 6+
-10-
available include 0.1, 1.0, 10.0, 100.0 ppm. Recalibrate and ensure that consecutive
calibration points are 1 decade apart from each other.
Ensure that you use new or fresh standard solutions during calibration. Do not reuse ion
standard solution as it may be contaminated and affect the calibration and accuracy of
measurements. Store standard solutions in a dry, cool environment if possible. Check
that ISE’s and ion standard solutions are kept in good condition for best results.
Before use, remove any plastic protective cap of ISE (at the tip of sensor) and refer to
electrode instruction manual for proper operation. Rinse probes before and after each
calibration or sample measurement to avoid cross-contamination.
3.2.1 Ion Calibration Procedure
The Ion 6+ can measure various ions. Ion measurement requires ion selective
electrodes (ISE)—(sold separately) which measure a specific ion of interest—such as
ammonia or fluoride.
The available ion calibration values for the Ion 6+ are 0.1, 1.0, 10.0, and 100.0 ppm.
Pick any 2 or 3 consecutive values to use and prepare the corresponding ion calibration
solutions. Turn on the meter and select ion mode by pressing MODE key if necessary.
For best results, always begin with your lowest standard value, followed by the
next lowest standard.
1. Dip the ISE into your standard solution. Add ISA if required. Swirl it gently. Press
CAL key to begin calibration mode.
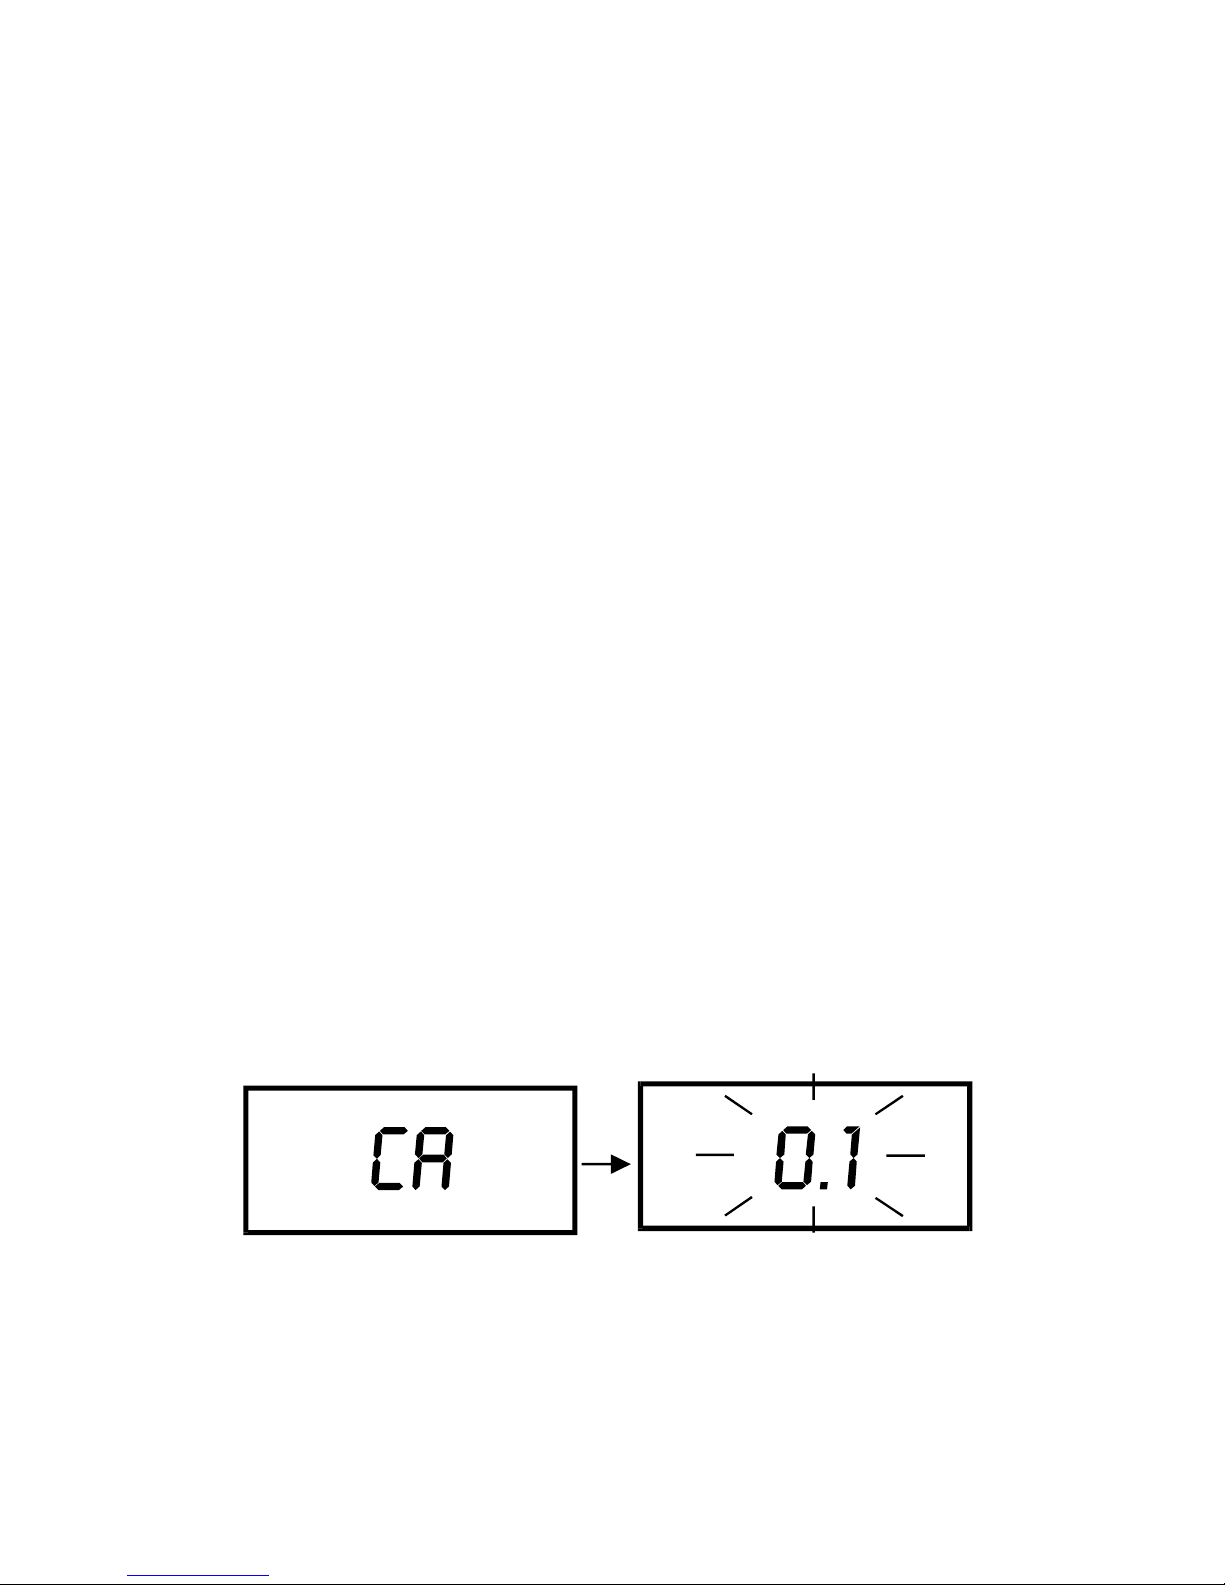
2. The display shows “CA” (to indicate calibration mode) momentarily followed by “0.1”
flashing. To select the appropriate standard, use S and T keys.
Page 14
Instruction Manual pH 5+, pH 6+, Ion 6+
-11-
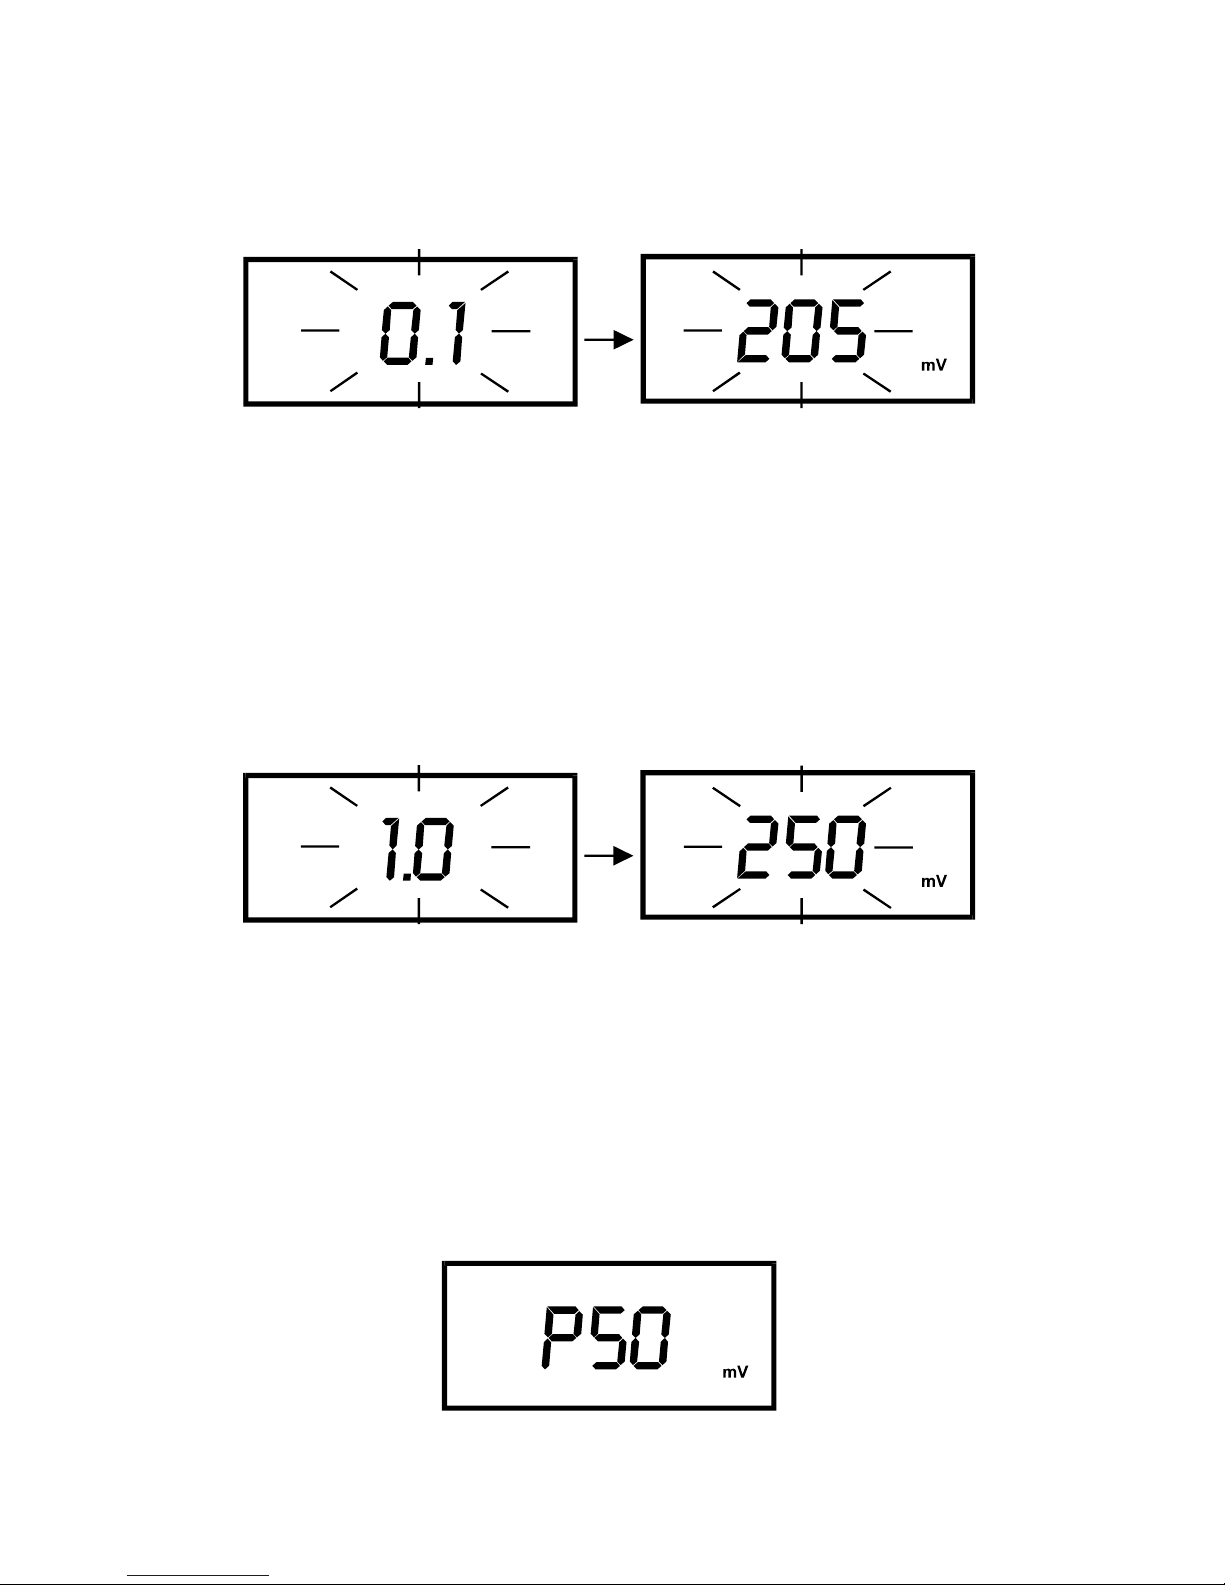
3. Press ENTER to confirm that the ppm value is the desired standard. The displayed
value now shows the corresponding mV reading for the selected ppm value
selected. Allow the reading to stabilise.
4. When the mV reading is stable, press ENTER to complete the 1
st
point calibration.
The display will show the next highest calibration standard value. Rinse the
electrode with clean water.
5. Dip the electrode into your next highest standard solution. Add ISA if required. Swirl
it gently. Press CAL key to begin calibration mode.
6. Press ENTER to confirm that the ppm value is the desired standard. The displayed
value now shows the corresponding mV reading for the selected ppm value
selected. Allow the reading to stabilise.
7. When the mV reading is stable, press ENTER to complete the 2
nd
point calibration.
The display will show the next highest calibration standard value. Rinse the
electrode with clean water.
8. To calibrate a 3
rd
point, repeat steps 6 & 7. To exit from 2-point calibration, press
CAL key.
9. The ISE slope in mV value “PXX mV” will momentarily display before reverting to
ion measurement mode.
Page 15
Instruction Manual pH 5+, pH 6+, Ion 6+
-12-
If the calibration is not successfully stored into its memory, an error message “Er3” will
be displayed. This occurs when the slope is lower than 15mV/decade or higher than
90mV/decade.
3.3 Millivolt (mV) Calibration (pH 6+ only)
mV calibration is performed for Oxidization Reduction Potential (ORP / Redox)
measurements, where you can adjust its mV value as a base value for measurements.
To abort press CAL to revert to measurement mode.
1. Press MODE key to enter mV mode, the LCD displays “mV”.
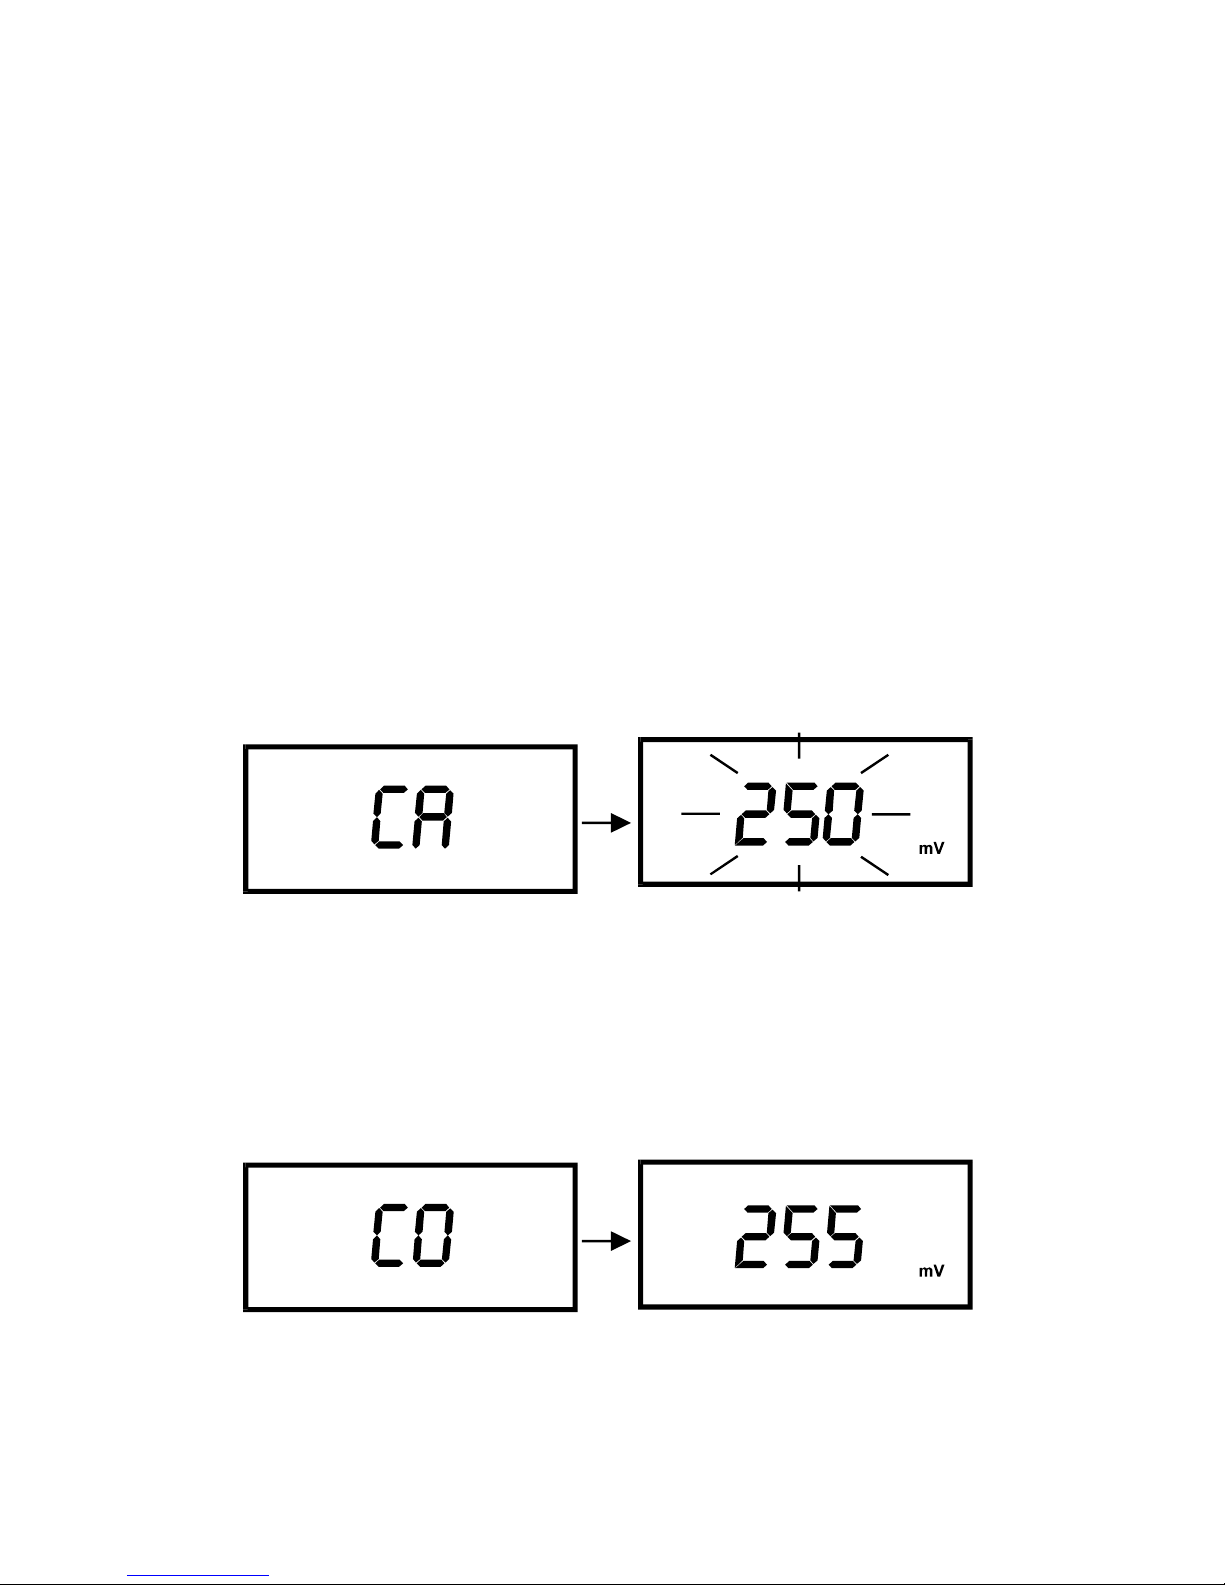
2. Dip the ORP electrode into a known standard solution, (e.g. Quinhydrone 255) and
swirl it until the reading stabilizes.
3. Press CAL key to enter mV calibration. The LCD shows “CA” momentarily before
flashing the mV reading.
4. To proceed calibration use INC key to adjust the reading to your desired value. The
maximum adjustment you can make is ± 50 mV. Pressing INC key continuously
allows you to scroll to the maximum allowable value and then loops back to the
minimum allowable value.
5. Press ENTER key to confirm calibration. The display shows “CO” momentarily and
meter reverts to measurement mode showing the current set value.
Page 16
Instruction Manual pH 5+, pH 6+, Ion 6+
-13-
3.4 Temperature Calibration
3.4.1 With Temperature Probe
The temperature probe (ECPH5TEM01P) provided with the meter is factory-calibrated.
Over time, temperature calibration may drift and require calibration. If there is a need to
replace with the new probe you should calibrate the temperature probe prior to pH
calibration.
1. Connect your temperature probe to the meter. Press MODE key to enter the
Temperature mode until “
o
C” annunciator appears in the LCD.
2. Compare the displayed value to a NIST certified thermometer or other thermometer
known to be accurate. For best accuracy, place both the probe and thermometer in
a constant temperature bath.
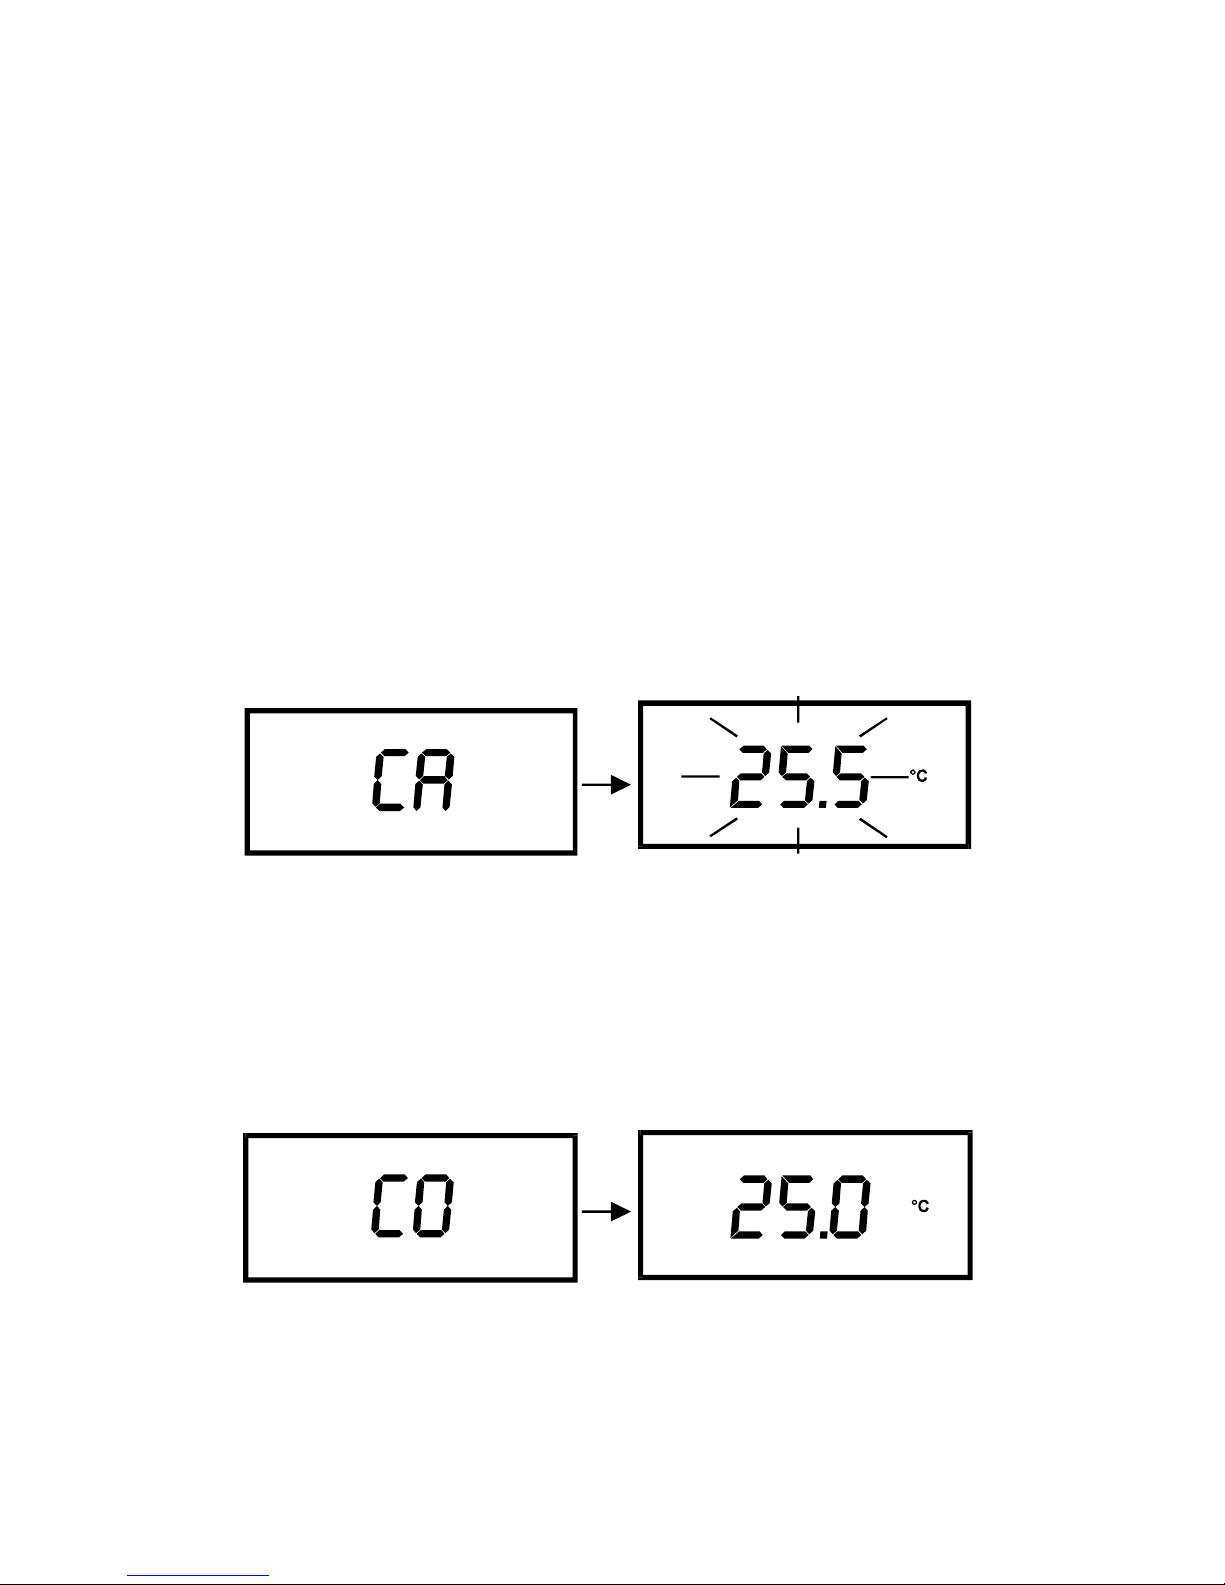
3. Press CAL key to enter temperature calibration mode. The LCD shows “CA”
momentarily and displayed reading flashes.
4. Press S and T keys (for Ion 6+) or INC key (for pH 5+ / pH 6+) until the LCD
display shows the desired temperature. The meter allows an adjustable maximum
value of ± 5
o
C from factory default.
5. To cancel or abort this operation, press CAL key. Note no new value will be stored
into its meter‘s non-volatile memory. To confirm calibration, press ENTER key. The
LCD displays “CO” momentarily, and the meter reverts to measurement mode.
Page 17
Instruction Manual pH 5+, pH 6+, Ion 6+
-14-
3.4.2 Without Temperature Probe (no ATC)
If no temperature probe is used, the meter compensates for pH response based on a
temperature value manually set by you or at 25.0
o
C (factory default).
1. Press MODE key to enter into Temperature mode until “
o
C” shows in LCD.
2. Compare the displayed value to NIST certified thermometer or thermometer known
to be accurate (dipped into a constant temperature bath).
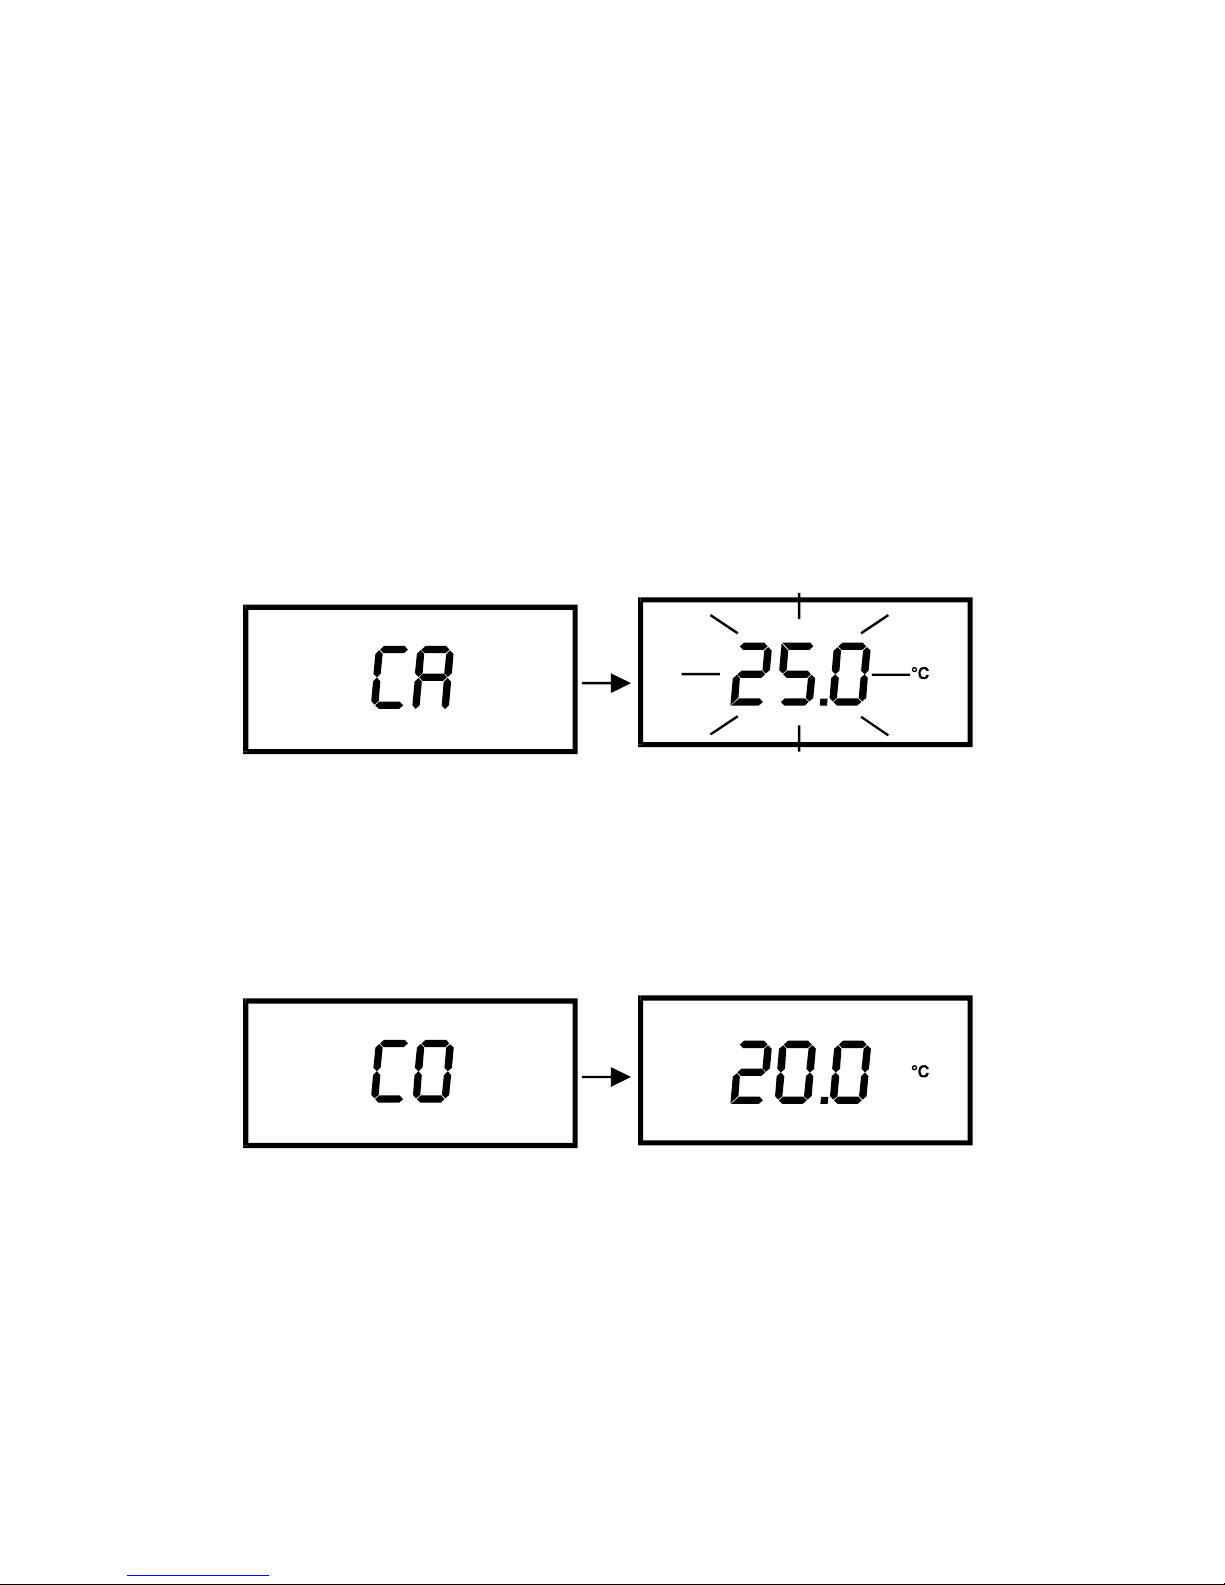
3. Press CAL key to enter temperature calibration mode. The LCD shows “CA”
momentarily and displayed reading flashes. Note that this displayed value should
either be 25.0
o
C or last set temperature value.
4. Press S and T key (for Ion 6) or INC key (for pH 5/6) until the displays shows the
desired temperature. You can set any value from 0 to 100
o
C.
5. To cancel or abort this operation, press CAL key. Note no new value will be stored
into its meter‘s non-volatile memory. To confirm calibration, press ENTER key. The
LCD displays “CO” momentarily, and the meter reverts to measurement mode.
Page 18
Instruction Manual pH 5+, pH 6+, Ion 6+
-15-
4. MEASUREMENT
4.1 Taking Measurements
1. Before measurement, rinse pH/ORP electrode or Ion Selective Electrode and
temperature probe with clean water to remove any impurities stuck onto the bodies
of probes.
2. Power on the meter using ON/OFF key. Press MODE key to select your desired
mode of operation (pH, mV, Ion, or Temperature).
3. Dip and stir both probes gently into an aqueous test sample, swirl gently and wait
for the reading to stabilise. Note the reading. Freeze the displayed if desired—for
details refer to Section 4.3.
4. Rinse probes with clean water before taking next reading or storage.
4.2 Millivolt (mV) Reference Check (Ion 6+ only)
The mV mode in Ion 6+ can be used for the diagnosis of ISE or pH electrode condition.
Press MODE to access mV mode, the “mV” annunciator in LCD is displayed. The
displayed value shows the absolute mV value of ISE or pH electrode being measured.
4.3 Holding a Reading
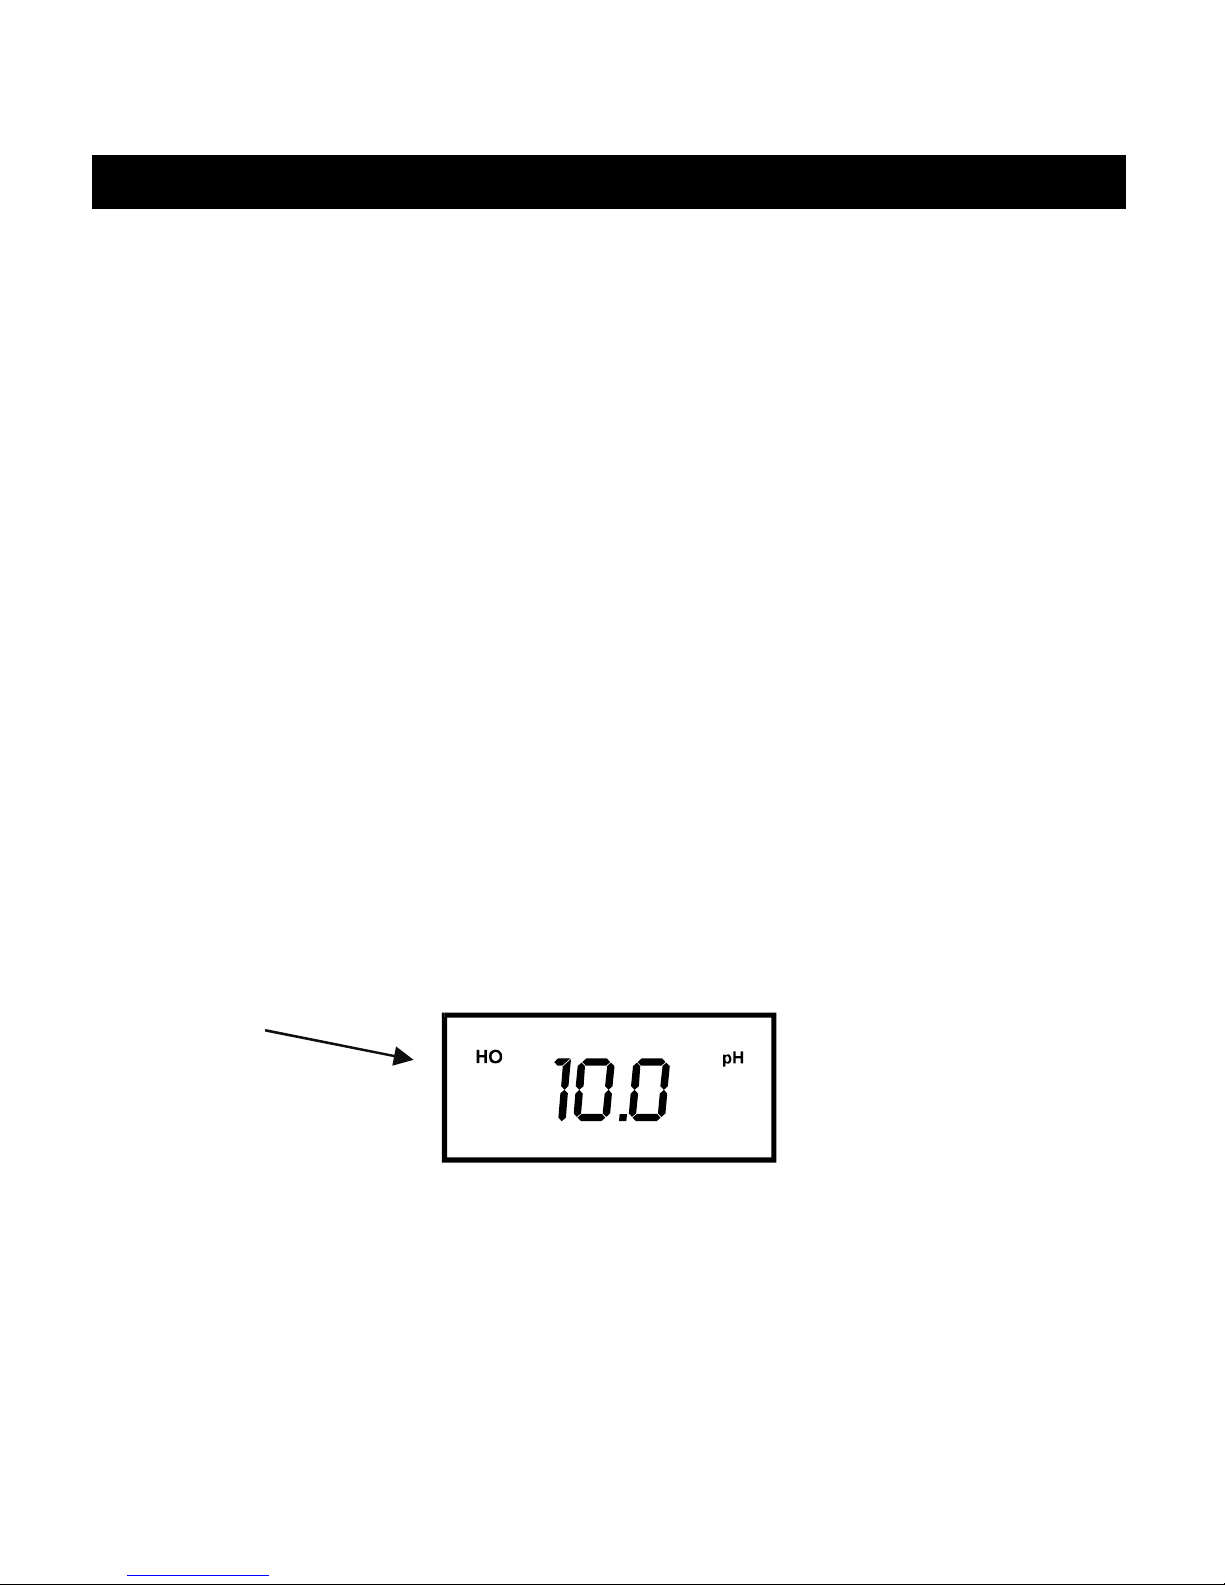
To freeze or hold your displayed reading momentarily, press HOLD key once. The LCD
displays ”HO” annunciator to indicate the HOLD function is activated.
4.4 Releasing a Held Reading
Press HOLD key once again to deactivate the HOLD function or to release your frozen
reading. The meter reverts to current measurement mode, and the “HO” annunciator
disappears from the LCD.
Page 19
Instruction Manual pH 5+, pH 6+, Ion 6+
-16-
5. ELECTRODE CARE AND MAINTENANCE
For best results, keep the ISE capped dry and pH/ORP electrode bulb wet. Store the
pH/ORP glass bulb with pH electrode storage solution. NEVER use deionised water for
storage. Wash electrodes with clean water after each use.
Your ISE or pH electrode is susceptible to contamination or dirt. Clean as needed using
mild detergent and warm water. Blot the probe gently with a soft tissue paper. Avoid
excessive drying of the glass membrane and avoid touching it with your fingers.
Recalibrate after cleaning.
6. TROUBLESHOOTING
Problem Cause Solution
No display Batteries not in place.
a) Insert batteries.
b) Re-insert batteries in correct polarity.
“---“ on
display
Ion 6+ does not have 2
point calibration
Perform 2 or 3 point ion calibration.
“LO” displays
in the LCD
Low battery Replace batteries.
Unstable
reading
a) Electrode not deep
enough in sample
b) Dirty electrode.
c) Broken electrode
a) Place electrode deeper in sample.
b) Clean electrode and recalibrate.
c) Replace electrode.
“Er1” display
Buffer value out of
tolerance
Use new pH buffer solution and recalibrate. Ensure
correct pH buffer group was selected.
“Er2” display Single point calibration Perform at least 2 point calibration. (Ion 6+).
“Er3” display
ISE slope not within the
specified tolerance
Check ISE is in good working condition-refer to ISE
manual (Ion 6+).
“Er4” display
Any calibration points
not within 1 decade
Ensure any calibration points between each other
must be within 1 decade. (Ion 6+)
Not able to
calibrate
a) Display freezes
b) Faulty electrode
c) Inaccurate buffer
a) Release reading by pressing HOLD.
b) Replace electrode.
c) Replace expired buffer solutions.
Page 20
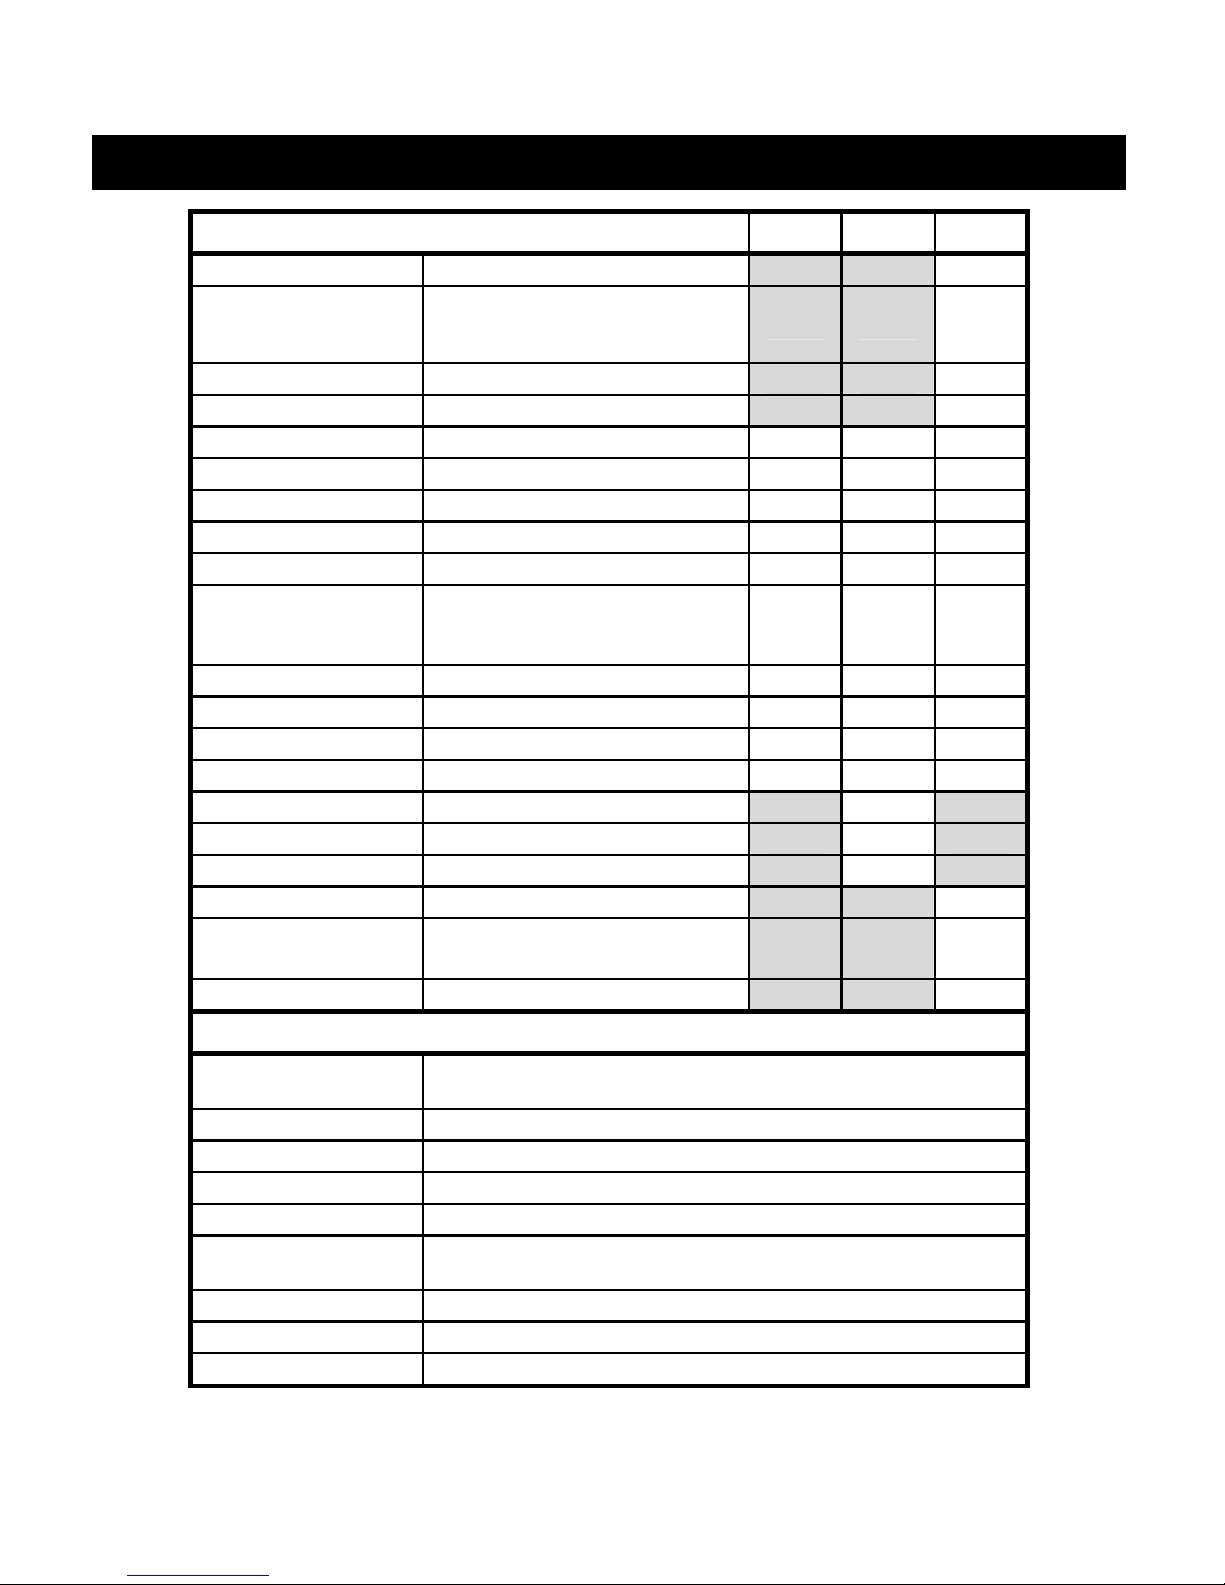
Instruction Manual pH 5+, pH 6+, Ion 6+
-17-
7. SPECIFICATIONS
Model pH 5+ pH 6+ Ion 6+
Ion Range 0.01 to 1999 ppm
3
Resolution
0.01 ppm for 0.01 to 0.99 ppm; 0.1
ppm for 1.0 to 199.9 ppm; 1 ppm
for 200 to 1999 ppm
3
Accuracy +/- 1% of reading
3
No. of Calibration Pts 2 to 3 points (minimum 2 pts)
3
pH Range 0.00 to 14.00 pH
3 3 3
Resolution 0.01 pH
3 3 3
Accuracy +/- 0.01 pH
3 3 3
pH Slope Range 80 to 120%
3 3 3
No. of Calibration Pts 1 to 3 points (push-button)
3 3 3
Buffer Options
pH 4.01, 7.00, 10.01 (USA)
pH 4.01, 6.86, 9.18 (NIST)
pH 4.10, 6.97 (Pb)
3 3 3
Temperature Range 0.0 to 100.0 oC
3 3 3
Resolution 0.1 oC
3 3 3
Accuracy +/- 0.5 oC
3 3 3
Temperature Comp. Automatic / Manual (0 to 100 oC)
3 3 3
Millivolt Range -1000 to +1000 mV
3
Resolution 1 mV
3
Accuracy +/- 2 mV
3
Millivolt Range -500 to 500 mV
3
Resolution
0.1 mV for –200 to 200 mV;
1 mV for 200 to 500 mV
3
Accuracy +/- 0.2 and 2 mV resp.
3
Features
Auto-Buffer
Recognition
Yes
Hold Function “HO”
Auto Shut Off After 17 minutes
Low Battery Indication “LO”
Display Single Custom LCD
Operating
Temperature
0 to 50 oC
Power Requirements 4 x “AAA” Alkaline Batteries
Battery Life 500 hours
Meter Dim./Weight 15.7 x 8.5 x 4.2 cm / 255 g
Page 21

Instruction Manual pH 5+, pH 6+, Ion 6+
-18-
8. REPLACEMENTS AND ACCESSORIES
Item Ordering Code
pH 5+ Meter with ATC probe (ECPH5TEMP01P) ECPH501PLUS
pH 5+ Meter with pH and ATC probes (ECFC7252201B &
ECPH5TEMP01P) and solutions in hard carrying case
ECPH502PLUSK
pH 5+ Meter with pH/ATC probe (ECFC7352901B) and
solutions in hard carrying case
ECPH503PLUSK
pH 6+ Meter with ATC probe (ECPH5TEMP01P) ECPH601PLUS
pH 6+ Meter with pH and ATC probes (ECFC7252201B &
ECPH5TEMP01P) and solutions in hard carrying case
ECPH602PLUSK
pH 6+ Meter with pH/ATC probe (ECFC7352901B) and
solutions in hard carrying case
ECPH603PLUSK
Ion 6+ Meter with ATC probe (ECPH5TEMP01P) ECION601PLUS
Ion 6+ Meter with pH and ATC probes (ECFC7252201B
& ECPH5TEMP01P) and solutions in hard carrying case
ECION602PLUSK
Epoxy pH Combination Electrode, Double Junction,
12x110 mm (1m cable)
ECFC7252201B
Epoxy pH/Temperature Combination Electrode, Single
Junction, 12x110 mm (1m cable)
ECFE7352901B
Epoxy ORP Combination Electrode, Single Junction, 12 x
110 mm (1m cable length)
ECFC7960101B
Electrode Storage Solution ECRE005
Electrode Cleaning Solution ECDPCBT
pH 4.01 buffer solution, 480 ml bottle (1 pint) ECBU4BT
pH 7.00 buffer solution, 480 ml bottle (1 pint) ECBU7BT
pH 10.01 buffer solution, 480 ml bottle (1 pint) ECBU10BT
pH 4.01 buffer sachets, 20 ml x 20 pcs. ECBU4BS
pH 7.00 buffer sachets, 20 ml x 20 pcs. ECBU7BS
pH 10.01 buffer sachets, 20 ml x 20 pcs. ECBU10BS
Page 22

Instruction Manual pH 5+, pH 6+, Ion 6+
-19-
9. WARRANTY
This meter is supplied with a warranty against significant deviations in material and
workmanship for a period of THREE years from date of purchase whereas probe with a
SIX month warranty.
If repair or adjustment is necessary and has not been the result of abuse or misuse
within the designated period, please return – freight prepaid – and correction will be
made without charge. Eutech Instruments will determine if the product problem is due
to deviations or customer misuse.
Out of warranty products will be repaired on a charged basis.
Exclusions
The warranty on your instrument shall not apply to defects resulting from:
• Improper or inadequate maintenance by customer
• Unauthorized modification or misuse
• Operation outside of the environment specifications of the products
10. RETURN OF ITEMS
Authorization must be obtained from our Customer Service Department or authorized
distributor before returning items for any reason. A “Return Goods Authorization” (RGA)
form is available through our authorized distributor. Please include data regarding the
reason the items are to be returned. For your protection, items must be carefully
packed to prevent damage in shipment and insured against possible damage or loss.
Eutech Instruments will not be responsible for damage resulting from careless or
insufficient packing. A restocking charge will be made on all unauthorized returns.
NOTE: Eutech Instruments Pte Ltd reserves the right to make improvements in design,
construction, and appearance of products without notice.
Page 23

Page 24

Instruction Manual pH 5+, pH 6+, Ion 6+
-20-
For more information on Eutech Instruments products, contact your nearest
distributor or visit our website listed below:
Eutech Instruments Pte Ltd.
Blk 55, Ayer Rajah Crescent,
#04-16/24 Singapore 139949
Tel: (65) 6778 6876
Fax: (65) 6773 0836
Email: [email protected]
Website: www.eutechinst.com
Distributed by:
 Loading...