

EUTECH INSTRUMENTS ECOSCAN TEMP JKT TEMPERATURE METER, Temp JKT Instruction Manual
Technolo
gyM
adeEa
sy...
Instruction Manual
Temp JKT
Temperature Meter Series
68X243615
Rev. 2 11/03

Preface
This manual serves to explain the use of the Temp JKT temperature
meter. This manual functions in two ways: first, as a step by step guide to
help you operate the meter; second, it serves as a handy reference guide.
This manual is written to cover as many anticipated applications of the
Temp JKT meter as possible. If there are doubts in the use of the T emp
JKT meter, do not hesitate to contact the nearest Eutech Instruments
Authorized Distributor.
Eutech Instruments/ Oakton Instruments will not accept any responsibility
for damage or malfunction to the meter caused by improper use of the
instrument.
The information presented in this manual is subj ected to change without
notice as improvements are made, and do es not represent a commitme nt
on the part of Eutech Instruments Pte Ltd/ Oakton Instruments.
Copyright © 1999
Eutech Instruments Pte Ltd/ Oakton Instruments
Rev 2 11/03.

TABLE OF CONTENTS
1. INTRODUCTION 1
1.1 Introducing the Temp JKT 1
2. GETTING STARTED 2
2.1 Description of Keypad Functions 2
2.2 Description of LCD Annunciators 2
2.3 Inserting & Removing the Rubber Boot 3
2.4 Inserting New Batteries 4
2.5 Battery Replacement 5
2.6 Connecting the Temperature Sensor 5
2.7 Switching the Meter On 5
3. CALIBRATION 6
3.1 Temperature Calibration 6
4. MEASUREMENT 8
4.1 Taking Measurements 8
4.2 Displaying Maximum and Minimum Readings 8
4.3 Holding a Reading 8
4.4 Releasing a Held Reading 8
4.5 Maximum and Minimum Hold Mode 9
5. DISABLE AUTO POWER OFF FEATURE 10
6. PROBE CARE AND MAINTENANCE 11
7. TROUBLESHOOTING 11
8. SPECIFICATIONS 12
9. ACCESSORIES 13
10. WARRANTY 14
11. RETURN OF ITEMS 15

1
1. INTRODUCTION
1.1 Introducing the Temp JKT
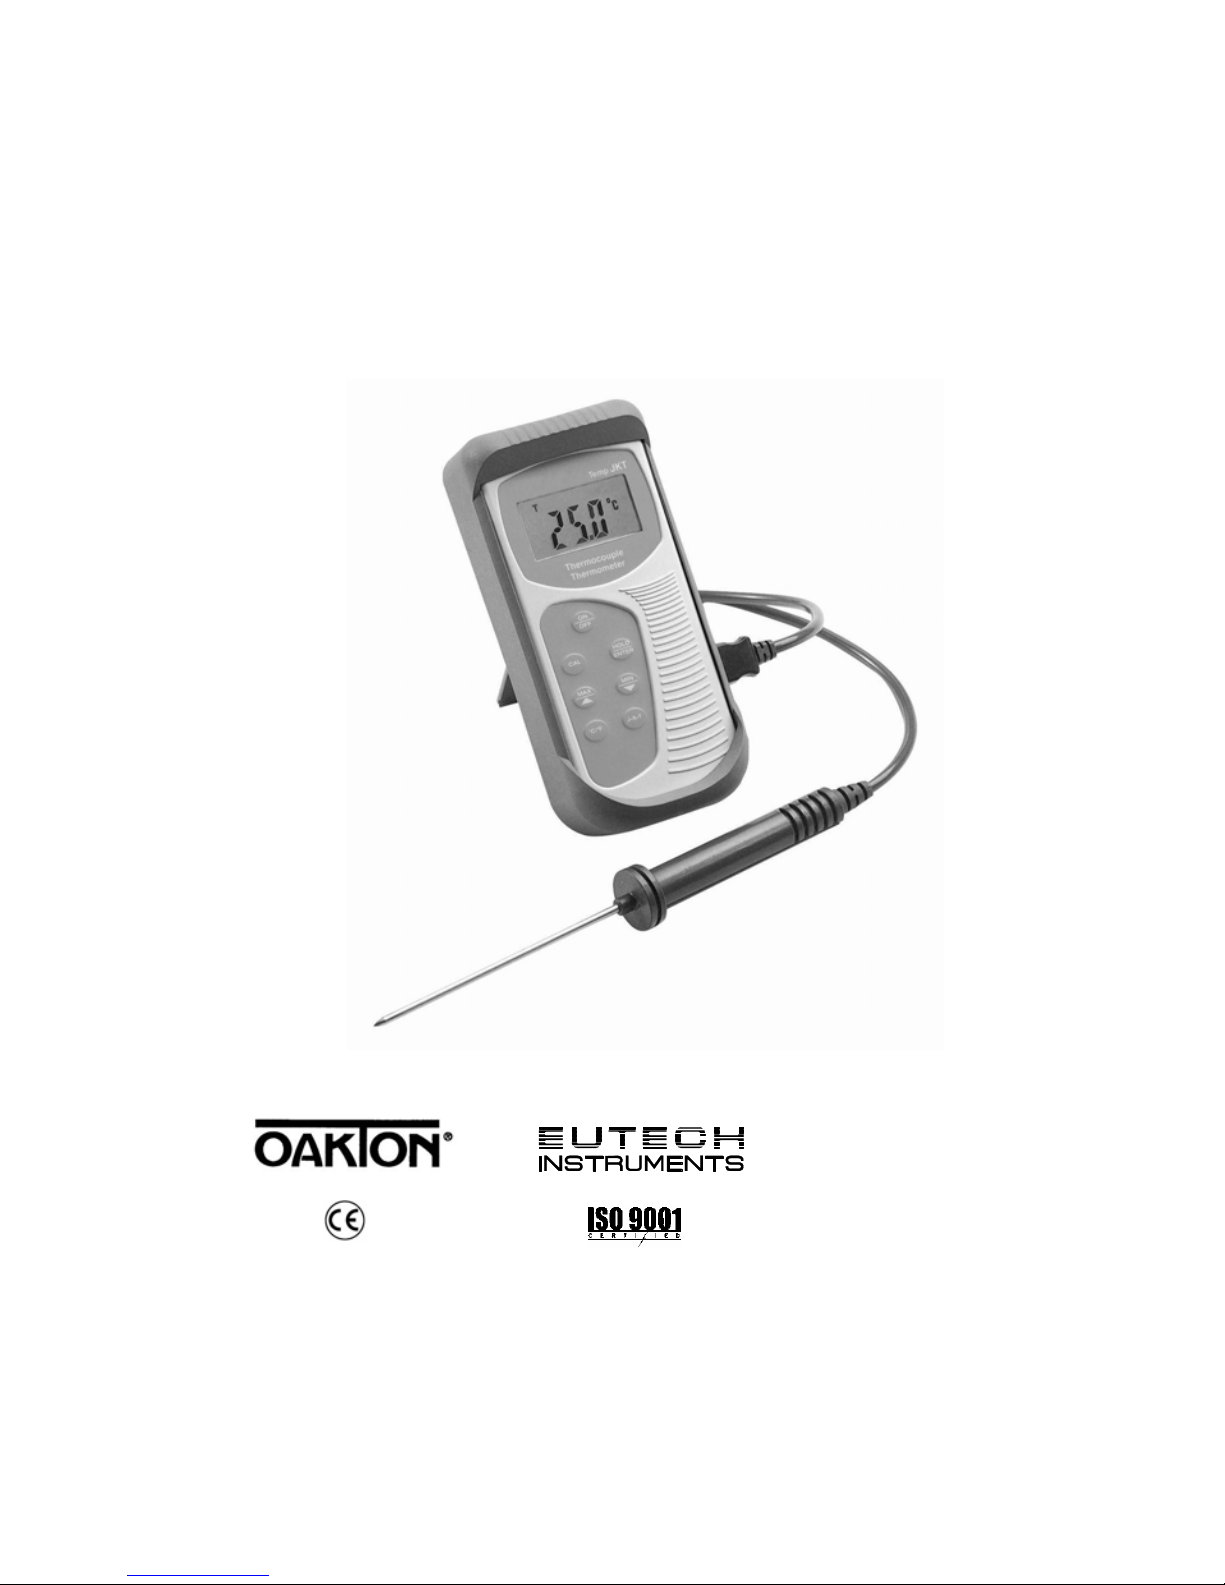
Thank you for purchasing the Temp JKT meter. This economical microprocessorbased handheld meter works with type J, type K and type T probes for a wide
temperature measurement range:
• Type J probes (iron-constantan) offer a wide range of –200 to 1000 °C / 328 to 1832 °F; use in reducing environments
• Type K probes (chromel-alumel) offer the widest range of –250 to 1372 °C
/ -418 to 2502 °F; use in oxidizing environments
• Type T probes (copper-constantan) of range of –250 to 400 °C / -418 to
752 °F; good for ambient and sub-freezing measurements
The Temp JKT meter features:
• Large LCD for clear and easy reading
• Readings in
o
C and oF (selectable)
• Minimum and maximum temperature display
• Minimum and maximum hold mode
• Low battery indicator
• Hold function, freezes measured reading
• User calibration - offset adjustment
• Built-in memory backup; calibration and other information remain if battery
is disconnected
This instruction manual is organized for quick reference with step-by-step
procedures that give you thorough review of the various features and meter
operations.
Included with your meter are a rubber boot, 4 alkaline “AAA” batteries, an
instruction manual and a warranty card. To order different type of thermocouple
probes, please refer to Section on Accessories for more information.
2
2. GETTING STARTED
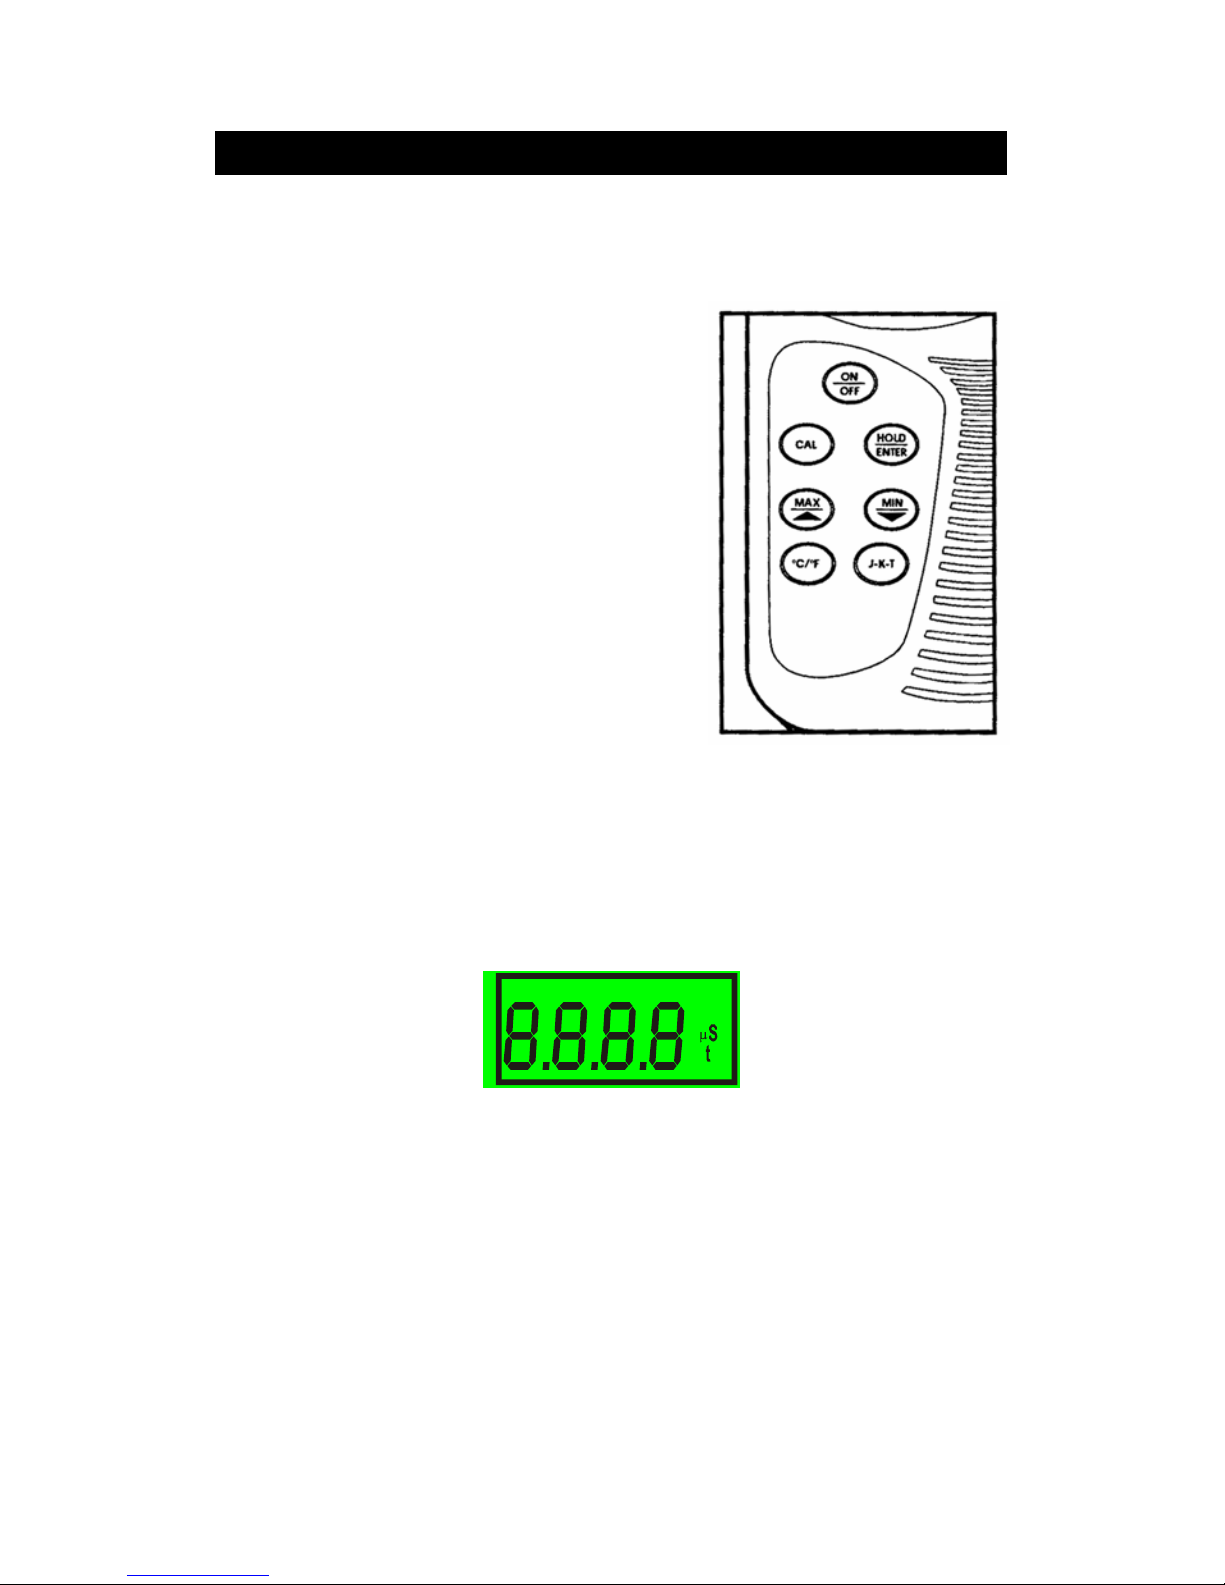
2.1 Description of Keypad Functions
Temp JKT meter has seven keys on its splash-proof keypad. These keys include
ON / OFF, CAL, HOLD / ENTER,
oC/o
F, MAX/ or MIN/ key and J-K-T keys.
ON/OFF: Powers meter on and shuts the unit off.
Meter directly enters measurement mode when
you turn it on.
CAL: Allows temperature calibration of the
meter.
HOLD/ENTER: Freezes the measured reading;
confirm calibration value.
MAX/ (UP) or MIN/ (DOWN): Momentarily
displays meter’s maximum and minimum
temperature; enter maximum or minimum hold
mode; scroll up and down in calibration mode.
oC/o
F: Switches between oC and oF in
measurement mode.
J-K-T: Switches between J, K and T
thermocouple measurement mode.
2.2 Description of LCD Annunciators
The EcoScan Temp JKT meter has a large custom LCD that consists of 4-digit
segments and operation annunciators for
o
C and oF. Other indicators include “MIN’,
“MAX”, “HO” (when the HOLD function is activated), “LO” (low battery condition)
and “J”/”K”/”T”.
JKT HO
LO
MIN
oo
C F
m
pp mv
pH %
MAX
Figure 2: Full segment LCD
Figure 1:
3
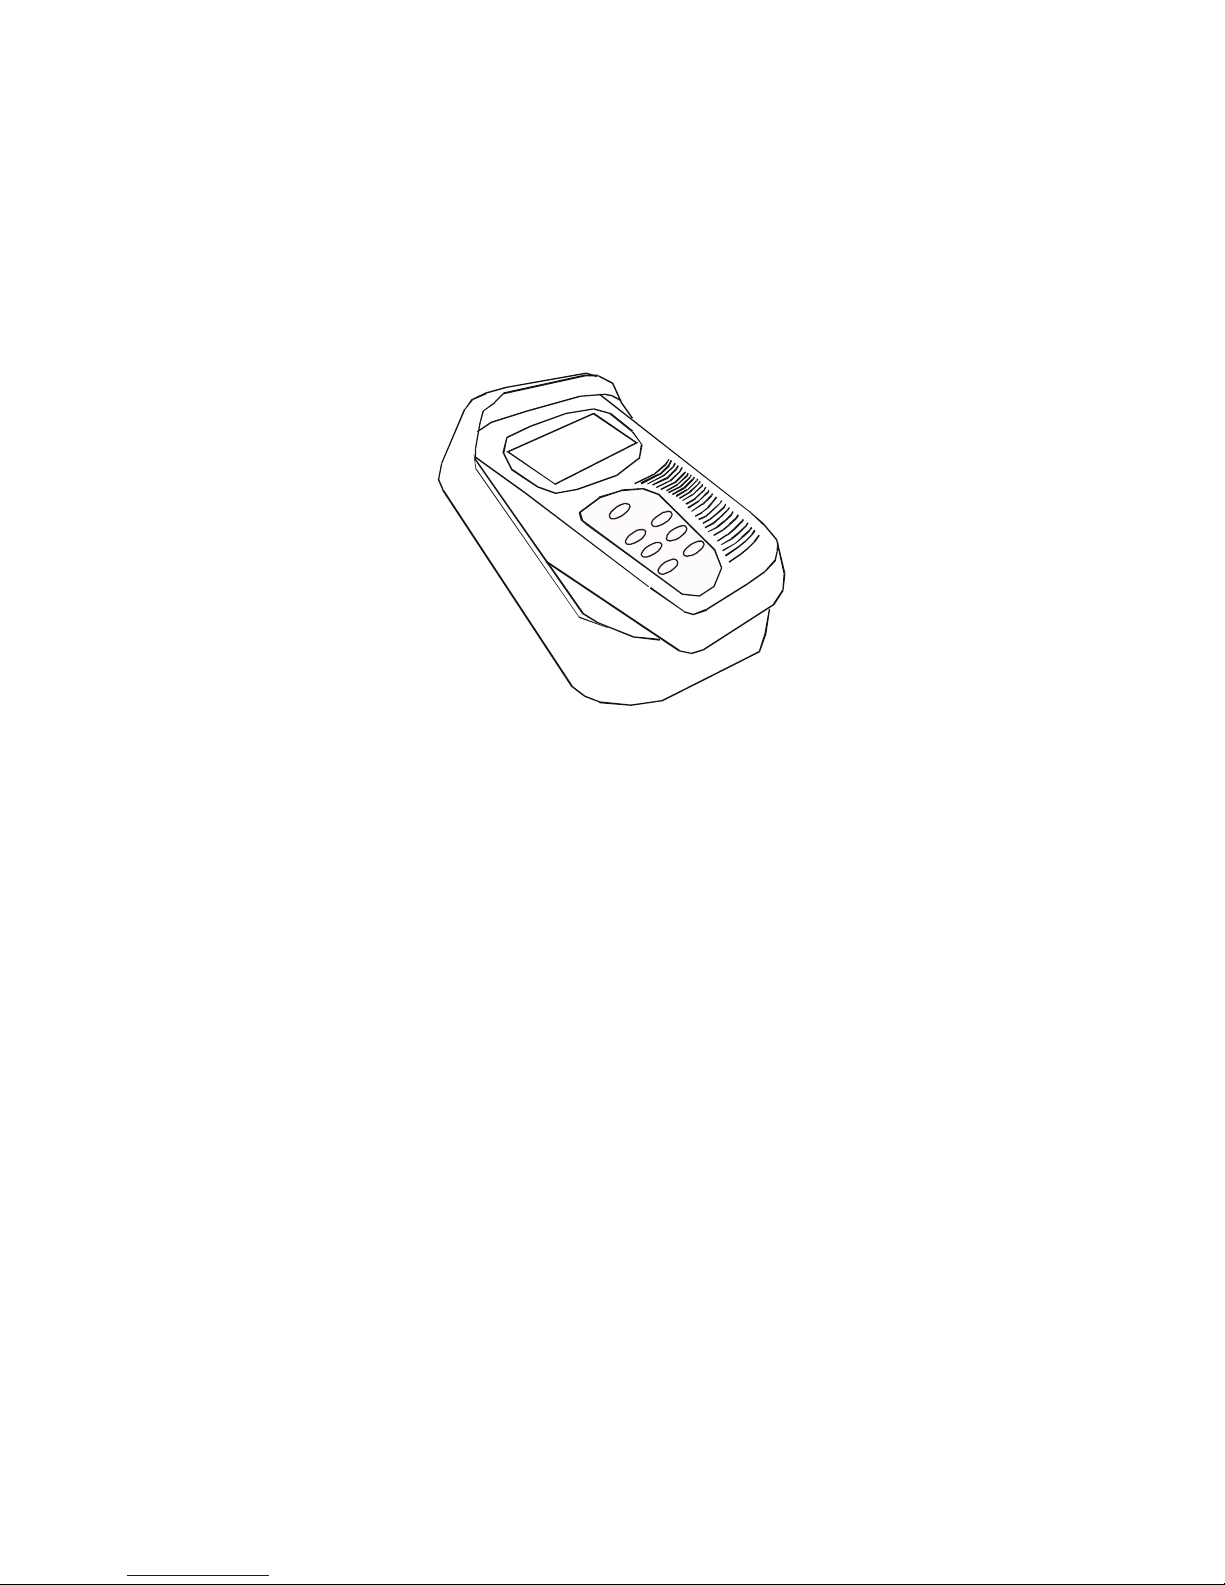
2.3 Inserting & Removing the Rubber Boot
1. To remove meter from rubbe r boot, push out from the bottom edges of meter
until it is completely out of boot. Ensure that the connector of temperature
sensor is not connected.
2. To insert meter into rubbe r boot, slide in from the top of meter before pushing
the bottom edges of meter down to set it into position. Lift up the stand at the
back of meter for bench top applications if necessary.
Figure 3: Inserting meter into the rubber boot
 Loading...