

Page 1
gyM
y..
.
Instruction Manual
CyberScan DO 5000
Bench Dissolved Oxygen Meter
(Also Applicable for CyberScan PCD 5500)
68X292330
Technolo
adeEas
Rev. 2 07/03
Page 2

PREFACE
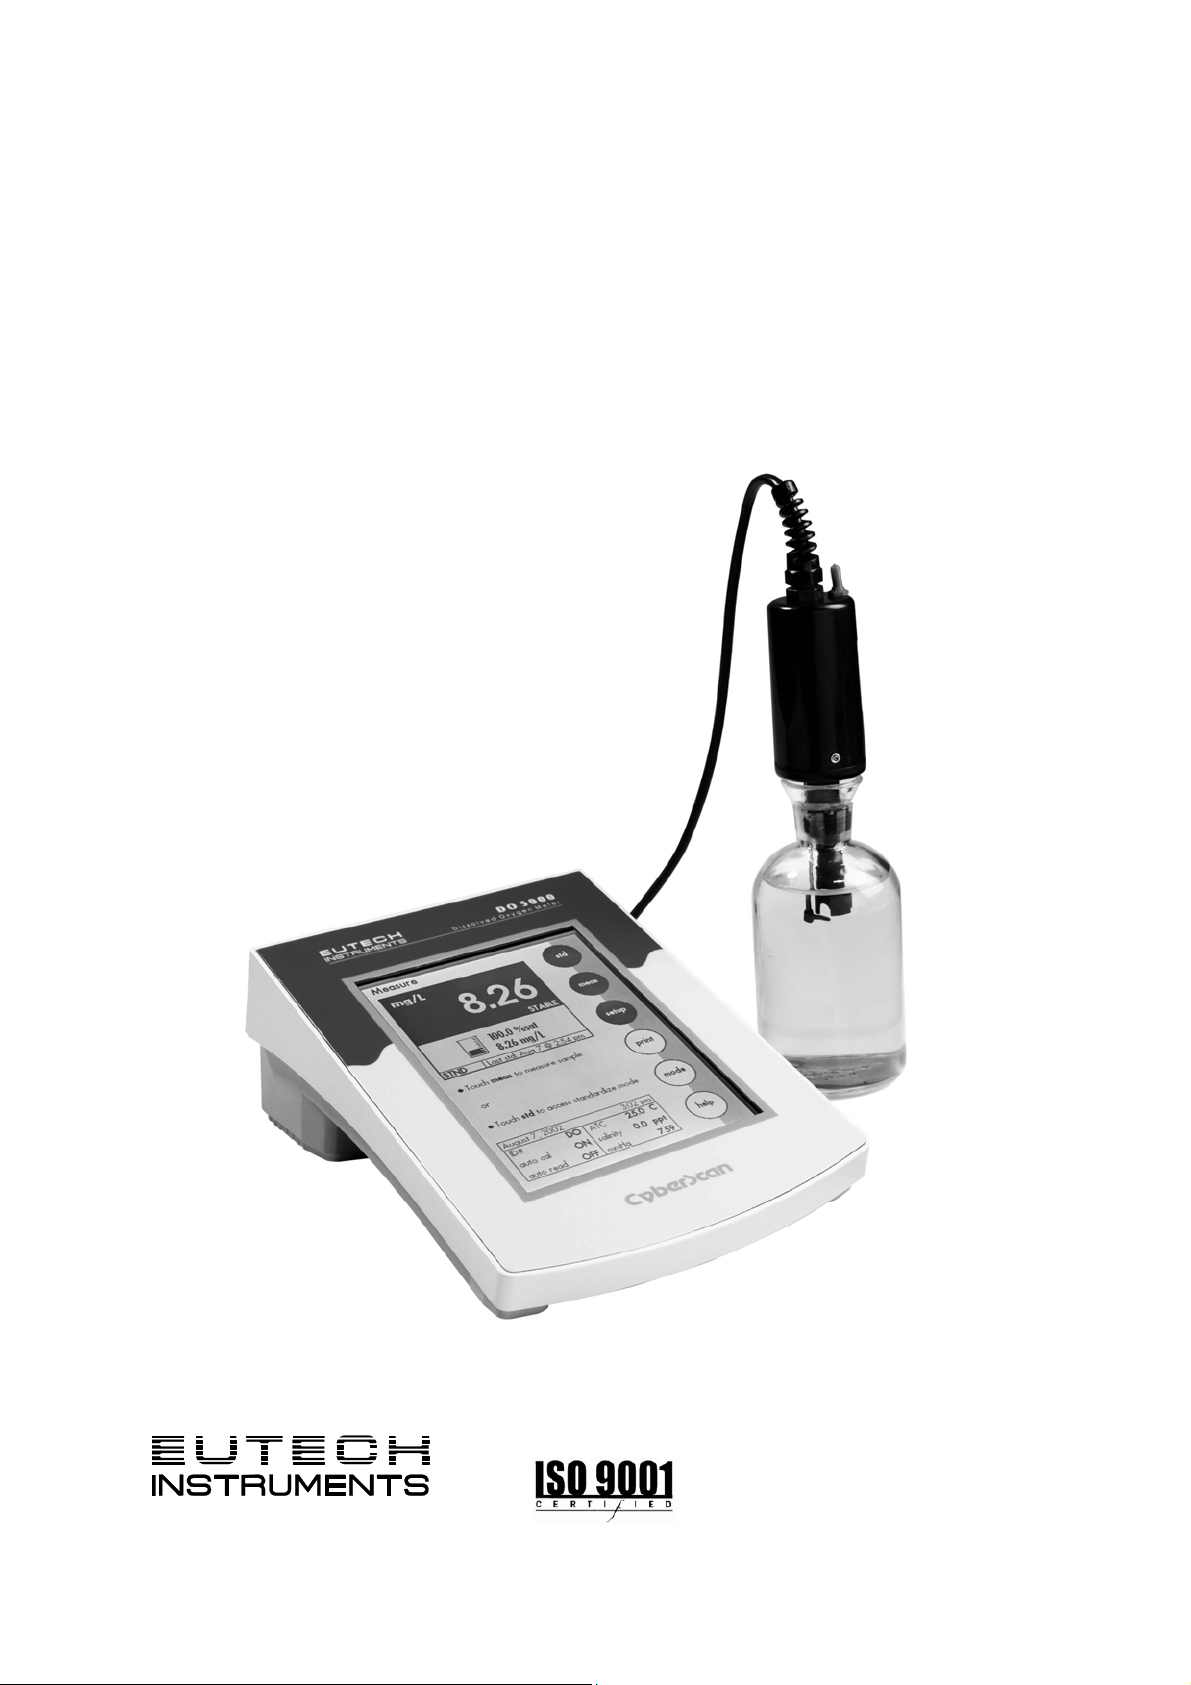
Thank you for selecting the Eutech Instruments CyberScan DO 5000
bench meter. This meter measures dissolved oxygen and
temperature (°C/ °F).
This instruction manual serves to explain the use of the CyberScan
DO 5000 bench meter as a step-by-step operational guide to help
you familiarize with the meter’s features and functions. It is structured
sequentially with illustration of diagrams that explains the various
functions and setup menus available.
This manual is written to cover as many anticipated applications and
uses of the CyberScan DO 5000 Bench meter as possible. If there
are doubts in the use of the meter, please do not hesitate to contact
the nearest Eutech Instruments’ Authorized Distributors or call us at
(65) 6778-6876 for Eutech Instruments’ Customer Service Dept. for
assistance.
Kindly remember to complete the warranty card and mail it back to
your Authorized Distributors or Eutech Instruments Pte Ltd.
Eutech Instruments reserve the rights to change, make improvement
and modify specifications without prior notice and cannot accept any
responsibility for damage or malfunction to the instrument caused by
improper use.
Copyright © 2002 Eutech Instruments Pte. Ltd.
All rights reserved.
Rev 2 07/03
Page 3

TABLE OF CONTENTS
1 INTRODUCTION 1
1.1 Introducing the CyberScan Series 1
2 UNPACKING THE METER 3
3 GETTING STARTED 4
3.1 Connectors 4
3.2 Dissolved Oxygen Probe 5
3.3 Touch Screen Operation 9
3.4 Button functions 10
4 SYSTEM SETUP 12
4.1 Set Date 15
4.2 Set Time 17
4.3 Set Beeper Status 19
4.4 Set Print Configuration 21
4.4.1 Set Baud Rate 23
4.4.2 Set Number of Bits 24
4.4.3 Set Stop Bits 25
4.4.4 Set Parity 26
4.4.5 Set Serial Output Mode 27
4.5 Set Barcode Configuration 28
4.6 Set Operator 29
4.7 Set Display Contrast 31
4.8 Display Meter Information 33
4.9 Reset to Factory Defaults 34
5 D.O. / BOD/ OUR/ SOUR SETUP 35
5.1 To Access Setup 36
5.2 Set Sample ID# 37
5.3 Select Calibration Mode 41
5.4 Select Auto Read Mode (Only available in D.O. mode) 42
5.5 Set Configurations for BOD/ OUR and SOUR 43
(Not applicable in D.O. mode) 43
5.6 Set Stability Criteria 45
5.7 Set Temperature Units 46
5.8 Set Measurement Units 47
5.9 Set the Salinity Value of Your Sample 48
5.10 Set Barometer 49
5.11 Set Alarm Limits 51
5.12 Set Print Criteria 53
5.13 Set Print Interval 55
5.14 Set Data Storage Criteria 57
5.15 Set Display Resolution 59
5.16 Set Display Configuration 61
5.17 View Stored Data 63
6 D.O. OPERATION 67
6.1 DO Standardization 68
6.2 Biological Oxygen Demand (BOD) Measurement 76
6.3 Oxygen Uptake Rate (OUR) Measurement 88
6.4 Specific Oxygen Uptake Rates (SOUR) 90
7 CLEANING 92
8 TROUBLE SHOOTING 92
9 DATA MANAGEMENT 93
10 DO FUNDAMENTALS 95
11 METER SPECIFICATIONS 96
12 ACCESSORIES 99
12.1 Replacement Meters and Accessories 99
12.2 Dissolved Oxygen / BOD Electrode 99
13 WARRANTY 100
Page 4

Instruction Manual CyberScan DO5000
1 INTRODUCTION
1.1 Introducing the CyberScan Series
Thank you for selecting a Eutech Instruments CyberScan Bench
meter. This manual describes the operation of the CyberScan DO
5000 bench meter. The state-of-art meter that you have purchased is
easy to operate and will guide you through the various functions by
displaying easy to understand prompts. This instruction manual
should answer any questions that might arise in operating your meter,
however, do not hesitate to call our Technical Support at (65)
67786876 or fax at (65) 67730836.
The CyberScan DO 5000 bench meter provides microprocessor
precision in a compact benchtop design that is easy to use. One
touch screen controls all procedures, letting you:
Measure dissolved oxygen and temperature (°C/ °F)
Customise your display screen and operating parameters
Assign operator and sample identification numbers
Store 250 data points in the meter’s memory or transfer data to a
computer or printer.
Access extensive online help with just a touch a button
It all adds up to rapid, completely automatic, intuitive operation.
You will find this symbol appearing in this manual; it indicates useful
tips that ease your meter operation.
1
Page 5
Instruction Manual CyberScan DO5000
2
Page 6

Instruction Manual CyberScan DO5000
2 UNPACKING THE METER
The following is a listing of what you should have received with your
new CyberScan DO 5000 meter.
Meter with kit includes
Meter
Power adapter (120 VAC/ 12VDC) OR (220 VAC/ 12 VDC)
depending on order code.
BOD Probe
Instruction Manual
If any of these items are missing, please contact your nearest
Authorized Distributor.
Accessory conductivity probes and ion selective electrodes are
available and can be ordered by contacting any Authorized
Distributor or Eutech Instruments Marketing (65) 67786876.
3
Page 7
Instruction Manual CyberScan DO5000
3 GETTING STARTED
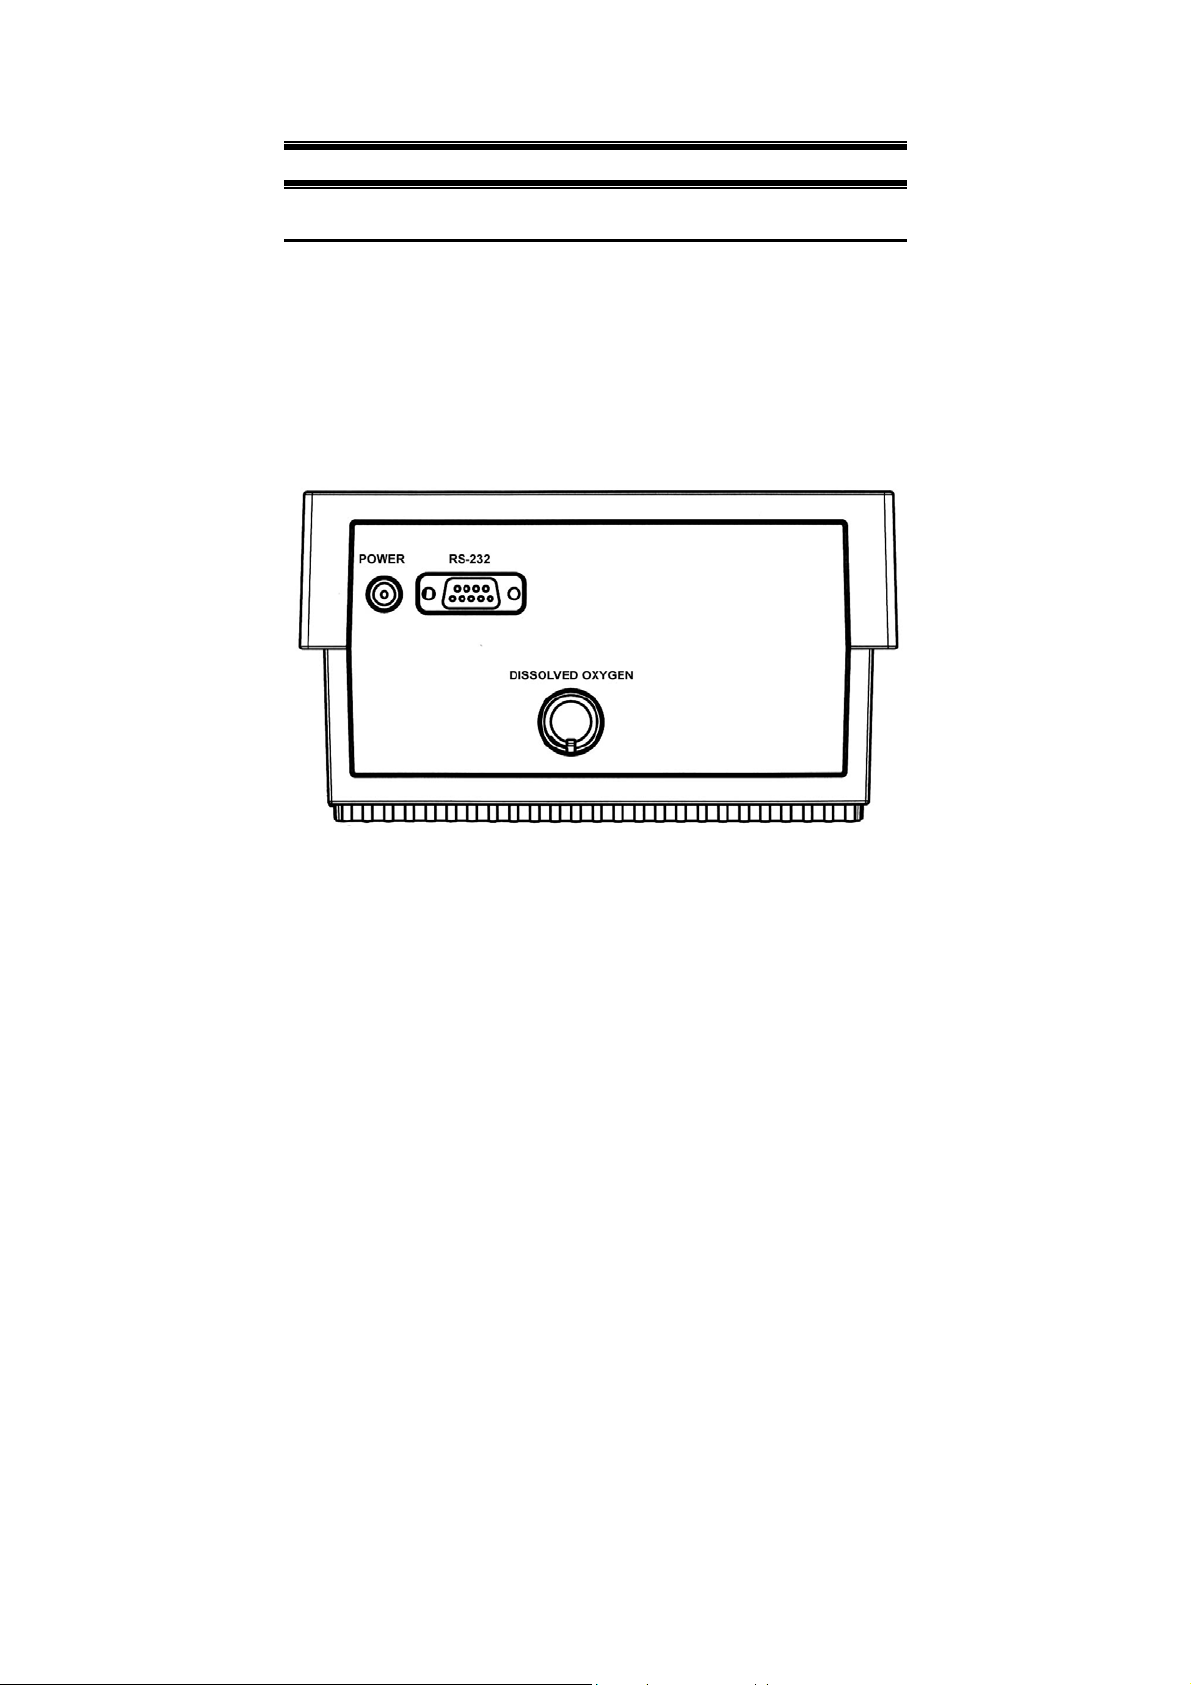
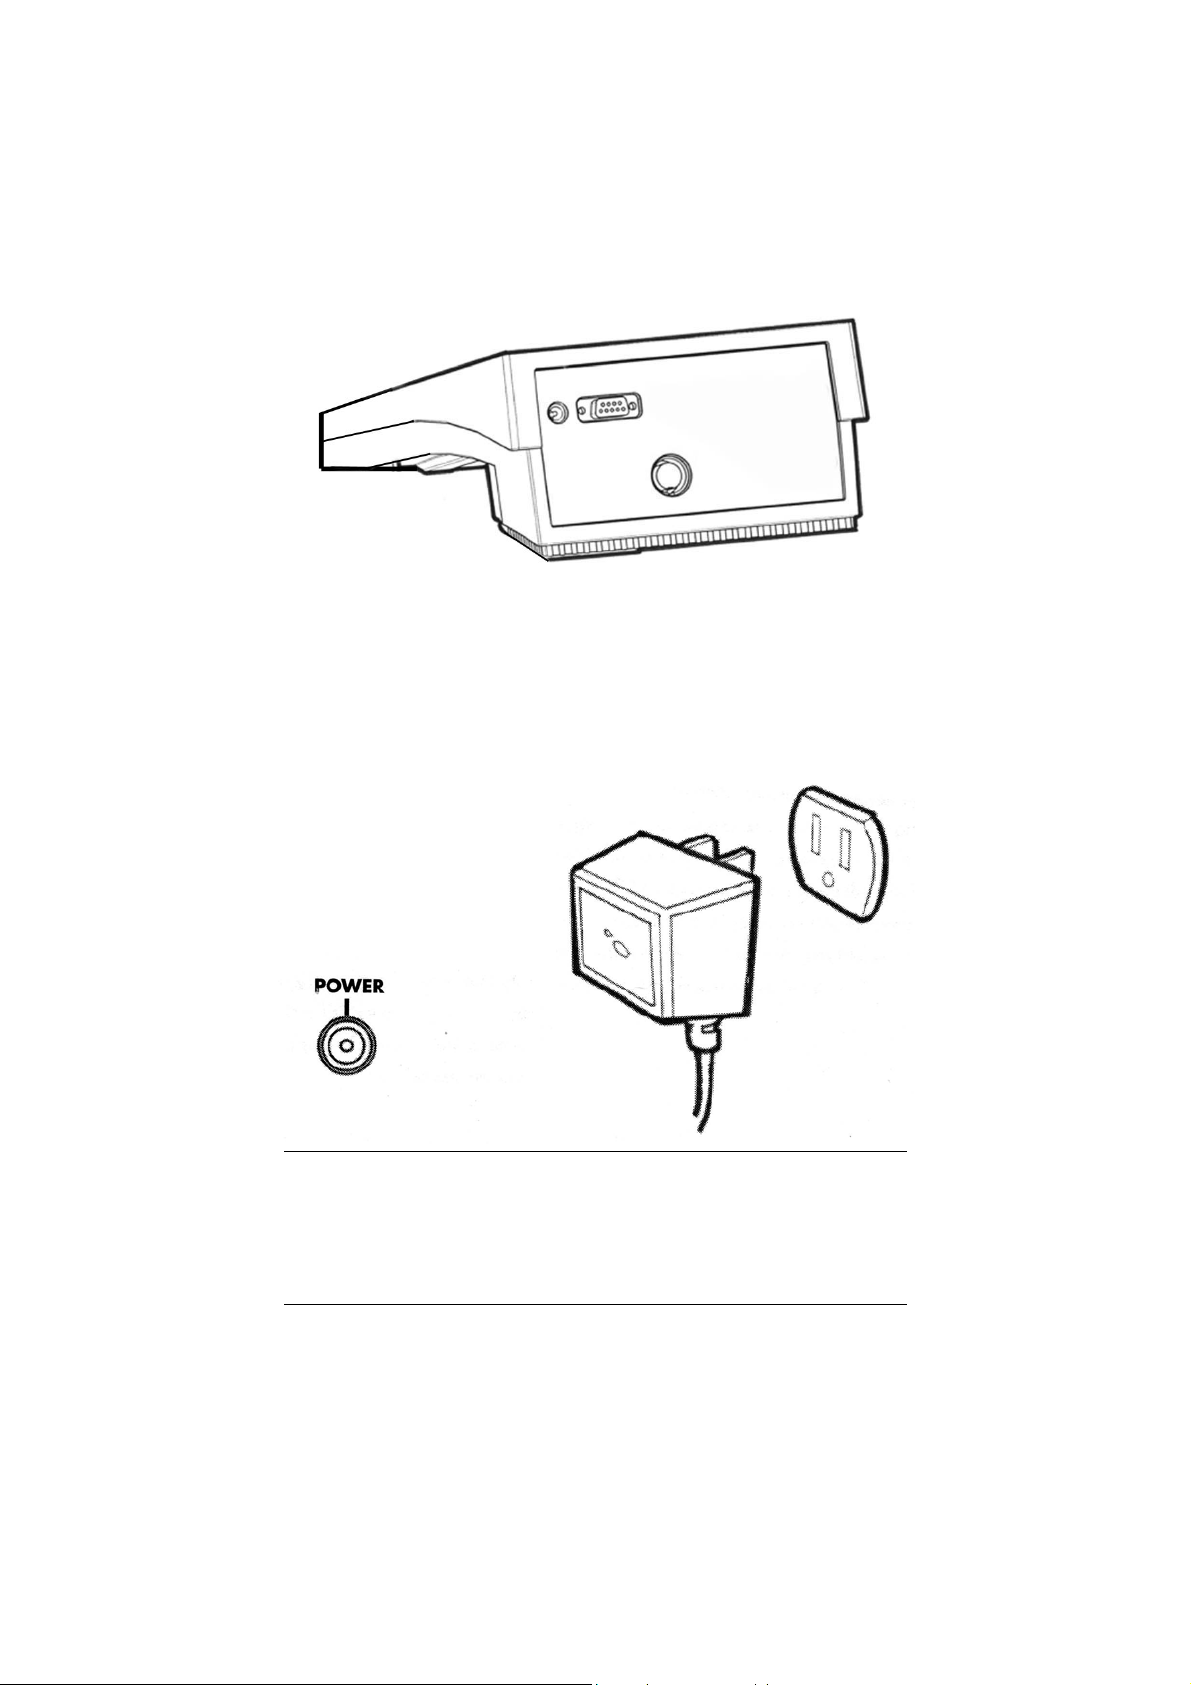
3.1 Connectors
1. Review the layout and arrangement of the rear connector panel.
2. Connect the power cable to the rear connector panel power jack
and to a powers source.
4
Page 8
Instruction Manual CyberScan DO5000
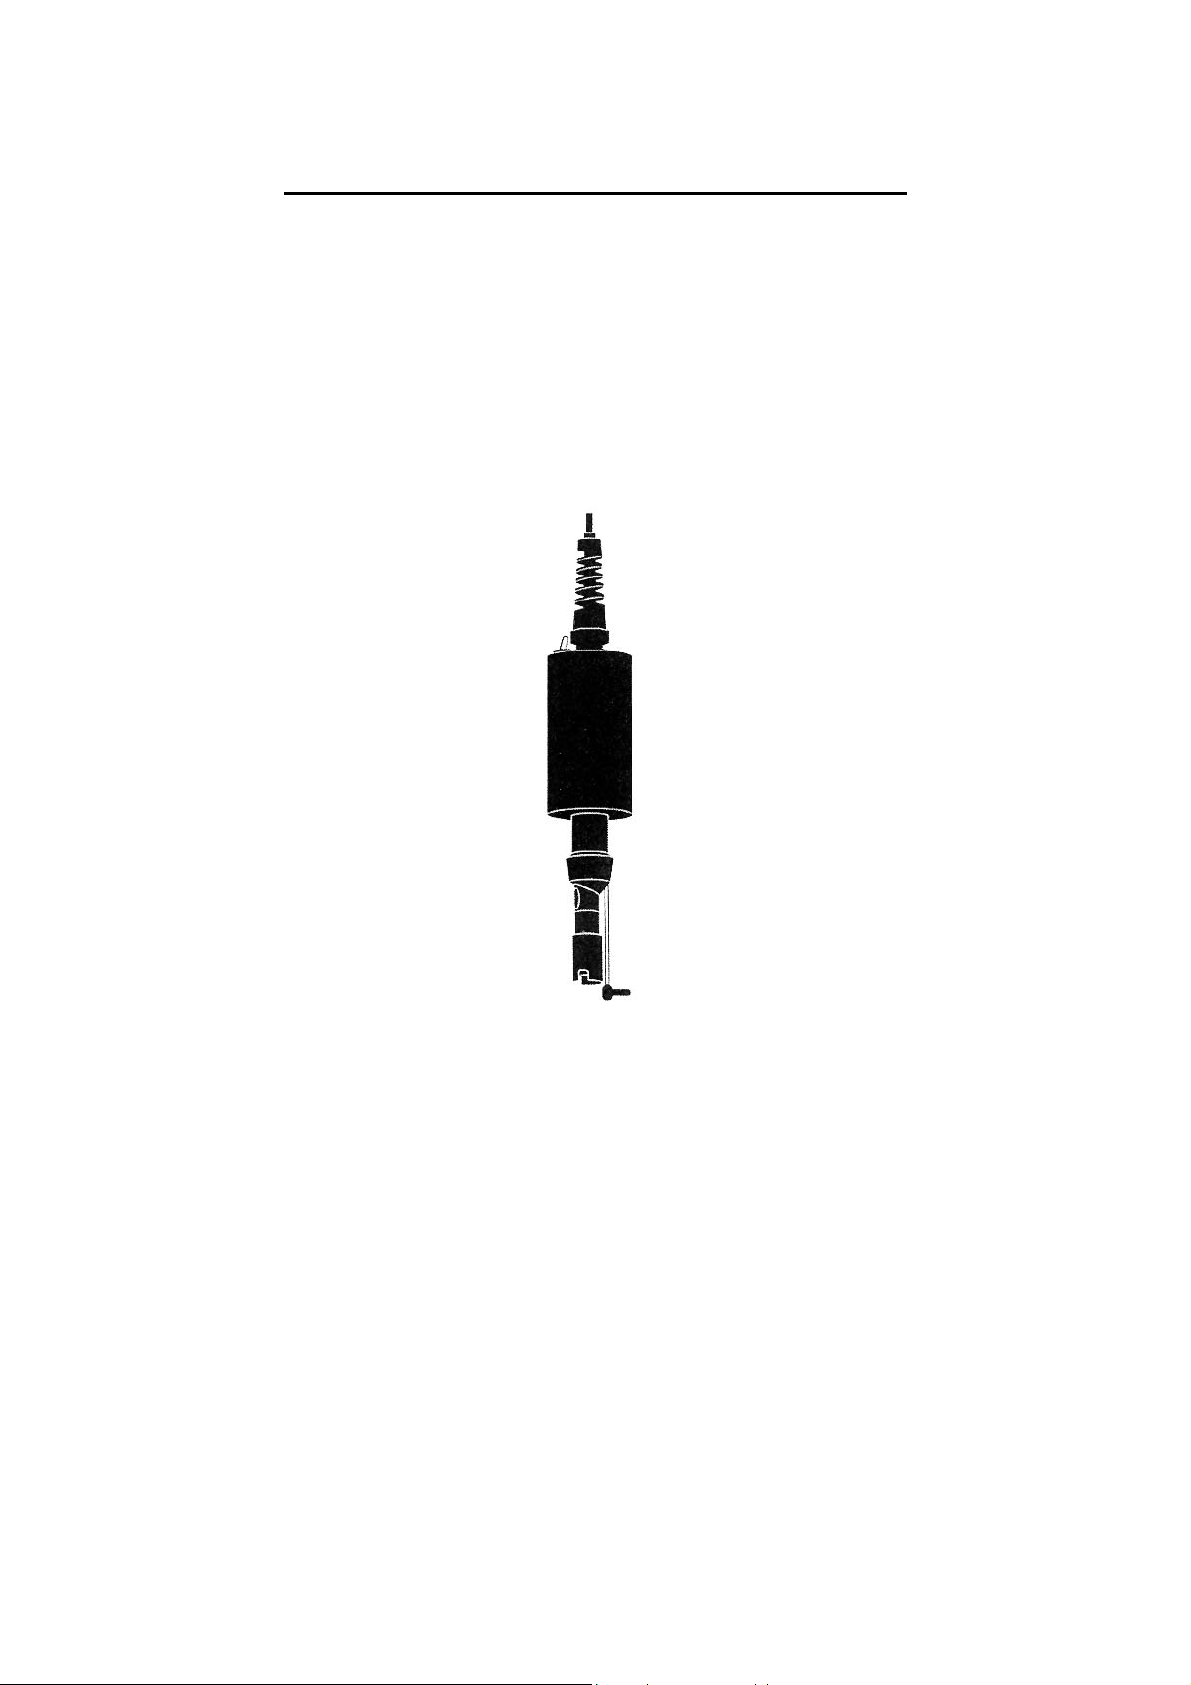
3.2 Dissolved Oxygen Probe
This meter is equipped to use the BOD probe.
1. Carefully review the instruction sheet accompanying the probe for
setup and conditioning information.
2. Connect the probe to the meter by plugging it into the DIN
connector on the back of the meter. Permit the probe to warm up
for 30 minutes.
3. Store the DO probe in a BOD bottle filled with 1 inch of water.
5
Page 9
Instruction Manual CyberScan DO5000
1. Connect the electrode arm to the base.
2. Connect the power cable to the connector cable to the rear
connector panel power jack and to a power source.
To connect RS232, see Data Management on Section 9 below, page
93.
6
Page 10
Instruction Manual CyberScan DO5000
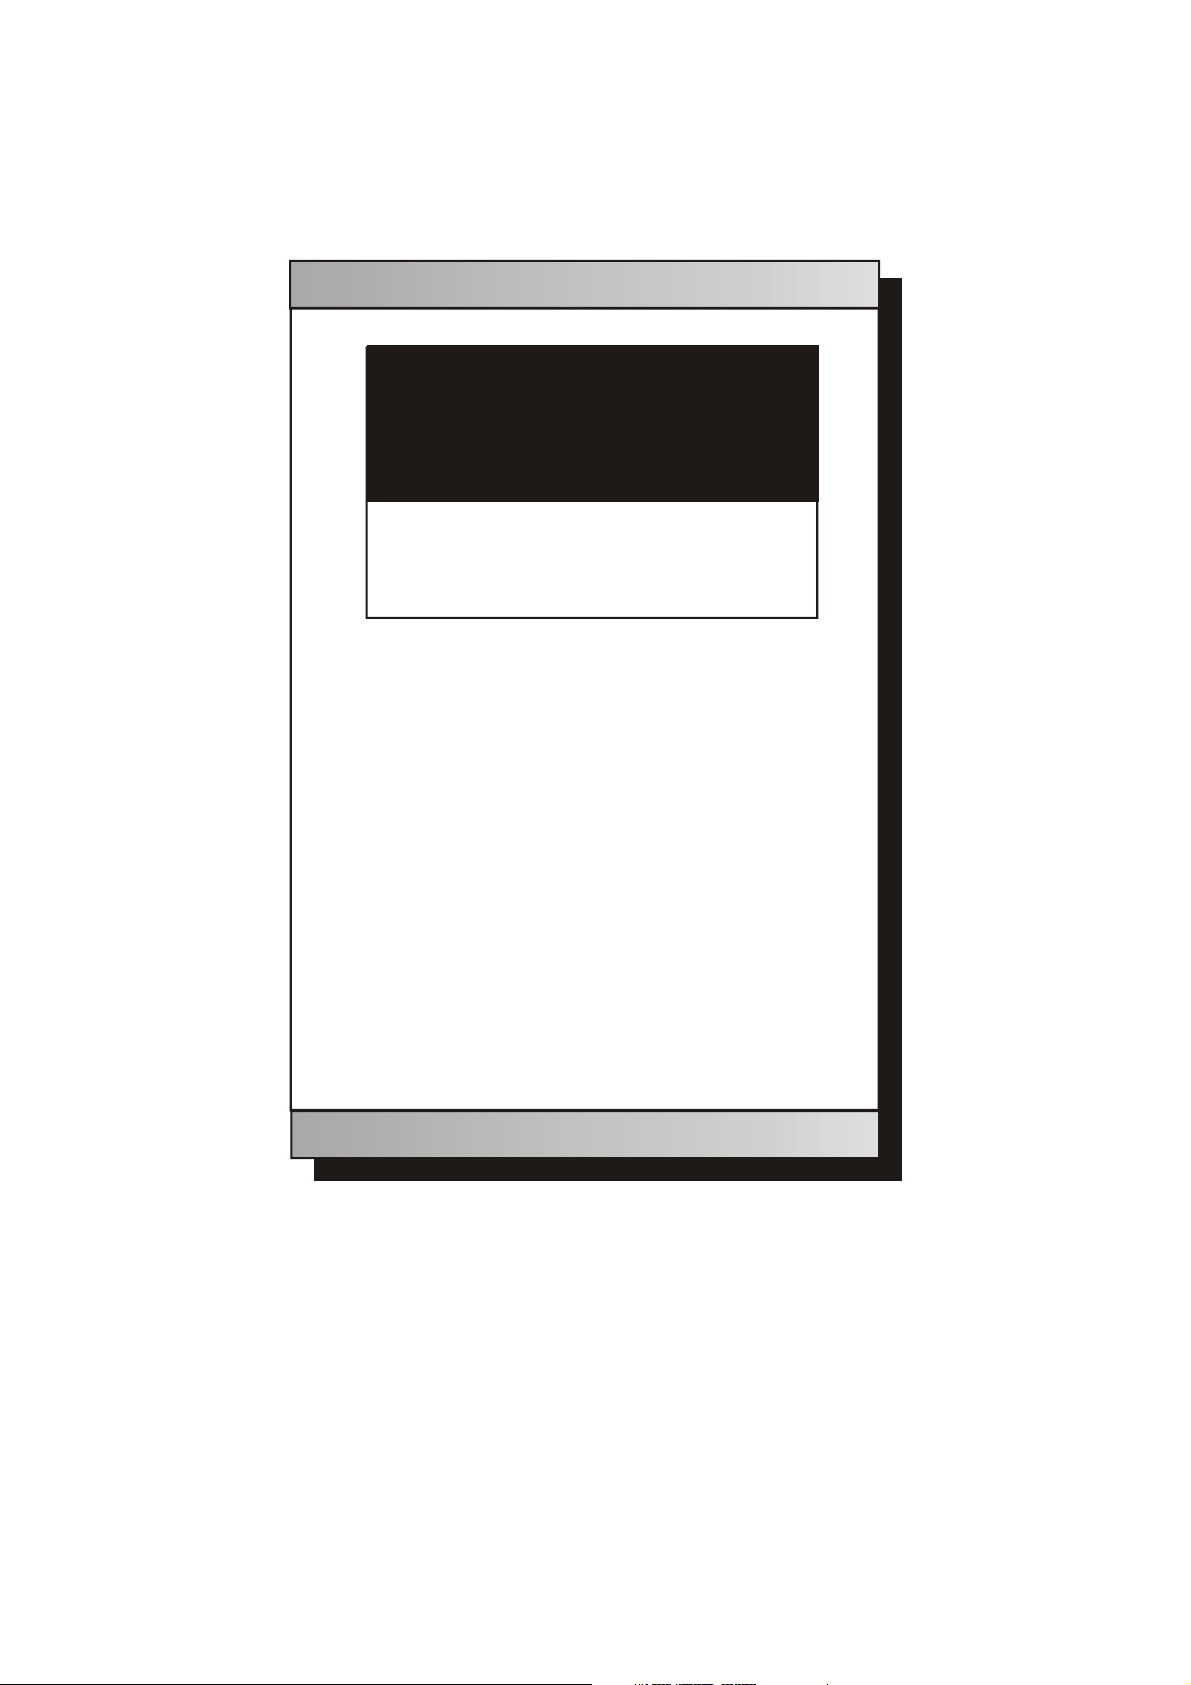
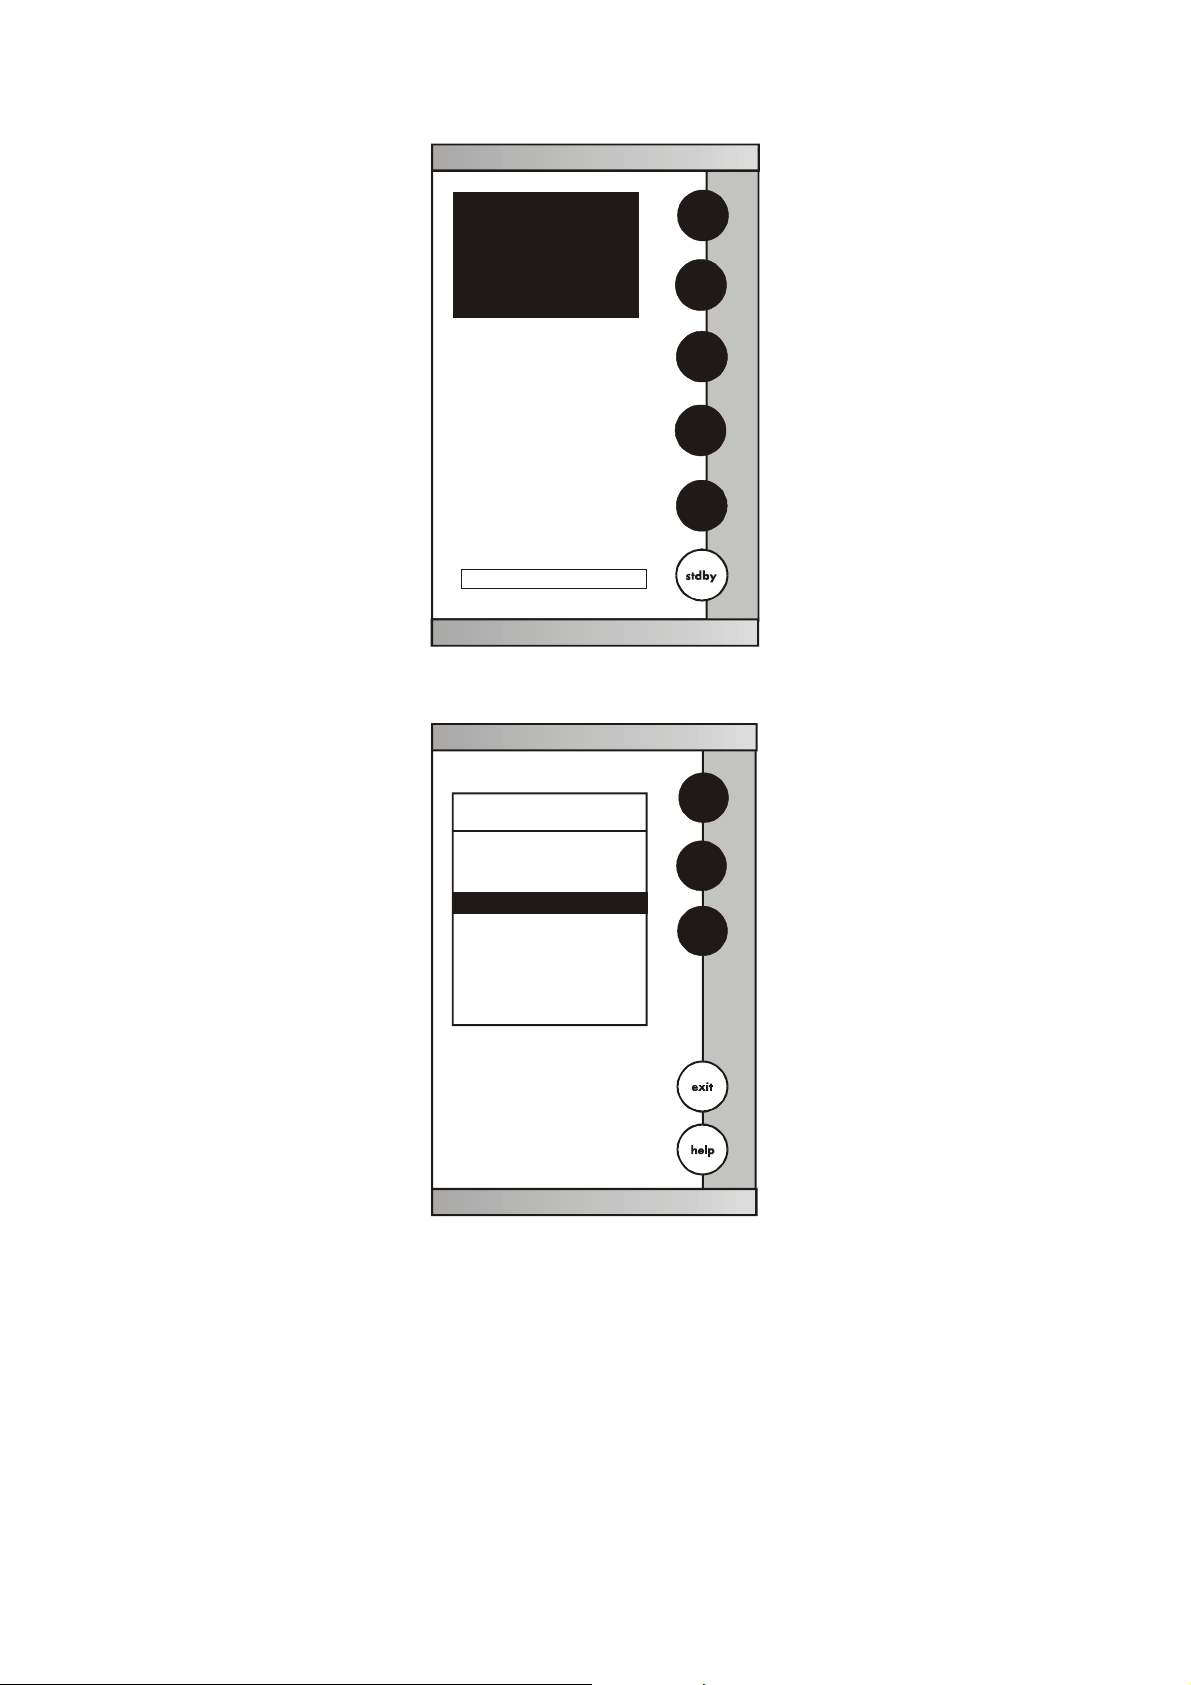
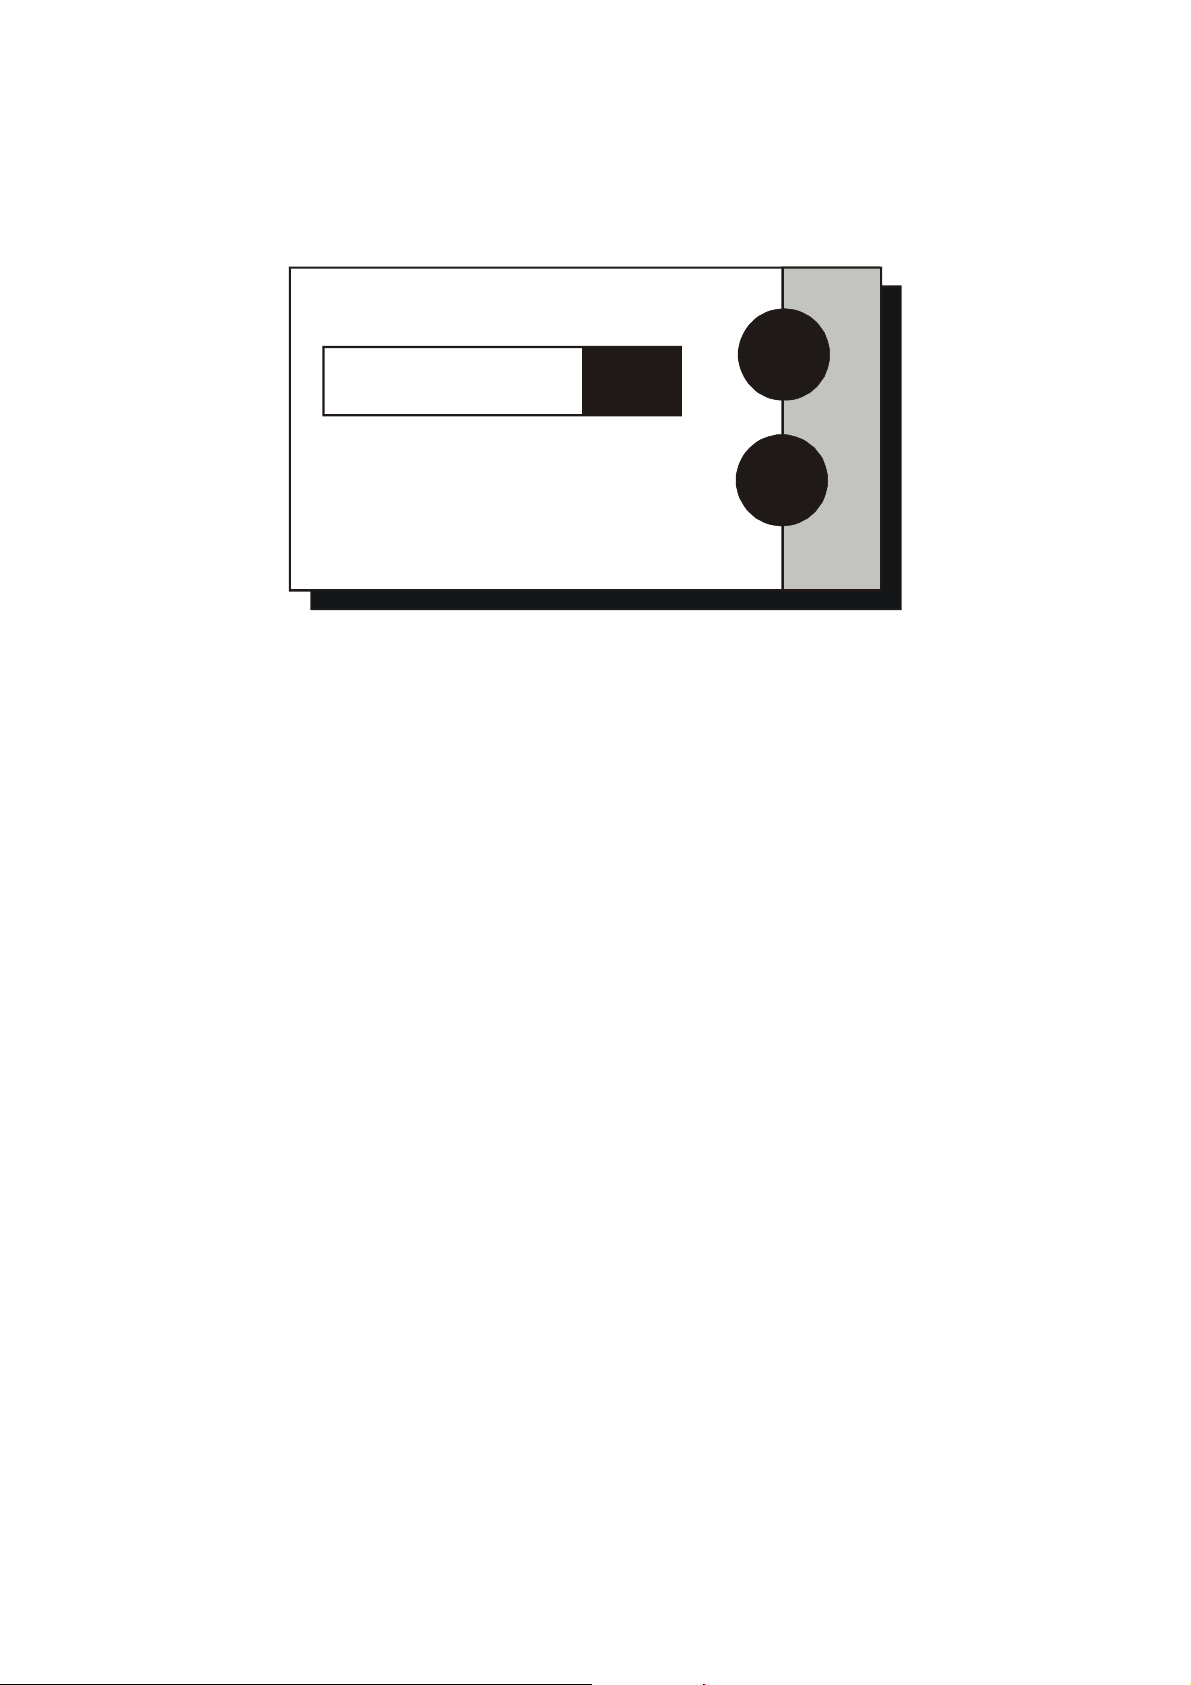
Standby screen
E U T E C H
INSTRUMENTS
11:11 am
Touch anywhere to resume
7
Page 11
Instruction Manual CyberScan DO5000
Meter Main Screen
E U T E C H
INSTRUMENTS
CyberScan DO 5000
Select from the options to the right
DO
BOD
OUR
SOUR
system
8
Page 12

Instruction Manual CyberScan DO5000
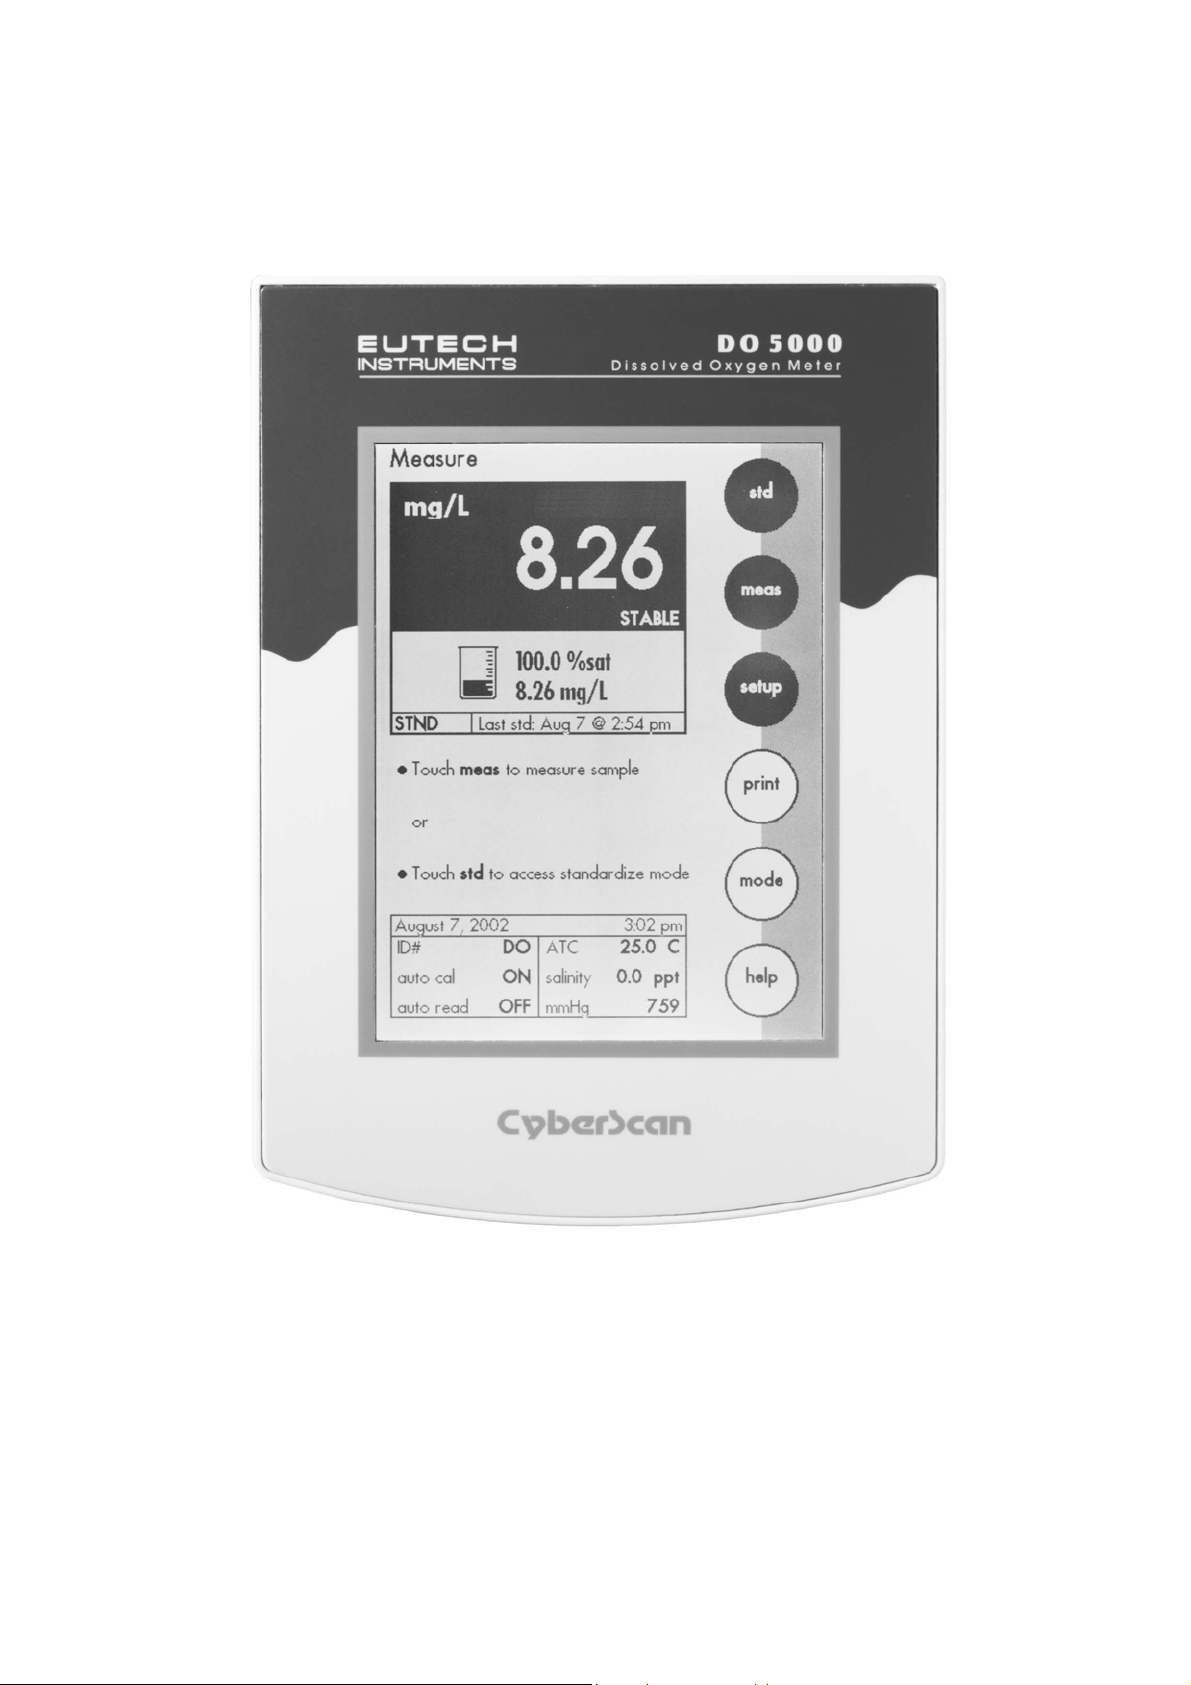
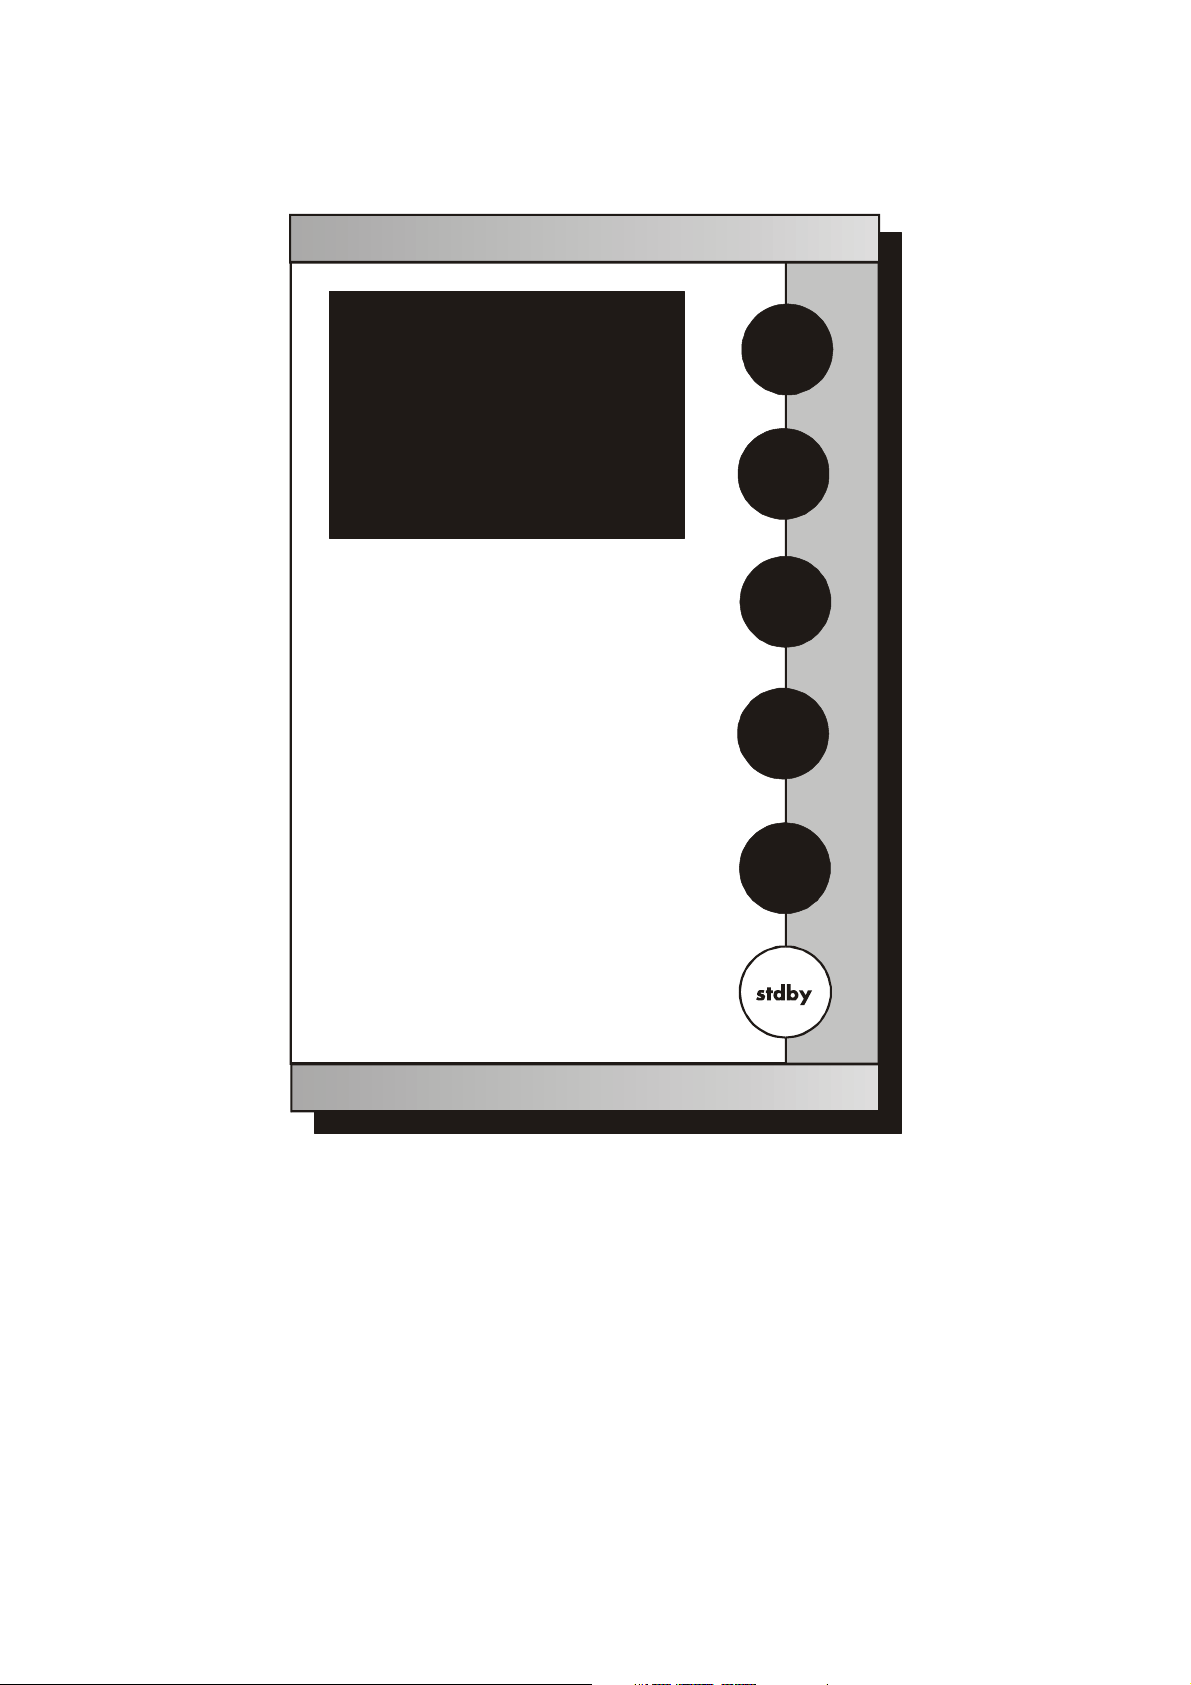
3.3 Touch Screen Operation
The CyberScan DO 5000 meter operates with a state of art touch
screen. The touch screen makes this the easiest meter on the market
to operate and care for. When this meter is first plugged in, the
STANDBY screen will appear. Touch anywhere on this screen to
access the functions of the meter.
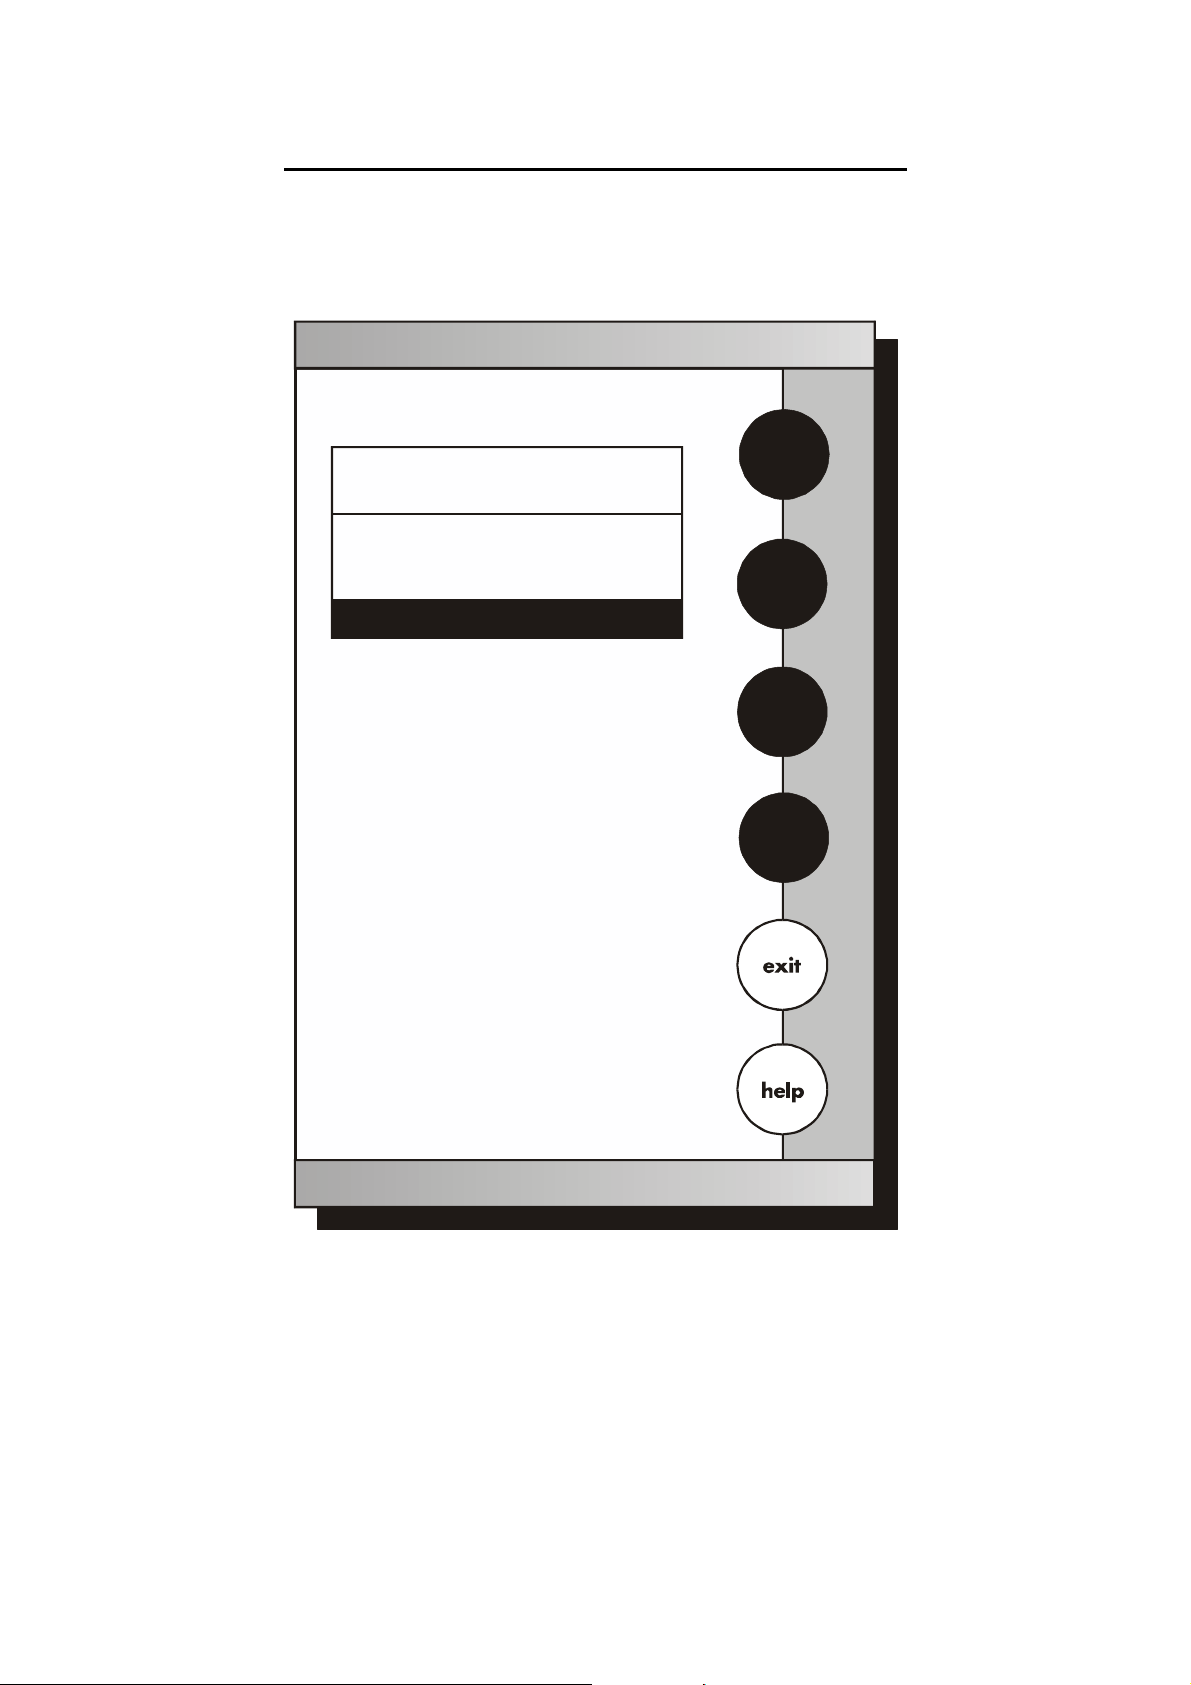
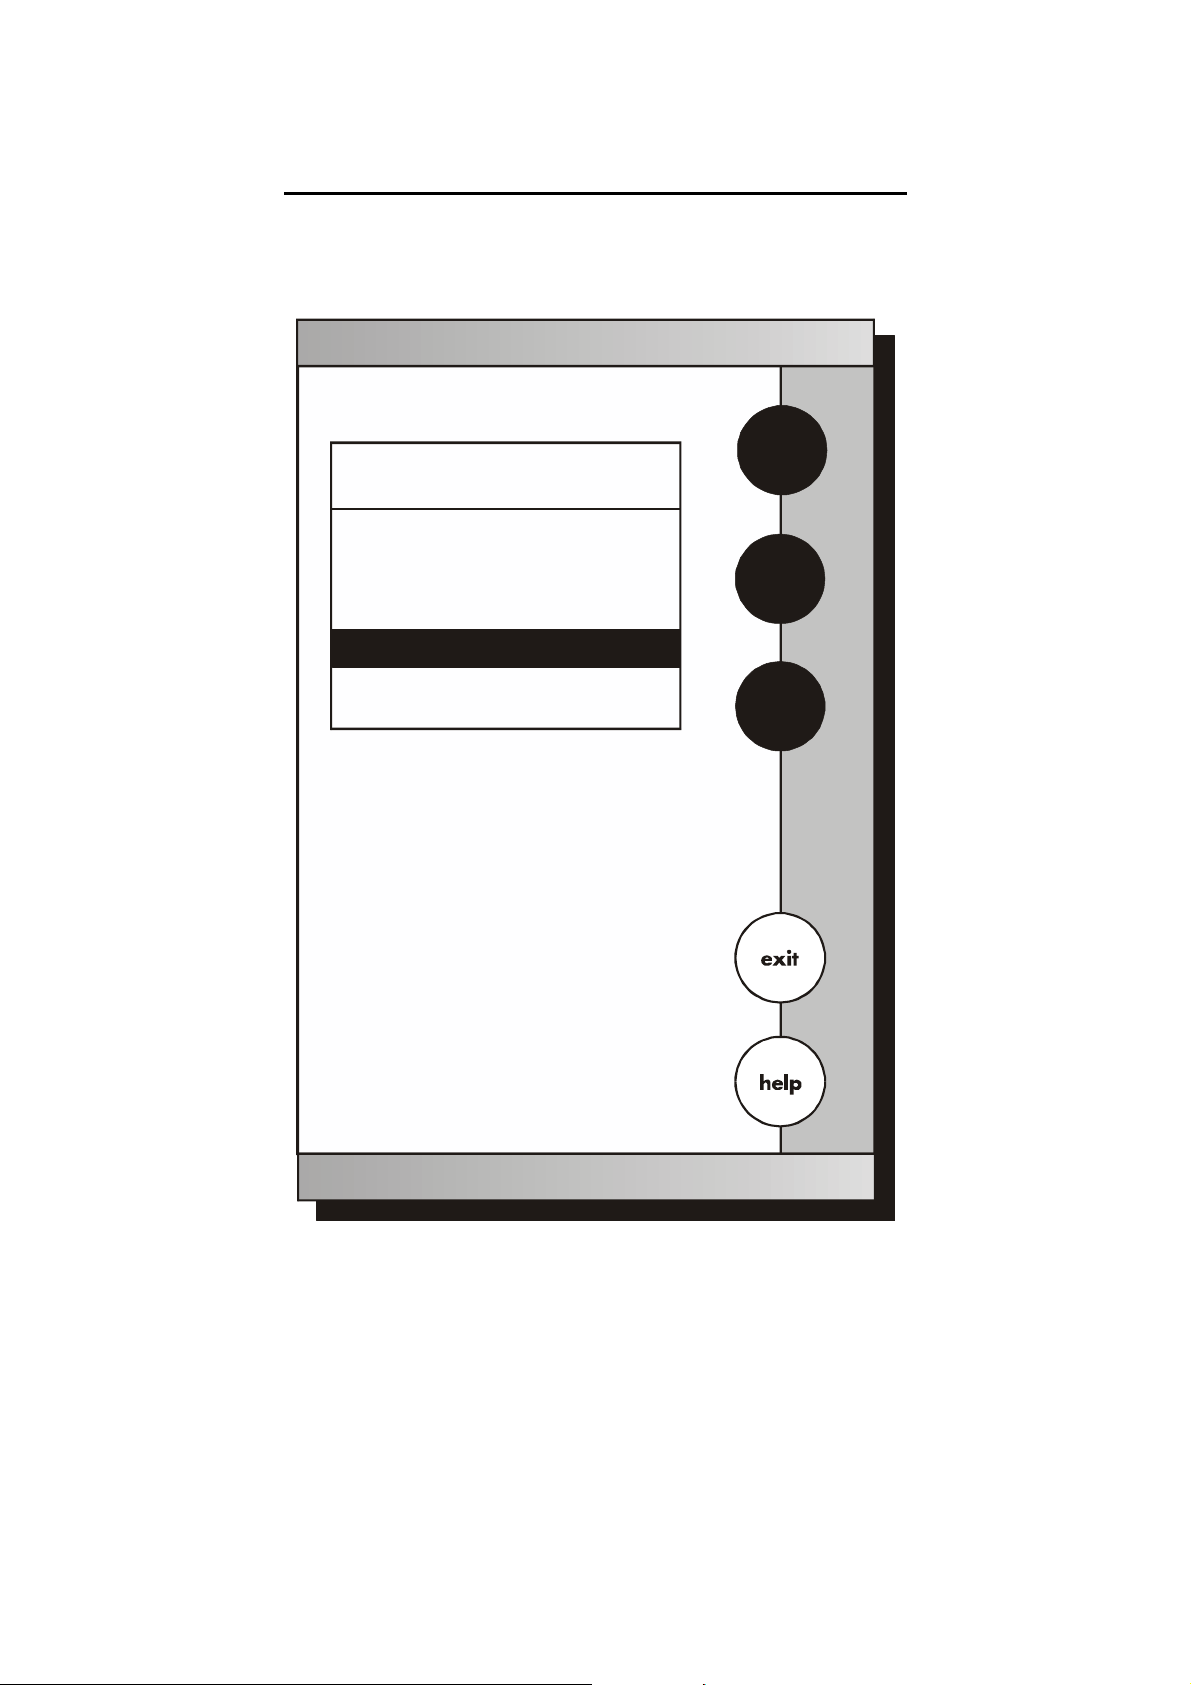
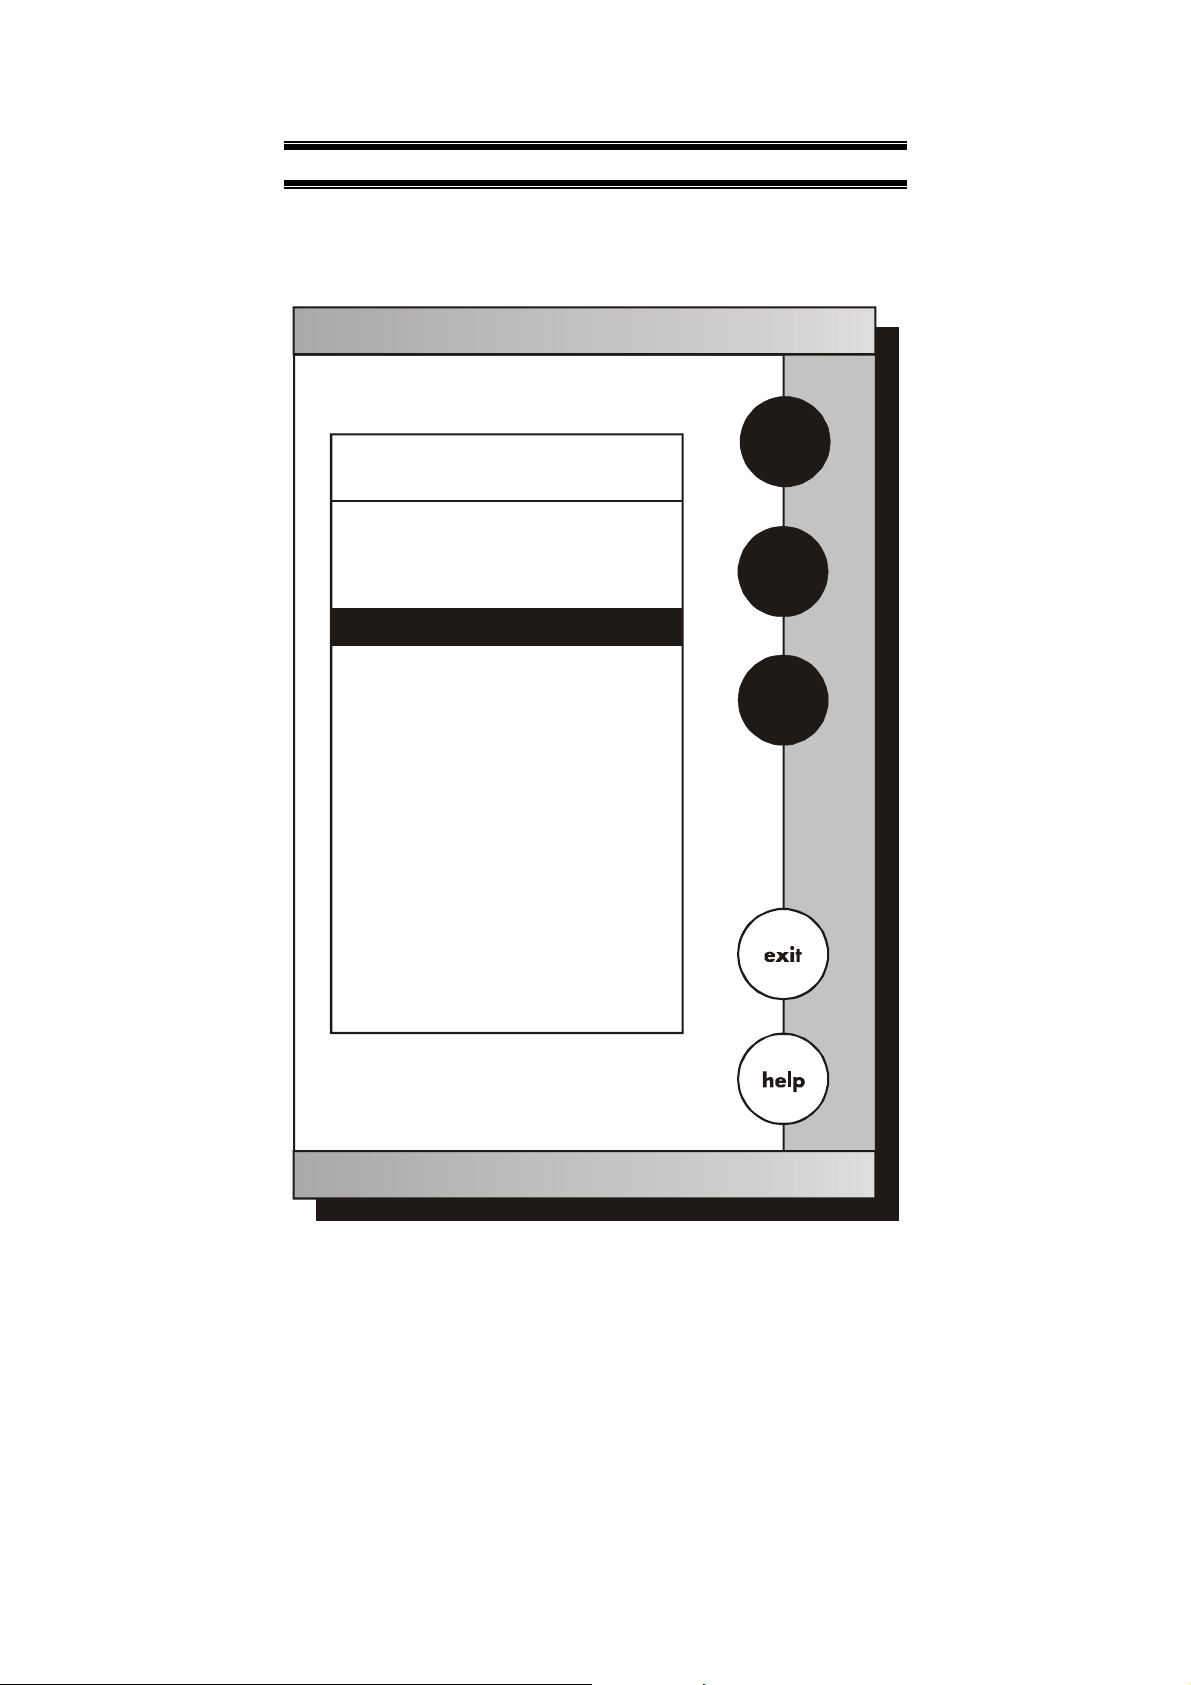
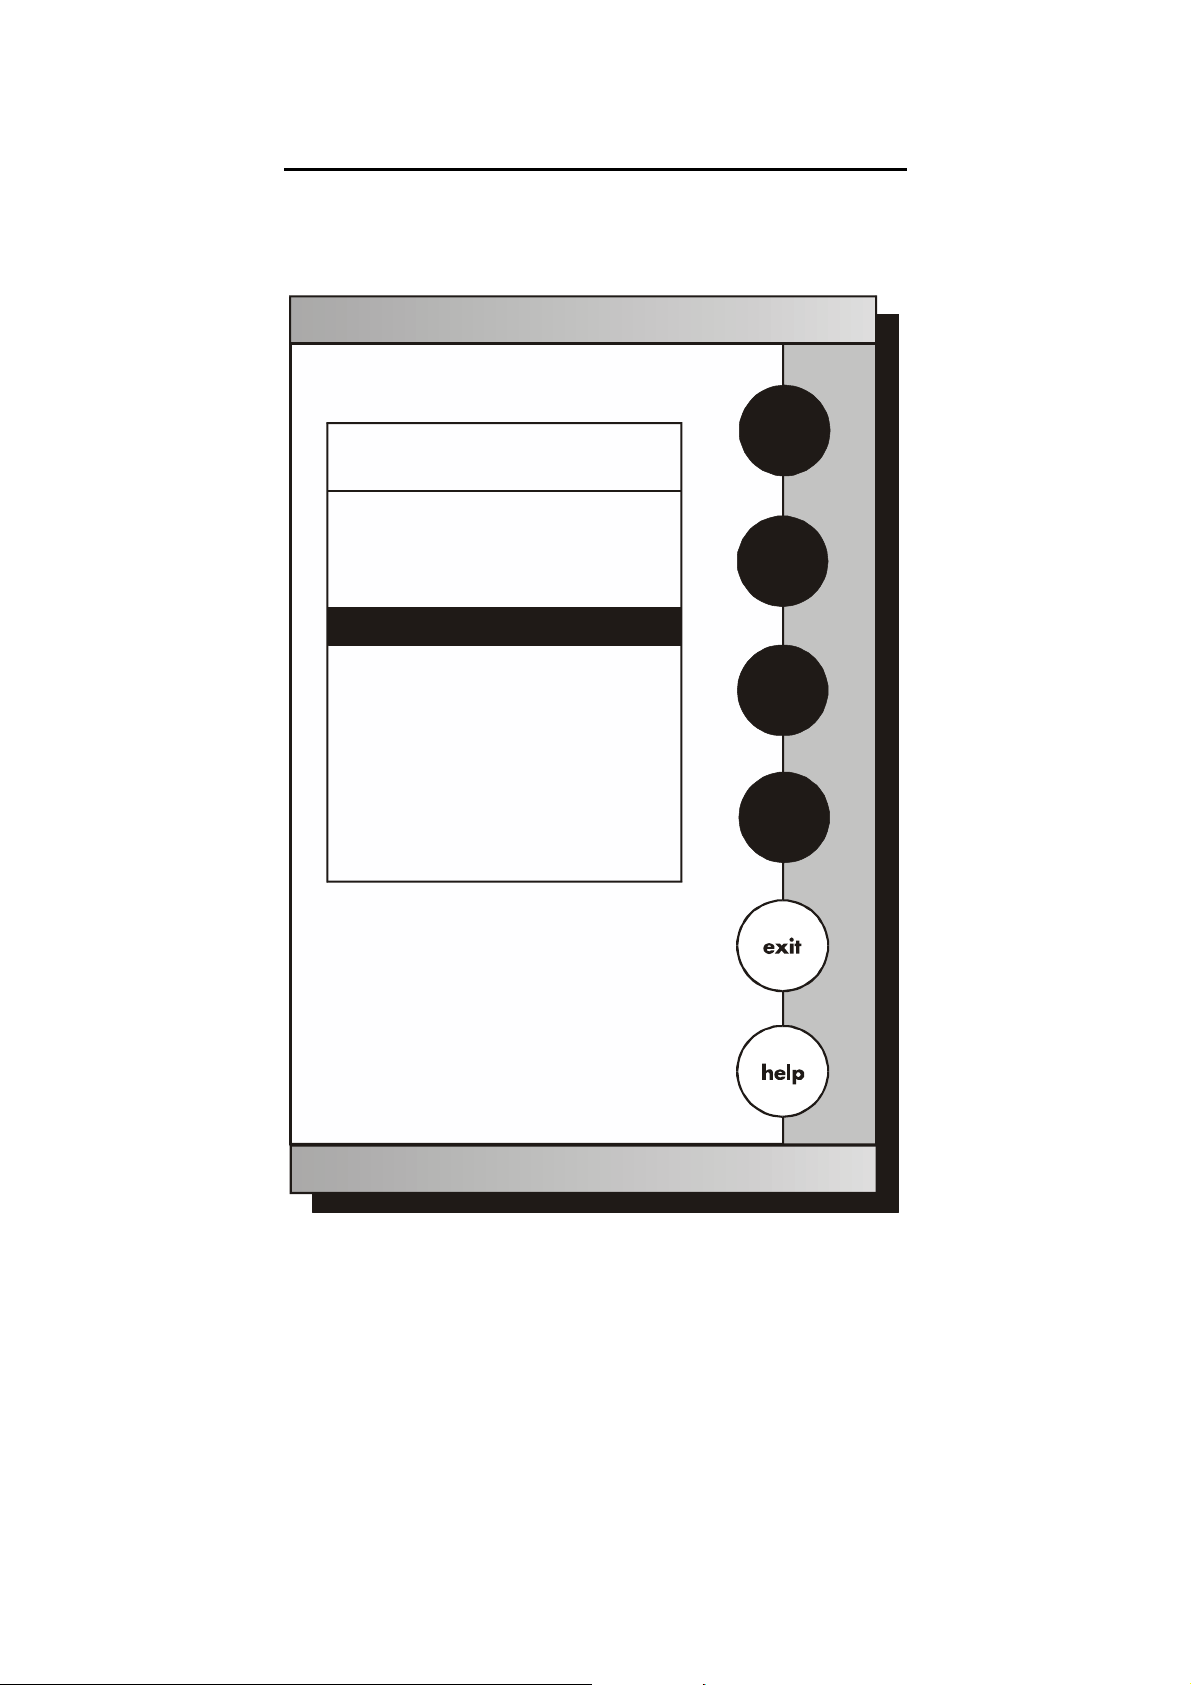
The buttons on the right side of the screen control all of the functions
of the meter. Alight touch on the screen is all you need to access the
various functions. Once you touch a button you will get an audible
tone; the screen will not change until you lift your finger.
This design prevents rapid uncontrolled scrolling through the various
function screens. Easy to understand prompts guide you through the
operation of the meter in the selected mode. If you are ever in doubt
about what to do, just touch help on the bottom right corner of the
screen for detailed information about the screen.
The touch screen is made of a durable polyester material that is
chemically resistant. Maintenance is simple with this meter. To clean
the screen you just need to wipe it with a damp cloth and dry it with a
clean dry towel. For additional information, see Cleaning and
Troubleshooting sections of the manual (page 92).
9
Page 13
Instruction Manual CyberScan DO5000
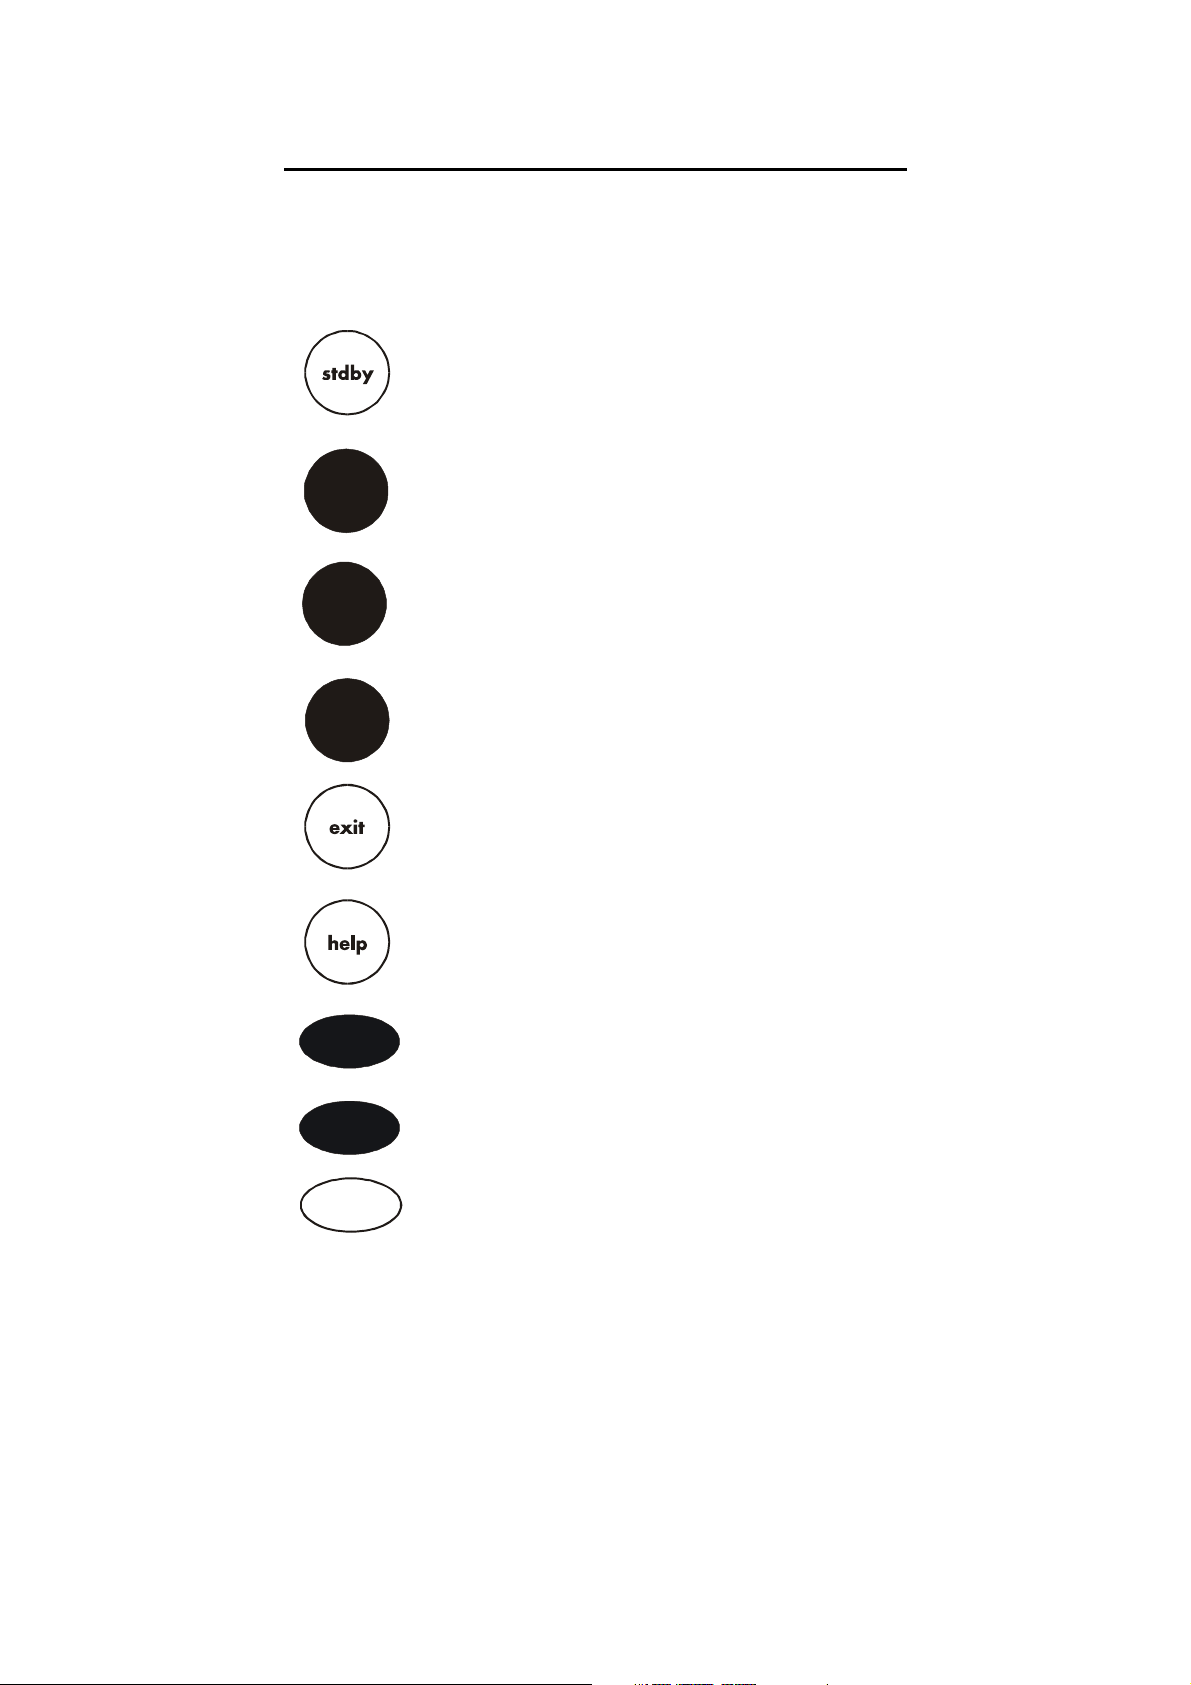
3.4 Button functions
The touch screen of your CyberScan research DO meter has
“buttons” along the right side of the screen that are common to many
of the screens. The following indicates the function of these common
buttons.
This is the standby button and it allows you to access the
standby mode. When in standby, the meter will not take
measurements. It is in a state of rest. When you touch
stdby the meter will return to the standby screen which
says “Eutech Instruments” and displays the time.
mode
enter
save
close
more
back
The mode button allows you to switch between the various
operations of the meter. These operations include DO,
BOD, OUR, SOUR, setup, and stdby.
The enter button allows you to accept any changes that
you have made on one setup screens or accept values that
you have input with keypads. When touched, enter will
save the changes and return you to the previous screen.
The save button allows you to save multiple changes that
you have made on one screen as a group. It functions like
the enter button does for an individual changes.
The exit button allows you to leave the screen you are
currently viewing and return to the previous screen without
making any changes.
The help button allows you to access helpful information
on any screen. When you touch the help button,
information about the current screen appears. This
information will include step by step instructions for
operating the meter from the current screen and possible
applications information for that screen.
The close key appears on the bottom of all help screens
and allows you to exit the help screen and return to the
previous screen.
The more button appears on the help screens and allows
you to advance to the next help screen for additional
information.
The back button appears on the help screen and allows
you to move back to a previous help screen.
10
Page 14

Instruction Manual CyberScan DO5000
std
meas
setup
print
edit
clear
BS
BS
delete
prev
next
This button accesses the standardization screen from the
various measurement modes and initiates standardization
of the meter once the standardization screen is accessed.
This button is the measure button and directs the meter to
measure your sample when in the Auto Read mode.
This button will access he setup screens for the measuring
mode that you are currently using. It can also be used to
access the system setup screen that allows you to set
parameters that are not related to measurements such as
the times and the date.
The print button sends information to the output device
that you have connected to your CyberScan meter. The
output device can be a printer, data logger or a computer.
In addition to this, touching the print button will also send
data to the data storage center of the meter if a sample ID
has been assigned to your sample.
The arrow keys on the screen move the cursor up and
down in order to highlight parameters that you would like to
T
review or edit.
The edit button appears on the setup screens. After you
have highlighted a parameter that you would like to change,
the edit button allows you to access the available options
for that parameter.
The clear button allows you to remove a setup parameter
or standard buffer value from the meter’s memory that may
have been entered at a previous time or by a previous user
that is no longer of value to you. Touching the clear button
erases the value so you may enter a new one. It can also
erase the data from the memory of the meter.
The BS button is a backspace button. It appears on keypad
screens and it allows you to back up and delete a character
entered in error.
The delete button appears on the “View Stored Data”
screens. This button allows you to erase the data from the
memory of the meter.
The prev button appears on the Data Screens when the
data stored in the meter’s memory has been accessed. It
allows you to scroll through data points sorted and stored
prior to the current data point displayed.
The next button appears on the Data Screens when the
data stored in the meter’s memory has been accessed. It
allows you to scroll through data points sorted and stored
prior to the current data point displayed.
11
Page 15

Instruction Manual CyberScan DO5000
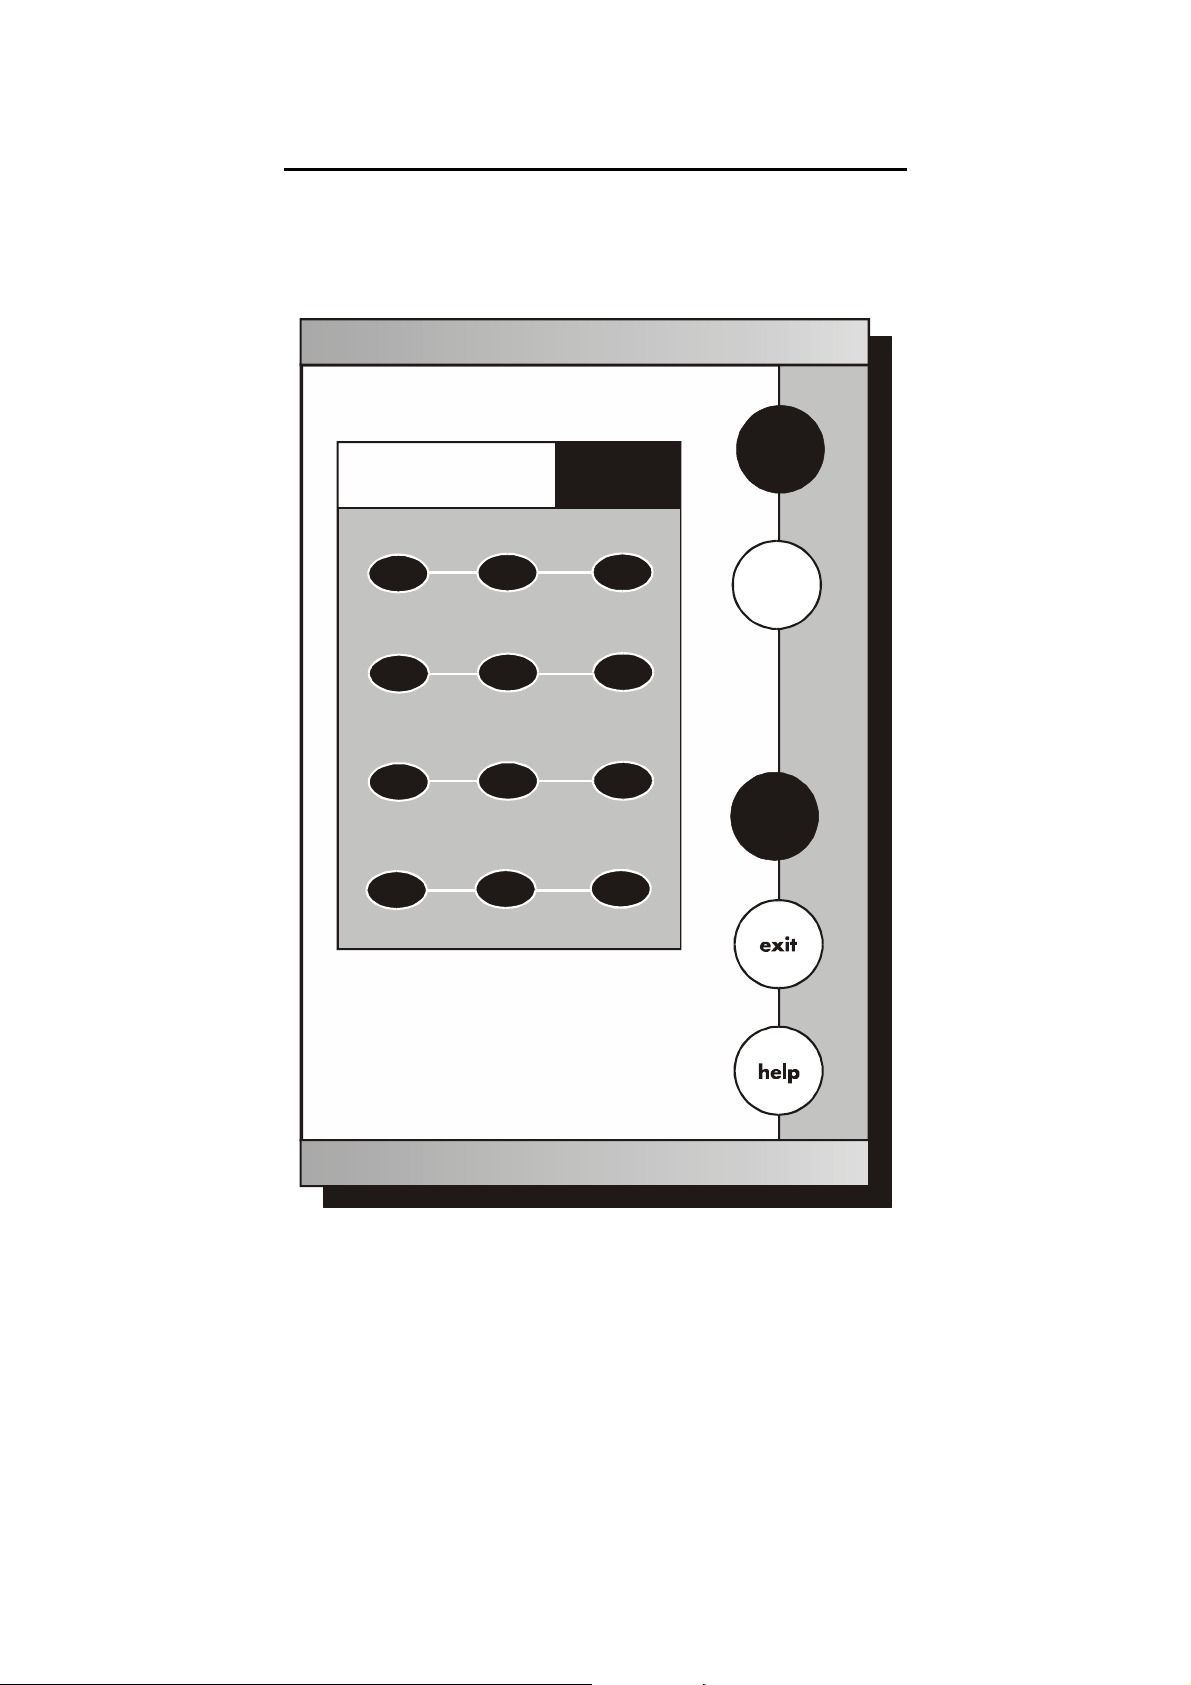
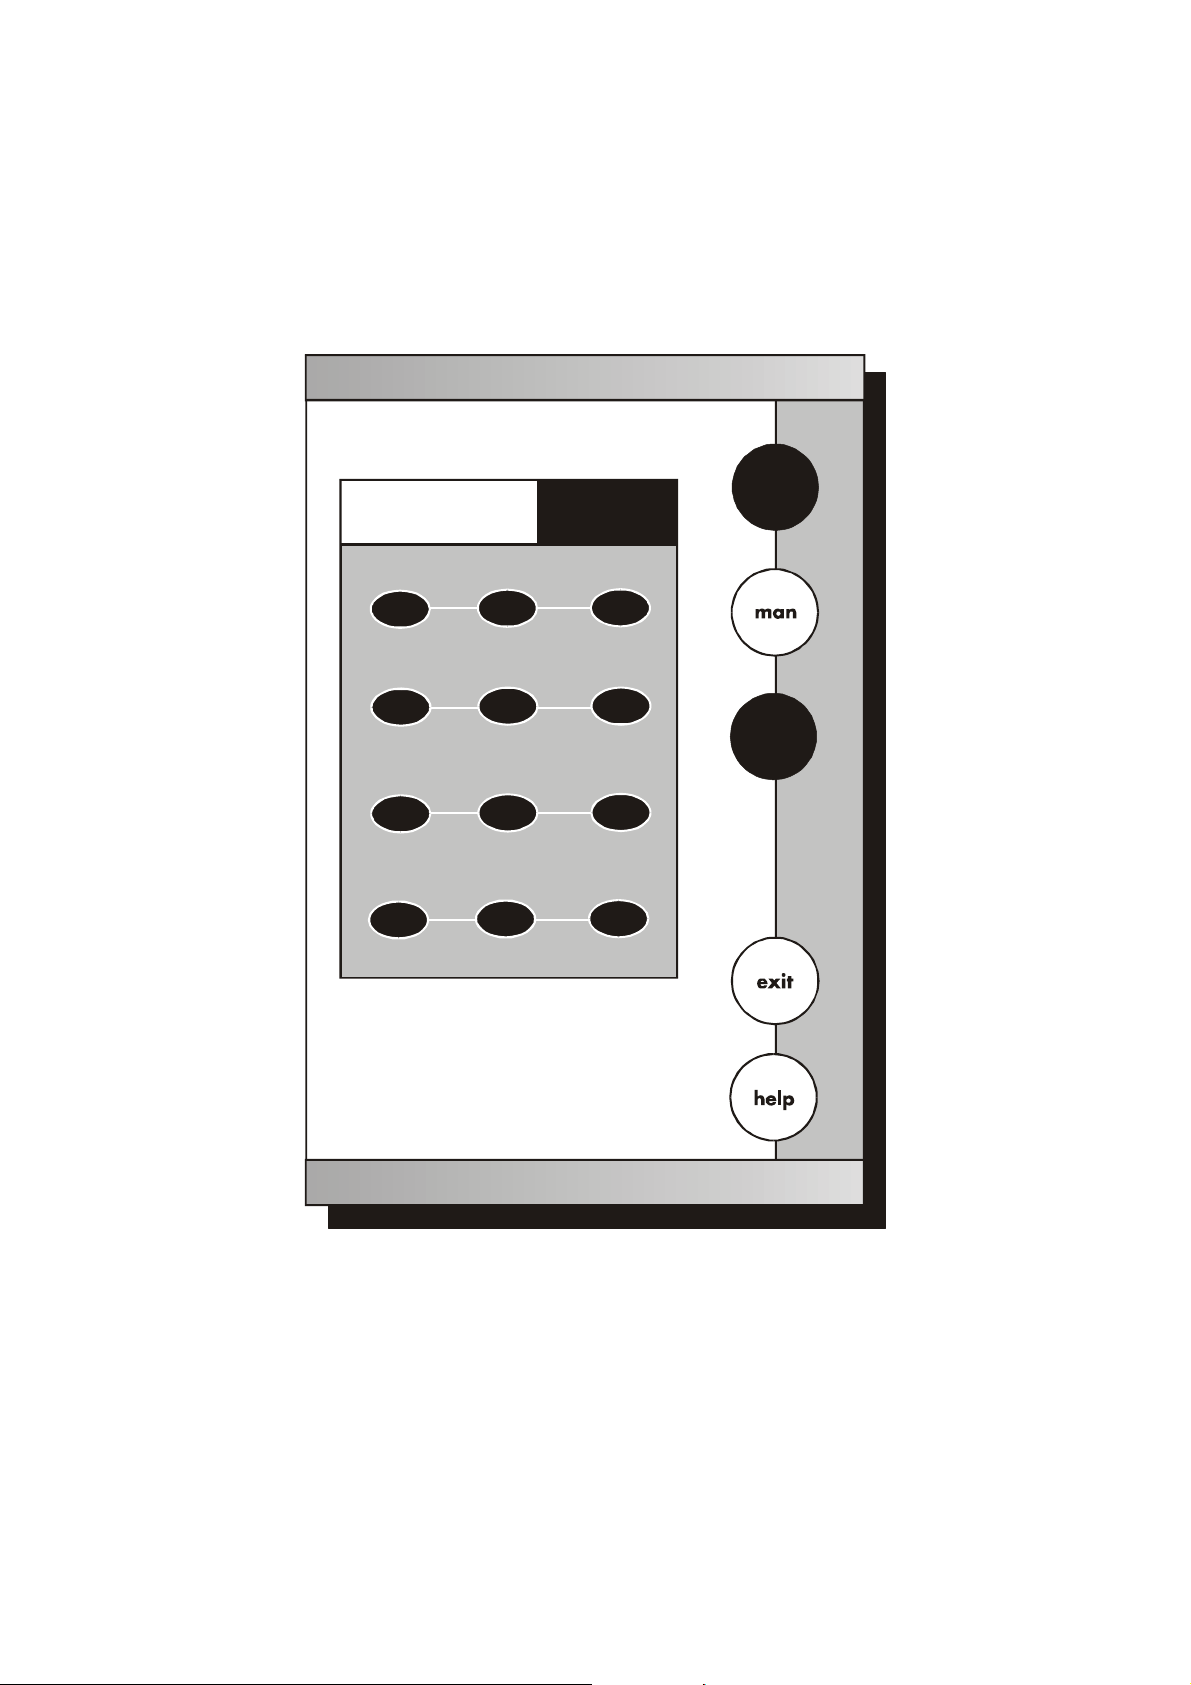
4 SYSTEM SETUP
System Setup
S
SYSTEM SETUP OPTIONS
-
Set
Date
- Set
Time
T
Beeper Status
- Set
- Set
Print Configuration
Barcode Configuration
- Set
edit
Operator
- Set
Display Contrast
- Set
- Display
- Reset to
Meter Information
Factory Defaults
12
Page 16
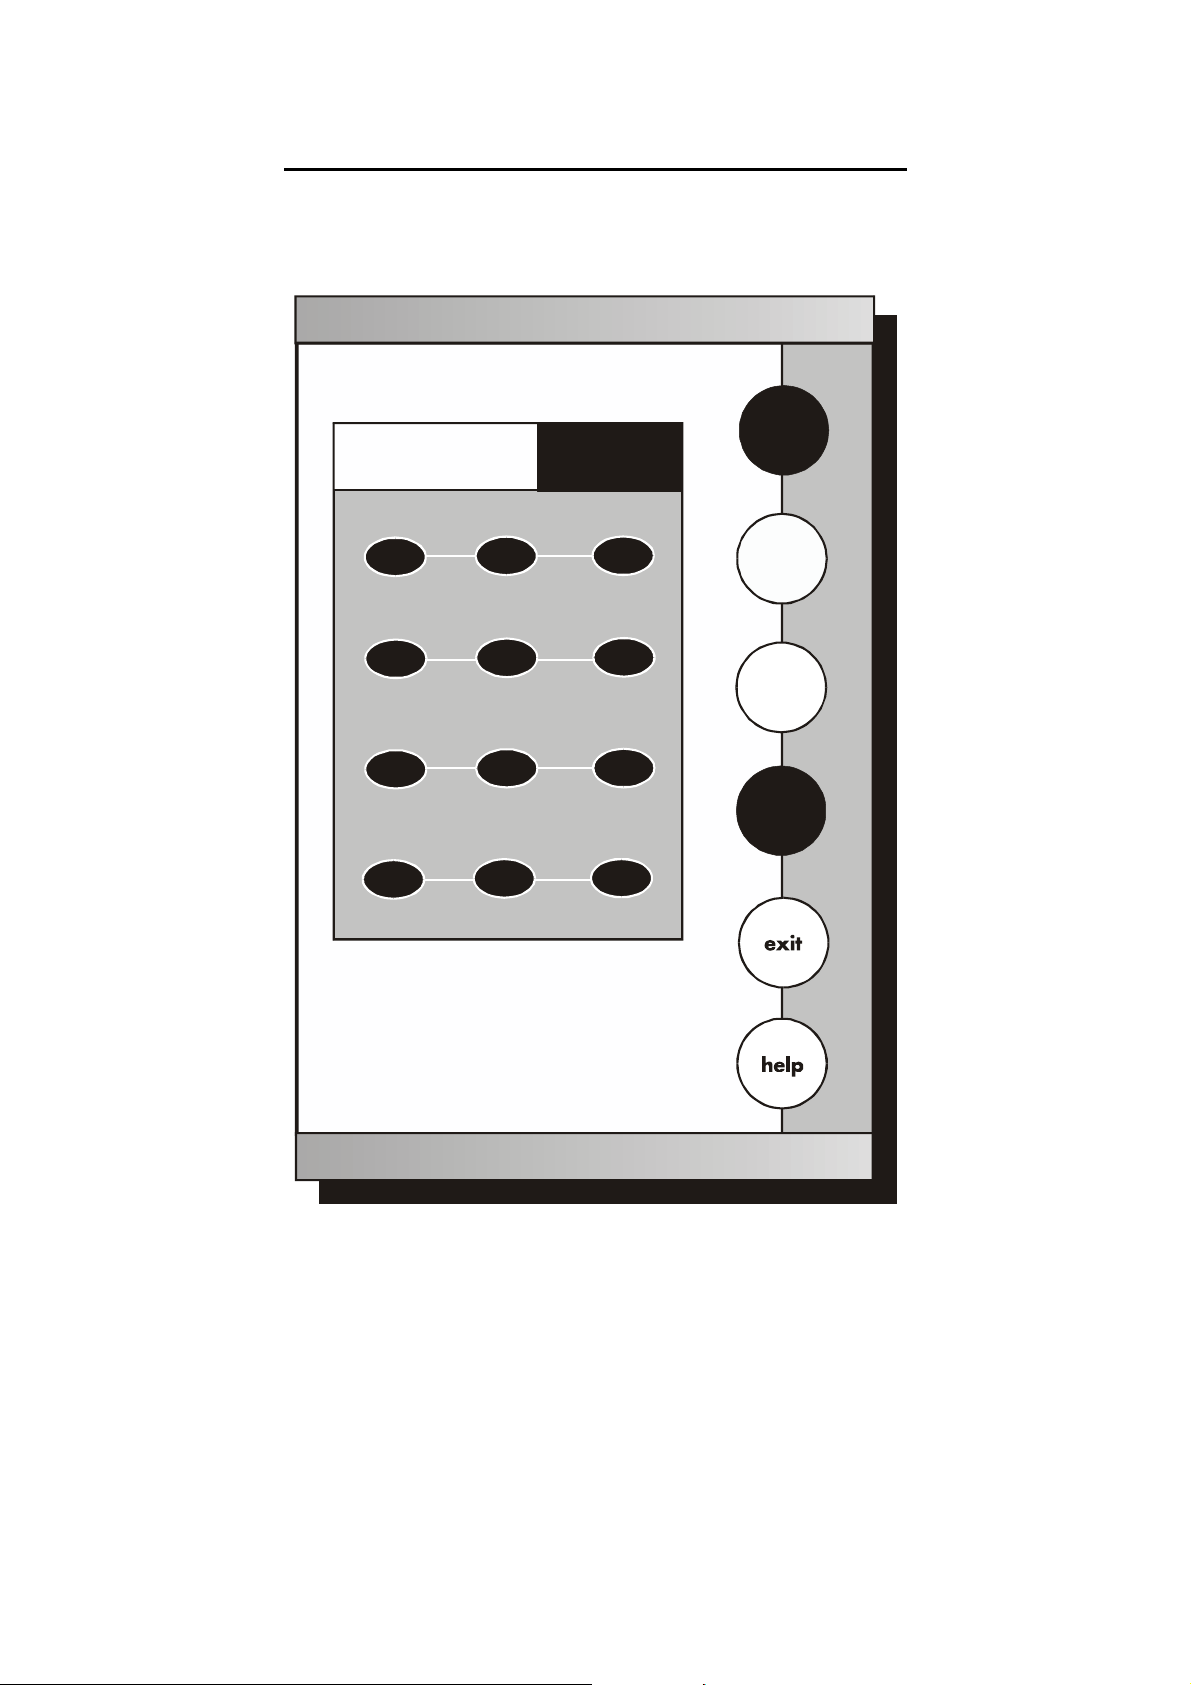
Instruction Manual CyberScan DO5000
E U T E C H
INSTRUMENTS
CyberScan DO 5000
Select from the options to the right
January 15, 2002 11:11 am
System Setup
SYSTEM SETUP OPTIONS
- Set
Date
- Set
Time
- Set
Beeper Status
Set
Print Configuration
-
- Set
Barcode Configurati on
- Set
Operator
- Set
Display Contrast
- Display
Meter Information
- Reset to
Factory D efaults
DO
BOD
OUR
SOUR
system
S
T
edit
13
Page 17

Instruction Manual CyberScan DO5000
Access system setup
System setup can be accessed from the Setup screen (Page 12).
The system setup function allows you to customise the meter display
options to meet your personal preference. Once set, these will rarely
need to be changed.
To Access System Setup
1. Touch anywhere on the standby screen
2. Touch system on the setup screen
The system setup options are now displayed on the screen.
To Access a System Setup Option
1. Use the arrow keys to scroll through the setup options and
highlight the option to be reviewed.
2. Touch edit to view the current status of the selected option.
The following is a detailed description of the system setup option
screens
14
Page 18
Instruction Manual CyberScan DO5000
4.1 Set Date
Set
Date
enter
Current MM/DD/YY
1-15-02
1 2 3
4 5 6
7 8 9
BS 0 /
Touch to delete current date
clear
Use to input the new
numeric touchpad
date and then touch to accept
enter
D/M/Y
clear
15
Page 19

Instruction Manual CyberScan DO5000
This screen can be used to set the present date which will be
displayed on the measure screens. This date will also be printed on
demand and stored in the data storage center of the meter when data
is saved. There are two format options for the date: month/ day/ year
(M/ D/ Y) or the European format of day/ month/ year (D/ M/ Y)
To set date
1. Access the Set Date screen from the System Setup screen. The
current date and numeric keypad are displayed on the screen.
2. Touch clear to delete the current entry.
3. Touch D/ M /Y or M/ D/ Y to set the date format.
4. Use the numeric touch pad to enter the desired date, separating
the day, the month and the year by touching the “/” key on the
keypad.
5. Touch enter to accept the date in the current format.
OR
Touch exit to return to the system setup screen, without making
any changes.
If you do not use “/”, the meter will not accept the date entry.
16
Page 20
Instruction Manual CyberScan DO5000
4.2 Set Time
Set
Time
enter
Current 12HR:
10:40 am
1 2 3
4 5 6
7 8 9
BS 0 :
Touch to delete current time
clear
Use to input the new
numeric touchpad
time and then touch to accept
enter
24hr
pm
clear
17
Page 21
Instruction Manual CyberScan DO5000
This screen can be used to set the present time which will be
displayed on the measure screens. This time will also be printed on
demand and stored in the data storage center of the meter when data
is saved. There are two formats options for the time. The clock can
be set as either a 12 hour clock or a 24 hour clock.
To set time
1. Access the set time screen from the System Setup screen. The
current time and numeric keypad are displayed on the screen.
2. Touch clear to delete the current entry.
3. Touch the 24hr or 12hr button to format the clock as either a 12
hour or a 24 hour clock.
4. Touch am or pm to set the appropriate time.
5. Use the numeric touch pad to enter desired time, separating the
hour and the minutes by touching the “:” key in the keypad.
6. Touch enter to accept the time in the current format.
OR
Touch exit to return to the System Setup screen, without making any
changes.
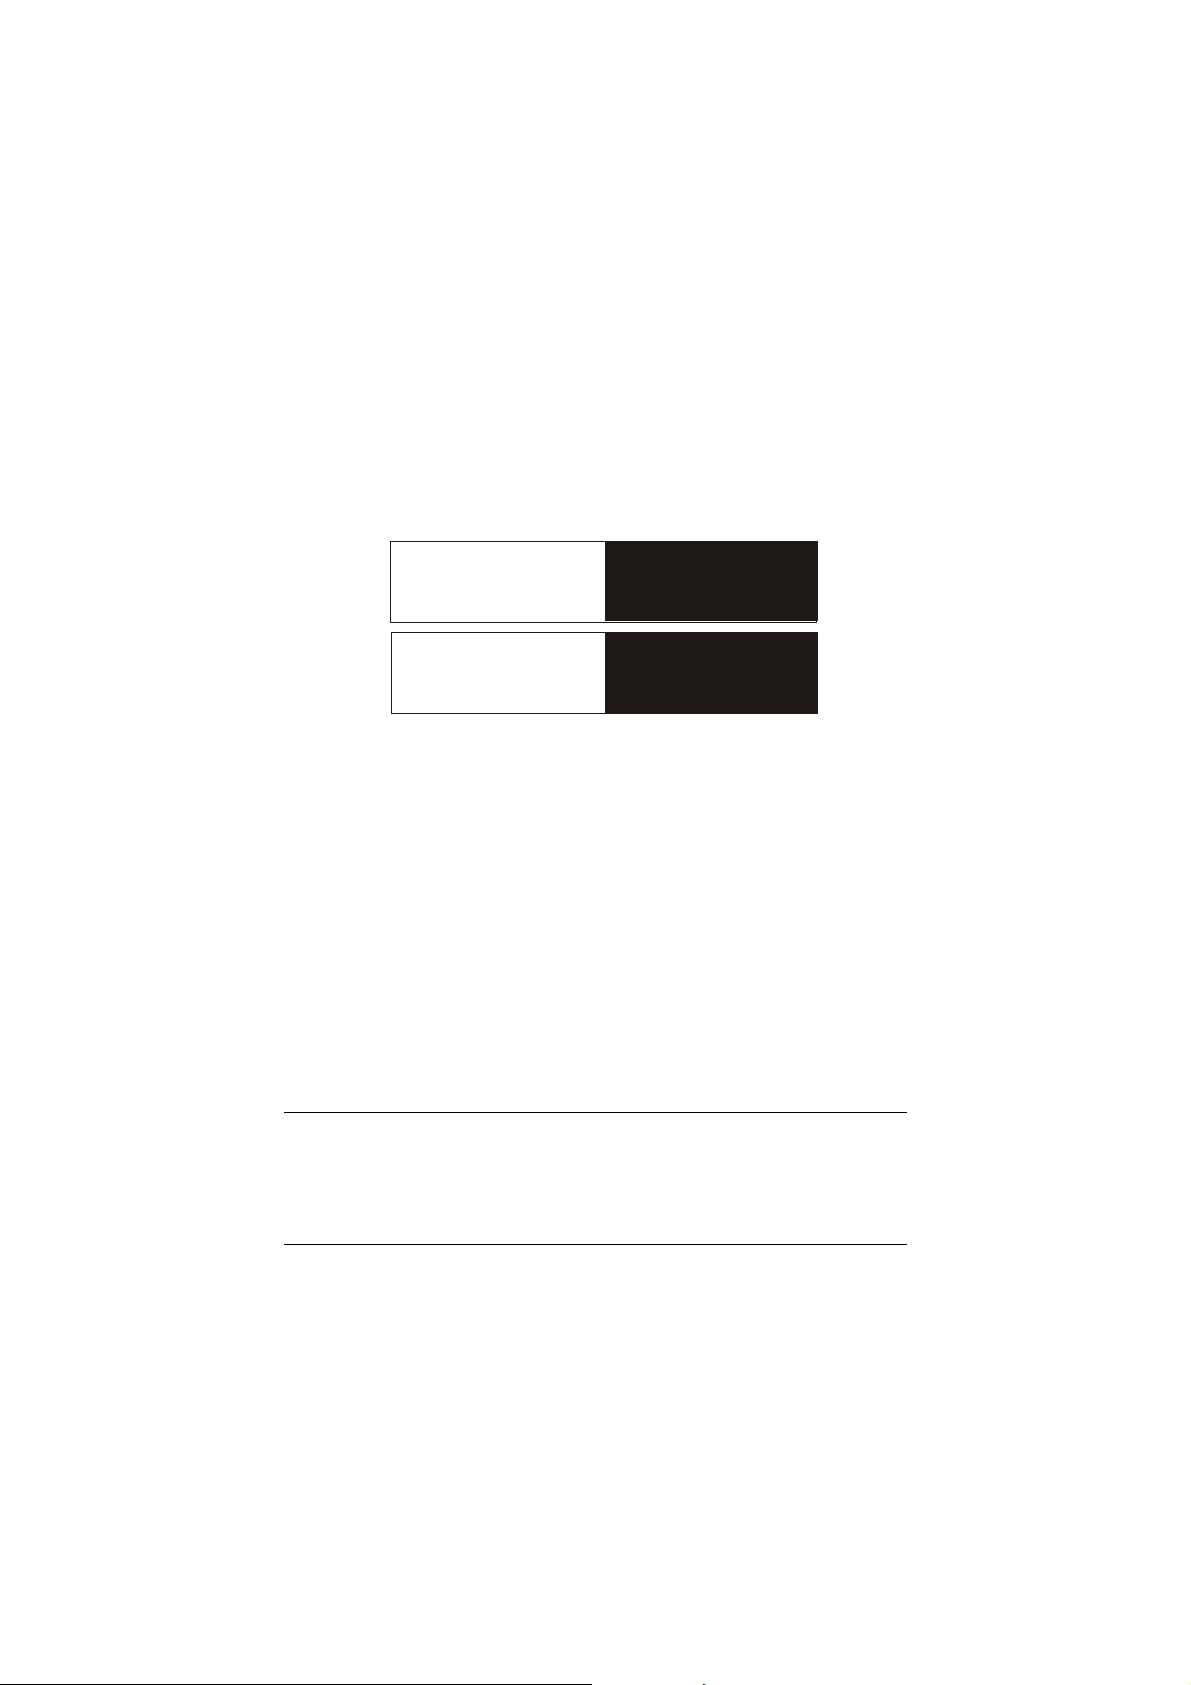
Current 12HR
Current 24HR
5:15 pm
17:15
If you do not use the “ : ”, the meter will not accept the time.
18
Page 22
Instruction Manual CyberScan DO5000
4.3 Set Beeper Status
Set
Beeper Status
S
Current BEEPER STATUS
-
After STABLE Reading
OFF
- After KEY Touch
- On LIMIT Exceeded
Use to highlight beeper
arrow keys
option and then touch to
change
Touch to accept changes
save
ON/OFF
OFF
OFF
T
ON
save
19
Page 23

Instruction Manual CyberScan DO5000
This screen allows you to turn on or off the beeper. You may choose
to have an audible signal when the meter recognises that the current
measurement is stable, each time a function button is touched and/
or when the set limits of a measurement mode have been exceeded.
To Set Beeper Status
1. Access the set beeper status screen from the System Setup
screen. The current beeper status is displayed on the screen.
2. Use the arrow keys to highlight the beeper status option that you
would like to modify.
3. Touch ON or OFF until the desired status is visible in the current
beeper status box.
4. Touch save to accept the changes and return to the System
Setup screen.
OR
Touch exit to return to the System.
20
Page 24
Instruction Manual CyberScan DO5000
4.4 Set Print Configuration
Set
Print Configuration
S
Current PRINT CONFIGURATION
- Baud Rate
- Number of Bits
- Stop Bits
- Parity
- Serial Output Mode
Use to highlight desired
print setting and then touch to
change
NONE
TEXT
arrow keys
19200
edit
8
1
T
edit
21
Page 25

Instruction Manual CyberScan DO5000
You can adjust the print configuration of this meter from this screen.
The configuration of the following screens must match the
configuration of the printer or computer to which the data will be sent.
To Set Print Configuration
1. Access the Print Configuration screen from the System Setup
screen. The current Print Configuration is displayed on the
screen.
2. Use the arrow keys to highlight the configuration option to be
modified.
3. Touch edit to access the parameters for the highlighted option
OR
Touch exit to return to the System Setup screen, without making
any changes.
22
Page 26
Instruction Manual CyberScan DO5000
4.4.1 Set Baud Rate
Set
Baud Rate
S
Current BAUD RATE
110
300
300
600
1200
2400
4800
9600
19200
38400
This configuration option will control the speed at which the data will
be transmitted by the printer. This parameter needs to match the
baud rate designated by the printer or computer.
To Set Baud Rate
1. Access the Set Baud Rate screen from the Set Print
Configuration screen. The current baud rate is displayed on the
screen.
2. Use the arrow keys to highlight the baud rate option that
matches the baud rate of your printer or computer.
3. Touch enter to accept the baud rate and return to the Set Print
Configuration screen.
OR
Touch exit to return to the Set Print Configuration screen, without
making any changes.
T
enter
23
Page 27

Instruction Manual CyberScan DO5000
4.4.2 Set Number of Bits
Set
Number of Bits
enter
Current NUMBER OF BITS
7
8
To Set Number of Bits
1. Access the Set number of Bits screen from the Set Print
Configuration screen. The current number of bits is displayed on
the screen.
2. Touch 7 or 8 to select the number of bits.
3. Touch enter to accept the bit value and return to the Set Print
Configuration screen.
OR
Touch exit to return to the Set Print Configuration screen, without
making any changes.
24
Page 28

Instruction Manual CyberScan DO5000
4.4.3 Set Stop Bits
Set
Stop Bits
enter
Current STOP BITS
1
2
To Set Stop Bits
1. Access the Set Stop Bits screen from the Set Print Configuration
screen. The current number of bits is displayed on the screen.
2. Touch 1 or 2 to set the desired number of stop bits.
3. Touch enter to accept the stop bit value and return to the Set
Print Configuration screen.
OR
Touch exit to return to the Set Print Configuration screen, without
making any changes.
25
Page 29
Instruction Manual CyberScan DO5000
4.4.4 Set Parity
Set
Parity
enter
Current PARITY
NONE
EVEN
ODD
To Set Parity
1. Access the Set Parity screen from the Set Print Configuration
screen. The current Parity is displayed on the screen.
2. Touch ODD or EVEN or NONE to set the desired parity.
3. Touch enter to accept the parity setting and return to the Set
Print Configuration screen.
OR
Touch exit to return to the Set Print Configuration screen, without
making any changes.
26
Page 30
Instruction Manual CyberScan DO5000
4.4.5 Set Serial Output Mode
Set
Serial Output Mode
enter
Current MODE
TEXT
DATA
To Set Serial Output Mode
1. Access the serial output mode from the set print configuration
screen. The current mode is displayed.
2. Touch Data or Text on your selection
3. Touch enter to accept the choice and return to the Set Print
Configuration screen.
27
Page 31

Instruction Manual CyberScan DO5000
4.5 Set Barcode Configuration
Set
Barcode Configuration
enter
Current MODE
OFF
ON
Use this option, as well as Set Print Configuration, to prepare the
meter for use with a barcode scanner. Set to “ON” is using a barcode
scanner.
To Set Barcode Configuration
1. Access the Set Barcode Configuration screen from the System
Setup screen. The current mode is displayed.
2. Touch ON or OFF on your selection
3. Touch enter to accept the mode.
28
Page 32

Instruction Manual CyberScan DO5000
Y
4.6 Set Operator
Set
Operator
enter
Current Operator
A B C 1
D E F 2
G H I 3
J K L 4
M N O 5
P Q R 6
S T U 7
V W X 8
Z - 9
BS / . 0
clear
29
Page 33

Instruction Manual CyberScan DO5000
This option allows you to identify the user of the meter. This
information can be saved in the meter’s memory. It can also be
printed out with measurement data on demand. The operator
identification can be up to 9 characters.
To Set Operator
1. Access the Set Operator screen from the System Setup screen.
The current operator identification is displayed on the screen.
2. Touch clear to remove the current operator identification.
3. Use the alphanumeric keys on the touch screen to enter the
desired operator identification. The BS button will allow you to
backspace to remove a character that was incorrectly entered.
The operator identification code can be a maximum of 9
characters in length.
4. Touch enter to accept the new operator identification.
OR
To deactivate the operator identification
1. Touch clear to erase the current user identification.
2. Touch enter to return to the System Setup screen.
OR
Touch exit to return to the System Setup screen, without making
any changes.
30
Page 34

Instruction Manual CyberScan DO5000
4.7 Set Display Contrast
Set
Display Contrast
lighter
darker
17
Touch or to adjust
lighter darker
contrast and then touch to accept
The value displayed ranges from
0(darkest) to 25 (lightest)
save
save
31
Page 35

Instruction Manual CyberScan DO5000
This option allows you to change the contrast on the screen to
improve the readability of the information presented on the screen.
The numbering system that appears on the screen is from 0 to 25.
The darkest setting is 0 and the lightest setting is 25.
To Set Display Contrast
1. Access the Set Display Contrast screen from the System Setup
screen. The current display contrast value is displayed on the
screen.
2. Use the lighter or darker button to adjust the contrast of the
screen to the desired level.
3. Touch save to accept the contrast setting and return to the
System Setup screen.
OR
Touch exit to return to the System Setup screen, without making
any changes.
The display contrast of the screen is affected by the internal
temperature of the meter. The meter will warn up after being plugged
in. during this period (approximately 20 minutes), the display contrast
of the screen will get lighter. You may need to adjust the contrast
during this period to meet your specifications.
32
Page 36

Instruction Manual CyberScan DO5000
4.8 Display Meter Information
E U T E C H
INSTRUMENTS
CyberScan DO 5000
Unit Serial Number: XX999XXX
Software Revision: 1.04b
This screen displays the model number, serial number and current
software revision of your meter.
33
Page 37

Instruction Manual CyberScan DO5000
4.9 Reset to Factory Defaults
Reset to Factory Defaults
You are about to reset all parameters of the meter
to factory default settings.
Are you sure you want to do this?
YES
NO
This screen allows you to reset all functions and setup parameters of
the meter of the settings originally programmed at the factory.
To Reset to Factory Defaults
1. Access the Reset to Factory Defaults screen from the System
Setup screen.
2. Touch Yes to reset all parameters to the original factory default
settings.
OR
Touch NO to return to the System Setup screen, without making
any changes.
34
Page 38
Instruction Manual CyberScan DO5000
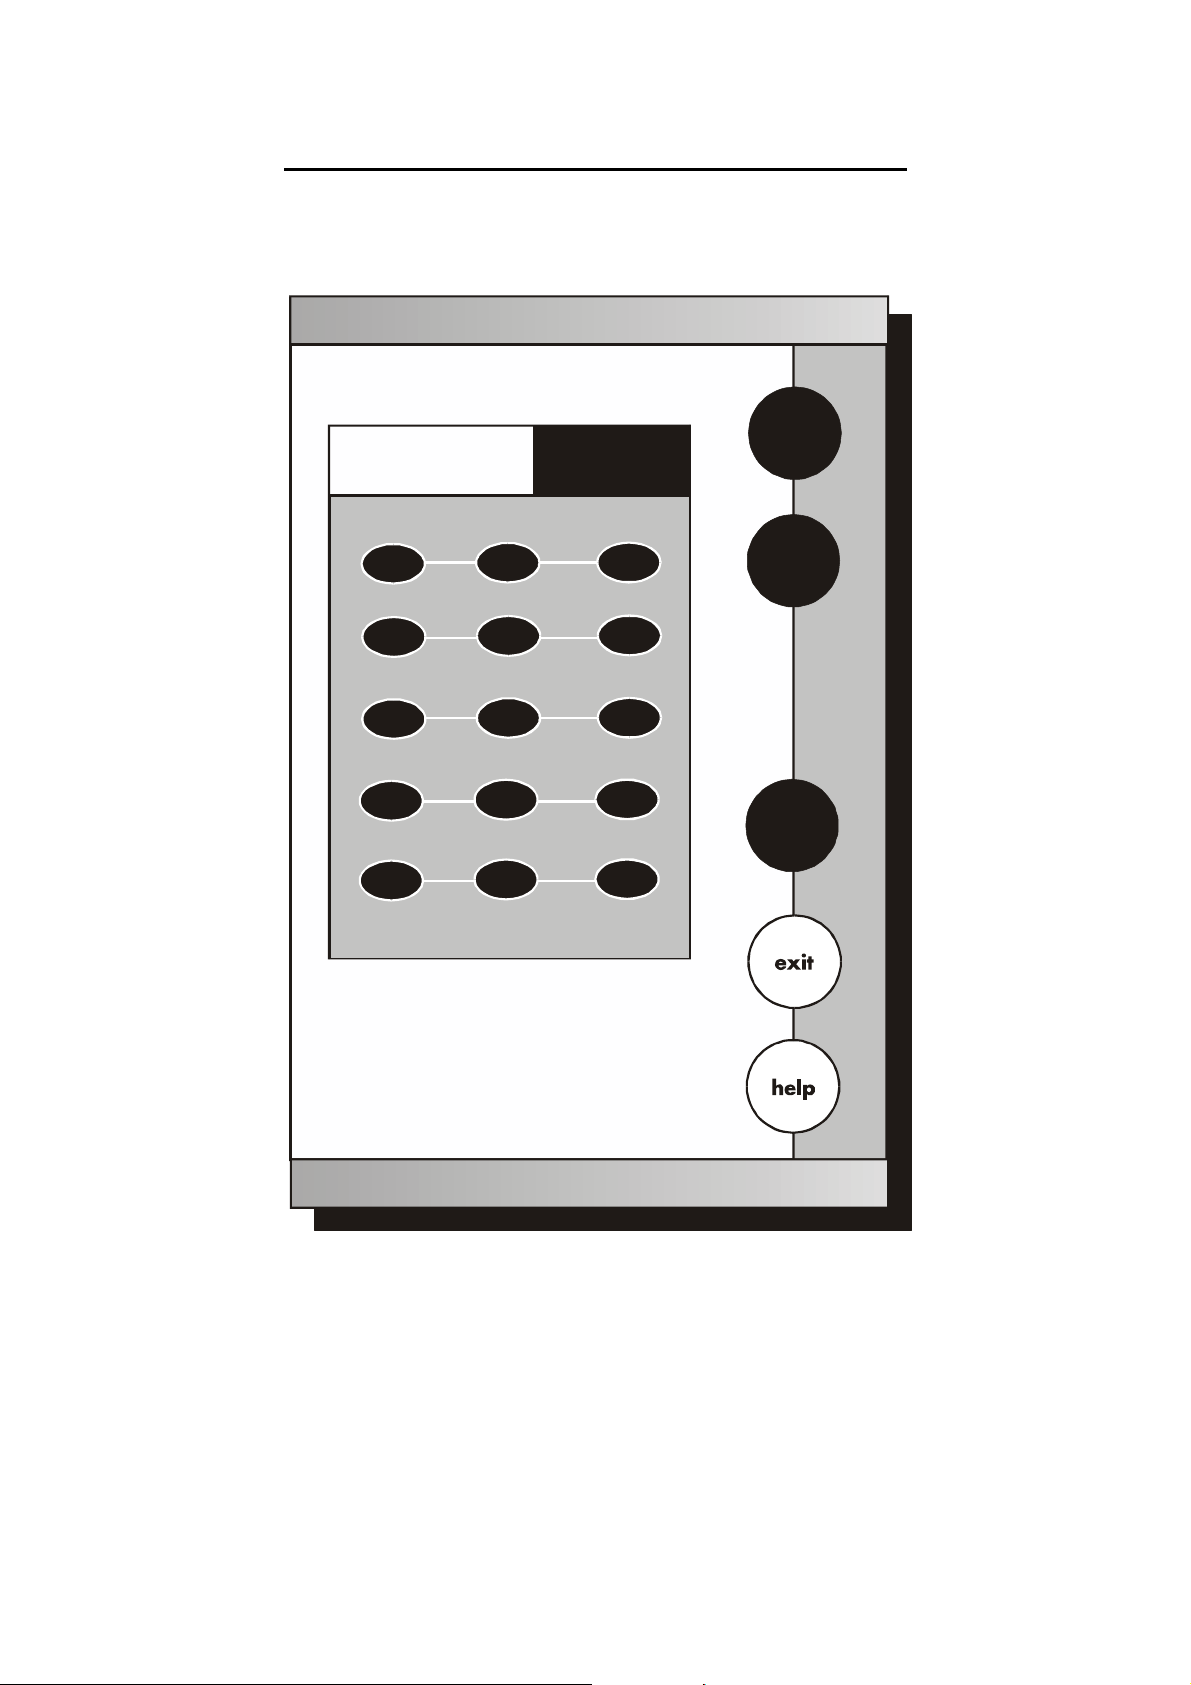
5 D.O. / BOD/ OUR/ SOUR SETUP
D.O. Setup
D.O. SETUP OPTIONS
- Set
Sample ID#
- Select
- Select
- Set
- Set
- Select
- Set
- Set
- Set
- Set
- Set
- Set
- Set
- Set
- View
Calibration Mode
Auto Read Mode
Stability Criteria
Temperature Units
Measurement Units
Salinity
Barometer
Alarm Limits
Print Criteria
Print Interval
Data Storage Criteria
Display Resolution
Display Configuration
Stored Data
S
T
edit
The operating parameters of the DO/ BOD/ OUR/ SOUR modes are
common for all (ONCE SET, SETUP OPTIONS WILL BE SET FOR
ALL MODES). The parameters can be set and controlled from the
setup screen. The following sections well guide you through the
various options available for the setup mode.
35
Page 39

Instruction Manual CyberScan DO5000
5.1 To Access Setup
From the DO, BOD, OUR and SOUR screens
1. Touch DO, BOD, OUR, or SOUR from the main screen to access
any of these modes.
2. Touch setup
3. Use the arrow keys to highlight the setup option that you would
like to review
4. Touch edit to access the screen for the selected option.
36
Page 40

Instruction Manual CyberScan DO5000
Y
5.2 Set Sample ID#
Set
D.O. Sample ID#
enter
Manual ID#
A B C 1
D E F 2
G H I 3
J K L 4
M N O 5
P Q R 6
S T U 7
V W X 8
Z - 9
BS / . 0
clear
37
Page 41

Instruction Manual CyberScan DO5000
When this option is active, each time you touch print on the Measure
Screen the DO values along with date/time and the sample ID will be
sent to data storage. You can manually enter an alphanumeric
identification of up to 9 characters for any sample or you can have
the meter sequentially number your samples beginning at the number
of your choice. You may also choose to deactivate the sample ID.
To Set Sample ID
Manual ID Assignment
1. Access the Set Sample ID screen from the Setup screen.
2. Touch auto or Man to choose the desired mode.
3. Touch enter to accept the choice and return to the setup screen.
4. Use the keypad to enter the new sample ID.
5. Touch enter to accept the first sequential ID# and return to the
Setup screen.
38
Page 42
Instruction Manual CyberScan DO5000
Set
D.O. Sample ID#
enter
Sequential ID#
1 2 3
4 5 6
7 8 9
BS 0 .
Touch to delete current ID
clear
Use to input the new
numeric touchpad
starting ID and then touch to accept
enter
24hr
clear
39
Page 43

Instruction Manual CyberScan DO5000
Sequential ID# Assignment
1. Access the Set Sample ID# screen from the Setup screen.
2. Touch seq for sequential ID# assignment. The current ID# is
displayed on the screen.
3. Touch clear to delete the current ID#.
4. Use the alphanumeric keypad on the screen to enter the number
that you would like your sequential ID# assignment to begin with.
Every time you touch print on the measure screen, the ID# will
increase by 1. The BS key will allow you to backspace to remove
a character that was incorrectly entered.
5. Touch enter to accept the first sequential ID# and return to the
Setup screen.
OR
To deactivate the Sample ID# Assignment
1. Access the Set Sample ID# screen from the Setup screen.
2. Touch man for manual ID# entry. The current ID# is displayed on
the screen.
3. Touch clear to delete the current ID#.
4. Touch enter. The ID# assignment is now deactivated. No number
will be assigned to your samples. The meter will return to the
Setup screen.
OR
Touch exit to return to the Setup screen, without making any
changes.
40
Page 44

Instruction Manual CyberScan DO5000
5.3 Select Calibration Mode
Select
This mode permits a choice between automatic and manual
standardization. In most case, automatic calibration is preferred.
However, if the standard is not saturated and the oxygen
concentration is known, (by titration, for example), manual calibration
offers the user capability of entering the known oxygen concentration
via a numeric keypad.
1. Access the Select Standardization Mode from the Setup screen.
2. Touch AUTO or MAN to choose the desired mode.
3. Touch enter to accept the choice and return to the setup screen.
D.O. Calibration Mode
Current MODE
The current mode is shown on the screen.
AUTO
enter
MAN
41
Page 45

Instruction Manual CyberScan DO5000
5.4 Select Auto Read Mode (Only available in D.O. mode)
Select
D.O. Auto Read Mode
enter
Current MODE
AUTO
MAN
You can use this meter when the Auto Read Mode function is active
or when it is inactive. When the Auto Read function is active, the
meter will lock onto a reading when the meter recognises it as stable.
The meter will not deviate from this reading until meas is touched. If
the auto Read function is inactive, then the meter will continuously
monitor the DO of the sample and the Measure screen display will
indicate any fluctuation that reading.
To Select Auto Read Mode
1. Access the Select Auto Read Mode screen from the DO Setup
screen. The current Read Mode id displayed on the screen.
2. Touch AUTO or MAN to choose the desired read mode.
3. Touch enter to accept the read mode and return to the DO setup
screen.
OR
4. Touch exit to return to the DO Setup Screen, without making any
changes.
42
Page 46

Instruction Manual CyberScan DO5000
5.5 Set Configurations for BOD/ OUR and SOUR
(Not applicable in D.O. mode)
Set BOD Configuration
This option allows the user to select certain parameters that define
the criteria for seed and sample acceptance. Theses parameters are
Seed Minimum Data DO (DO
initial
- DO
DO, Sample minimum Delta DO, and sample Minimum endpoint DO.
These parameters will aid the user to disregard “bad” samples. This
setup option appears only when the meter is in the BOD mode.
1. Access the Set BOD Configuration from the Setup screen while
on BOD mode.
2. Use the arrow keys to highlight to parameter you wish to change.
3. Touch edit.
4. Use the numeric keypad that appears to key in the value desired
for the chosen parameter.
5. Touch enter to accept the value.
Set OUR Configuration
This option allows the user to select parameters that define the
criteria for the Oxygen Uptake Rate (OUR) test. These include
Dilution Factor, Minimum Time (minutes) duration of the test,
Maximum Time duration, Minimum Starting DO, and Minimum Ending
DO. This setup option appears only when the meter is in the OUR
mode.
1. Access the Set OUR Configuration from Setup screen while in
OUR mode.
2. Use the arrow keys to highlight to parameter you wish to change.
3. Touch edit.
4. Use the numeric keypad that appears to key in the value desired
for the chosen parameter.
5. Touch enter to accept the value.
). Seed minimum endpoint
final
43
Page 47

Instruction Manual CyberScan DO5000
Set SOUR Configuration
This option allows the user select parameters that define the criteria
for the Specific Oxygen Uptake Rate (OUR) test. These include
Dilution Factor, Minimum Time (minutes) duration of the test,
Maximum Time duration, Minimum Starting DO, Minimum Ending
DO, and Solids Weight (g/L). This setup option appears only when
the meter is in the SOUR mode.
1. Access the Set SOUR Configuration from the Setup screen while
in SOUR mode.
2. Use the arrow keys to highlight the parameter you wish to
change.
3. Touch edit.
4. Use the numeric keypad that appears to key in the value desired
for the chosen parameter.
5. Touch enter to accept the value.
44
Page 48

Instruction Manual CyberScan DO5000
5.6 Set Stability Criteria
Select
D.O. Stability Criteria
Current MODE
Fast
Medium
Slow
This setup screen allows you to choose how quickly the meter will
accept a reading as stable.
There are three settings: fast, medium, and slow.
To set Stability Criteria
1. Access the Set Stability Criteria screen from the DO/ BOD/ OUR/
SOUR Setup screen. The current stability setting is displayed on
the screen.
2. Use the arrow keys to highlight the parameter you wish to
change.
3. Touch enter to accept the stability criteria and return to the Setup
screen.
OR
Touch exit to return to the Setup screen, without making any
changes.
AUTO
S
T
enter
45
Page 49

Instruction Manual CyberScan DO5000
5.7 Set Temperature Units
Select
D.O. Temperature Units
enter
Current UNITS
C
F
K
1. Access the Select Temperature Units screen from the DO/ BOD/
OUR/ SOUR Setup screen. The current temperature unit is
displayed on the screen.
2. Use the arrow keys to highlight the parameter you wish to
change.
3. Touch enter to accept the temperature unit and return to the
Setup screen.
OR
Touch exit to return to the Setup screen, without making a
change.
46
Page 50

Instruction Manual CyberScan DO5000
5.8 Set Measurement Units
Select
D.O. Measurement Units
Current UNITS
mg/L
%sat
mbar
1. Access the Select Measurement Units screen from the DO/ BOD/
OUR/ SOUR Setup screen.
2. Use the arrow keys to highlight desired unit.
3. Touch enter to accept the measurement unit and return to the
Setup screen.
OR
Touch exit to return to the Setup screen, without making a
change.
%sat
S
T
enter
47
Page 51

Instruction Manual CyberScan DO5000
5.9 Set the Salinity Value of Your Sample
1. Access the Set Salinity screen from the DO/ BOD/ OUR/ SOUR
Setup screen
2. Touch clear to delete the current value
3. Key in the desired new value using the numeric keypad
4. Touch enter to accept the new value and return to the Setup
screen
Set
D.O Salinity
enter
Current Salinity
3.2 ppt
1 2 3
4 5 6
7 8 9
0 .
BS
Touch to delete current salinity
clear
Use to input the new
numeric touchpad
salinity and then touch to accept
enter
clear
48
Page 52
Instruction Manual CyberScan DO5000
5.10 Set Barometer
Set
Barometer
enter
Current Pressure
668.5 mmHg
1 2 3
4 5 6
7 8 9
0 .
BS
Touch to delete current pressure
clear
Use to input the new
numeric touchpad
pressure and then touch to accept
enter
mbar
clear
49
Page 53

Instruction Manual CyberScan DO5000
The DO 5000 has an internal barometer. When it is no longer reflects
the true barometer pressure, it must be calibrated. The Set
Barometer option allows you to do this.
To Set Barometer
1. Access the Set Barometer screen from the DO/ BOD/ OUR/
SOUR setup screen. The current pressure is displayed on the
screen
2. Choose the pressure units desired by touching one of the two
unit buttons, mm Hg or mbars.
3. Use the keypad to enter the local barometric pressure, obtained
from a barometer. Do not use weather bureau pressure, as it is
corrected to sea level.
4. Touch enter to accept the reading and exit to the Setup screen.
OR
Touch exit to return to the DO/ BOD/ OUR/ SOUR Setup screen,
without making a change.
50
Page 54

Instruction Manual CyberScan DO5000
5.11 Set Alarm Limits
Set
D.O. Limits
S
Current LIMITS
- D.O. Alarm
-
D.O. Minimum - 0.00
D.O. Maximum
Use to highlight desired Limit
arrow keys
Touch o r to c hange
ON/OFF edit
OFF
1500
T
ON
51
Page 55

Instruction Manual CyberScan DO5000
This option allows you to set alarm limits for the DO/ BOD/ OUR/
SOUR measuring mode. If the DO value of the measurement is
outside the boundaries set by the minimum and maximum limits, an
audible alarm and/ or a visual warning will appear to let you know that
your sample measurement was outside of the set limits.
To Set Alarm Limits
1. Access the Set Alarm Limits screen from the DO/ BOD/ OUR/
SOUR Setup screen. The current alarm limits are displayed on
the screen.
2. Use the arrow keys to highlight the Alarm option you want to
modify.
3. Touch ON, OFF or edit to set the status of the alarm.
4. Use the keypad to enter the new limit value
5. Touch enter on the keypad to accept this limit and return to the
set DO limits screen. If you do not want to change the limit value,
you can touch exit on the keypad and return to the Set DO/ BOD/
OUR/ SOUR limits screen.
OR
Touch exit to return to the Setup screen, without making any
changes.
52
Page 56
Instruction Manual CyberScan DO5000
5.12 Set Print Criteria
Set
D.O. Print Criteria
S
Current PRINT CRITERIA
- Date/Time/Channel
- Sample ID
- DO Measurement
- Temperature - ATC
- Last Standardization
- Current Standard
- Atmospheric Pressure
- Salinity
- Meter Model # / serial #
- Operator
Use to highlight print criteria
arrow keys
and then touch to change
Touch to save the print criteria
save
ON/OFF
ON
ON
ON
ON
ON
ON
ON
ON
ON
ON
T
OFF
save
53
Page 57

Instruction Manual CyberScan DO5000
This screen allows you to select which criteria are printed with the
measurement when you print the data or send it to the computer. The
status of the current print criteria is displayed on the screen. The
criteria option is active if “ON” appears to the right of the option. It is
inactive if “OFF” appears to the right of the option. Any active criteria
will be printed on demand.
To Set Print Criteria
1. Access the Set Print Criteria screen from the DO/ BOD/ OUR/
SOUR Setup screen. The current print criteria are displayed on
the screen.
2. Use the arrow keys to highlight the print criteria option you want
to modify.
3. Touch ON or OFF change the status of the criteria.
4. Repeat steps 2 and 3 with the remaining criteria.
5. Touch save to save the entire group of print criteria and return to
the Setup screen.
OR
Touch exit to return to the Setup screen, without making any
changes.
54
Page 58

Instruction Manual CyberScan DO5000
5.13 Set Print Interval
Set
D.O. Print Interval
enter
Current INTERVAL
manual
1 2 3
4 5 6
7 8 9
BS 0 /
Use to input the
numeric touchpad
desired print interval in seconds and then
enter
touch to accept
stable
Touch to print upon stable readings
Touch to select manual printing interval
man
stable
man
timed
You have three options for setting the print interval: manual printing,
stable reading printing, and timed interval printing.
For Manual Printing
In this mode, data is printed only when you touch print on the
Measure screen.
1. Access the Set Print Interval screen from the DO/ BOD/ OUR/
SOUR Setup screen. The current print interval is displayed on the
screen.
55
Page 59

Instruction Manual CyberScan DO5000
2. Touch MAN to set the meter for manual printing. Touch enter to
accept the print interval mode and return to the Setup screen.
Printing is now done manually by touching print on the Measure
screen.
OR
Touch exit to return to the Setup screen, without making any
changes.
For Stable Reading Printed
In this mode, data is printed every time the meter recognises the
current measurement as stable.
1. Access the Set Print Interval screen from the DO/ BOD/ OUR/
SOUR Setup screen. The current print interval is displayed on the
screen.
2. Touch stable to set the meter for stable reading printing.
3. Touch enter to accept the print interval mode and return to the
Setup screen.
Printing is now done when the meter recognises the present
reading as stable.
OR
Touch exit to return to the Setup screen, without making any
changes.
For Timed Interval Printing
In this mode, data is printed at the timed interval that you select.
1. Access the Set Print Interval screen from the DO/ BOD/ OUR/
SOUR Setup screen. The current print interval is displayed on the
screen.
2. Touch timed to access the timed interval mode and delete the
current print interval time.
3. Use the keypad to enter the desired time for the print interval.
4. Touch enter to accept the new time interval for printing and
return to the Setup screen.
Printing is now done at the set timed interval.
OR
Touch exit to return to the Setup screen, without making any
changes.
56
Page 60

Instruction Manual CyberScan DO5000
5.14 Set Data Storage Criteria
Set
D.O. Data Storage Criteria
Current DATA STORAGE CRITERIA
- Date/Time
- Sample ID
- measurement
- Temperature - ATC
- Last Standardization
- Current Standard
- Atmospheric Pressure
- salinity
- Meter Model # / serial #
- Operator
- BOD/OUR/SOUR setup
Use to highlight data storage
arrow keys
criteria and then touch to change
ON/OFF
ON
ON
ON
ON
ON
ON
ON
ON
ON
ON
ON
S
T
OFF
save
Touch to save the print criteria
save
57
Page 61

Instruction Manual CyberScan DO5000
This screen allows you to select what criteria are stored in the
meter’s memory with the measurement when you save the data.
Data is stored only if a Sample ID has been assigned.
The status
of the current data storage criteria is displayed on the screen. The
criteria option is active if “ON” appears to the right on the screen. It is
inactive if “OFF” appears to the right of the option. All storage criteria
will be stored in the meter’s memory with the measurement.
However, only active items will appear on the View Stored Data
screens. Changing the status of the storage criteria to active from
inactive will allow the criteria to be displayed with the previously
stored data.
To Set Data Storage Criteria
1. Access the Set Data Storage Criteria screen from the DO/ BOD/
OUR/ SOUR Setup screen. Current criteria are displayed on the
screen.
2. Use the arrow keys to highlight the data storage criteria you
want to modify.
3. Touch ON or OFF to change the status of the criteria.
4. Repeat steps 2 and 3 with the remaining criteria.
5. Touch save to save the entire group of Data Storage Criteria and
return to the Setup screen.
OR
Touch exit to return to the Setup screen, without making any
changes.
58
Page 62

Instruction Manual CyberScan DO5000
5.15 Set Display Resolution
Set
D.O. Display Resolution
enter
Current RESOLUTION
high
low
Select desired display resolution and then
enter
touch to accept
high
59
Page 63

Instruction Manual CyberScan DO5000
Here you can set the display resolution on the screen. Choose high
for two decimal points in mg/L, and for one decimal point in % sat and
mbar. Choose low for one decimal point in mg/L and one unit
resolution in % sat and mbar.
To Set Display Resolution
1. Access the Set Display resolution screen from the DO/ BOD/
OUR/ SOUR Setup screen.
2. The current Display Resolution is displayed on the screen.
3. Touch high or low to select the desired resolution.
4. Touch enter to accept this choice and return to the Setup screen.
OR
Touch exit to return to the Setup screen, without making any
changes.
60
Page 64

Instruction Manual CyberScan DO5000
5.16 Set Display Configuration
Set
D.O. Display Configuration
S
Current DISPLAY CONFIGURATION
- Last Standardization
- Date
- Time
- measurement channel
- sample ID
- auto cal status
- auto read status
- temperature
- atmospheric pressure
- salinity
Use to highlight display option
arrow keys
and then touch to change
Touch to save the configuration
save
ON/OFF
ON
ON
ON
ON
ON
ON
ON
ON
ON
ON
T
OFF
save
61
Page 65

Instruction Manual CyberScan DO5000
This particular function will allow you to choose what information you
would like to be displayed on the DO/ BOD/ OUR/ SOUR Measure
screen, particularly the information contained in the data box at the
bottom of that screen.
To Set Display Configuration
1. Access the Set Display Configuration screen from the DO/ BOD/
OUR/ SOUR Setup screen.
2. Use the arrow keys to highlight the item you want to change.
3. Touch ON or OFF to change the status of the criteria
4. Touch save to save the entire group of display configuration
criteria and return to the Setup screen.
OR
Touch exit to return to the Setup screen without making any
changes.
62
Page 66

Instruction Manual CyberScan DO5000
5.17 View Stored Data
View
STORED DATA
S
Data POINTS
Sample ID
Date
Operator
17
T
Use to highlight desired sort
arrow keys
option and then touch to accept
Touch to erase all stored data
clear
enter
enter
clear
63
Page 67

Instruction Manual CyberScan DO5000
The meter has memory capacity of up to 250 data points. The view
stored data screen allows you to sort and look at specific data points.
The stored data can be sorted by sample identification number, date
or operator identification number.
To View Stored Data
1. Access the view stored data screen from the DO/ BOD/ OUR/
SOUR Setup screen. The number of data points in the memory
and the sorting options are now displayed on the screen.
2. Use the arrow keys to highlight the desired data sort option.
3. Touch enter to access the sort option screen.
NOTE: Touch clear to erase all stored data at once.
To sort by Sample ID#
1. Access the Sample ID option from the View Stored Data screen.
2. Use the keypad to enter the sample ID# entered in error and re-
enter the ID#
3. Touch clear to delete a Sample ID# entered in error and re-enter
the ID#.
4. Touch enter. All data will be sorted by the meter and the first
data point displayed on the screen will be the most recent data
point saved under the selected Sample ID#.
5. Touch next or prev to scroll through additional data points saved
in the memory of the meter.
6. Touch print to send the data to a printer or computer, OR touch
delete to erase the data point from the meter’s memory, OR
touch exit to return to the Setup screen.
If a sample ID# is entered and no data points are stored with that
sample ID#, you will see a message indicating the sample ID# was
not found. Touch OK to return to the sample ID# keypad and enter
new sample ID #.
64
Page 68

Instruction Manual CyberScan DO5000
To sort by Date
1. Access the Date sort option from the View Stored Data screen.
2. Touch clear to delete the current date.
3. Use the numeric keypad to enter the date on which the data
points you want to view were saved. Be sure to use/ to separate
the month, the day and the year.
4. Touch enter. All data will be sorted by the meter and the first
data point displayed on the screen will be the most recent data
point saved under the selected Date.
5. Touch next or prev to scroll through additional data points saved
in the memory of the meter.
6. Touch print to send the data to a printer, OR touch delete to
erase the data point from the meter’s memory, OR touch exit to
return to the Setup screen.
If a sample date is entered and no data points are stored with that
date, you will see a message indicating the date was not found.
Touch OK to return to the operator ID keypad and enter a new date.
To sort by Operator
1. Access the Operator sort option from the View sort data screen
2. Use the keypad to enter the Operator ID of the data point(s) that
you want to view.
3. Touch enter. All data will be sorted by the meter and the first
data point displayed on the screen will be the most recent data
point saved under the selected Operator ID.
4. Touch next or prev to scroll through additional data points saved
in the memory of the meter.
5. Touch print to send the data to a printer, OR touch delete to
erase the data point from the meter’s memory, OR touch exit to
return to the Setup screen.
65
Page 69

Instruction Manual CyberScan DO5000
If an operator ID is entered and no data points are stored with that
operator ID, you will see a message indicating the operator ID was
not found. Touch OK to return to the operator ID keypad and enter a
new operator ID.
Note:
Even if you do not know the appropriate information to access a
specific data point, you can access the stored data through any of the
sort options. Highlight the sort option of interest and touch enter to
access the sort screen. Touch enter again and the meter will place
you at a data point.
• The sample ID# sort option will place you at the first data point in
numeric order by sample ID#.
• The operator sort option will place you at the first data point of the
first operator ID in alphabetic order.
• The date sort option will place you at the most recent point on the
last date that data was stored.
Once you access the data storage center, you can touch prev and
next to scroll through the additional data points stored in memory.
66
Page 70

Instruction Manual CyberScan DO5000
6 D.O. OPERATION
Measure
std
mg/L
8.21
STABLE
STND
Touch to measure sample
or
Touch to access standardize mode
August 12, 2002 9.32am
ID# ATC
auto cal Salinity
auto read mmHg
Not Standardized
meas
std
25.3°C
ON 0.0ppt
OFF 761
meas
setup
67
Page 71

Instruction Manual CyberScan DO5000
6.1 DO Standardization
The CyberScan DO 5000 has two standardization modes. There is
auto- standardization, merely requiring the touch of a button to
complete. There is also manual standardization. Here the DO value,
in either % Saturation or mg/L units, of the standard will be entered
manually by means of a keypad, which appears on the screen.
It is necessary to standardize the meter when the probe is in an
environment with a known concentration of oxygen. One such
environment is water-saturated air. Most commonly, this involves
placing the DO probe into a BOD bottle filled with about 1 inch of
water. Stirring is not required. Another environment is air-saturated
water, achieved by aerating 300 – 500 ml of water for at least 15
minutes. The probe can be placed into the water with stirring
provided. Lastly, the probe is placed into an environment whose
oxygen content has been determined by a Winkler titration. The
meter is standardized in the manual mode.
Prior to standardization, adequately prepare the probe as
recommended in its operation manual.
ONCE STANDARDIZATION IS SET, IT WILL BE APPLICABLE IN
OTHER MODES.
68
Page 72

Instruction Manual CyberScan DO5000
Standardize
std
mg/L
8.21
STABLE
97.9 %sat
8.15 mg/L
STND
Touch to delete previous standard
Insert electrode into standard and stir
Touch to standardize mode
August 12, 2002 9.32am
ID# ATC
auto cal Salinity
auto read mmHg
Last std: Aug 12 @ 8:16 am
clear
std
ABC 25.3°C
ON 0.0 ppt
OFF 732
meas
setup
69
Page 73

Instruction Manual CyberScan DO5000
To Standardize the meter in the Automatic Standardization Mode
1. Insert the DO probe into a BOD bottle containing about 1 inch of
water.
2. Touch STD on the DO or BOD Measure screen to access the
standardized screen
3. Touch clear to delete a previous standardization.
OR
If the screen says “Not standardized” proceed to step 4.
4. Touch std again to standardize the meter using this buffer. The
word MEASURING will flash until the signal is stable. The meter
will accept the value once it recognizes that the reading is stable.
At that time, STABLE will appear on the screen at this time. A
beaker icon and the entered DO value will also appear on the
screen at this time. The meter will then return to the measure
screen.
Allow the probe to warm up for 30 minutes after connecting it to the
meter, and prior to standardization.
Once standardization is set, it will be applicable in other modes.
70
Page 74

Instruction Manual CyberScan DO5000
Standardize
std
mg/L
8.21
STABLE
8.15 mg/L
97.9 %Sat
STND
Insert electrode into standard and stir
August 12, 2002 9.32am
ID# ATC
auto cal Salinity
auto read mmHg
Last std: Aug 12 @ 8:16 am
Touch to delete previous standard
clear
Touch to standardize mode
std
ON 0.0 ppt
OFF 732
25.3°C
meas
setup
Measure
mg/L
mg/L
8.21
1 2 3
STND
or
August 12, 2002 9.32am
ID# ATC
mmHg Salinity
mbars Altitude
Not Standardized
4 5 6
7 8 9
Touch to measure sample
meas
- 0 .
Touch to access standardize mode
std
BS exit enter
ON 0.0 ppt
OFF 732
STABLE
25.3°C
std
meas
setup
71
Page 75

Instruction Manual CyberScan DO5000
To Standardize the meter in the Manual Standardization Mode
1. Insert the DO into your choice of standard.
2. Touch std on the DO or BOD Measure screen to access the
standardized screen
3. Touch clear to delete a previous standardization.
OR
If the screen says “Not standardized” proceed to step 4.
4. Touch std again to initiate standardization
5. Using the touch pad, input the value of the DO standard in %
Saturation, or mg/L.
6. Touch enter to accept the DO value of the standard.
MEASURING will flash until the signal is stable. The meter will
accept the value once it recognizes that the reading is stable. At
that time, STABLE will appear on the screen at this time. A
beaker icon and the entered DO value will also appear on the
screen at this time. The meter will then return to the measure
screen.
Barometer Calibration
The CyberScan DO 5000 internal barometer provides pressure
compensation for both auto and manual standardization. For most
accurate results, the barometer reading should be checked
occasionally for accuracy. If the meter’s barometer reading is
inaccurate, refer to DO setup to calibrate the barometer.
72
Page 76

Instruction Manual CyberScan DO5000
Measure
std
mg/L
8.21
STABLE
STND
Touch to measure sample
or
Touch to access standardize mode
August 12, 2002 9.32am
ID# ATC
auto cal Salinity
auto read mmHg
Not Standardized
meas
std
25.3°C
ON 0.0ppt
OFF 761
meas
setup
73
Page 77

Instruction Manual CyberScan DO5000
Measuring DO with Auto Read ON
The measure screen provides a readout of the current sample
measurement. If Auto Read is active, the meter will lock onto a
reading until meas is touched. If Auto Read is inactive, the meter will
continuously monitor the DO and the reading will indicate any change
in the DO level, Regardless of the status of the Auto Read mode, a
STABLE message is displayed when the measurement meets the
stability criteria chosen.
Once the meter has been standardized, you are ready to take DO
measurements.
To Measure DO with Auto Read ON
1. Insert the probe into the sample
2. Provide stirring, such as that provided by the self-stirring BOD
probe.
3. Touch meas, and permit the reading to stabilize
4. Record the reading
Prior to sample measurement, it is important to verify the salinity of
the sample and enter that’s salinity value using the DO setup menu.
To Measure DO with Auto Read OFF
1. Insert the probe into the sample
2. Provide stirring, such as that provided by the self-stirring BOD
probe.
3. Record the reading when the STABLE message appears.
74
Page 78

Instruction Manual CyberScan DO5000
E U T E C H
INSTRUMENTS
CyberScan DO 5000
Select from the options to the right
January 15, 2002 11:11 am
DO
BOD
OUR
SOUR
system
Measure
mg/L
8.21
STABLE
STND
Touch to measure sample
or
Touch to access standardize mode
August 12, 2002 9.32am
ID# ATC
auto cal Salinity
auto read mmHg
Not Standardized
meas
std
25.3°C
ON 0.0 ppt
OFF 732
std
meas
setup
75
Page 79

Instruction Manual CyberScan DO5000
6.2 Biological Oxygen Demand (BOD) Measurement
Measure - BOD
std
mg/L
8.21
0:00
STND
Touch to begin measurement
or
Touch to access standardize mode
August 12, 2002 9.32am
ID# ATC
autocal salinity
Not Standardized
start
std
ON 0.0 ppt
732
mmHg
STABLE
25.3°C
start
setup
To measure BOD, a sample is seeded and incubated in the dark at
20°C for five days. The dissolved oxygen concentration is then
measured and subtracted from the initial, pre-incubation, dissolved
oxygen concentration. The difference is a measure of the biochemical
oxygen demand, or BOD of the sample.
76
Page 80

Instruction Manual CyberScan DO5000
With the CyberScan DO 5000, BOD calculations are automatic.
When the BOD button is touched, a variety of meter screens will
sequentially appear, allowing you to enter information essential to a
BOD calculation. Among these are the sample description, ID
number, and date. If a search of the memory does not match the
current sample ID, the meter treats the sample’s DO reading as an
initial reading. If the sample ID is matched in the data log, and at
least one day has passed, the meter treats the sample’s DO reading
as a final reading, and based on parameters previously entered,
calculates and displays the sample BOD, along with all relevant
information.(If the sample ID is matched on the same day as the
initial DO reading, the meter will assume a new reading, and offer
information includes a sample description, sample bottle ID volume),
final dilution (ml sample: ml bottle volume), initial and final DO values,
and the average BOD value. The average is derived from all BOD
values with the same sample description and date.
Once the meter has been standardized, you are ready to measure
DO for a BOD measurement.
77
Page 81

Instruction Manual CyberScan DO5000
To Measure the BOD of the Seed
Initial DO Measurement
1. Access the BOD mode from the main mode screen
2. Once the DO reading is stable, touch BOD.
3. Using the bottle ID numeric touch pad, key in a sample bottle ID
number
4. Touch enter to accept the sample description.
Measure-BOD
std
mg/L
Bottle ID
8.21
1 2 3
STND
Touch to measure sample
or
Touch to access standardize mode
August 12, 2002 9.32am
ID# ATC
auto cal Salinity
732
Not Standardized
4 5 6
7 8 9
meas
- 0 .
std
BS exit enter
ON 0.0 ppt
mmHg
STABLE
25.3°C
123
BOD
setup
If the meter’s barcode scanning feature is employed, simply scan the
bottle to record its ID number.
78
Page 82

Instruction Manual CyberScan DO5000
5. If the sample is new, the BOD first reading screen appears.
Touch SEED.
Measure-BOD
std
mg/L
BOD first reading
8.21
Is this reading a SEED or a SAMPLE?
BOD
STND
Touch t o measur e sampl e
or
Touch to access standardize mode
August 12, 2002 9.32am
ID# ATC
auto cal Salinity
732
Not Standardized
setup
meas
std
SEED QUIT SAMPLE
25.3°C
ON 0.0 ppt
mmHg
79
Page 83

Instruction Manual CyberScan DO5000
A
6. Key in a sample description using the alphanumeric touch pad,
SEED, for example.
7. Touch enter to accept the sample description.
enter
Description
B C 1
D E F 2
G H I 3
SEED
J K L 4
M N O 5
P Q R 6
S T U 7
V W X 8
Y Z - 9
BS / . 0
clear
80
Page 84

Instruction Manual CyberScan DO5000
8. Key in the volume of the SEED sample using the alphanumeric
touch pad. Touch enter to accept the SEED volume.
SEED volume
1 2 3
Not Standardized
4 5 6
7 8 9
- 0 .
BS exit enter
STABLE
123
9. Touch enter to accept the Seed dilution ratio.
10. Use the bottle volume touch pad to key in the mL volume of the
BOD bottle.
Bottle volume
1 2 3
Not Standardized
4 5 6
7 8 9
- 0 .
BS exit enter
STABLE
123
11. Touch enter to accept the bottle volume and return to the BOD
measure screen.
81
Page 85

Instruction Manual CyberScan DO5000
Final DO Measurement
1. Access the BOD mode from the main mode screen
2. Once the DO reading is stable, touch BOD.
3. Using the bottle ID numeric touch pad, key in a sample bottle ID
number
4. Touch enter to accept the bottle ID number.
If the meter’s barcode scanning feature is employed, simply scan the
bottle to record its ID number.
If, at this point, the meter matches the seed’s identification
parameters with those stored in the memory and at least one day has
passed*, it accepts the current DO measurement as a final
measurement. Using this value along with the initial DO value and
associated information, a BOD for the seed is calculated, and stored
in memory (See Viewed Stored Data). An average BOD calculated
from all seed vales on this date will be used to calculate the seed
correction value used in all subsequent sample therefore necessary
to run seed samples on the same day as the BOD samples. Seed
BOD data will be used only if the DO loss and the final DO exceed
the criteria set under the Set BOD configuration option in setup.
*If a second BOD value is taken on the same day as the first BOD
value, the meter will ask the user if he or she wants to repeat the first
BOD measurement. Touch OK to do so and overwrite the first
measurement. Touch Quit to return to the BOD measurement
screen.
82
Page 86

Instruction Manual CyberScan DO5000
To Measure BOD of a Sample
Initial DO measurement
1. Access the BOD mode from the main mode screen
2. Once the DO reading is stable, touch BOD
3. Using the bottle ID numeric touch pad, key in a sample bottle ID
number
4. Touch enter to accept the bottle ID number.
If the meter’s barcode scanning feature is employed, simply scan the
bottle to record its ID number.
83
Page 87

Instruction Manual CyberScan DO5000
5. If the sample is new, the BOD first reading screen appears.
Touch SAMPLE.
Measure-BOD
std
mg/L
BOD first reading
8.21
Is this reading a SEED or a SAMPLE?
BOD
STND
Touch t o measur e sampl e
or
Touch to access standardize mode
August 12, 2002 9.32am
ID# ATC
auto cal Salinity
732
6. Key in a sample description using the alphanumeric touch pad.
7. Touch enter to accept the sample description.
Not Standardized
setup
meas
std
SEED QUIT SAMPLE
25.3°C
ON 0.0 ppt
mmHg
84
Page 88

Instruction Manual CyberScan DO5000
8. Use the Predilution Ratio touch pad to key in the ml ratio of
sample to final volume. If there is no predilution, use the ratio
1:1, and key in the value 1. If the ratio is 1:100, key in 100.
Predilution (1 to X)
123
1 2 3
Not Standardized
STABLE
4 5 6
7 8 9
- 0 .
BS exit enter
9. Touch enter to accept the Seed Volume.
10. Use the Seed Volume touch pad to key in the mL volume of the
sample.
11. Touch enter to accept the Seed Volume.
12. Use the Sample Volume touch pad to key in the mL volume of
the sample.
13. Touch enter to accept the Sample volume.
14. Use the Bottle volume keypad to key in the mL volume of the
BOD bottle.
15. Touch enter to accept the bottle volume and return to the BOD
measure screen.
85
Page 89

Instruction Manual CyberScan DO5000
BOD Results
mg/L
817
Seed ID: 1, SEEDA
Predilution:
Seed Volume:
1
3 ml
Bottle Volume:
Initial DO:
Final DO:
Delta DO:
OK
300 ml
8.17 mg/L
0.00 mg/L
8.17 mg/L
print
86
Page 90

Instruction Manual CyberScan DO5000
At this point, the initial DO and all of the above information about the
sample will be stored in the data log. After an incubation period of at
least one day, the DO of the sample must be measured again.
Final DO Measurement
1. Access the BOD mode from the main mode screen.
2. Once the DO reading is stable, touch BOD.
3. Using the Manual ID numeric touch pad, key in the sample bottle
ID number.
If the meter’s bar code feature is employed, simply scan the bottle to
record its bottle ID number.
If, at this point, the meter matches the above sample parameters in
the memory and the sample date, it accepts the current DO
measurement as a final measurement. Using this value along with
the initial DO value and associated information, a BOD for the sample
is calculated, and displayed on the screen along with associated test
parameters, including the average BOD value based on all samples
that have the same description and starting date.
.
87
Page 91

Instruction Manual CyberScan DO5000
6.3 Oxygen Uptake Rate (OUR) Measurement
Measure - OUR
std
mg/L/hr
8.21
0:00
STND
Touch to begin measurement
or
Touch to access standardize mode
August 12, 2002 9.32am
ID# ATC
autocal Salinity
mg/L Altitude
Not Standardized
start
std
ON 0.0 ppt
1.28 732
STABLE
25.3°C
start
setup
Measure - OUR (RUNNING)
mg/L/hr
8.21
1:35
STND
Touc h t o beg in mea sur eme nt
or
Touch to access standardize mode
August 12, 2002 9.32am
ID# ATC
autocal Salinity
mg/L Altitude
Not Standardized
stop
std
ON 0.0 ppt
1.28 732
STABLE
25.3°C
stop
88
Page 92

Instruction Manual CyberScan DO5000
1. Touch OUR on the main mode screen.
2. Touch setup to set parameters essential for the OUR calculation.
These include dilution ratio, minimum run time, maximum run
time, minimum DO required to end the test.
3. Touch start to initiate the OUR test.
4. Touch stop to terminate the test at any time.
A timer on the OUR screen will display the time of the test. When the
test concludes, the OUR results in mg/L/hr will be displayed. Touch
print to save the data into the data log, or touch OK to return to the
OUR screen.
The calculation employed for the OUR result is:
OUR= [DO
(mg/L) – DO
start
(mg/L) / T
end
(sec)] * (3600sec/hr)
duration
* dilution ratio = mg/L/hr
89
Page 93

Instruction Manual CyberScan DO5000
6.4 Specific Oxygen Uptake Rates (SOUR)
Measure - SOUR
std
mg/hr/g
8.21
0:00
STND
or
August 12, 2002 9.32am
ID# ATC
autocal salinity
mg/L mmHg
Not Standardized
Touch to begin measurement
start
Touch to access standardize mode
std
ON 0.0 ppt
1.28 732
STABLE
25.3°C
start
setup
Measure - SOUR (RUNNING)
mg/hr/g
0.00
1:35
STND
or
August 12, 2002 9.32am
ID# ATC
autocal salinity
mg/L mmHg
Not Standardized
Touch to begin measurement
stop
Touch to access standardize mode
std
ON 0.0 ppt
1.28 732
STABLE
25.3°C
stop
90
Page 94

Instruction Manual CyberScan DO5000
1. Touch SOUR on the main mode screen.
2. Touch setup to set parameters essential for the SOUR
calculation. These include dilution ratio, minimum run time,
maximum run time, minimum DO required to start the test, the
minimum DO required to end the test and the total solids of the
sample in g/L.
3. Touch start to initiate the SOUR test.
4. Touch stop to terminate the test at any time.
A timer on the SOUR screen will display the time of the test. When
the test concludes, the SOUR results in mg/L/hr will be displayed.
Touch print to save the data into the data log, or touch OK to return
to the SOUR screen.
The calculation employed for the SOUR result is:
SOUR= OUR / solids weight (g/L) = mg/hr/g
91
Page 95

Instruction Manual CyberScan DO5000
7 CLEANING
The touch screen should be kept as clean as possible to preserve
optical properties. Attempt to keep the screen free of dirt, dust
fingerprints, etc. long term contact with abrasive materials will scratch
the surface, and impair image quality. To clean, use a damp
nonabrasive cloth towel and any commercially available window
cleaner. The cleaning solution should be applied to the towel rather
than the surface of the touch screen.
The case is made out of durable ABS plastic. It can be cleaned with a
damp cloth and a mild detergent. Do not use chemical solvents on
the case.
8 TROUBLE SHOOTING
The CyberScan DO 5000 displays pertinent error messages to guide
you should an error occur with a measurement or meter operation
(touch pad and input errors). The messages come with a brief
description of the error, and in some cases advice on how to correct
it.
Error messages displayed by the meter include:
• Data Log full
• Data log empty
• Unrecognized date
• Unrecognized time
• Invalid DO limit
• Invalid limit
• Limit exceeded
• Invalid temperature
• Invalid Isopotential
• Invalid Print interval
• Invalid DO value
• Sample ID not found
Also, whenever possible, touch help for complete information about
the meter operation in which you are currently engaged,
92
Page 96

Instruction Manual CyberScan DO5000
9 DATA MANAGEMENT
Your CyberScan DO 5000 meter is equipped with an RS-232 port for
sending measurement data to a printer. The printer must be capable
of receiving data within the following guidelines.
Baud rates 110 to 38400 bps
Data Bits 7 or 8
Parity even, odd or none
Stop Bits 1 or 2
The meter and the external device must be configured to match with
respect to these parameters.
A shielded RS-232 cable must be used. The RS-232 connector on
the back panel of the meter is a female DB9 style. Is the external
device has a 25 pin connector, an adapter is required. The meter’s
pin configuration is:
Pin
Description
1 Buffers analog copy of input
2 Send data from meter
3 Receive data to meter
5 Signal Common
9 Signal Common
To initiate printing, touch print if in the manual print mode, or set the
print interval for stable readings or at a timed interval. Refer to the
Setup sections, Set Print Interval and Set Print Criteria.
93
Page 97

Instruction Manual CyberScan DO5000
To download data stored in memory to a printer, access the View
Stored Data option in the setup screens. Access the desired data
point by sorting the data via one of the three sorting options. Touch
print on the screen displaying the data.
The following is a list of factory default settings for the CyberScan DO
5000 meter. You can reset your meter to the factory default settings
by accessing the Reset to Factory Default screen from the System
Setup screen.
Screen Default Setting
Mode
System Setup Time 12 hour time mode
Date month/date/year
Print Configuration Baud Rate 19200
Parity None
Data Bits 8
Stop Bits 1
Operator ID none
Beeper Status ON
Display Contrast 15
DO Setup Print Configuration All parameters ON
Data Configuration All parameters ON
Sample ID none
Print Interval manual
Display Resolution X.XX
Auto Read Mode OFF
Temperature Units Celsius
Stability Criteria Medium
Alarm Limits OFF
Alarm Limit Low 0
Alarm limit High 1500
94
Page 98

Instruction Manual CyberScan DO5000
10 DO FUNDAMENTALS
Meter Operation
The CyberScan DO 5000 meter uses the polarographic method of
determining dissolved oxygen concentration. A voltage is maintained
across two electrodes (a gold cathode and a silver anode) and an
electrolyte separated from the sample solution by an oxygen
permeable membrane. Oxygen diffuses form the sample across the
membrane where it is reduced at the cathode.
1) 0
+ 2H20 + 4e- 4OH
2
The current generated, I, by such an electrode is proportional to the
oxygen concentration of the sample. The rate of oxygen reduction at
the cathode is significantly faster than the rate of diffusion to the
electrode. Therefore, the rate of oxygen reduction is diffusion limited.
2) I = k D [O2]
I is the measured current
K is a proportionally constant
D is the diffusion coefficient of oxygen
Equation 2 is a simplified description of current generated by the
oxygen electrode. Many other factors such as electrode surface area,
membrane thickness, membrane permeability coefficient,
incorporated into the constants k and D. as the partial pressure of
oxygen in the water is equal to that in the atmosphere, the electrode
output is an indicator of oxygen partial pressure. The oxygen partial
pressure differential between the sample and the electrolyte inside
the electrode is the driving force bringing oxygen to the electrode.
Oxygen Solubility
Oxygen Solubility in water is a critical parameter in many arenas
including biochemistry, industrial processes, and particularly
environmental science and engineering. Sufficient dissolved oxygen
is an absolute requirement for good water quality. It is essential for
aerobic life and the natural purification processes to which they
contribute. Dissolved oxygen concentrations below 5 ppm will result
in substantial damage to the aquatic ecosystem, and concentration
below 2 ppm can result in fish kills and growth of harmful bacteria.
-
95
Page 99

Instruction Manual CyberScan DO5000
11 METER SPECIFICATIONS
Feature Details DO
5000
Display
Screen size 114.3(W) X 152.4(H) mm
Measurement display
height
Temp/etc. display height 6.4 (H) mm
Menu options Extensive
Help screens Extensive
Configurable display
Interface Context specific
Keypad controls Touch screen
Memory
Internal diagnostics
Programmable data
storage
Programmable data
output
Print interval 1 to 9,999 sec
Programmable alarm
Dissolved Oxygen
Range, mg/L 0 – 60
Range, % saturation 0 - 600
Accuracy, mg/L 0.1% + 1 lsd
Accuracy, % saturation 0.1% + 1 lsd
Resolution, mg/L 0.01
Resolution, % saturation 0.1
Temperature for DO
Range 0.0 to 45.0°C
Resolution 0.1°C
Accuracy ±0.1°C
Temperature for other
parameters
Range -5.0 to 105.0°C
Resolution 0.1°C
Accuracy ±0.1°C
Automatic Barometric
Pressure
Range, mm Hg 450 – 825
Accuracy, mm Hg ±1 + 1 lsd
Resolution, mm Hg 1
Salinity Correction
Range, ppt 0 – 40
640X480 back-lit dot-
matrix LCD
19.1 (H) mm
data points
Store on stable, time,
manual
Output on stable, time,
manual
250 1000
PCD
5500
96
Page 100

Instruction Manual CyberScan DO5000
Feature Details DO
5000
pH mode
Range
Resolution 0.1/ 0.01/ 0.001
Relative Accuracy ±0.002
Calibration points 5
Incremental methods KA,KS,AA,AS
FET
mV mode
Range ±1800.0 ~
Resolution 0.1 ~
Accuracy ±0.1 ~
Ion mode
Range 1 X 10⁻⁶ to
Resolution 0.1/ 0.01/ 0.001 ~
Relative accuracy ±0.17n% ~
Calibration points 5 ~
Incremental methods KA, KS, AA, AS ~
Conductivity Mode
Cell constants range 0.1, 1.0, 10 ~
Conductivity 0 to 300 mS/cm ~
Resistivity 30 megohm.cm to 100
Salinity 2 to 42 ppt ~
Accuracy ±0.5% ~
Operating Conditions
Operating temperature - 5 to 45°C
Operation humidity 5-80% non-condensing
Maximum operating
altitude
-2.000 to ±20.000 ا
9.99 X 10
megohm.cm
10
3000m
~
~
~
~
~
~
~
~
PCD
5500
97
 Loading...