

Euronics Sole cleaning machine, ESCD3 Operation Manual
1
Sole cleaning machine operation manuals
I.Instruction
III. Maintenance
1、 Placed sole cleaning machine on flat ground;
2、 Placed dry pad on cover plate, side of dry pad into quadrilateral frame;
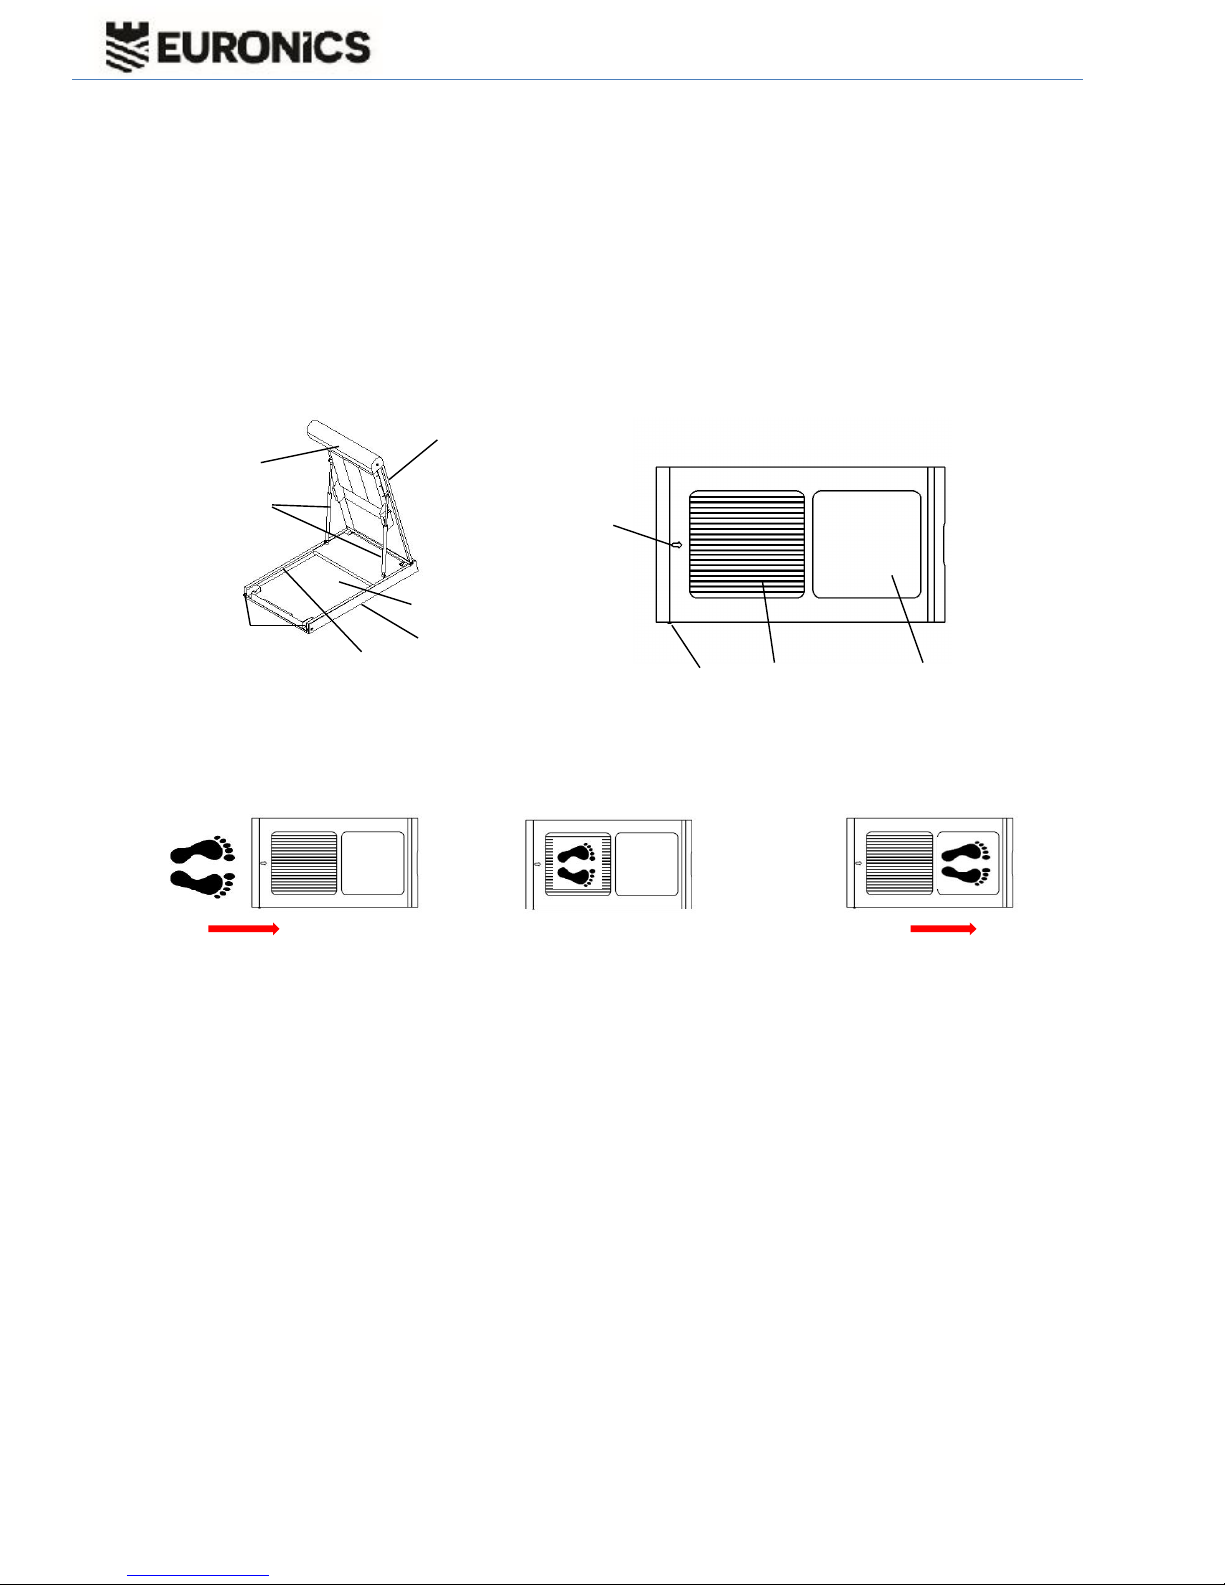
3、 Unlock on two sides, then open the cover, please referring to Figure1.1;
4、 Add water, level line between “min” and “max”;
5、 Close the cover slowly and lock it, connect the power.
6、 Before removing make sure it locked
1、Cleaning machine: Regular clean the dust of the machine and brushes surface dirty.
2、Cleaning dry mat: Clean once every day, or more times than that, just depend on the actual situation to keep
the dry mat clean and absorbing effect. After cleaning, reset the mat to dry zone. Do not wring dry mat to
prevent damage. If you don't use the mats, seal it with plastic film.
3、Changing water:
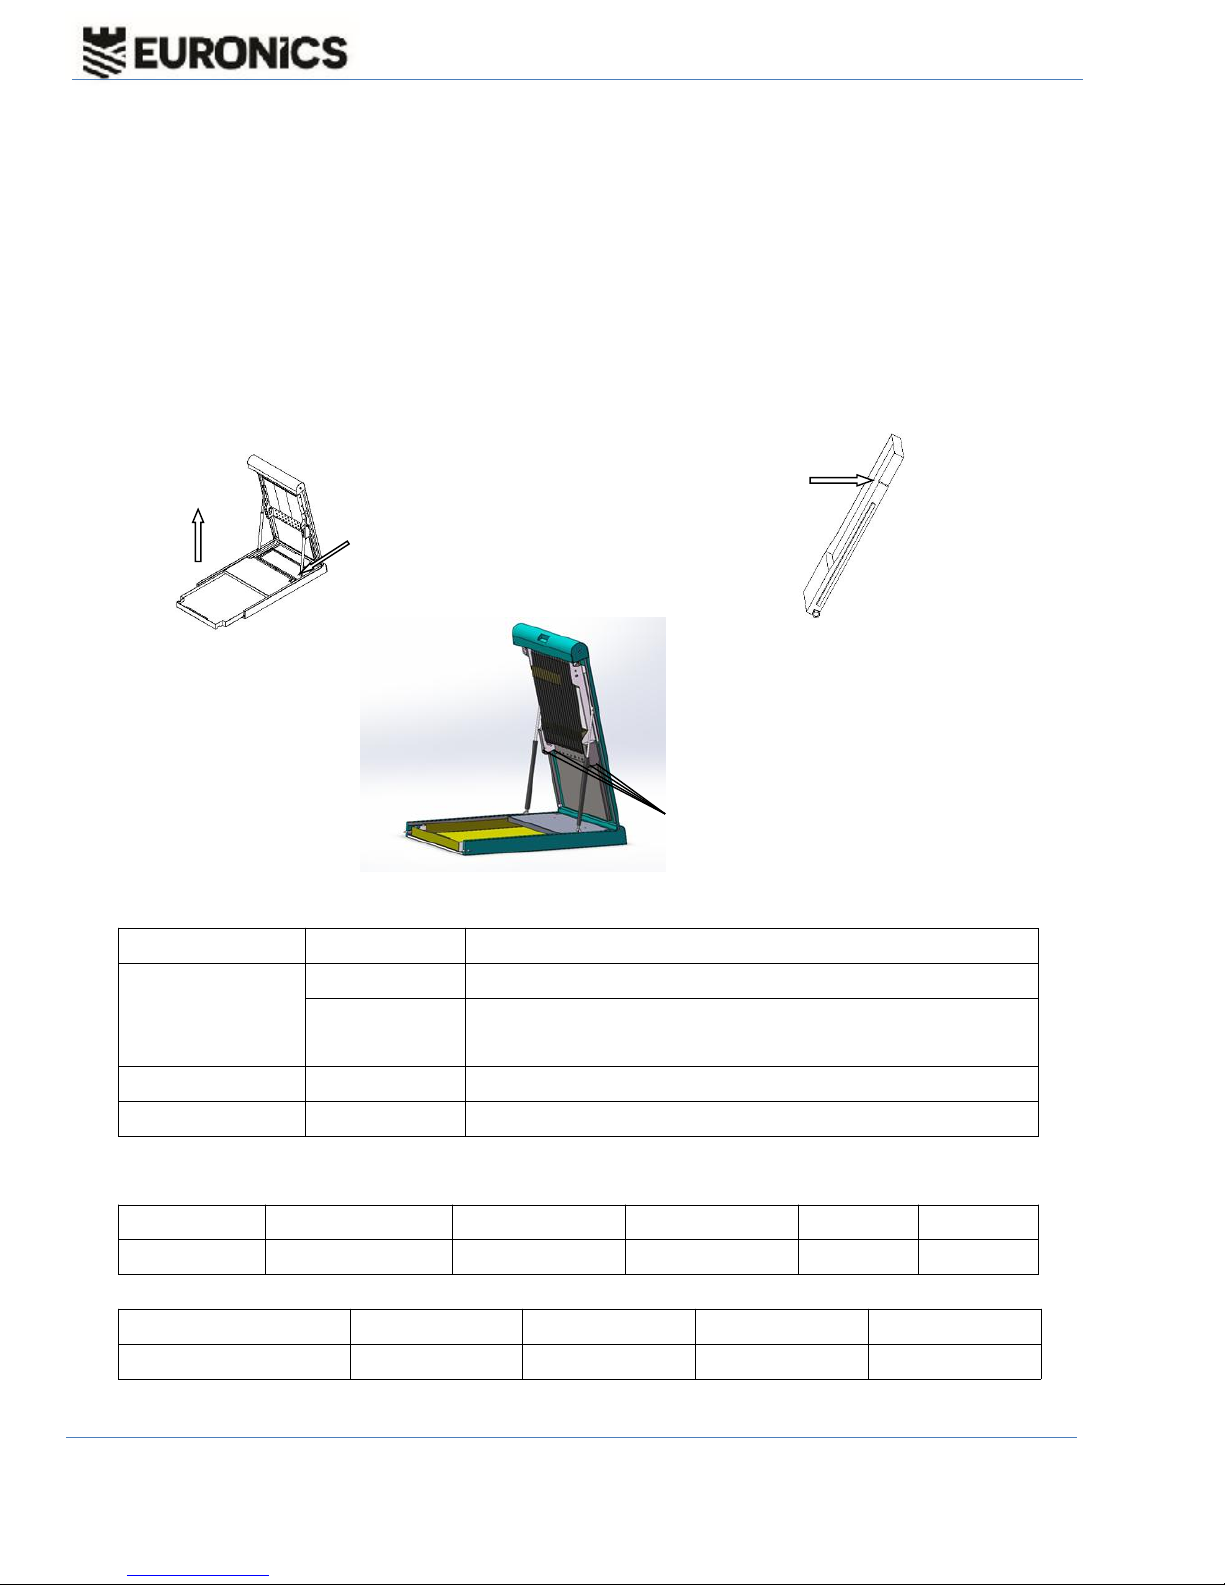
1) Power off, unlock two sides, lift up cover;
2) Back tank, referring to figure 3.3.1;
3) Lift tank handle, referring to figure 3.3.1;
4) Out of tank, water pouring, cleaning tank, add water to the liquid level scale, referring to figure 3.3.2;
5) Replace the tank;
6) Close cover slowly and lock it, then connect the power.
II. Usage
1、Pls stand upon clean zone as arrow
For the best cleaning result, pls pass through cleaning and dry zone referring to Figure 2.1-2.2. First the
cleaning zone. On the dry zone stay 2 seconds. More time cleaning, the effect will be better.
2、Piaffe 4 times
3、Pls walk to the dry zone, stay 2s
Clean zone
Figure2.1
Dry zone
Figure2.2
Tank
Handle
Figure1.1
Lower casing
Level indication
2
Questions
Reason
Troubleshooting
Machine doesn’t work
Loose power outlet
Check power plug
Perception sensor
fault
Check the sensor indicator light.
Brush doesn’t work
Loose Brush
Adjust brush by hand(Check Routine Maintenance No. 4).
Human absent, still work
Sensor is blocked
Make sure there is no obstruction above the sensor and clean the sensor surface.
Type
Dimension
Clean zone
Dry zone
Water tem.
Tank
ESCD3
900×470×85mm
345×325mm
335×325mm
0-40℃
4L
Voltage
Power
Noise
Overload
N.W
220V/50HZ
75W
<60db
150Kg
25Kg
Sole cleaning machine operation manuals
IV. Common trouble shooting
V. Specifications
4. Adjust the brushes: When the machine is running normally, you find the brushes do not work, then you
should adjust tension bolt tight.
① Power off, unlock two sides, lift cover;
② Find the brushes tension bolts (check Figure4.1), tighten it;
③ Both sides of a total 4 tension bolts are required to maintain a consistent adjustment, to ensure the equipment
work properly.
④ Connect the adapter, check brushes whether running normally, if the brushes still do not work, please repeat ①,
②,③ above, adjust the tension bolts, until the brush work.
Figure 4.1
Figure 3.3.1
Figure 3.3.2
Tension bolts
 Loading...