

Page 1
Instruction Manual
For
Converting Spartan
5 Burner & 8 Burner BBQ
from LPG to NG
*LPG parts need to be assembly as below:
*AGA pressure regulator;
Attention:
This conversion process should only be
undertaken by a Professional Gas Fitter.
Please read this manual carefully
Page 2
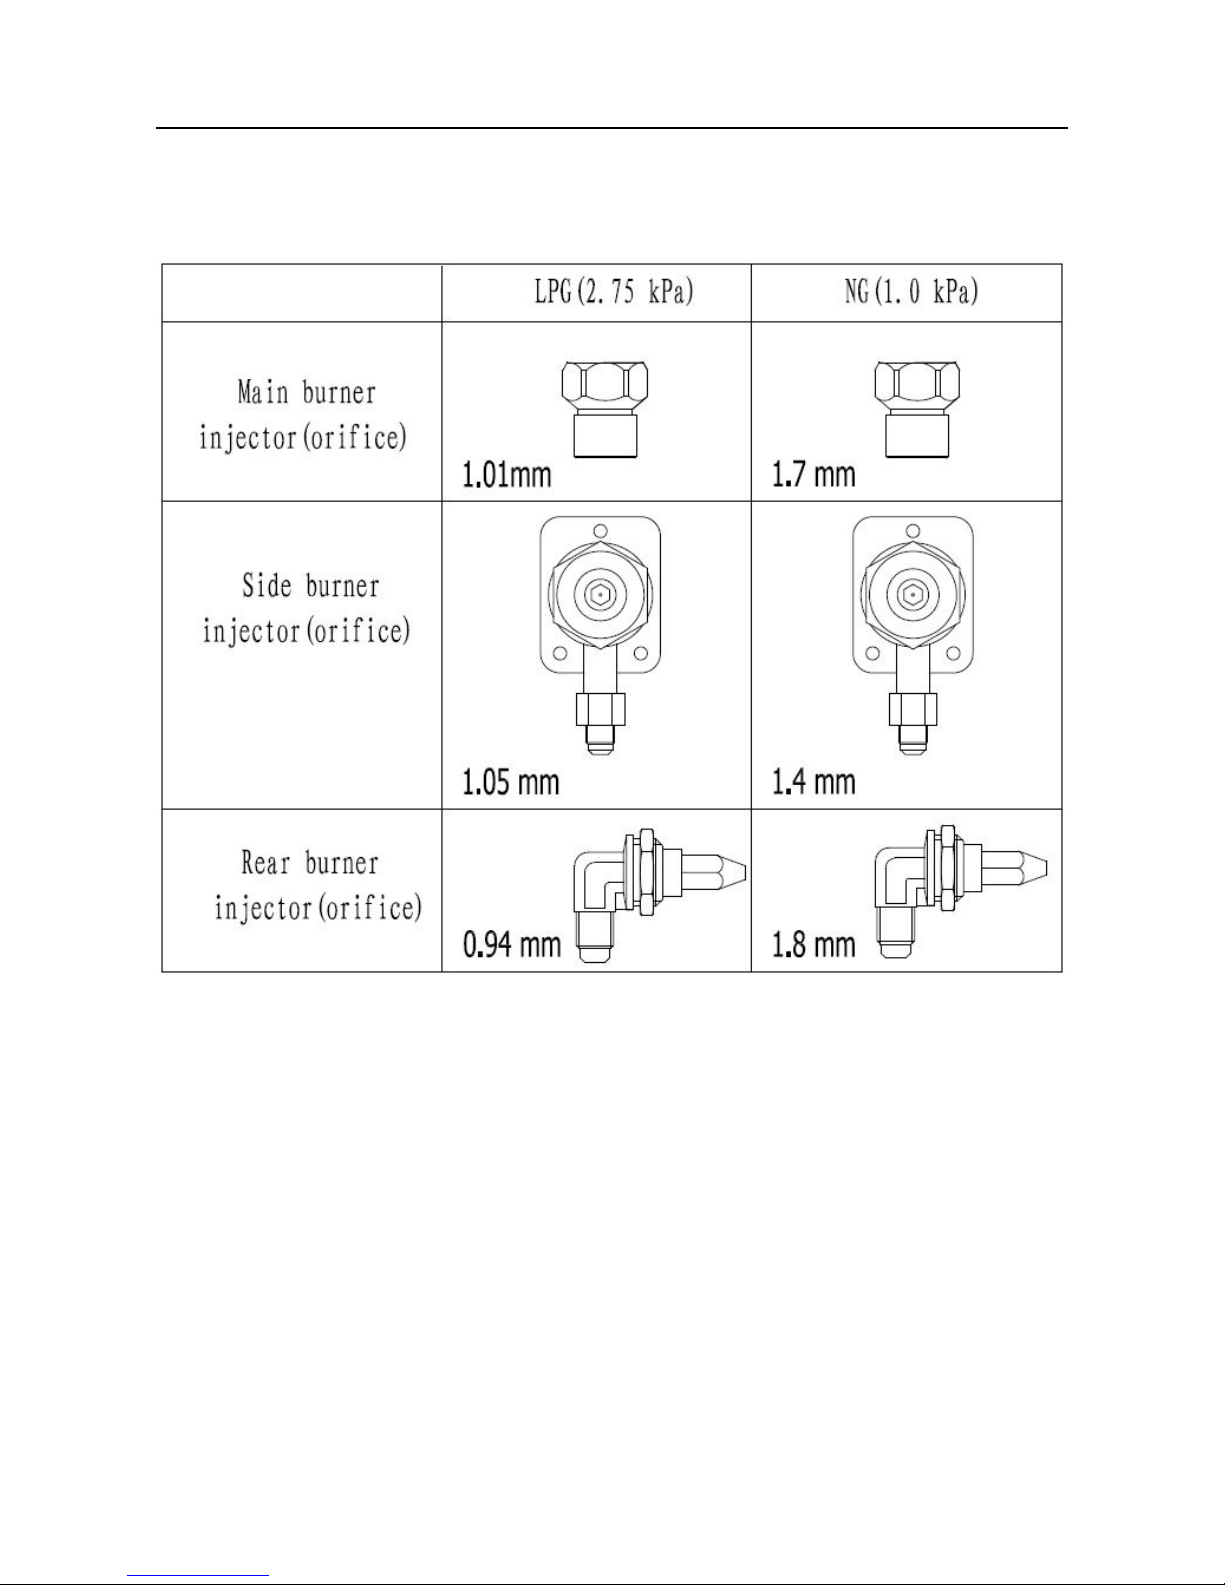
LPG & NG INJECTOR - IDENTIFICATION DRAWINGS
Page 3
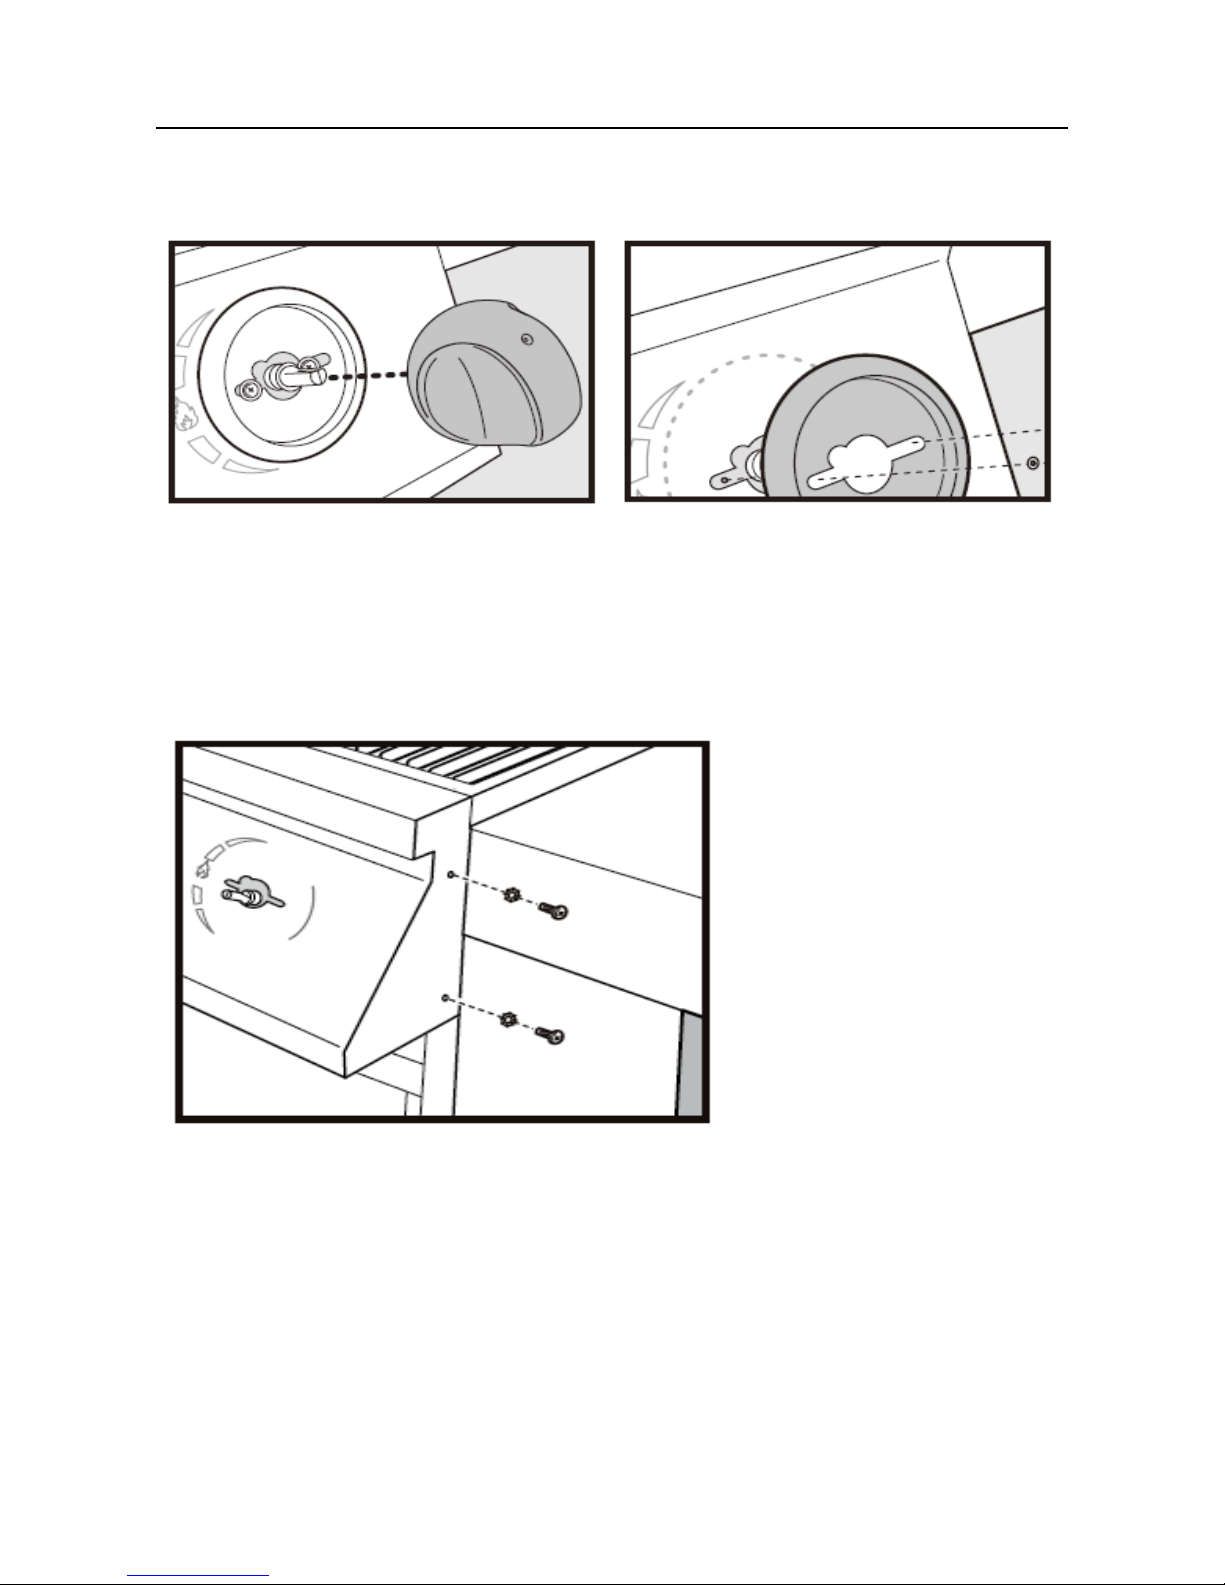
STEP 1 - PREPARING BBQ FOR CHANGING OF INJECTORS
a. Remove the two screws holding each valve to the control panel and control
knob bezel.
b. Loosen the control panel by removing two screws & washers on each end.
Page 4

c. Loosen the gas supply nut and thermocouple from the main burner valves,
side burner valve and rotisserie burner valve.
d. Disconnect wire from the electronic igniter for the rotisserie burner,
e. Then pull control panel away from grill.
Page 5

STEP 2 - CHANGING INJECTORS ON MAIN BURNER VALVES
a. Take each of the 4 or 6 Main valve NG injectors provided in the Spartan
BBQ LPG to NG Conversion Kit
b. Replace the current Main valve LPG injectors with the NG injector at their
location as shown below:
Page 6

STEP 3 - CHANGING INJECTOR FOR SIDE BURNER
a. Take each of the 1 Side burner NG valve injectors provided in the Spartan
BBQ LPG to NG Conversion Kit
b. Replace the current Side Valve LPG injectors by
- Removing the Side Burner Top Base
- Remove the Base Nut and the Tray
- Disconnect the Gas Supply Nut
- Replace the Side LPG Injector with the Side NG Injector
- Reconnect Gas Supply Nut, and reinstall the Tray & Base Nut and Top Base
Page 7

STEP 4 - CHANGING INJECTOR FOR REAR BURNER
a. Loosen the seven (7) screws & washers for rotisserie burner rain cover.
b. Loosen the Gas Supply Nut from the Rear LPG valve injector.
c. Replace the Rear LPG valve injector with the NG injector.
d. Reverse above steps and tighten all screws & washers and Gas Supply Nut
Page 8

STEP 5 - RE-ASSEMBLY & TESTING
a. Reassemble the gas supply nut & thermocouple to the main, side &
rotisserie burner valve.
b. Connect the electronic wirer to ignition igniter.
c. Tighten the screws & washers.
CAUTION: The burner openings must be positioned properly over the
valve injectors. Check proper assembly before fastening
manifold/control panel in place.
WARNING: After reinstalling the gas lines, there should be leak test with
a soap and water solution before using the barbecue.
Page 9

STEP 6 - CHANGING HOSE, REGULATOR AND CONNECTION
a. Remove current LPG hose, regulator and connection.
b. Replace with Bromic NG ConversIon Kit supplied pieces.
STEP 7 APPLICATION OF SAFETY STICKER
a. Replace Use with LPG sticker with Use with NG sticker provided. (Sticker
location should be inside the BBQ’s right hand side door next to the Rating
Label)
Page 10

CONCLUSION OF ABOVE PROCESS
 Loading...