

Eurolux DW9-CBE Instructions For Use & Warranty
Code: 012050
Dishwasher
DW9-CBE
Instructions for Use
1
Index
en
Safety i n fo r ma ti o n
Installation
Getting to know your dishwasher
How to fill the salt
How to fill rinse aid
How to fill the detergent
Not suitable for the dishwasher
Arranging crockery, glasses, etc. in the dishwasher
Programme overview
Washing dishes
How to keep your dishwasher in shape
Care and maintenance
Fault finding
Technical data
Important information
2
4
6
7
8
9
10
11
13
15
18
19
20
24
24

2
Safety information
At time of delivery
Site the dishwasher and connect it up in accordance with the installation instructions.
The dishwasher must not be connected to the electricity supply while installation is being carried out.
Ensure that the domestic wiring is properly earthed.
The mains electricity supply must conform to the details shown on the dishwasher nameplate.
Do not connect the dishwasher to the electricity supply via an extension cable.
Built-under and built-in appliances s hould alway s be installed under a continuous work su r face which
is attached to the adjacent cupboards, in order to ensure that the appliance is entirely stable.
After the appliance has been installed,the mains plug should still be easily accessible.
The plastic hous ing on the water in let co nt ains an e lectr ical ly o pera t ed va lve.The conn ecting wires
are inside t he inle t hose.Do not cut through this hose and do not immers e the plastic housing in water .
During installation, the power supply cord must not be excessively or dangerously bent or flattened.
Check packaging and dishwasher immediately for signs of transport damage. If the appliance is
damaged, do not put it into use but contact your supplier or customer service without delay.
Please dispose of packaging materials properly.
During installation
The dishwasher must only be used by adults for the washing of household dishes and cooking utensils.
This appliance cannot be installed outdoor, not even if the area in which it is installed is covered by a
roof; it is also very dangerous to leave it exposed to the rain and elements.
Do not place any heavy objects or stand on the door when it is open. The appliance could tip f or war d.
The water inside the dishwasher is not suitable for drinking.
Do not use solvents of any kind inside your dishwasher. They could cause an explosion danger.
Open the door very carefully if the dishwasher is operating. There is a risk of water squirting out.
During normal use
Do not touch the heating element during or after a wash cycle.
Fundamental rules to follow when using the appliance:
- Never touch the dishwasher when barefoot or with wet hands or feet;
- We discourage the use of extension cords and multiple sockets;
- If the a pplian c e i s not operating p r op er ly or mai ntenance m us t b e perfor med, disc onnect t h e
appliance from the power supply.
en
3
If your family in clud es children
This appliance is not intended for use by persons (including children) with reduced physical,sensory
or mental capcabilit ies, o r lac k o f experienc e and knowledge,unless they hav e been given supervision or instruction concerning use of the appliance by a person responsible for their safety.
Children should be supervised to ensure that they to not play with the appliance.
Keep detergents out of the reach of children, who m us t also be kept away from the dishwasher when
it is open.
If a fault occurs
If the appliance malfunctions, turn off water supply to the appliance and disconnect the plug from the
wall socket. Then, consult the section entitled, "Fault finding" . If you cannot solve the proble m, contact a service center.
Only specialised personnel are authorised to make repairs.
If the supply cord is damaged ,it mus t be replace d by the man ufacture ,i ts servic e agent of similarly
qualified persons in order to avoid a hazard.
To maintain the EFFICIENCY and SAFETY of this appliance,we recommend:
- call only the Service Centers authorized by the manufacturer.
- always use original Spare Parts.
When disposing of old appliances
Appliances whic h are no longer being used m us t be m ade inoperable by c utt ing t he po wer s upply
cord and removing the door lock.
Take the appliance to a designated waste disposal center.
Warning
Children could get locked in the appliance (risk of suffocation)
or get stuck in other positions. Therefore: Remove the mains
plug, cut the mains wire and set aside. Damage the door lock so
that the door can no longer be closed.
Dangerous voltage
en

4
Cold wat er connectio n
Connect t he water supp ly hose to a threaded 3/4 (gas)
connector, making sure that it is fastened tightly in place (see
fig.A).
Some models are fitted with an "Aquastop" wat er su pply hos e
(see fig .B) in w hic h the s mall filt er is alr eady hous ed in th e
threaded end.
If the water pipes are new or have not been us ed for an ex tended period of time, let the water run to make sure that the
water is c lear and fr ee of impur ities. If this prec aution is not
taken, there is a risk that t he water inlet can ge t blocke d and
damage the appliance.
Positioning the appliance
Positioning the appliance in the desir ed location. The back s hould r es t against the wall behind it, and the
sides , along the adja cent ca binet s or wal l. T he dis hwas her is e quipp ed wi th w ate r supp ly an d d rain
hoses that can be positioned to the right or the left to facilitate proper installation.
fig.A
Anti-Flooding protection
The dishwasher is equipped with a system that stops the supply of water in the event of a problem with the water
supply hose, or leaks within the unit, in order to prevent damage to your home. If for any reason the box
containing th e el ectrical com ponents happ ens to get da m aged, remove the pl ug f or th e app li ance from the
socket immediately. In order to guarantee that the anti-flooding feature operates properly, the "A" box with water
supply hose must be attached to the water supply tap as shown in fig.B. No other type of con nection is acceptab le.
The water supply hose must not, under any circumstances, be cut, as it contains electrical parts which are live.
If the length of the hose is not adequate to make a proper connection, the hose must be replaced with one which
is long enough. This hose is available upon request from specialised retailers and service center.
fig.B
Levelling the appliance
Once the appliance is positioned, adjust t he feet (screwing t hem
in or out) to adjus t the dishwasher, mak ing it level. In any ca se ,
the appliance should not be inclined more than 2˚. If the appliance is level, it will help ensure proper performance.
Installation
Warning
The appliance is to be connected to the
water mains using new hose-sets and
that old hose-sets should not be reused.
en
5
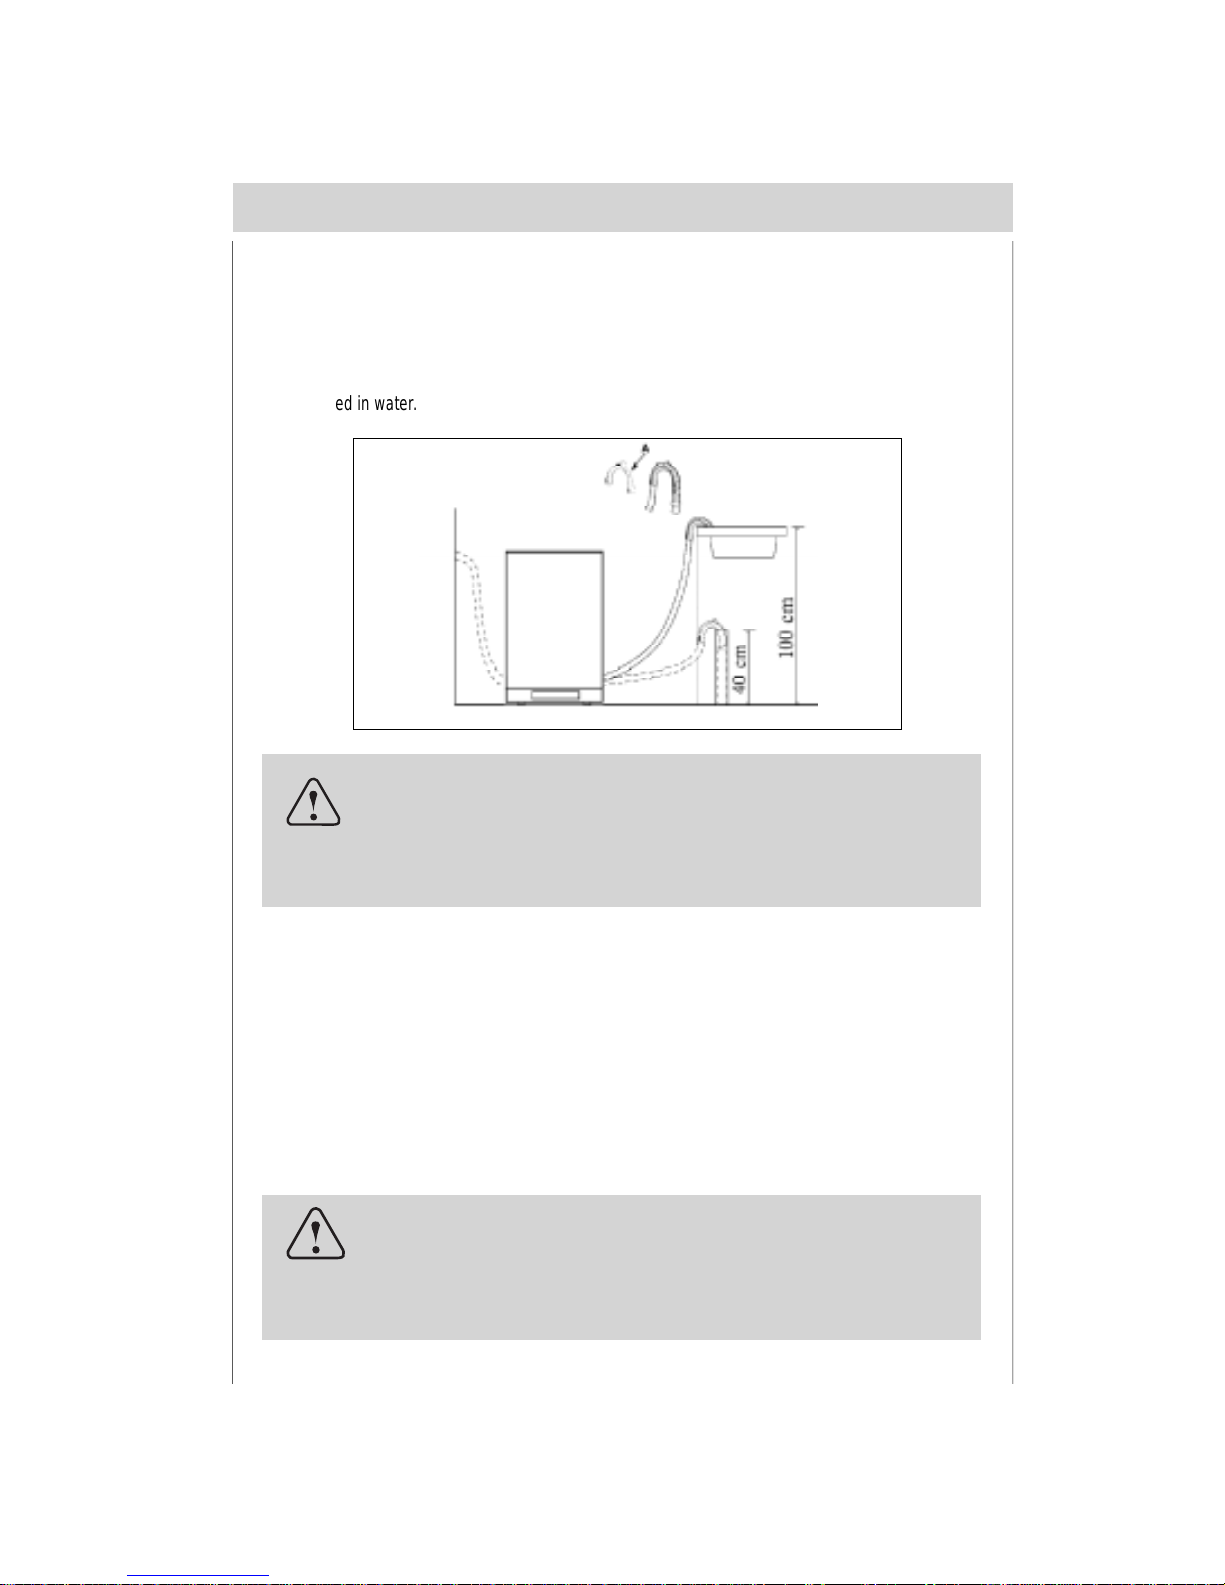
Drain hose co nnect ion
Insert the drain hose into a drain pipe with a minimum diameter of 4cm , or let it run into the sink, making
sure to avoid bending or crimping it. If necessary, fit a syphon trap (U-bend) with a connecting piece for
the drain hos e ( fig.C) . The free end of the hose m ust be at a heig ht between 40 and 100 c m and must not
be immers ed in wa t er.
fig.C
Attention:
The connecting piece for syphon trap (U-bend) must be solidly
fastened to the wall to prevent the drain hose from moving and
allowing water to spill outside the drain.
Electrical Connection
After making sure that the voltage and frequenc y va lues for the current in the home corres pond to those
on the rat ing plat e (locat ed on the st ainles s st eel inner door of the ap pli ance) and that t he elec tric al
system is correc t for the maximum voltage on t he r ating plate, insert the p lug int o an electrical socket
which is earthed properly (the earthing of the appliance is a safety requirement mandated by law).
If the electrical socket to which the appliance must be connected is not appropriate for the plug, replace
the who le cab le, rathe r than using ad aptor s or the sim ilar lik e as the y c ould c ause o ver heatin g an d
burns.
Caution:
The dishwasher plug must be accessible even when the appliance is installed as a built-in unit so that maintenance can be
done safely.
en
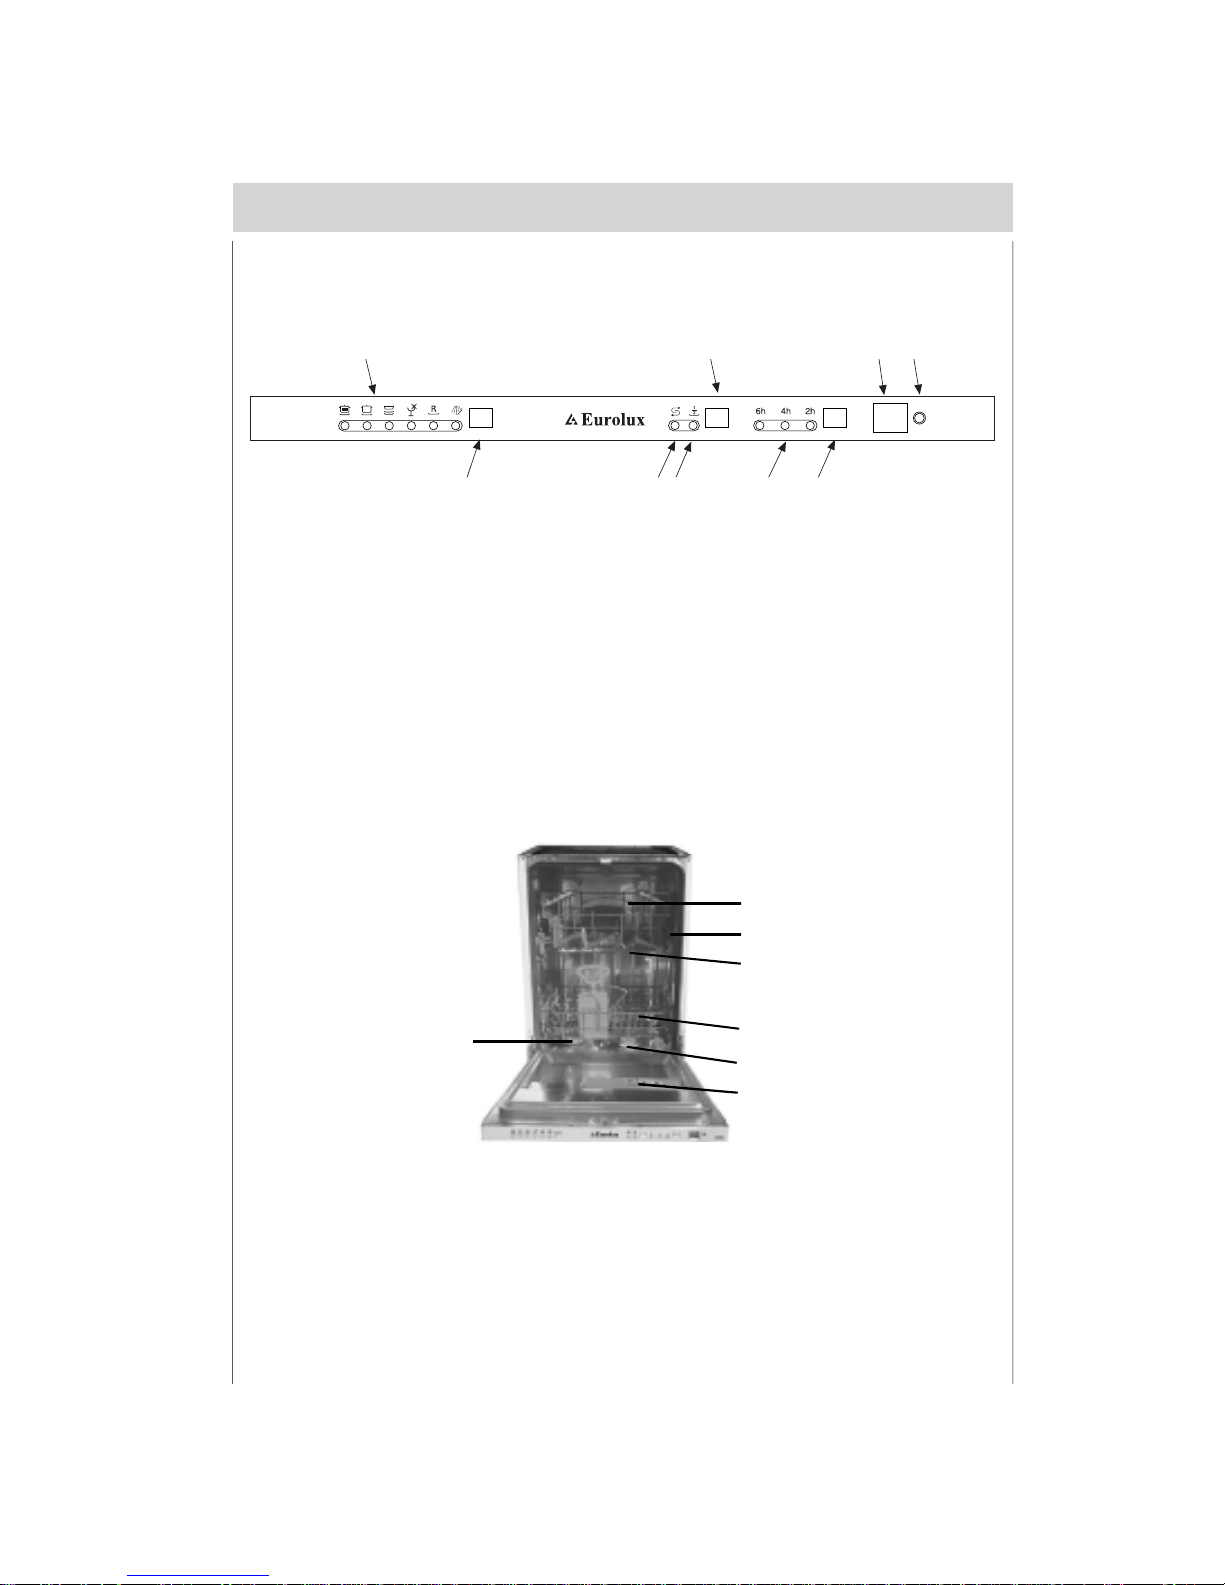
Getting to know your dishwasher
Close-up view (control panel)
6
Dishwasher in terio r
en
ADCB
FEGHI
A
B
C
D
E
F
G
H
I
"HALF LOAD" indicator light
Low salt indicator light
Cycle select button
Cycle indicator light
ON-OFF Button
ON-OFF Light
Delay select button
Delay indicator light
"HALF LOAD" Button
A
B
C
D
Upper Rack
Top Spray Arm
Rack Height Adjustor
Lower Rack
E
F
G
Washing Filter
Detergent and Rinse Aid Dispenser
Bottom Spray Arm
A
B
C
D
E
F
G
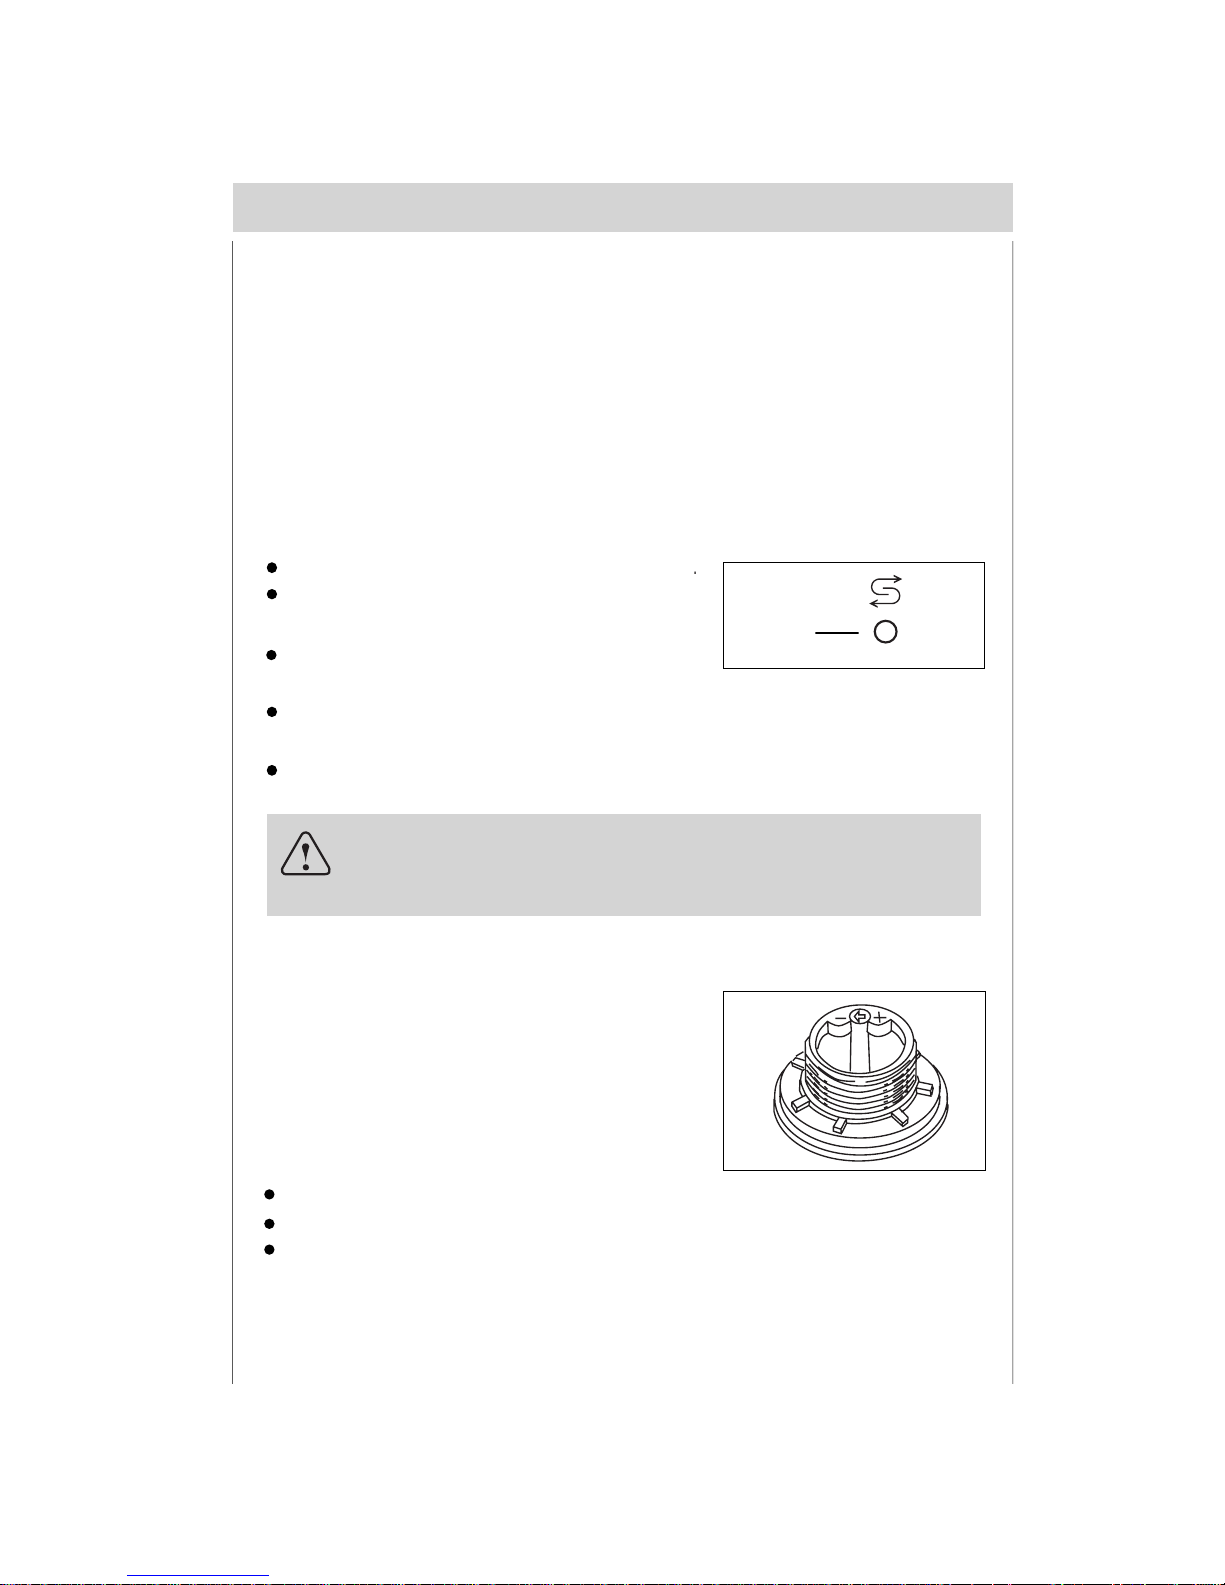
Salt
The hardness of the water varies from place to plac e. I f hard water is use d in the dishw asher , deposit s
will form on the dishes and utensils.
The appliance is equipped with a special softener that uses a salt specifically designed to eliminate lime
and minerals from the water.
How to fill the salt
Loading the salt into the container
Always use salt intended for use with dishwashers.
The salt container is located beneath the lower rack and should be filled as follows:
7
When the low salt indicator “F” lights, you must fill the salt.
Remove the lower rack and then unscrew and remove
the cap from the salt container;
If you are filling the container for the firs t time, fill it with
water;
Important
To prevent the formation of rust, load the salt just before beginning a
wash cycle.
en
F
Place the end of the funnel (supplied) into the hole and introduce about 2 kg of salt. It is normal for
a small amount of water to come out of the salt container.
Carefully screw the cap back on.
Adjusting salt consumption
The dishwasher is designed to allow for adjusting the amount
of salt consumed based on the hardness of the water used.
This is intended to optimiz e an d c us t omize t he l ev el of s alt
consumption so that it remains at a minimum.
To adjust salt consumption, proceed as follows:
Unscrew the cap from the salt container;
There is a ring on the container with an arrow on it (see figure to the side),
If necessary, rotate the ring in an anticlockwise direction from the "-" setting towards the "+" sign,
based on the hardness of the water being used.
8
en
It is recommended that adjustments be made in accordance with the following table:
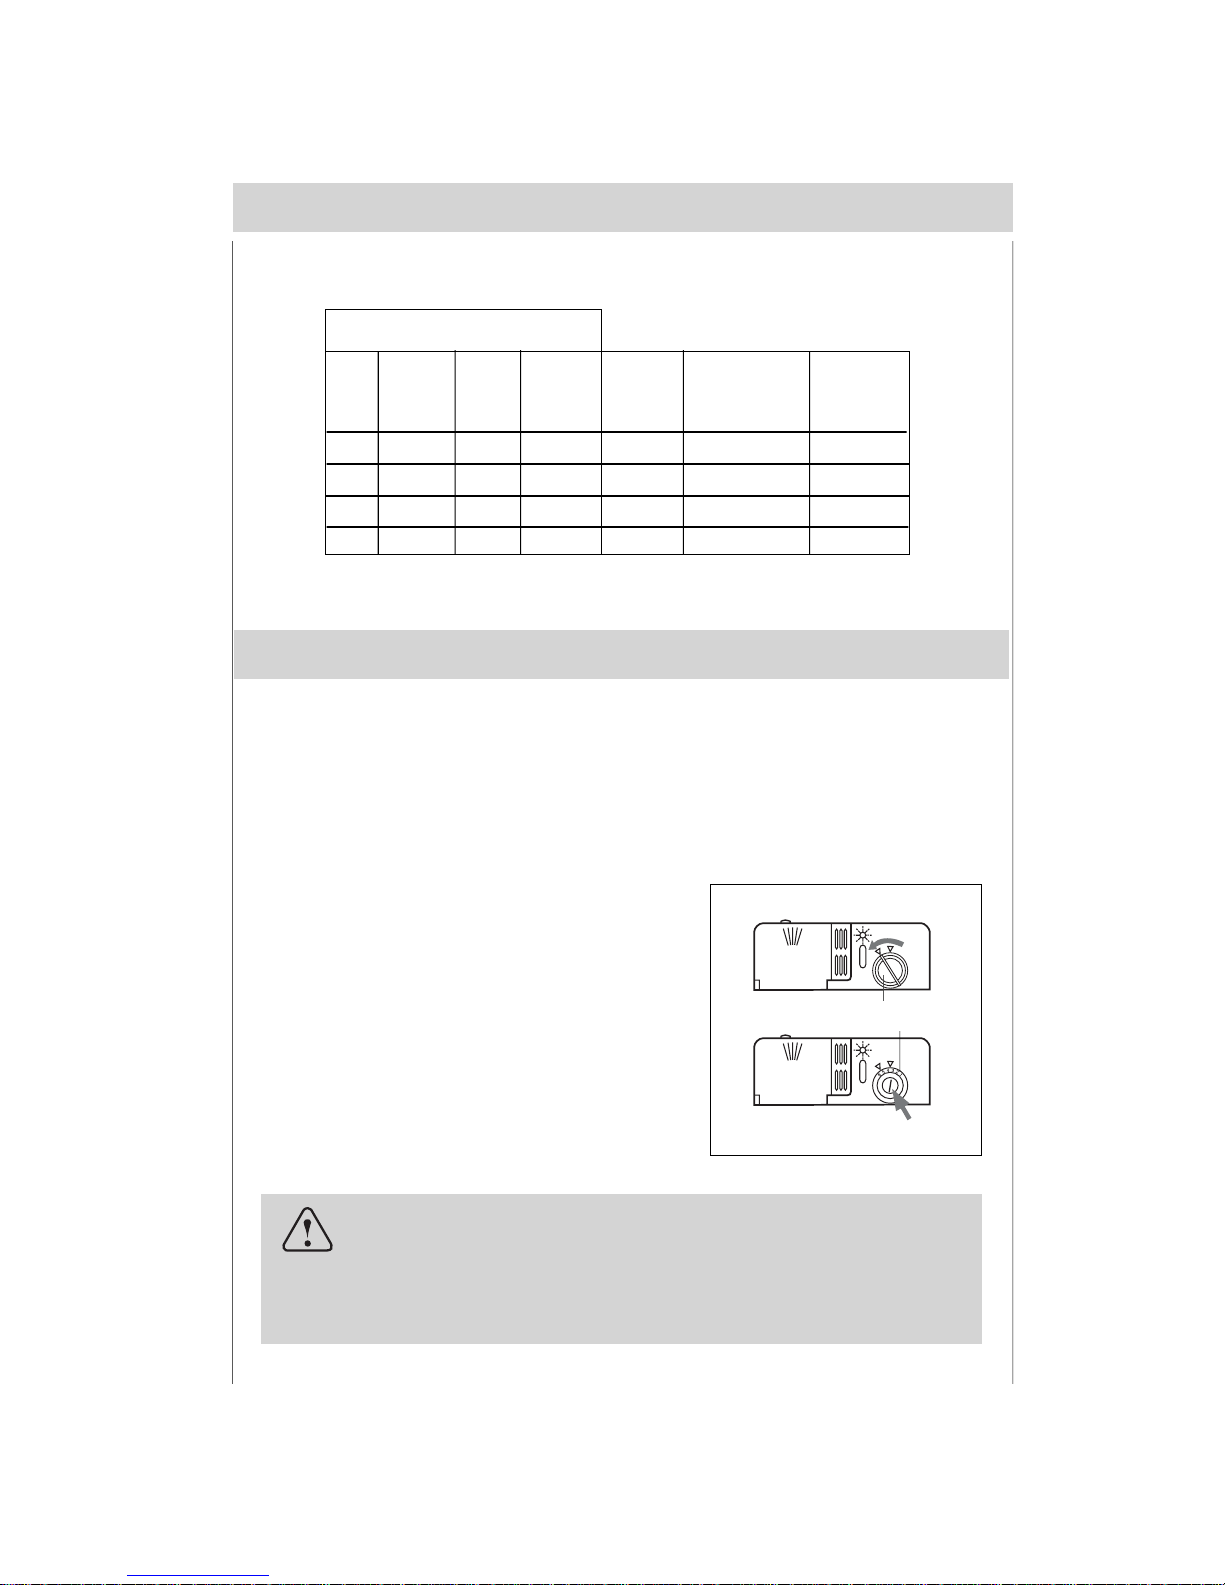
Rinse aid
This product makes dishes sparkle and helps them to dry without spotting. The dispenser is located on
the inside panel of the door .
Loading the rinse aid
Regardless of the type of detergent disp enser installed on
your appliance, you must proceed as indicated below when
loading the rinse aid.
To open the dispenser, t ur n the "1" cap in an anti- c loc kw is e
direction and then pour in the rinse aid, making sure not to
overfill. The amount of rinse aid used for each cycle can be
regulated by turning the " 2" dose adjust er , located beneath
the "1" cap, with a screwdriver.
There are 6 different settings; the normal dosage setting is
3.
How to fill rinse aid
1
2
Important
Proper dosage of the rinse aid improves drying.
If drops of water remain on the dishes o r spottin g occurs, th e dosage ad ju ster
should be turned to a higher setting.
If the dishes have white streaks, turn the dosage adjuster to a lower setting.
Water Hardness
Clarke
degrees
ºdH
mmol/l
Selector
position
Salt
consumption
(Grams/cycle)
Autonomy
(cycles/2kg)
0 - 14 0 - 17
0 - 1,7
1,8 - 4,418 - 4414 - 36
36 - 71 45 - 89 4,5 - 8,9
> 89> 71 > 8,9
/
"-"
Middle
/0
20
40
60"+"
60
40
25
Level
1
2
3
4
 Loading...