

EUROCOM Monster 4 User Manual
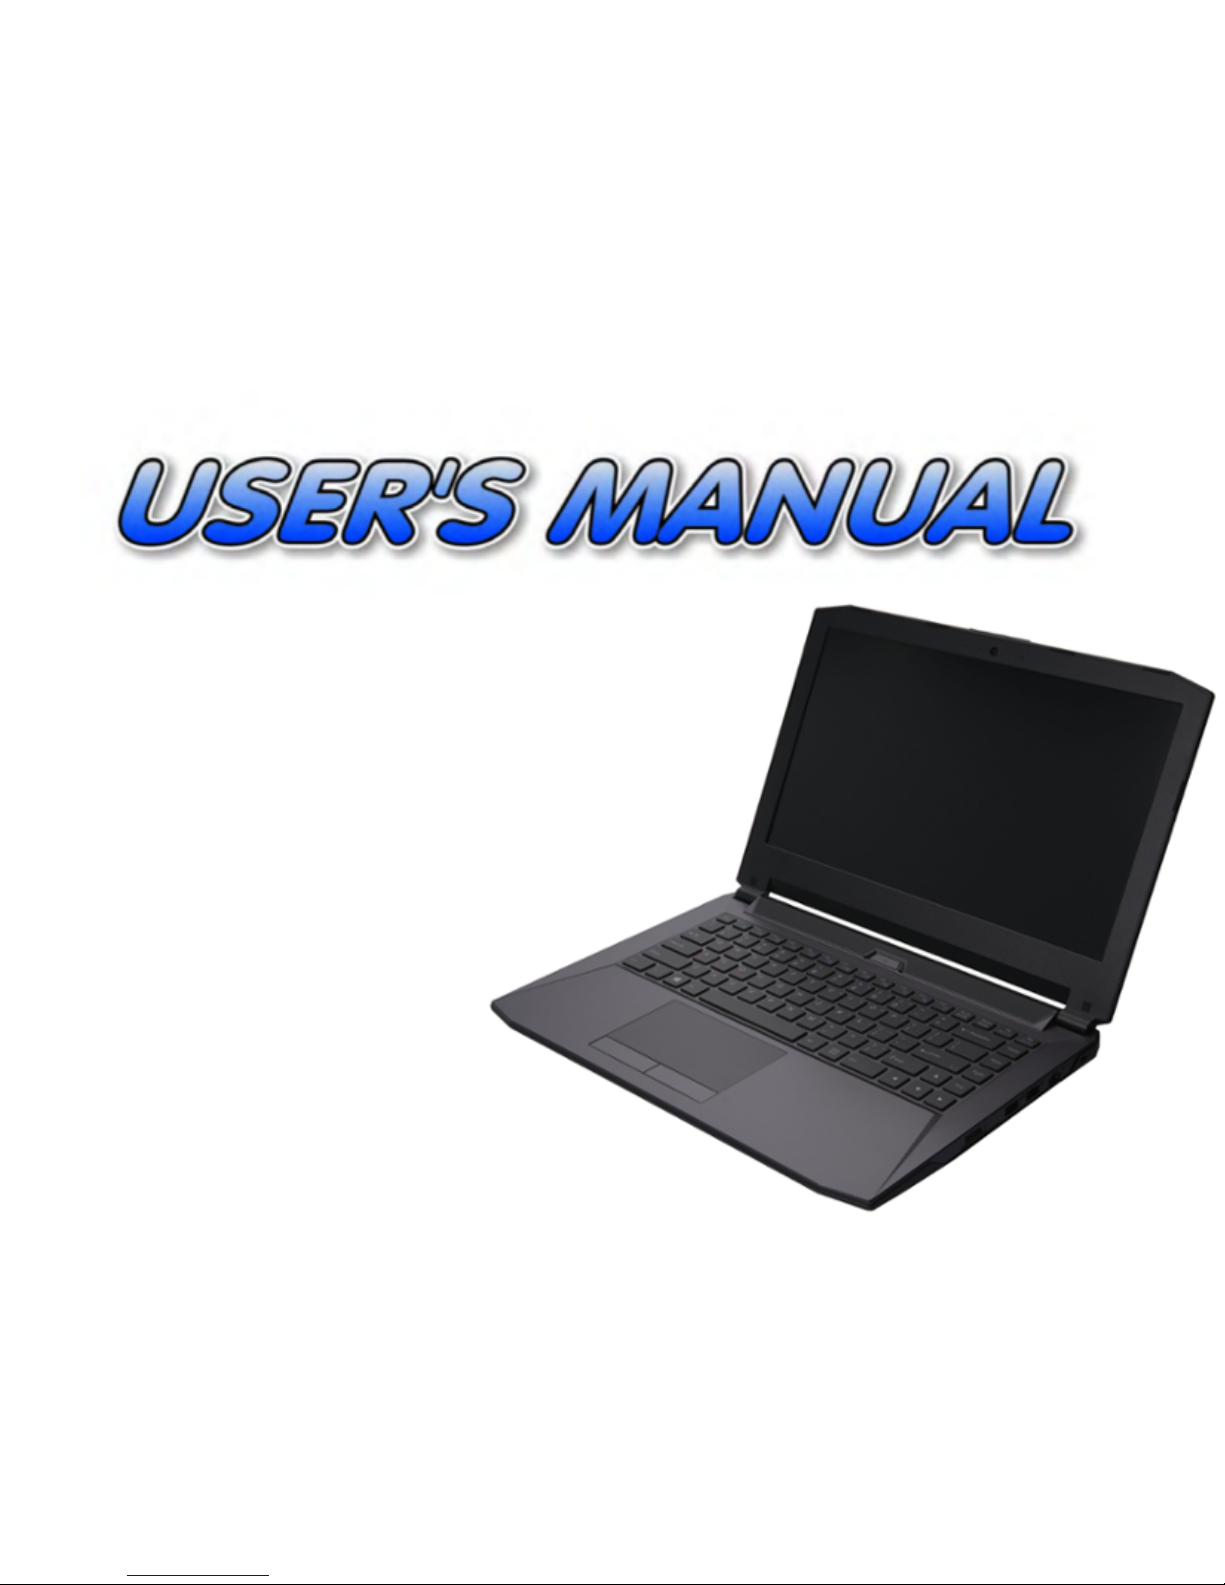
EUROCOM
Monster 4

1
English
About this Concise User Guide
This quick guide is a brief introduction to getting your system started. This is a supplement, and not a substitute for the
expanded English language User’s Manual in Adobe Acrobat format on the Device Drivers & Utilities + User’s Manual
disc supplied with your computer. This disc also contains the drivers and utilities necessary for the proper operation of
the computer (Note: The company reserves the right to revise this publication or to change its contents without notice).
Some or all of the computer’s features may already have been setup. If they aren’t, or you are planning to re-configure
(or re-install) portions of the system, refer to the expanded User’s Manual. The Device Drivers & Utilities + User’s
Manual disc does not contain an operating system.
Regulatory and Safety Information
Please pay careful attention to the full regulatory notices and safety information
contained in the expanded User’s Manual on the Device Drivers & Utilities + Us-
er’s Manual disc.
© December 2015
Trademarks
Intel and Intel Core are trademarks/registered trademarks of Intel Corporation.
FCC Statement
This device complies with Part
15 of the FCC Rules. Operation
is subject to the following two
conditions:
1. This device may not cause
harmful interference.
2. This device must accept any
interference received, including interference that may
cause undesired operation.

2
English
Instructions for Care and Operation
The computer is quite rugged, but it can be damaged. To
prevent this, follow these suggestions:
• Don’t drop it, or expose it to shock. If the computer falls, the
case and the components could be damaged.
• Keep it dry, and don’t overheat it. Keep the computer and
power supply away from any kind of heating element. This is an
electrical appliance. If water or any other liquid gets into it, the
computer could be badly damaged.
• Avoid interference. Keep the computer away from high capacity
transformers, electric motors, and other strong magnetic fields.
These can hinder proper performance and damage your data.
• Follow the proper working procedures for the computer. Shut
the computer down properly and don’t forget to save your work.
Remember to periodically save your data as data may be lost.
• Note that in computer’s featuring a raised LCD electro-plated
logo, the logo is covered by a protective adhesive. Due to general
wear and tear, this adhesive may deteriorate over time and the
exposed logo may develop sharp edges. Be careful when handling
the computer in this case, and avoid touching the raised LCD
electro-plated logo. Avoid placing any other items in the carrying
bag which may rub against the top of the computer during transport. If any such wear and tear develops contact your service center.
Power & Battery Safety
• Only use an AC/DC adapter approved for use with this computer.
• Use only the power cord and batteries indicated in this manual.
• Your AC/DC adapter may be designed for international travel but
it still requires a steady, uninterrupted power supply. If you are
unsure of your local power specifications, consult your service
representative or local power company.
• The AC/DC adapter may have either a 2-prong or a 3-prong
grounded plug. The third prong is an important safety feature; do
not defeat its purpose. If you do not have access to a compatible
outlet, have a qualified electrician install one.
• When you want to unplug the power cord, be sure to disconnect it
by the plug head, not by its wire.
• Make sure the socket and any extension cord(s) you use can support the total current load of all the connected devices.
• Make sure that your computer is completely powered off before
putting it into a travel bag (or any such container).
• Only use batteries designed for this computer. The wrong battery
type may explode, leak or damage the computer.
• Do not continue to use a battery that has been dropped, or that
appears damaged (e.g. bent or twisted) in any way. Even if the
computer continues to work with a damaged battery in place, it
may cause circuit damage, which may possibly result in fire.
• Recharge the batteries using the computer’s system. Incorrect
recharging may make the battery explode.
• Do not try to repair a battery pack. Refer any battery pack repair
or replacement to your service representative or qualified service
personnel.
• Keep children away from, and promptly dispose of a damaged
battery. Always dispose of batteries carefully. Batteries may
explode or leak if exposed to fire, or improperly handled or discarded.
• Keep the battery away from metal appliances.
• Affix tape to the battery contacts before disposing of the battery.
• Do not dispose of batteries in a fire. They may explode. Check
with local codes for possible special disposal instructions.
• Do not touch the battery contacts with your hands or metal
objects.

3
English
Polymer Battery Precautions
Note the following information which is specific to polymer batteries only, and where applicable, this overrides
the general battery precaution information.
• Polymer batteries may experience a slight expansion or swelling,
however this is part of the battery’s safety mechanism and is not a
cause for concern.
• Use proper handling procedures when using polymer batteries.
Do not use polymer batteries in high ambient temperature environments, and do not store unused batteries for extended periods.
Cleaning
• Use a soft clean cloth to clean the computer, but do not apply
cleaner directly to the computer.
• Do not use volatile (petroleum distillates) or abrasive cleaners on
any part of the computer.
• Before cleaning the computer remove the battery and make sure
the computer is disconnected from any external power supplies,
peripherals and cables (including telephone lines).
Servicing
Attempting to service the computer yourself may violate
your warranty and expose you and the computer to electric
shock. Refer all servicing to qualified service personnel,
particularly under any of the following conditions:
• When the power cord or AC/DC adapter is damaged or frayed.
• If the computer has been exposed to any liquids.
• If the computer does not work normally when you follow the
operating instructions.
• If the computer has been dropped or damaged (do not touch the
poisonous liquid if the LCD panel breaks).
• If there is an unusual odor, heat or smoke coming from your computer.
Battery Disposal & Caution
The product that you have purchased contains a rechargeable battery. The battery is recyclable. At the end of its useful life, under various state and local laws, it may be illegal
to dispose of this battery into the municipal waste stream.
Check with your local solid waste officials for details in your
area for recycling options or proper disposal.
Danger of explosion if battery is incorrectly replaced. Replace only with the same or equivalent type recommended
by the manufacturer. Discard used battery according to the
manufacturer’s instructions.
4
English
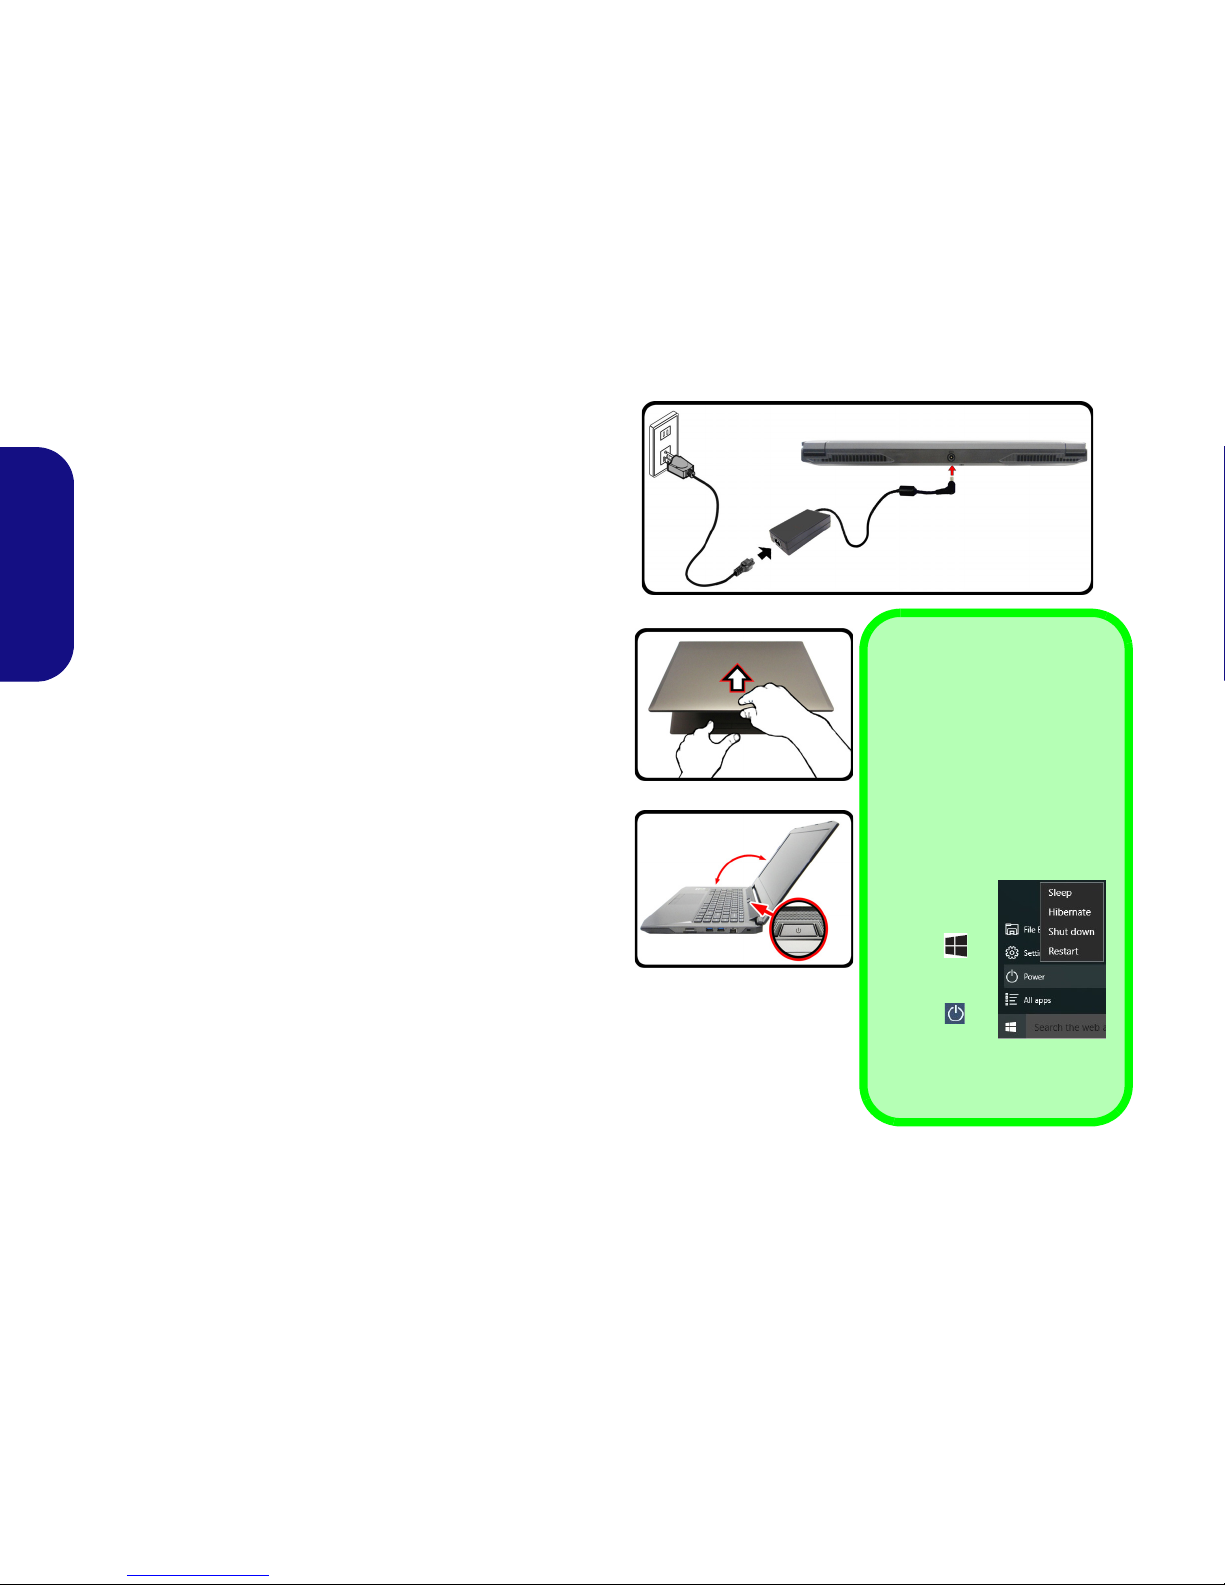
System Startup
1. Remove all packing materials.
2. Place the computer on a stable surface.
3. Securely attach any peripherals you want to use with the computer
(e.g. keyboard and mouse) to their ports.
4. Attach the AC/DC adapter to the DC-In jack at the rear of the
computer, then plug the AC power cord into an outlet, and connect
the AC power cord to the AC/DC adapter
(make sure you use
the adapter when first setting up the computer, as to
safeguard the computer during shipping the battery will be locked
to not power the system until first connected to the AC/DC
adapter).
5. Use one hand to raise the lid/LCD to a comfortable viewing angle
(do not to exceed 135 degrees);
use the other hand (as illustrated
in Figure 1) to support the base of the computer (Note: Never lift
the computer by the lid/LCD).
6. Press the power button to turn the computer “on”.
System Software
Your computer may already come with system software preinstalled. Where this is not the case, or where you are re-configuring your computer for a different system, you will find
this manual refers to Microsoft Windows 10.
135°
Figure 1
Opening the Lid/LCD/
Computer with AC/DC
Adapter Plugged-In
Shut Down
Note that you should always
shut your computer down by
choosing the Shut down
command in Windows (see
below). This will help prevent
hard disk or system problems.
1. Click the
Start
Menu
icon .
2. Click the
Power
item .
3. Choose
Shut
Down from the menu.
5
English
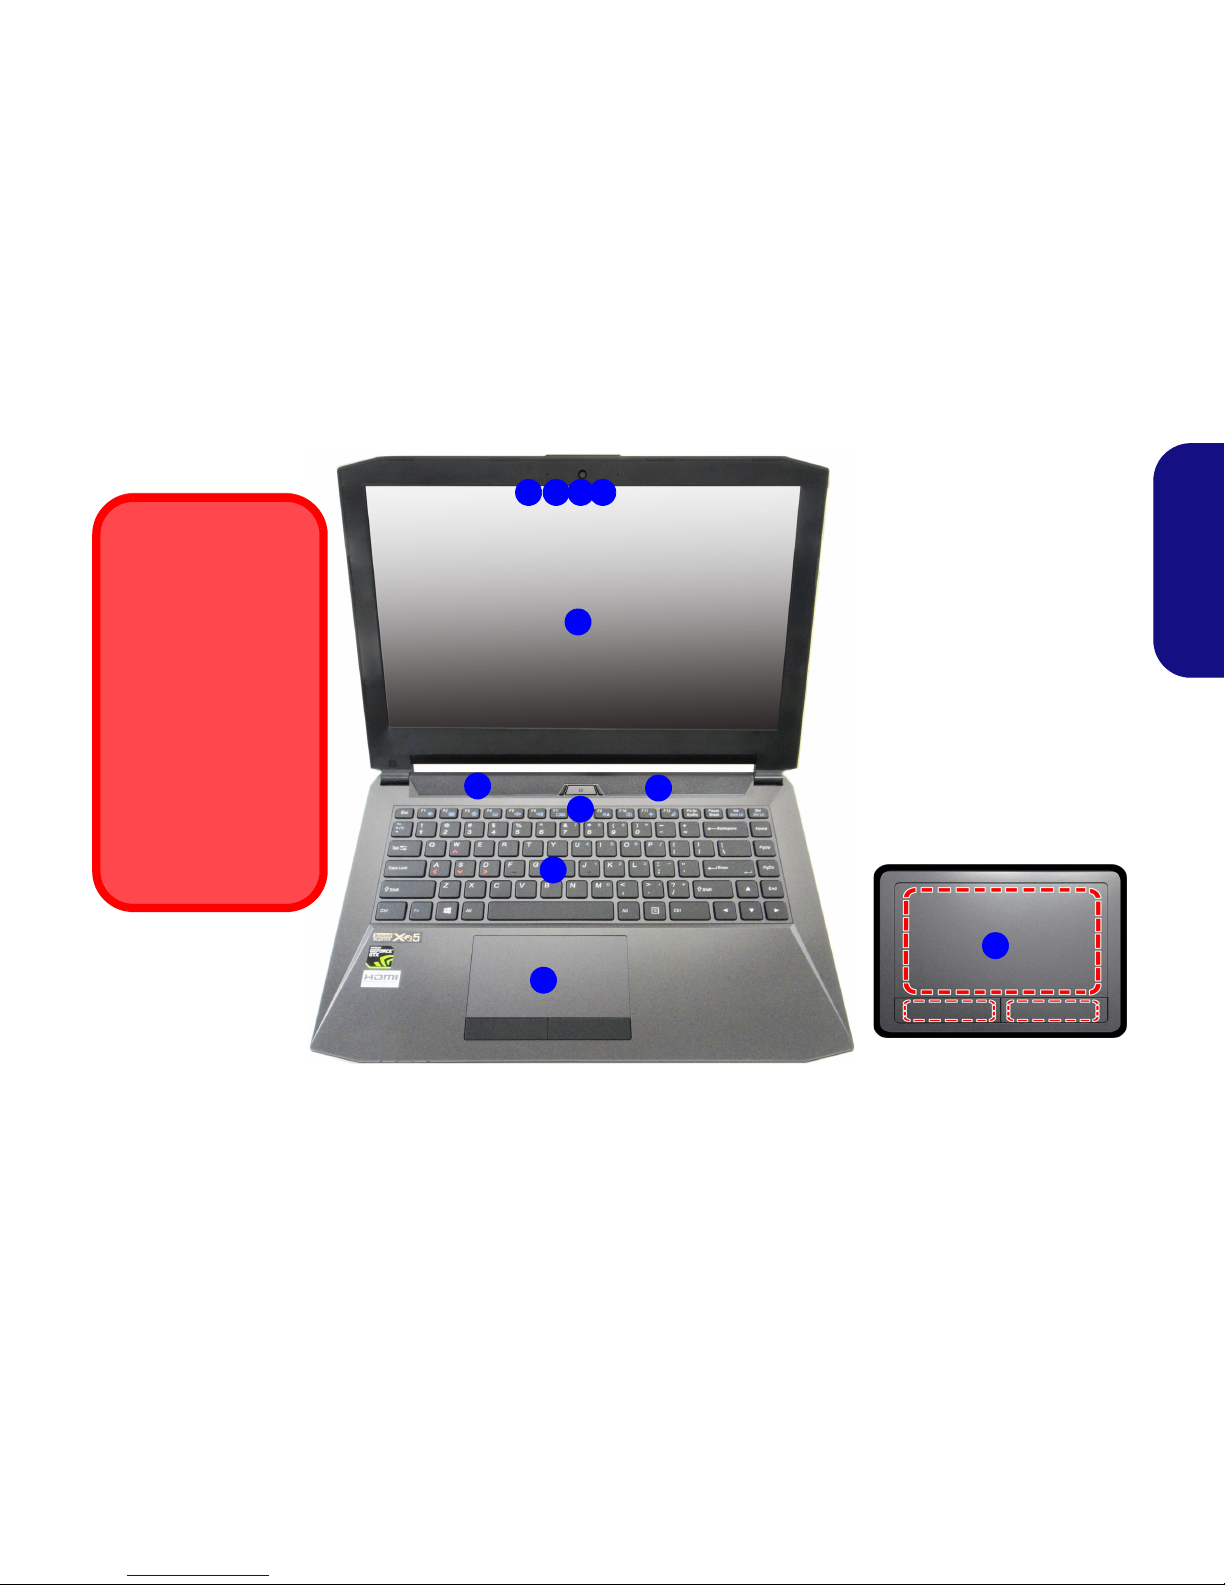
System Map: Front View with LCD Panel Open
Wireless Device
Operation Aboard
Aircraft
The use of any portable
electronic transmission
devices aboard aircraft
is usually prohibited.
Make sure the WLAN,
Bluetooth & 3G/4G
module(s) are OFF if
you are using the computer aboard aircraft by
putting the system in to
Airplane Mode.
241 3
5
6
8
7
3
Figure 2
Front View with LCD Panel
Open
1. PC Camera
2. *PC Camera LED
*When the PC camera is in
use, the LED will be
illuminated in red.
3. Built-In Array Microphone
4. LCD
5. Speakers
6. Power Button
7. Keyboard
8. Touchpad & Buttons
Note that the Touchpad and
Buttons valid operational
area is that indicated within
the red dotted lines above.
5
8

6
English
LED Indicators
The LED indicators on the computer display helpful information about the current status of the computer.
Table 1 - LED Indicators
*The powered USB 3.0 port (see page 15) may be toggled
on /off by means of the Fn + Power Button key combination. When the powered USB port is on it will supply power (for charging devices only, not for operating devices)
when the system is off but still powered by the AC/DC
adapter plugged into a working outlet, or powered by the
battery with a capacity level above 20% (this may not
work with certain devices - see page 30).
Icon Color Description
Green
Airplane Mode is ON (the WLAN, Blue-
tooth and 3G/4G Modules are OFF)
Green The Hard Disk is in use
Orange The Battery is Charging
Green The Battery is Fully Charged
Blinking
Orange
The Battery Has Reached Critically Low
Power Status
Orange The AC/DC Adapter is Plugged In
Blinking
Orange*
The AC/DC adapter is plugged in and the
powered USB Port is on*
Green The Computer is On
Blinking
Green
The Computer is in Sleep Mode
7
English
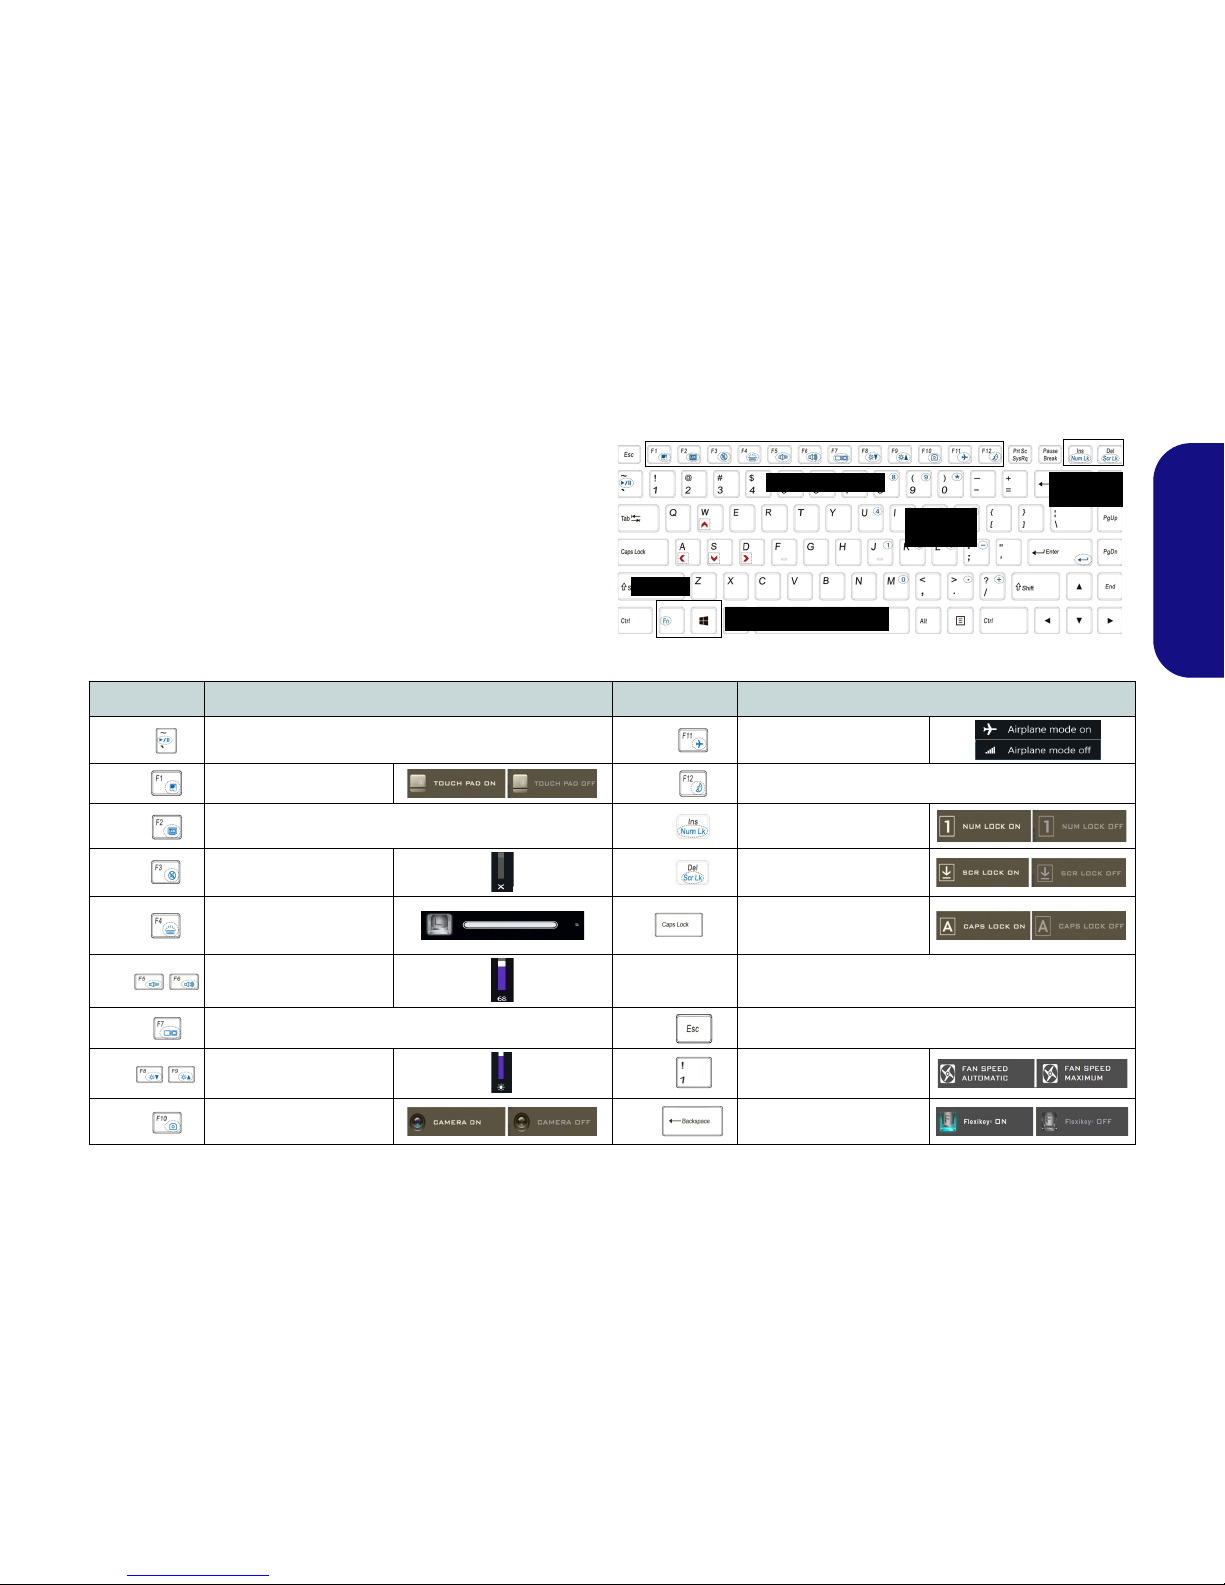
Keyboard & Function Keys
Table 2 - Function Keys & Visual Indicators
The keyboard includes a numeric keypad for easy numeric data input. Pressing Fn + NumLk turns on/off the numeric keypad. It also features function keys to allow you
to change operational features instantly. The function
keys (F1 - F12 etc.) will act as hot keys when pressed
while the Fn key is held down. In addition to the basic
function key combinations, some visual indicators are
available when the Control Center driver is installed.
Keys Function/Visual Indicators Keys Function/Visual Indicators
Fn +
Play/Pause (in Audio/Video Programs)
Fn +
Airplane Mode Toggle
Fn +
Touchpad Toggle
Fn +
Sleep Toggle
Fn +
Turn LCD Backlight Off
(Press a key to or use Touchpad to turn on)
Fn +
Number Lock Toggle
Fn +
Mute Toggle
Fn +
Scroll Lock Toggle
Fn +
Toggle Keyboard Illumi-
nation/Adjust Brightness
Level
Caps Lock Toggle
Fn +
Volume Decrease/
Increase
Fn + Power But-
ton
Powered USB Port Power Toggle (see page 15)
Fn +
Change Display Configuration (see page 19)
Fn +
Control Center Toggle (see page 8)
Fn +
Brightness Decrease/
Increase
Fn +
Fan Automatic Control/
Full Power
Fn +
PC Camera Power
Toggle
Fn +
Disable/Enable Flexikey®
(see page 11)
Function Keys
Numeric
Keypad
Fn Key
Windows Logo Key
ScrLk &
NumLk
Figure 3 - Keyboard

8
English
Control Center
Press the Fn + Esc key combination, or double-click the
icon in the notification area of the taskbar to toggle
the Control Center on/off. The Control Center gives
quick access to frequently used controls and enables you
to quickly turn the camera/Touchpad on/off.
Power Modes
You can set a Power Mode by clicking the appropriate
icon at the top of the Control Center. Each power mode
will affect the Power Conservation Mode, Airplane Mode,
Power Plan and PC camera power etc.
Control Center Menus
The Control Center contains 3 menu headings (System
Program, Device and Gaming) under the Power Modes.
Click the Control Center icons to toggle the appropriate
function, or hold the mouse button down and move the
dial control where applicable. Certain functions will automatically be adjusted when a power mode is selected.
Click the menu headings and then click any of the buttons.
Figure 4 - Control Center
9
English
Power Status
The Power Status icon will show whether you are currently powered by the battery, or by the AC/DC adapter
plugged in to a working power outlet. The power status
bar will show the current battery charge state.
Brightness
The Brightness icon will show the current screen brightness level. You can use the slider to adjust the screen
brightness or the Fn + F8/F9 key combinations, or use the
Fn + F2 key combination to turn off the LED backlight
(press any key to turn it on again). Note that screen brightness is also effected by the Power Mode selected.
Volume
The Volume icon will show the current volume level. You
can use the slider to adjust the volume or the Fn + F5/F6
key combinations, or use the Fn + F3 key combination to
mute the volume.
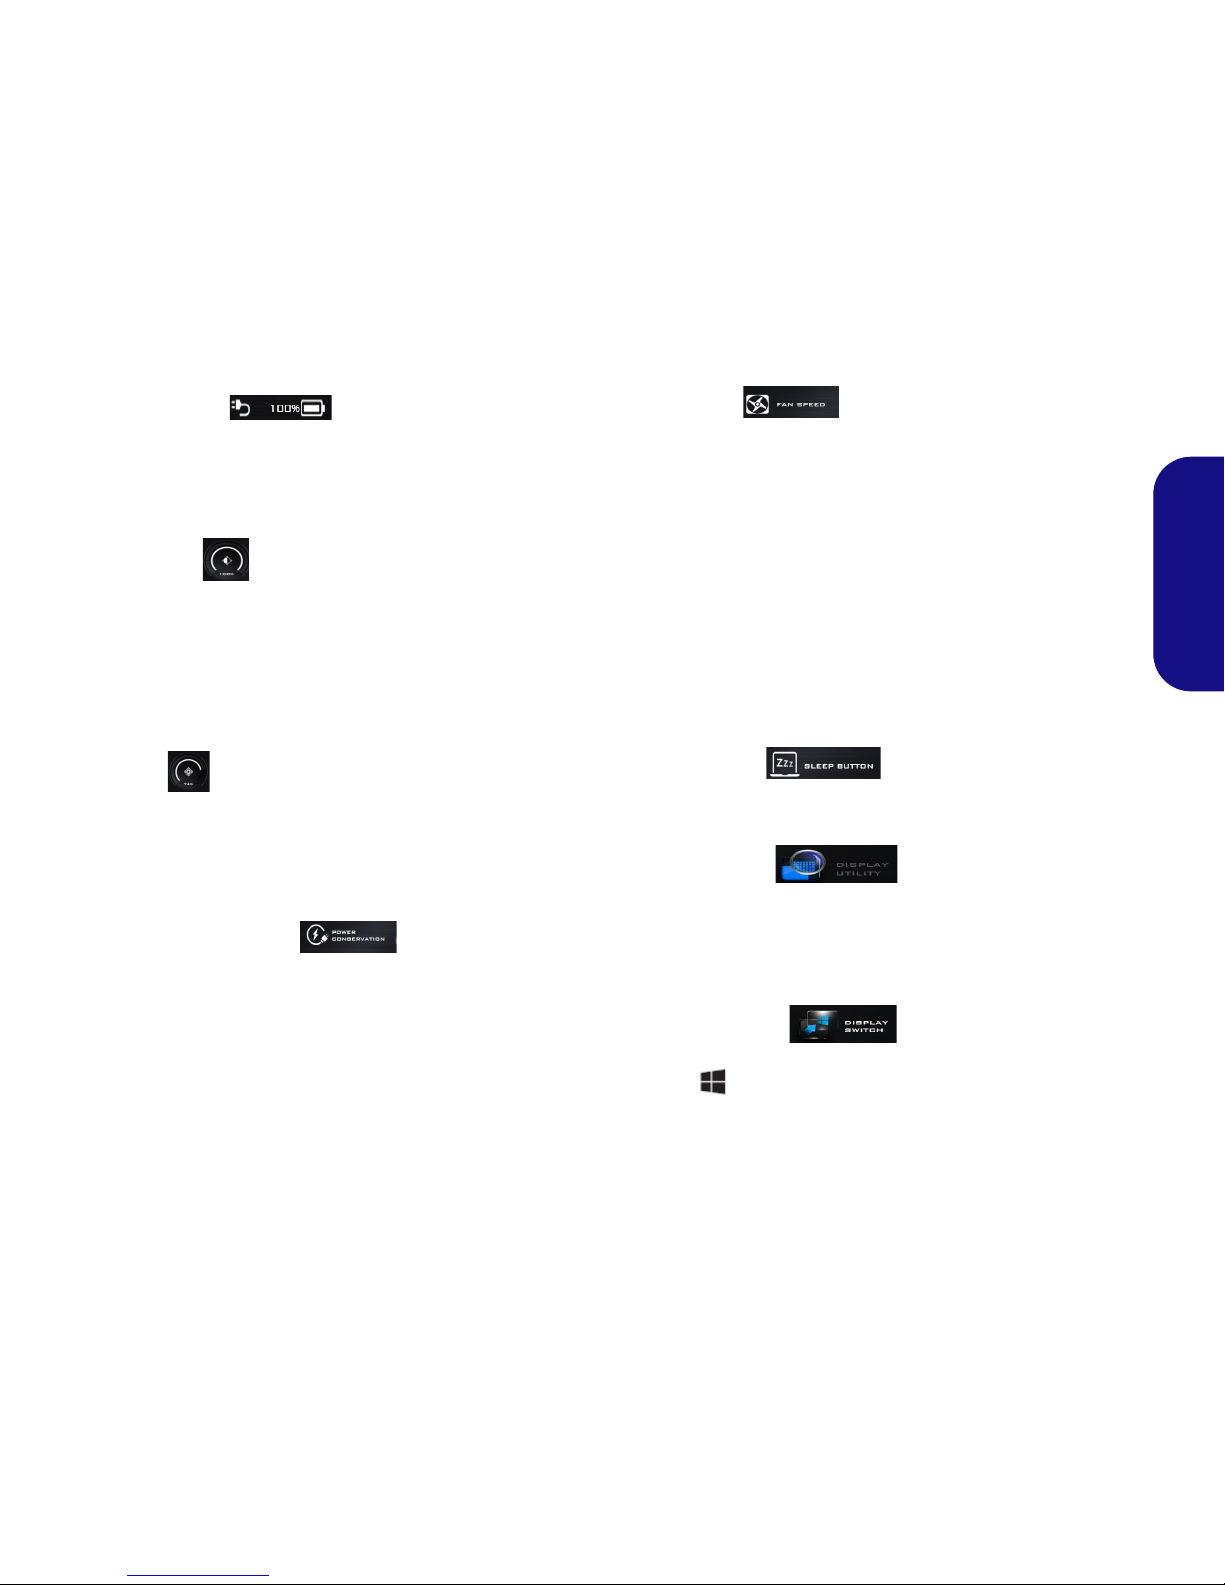
Power Conservation
This system supports Energy Star power management
features that place computers (CPU, hard drive, etc.) into
a low-power sleep mode after a designated period of inactivity. Click either the Performance, Balanced or Ener-
gy Star button.
Fan Speed
You can set the fan speed to Maximum (full power), Automatic, Custom or Overclock from this menu item. The
fan speed will adjust itself automatically to control the heat
of the CPU. However you can adjust the setting to maximum if you prefer. Select Custom and click on the sliders
to adjust the settings to your preference, however these settings can be overidden by the system, as a safety precaution,
if it requires heavier use of the fan.
Overclock will be selected automatically if you have enabled CPU overclocking (in this case do not change the
setting).
Sleep Button
Click either the Hibernate or Sleep button to have the
computer enter the selected power-saving mode.
Display Utility
The Display Utility icon will only appear in the System
Program menu if your display’s resolution is QHD or
above. The Display Utility allows you to adjust text size
on the screen to make it easier to view.
Display Switch
Click the Display Switch button to access the menu (or
use the + P key combination) and select the appropriate display mode.
 Loading...