

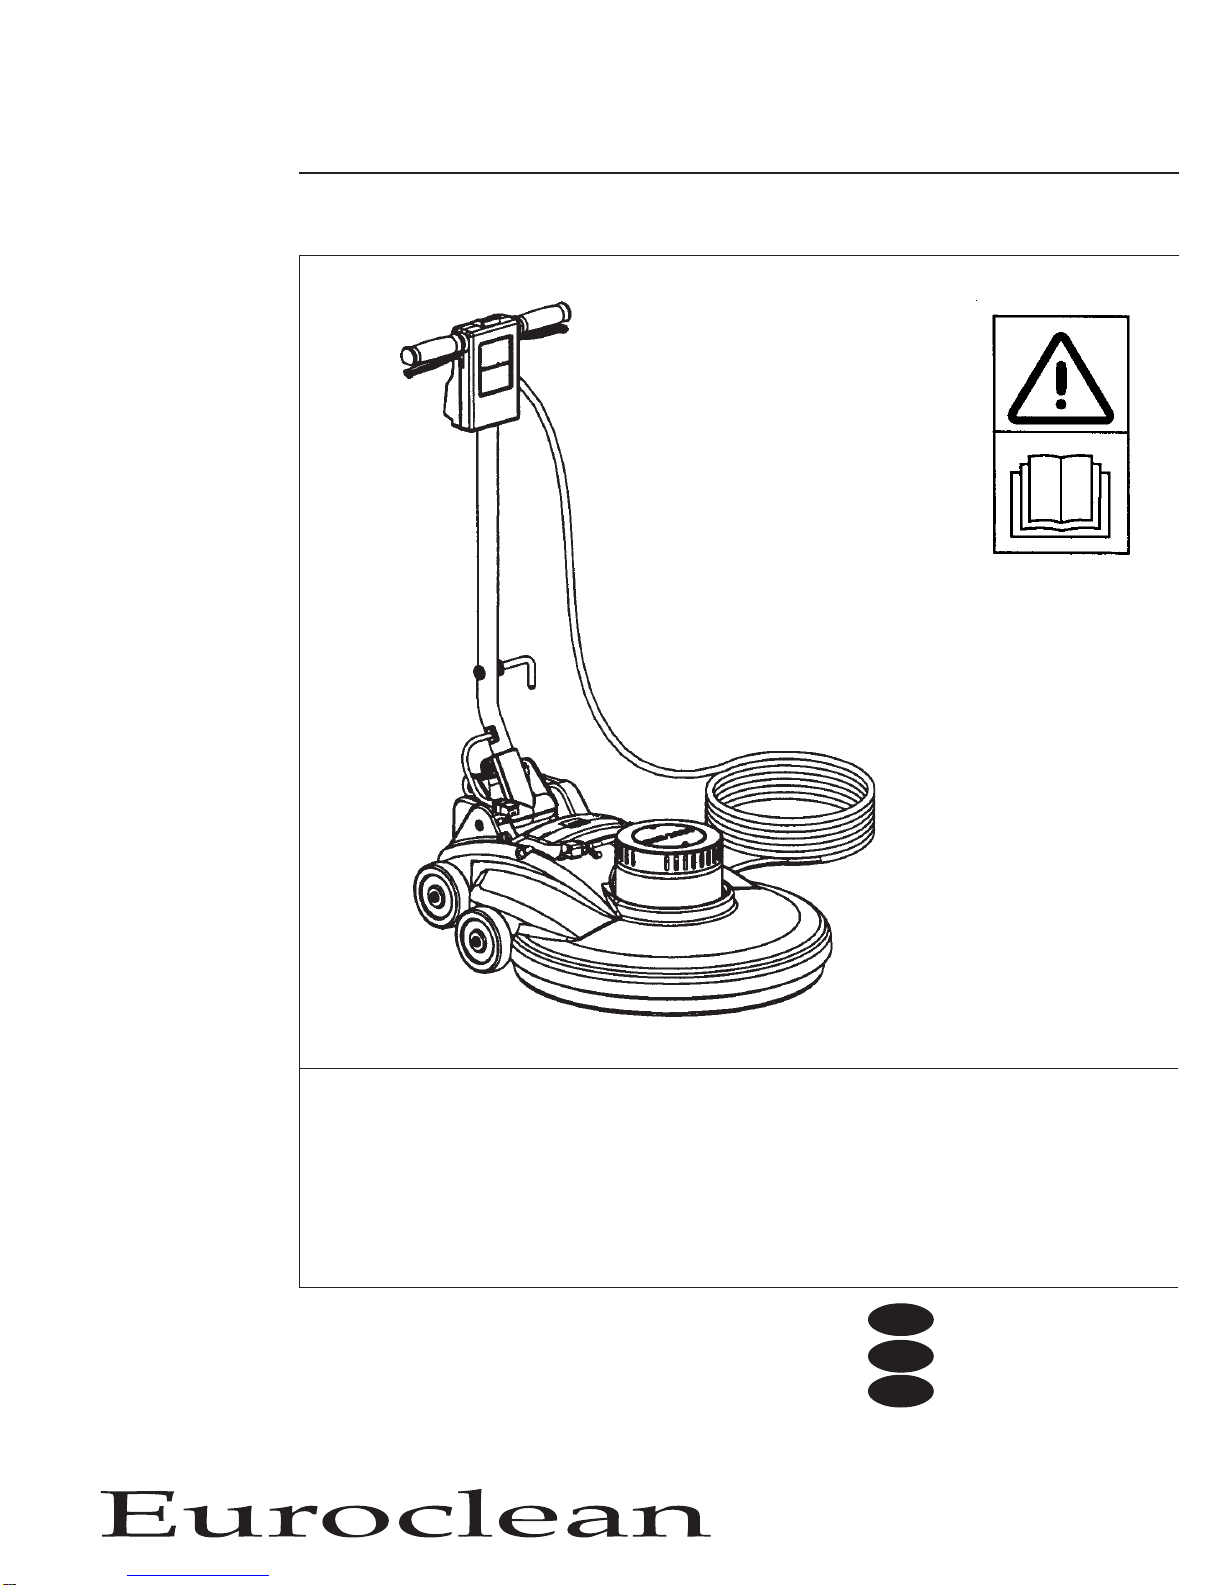
ECB-1500, ECB-2000
Instructions For Use
Instrucciones para el uso
Guides d’utilisation
Euroclean Models: 01560A (1500); 01570A (2000)
EN
English (2 - 6)
ES
Español (8 - 12)
FR
Français (14 - 18)
Parts List (21-27)
7/07 Form Number 71281A

ENGLISH
EN
IMPORTANT SAFETY INSTRUCTIONS
This machine is only suitable for commercial use, for example in hotels, schools, hospitals, factories, shops and offices other than
normal residential housekeeping purposes.
When using an electrical appliance, basic precautions should always be followed, including the following:
Read all instructions before using.
WARNING!
To reduce risk of fire, electric shock, or injury:
* Do not leave the appliance when it is plugged in. Unplug the unit from the outlet when not in use and before servicing.
* This machine is for dry use only and shall not be used or stored outdoors in wet conditions.
* To avoid electric shock, do not expose to rain. Store indoors.
* Do not allow to be used as a toy. Close attention is necessary when used by or near children.
* Use only as described in this manual. Use only manufacturer’s recommended attachments.
* Do not use with damaged cord or plug. If appliance is not working as it should, has been dropped, damaged, left outdoors,
or dropped into water, return it to a service center.
* Do not pull or carry by cord, use cord as a handle, close a door on a cord, or pull cord around sharp edges or corners. Do
not run appliance over cord. Keep cord away from heated surfaces.
* Do not unplug by pulling on cord. To unplug, grasp the plug, not the cord.
* Do not handle plug or appliance with wet hands.
* Do not put any object into openings. Do not use with any opening blocked; keep free of dust, lint, hair, and anything that may
reduce air flow.
* Keep hair, loose clothing, fingers, and all parts of body away from openings and moving parts.
* Turn off all controls before unplugging.
* Use extra care when cleaning on stairs.
* Do not use with flammable or combustible liquids such as gasoline or use in areas where they may be present.
* This appliance is provided with double insulation. Use only identical replacement parts.
* This machine is not suitable for picking up health endangering dust.
* Do not use without dust bag and / or filters in place.
* Connect to a properly grounded outlet only. See Grounding Instructions.
SAVE THESE INSTRUCTIONS
2 - FORM NO. 71281A - ECB-1500, ECB-2000

ENGLISH
EN
GROUNDING INSTRUCTIONS
This appliance must be grounded. If it should electrically malfunction, grounding provides a path of least resistance for electric current to reduce
the risk of electric shock. This appliance is equipped with a cord having an equipment-grounding conductor and grounding plug. The plug must
be plugged into an appropriate outlet that is properly installed and grounded in accordance with all local codes and ordinances.
DANGER!
Improper connection of the equipment-grounding conductor can result in a risk of electric shock. Check with a qualified electrician
or service person if you are in doubt as to whether the outlet is properly grounded. Do not modify the plug provided with the appliance.
If it will not fit the outlet, have a proper outlet installed by a qualified electrician.
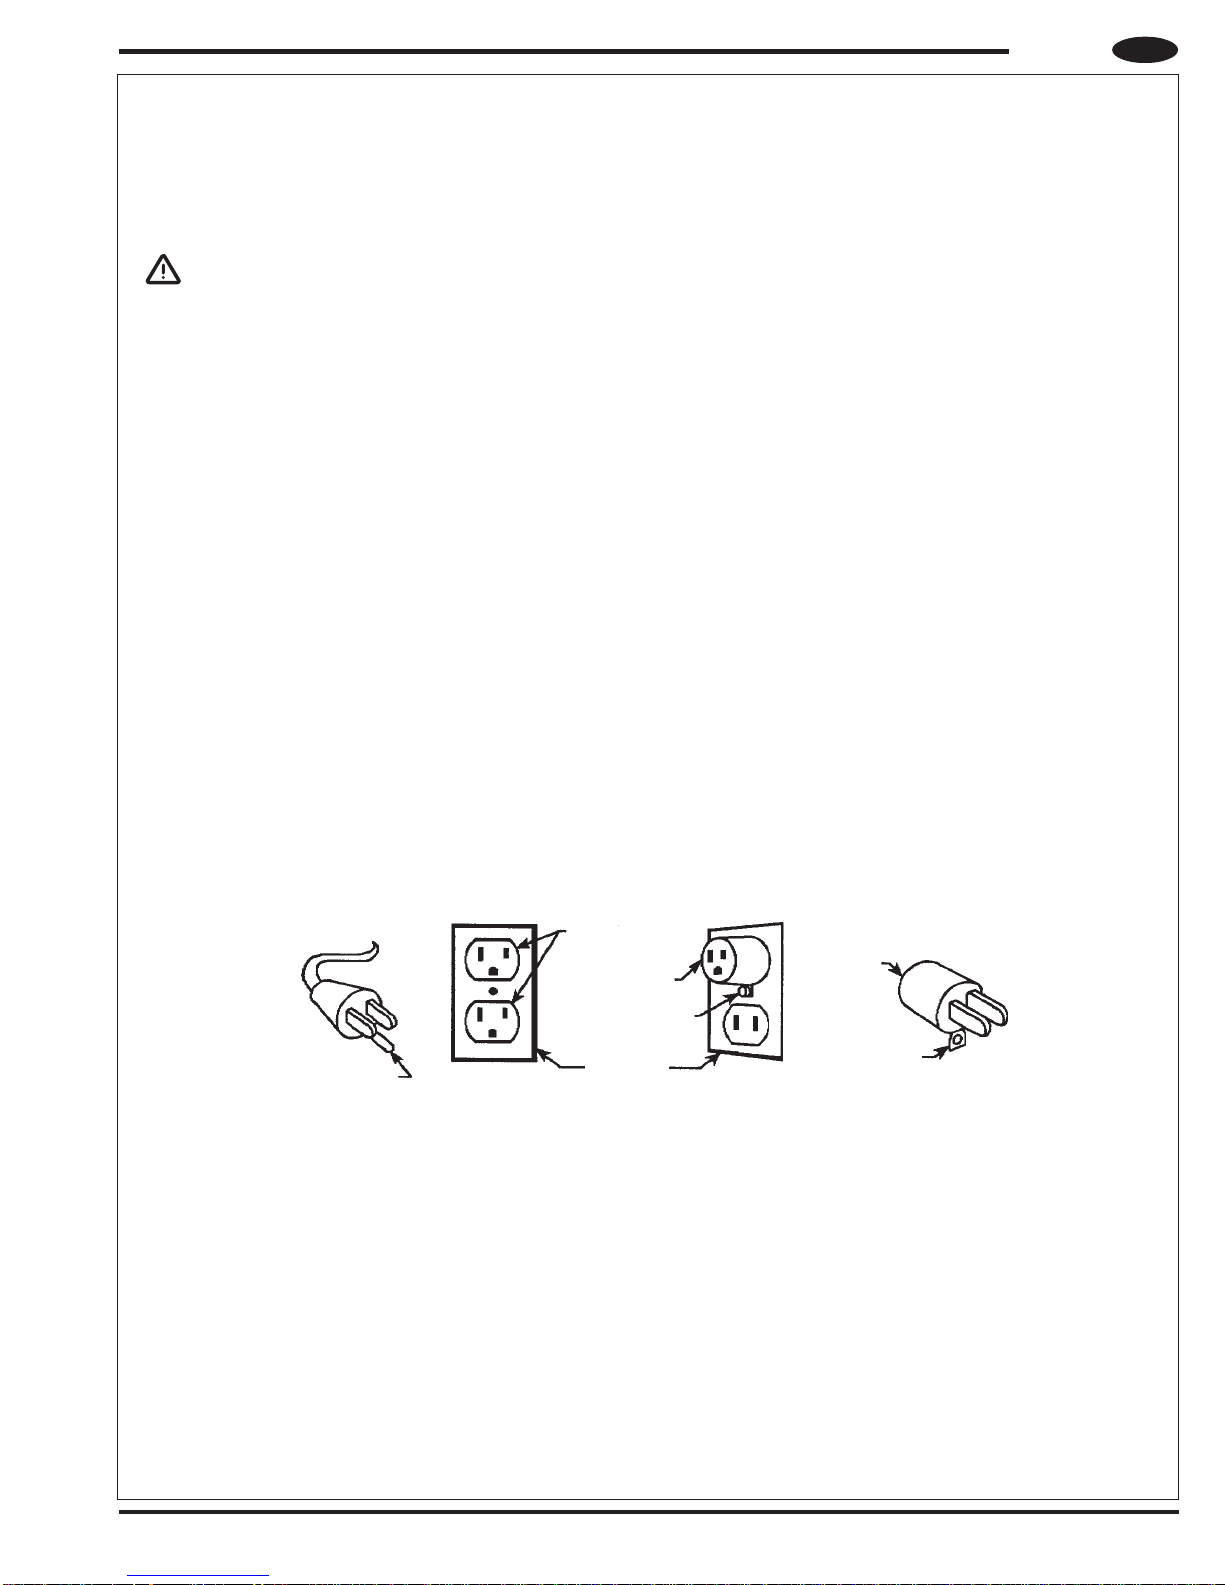
This appliance is for use on a nominal 120-volt circuit, and has a grounding plug that looks like the plug illustrated in Figure 1 below. A temporary
adapter illustrated in Figures 2 and 3 may be used to connect this plug to a 2-pole receptacle as shown in Figure 2 if a properly grounded outlet
is not available. The temporary adapter should be used only until a properly grounded outlet (Figure 1) can be installed by a qualified electrician.
The green-colored rigid ear, tab, or the like extending from the adapter must be connected to a permanent ground such as a properly grounded
outlet box cover. Whenever the adapter is used, it must be held in place by a metal screw. Grounding adapters are not approved for use in Canada.
Replace the plug if the grounding pin is damaged or broken.
The Green (or Green/Yellow) wire in the cord is the grounding wire. When replacing a plug, this wire must be attached to the grounding pin only.
Extension cords connected to this machine should be 12 gauge, three-wire cords with three-prong plugs and outlets. DO NOT use extension cords
more than 50 feet (15 m) long.
PLEASE NOTE: FOR NORTH AMERICA ONLY
FORM NO. 71281A - ECB-1500, ECB-2000 - 3

ENGLISH
EN
A
1
2
1
3
3
6
4
7
5
B
↑
B
↑
ECB-1500, ECB-2000
A
4 - FORM NO. 71281A - ECB-1500, ECB-2000
ENGLISH
EN
INTRODUCTION
This manual will help you get the most from your Euroclean floor machine. Read
it thoroughly before operating the machine.
This product is intended for commercial use only.
PARTS AND SERVICE
Repairs, when required, should be performed by your Authorized Euroclean
Service Center, who employs factory trained service personnel, and maintains
an inventory of Euroclean original replacement parts and accessories.
Call the Euroclean dealer named below for repair parts or service. Please specify
the Model and Serial Number when discussing your machine.
(Dealer, affix service sticker here.)
(A)-KNOW YOUR MACHINE
1 Operator Handle Grips
2 Switch Lever Safety Lock Button
3 Switch Levers - Squeeze - ON / Release - OFF
4 Handle Release Latch
5 Power Cord
6 Operator Handle
7 Motor Brush Wear Indicator Light
PREPARING THE FLOOR
Before each use of this machine, the floor must be clean and completely dry.
Clean the floor with an automatic floor scrubber or a damp mop, using a solution
of water and neutral cleaner.
CAUTION!
This machine should be used only on floors that are coated with
a floor finish suitable for burnishing. Contact your local Euroclean
Distributor for further information on floor finishing products.
PREPARING THE MACHINE FOR USE
WARNING!
This machine contains moving parts. To reduce the risk of injury,
always unplug the power cord before servicing.
NAME PLATE
The Model Number and Serial Number of your machine are shown on the
Nameplate on the bottom of the machine. This information is needed when
ordering repair parts for the machine. Use the space below to note the Model
Number and Serial Number of your machine for future reference.
MODEL NUMBER
SERIAL NUMBER
UNCRATE THE MACHINE
When the machine is delivered, carefully inspect the shipping carton and the
machine for damage. If damage is evident, save the shipping carton so that it
can be inspected. Contact the Euroclean Customer Service Department
immediately to file a freight damage claim (phone number is provided on the back
cover of this manual).
B - INSTALLING THE PAD
To install a pad, tip the machine back on it’s handle. Remove the Pad Retainer
“A” (in the center of the pad holder) by turning counter-clockwise to loosen. Put
the proper size Pad “B” on the Pad Holder Hub “C”. Re-install the Pad Retainer
“A” by turning clockwise to tighten.
OPERATION
1 Unwrap the Power Cord (5) and plug it in to an outlet.
2 Unlatch the Operator Handle (6) by pushing forward on the Handle
Release Latch (4) with your foot. Continue to hold latch (4) while pulling
the handle (6) back. It is normal for the base of the machine to lift off
of the floor slightly when the handle is lowered. It will pull itself down
against the floor as soon as the motor is started.
3 Hold one of the Operator Hand Grips (1) firmly, push the Safety Lock
Button (2) and then compress the Switch Levers (3) to start the motor.
NOTE: The Safety Lock Button (2) will not depress unless the Operator
Handle (6) has been released and tilted back into the operating
position. When the dual controlled Switch Levers (3) are released, the
machine shuts off immediately.
4 Push the machine forward in a straight line, at a slow walking speed.
Overlap each pass about 1-3 inches (25-75 mm).
5 When using a polishing pad, check every 15 minutes to see if the pad
is loaded up with wax and dirt. If it is, turn the pad over to expose the
clean side, or install a clean pad.
FORM NO. 71281A - ECB-1500, ECB-2000 - 5
ENGLISH
EN
AFTER USE
1 Lift the Operator Handle (6) until it locks in the upright position. NOTE:
The Safety Lock Button (2) will not depress unless the Operator Handle
(6) has been released and tilted back into the operating position. This
will prevent the motor from being engaged while Operator Handle (6) is
in the storage position.
2 Unplug the Power Cord (5) and wrap it around the Handle Release Latch
(4) and the right Operator Handle Grip (1).
3 Check the skirt around the dust control housing. The skirt should be
replaced if it is worn out or torn.
4 Remove the pad from the machine. Clean the pad and hang it up to dry.
Allow buffing pads to dry
5 Wipe the entire machine with a clean, damp cloth.
6 Inspect the entire machine and all accessories for damage. Perform any
required maintenance or repairs before storage.
7 Store the machine in a clean, dry place with the Operator Handle (6)
locked in the upright position.
completely before using again.
MAINTENANCE
C - DUST COLLECTION BAG
The dust collection bag should be removed and replaced after about every 20
hours of use. Tip the machine back onto it’s handle (6), the same as you would
if you were changing the pad. Squeeze in on the sides of the bag cover “A” and
remove it from the machine. Remove the dust bag “B” (being careful not to spill
any debris) and discard. Tip the machine back upright. Push in on the sides of
the new bag “B” to pop-it-open and install it by pushing it down (grip the cardboard
base of the bag) onto the (2) tubes protruding from the base. Re-install the cover
“A”.
MOTOR BRUSHES
This machine is equipped with a motor brush wear indicator light. If this light
comes on during use, contact your local Nilfisk-Advance distributor to have the
motor serviced.
NOTE: If the supply cord is damaged, it must be replaced by the manufacturer
or its service agent or a similarly qualified person in order to avoid a hazard.
CAUTION!
The motor can be severely damaged if the machine is used for
an extended period of time with the light glowing.
TROUBLESHOOTING
SWIRL MARKS
• Floor not clean.
• Area not properly swept - debris in pad or brush.
• Improper pad for the job.
• Moving the machine too fast.
CIRCLES ON THE FLOOR
• Machine standing still while the pad is running.
FLOOR FINISH REMOVED
• Improper pad...too aggressive.
• Moving the machine too slowly.
MACHINE WOBBLES DURING OPERATION
• Defective pad... one side is more dense than the other.
• Machine left sitting on pad for extended period of time causing
pad to “take a set”.
• Pad not “seated” properly into pad holder bristles.
• Padholder out of balance - replace.
MACHINE DOES NOT RUN
• Check plug for proper connection - on machine and at wall outlet.
• Check building circuit breaker.
• Call for service.
6 - FORM NO. 71281A - ECB-1500, ECB-2000

TECHNICAL SPECIFICATIONS (as installed and tested on the unit)
Model ECB-1500 ECB-2000
Model Number 01560A 01570A
Motor 1.5 hp (1.1 kW) 1.5 hp (1.1 kW)
Pad Speed 1,500 rpm 2,000 rpm
Pad Size 20” (51 cm) 20” (51cm)
Wheels 5” (13 cm) 5” (13 cm)
Cord Length 50’ (15 m) 50’ (15 m)
Height w/Handle 46” (117 cm) 46” (117 cm)
Weight (w/cord) 81 lbs. (36.8 kg) 83 lbs (37.7 kg)
Construction:
Handle Tube Tubular Steel Tubular Steel
Base Polyethylene Polyethylene
FORM NO. 71281A - ECB-1500, ECB-2000 - 7
ESPAÑOL
ES
INSTRUCCIONES DE SEGURIDAD IMPORTANTES
Esta máquina únicamente es apropiada para el uso comercial, por ejemplo, en hoteles, escuelas, hopitales, fábricas, negocios y
oficinas y no para ser utilizada en la limpieza doméstica normal.
Al usar un artefacto eléctrico es necesario tomar precauciones básicas en todo momento, incluyendo:
Lea todas las instrucciones antes de usar el artefacto.
¡ADVERTENCIA!
Para reducir el riesgo de incendio, descargas eléctricas o lesiones:
* No deje el artefacto enchufado. Desconecte la unidad del tomacorriente cuando no la utiliza y antes de realizer el
mantenimiento de la misma.
* This machine is for dry use only and shall not be used or stored outdoors in wet conditions.
* Para evitar descargas eléctricas, no exponga la unidad a la lluvia. Guarde la unidad en un lugar cerrado, bajo techo.
* No permita que se utilice como un juguete. Hay que prestar mucha atención si la máquina es utilizada por niños o se usa
cerca de ellos.
* Use la máquina únicamente como se describe en este manual. Use únicamente accesorios recomendados por el fabricante.
* No utilice la máquina si el cable o el enchufe están dañados. Si la máquina no funciona correctamente, se ha caído, ha sufrido
daños, ha sido dejada a la intemperie, o se ha caído al agua, llévela a un centro de servico.
* No tire del cable ni arrastre la máquina tirando del mismo, no lo utilice como si fuese una manija, no cierre la puerta sobre
él, ni lo doble alrededor de esquinas o bordes cortantes. No deje que la máquina pise el cable durante el uso. Mantenga
el cable lejos de superficies calientes.
* No desenchufe la máquina tirando del cable. Para desenchufar, tome el enchufe, no el cable.
* No manipule el enchufe ni la aspiradora con las manos húmedas.
* No introduzca objetos en las aberturas. No use la máquina si alguna de las aberturas está bloqueada; manténgala libre de
polvo, pelusa, cabellos y de cualquier otro elemento que pueda reducir el flujo de aire.
* Mantenga el cabello, la vestimenta floja, los dedos y el resto cuerpo lejos de aberturas y partes móviles.
* Apague todos los controles antes de desenchufar.
* Trabaje con extremco cuidado cuando realiza la limpieza de escaleras.
* No use la máquina con líquidos combustibles o inflamables, tales como gasolina, ni en los lugares donde puede haber fluidos
de ese tipo.
* El presente artefacto cuenta con aislamiento doble. Utilice únicamente piezas de reemplazo idénticas.
* Esta máquina no es adecuada para recoger residuos peligrosos para la salud.
* No utilice la máquina si la bolsa y/o los filtros para el polvo no están en su lugar.
* Conecte la máquina únicamente en un tomacorriente con adecuada conexión a tierra. Lea las instrucciones para conexión
a tierra.
GUARDE ESTAS INSTRUCCIONES
8 - FORM NO. 71281A - ECB-1500, ECB-2000
ESPAÑOL
ES
INSTRUCCIONES DE CONEXIÓN A TIERRA
Esta máquina debe estar conectada a tierra. Si funcionase mal eléctricamente, la conexión a tierra brinda una ruta de menor resistencia para
la corriente eléctrica, con lo que se reduce el riesgo de descargas eléctricas. Este artefacto está equipado con un cable que cuenta con un
conductor para conexión a tierra del equipo y con un enchufe de conexión a tierra. El enchufe debe insertarse en un tomacorriente adecuado,
que esté correctamente instalado y conectado a tierra según todos los códigos y regulaciones locales.
¡PELIGRO!:
Una mala conexión del conductor de la toma de tierra del equipo puede resultar en un riesgo de descarga eléctrica. Consulte con
un electricista acreditado o con el personal del servicio técnico en caso de tener dudas respecto de la conexión a tierra. No modifique
el enchufe que se suministra con el artefacto. Si no es adecuado para el tomacorriente, haga que un electricista acreditado le instale
un tomacorriente adecuado.
Este artefacto debe utilizarse en un circuito con 120 voltios de tensión nominal, y cuenta con un enchufe con conexión a tierra que es similar al
enchufe que se muestra en la Figura 1 más abajo. Puede utilizarse un adaptador temporal que se ilustra en las figuras 2 y 3 para conectar este
enchufe a un receptáculo de 2 polos, tal y como se ve en la Figura 2, si no dispone de un tomacorriente adecuado. El adaptador temporal debe
usarse sólo hasta que un electricista acreditado pueda instalar un tomacorriente debidamente conectado a tierra (Figura 1). La orejeta, lengüeta
o accesorio similar de color verde, que sale del adaptador, debe ser conectado a una toma de tierra permanenete, como por ejemplo la cubierta
de la caja de un tomacorriente adecuadamente conectado a tierra. Siempre que se utilice el adaptador, hay que mantenerlo fijo en su lugar
mediante un tornillo metálico. En Canadá no se permite el uso de adaptadores de toma de tierra.
Si la terminal de tierra está dañada o rota, cambie el enchufe.
El hilo verde (o verde/amarillo) del cable es el hilo de tierra. Al cambiar el enchufe, este hilo se debe adosar únicamente a la terminal de tierra.
Los cables de extensión conectados a esta máquina deben ser de calibre 12, de tres hilos, con enchufes y tomacorrientes de tres puntas. NO
USE cables de extensión que superen 50 pies (15 m) de longitud.
NOTA: ÙNICAMENTE PARA NORTEAAMÉRICA
Tomacorriente con
Terminal de tierra
FIGURA 1
conexión a tierra
Adaptador
Tornillo de metal
Caja de
tomacorriente
con conexióx a
tierra
FIGURA 2
Adaptador
Lengüeta para
tornillo de tierra
FIGURA 3
FORM NO. 71281A - ECB-1500, ECB-2000 - 9

ESPAÑOL
ES
A
1
2
1
3
3
6
4
7
5
B
↑
B
↑
ECB-1500, ECB-2000
A
10 - FORM NO. 71281A - ECB-1500, ECB-2000

ESPAÑOL
ES
INTRODUCCIÓN
Este manual lo ayudará a aprovechar al máximo su máquina para pisos
Euroclean. Léalo a fondo antes de poner la máquina en funcionamiento.
Este producto se ha fabricado para el uso comercial.
PIEZAS Y MANTENIMENTO
Cuando sea necesario realizar reparaciones, las mismas deben ser efectuadas
por el Centro de Servicios autorizado de Euroclean, el cual emplea personal de
mantenimiento capacitado en fábrica y dispone de un inventario de piezas de
recambio y accesorios originales Euroclean.
Llame al distribuidor Euroclean citado más adelante para obtener piezas de
reemplazo o servicios de mantenimiento. Al referirse a la máquina, por favor
especifique el modelo y número de serie de la misma.
(Distribuidor, pegue la calcomanía de mantenimiento aquí)
(A)-FAMILIARÍCESE CON SU MÁQUINA
1 Manijas para el operador
2 Botón de cierre de seguridad de la palanca de maniobras
3 Palancas de maniobras - Apretar - ENCENDIDO (ON) / Aflojar -
APAGADO (OFF)
4 Palanca de compresión para soltar la manija
5 Cable de energía
6 Manija para el operador
7 Luz indicadora de desgaste del cepillo accionado por motor.
PREPARACIÓN DEL SUELO
Antes de utilizar la máquina, el suelo debe estar limpio y completamente seco.
Limpiar el suelo con una fregadora de suelos automática o una fregona
humedecida, utilizando una solución acuosa y un limpiador neutro.
¡PRECAUCIÓN!
Esta máquina sólo debe utilizarse en suelos que estén recubiertos
con un acabado de suelo adecuado para su bruñido. Contactar
a su Agente local de Euroclean para más información de los
productos de acabado de suelos.
PREPARACIÓN DE LA MÁQUINA PARA SU
USO
PLACA DE IDENTIFICACIÓN
El número de modelo y el número de serie de su máquina aparecen en la placa
de identificación ubicada en la parte inferior de la máquina. Es necesario contar
con esta información para realizer pedidos de piezas de recambio para la
máquina. Use el espacio provisto o a continuación para anotar el número de
modelo y el número de serie de su máquina para referencia futura.
NÚMERO DE MODELO
NÚMERO DE SERIE
DESEMBALAJE DE LA MÁQUINA
Cuando reciba la màquina, inspeccione con cuidado la caja de embarque y la
máquina, para verificar si hay algún daño. Si hay algún daño evidente, guarde
la caja de embarque de modo que se la pueda inspeccionar. Comuníques con
el Departamento de Atención al Cliente de Euroclean inmediatamente para
presentar un reclamo por daños en el flete (el número de teléfono aparece en
la contratapa de este manual.)
¡ADVERTENCIA!
Piezas mecánicas - Para reducir el riesgo de lesión, desenchufar
el aparato antes de efectuar trabajos de reparación o mantenimiento.
(B) - INSTALACIÓN DEL DISCO
Para instalar el disco, bascular la máquina sobre el manillar. Quitar el retén «A»
del disco (situado en el centro del soporte del disco) y girarlo en sentido
antihorario para aflojarlo. extraerlo. Colocar el disco «B» del tamaño adecuado
sobre el centro del soporte del disco «C». Volver a colocar el retén «A» del disco
girándolo en sentido horario para apretar.
FUNCIONAMIENTO
1 Desenroscas el cable de corriente (5) y enchufarlo a la toma.
2 Desbloquear el manillar del operador (6) tirando hacia adelante el
pestillo de desenganche del manillar (4) con el pie. Mantener el pestillo
sujeto (4) mientras se tira del manilla (6) hacia atrás. Es normal que la
base de la máquina se levante del suelo ligeramente al bajar el
manillar. Se colocará en su posición de nuevo al poner en marcha el
motor.
3 Sostener una de las asas del manillar del operador (1) con fuerza,
presionar el botón de bloqueo de seguridad (2) y a continuación apretar
las palancas de los interruptores (3) para arrancar el motor. NOTA: El
botón de bloqueo de seguridad (2) no bajará a menos que el manillar
del operador (6) se haya desenganchado y balanceado hacia atrás en
su posición de funcionamiento. Cuando se sueltan las palancas de los
interruptores dobles (3), la máquina se apaga inmediatamente.
4 Hacer avanzar la máquina en línea recta, a una velocidad de paso
lento. Volver a recorrer cada paso cada 25-75 mm.)
5 Al utilizar un disco de pulido, verificar cada 15 minutos para ver si el
disco tiene cera o está sucio. Si lo está, girar el disco para que la parte
limpia quede visible, o colocar uno de nuevo.
FORM NO. 71281A - ECB-1500, ECB-2000 - 11

ESPAÑOL
ES
DESPUÉS DE UTILIZAR
1 Levantar el manillar del operador (6) hasta que se bloquee en su
posición vertical. NOTA: El botón de bloqueo de seguridad (2) no bajará
a menos que el manillar del operador (6) se haya desenganchado y
balanceado hacia atrás en su posición de funcionamiento. Así se evitará
que el motor quede en marcha mientras el manillar del operador (6) esté
en la posición de almacenaje.
2 Desenchufar el cable de corriente (5) y enrollarlo alrededor del pestillo
de desenganche del manillar (4) y el asa derecha del manillar del
operador (1).
3 Verificar el faldón que hay alrededor del alojamiento de control del polvo.
Se debe cambiar el faldón si está gastado o desgarrado.
4 Quitar el disco de la máquina. Limpiar el disco y tenderlo para que se
seque. Dejar secar los discos antes de volverlos a utilizar.
5 Pasar un paño limpio y húmedo por toda la máquina.
6 Inspeccionar que toda la máquina y sus accesorios no estén dañados.
Efectuar cualquier trabajo de mantenimiento o reparación necesario
antes de guardar la máquina.
7 Guardar la máquina en un lugar limpio y seco con el manillar del
operador (6) bloqueado en la posición vertical.
MANTENIMIENTO
C - BOLSA DE RECOGIDA DE POLVO
La bolsa de recogida de polvo se tiene que quitar y cambiar transcurridas
aproximadamente 20 horas de uso. Balancear la máquina hacia atrás sobre su
manillar (6), del mismo modo que al cambiar el disco. Apretar a ambos lados de
la tapa «A» de la bolsa y extraerla de la máquina. Quitar la bolsa de polvo «B»
(vigilando de no verter los escombros) y desecharla. Volver a poner la máquina
en posición vertical. Presionar ambos lados de la nueva bolsa «B» para que se
abra e introducirla (cogerla por la base de cartón) sobre los (2) tubos que
sobresalen de la base. Volver a colocar la tapa «A».
ESCOBILLAS DEL MOTOR
Esta máquina viene equipada con una luz que indica el desgaste de las
escobillas del motor. Si la luz se enciende durante el funcionamiento de la
máquina, contactar a su agente Euroclean local para que realiza el servicio del
motor.
NOTA: Si el cable eléctrico se daña, debe reemplazarlo el fabricante o su agente
de servicio o una persona de cualificación similar para evitar cualquier tipo de
peligro.
¡PRECAUCIÓN!
El motor se puede dañar gravemente si la máquina se utiliza
durante un largo período de tiempo con la luz encendida.
LOCALIZACIÓN DE AVERÍAS
MARCAS EN FORMA DE TORBELLINO
• EL suelo no está limpio
• La zona no se barrido correctamente - hay escombros en el disco o en
el cepillo
• Disco no adecuado para la tarea a realizar.
• La máquina está siendo deslizada demasiado rápidamente.
CÍRCULOS EN EL SUELO
• La máquina no avanza cuando el disco sigue girando.
EL ACABADO DEL SUELO SALTA
• Disco no adecuado… demasiado agresivo.
• La máquina es desplazada demasiado lentamente.
LA MÁQUINA OSCILA IRREGULARMENTE DURANTE SU FUNCIONAMIENTO
• Disco defectuoso… un lado es más denso que el otro.
• Se ha dejado la máquina apoyada sobre el disco demasiado tiempo lo
cual ha provocado que el disco se haya deformado.
• El disco no está bien «asentado» en los anclajes de su soporte.
• El soporte del disco está descentrado - cambiar.
LA MÁQUINA NO FUNCIONA
• Comprobar que el enchufe esté bien conectado en la máquina y en la
toma de pared.
• Verificar el disyuntor del circuito del edificio.
• Pedir asistencia.
12 - FORM NO. 71281A - ECB-1500, ECB-2000

ESPECIFICACIONES TÉCNICAS (según la instalación y las pruebas de la unidad)
Modelo ECB-1500 ECB-2000
Número de modelo 01560A 01570A
Motor 1.5 cv (1.1 kW) 1.5 cv (1.1 kW)
Velocidad de la almohadilla 1,500 rpm 2000 rpm
Tamaño de la almohadilla 20” (51 cm) 20” (51 cm)
Ruedas 5” (13 cm) 5” (13 cm)
Longitud del cable 50’ (15 m) 50’ (15 m)
Peso con manija 46” (117 cm) 46” (117 cm)
Peso (con cable) 81 lbs. (36.8 kg) 83 lbs (37.7 kg)
Construcción:
Tubo de la manija Acero tubular Acero tubular
Base Polyethylene Polyethylene
FORM NO. 71281A - ECB-1500, ECB-2000 - 13

FRANÇAIS
FR
CONSIGNES DE SÉCURITÉ IMPORTANTES
Cette machine est destinée à un usage commercial et peut, entre autres, être utilisée dans les hôtels, écoles, hôpitaux, usines,
magasins et bureaux. Elle n’a donc pas été conçue pour l’entretien ménager.
Lorsque vous utilisez un appareil électrique, il y a certaines règles de base que vous devez toujours observer, dont celle énoncée
ci-après.
Lire toutes les instructions avant d’utiliser l’appareil.
ATTENTION!
Afin de réduire les risques d’incendie, de décharge électrique ou de blessure:
* Ne laissez pas l’appareil branché sur le secteur. Débranchez-le lorsque vous ne l’utilisez pas et avant de procéder à son
entretien.
* Afin d’éviter tout risque de décharge électrique, n’exposez pas l’appareil à la pluie. Rangez la machine à l’intérieur d’un
bâtiment.
* Ne permettez pas qu’on l’utilise comme un jeu. Faites très attention lorsque l’appareil est utilisé par ou à proximité d’enfants.
* N’utilisez cet appareil que tel qu’il est décrit dans ce manuel. N’utilisez que les accessoires recommandés par le fabricant.
* N’utilisez pas l’appareil si le cordon ou la prise sont endommagés. Si l’appareil ne fonctionne pas correctement, est tombé,
endommagé, resté à l’extérieur voire même tombé dans l’eau, renvoyez-le au centre d’entretien.
* Ne tirez et ne portez pas l’appareil par le cordon électrique. Ne l’utilisez pas non plus comme poignée et ne l’enroulez pas
autour d’objets pointus ou tranchants. Évitez également de refermer une porte sur le cordon. Évitez de faire rouler l’appareil
sur le cordon. Gardez le cordon à l’écart de toute surface chauffée.
* Ne débranchez pas l’appareil en tirant sur le cordon. Pour ce faire, saisissez la prise et non le cordon.
* Ne manipulez pas la prise, le cordon ou l’appareil avec les mains humides.
* N’introduisez aucun objet dans les ouvertures de l’appareil. N’utilisez pas l’appareil si l’une de ses ouvertures est bloquée.
Veillez à ce que rien ne réduise le flux d’air : poussières, cheveux, peluches, etc.
* Prenez toutes les mesures nécessaires afin d’éviter que les cheveux, doigts, bijoux ou vêtements amples ne soient entraînés
dans les parties mobiles de la machine ou pris dans une de ses ouvertures.
* Éteignez toutes les commandes avant de débrancher l’appareil.
* Faites très attention lorsque vous nettoyez les escaliers.
* N’utilisez pas la machine avec des liquides inflammables ou combustibles tels que l’essence ou à proximité de telles
substances.
* Cet appareil est fourni avec une double isolation. Veuillez utiliser des pièces de rechange identiques.
* Cette machine n’est pas conçue pour aspirer de la poussière dangereuse pour la santé.
* N’utilisez pas cette machine si le sac à poussière et/ou les filtres ne sont pas en place.
* Connectez uniquement l’appareil à une prise correctement mise à la terre. Voir Instructions de mise à la terre.
CONSERVEZ SOIGNEUSEMENT CES INSTRUCTIONS
14 - FORM NO. 71281A - ECB-1500, ECB-2000

FRANÇAIS
FR
INSTRUCTIONS DE MISE À LA TERRE
Cet appareil doit être mis à la terre. En cas de mauvais fonctionnement, la mise à la terre établit un trajet de moindre résistance pour le courant
électrique pour réduire le risque de décharge électrique. Cet appareil est équipé d’un cordon doté d’un conducteur de mise à la terre de l’équipement
et d’une prise de mise à la terre. La prise doit être branchée dans une sortie appropriée correctement installée et mise à la terre en accord avec
tous les codes et consignes locaux.
DANGER!
Un conducteur de mise à la terre d’équipement incorrectement branché peut entraîner un risque de décharge électrique. Vérifiez avec un électricien
ou un technicien qualifié si vous doutez de la mise à la terre correcte de la sortie. Ne modifiez pas la prise fournie avec l’appareil. Si elle ne peut
être branchée, faites installer une sortie appropriée par un électricien qualifié.
Cet appareil est destiné à être utilisé sur un circuit de 120 volts et possède une prise de mise à la terre illustrée sur la figure 1. Un adaptateur
temporaire illustré sur les figures 2 et 3 peut être utilisé pour brancher cette dernière sur une prise fixe bipolaire, illustrée sur la figure 2, si une
sortie correctement mise à la terre n’est pas disponible. L’adaptateur temporaire pourra être utilisé jusqu’à ce q’une prise correctement mise à
la terre (figure 1) soit installée par un électricien qualifié. La patte rigide, l’attache de couleur verte, ou autres du même genre, de l’adaptateur doit
être connectée à une mise à la terre permanente telle qu’un couvercle de boîte de prise correctement mis à la terre. Lorsque l’adaptateur est utilisé,
il doit être maintenu en position par une vis métallique. Les adaptateurs de mise à la terre ne sont pas conçus pour une utilisation au Canada.
Remplacez la prise si la broche de mise à la terre est endommagée ou cassée.
Le fil vert (ou vert/jaune) est le fil de mise à la terre. Lorsque vous remplacez la prise, ce fil doit être connecté à la broche de mise à la terre
uniquement.
Les cordons prolongateurs connectés à cette machine doivent être des cordons à trois conducteurs de jauge 12, avec prises et sorties à trois
broches. N’utilisez PAS des cordons prolongateurs de plus de 50 pieds (15 m).
REMARQUE : UNIQUEMENT POUR L’AMÉRIQUE DU NORD
FORM NO. 71281A - ECB-1500, ECB-2000 - 15

FRANÇAIS
FR
A
1
2
1
3
3
6
4
7
5
B
16 - FORM NO. 71281A - ECB-1500, ECB-2000
↑
B
↑
A

FRANÇAIS
FR
INTRODUCTION
Ce manuel vous permettra de tirer le maximum de profit de votre machine
Euroclean de nettoyage de sols. Lisez-le attentivement avant d’utiliser la
machine.
Ce produit est prévu pour une utilisation commerciale; pour le polissage,
nettoyage/polissage simultané, récurage, décapage et comme shampouineuse
rotative pour moquettes.
PIÈCES ET ENTRETIEN
Les réparations, lorsqu’elles sont requises, devront être réalisées par votre
centre d’entretien agréé Euroclean qui emploie un personnel d’entretien formé
en usine, et stocke un inventaire de pièces de remplacement et d’accessories
originaux Euroclean.
Contactez le concessionnaire Euroclean indiqué ci-dessous pour toute réparation,
pièce ou entretien. Veuillez spécifier le Modèle et le Numéro de série relatif à
votre machine.
(Concessionnaire, placez ici l’adhésif de votre service d’entretien.)
(A)-CONNAÎTRE VOTRE MACHINE
1 Prises de la poignée de l’opérateur
2 Bouton de verrouillage de sécurité du levier d’interrupteur
3 Leviers d’interrupteur - Appuyer - MARCHE / Relâcher - ARRÊT
4 Levier de dégagement de la poignée
5 Câble d’alimentation
6 Manette de commande
7 Indicateur d’usure de la brosse du moteur.
PREPARATION DU SOL
Avant d’utiliser la machine, veillez à ce que le sol soit propre et parfaitement
sec. Nettoyez le sol à l’aide d’une nettoyeuse automatique ou avec un balai
humide en utilisant une solution composée d’eau et d’un détergent neutre.
¡ATTENTION!
Cette machine ne peut être utilisée que sur des sols recouverts d’une
couche de finition pouvant être polie. Pour obtenir de plus amples
informations sur les produits de finition des sols, contactez le revendeur
Nilfisk-Advance le plus proche.
PRÉPARATION DE LA MACHINE
¡AVERTISSEMENT!
Cette machine contient des pièces mobiles. Afin de réduire le risque de
blessures, déconnectez toujours le câble d’alimentation avant de
procéder à l’entretien.
PLAQUE SIGNALÉTIQUE
Le numéro du modéle et numéro de série de votre machine sont indiqués sur la
plaque signalétique audessous de la machine. Ces informations sont nécessaires
lorsque vous commandez des pièces de remplacement pour la machine.
Utilisez l’espace ci-dessous pour noter le numéro du modéle et numéro de série
de votre machine pour consultation ultérieure.
NUMÉRO DU MODÈLE
NUMÉRO DE SÉRIE
DÉBALLER LA MACHINE
Lorsque la machine vous est livrée, contrôlez minutieusement que la boîte
d’emballage et la machine ne présentent aucun dommage. Si elles sont
endommagées, conservez la boîte d’emballage afin qu’elle puisse être inspectée.
Contactez immédiatement le service d’entretien Euroclean pour déposer une
demande de remboursement des dégâts de transport (le numéro de téléphone
est indiqué au dos de ce manuel).
(B)-INSTALLATION DU TAMPON
Pour installer un tampon, faites basculer la machine vers l’arrière, sur sa
poignée. Enlevez la fixation du tampon “A” (au centre du support de tampon)
en la faisant tourner dans le sens contraire des aiguilles d’une montre pour
la desserrer. Placez un tampon de format adéquat “B” sur le support “C”.
Replacez la fixation du tampon “A” en la tournant dans le sens des aiguilles
d’une montre pour la serrer.
FONCTIONNEMENT
1 Désenroulez le câble d’alimentation (5) et branchez-le à une prise
correctement mise à la terre.
2 Débloquez la poignée (6) en poussant vers l’avant le loquet de blocage
de la poignée (4), avec votre pied. Maintenez le loquet (4) enfoncé
pendant que vous tirez sur la poignée (6). Il est normal que la base de
la machine se soulève légèrement du sol lorsque vous abaissez la
poignée. La machine se repose sur le sol d’elle-même dès que vous
démarrez le moteur.
3 Tenez fermement la poignée (1), enfoncez le bouton de verrouillage de
sécurité (2), puis actionnez les leviers des interrupteurs (3) pour
démarrer le moteur. REMARQUE : il est impossible d’enfoncer le
bouton e verrouillage de sécurité (2) tant que la poignée de l’opérateur
(6) n’est pas relâchée et inclinée en position de fonctionnement.
Lorsque les deux leviers d’interrupteurs de contrôle (3) sont relâchés,
la machine s’éteint automatiquement.
4 Poussez la machine vers l’avant en ligne droite, à une vitesse lente.
Repassez sur chaque passe d’environ 25-75 mm.
5 Lorsque vous utilisez un tampon de polissage, vérifiez toutes les 15
minutes si celui n’est pas recouvert de cire et de poussières. Si tel est
le cas, retournez-le de manière à utiliser la face propre ou installez un
nouveau tampon.
FORM NO. 71281A - ECB-1500, ECB-2000 - 17

FRANÇAIS
FR
APRÈS UTILISATION
1 Levez la poignée de l ‘opérateur (6) jusqu’à ce qu’elle se bloque en
position verticale. REMARQUE: : il est impossible d’enfoncer le bouton
e verrouillage de sécurité (2) tant que la poignée de l’opérateur (6) n’est
pas relâchée et inclinée en position de fonctionnement. Ainsi, le moteur
ne peut pas être démarré tant que la poignée de l’opérateur (6) est en
position de stockage.
2 Débranchez le cordon d’alimentatio n (5) et enroulez-le autour du verrou
de débloquage de la poignée (4) et de la poignée de l’opérateur (1).
3 Vérifiez la jupe autour du logement de comtrôle de la poussière. La jupe
doit être remplacée si elle est usée ou déchirée.
4 Retirez de la machine le patin. Nettoyez le patin et mettez-le à sécher.
Attendre que les patins de nettoyage soient complètement secs avant
de les réutiliser.
5 Essuyez l’ensemble de la machine avec un chiffon humide propre.
6 Inspectez la totalité de la machine ainsi que tous les accessories pour
contrôler qu’ils ne sont pas endommagés. Effectuez toute réparation ou
entretien requis avant de ranger la machine.
7 Conservez la machine dans un lieu propre et sec, avec la poignée de
l’opérateur (6) verrouillée en position verticale.
ENTRETIEN
C - FILTRE À AIR
Le filtre à air doit être retiré et remplacé après environ 20 heures
d’utilisation. Faites basculer la machine vers l’arrière sur sa poignée (6),
comme vous le feriez pour chagner le patin. Appuyez sur les côtés du
couvercle du filtre “A” et retirez-le de la machine. Retirez le filtre à air “B” (en
veillant à ne pas répandre des débris) et éliminez-le. Remettez la machine
en position verticale.Appuyez sur les côtés du nouveau filtre “B” pour l’ouvrir
et installez-le en le poussant vers le bas (saisissez la base en carton du
filtre) sur les tubes en saillie (2) du socle. Reposez le couvercle “A”.
¡ATTENTION!
Si vous utilisez la machine pendant une longue période avec
le voyant allumé, vous risquez d’endommager sérieusement
le moteur.
DIAGNOSTIC
TRACES SUR LE SOL
• Le sol n’est pas propre.
• Le zone n’a pas été correctement balayée - débris sur le patin ou la
brosse.
• Patin ou brosse incorrect pour la tâche.
• Déplacement trop rapide de la machine.
CERCLES SUR LE SOL
• La machine est restée immobile pendant que la brosse ou le patin était
en fonctionnement.
FINITION DU SOL ENLEVE
• Patin incorrect... trop agressif.
• Solution trop décapante.
LA MACHINE OSCILLE AU COURS DE L’OPÉRATION
• Patin défectueux... un côté est plus dense que l’autre.
• La machine est restée appuyée sur la brosse ou patin pendant trop
longtemps, causant aux poils de la brosse ou au patin de prendre une
forme incorrecte.
• Le patin n’est pas placé correctement sur les poils du support du patin.
• Padholder out of balance - replace.
BROSSES DU MOTEUR
Cette machine est équipée d’un voyant d’usure des brosses du moteur. Si ce
voyant s’allume pendant que vous utilisez la machine, contactez votre
revendeur Euroclean pour qu’il procède à l’entretien du moteur.
REMARQUE : Si le cordon d‘alimentation est endommagé, il doit être
remplacé par le fabricant ou son technicien de maintenance ou une
personne personne présetant les même compétences, pour éviter tout
danger.
LA MACHINE NE FONCTIONNE PAS
• Contrôlez que la prise est connectée correctement - sur la machine et
la prise murale.
• Contrôlez le coupe-circuit du bâtiment.
• Contactez le service de réparation.
18 - FORM NO. 71281A - ECB-1500, ECB-2000

SPÉCIFICATIONS TECHNIQUES (telles qu’installées et testées sur l’unité)
Modèle Advolution 20 Advolution 20XP
Numéro du modèle
Moteur 1.5 hp (1.1 kW) 1.5 hp (1.1 kW)
Vitesse du patin/brosse 1,500 tr/m 2000 tr/m
Tailee du patin/brosse 20” (51 cm) 20” (51 cm)
Roues 5” (13 cm) 5” (13 cm)
Longueur du câble 50’ (15 m) 50’ (15 m)
Hauteur avec poignée 46” (117 cm) 46” (117 cm)
Poids (avec câble) 81 livres (36.8 kg) 83 livres (37.7 kg)
Construction:
Tube poignée Acier tubulaire Acier tubulaire
Base Polyethylene Polyethylene
FORM NO. 71281A - ECB-1500, ECB-2000 - 19


ECB-1500, ECB-2000
SECTION II: PARTS LIST
Euroclean Models: 01560A (1500),
This parts list is for machines after serial number EA
01570A (2000)
7/07 Form Number 71281A

22
ASSEMBLY DRAWING
ECB-1500
07-7
26
25
24
4
3
2
1
5
6
7
8
9
10
11
12
23
FORM NO. 71281A
15
22
21
19
20
19
13
14
15
7
16
17
15
18

07-7
ASSEMBLY PARTS LIST & WIRING DIAGRAM
ECB-1500
23
Ref. # Part No. Description Qty.
1 61890A Spring Tube 2
2 39872A Guide, Spring 4
3 61892A Pin, Load Spring 1/2 x 5.75 1
4 87607A Washer, Nylon 1.25 x .52 x .06 Flat 3
5 61849A Pedal, Release 1
6 11118A Handle Assembly 1
7 80297A Screw, Buttonhead 1/4-20 x 1.75 6
8 54196A Spring, Extension 2
9 38738A Spacer, .257 x 1/2 x 1 2
10 71335A Label, Motor Cover 1
11 40935A Motor, 1.5 HP 120/60 1500 RPM 1
12 30743A Mainframe 1
13 53793A Pin, Coiled 1/2 x 2.25 2
Ref. # Part No. Description Qty.
14 30744A Mount, Motor 1
15 80292A Screw, Buttonhead (SEMS) 13
16 54198A Pad Driver 1
17 980413 Washer, Retainer 1
18 61871A Axle, Front 2
19 980673 Washer, Flat 1/2 x 7/8 x 3/64 8
20 80295A Washer, Bowed 4
21 56201018 Wheel 4
22 61870A Axle, Pivot 1
23 61869A Axle, Rear 1
24 38737A Sleeve, Split .810 ID x 1.02 OD 2
25 80346A Spring, Compression #25 2
26 39873A Arm, Link 2
FORM NO. 71281A

ASSEMBLY DRAWING
07-7
24
ECB-2000
4
3
2
1
5
6
7
8
9
10
11
12
13
33
32
31
5
30
14
15
16
17
18
19
20
8
21
29
28
18
27
2426
FORM NO. 71281A
25
24
23
22

07-7
ASSEMBLY PARTS LIST & WIRING DIAGRAM
ECB-2000
25
Ref. # Part No. Description Qty.
1 39873A Arm, Link 2
2 61890A Spring Tube 2
3 61892A Pin, Load Spring 1/2 x 5.75 1
4 11170A Handle Assembly 1
5 87607A Washer, Nylon 1,25 x .52 x .06 Flat 3
6 80374A Spring, Compression #30 2
7 54196A Spring, Extension 2
8 80297A Screw, Buttonhead 1/4-20 x 1.75 6
9 38738A Spacer, .257 x 1/2 x 1 2
10 30741A Cover, Dust Bag 1
11 71331A Label, Motor Cover 1
12 40936A Motor, 1.5 HP, 120/60, 2000 RPM 1
13 56201569 Bag, Dust (Package of 10) 1
14 54435A Gasket, 2 pcs. 1
15 30742A Mainframe, Dust Control 1
16 53793A Pin, Coiled 1/2 x 2.25 2
17 30744A Mount, Motor 1
Ref. # Part No. Description Qty.
18 80292A Screw, Button Head SEMS 13
19 30739A Shroud, Dust 1
20 56393565 Skirt Asssembly 1
21 54198A Pad Driver 1
22 980413 Washer, Retainer 1
23 61871A Axle, Front 2
24 980673 Washer, Flat 1/2 x 7/8 x 3/64 8
25 80295A Washer, Bowed 4
26 61870A Axle, Pivot 1
27 56291918 Wheel 4
28 61869A Axle, Rear 1
29 39872A Guide, Spring 4
30 38737A Sleeve, Split .810 ID x 1.02 OD 2
31 61849A Pedal, Release 1
32 54434A Clamp, Cable 2
33 80290A Screw, 10-32 x .38 HRCS 2
FORM NO. 71281A

26
HANDLE ASSEMBLY DRAWING AND PARTS LIST
07-7
ECB-1500
5
4
1
2
3
7
6
8
9
10
11
12
13
14
15
16
21
20
19
Ref. # Part No. Description Qty.
1 80297A Screw, Buttonhead 1/4-20x1.75 5
2 29926A Conterweight 1
3 80292A Screw, Buttonhead 1/4-20 x 1 3
4 56201657 Handle, Back 1
5 56201592 Ball, 1.4 SS 1
6 40949A Switch, SPST 25A 125AC 1
7 56201031 Button, Lock 1
8 56201027 Handle, Lever 2
9 56263648 Spring, Plate 1
10 61726A Support, Handle Mount 2
17
18
Ref. # Part No. Description Qty.
11 56201656 Handle, Front 1
12 70977A Label, Handle Euroclean 1
13 920722 Nut, 10-32 ESNA 1
14 80290A Screw, 10-32 x .38 HRCS 1
15 80295A Washer, Bowed 1
16 61894A Cord Wrap 1
17 54199A Pin, Coiled 3
18 29901A Handle Mount 1
19 40760A Cord, Power 1
20 41026A Cord, Interconnect 1
21 61850A Handle Tube Weldment 1
FORM NO. 71281A

07-7
HANDLE ASSEMBLY DRAWING AND PARTS LIST
ECB-2000
27
4
2
1
3
21
6
5
7
8
9
10
11
12
13
14
15
16
17
20
19
18
Ref. # Part No. Description Qty.
1 80297A Screw, Buttonhead 1/4-20x1.75 5
2 29926A Conterweight 1
3 80292A Screw, Buttonhead 1/4-20 x 1 3
4 56201657 Handle, Back 1
5 40949A Switch, SPST 25A 125AC 1
6 56201592 Ball, 1.4 SS 1
7 56201031 Button, Lock 1
8 56201027 Handle, Lever 2
9 56263648 Spring, Plate 1
10 61726A Support, Handle Mount 2
11 56201656 Handle, Front 1
Ref. # Part No. Description Qty.
12 70977A Label, Handle Euroclean 1
13 920722 Nut, 10-32 ESNA 1
14 80290A Screw, 10-32 x .38 HRCS 1
15 80295A Washer, Bowed 1
16 61894A Cord Wrap 1
17 54199A Pin, Coiled 3
18 40760A Cord, Power 1
19 29901A Handle Mount 1
20 40950A Cord, Interconnect 1
21 61850A Handle Tube Weldment 1
FORM NO. 71281A

 Loading...