

EuroCase CROSS CAM EUCS-1360 User Manual

EUCS-1360 User Manual

HELLO!
Thanks for acquiring our camera
EUROCASE EUCS-1360 CROSSCAM
360. Read thoroughly these operating
instructions to properly use the
product.

1- Package contents
2- Technical specifications
3- Buttons and connections
4- How to use
4.1 Memory card
4.2 Turn-on & turn-off
4.3 Charge the camera
4.4 Function mode switch
5- Menu operation
6- Connect to PC
7- Remote control
03
04
05
06
08
09
3
CONTENTS
1- PACKAGE CONTENTS
2- Technical specifications
- Video resolution: 1920x960
pixels @ 30 fps (H.264)
- Photo resolution: 5 MP
- 1" LCD Display
- TF card reader up to 32 GB
- Built-in Wi-Fi IEEE
802.11b/g/n
- Lens view angle: 220ºx2
- Built-in microphone and
speaker
- Power Battery: 1500mAh/3.7V
- Inputs: Micro USB, TF Card
EUCS-1360 CrossCam 360, Tripod, Water Resistant case, USB
cable, User manual, 2032 battery.
4
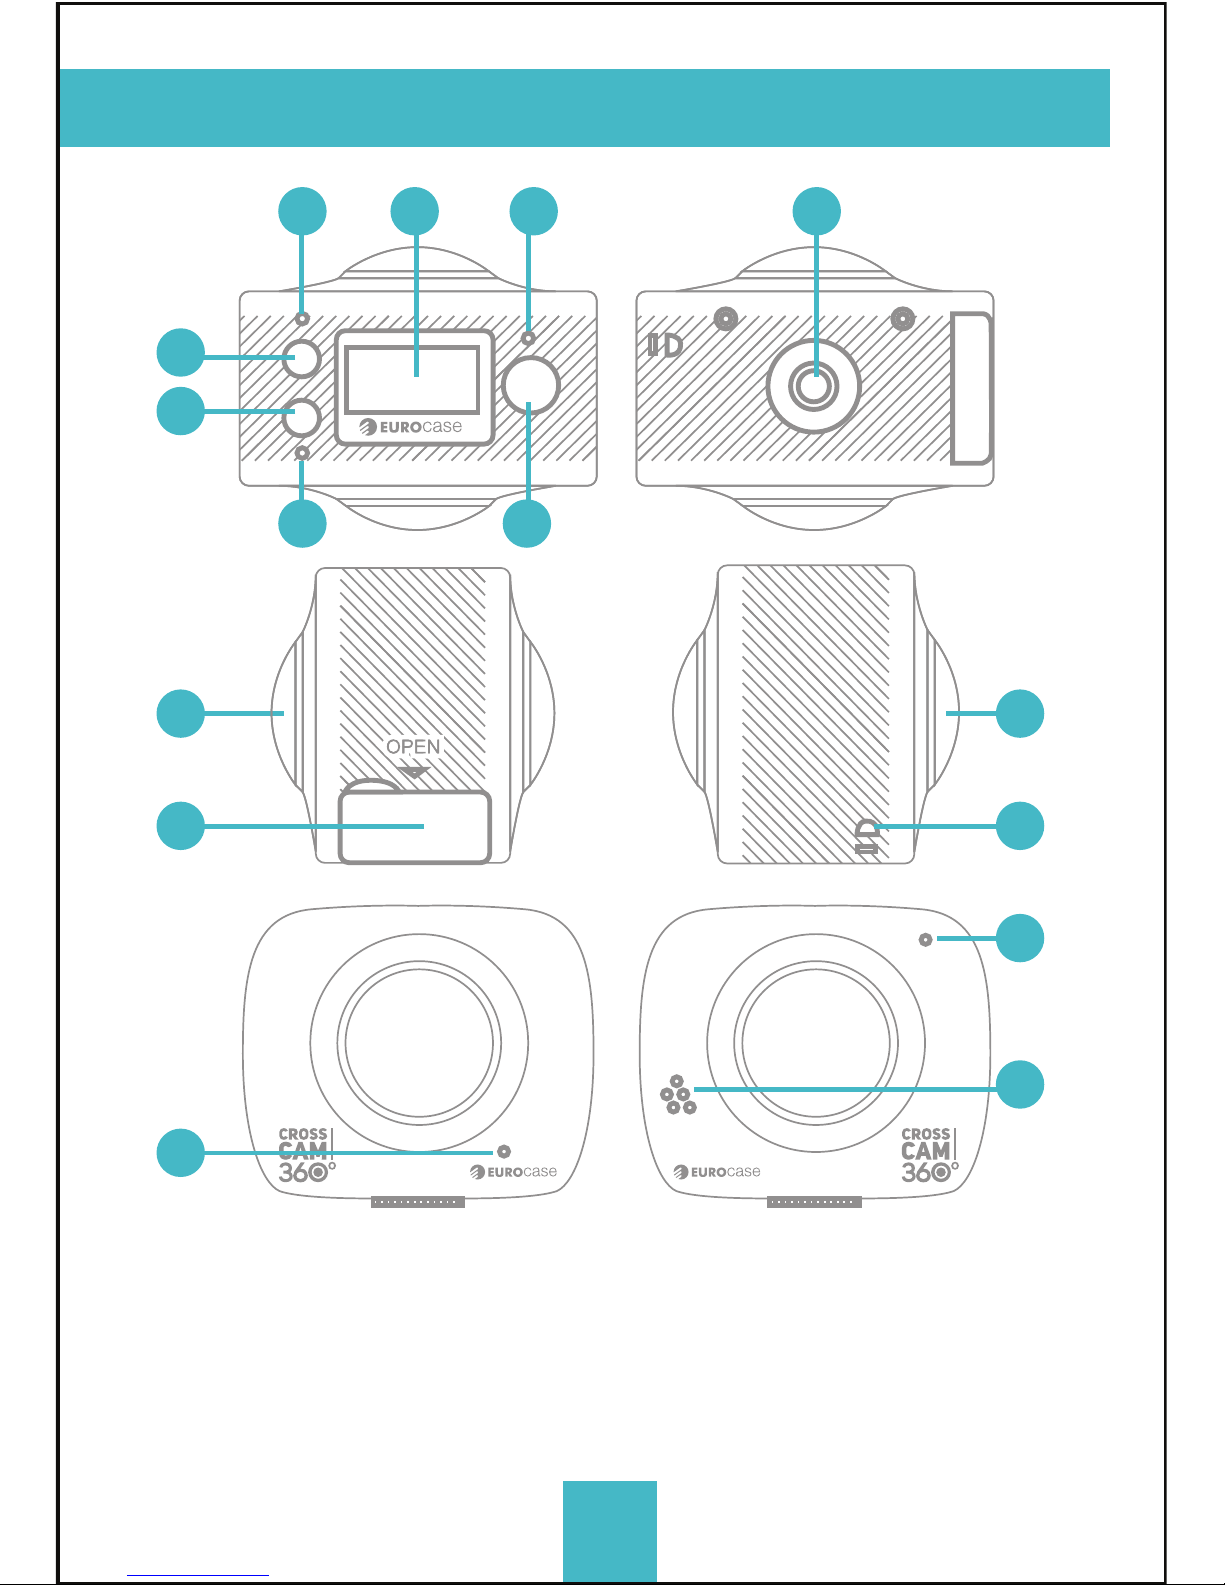
3- Buttons and connections
01
04
03
06 09
07
02
05
08 08
13
14
11
12
01. LCD display screen
02. Power/Mode
03. WIFI Indicator (red)
04. Power indicator/Charging
indicator (Blue)
05. Wifi/Menu
06. Busy (red)
07. Shutter /OK Key
08. Camera Lens*2(220°)
09.Triangle nut
10. Access flap (USB, TF)
11. Loudspeaker
12. Microphone
13. Lanyard hole
14. Reset Button
10
5
4- How to use
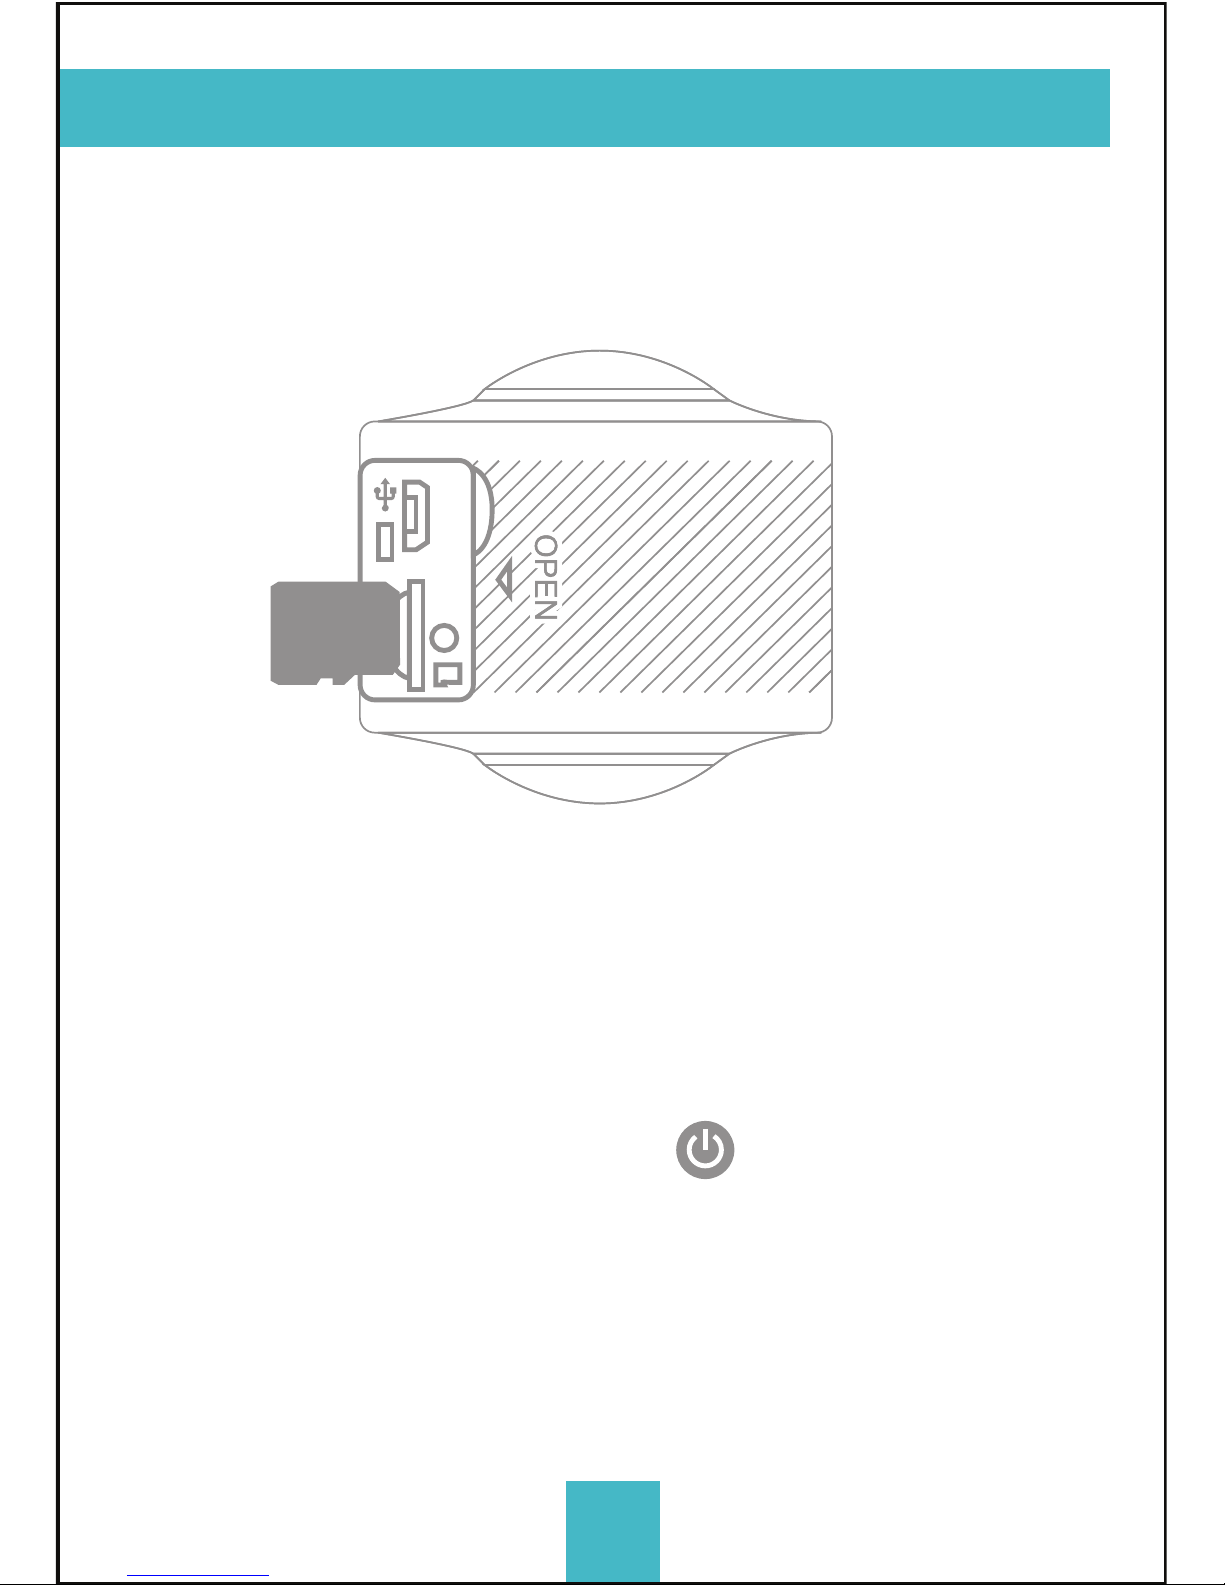
4.1. Memory card
First, insert a TF card; see the picture on the right.
When the professional mode is on for video recording a
Class 10 card is recommended for use.
NOTE: Please close the camera when plug-in or pull-out the card.
4.2 Turn-on & Turn-off
Turn-on: Press the on/off button and hold for about 2
seconds, the LCD display screen will be on (default mode:
video recording) and show a welcome screen. Power
indicator in red is normally on.
Power saving mode: When the camera is not under
operation for 1 minute (system default), it will enter into the

6
power saving mode. The LCD display screen will be off
automatically. The camera can be activated when any
button is pressed.
Turn-off: Press the button and hold for about 3 seconds
when the camera is not in operation, the camera will be off.
The camera will be automatically off when it is in power
saving mode for 3 minutes (system default). “GOODBYE” will
be on the LCD screen when it is off.
4.3 Charge the camera
Built-in rechargeable lithium battery is used for the camera:
The camera can be charged when it is connected to the
computer USB or a 5V charger with a USB cable. The power
indicator will be blue when it is charging. It shall take 4
hours because of the limited electric current of the
computer. The blue light will be off when charging is
completed.
4.4 Function mode switch
The camera has two modes, video recording and
photograph shooting. They can be converted by pressing
the button on/off /MODE or through APP.
Video recording: (see the following pictures) press the
shutter to start shooting and video recording. The buzzer
will send out one sound when it starts; the busy button (red)
will be twinkling during the video recording process. LCD
timer starts timing. Press the button again when video
recording is over.
 Loading...