

Page 1

standard headboard assembly
components
item description qty
A Headboard 1
B Headboard Leg 2
Please note: actual headboard may
look dierent than illustration.
hardware
A
B
(H1) x 4
5/8” x 5/16” bolt
(H2) x 12
1 1/4” washer
(H3) x 4
1 x 1/4” bolt
(H4) x 4
1/4” nuts
Please note: you will need a at head screwdriver and a wrench to assemble your headboard.
limited warranty
We guarantee our upholstered furniture against
defects in construction for a period of one (1)
year. When a structural defect is brought to our
attention, we will repair or replace it at our option
at no charge to the customer (inculdes parts and
labor, not transportation costs). Fabric
wearability for upholstered furniture is not
covered by the warranty. Vacuum for regular
cleaning.
PLEASE DISPOSE OF PLASTIC BAGS AND
CARTONS RESPONSIBLY.
limite de garantia
Nosotros garantiza sus muebles tapizados
contra defectos en construccion por un periodo
de un (1) ano. Cuando un problema de
estructura es traido a nuestra atencion, nosotros
repararemos o remplazaremos sin ningun cargo
a nuestro cliente (incluye partes y trabajo, no
costo en transportacion). Descolora-miento del
material de muebles tapizados no es cubierto
por la garantia. Regularmente puede aspirar.
POR FAVOR TIRAR BOLSAS Y CAJAS
RESPONSABLEMENTE.
garantie limitée
Nous garantit ses meubles rembourrés contre les
défauts de construction pendant une période d’un
(1) an. Lorsqu’un vice de construction nous est
signalé, nous réparons ou remplaçons le meuble,
selon notre choix, sans frais pour le client (incluant
les pièces et la main-d’oeu-vre, mais excluant les
frais de transport). La dura-bilité du tissu des
meubles rembourrés n’est pas couverte par la
garantie. Nettoyer régulièrement avec un
aspirateur.
VEUILLEZ JETER LE OU LES SAC(S) EN PLASTIQUE
ET BOÎTE(S) DE FAÇON RESPONSABLE.
1
Page 2
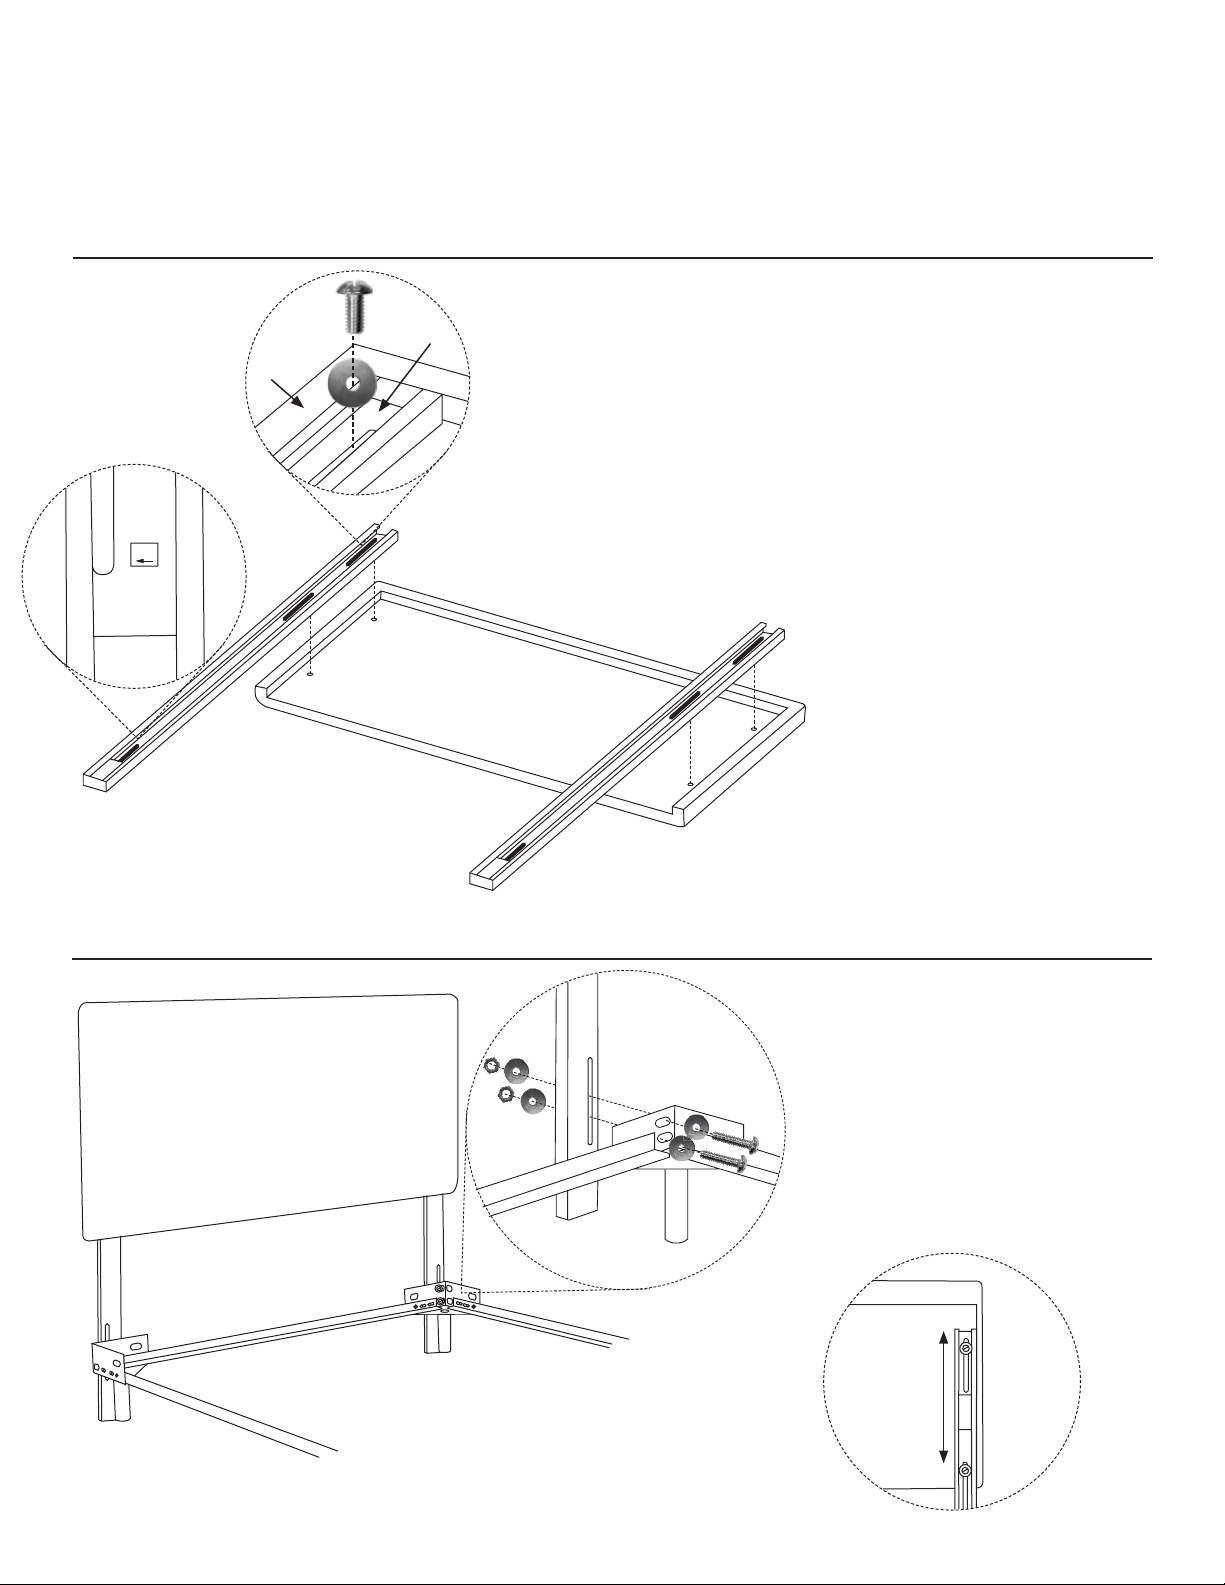
standard headboard assembly
step 1 - attaching the headboard legs
OUT
A
B
1.1
Place (A) headboard face down on
a flat surface. Place (B) headboard
legs on the back of (A) headboard,
aligning the slots of the legs with the
holes of the headboard.
Please note: Make sure the “Out”
sticker on each (B) headboard leg is
facing the correct way.
1.2
Attach (B) headboard legs to (A)
headboard using (H1) bolts and (H2)
washers. Tighten with a flat head
screwdriver.
step 2 - attaching the headboard to your bed frame
2.1
Attach the assembled headboard to
your bedframe using (H3) bolts, (H2)
washers and (H4) nuts. Tighten with a
flat head screwdriver and wrench.
Please note: The height of your
headboard can be adjusted by
loosening the (H1) bolts and shifting
the (A) headboard up or down.
2
 Loading...