

E-TOP GR290n User Manual

E-TOP 11n Broadband Router
N+ High Power Gigabit Broadband Router - All Broadbands
GR290n
User Manual
1

Table of Contents
FCC Caution ..........................................................................................................................................5
Safe Seating Gestures..........................................................................................................................6
CE Statement of Conformity................................................................................................................6
Notice .....................................................................................................................................................6
Chapter 1 Introduction.................................................................................................................7
1.1 Overview ......................................................................................................................7
1.2 Features.......................................................................................................................8
1.3 Specifications..............................................................................................................9
1.3.1 Product Appearance ........................................................................................ 11
1.3.2 LED Indicator Status Description................................................................... 11
1.4 System Requirements ..............................................................................................12
1.5 Get Y our IP Automatically & Manually ....................................................................13
1.5.1 Network Testing................................................................................................16
1.5.2 T esting with Internet Browser.........................................................................16
1.5.2.1 Testing with DOS (Windows XP Platform).........................................................16
Chapter 2 Hardware Installation................................................................................................19
2.1 Diagram of Connecting Hardware to 11N Broadband Router..............................19
2.1.1 Hardware Connection and Application for Router Mode.............................19
Chapter 3 One Button Setup......................................................................................................20
3.1 One Button Setup configuration for Router Mode ................................................20
Chapter 4 Basic Setup................................................................................................................24
4.1 Router Mode..............................................................................................................24
4.1.1 Administrator Setup Instruction.....................................................................24
4.2 Basic Setup................................................................................................................25
4.2.1 Time Zone Setup...............................................................................................25
4.2.2 LAN Interface Setup.........................................................................................26
4.2.3 WAN Setup........................................................................................................27
4.2.3.1 WAN Interface– Ethernet Port.............................................................................27
4.2.3.2 WAN Interface– Wireless ....................................................................................27
4.2.3.3 WAN Access Type – Static IP..............................................................................27
4.2.3.4 WAN Access Type – Dynamic IP........................................................................27
4.2.3.5 WAN Access Type – PPPoE................................................................................28
4.2.3.6 WAN Access Type – PPTP..................................................................................28
4.2.3.7 Wireless Setup..................................................................................................... 28
4.2.3.8 Wireless Security Setup......................................................................................29
4.2.4 Basic Setup Complete .....................................................................................30
2

Chapter 5
Advanced Configuration ..........................................................................................32
5.1 IP Configuration........................................................................................................32
5.1.1 WAN...................................................................................................................32
5.1.1.1 WAN Interface– Ethernet Port.............................................................................32
5.1.1.2 WAN Interface– Wireless ....................................................................................33
5.1.1.3 WAN Access Type – Static IP..............................................................................33
5.1.1.4 WAN Access Type –Dynamic IP.........................................................................34
5.1.1.5 WAN Access T y pe –PPPoE.................................................................................35
5.1.1.6 WAN Access Type – PPTP..................................................................................37
5.1.2 LAN Interface Setup.........................................................................................38
5.1.3 Dynamic DNS Setting.......................................................................................40
5.2 Wireless Setup ..........................................................................................................41
5.2.1 Wireless Basic Settings...................................................................................42
5.2.2 Wireless Advanced Settings ...........................................................................46
5.2.3 Wireless Security Setup ..................................................................................47
5.2.4 Wireless Access Control .................................................................................49
5.2.5 WDS Settings....................................................................................................51
5.2.6 WPS ...................................................................................................................56
5.3 NA T.............................................................................................................................60
5.3.1 Visual Server.....................................................................................................60
5.3.2 Visual DMZ........................................................................................................62
5.4 Firewall.......................................................................................................................63
5.4.1 QoS....................................................................................................................63
5.4.2 Port Filtering.....................................................................................................65
5.4.3 IP Filtering.........................................................................................................67
5.4.4 MAC Filtering....................................................................................................68
5.4.5 URL Filtering.....................................................................................................70
5.5 System Management ................................................................................................71
5.5.1 Change Password ............................................................................................71
5.5.2 Upgrade Firmware............................................................................................72
5.5.3 Profiles Save.....................................................................................................73
5.5.4 Time Zone Setting............................................................................................78
5.5.5 UPnP Setting.....................................................................................................80
5.5.6 Language Setting .............................................................................................81
5.6 Log & Status..............................................................................................................82
5.6.1 Network Config.................................................................................................82
5.6.2 Event Log..........................................................................................................83
5.7 Logout........................................................................................................................85
3

Chapter 6
Chapter 7 Q & A ..........................................................................................................................92
Chapter 8 Appendices..............................................................................................................100
DDNS Service Application........................................................................................87
7.1 Installation.................................................................................................................92
7.2 LED.............................................................................................................................92
7.3 IP Address..................................................................................................................93
7.4 OS Setting..................................................................................................................93
7.5 11n Broadband Router Setup..................................................................................94
7.6 Wireless LAN.............................................................................................................96
7.7 Support ......................................................................................................................98
7.8 Others.........................................................................................................................99
7.9 USB Device................................................................................................................99
8.1 Operating Systems .................................................................................................100
8.2 Browsers..................................................................................................................100
8.3 Communications Regulation Information ............................................................100
4
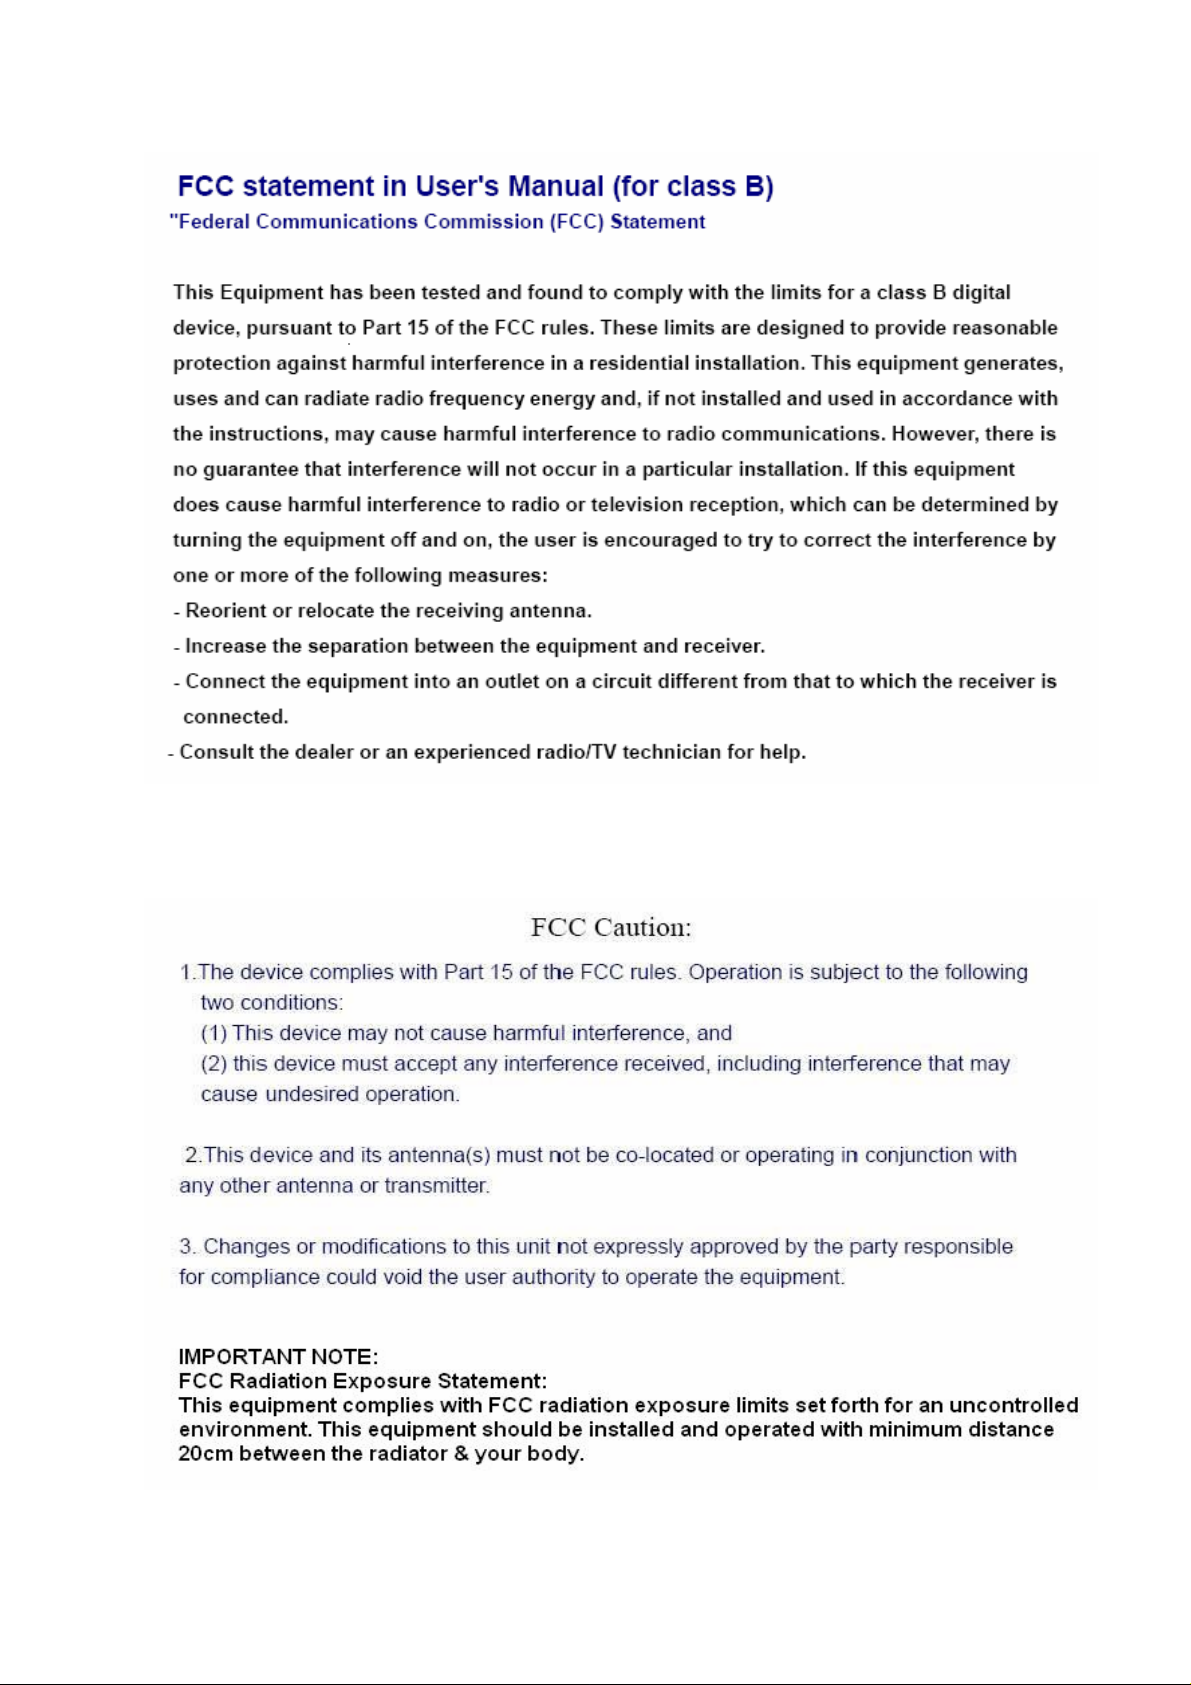
5

Safe Seating Gestures
You should follow the manufacturer’s instructions for adjusting the backrest to fit your body
properly.
An adjustable chair that provides firm, comfortable support is best.
Adjust the height of the chair so your thighs are horizontal and your feet flat on the floor.
The back of the chair should support your lower back (lumbar region).
CE Statement of Conformity
Our product has been tested in typical configuration by Ecom Sertech Corp and was found to
comply with the essential requirement of “Council Directive on the Approximation of the Laws
of the Member States relating to Electromagnetic Compatibility” (89/336/EEC; 92/31/EEC;
93/68/EEC)
Notice
Changing RF parameter is not allowed.
6

Chapter 1 Introduction
1.1 Overview
11n Broadband Router is a convenient wireless solution for delivering 802.11n wireless
connectivity with a maximum wireless signal rate of up to 300Mbps. Use it in home or
company.
7

1.2 Features
y WPS button provides not only an easy and secured wireless network but also a WDS
repeater in one push
y Multiple APs Supported : adds or limits the properties for classed SSID, increasing the
flexibility and efficiency of the network.
y Superior, reliable performance : 20000 fast recycling sessions provide a stable
network connection for P2P downloading.
8

1.3 Specifications
Item Specification
Key Components
Main Processor
Flash
RAM
Wireless Chip
WAN Port
LAN Port
USB Port
Wireless
Wireless Antenna
Realtek RTL8198 (600MHz )
8Mbytes Serial Flash
64Mbytes DDR2
Realtek RTL8192CE (MAC+BB+RF) 2T2R
Communication Interfaces
1 x 10/100/1000Mbps RJ45, with auto MDI/MDIX
4 x 10/100/1000Mbps RJ45, with auto MDI/MDIX
1 x USB 2.0 host for 3.5G \ WiMAX USB dongle and
Smartphone
IEEE 802.11 b/g/n
Others
External 5dBi x 2
Transmission Power
Receive Sensitivity
Button
802.11b: 13±1dBm @ normal temp. range
802.11g: 19±1dBm @ normal temp. range
802.11n (20MHz/40MHz): 18.5±1dBm @ normal temp.
range
11Mbps : TYP. -83dBm @ 8% PER
54Mbps: TYP. -70dBm @ 10% PER
11n (20MHz): TYP. -64dBm @ 10% PER
11n (40MHz): TYP. -61dBm @ 10% PER
Reboot button / Reset button – one second for
reboot/ten seconds for restore to factory default
setting。
WPS button – When WPS button pushed,system will
enter WPS connecting mode。
9

Operation Requirement
Operating Temp. 0°C~40°C (32°F~104°F)
Storage Temp. -20°C~70°C (-4°F~158°F)
Operating Humidity 10% to 85% Non-Condensing
Storage Humidity 5% to 90% Non-Condensing
Power Supply
Dimensions
Power Adapter DC5V/1.5A
198.2(L) x 107(W) x 39.1(H)mm
Notice:
1. USB device with power more than 500mA is not supported
10
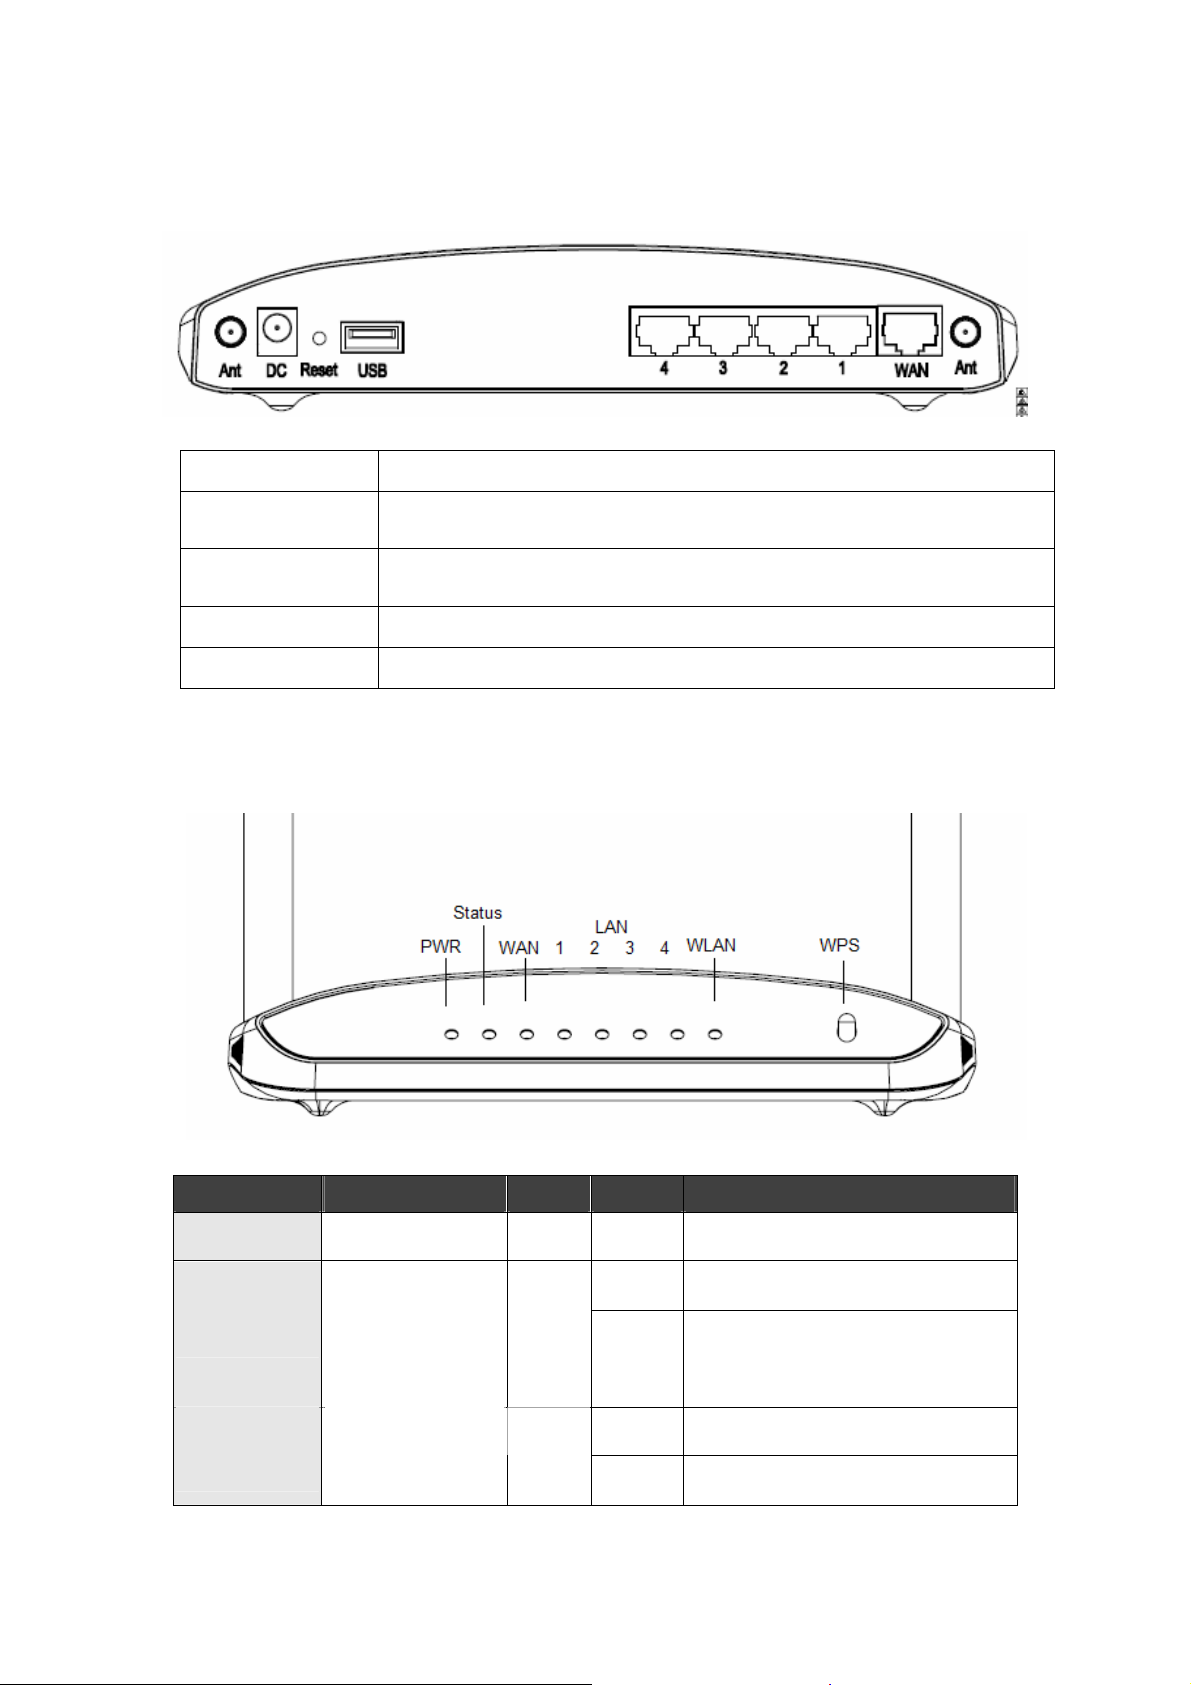
1.3.1 Product Appearance
Power Receptor
WPS
Reset Button
Ethernet Port
USB2.0 Ports
Adapter, Input:90-240Vac, Output: 12V/ 1A
Push “WPS” button to looking for other WPS devices. The security will be
set up between these 2 Wi-Fi devices after pairing.
Press “Reset” button over 10 seconds. When status indicator turns from
flashing to solid, the process is completed. All settings are back to default.
1x WAN port, 4x LAN ports
1 USB Port
1.3.2 LED Indicator Status Description
LED Function Color Status Description
Power x 1
Status x 1
WLAN/ WPS x
1
Power indication
System status
Wireless activity
&
Green
Green
Green
On Power is being applied to this product
On System is ready to work
Blinking
Reset / Firmware update in progress
120ms
On Wireless is connected
Blinking Wireless Tx/Rx activity
11

30ms WPS status
WAN x 1
LAN x 4
WAN port activity
LAN port activity
Reddish
Orange
Green
Green
Green
Green
Blinking
WPS function in progress
120ms
On 100Mbps Ethernet is connected
Blinking
100Mbps Ethernet Tx/Rx activity
30ms
On 10Mbps Ethernet is connected
Blinking
10Mbps Ethernet Tx/Rx activity
120ms
On 100Mbps Ethernet is connected
Blinking
100Mbps Ethernet Tx/Rx activity
30ms
On 10Mbps Ethernet is connected
Blinking
10Mbps Ethernet Tx/Rx activity
120ms
1.4 System Requirements
To begin with 11n Broadband Router, you must have the following minimum system
requirements. If your system can’t correspond to the following requirements, you might get
some unknown troubles on your system.
XDSL/Cable Modem and broadband Internet Account.
One Ethernet (10 BASE-T or 10/100 BASE-TX) network interface card.
One PC or Notebook with web browser software installed (E.g.: Internet Explorer 5.0,
Netscape Navigator 7.x, Apple Safari 2.03 or higher version).
At lease one 802.11b/g/n wireless adapter for wireless mobile clients.
Recommended OS: Win2000 or WinXP / Linux.
12
1.5 Get Your IP Automatically & Manually
After 11n Broadband Router connected with your computer, please make sure your IP is in
the automatic IP position or you adjust it manually in order to activate the Internet network
from home to Internet. If you don’t know how to enter the settings, please follow the steps as
below.
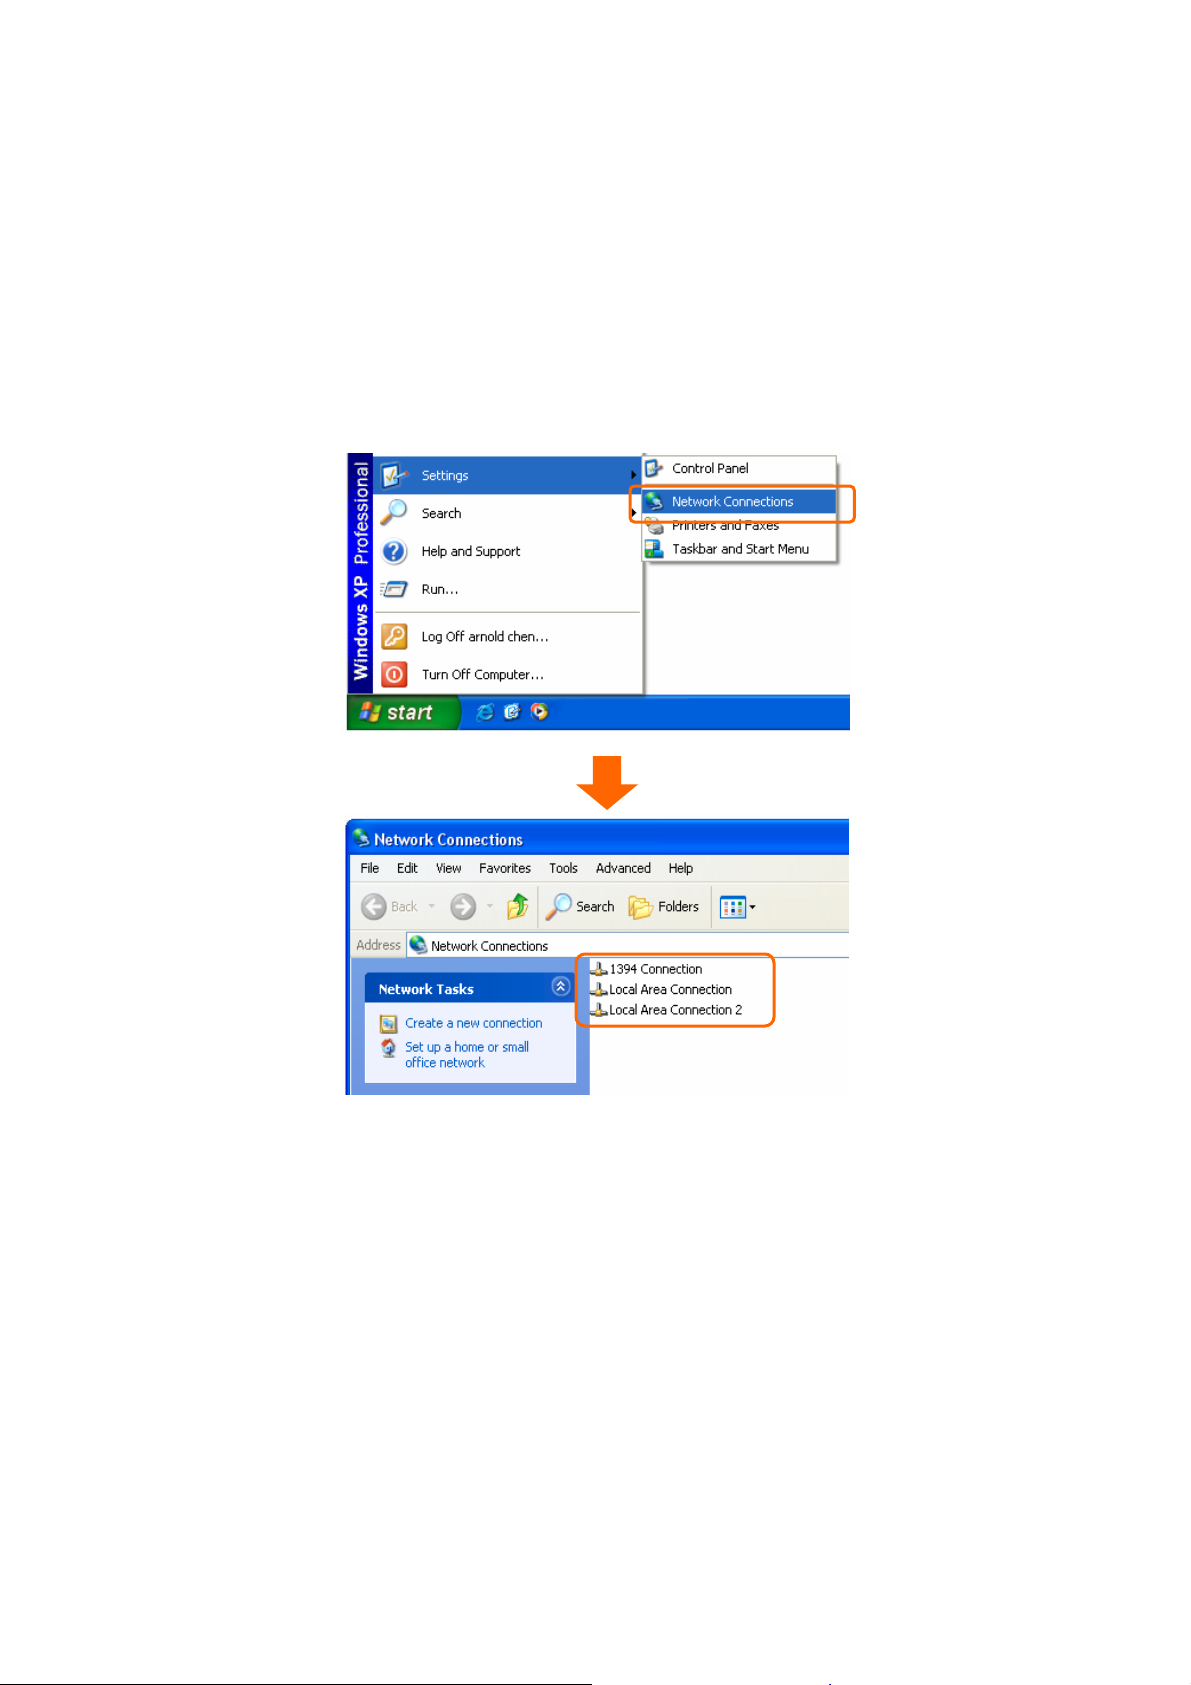
Step 1. Go to Start>Settings> Network Connections and then select Local Area
Connection.
Step 2. Click on Properties
13
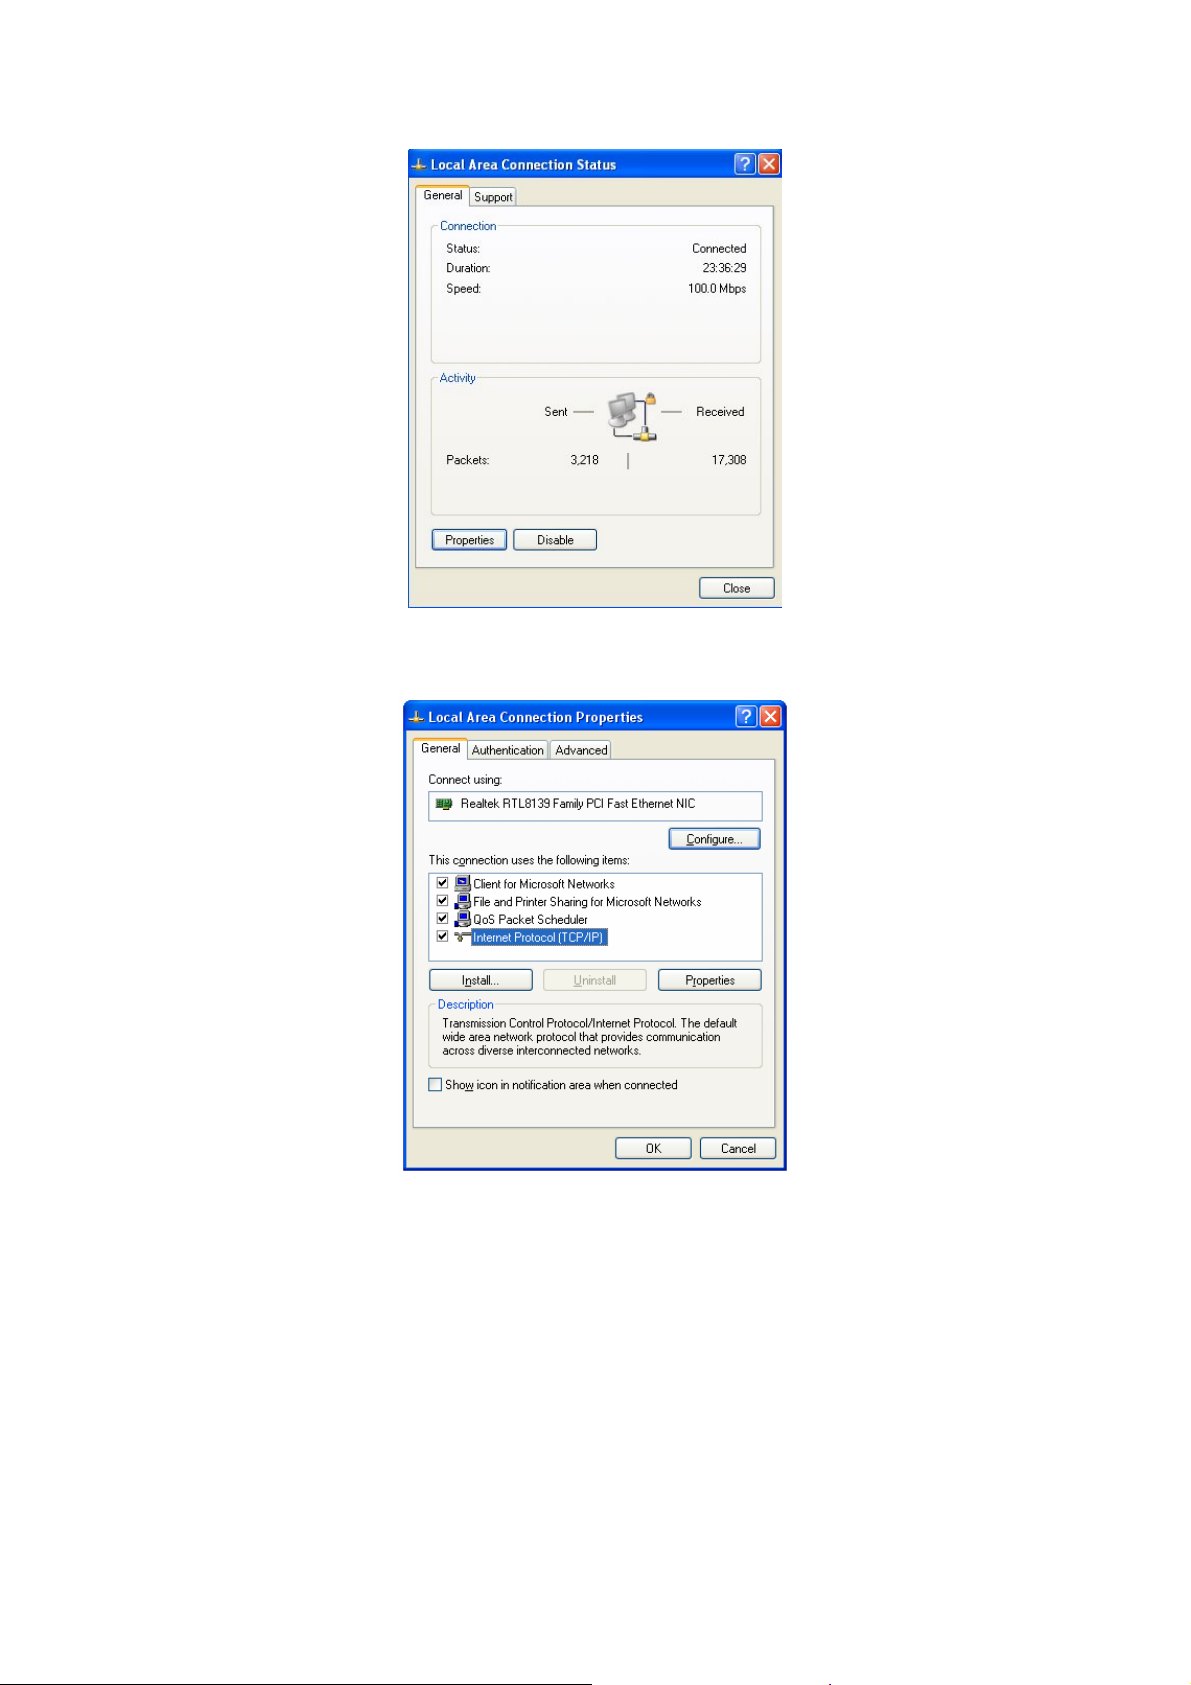
Step 3. Double click on Internet Protocol (TCP/IP).
Step 4-1. For getting IP automatically if you are one of the users under 11n Broadband Router,
please skip Use the following IP address and then select Obtain an IP address
automatically and Obtain DNS server address automatically and then click on OK button.
14

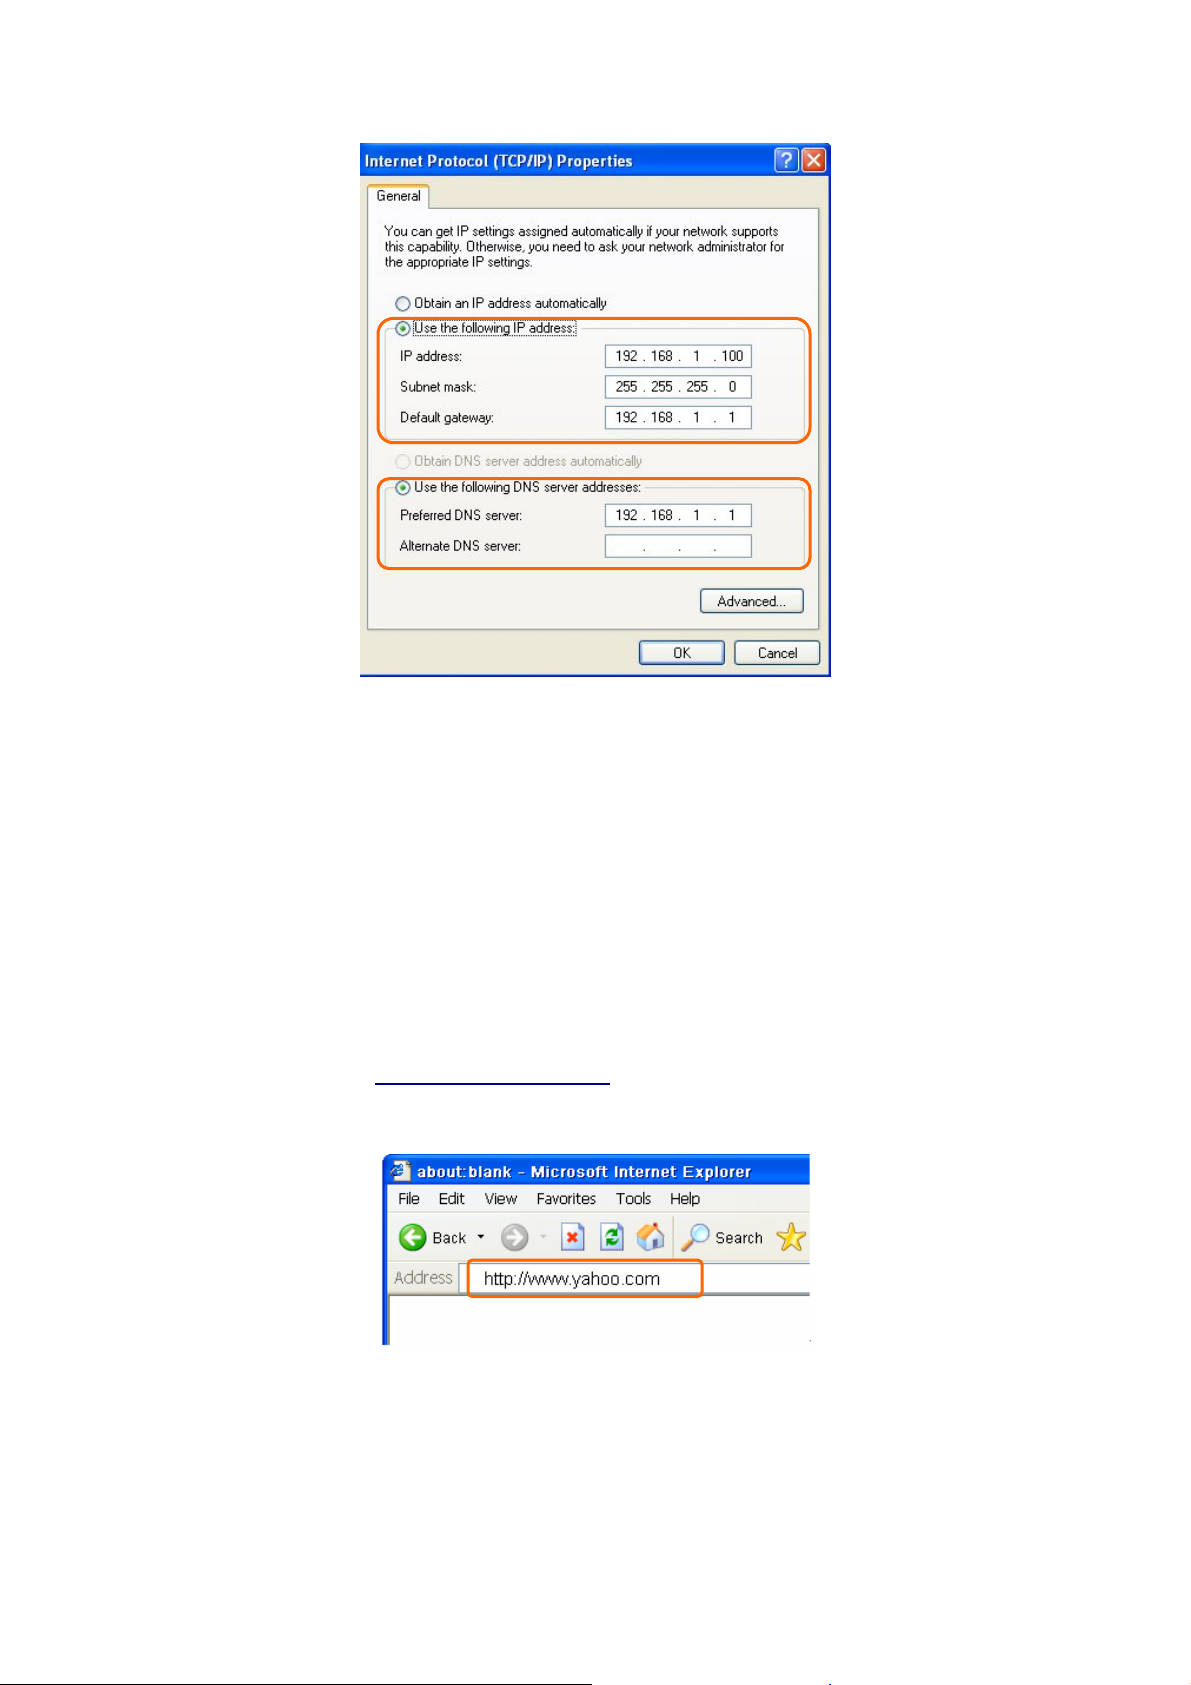
Step 4-2. For getting IP manually in order to specify a Virtual Server, such as Print Server,
FTP Server and so on, please skip Obtain an IP address automatically and then select Use
the following IP address. And the following default setting of 11n Broadband Router should
be noted:
y IP Address: 192.168.1.10 (as your Print Server for example)
y Subnet Mask: 255.255.255.0
y Default Gateway: 192.168.1.1
Note: If you configure your computer’s IP Address manually, it needs to be on the same
network segment.
For example:
z IP Address: 192.168.1.xxx (xxx can be any number between 2 and 253, but it can’t be
repeated, we use 100 to be the example.)
z Subnet Mask: 255.255.255.0
z Gateway: 192.168.1.1 (this is the IP address of 11n Broadband Router in Router Mode)
z DNS: 192.168.1.1 (use 11n Broadband Router’s IP address or on your own choice)
Note: IP address and Default gateway cannot be the same.
15
1.5.1 Network Testing
There are two ways to test your Network whether it can work on Internet or not. They are
“Testing with Internet Browser” and “Testing with Dos”.
1.5.2 Testing with Internet Browser
Open an Internet Browser, such as Internet Explore or Netscape. Input a valid web address
you like, for example,
enter. If the website appears, that means your Internet is working under normal situation.
http://www.yahoo.com in the web address blank and then press
1.5.2.1 Testing with DOS (Windows XP Platform)
Step 1. Go to start > Run.
16
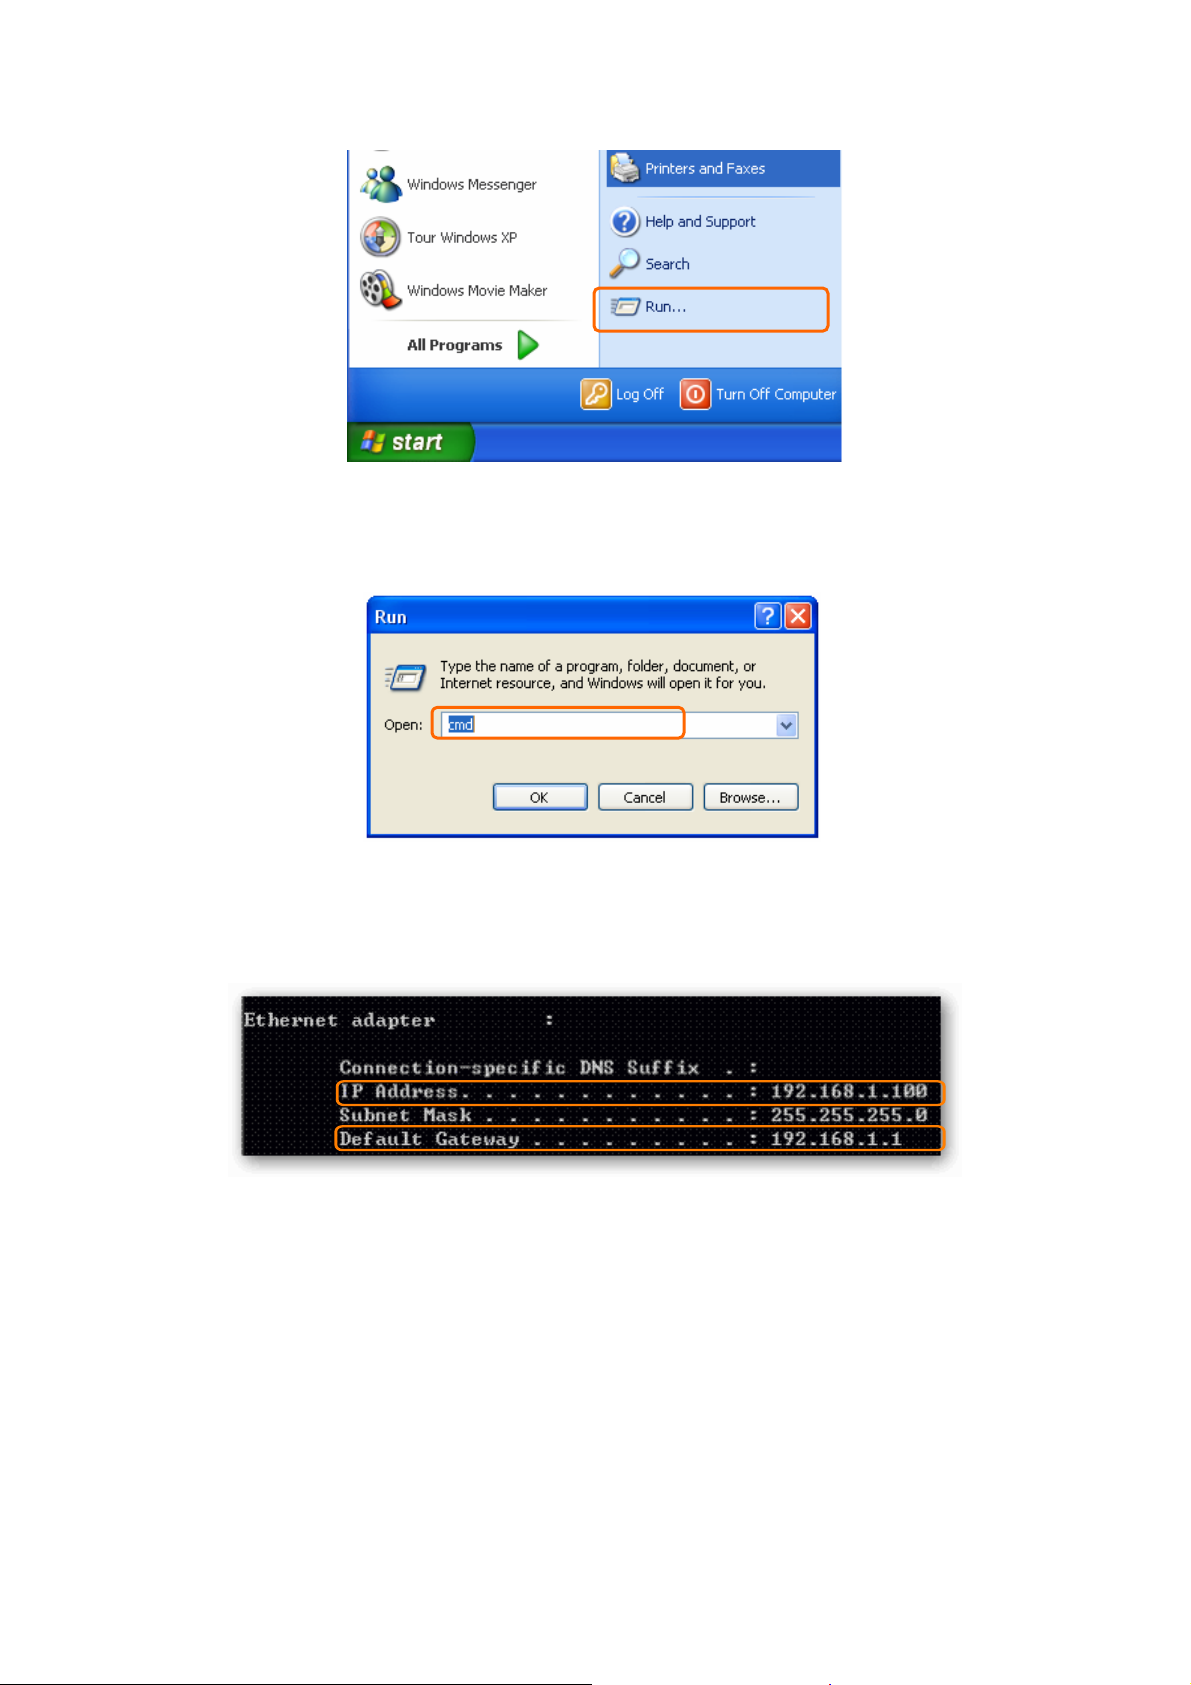
Step 2. Input cmd in the blank, and then click OK button. The Command Prompt window
appears.
Step 3. Input ipconfig in the flashing area then press enter. You will get an IP Address
192.168.1.100, for example, and Default Gateway as 192.168.1.1.
Step 4. Ping a legal WAN Address such as 192.168.1.1. If Internet works, it will show Reply
from 192.168.1.1: bytes = 32 time = 3ms TTL =64, for example.
17
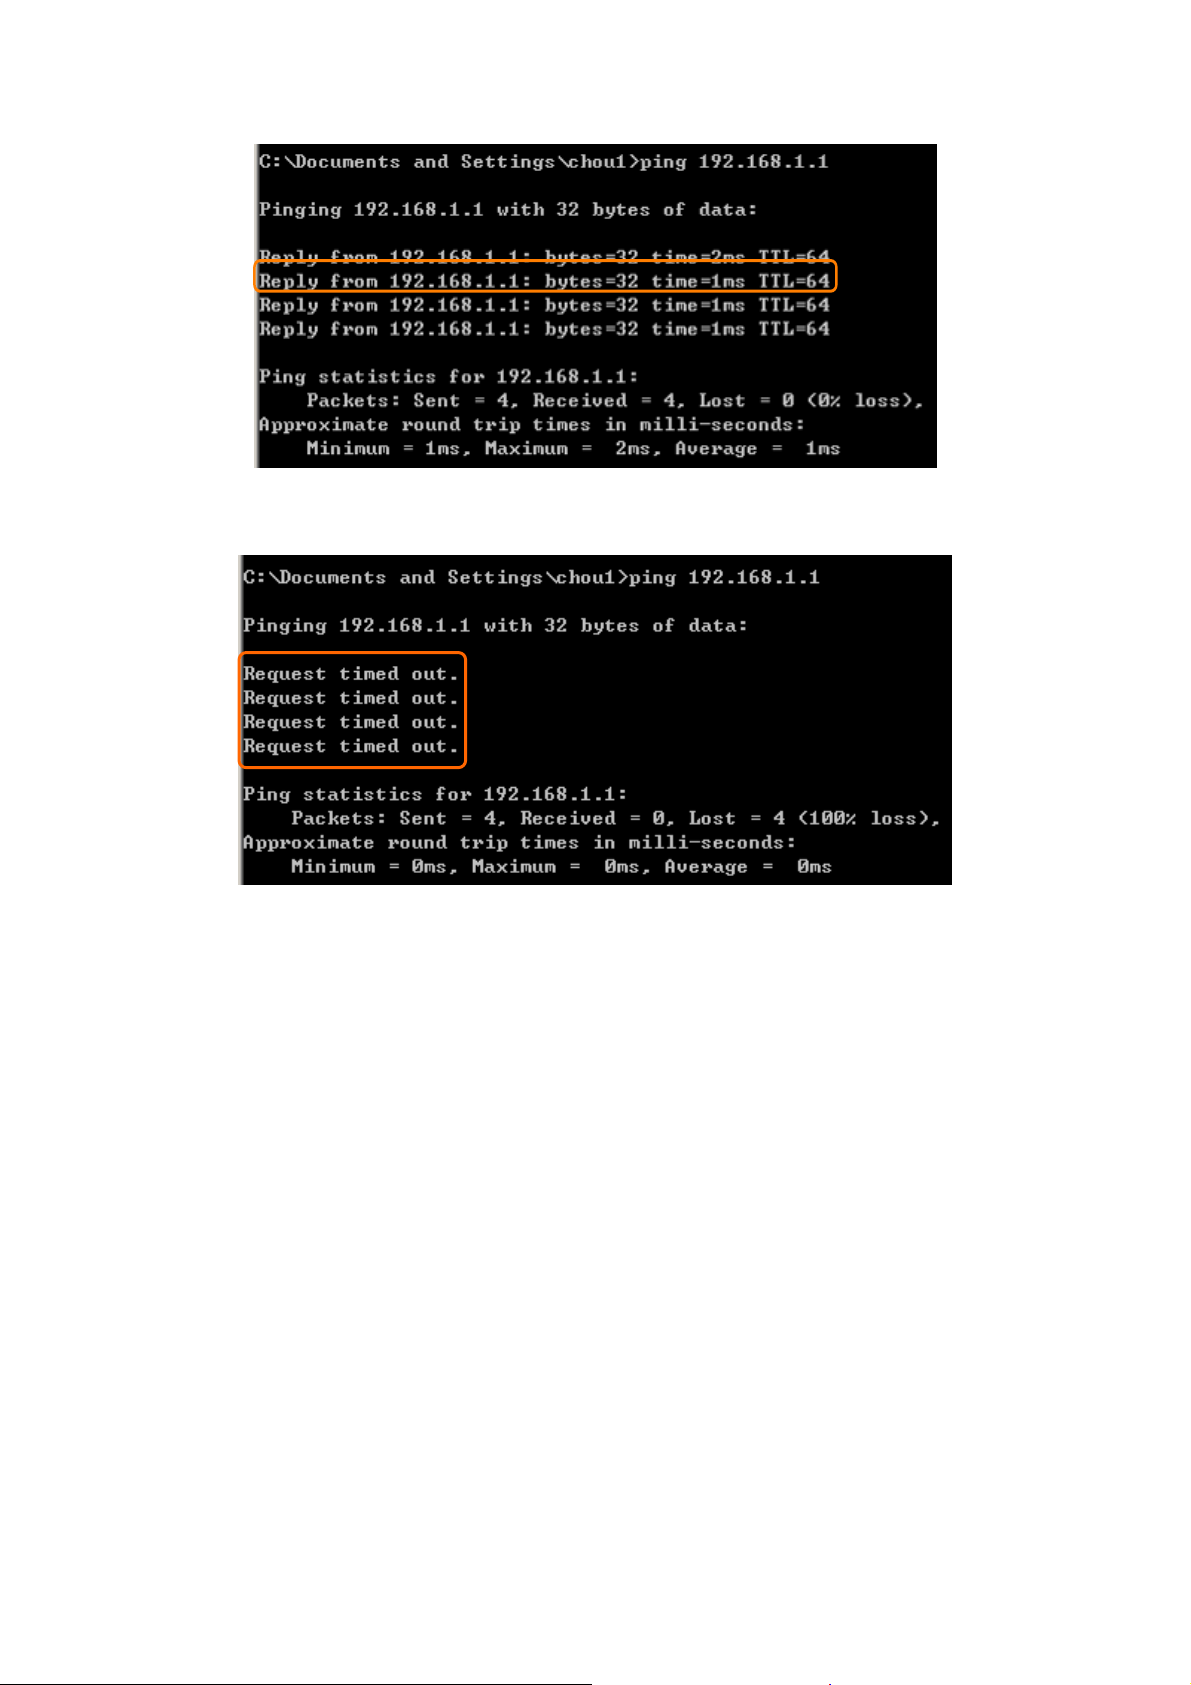
If it can’t work, it will show Request timed out.
18
Chapter 2 Hardware Installation
2.1 Diagram of Connecting Hardware to 11N Broadband Router
11n Broadband Router is a portable and convenient wireless solution for delivering 802.11n
wireless connectivity with a maximum wireless signal rate of up to 300Mbps. Use it in
conference rooms, hotel rooms, or even at hotspots.
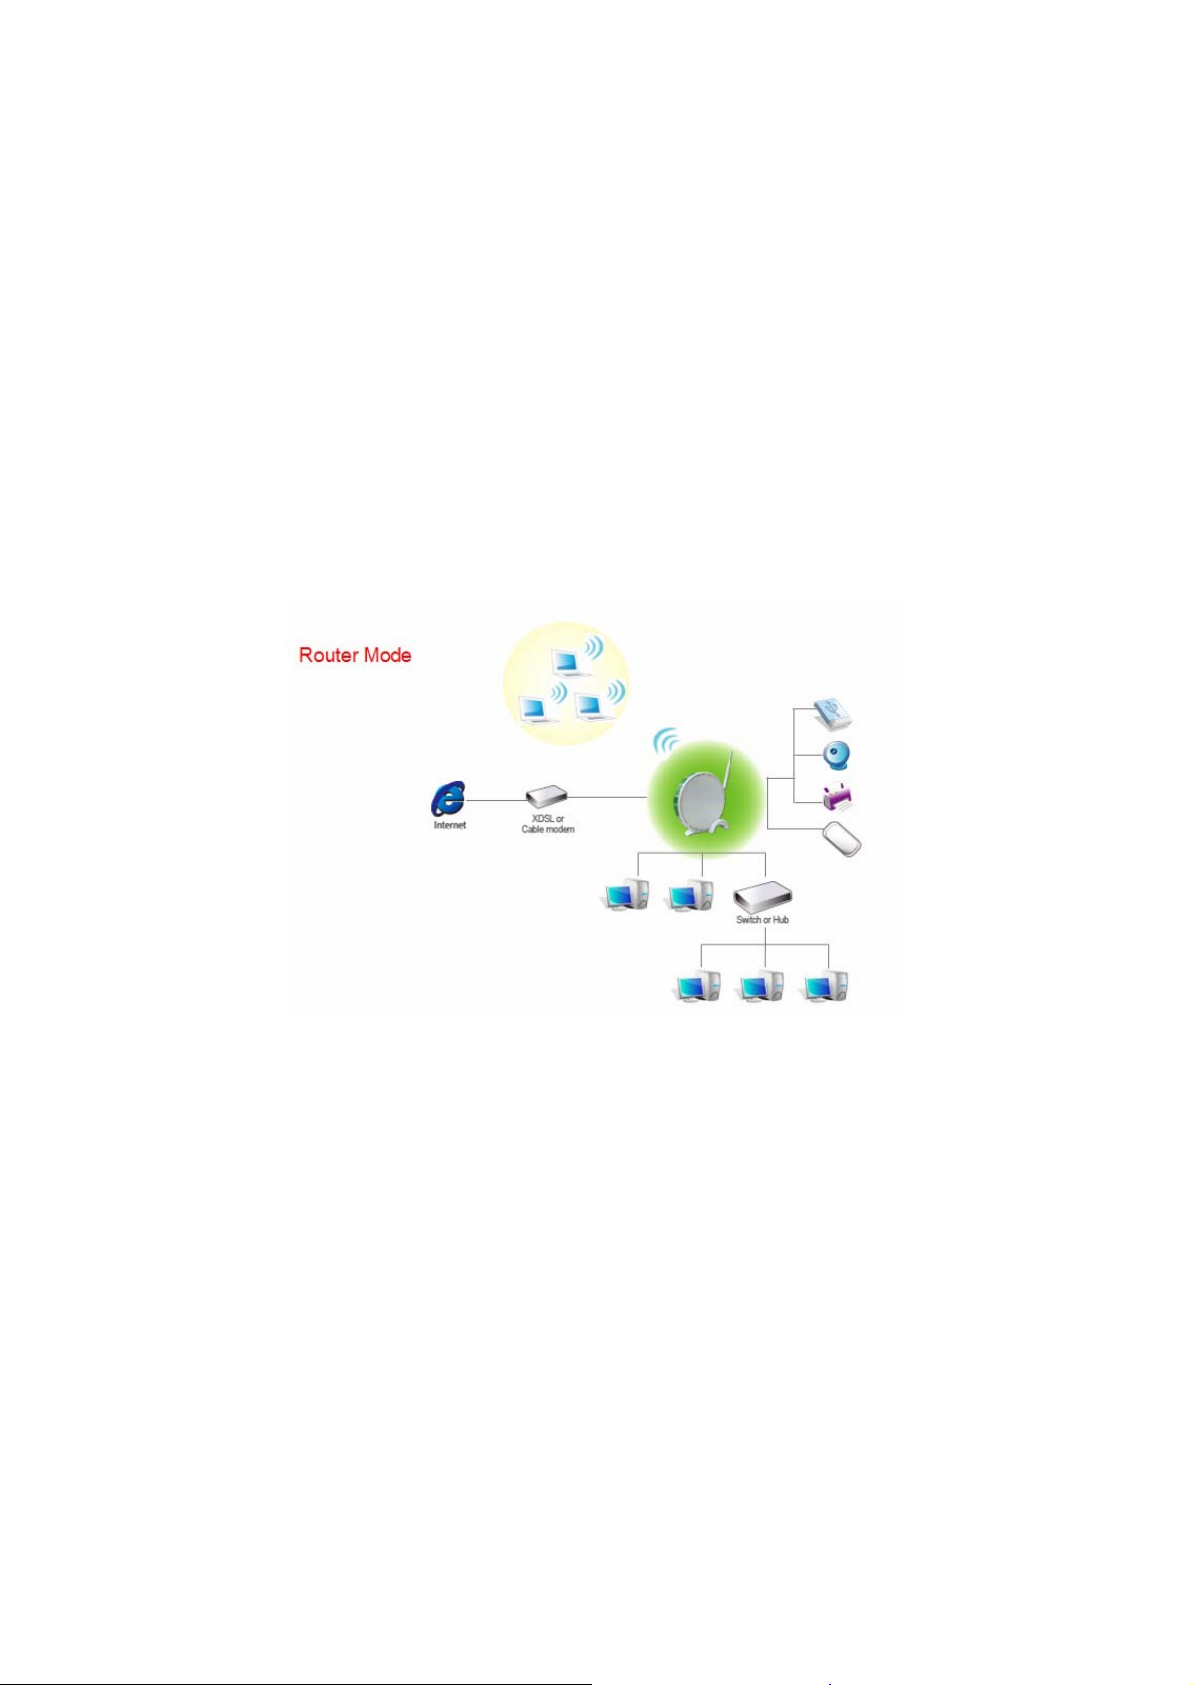
2.1.1 Hardware Connection and Application for Router Mode
When 11n Broadband Router switches to Router Mode, there will be each WAN and LAN port
existing, the administrator can do the Quick Setup including WAN Setup, LAN Setup,
Wireless Setup, Time Server Setup, Password Setup, Firewall Setup, QoS Setup.
19

Chapter 3 One Button Setup
The advanced One Button Setup provides users a simple way to set up the complicated
network. Instead of numbers of IPs to be memorized, you just need to fill in some necessary
information and then enjoy the secured internet by clicking the “Finished” button.
3.1 One Button Setup configuration for Router Mode
The default UPnP of 11n Broadband Router is ON. When users connect 11N Broadband
Router to their PC, and icon will show up in the right-down corner.
Step 1. Click the Internet Gateway Device to open the login page.
20
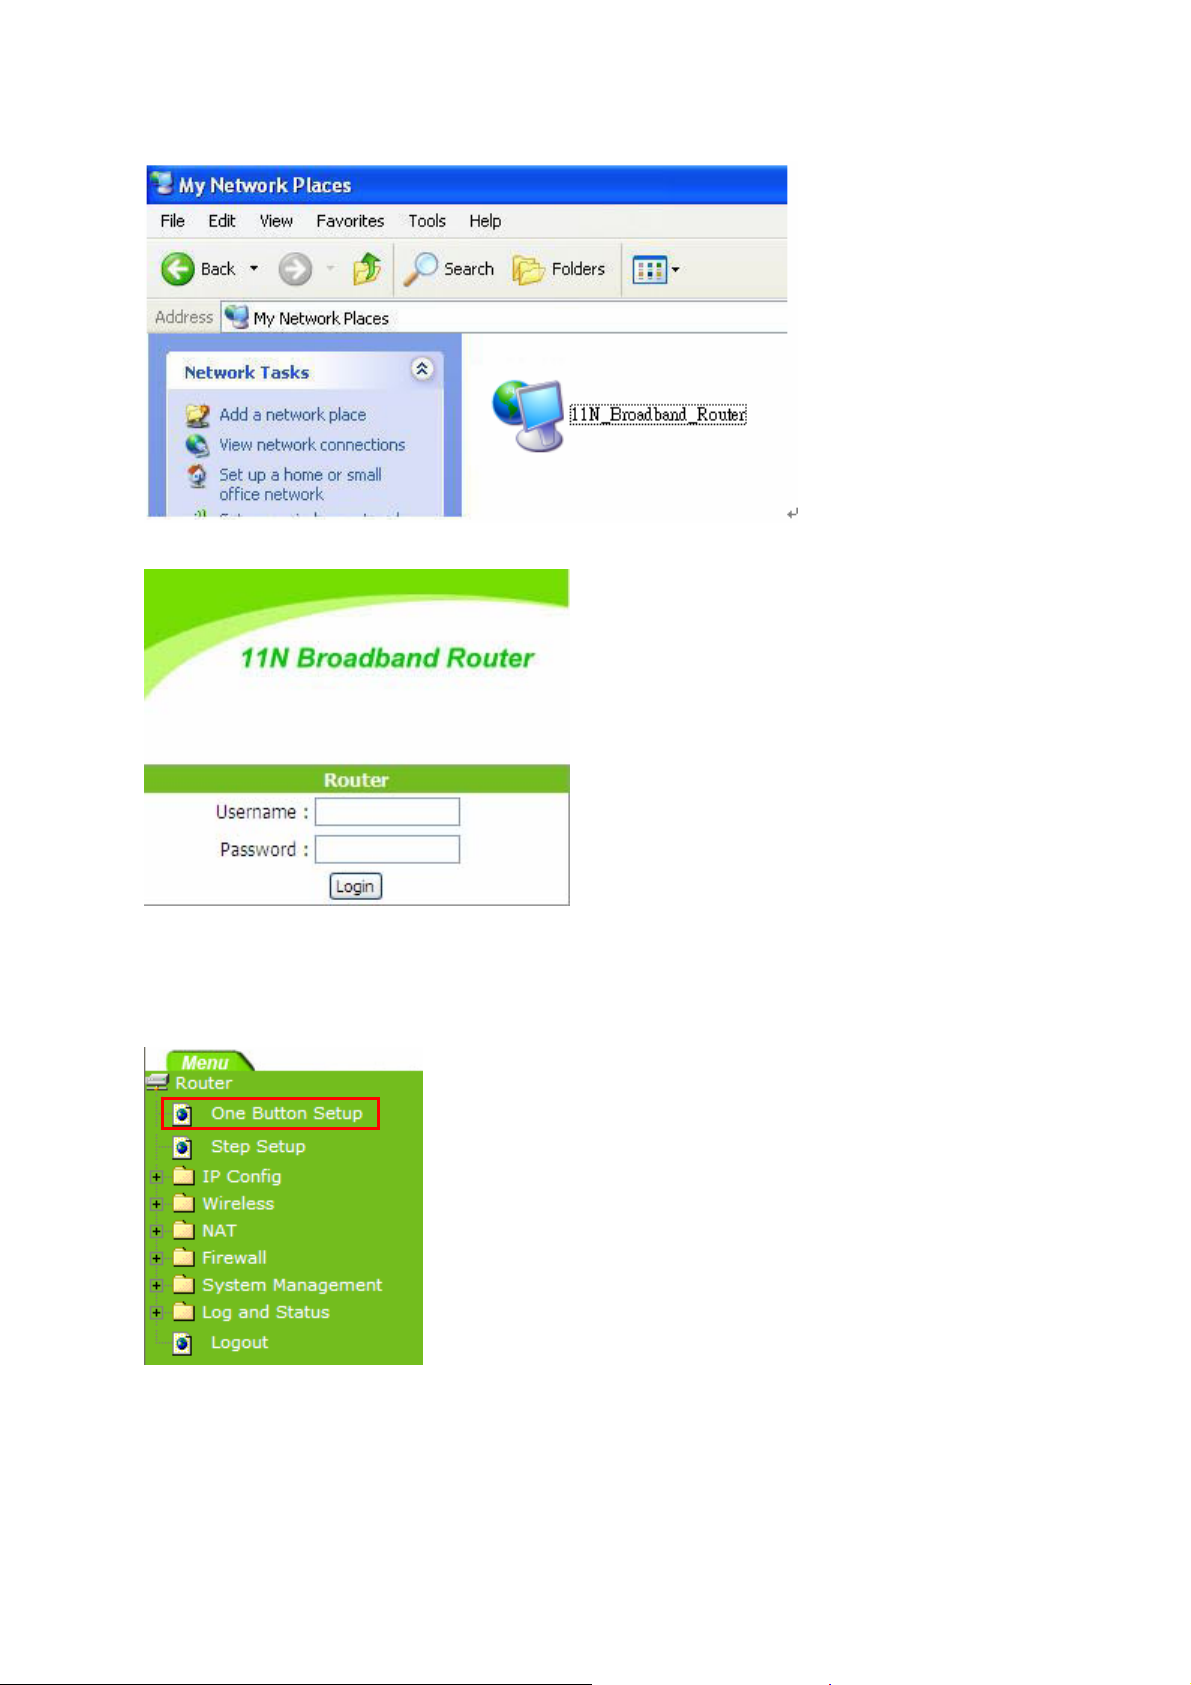
Step 2. Click One Button Setup on the left of the main menu under router mode.
21
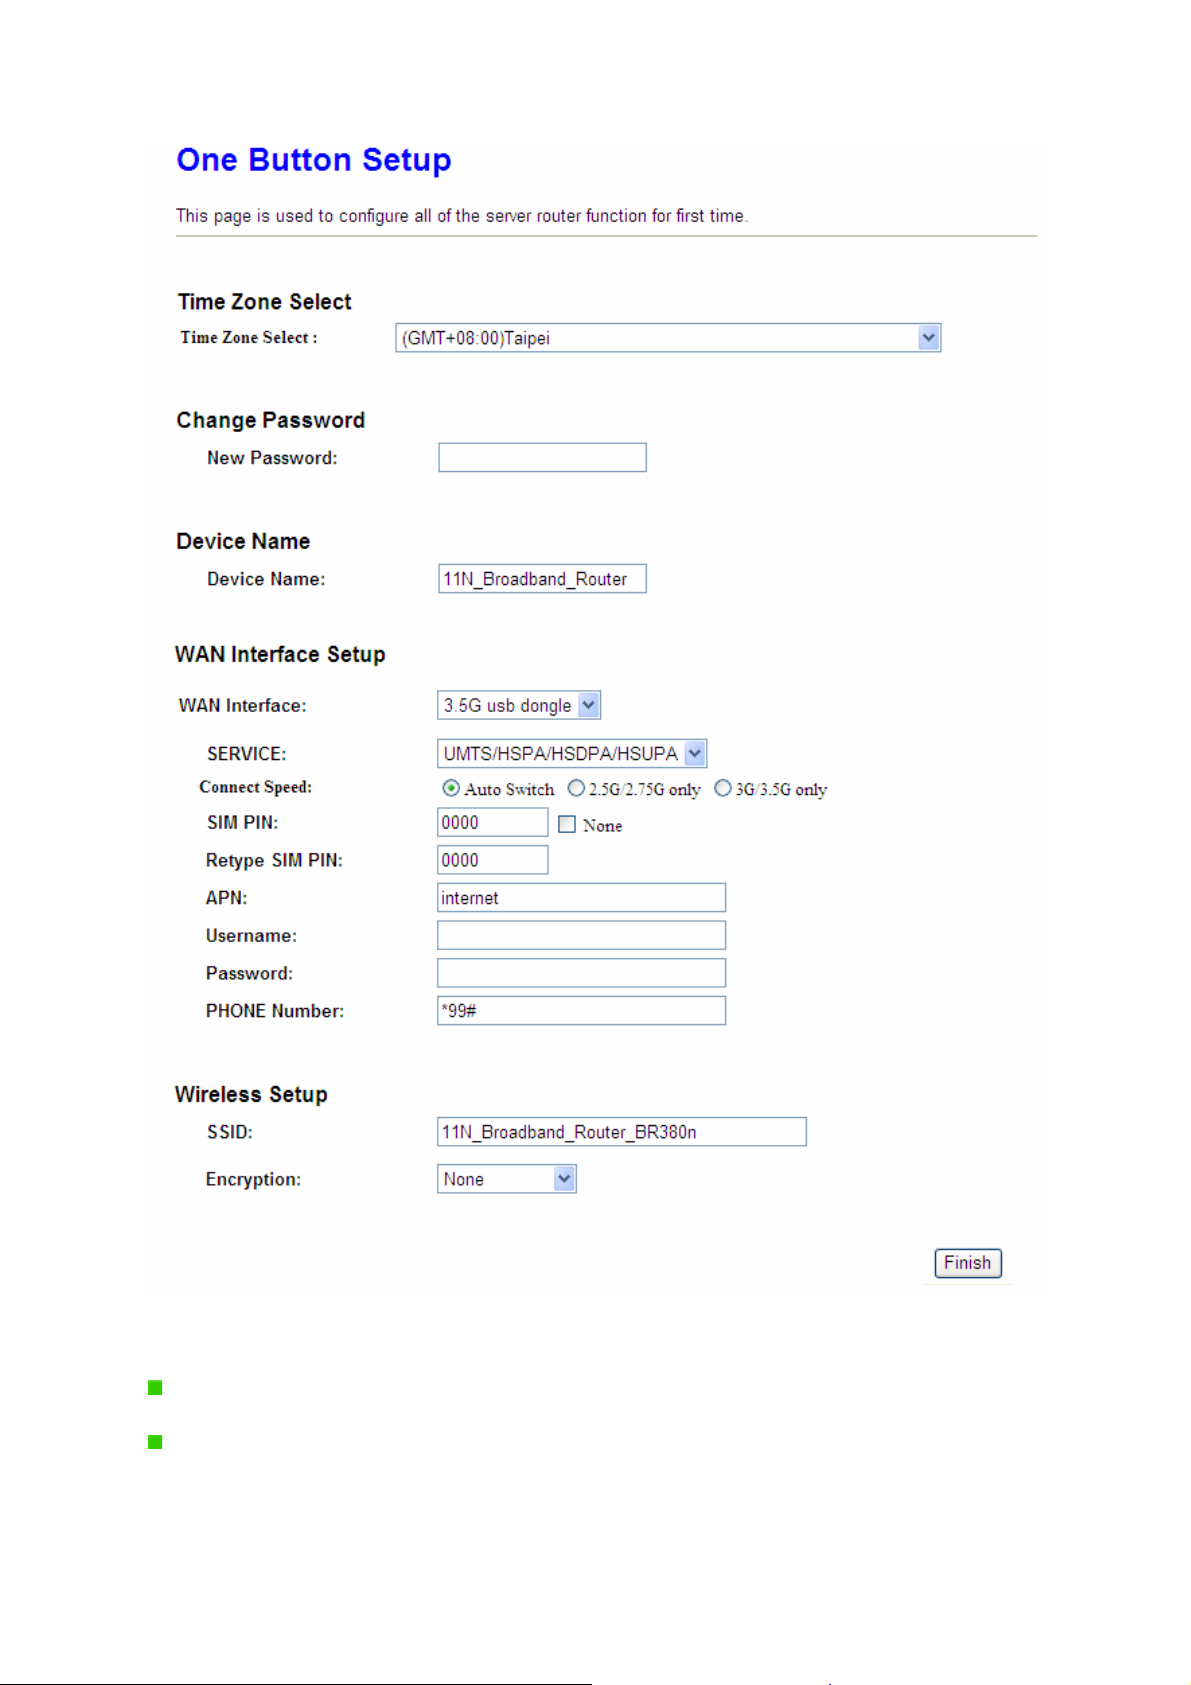
Time Zone Select: Select your time zone from the Time Zone drop-down list.
Change Password: For changing password, please fill the password information into
the blank.
22

Device Name: Name your device here. The default is “11N_Broadband_Router”.
WAN Interface Setup: Select the WAN Interface from the drop-down list.
Connect Speed: Select connection speed.
WAN Type Setup: Please choose the access type.
Wireless Setup: Define the SSID, and Encryption type.
Finished: Click finished button to complete the setting.
Note: One Button Setup is not completed unless users finish all settings and clic k Finished button.
Chapter 4
23
Chapter 5 Basic Setup
5.1 Router Mode
Under Router Mode, the Router provides a Router/AP function. User can get IP address
assigned by ISP wired or wirelessly. It also supports NAT and DHCP functions that enable
multiple computers to share an Internet connection at the same time.
5.1.1 Administrator Setup Instruction
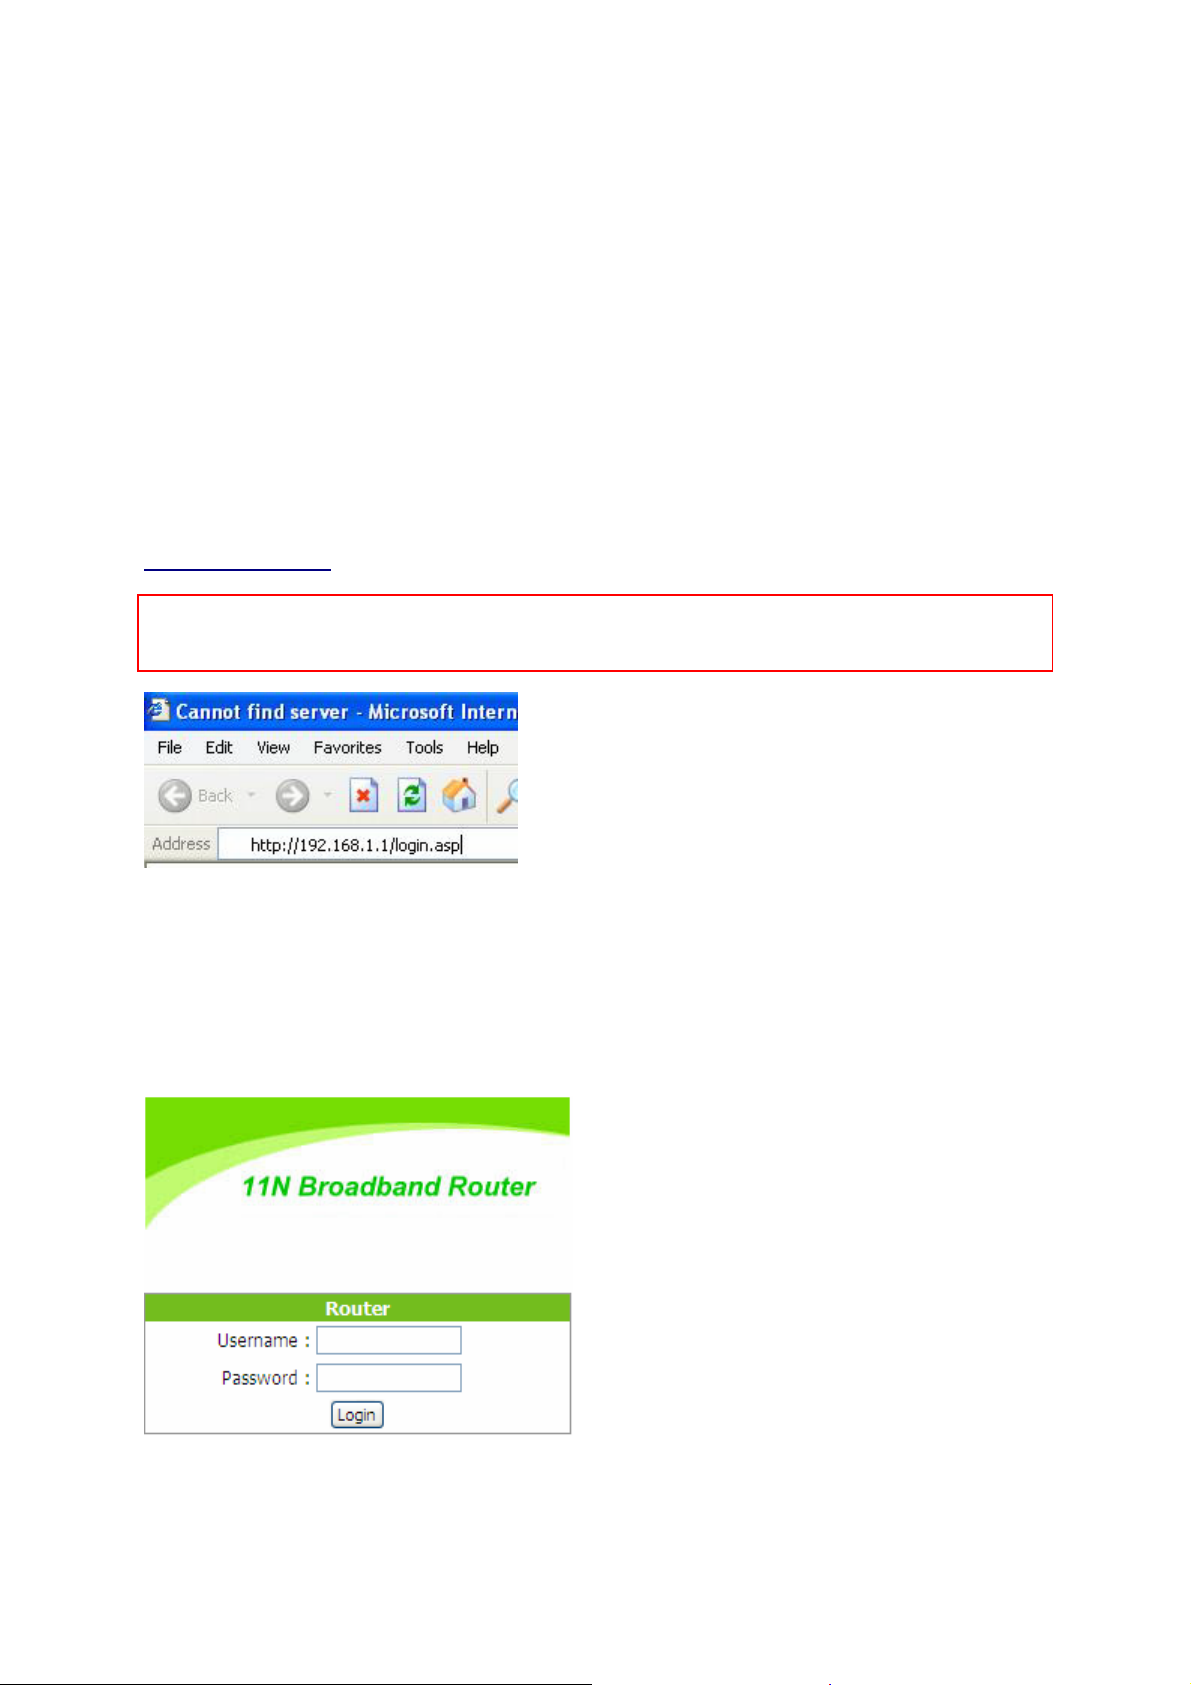
Open a Microsoft Internet Explorer, Mozilla Firefox or Apple Safari browser, and enter
http://192.168.1.1 (Default Gateway) into browser’s blank.
Notice: If the homepage doesn’t appear, please check if the TCP/IP configuration is obtaining IP address
automatically or not. If you don’t know how to do it, please refer to “1.5 Get your IP Automatically &
Manually”.
Homepage
The default values for User Name and Password are admin (all in lowercase letters). Click
Login to enter.
24
5.2 Basic Setup
Typical Conf iguration Manager Page consist s of t wo separate frames. The left frame contains
all the means available for device configuration. Menus are indicated by file icons, and related
menus are grouped into categories, such as LAN, W AN and etc., and indicated by folder icon,
depending on whether the group of menus are expanded or not. You can click on any of these
to display a specific configuration page.
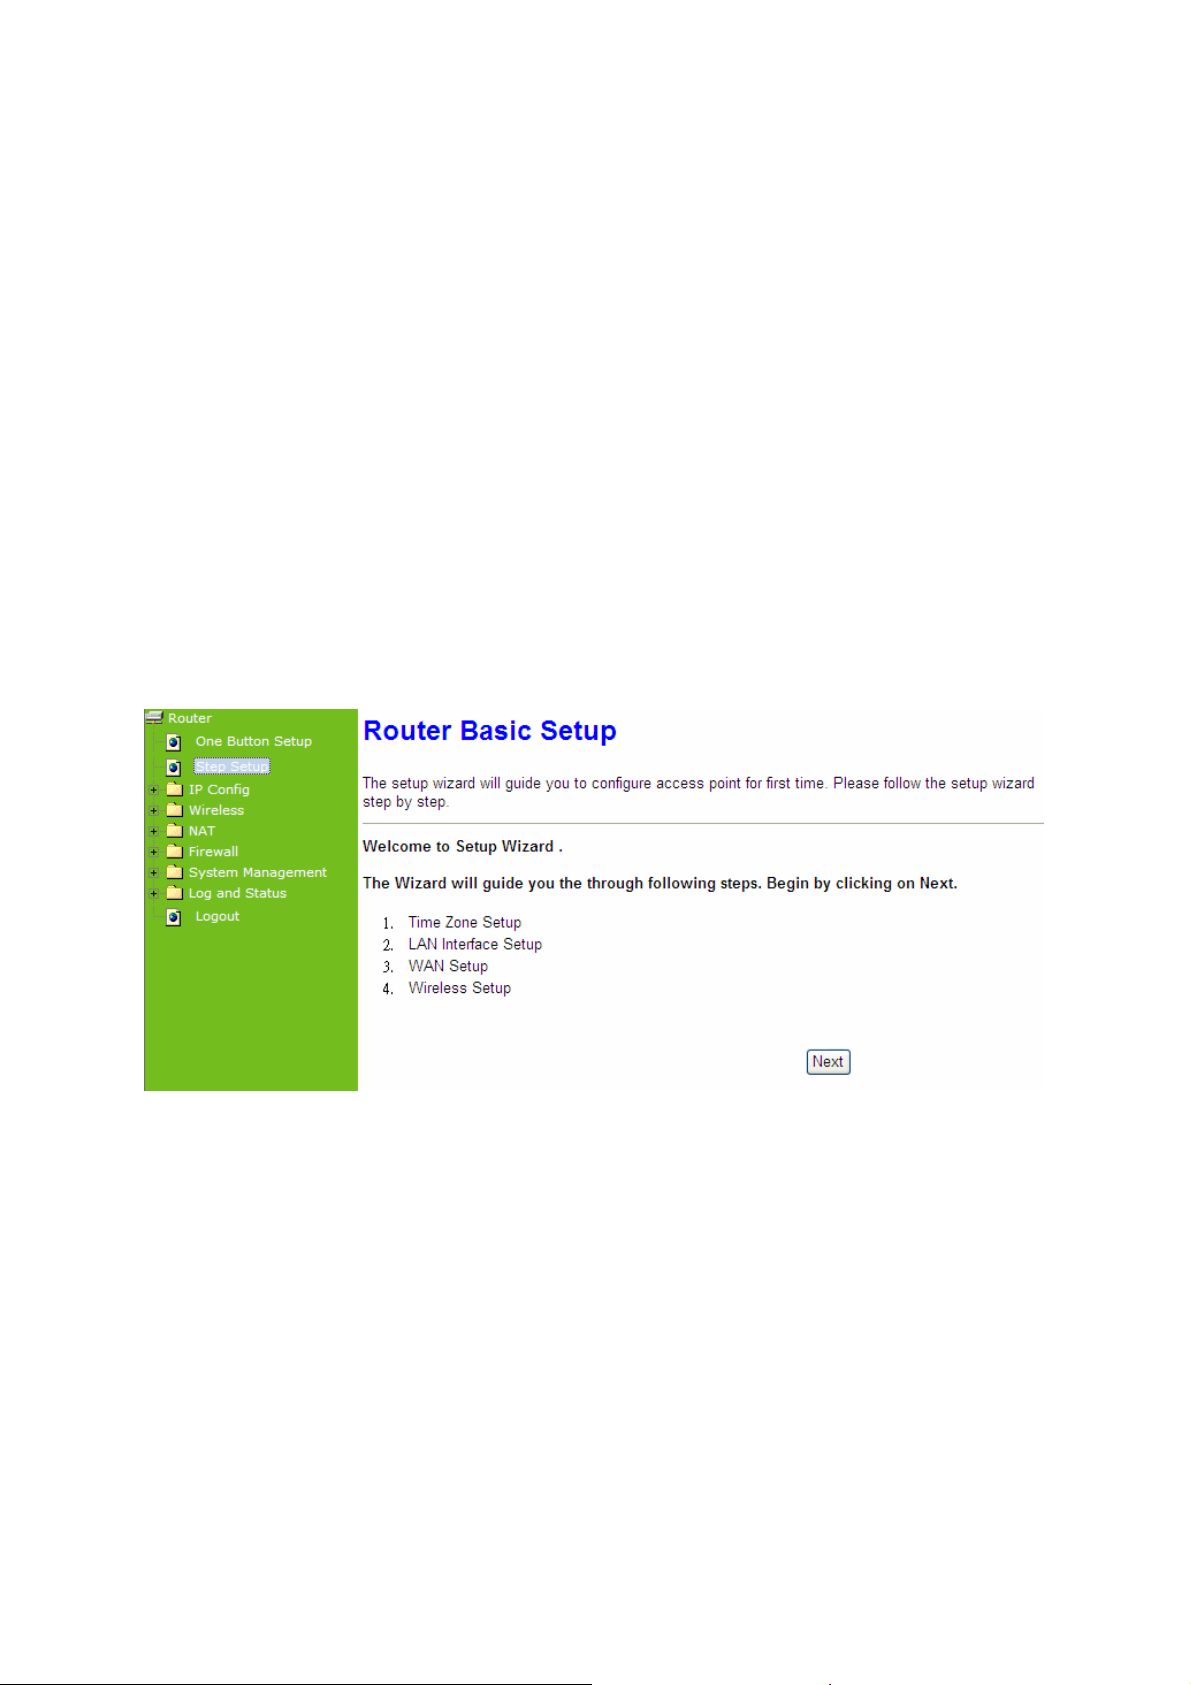
Select Step Setup on the left of the main menu. Then you’ll see the full f unctionality selection
screen appears and detailed settings for each item, including “Basic” and “Application” two
parts.
Click Basic, you see 4 major items set in Basic Setup Selection. Please click Next to the
next page.
5.2.1 Time Zone Setup
25
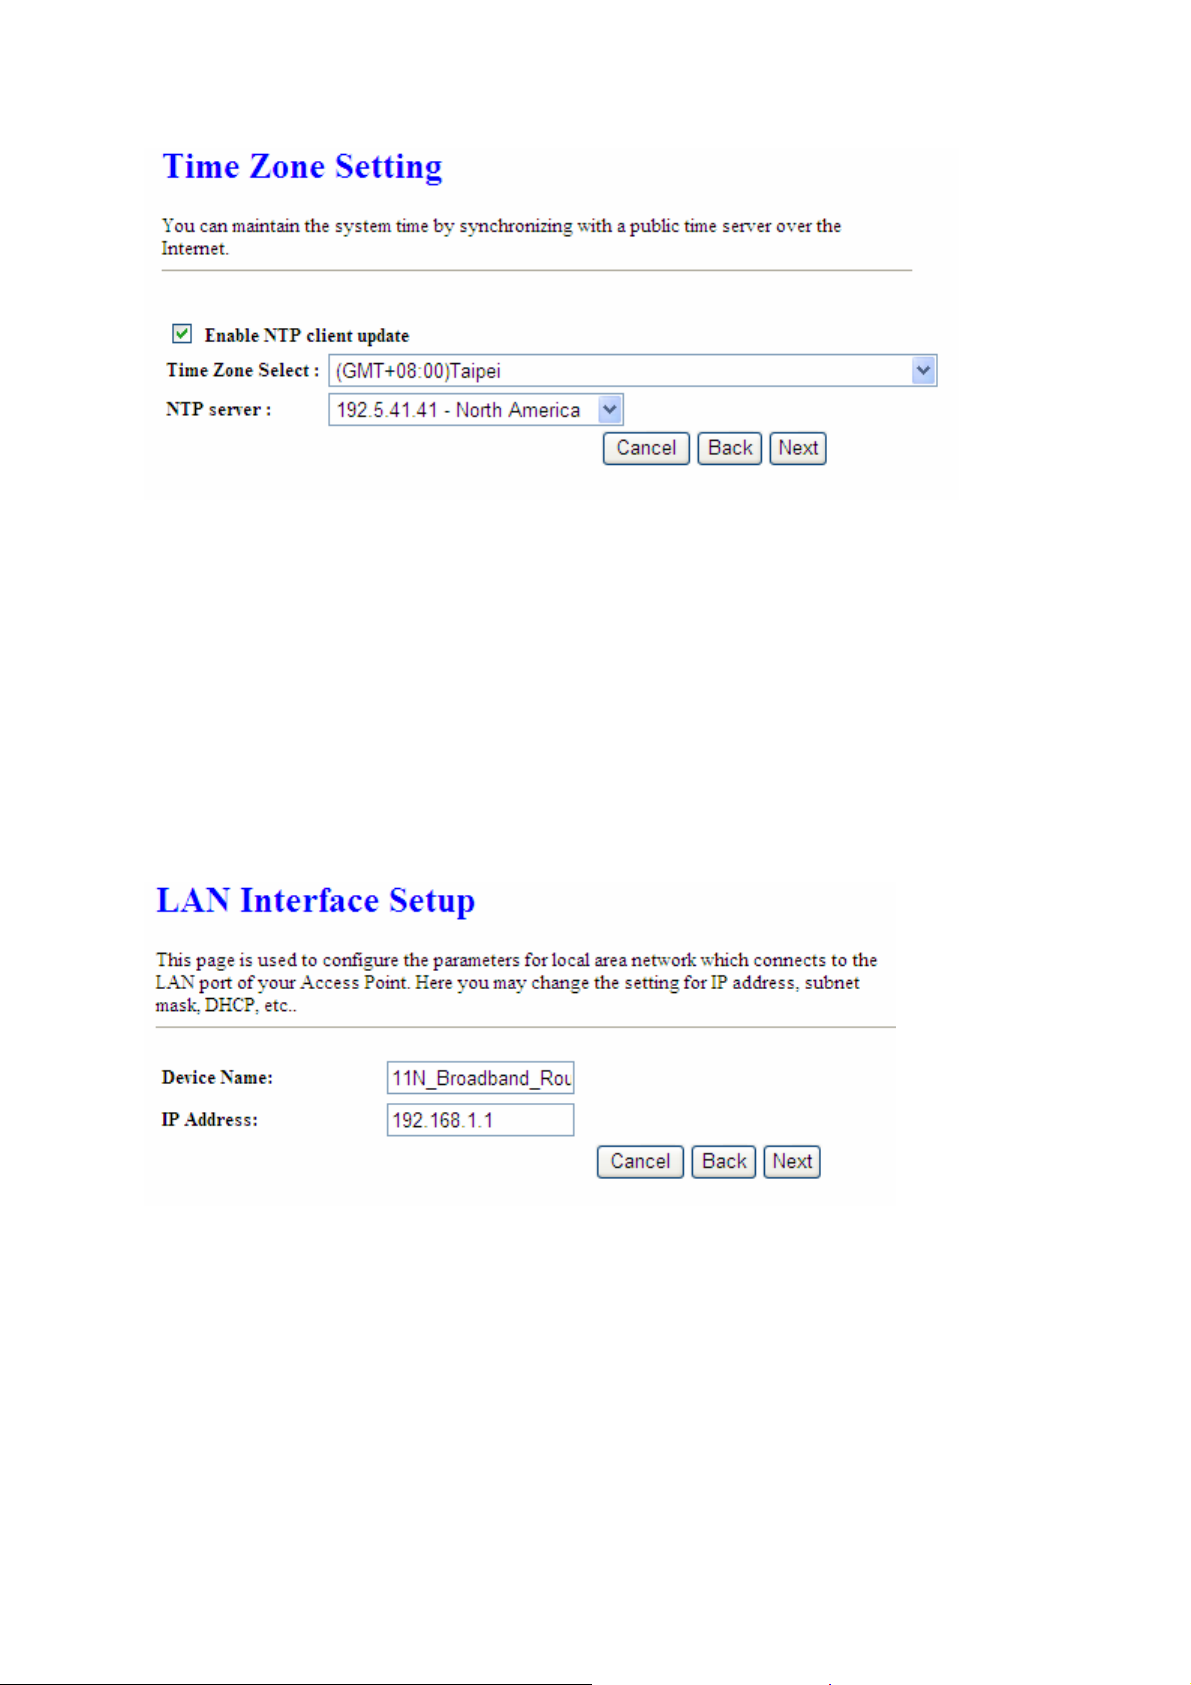
Select Enable NTP client update to maintain the system time.
5.2.2 LAN Interface Setup
If you are using 11n Broadband Router with multiple PCs on your LAN, you must connect the
LAN via the Ethernet ports on the built-in Ethernet switch. You must assign a unique IP
address to each device residing on your LAN. The LAN IP address identifies the router as a
node on your network; that is, its IP address must be in the same subnet as the PCs on your
LAN. The default LAN IP for the Internet Security Router is 192.168.1.1.
For Gateway IP Address, the IP address 192.168.1.xxx (xxx can be any number between 1
and 254 that is not used by another device.) Please don’t change the default LAN IP settings
at this section until you have completed the rest of the configurations and confirm that your
Internet connection is working.
Click on Next button to proceed.
26

5.2.3 WAN Setup
The WAN settings can be referred to as the Public setting. All IP information in the WAN
settings is public IP addresses which are accessible on the Internet. 11n Broadband Router
supports 4 interfaces and 4 access types to WAN. Select one of the WAN connection modes
required by your ISP in the following WAN Setup Configuration page, the WAN setup pages
will vary depending on what kind of WAN Type you select.
Choose your WAN Interface and Access WAN type as the above mentioned, and click Next,
its associated settings will show up.
5.2.3.1 WAN Interface– Ethernet Port
If you are using an Ethernet cable to connect the Internet, please select Ethernet port.
5.2.3.2 WAN Interface– Wireless
If you are connecting the internet via wireless, please select Wireless and its associated
settings will show up underneath at the same time.
You can see a list of available Wireless networks. Select you preferred one to connect and
the Encryption type form the drop-down list.
5.2.3.3 WAN Access Type – Static IP
Choose Static IP Address if all WAN IP information is provided to you by your ISP. You will
need to enter the IP address, IP netmask and IP gateway as provided. Each entered fields
must be in the appropriate IP form, which are four IP octets separated by a dot (x.x.x.x). The
Router will not accept the IP address if it is not in this format. Fill in the DNS information
provided by your ISP; otherwise, Domain Name can’t be used.
Click on Next button to go on next setting page.
5.2.3.4 WAN Access Type – Dynamic IP
27

Choose Dynamic IP to obtain IP address information automatically from your ISP. Select this
option if your ISP does not give you any IP numbers to use. T his option is commonly used for
Cable modem services.
Click on Next button to go on next setting page.
5.2.3.5 WAN Access Type – PPPoE
This option is typically used for DSL services. Choose PPPoE (Point to Point Protocol over
Ethernet) if your ISP uses PPPoE connection. Your ISP will provide you with a username and
password.
Click on Next button to go on next setting page.
5.2.3.6 WAN Access Type – PPTP
This option is typically used for DSL services. Some DSL service providers supply a special
DSL modem. This kind of modem only supports the PPTP tunnel to access the Internet, you
should create a PPTP tunnel that carries a PPP session and terminates on the DSL model.
Once the tunnel has been established, this kind of DSL modem will forward the PPP session
to the ISP. As long as the PPP session is connected, all the local users will be able to share
this PPP session to access to the Internet.
Click on Next button to go on next setting page.
5.2.3.7 Wireless Setup
First step is to name your SSID, and the default value is Download Server Router. Please
follow the illustrations below to proceed.
28
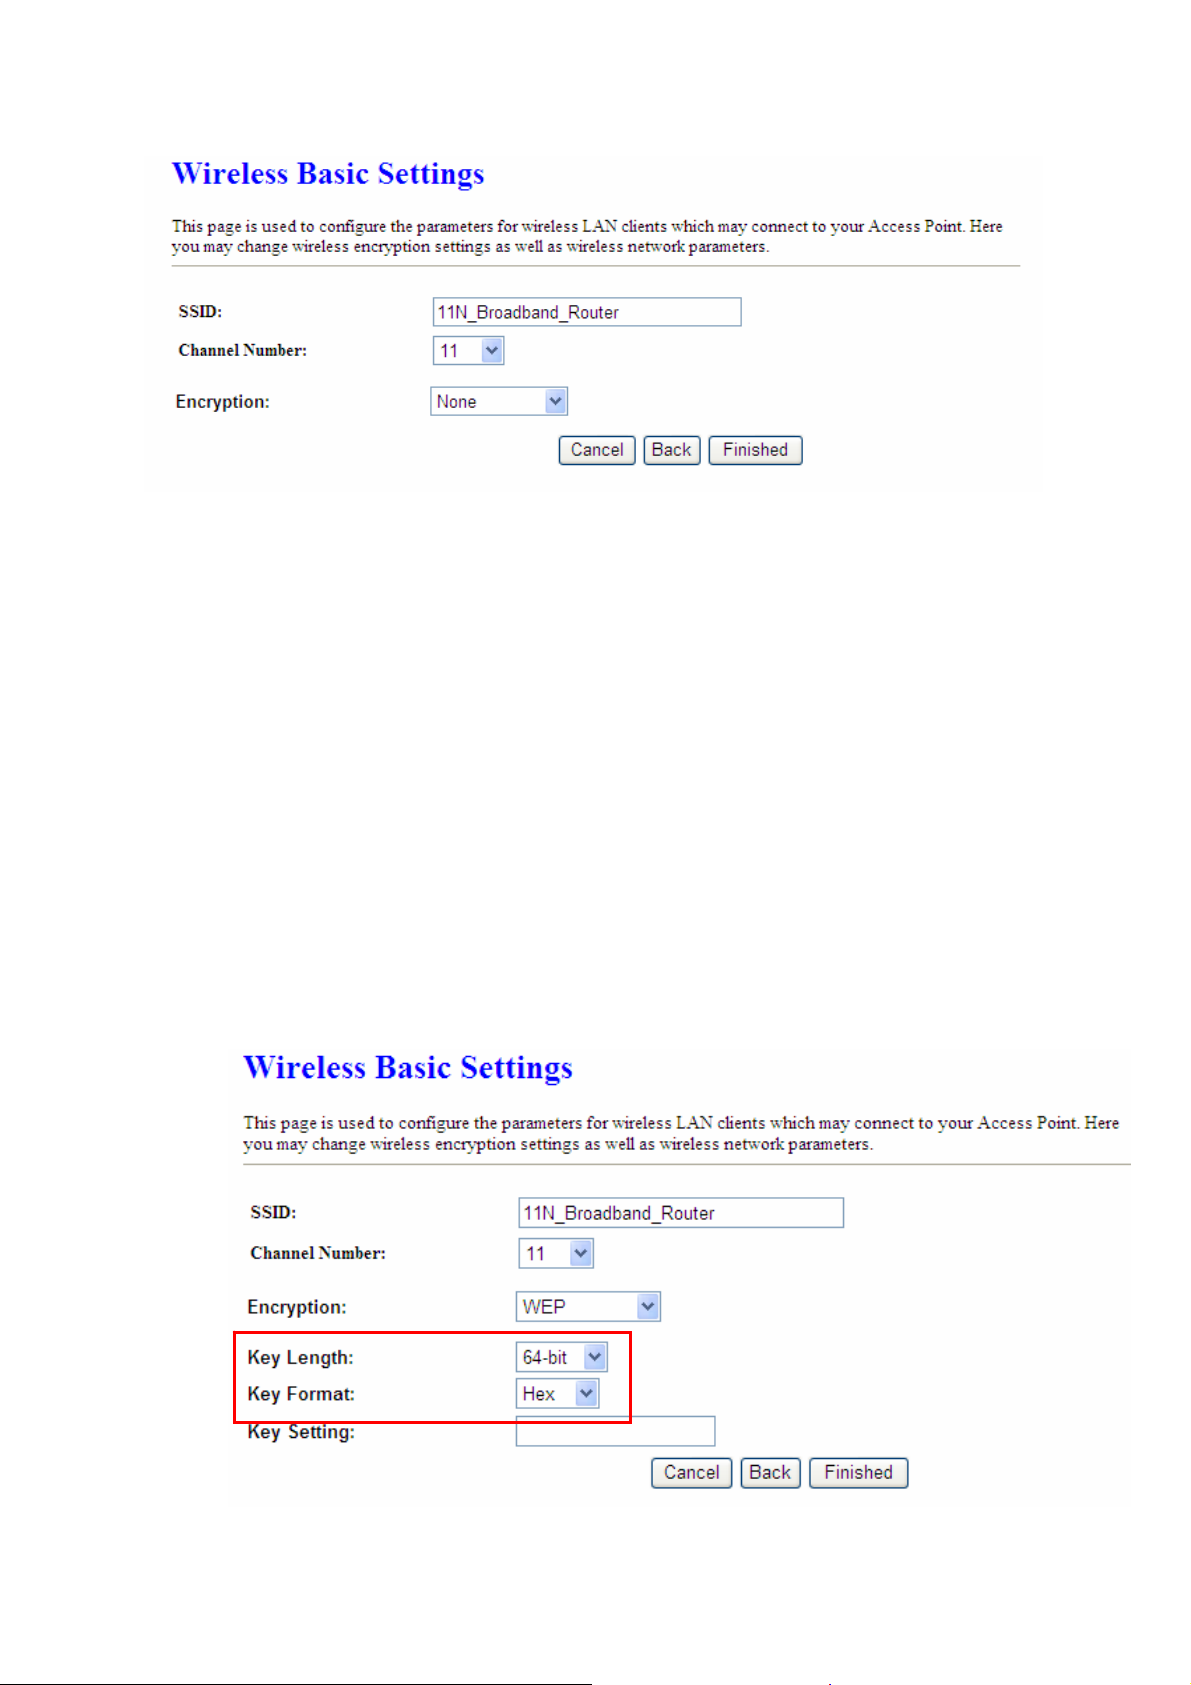
5.2.3.8 Wireless Security Setup
The security function is provided to prevent the connection requests from unauthorized
wireless clients. As the Encryption Type, select WEP or WPA can protect your data from
eavesdroppers, if you do not need the encryption, select “None” to skip the following setting.
a. Encrypt Type - WEP
11n Broadband Router supports both 64-bit and 128-bit encryption using the Wired
Equivalent Privacy (WEP) algorithm. Select the type of encryption you want to use
(64 or 128 bit) and configure one to four WEP Keys. The “1280bit” method is more
secure than the “64-bit”.
29
Key Length: For 64bits WEP key, 10 hexadecimal digitals leading by 0x can be
entered. For 128bits WEP key, 26 hexadecimal digits leading by 0x can be entered.
Key Format: The keys can be entered in ASCII or Hexadecimal. Select the item
from drop-down list you wish to use.
Key Setting:
Note: 128 bits WEP is most secure, but has more encryption/decryption overhead. Note that all wireless devices
must support the same WEP encryption bit size and have the same key.
A password is requested here.
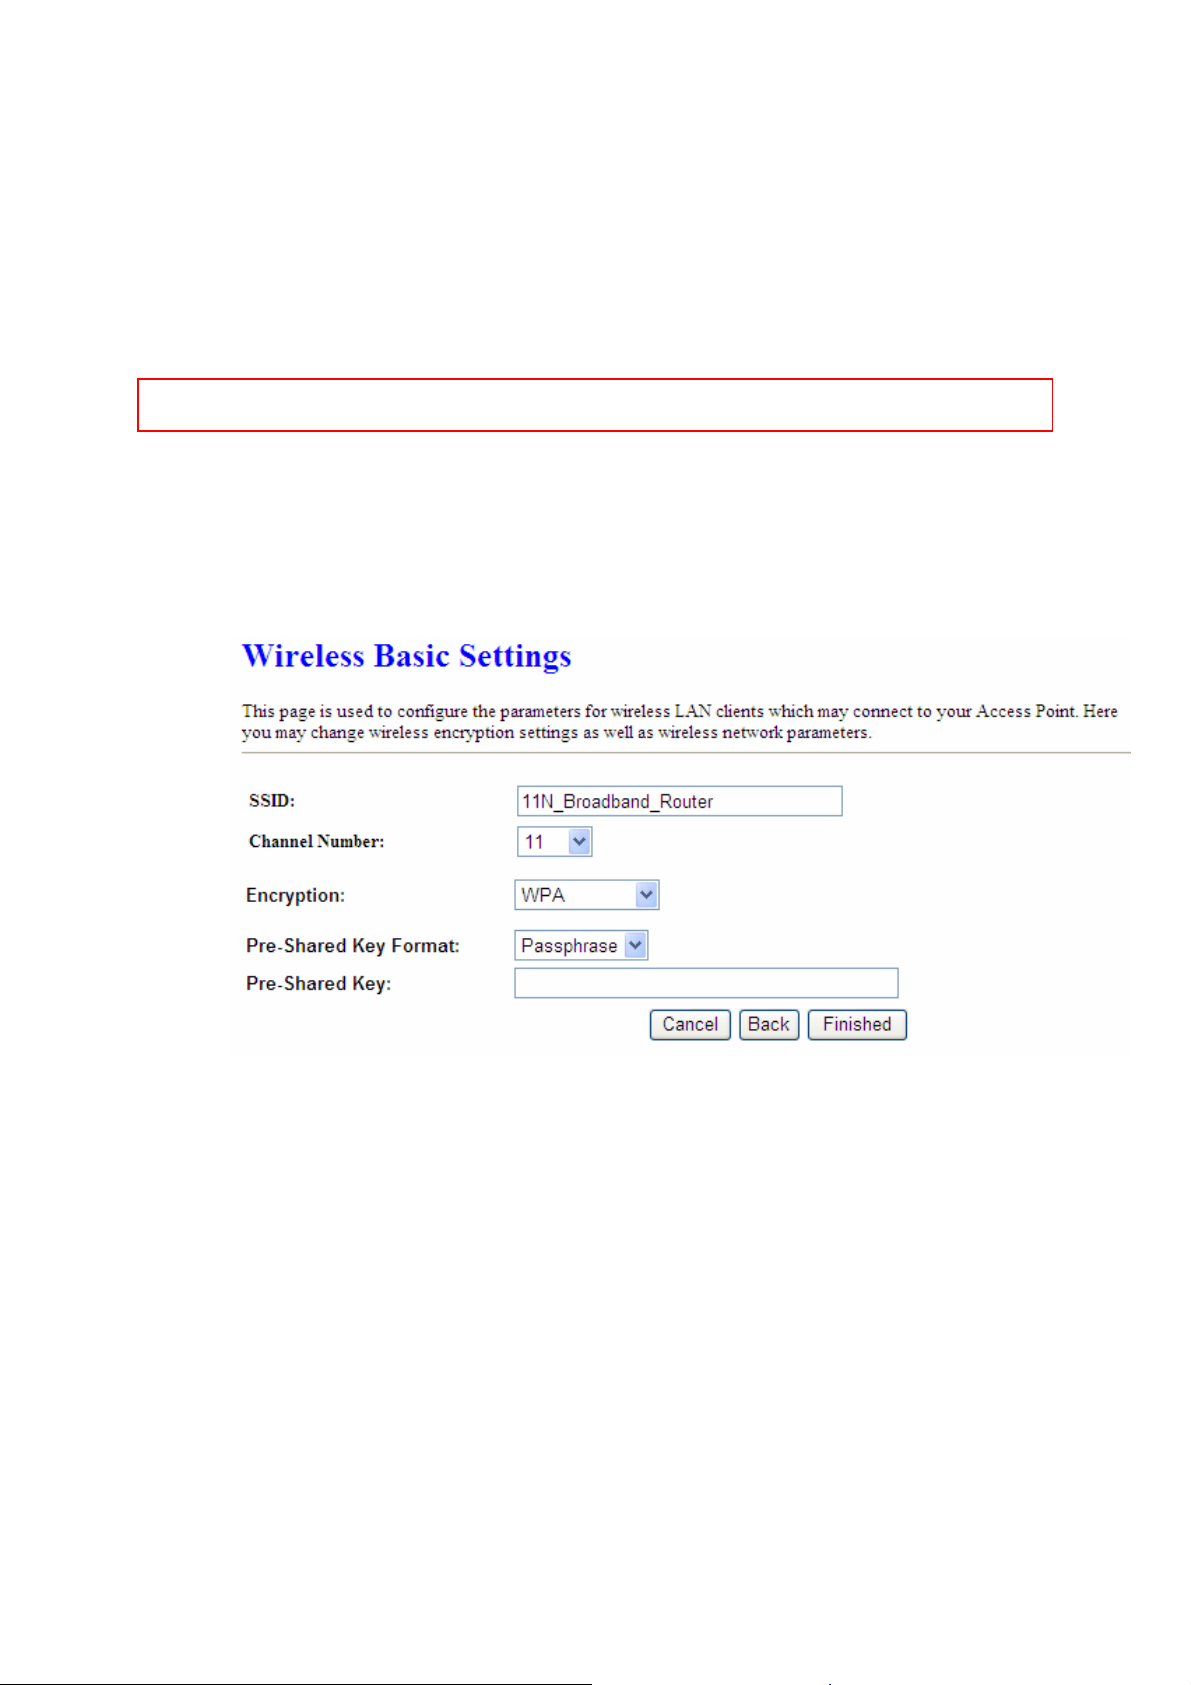
b. Encrypt Type - WPA, WPA2 & WPA2 Mixed
The WPA and WPA2 encrypt each frame transmitted from the radio using the
pre-shared key (PSK) which entered from this panel or a key got dynamically
through 802.1x.
WPA (TKIP) and WPA2 (TKIP):
Allow the access from WPA clients simultaneously
and the encryption keys are given from PSK respectively.
Pre-Shared Key Format: The keys can be entered in ASCII, 8~63 ASCII characters,
for example, “0123456789ABCD….” or Hex, 64 bytes hexadecimal digits (0~9, a~f,
and A~F). Select the item from drop-down list you wish to use and enter your
Pre-Shared Key.
After checking each above and choose the suitable item by demand, click Finished to
proceed.
5.2.4 Basic Setup Complete
30
 Loading...