


Quick start guide
S5 SIM Wi-Fi Secual
www.etiger.com


EN

Contents
- S5 Control panel x1
- ES-D2A (Pet-immune motion sensor) x1
- ES-D3D (Door / Window contact) x2
- ES-RC1N (Remote controls) x2
- ES-T1A (RFID badge) x2
Panel design
- AC Adapter x1
- Screws and anchors
- SIM adaptor
- Documentation
Searching GSM network: Blinks once every second
GSM signal is normal: Signal is constantly on
LED
SIM CARD SLOT
GSM Signal Indicator
RFID reader
Arm
Disarm
Home arm
Button sounds
Wi-Fi connection
EnterCallSOS
TamperSpeaker
12VDC INPUT
ON/OFF SWITCH

Specications
EN
Product name
S5 SIM Wi-Fi Secual
Power Supply
Input: AC 110-240V / 50-60 Hz
Output: DC 12V / 1A
Wi-Fi
2.4GHz 802.11 b/g/n
GSM- frequency
GSM:850 / 900 / 1800 / 1900 MHz
Radio-frequency
433 + 868MHz
Transmission distance
< 80M in open space
Backup batteries
Lithium Batteries: 7.4V / 600 mAh
Internal siren
95dB
Housing material
ABS plastic
Operating conditions
Temperature: -10°C~55°C
Humidity: 80% (non-condensing)
Control panel dimensions (L x W x H)
205 x 135 x 28 mm
Transmission power
Max. radio transmit power : 10 dBm
antenna gain : 2 dBi
Note
This is not a full manual, but a quick connection guide. For more functionalities
and SMS or app setup, please download the manual on www.etiger.com

Panel LED signals
Alarm
status
White LED
OFF : There is not alarm triggered
LED “A” Blink ing : When the alarm is triggered
from Normal Zone sensor
LED “B” Blinking : When the alarm is triggered
from Home Zone sensor
LED “C” Blinking : When the alarm is triggered
from Delay Zone sensor
LED “D” Blinking : When the alarm is triggered
from 24H Zone sensor
LED “ABCD” Blinking : When the alarm is
triggered from SOS or Panel tamper
GSM Status
White LED
Wi-Fi Status
White LED
System
Status
Blue LED
Settings
Status
White LED
Power
Status
Green LED
OFF : No SIM card or GSM function is disable
ON : GSM network is ready
Blinking : Search GSM network
OFF : WIFI is disable
ON : Connect to the servers
Blinking : During Wi-Fi setting mode
ON—System armed
OFF—System disarmed
Blinking—System armed in home mode
ON--RF connection mode
Continue Blinking--System settings mode
OFF--There is no signal detected
ON—DC power is connected
Blinking—DC power is disconnected

This step only applies
if you are using your system with a SIM card.
1
Control panel’s SIM
card
Insert a SIM card in the control panel
You will need a SIM card if you wish to interact with your alarm by SMS and
phone calls.
Important
- Make sure the SIM card is not protected by a PIN code.
- We advise you to choose a plan with unlimited text and 1 or 2 hours of call.
The SIM card must be compatible with a 2G GSM network. Contact your
carrier for more information.
- Insert the SIM card before turning on your system.
- For more SMS options download the manual on www.etiger.com

2
OFF
ON
Turn the control panel on
Plug the output connector of the AC adaptor into the adaptor interface
in the battery compartment at the back of the control panel. Plug the AC
adaptor to an AC socket. Turn the power switch to “ON” and put back the
cover of the battery compartment. The control panel is turning on.
Attention
Make sure you have inserted a SIM card in the control panel before turning it on. If you insert a SIM card after rst connection, always make sure
to turn the control panel “OFF” before inserting the SIM card.

EN
3
Get your app ready
1. Download the ”eTIGER Home” app on your smartphone (on the App
Store and Google Play).
2. Open the ”eTIGER Home” app on your smartphone.
3. Register by your Mobile number and/or e-mail address.
4. Login and create a location (or home) for your alarm. Make sure you are
connected to your home network.
“SIM card only” users
If you are using the this alarm with a SIM card and cannot use the iOS and
Android apps, read the full manual to learn more about interaction by SMS
and phone call. Full manual is available on etiger.com

4
Connect the alarm to your app (EZ mode)
Step 1 : Enter Wi-Fi Connection Mode on your alarm.
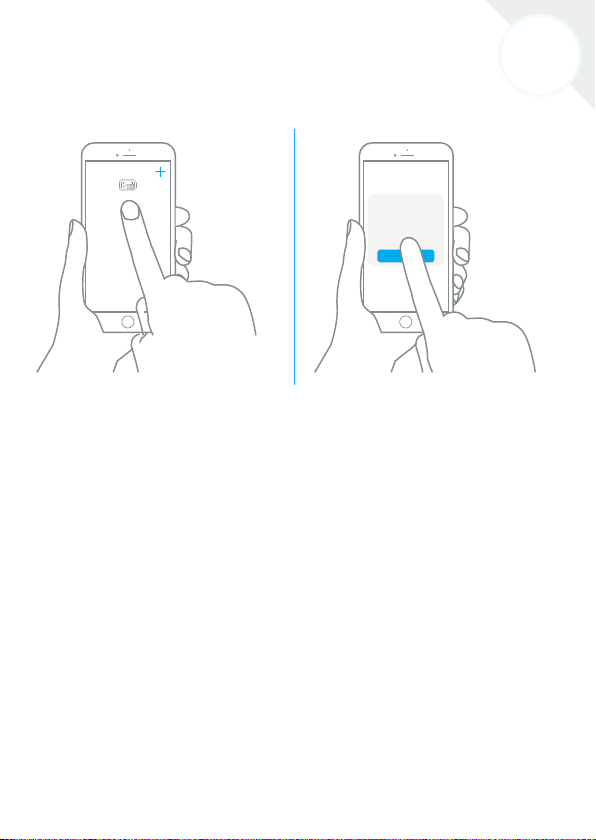
Press the Admin code 123456 +
Attention
Ensure the system is disarmed, the Blue LED is OFF. After entering Wi-Fi connection mode, the Wi-Fi white LED starts to blink fast. now your alarm is ready to
connect to your home network.
Step 2 : In your app, choose the device you will add : choose “Add device” or “+”
and “Smart Alarm” . The app will ask if the LED is blinking fast. Conrm if this is
the case.
Note
Make sure to connect your alarm system to a 2.4 GHz network. eTIGER alarmsystems do not work with 5.0 Ghz network. If expierincing any problems, please rst
contact your network provider.

EN
Smart Alarm
Your Wi-Fi
SSID
Your Password
XXXXXXXXX
CONFIRM
Step 3 : Set the Wi-Fi network you will need your alarm to connect with. If your
are already connected to your home network the app will automatically use this
network.
Enter the Wi-Fi password of the router, conrm, and wait for about 20 seconds to
get a response (until the %-circle in the app reached 100%)
Step 4 : After connection procedure is complete , you can set the alarm name to
complete the connection.
Note
There are two ways to connect the alarm to your app : EZ and AP mode.
please use the AP mode when you cannot connect your alarm as described
above. A Full manual is available on etiger.com

Your system is ready.
Now what happens if the alarm is triggered?
Notications over Wi-Fi
- The siren of the control panel rings out.
- You will receive a notication over Wi-Fi or 4G that the alarm has been
triggered.
When using a SIM card*
- If there is a SIM card in your control panel, you also receive an SMS notifying
you that the alarm has been triggered.
- You receive a phone call. Pick up the call: you hear a voice prompt giving you a
list of options (stop the siren, disarm the system, start audio surveillance etc.)
APP interface
ARM
DISARM
HOME ARM
Settings
Accessories
Records

Accessories
EN
Motion detector
We recommend to mount the detector
at a height of 2.2m in a 90° angle . The
detector does not detect animals under
25 kg. Avoid mounting the detectors in
areas with a large amount of metal or
electrical devices.
90°
2.2m
<25kg
Understanding the standby mode
If the detector is triggered more than twice within 3 minutes,
it switches to standby mode to save power. During standby
mode, the detector is inactive. If within the next 3 minutes a
new movement is detected, the standby mode is extended
by 3 minutes. If no movement is detected within the next 3
minutes, the sensor is activated again.
Door contacts
Mount the magnet with double-sided
tape on the door and the door frame
respectively.

Advanced settings
Advanced setup
For more settings, please refer to the user manual of the control panel, available
for download on
Connect more accessories
On the control panel, type your admin code (default code: 123456*) followed by the
key : your control panel is now in Connection mode.
Within the next 15 seconds, trigger the accessory you wish to connect (for a RFID
tag, swipe it in front of the RFID reader of the control panel). You hear one beep:
the accessory is registered.
A piece of advice
All eTIGER accessories in the box are already precongured to your control panel.
You do not need to add them again.
Change the access code
Do not forget to change your access code. To change your access code, send
“13” by SMS to the control panel or change your code by app in the settings
menu of your device.
www.etiger.com
Full manual
For more settings, please refer to the user manual of the control panel, which can
be downloaded at
www.etiger.com

EN
Precaution
For a safer use of the product and to optimize the lifespan of the product, we
recommend you to follow the precautions below:
- The wireless accessories must be connected to the control panel.
- Low power voltage may aect transmission distance.
- Do not press the SOS key on the remote control if it is unnecessary to avoid
disturbing neighborhood.
- Check the system regularly to make sure the system works properly.
- The control panel is neither waterproof nor moisture-proof, install it in a shady,
cool and dry place.
- The case of the control panel is made of ABS plastic. Keep away from bright
light for a longer lifespan.
- The control panel is not explosion-proof. Keep away from re and ames.
- Install the control panel away from objects such as heater, air conditioner,
microwave oven etc. that generate heat or electromagnetic elds.
- Dispose of the batteries according to local regulations.
- Dismantling of this product must be done by professional personnel only.
Images, illustrations and text are non-contractual. eTIGER and the eTIGER logo
are registered trademarks and the property of eTIGER. Copyright © 2019 eTIGER.
All rights reserved.

Standards
This product bears the selective sorting symbol for waste electrical and electronic equipment (WEEE). This means that this product must be handled pursuant
to European Directive 2012/19/EU in order to be recycled or dismantled to
minimize its impact on the environment.
For further information, please contact your local or regional authorities.
Electronic products not included in the selective sorting process are potentially
dangerous for the environment and human health due to the presence of hazardous substances.
In compliance with European laws. This product is in compliance with the essential requirements and other relevant provisions of Directive 2014/53/EU.
This product was designed and manufactured in compliance with Directive
2011/65/EU of the European Parliament and of the Council on the restriction of
use of certain hazardous substances in electrical and electronic equipment (RoHS
Directive - RoHS) and is deemed to comply with the maximum concentration
values set by the European Technical Adaptation Committee (TAC).
Manufactured in China.
Images, illustrations and text are non-contractual. eTIGER and the eTIGER logo
are registered trademarks and the property of eTIGER.
Copyright © 2019 eTIGER. All rights reserved.

DE

Inhalt
- S5 Bedienfeld x 1
- ES-D2A (Haustierimmuner
Bewegungssensor) x 1
- ES-D3D (Tür-/Fensterkontakt) x 2
- ES-RC1N (Fernbedienungen) x 2
- ES-T1A (RFID-Badge) x 2
Bedienfeld-Design
Suchen GSM-Netz: Blinkt einmal pro Sekunde
GSM-Signal ist normal: Signal ist ständig an
LED
GSM-Signalanzeige
Lautspre-
cher
- Netzteil x 1
- Schrauben und Dübel
- SIM-Adapter
- Dokumentation
RFID-Lesegerät
Scharfschalten
Entschärfen
Haus scharfschalten
Tastentöne
WLAN-Verbindung
EingangAnrufSOS
Sabotage
SIM-KARTEN-STECKPLATZ
12 V DC-EINGANG
EIN/AUS-SCHALTER

Technische daten
DE
Produktname
S5 SIM WLAN Secual
Stromzufuhr
Eingang: AC 110-240 V / 50-60 Hz
Leistung: DC 12 V / 1 A
WLAN
2,4 GHz 802,11 b/g/n
GSM-Frequenz
GSM: 850 / 900 / 1800 / 1900 MHz
Funkfrequenz
433 + 868 MHz
Übertragungsreichweite:
80 m (im freien Raum)
Sicherungsakkus
Lithium-Akkus: 7,4 V 600
mAh
Interne Sirene
95 dB
Gehäusematerial
ABS-Kunststo
Betriebsbedingungen
Temperatur: -10 °C ~ 55 °C
Luftfeuchtigkeit: 80% (nicht kondensierend)
Abmessungen Bedienfeld (L x B x H)
205 x 135 x 28 mm
Transmission power
Max. radio transmit power : 10 dBm
antenna gain : 2 dBi
Hinweis
Dies ist keine vollständige Anleitung, sondern eine Kurzanleitung für den
Anschluss. Für weitere Funktionalitäten und die Einrichtung von SMS oder Apps
laden Sie bitte das Handbuch herunter auf www.etiger.com

Bedienfeld LED-Signale
AUS: Es wird kein Alarm ausgelöst
LED „A“ blinkt: Wenn der Alarm ausgelöst wird
vom normalen Bereichssensor
LED „B“ blinkt: Wenn der Alarm ausgelöst wird
Alarmstatus
Weiße LED
vom Heimbereichssensor
LED „C“ blinkt: Wenn der Alarm ausgelöst wird
vom Verzögerungsbereichssensor
LED „D“ blinkt: Wenn der Alarm ausgelöst wird
vom 24-h-Bereichssensor
LEDs „ABCD“ blinkten: Wenn der Alarm ausgelöst
wird
wegen SOS oder Bedienfeldsabotage
GSM-Status:
Weiße LED
WLAN-Status
Weiße LED
System
Status
Blaue LED
Einstellungen
Status
Weiße LED
Leistung
Status
Grüne LED
AUS: Keine SIM-Karte oder GSM-Funktion deaktiviert
EIN: GSM-Netz bereit
Blinken: Suche GSM-Netz
AUS: WLAN ist deaktiviert
EIN: Mit Servern verbinden
Blinken: Während WLAN-Einstellmodus
EIN — System scharfgeschaltet
AUS — System entschärft
Blinken — System scharfgeschaltet in Heimmodus
EIN — Funkverbindungsmodus
Weiteres Blinken — Systemeinstellungsmodus
AUS — Es wird kein Signal erkannt
EIN — DC-Leistung ist verbunden
Blinken — DC-Leistung ist unterbrochen

Dieser Schritt gilt nur,
wenn Sie Ihr System mit einer SIM-Karte verwenden.
1
Control panel’s SIM
card
SIM-Karte in das Bedienfeld einfügen
Sie benötigen eine SIM-Karte, wenn Sie mit Ihrem Alarm per SMS und Telefon
kommunizieren wollen.
Wichtig
- Stellen Sie sicher, dass die SIM-Karte nicht durch einen PIN-Code geschützt
ist.
- Wir raten Ihnen, ein Angebot mit unbegrenztem Text und 1 oder 2
Stunden Anrufzeit zu wählen. Die SIM-Karte muss mit einem 2G-GSM-Netz
kompatibel sein. Kontaktieren Sie Ihren Anbieter für mehr Informationen.
- Legen Sie die SIM-Karte ein, bevor Sie Ihr System einschalten.
- Für weitere SMS-Optionen laden Sie das Handbuch herunter auf
www.etiger.com

2
OFF
ON
Schalten Sie das Bedienfeld ein
Stecken Sie den Ausgangsstecker des AC-Netzteils in die Adapter-Schnittstelle im Akkufach auf der Rückseite des Bedienfeldes. Schließen Sie das
Netzteil an eine Steckdose an. Schalten Sie den Netzschalter auf “EIN”
und setzen Sie die Abdeckung des Akkufachs wieder ein. Das Bedienfeld
schaltet sich ein.
Achtung
Überprüfen Sie, ob Sie eine SIM-Karte in das Bedienfeld eingelegt haben,
bevor Sie es einschalten. Wenn Sie eine SIM-Karte nach der ersten Verbindung einsetzen, überprüfen Sie immer, dass das Bedienfeld auf “AUS”
geschaltet ist, bevor Sie die SIM-Karte einsetzen.

DE
3
App einrichten
1. Laden Sie die App ”eTIGER Home” auf Ihr Smartphone herunter (im App
Store und auf Google Play).
2. Önen Sie die App ”eTIGER Home” auf Ihrem Smartphone.
3. Registrieren Sie sich mit Ihrer Handynummer und/oder E-Mail-Adresse.
4. Melden Sie sich an und erstellen Sie einen Ort (oder ein Heim) für Ihren
Alarm. Stellen Sie sicher, dass Sie mit Ihrem Heimnetzwerk verbunden
sind.
“Nur SIM-Karten-Benutzer”
Wenn Sie diesen Alarm mit einer SIM-Karte verwenden und Sie iOS- und Android-Apps nicht nutzen können, lesen Sie das komplette Handbuch, um mehr
über die Interaktion per SMS und Telefonanruf zu erfahren. Das komplette
Handbuch ist verfügbar auf etiger.com

4
Verbinden Sie den Alarm mit Ihrer App (EZ-Modus)
Schritt 1: Rufen Sie in den WLAN-Verbindungsmodus Ihres Alarms auf: Drücken
Sie den Admin-Code 123456 +
Achtung
Überprüfen Sie, ob das System entschärft ist, die blaue LED ist AUS. Nach dem
Aufrufen des WLAN-Verbindungsmodus beginnt die weiße WLAN-LED schnell zu
blinken. Jetzt ist Ihr Alarm bereit, sich mit Ihrem Heimnetzwerk zu verbinden.
Schritt 2: Wählen Sie in Ihrer App das Gerät, das Sie hinzufügen möchten: Wählen
Sie “Gerät hinzufügen” oder “+” und “Smart-Alarm”. Die App fragt nach, wenn die
LED schnell blinkt. Bestätigen Sie, sollte dies der Fall sein.
Hinweis
Stellen Sie sicher, dass Sie Ihr Alarmsystem an ein 2,4 GHz-Netzwerk anschließen.
eTIGER-Alarmsysteme funktionieren nicht mit einem 5,0 GHz-Netzwerk. Bei
Problemen wenden Sie sich bitte zunächst an Ihren Netzbetreiber.

DE
Smart Alarm
Your Wi-Fi
SSID
Your Password
XXXXXXXXX
CONFIRM
Schritt 3: Wählen Sie das WLAN-Netzwerk, mit dem Sie Ihren Alarm verbinden
möchten. Wenn Sie bereits mit Ihrem Heimnetzwerk verbunden sind, wird die
App dieses Netzwerk automatisch nutzen.
Geben Sie das WLAN-Passwort des Routers ein, bestätigen Sie und warten Sie
ca. 20 Sekunden, um eine Antwort zu erhalten (bis der %-Kreis in der App 100%
erreicht hat)
Schritt 4:
Nach Abschluss des Verbindungsvorgangs können Sie den Alarmnamen einstellen, um die Verbindung abzuschließen.
Hinweis
Es gibt zwei Möglichkeiten, den Alarm mit Ihrer App zu verbinden: EZ- und
AP-Modus. Bitte verwenden Sie den AP-Modus, wenn Sie Ihren Alarm nicht wie
oben beschrieben verbinden können. Das komplette Handbuch ist verfügbar auf
www.etiger.com

Ihr System ist bereit.
Was passiert nun, wenn der Alarm ausgelöst wird?
Benachrichtigungen über WLAN
1. Die Sirene des Bedienfeldes ertönt.
2. Sie erhalten eine Benachrichtigung über WLAN oder 4G, dass der Alarm
ausgelöst wurde.
Wenn Sie eine SIM-Karte verwenden*
3. Wenn eine SIM-Karte in Ihr Bedienfeld eingefügt ist, erhalten Sie zusätzlich
eine SMS, die Sie darüber informiert, dass der Alarm ausgelöst wurde.
4. Sie erhalten einen Anruf. Anruf entgegennehmen: Sie hören eine
Sprachausgabe, die Ihnen eine Liste von Optionen bietet (Stoppen der
Sirene, Entschärfen des Systems, Starten der Audioüberwachung usw.)
APP interface
SCHARFSCHALTEN
HAUS SCHARFSCHALTEN
ENTSCHÄRFEN
Einstellungen
Zubehör
Aufzeichnungen

Zubehör
DE
Bewegungsmelder
Wir empfehlen, den Bewegungsmelder
in einer Höhe von 2,2 Metern und 90 °
Winkel anzubringen . Der Bewegungsmelder erkennt keine Tiere unter 25
kg. Vermeiden Sie, Bewegungsmelder
in einem Bereich mit viel Metallgegenständen oder elektrischen Geräten
anzubringen.
Den Standby-Modus verstehen
Wird der Melder innerhalb von 3 Minuten mehr als zweimal ausgelöst,
schaltet er auf Standby-Modus, um Strom zu sparen. Im Standby-Modus
ist der Melder inaktiv. Wird innerhalb der nächsten 3 Minuten eine neue
Bewegung erkannt, verlängert sich der Standby-Modus um 3 Minuten.
Wird innerhalb der nächsten 3 Minuten keine Bewegung erkannt, wird
der Sensor wieder aktiviert.
90°
2.2m
<25kg
Türkontakte
Montieren Sie den Magneten mit doppelseitigem Klebeband jeweils an der Tür und dem
Türrahmen.

Erweiterte Einstellungen
Für die Installation Ihres Zubehörs lesen Sie bitte das vollständige Handbuch von
www.etiger.com.
Mehr Zubehör anschließen
Geben Sie auf dem Bedienfeld Ihren Admin-Code (Standard-Code: 123456*) ein,
gefolgt von der Taste : Ihr Bedienfeld bendet sich nun im Verbindungsmodus.
Rufen Sie innerhalb der nächsten 15 Sekunden das anzuschließende Zubehör ab
(einen RFID-Tag ziehen Sie vor den RFID-Leser des Bedienfeldes). Es ertönt ein
Piepton: Das Zubehör ist registriert.
Gut zu wissen
Alle eTIGER-Zubehörteile in der Box sind bereits auf Ihrem Bedienfeld vorkonguriert. Sie müssen sie nicht erneut hinzufügen.
Ändern des Zugangscodes
Vergessen Sie nicht, Ihren Zugangscode zu ändern. Um Ihren Zugangscode
zu ändern, senden Sie “13” per SMS an das Bedienfeld oder ändern Sie Ihren
Code per App im Einstellungsmenü Ihres Geräts.
Komplettes Handbuch
Weitere Einstellungen entnehmen Sie bitte dem Handbuch des Bedienfeldes,
verfügbar zum Herunterladen auf www.etiger.com

DE
Vorsichtsmaßnahmen
Für einen sichereren Gebrauch und zur Optimierung der Lebensdauer des Produkts empfehlen wir Ihnen, die folgenden Vorsichtsmaßnahmen zu beachten:
- Das drahtlose Zubehör muss mit dem Bedienfeld verbunden werden.
- Eine niedrige Leistung kann die Übertragungsdistanz beeinträchtigen.
- Drücken Sie nicht die SOS-Taste der Fernbedienung, wenn es nicht nötig ist,
um die Nachbarschaft nicht zu stören.
- Überprüfen Sie das System regelmäßig, um sicherzustellen, dass es
ordnungsgemäß funktioniert.
- Das Bedienfeld ist weder wasserdicht noch feuchtigkeitsdicht, installieren Sie
es an einem schattigen, kühlen und trockenen Ort.
- Das Gehäuse des Bedienfeldes ist aus ABS-Kunststo gefertigt. Für eine
längere Lebensdauer darf es keinem hellen Licht ausgesetzt sein.
- Das Bedienfeld ist nicht explosionsgeschützt. Halten Sie es von Feuer und
Flammen fern.
- Installieren Sie das Bedienfeld entfernt von Gegenständen wie Heizung,
Klimaanlage, Mikrowellenherd usw., die Wärme oder elektromagnetische
Felder erzeugen.
- Entsorgen Sie die Akkus gemäß den örtlichen Vorschriften.
- Die Demontage dieses Produkts darf nur von Fachpersonal durchgeführt
werden.
Bilder, Illustrationen und Texte sind nicht vertraglich bindend. eTIGER und das
eTIGER-Logo sind eingetragene Warenzeichen und Eigentum von eTIGER. Copyright © 2019 eTIGER Alle Rechte vorbehalten.

Standards
Dieses Produkt trägt das Entsorgungssymbol für Elektromüll und elektronische
Geräte (WEEE). Das bedeutet, dass dieses Produkt gemäß der europäischen
Direktive 2012/19/EU gehandhabt werden muss, um mit nur minimalen umweltspezischen Auswirkungen recycelt oder zerlegt werden zu können. Weitere
Informationen erhalten Sie von Ihren regionalen Behörden. Elektronikprodukte,
die nicht durch den selektiven Entsorgungsvorgang erfasst werden, stellen durch
das Vorhandensein potenziell gefährlicher Substanzen umwelt- und gesundheitsrelevante Risiken dar.
In Übereinstimmung mit europäischen Gesetzen. Dieses Produkt entspricht
den wesentlichen Anforderungen und anderen relevanten Bestimmungen der
Richtlinie 2014/53/EU.
Dieses Produkt wurde in Übereinstimmung mit der Direktive 2011/65/EU des
Europaparlaments und des Rats bezüglich der Verwendungseinschränkung
bestimmter gefährlicher Substanzen in elektrischen und elektronischen Geräten
(RoHS-Direktive - RoHS) entwickelt und hergestellt und erfüllt die Anforderungen für maximale Konzentrationswerte, die vom European Technical Adaptation
Committee (TAC) festgelegt wurden.
Hergestellt in China.
Bilder, Abbildungen und Text sind unverbindlich. eTIGER und das eTIGER-Logo
sind eingetragene Marken und das Eigentum von eTIGER. Copyright © 2019
eTIGER. Alle Rechte vorbehalten

FR

Contenu
- 1panneau de commande S5
- 1ES-D2A (détecteur de mouvement
compatible avec les animaux de compagnie)
- 2ES-D3D (détecteurs d’ouverture de porte/
fenêtre)
- 2ES-RC1N (télécommandes)
- 2ES-T1A (badges RFID)
- 1adaptateur CA
- Vis et ancrages
- Adaptateur SIM
- Documentation
Présentation du panneau de commande
Recherche du réseau GSM : clignote toutes les secondes
Signal GSM normal : Le signal est constamment allumé
LED
Témoin de signal GSM
Haut-
parleur
Protection
anti-sabotage
EnterAppelSOS
Lecteur RFID
Armement
Désarmement
Armement en mode
Home
Son des boutons
Connexion Wi-Fi
LOGEMENT POUR
CARTE SIM
ENTRÉE 12VCC
INTERRUPTEUR ON/
OFF

Spécications
FR
Nom du produit
S5 SIM Wi-Fi Secual
Alimentation électrique
Entrée: 110-240VCA / 50-60Hz
Sortie: 12VCC / 1A
Wi-Fi
2,4GHz 802.11 b/g/n
Fréquence GSM
GSM: 850 / 900 / 1800 /
1900MHz
Radiofréquence
433 + 868MHz
Distance de transmission
< 80m en champ libre
Piles de secours
Piles au lithium: 7,4V / 600mAh
Sirène intérieure
95dB
Matériau du boîtier
Plastique ABS
Conditions d’utilisation
Température: -10°C~55°C
Humidité: 80% (sans condensation)
Dimensions du panneau de commande (L x l x H)
205 x 135 x 28mm
Transmission power
Max. radio transmit power : 10 dBm
antenna gain : 2 dBi
Remarque
Ce document n’est pas un manuel complet, mais un guide de démarrage rapide.
Pour découvrir d’autres fonctionnalités et la conguration des SMS ou de l’application, veuillez télécharger le manuel sur le site www.etiger.com.

Témoins LED du panneau de commande
Éteinte: pas d’alarme déclenchée
LED «A» clignotante: alarme déclenchée
par le détecteur de la zone normale
Statut
alarme
LED
blanche
LED «B» clignotante: alarme déclenchée
par le détecteur de la zone Maison
LED «C» clignotante: alarme déclenchée
par le détecteur de la zone Temporisation
LED «D» clignotante: alarme déclenchée
par le détecteur de la zone 24h
LED «ABCD» clignotantes: alarme déclenchée
par le bouton SOS ou une violation du panneau
Statut GSM
LED
blanche
Statut Wi-Fi
LED
blanche
Statut
système
LED bleue
Statut
paramètres
LED
blanche
Statut
alimentation
LED verte
Éteinte: pas de carte SIM ou fonctionnalité
GSM désactivée
Allumée: réseau GSM disponible
Clignotante: recherche du réseau GSM
Éteinte: Wi-Fi désactivé
Allumée: connexion aux serveurs
Clignotante: en mode de conguration du
Wi-Fi
Allumée: système armé
Éteinte: système désarmé
Clignotante: système armé en mode Home
Allumée: mode de connexion RF
Clignotement continu: mode de conguration
du système
Éteinte: aucun signal détecté
Allumée: alimentation CA branchée
Clignotante: alimentation CA débranchée

Cette étape s’applique uniquement
si vous utilisez une carte SIM.
1
Control panel’s SIM
card
Insérez une carte SIM dans le panneau de commande
Vous avez besoin d’une carte SIM si vous souhaitez interagir avec votre système d’alarme par SMS ou appel téléphonique.
Important
- Assurez-vous que la carte SIM ne soit pas protégée par un code PIN.
- Nous vous conseillons de choisir un plan de paiement avec SMS illimités et
une ou deux heures d’appel inclus. La carte SIM doit être compatible avec le
réseau GSM 2G. Contactez votre opérateur pour plus d’informations.
- Insérez la carte SIM avant d’allumer le système.
- Pour découvrir d’autres options SMS, téléchargez le manuel sur le site
www.etiger.com.

2
OFF
ON
Allumez le panneau de commande
Branchez le connecteur de sortie de l’adaptateur CA sur l’interface de
l’adaptateur dans le compartiment des piles à l’arrière du panneau de
commande. Branchez l’adaptateur CA sur une prise CA. Placez l’interrupteur sur «ON», puis remettez le couvercle du compartiment des piles en
place. Le panneau de commande s’allume.
Attention
Assurez-vous d’avoir inséré une carte SIM dans le panneau de commande avant de l’allumer. Si vous insérez une carte SIM après la première
connexion, n’oubliez jamais d’éteindre le panneau de commande (interrupteur sur «OFF») avant d’insérer la carte SIM.

3FR4
Préparez votre application
1. Téléchargez l’application «eTIGER Home» sur votre smartphone
(disponible dans l’App Store et sur Google Play).
2. Ouvrez l’application «eTIGER Home» sur votre smartphone.
3. Enregistrez-vous au moyen de votre numéro de téléphone mobile et/ou
de votre adresse e-mail.
4. Connectez-vous et créez un emplacement (ou domicile) pour votre
système d’alarme. Assurez-vous d’être connecté à votre réseau
domestique.
Utilisateurs «carte SIM uniquement»
Si vous utilisez ce système d’alarme avec une carte SIM et que vous n’êtes pas
en mesure d’utiliser les applications iOS et Android, lisez le manuel complet
pour en savoir plus sur les interactions par SMS et appel téléphonique. Le
manuel complet peut être consulté sur etiger.com.

Connectez votre système d’alarme à votre application
(mode EZ)
Étape 1: accédez au mode Connexion Wi-Fi sur votre système d’alarme: tapez le
code Admin 123456 +
Attention
Assurez-vous que le système soit désarmé (la LED bleue doit être éteinte). Une
fois en mode Connexion Wi-Fi, la LED blanche du statut Wi-Fi se met à clignoter rapidement. Votre système d’alarme est prêt à se connecter à votre réseau
domestique.
Étape 2: dans l’application, choisissez l’appareil que vous souhaitez ajouter:
Sélectionnez «Ajouter appareil» ou «+» et «Alarme intelligente». L’application
demande si la LED clignote rapidement. Conrmez si c’est bien le cas.
Remarque
Assurez-vous de connecter votre système d’alarme à un réseau 2,4GHz. Les systèmes d’alarme eTIGER ne sont pas compatibles avec le réseau 5,0GHz. Si vous
rencontrez des problèmes, commencez par contacter votre opérateur de réseau.

FR
Smart Alarm
Your Wi-Fi
SSID
Your Password
XXXXXXXXX
CONFIRM
Étape 3: sélectionnez le réseau Wi-Fi auquel vous souhaitez que votre système
d’alarme se connecte. Si vous êtes déjà connecté à votre réseau domestique,
l’application l’utilisera automatiquement.
Introduisez le mode de passe Wi-Fi du routeur, conrmez, puis attendez environ
20secondes avant d’avoir une réponse (le cercle % de l’application doit avoir
atteint 100%).
Étape 4: une fois la procédure de connexion terminée, vous pouvez indiquer le
nom du système d’alarme pour clôturer.
Remarque
Il y a deux manières de connecter le système d’alarme à l’application: le mode
EZ et le mode AP. Utilisez le mode AP lorsque vous ne parvenez pas à connecter
votre système d’alarme via la procédure ci-dessus. Le manuel complet peut être
consulté sur etiger.com.

Votre système d’alarme est prêt.
Que se passe-t-il si l’alarme se déclenche?
Notications via Wi-Fi
1. La sirène du panneau de commande retentit.
2. Vous recevez une notication via le réseau Wi-Fi ou 4G indiquant que
l’alarme s’est déclenchée.
Si vous utilisez une carte SIM*
3. Si vous avez inséré une carte SIM dans votre panneau de commande, vous
recevez aussi une notication par SMS vous prévenant que l’alarme s’est
déclenchée.
4. Vous recevez un appel. Décrochez: vous entendrez un message vous
invitant à faire votre choix parmi une série d’options (arrêter la sirène,
désarmer le système, lancer la surveillance audio, etc.).
APP interface
ARMEMENT
DÉSARMEMENT
ARMEMENT EN MODE
HOME
Paramètres
Accessoires
Enregistrements

Accessories
FR
Détecteur de mouvement
Nous conseillons d’installer le détecteur à 2,2m
de hauteur et angle de 90°. Le détecteur ne
repère pas les animaux de moins de 25kg. Évitez
de placer les détecteurs dans des zones où se
trouvent de nombreux appareils en métal ou
dispositifs électriques.
90°
2.2m
<25kg
Comprendre le mode veille
Si le détecteur se déclenche plus de deux fois en 3minutes, il
passe en mode veille pour économiser de l’énergie. Le détecteur
est désactivé lorsqu’il est en mode veille. Si un nouveau mouvement est décelé au cours des 3minutes suivantes, le mode veille
est prolongé de 3minutes. Si aucun mouvement n’est détecté au
cours des 3minutes suivantes, le capteur est réactivé.
Détecteurs d’ouverture de
porte
Installez l’aimant à l’aide d’un adhésif double
face sur la porte d’une part, et sur l’encadrement
de la porte d’autre part.

Paramètres avancés
Pour savoir comment installer les accessoires, consultez le manuel complet sur le
site www.etiger.com.
Connectez plus d’accessoires
Tapez votre code Admin sur le panneau de commande (code par défaut:
123456*) suivi de la clé: votre panneau de commande est à présent en mode
Connexion.
Au cours des 15prochaines secondes, activez l’accessoire que vous souhaitez
connecter (s’il s’agit d’un badge RFID, passez-le devant le lecteur RFID du panneau de commande). Si vous entendez un bip sonore, l’accessoire est enregistré.
Conseil
Tous les accessoires eTIGER fournis sont déjà précouplés à votre panneau de
commande. Vous ne devez pas les réajouter.
Modiez le code d’accès
N’oubliez pas de modier votre code d’accès. Pour ce faire, envoyez «13»
par SMS au panneau de commande ou modiez votre code par application
dans le menu des paramètres de votre appareil.
Manuel complet
Pour plus de paramètres, veuillez consulter le manuel d’utilisation du panneau
de commande, téléchargeable sur www.etiger.com.

FR
Précautions
Pour garantir une utilisation sûre du produit et optimiser sa durée de vie, nous
vous recommandons de prendre les précautions suivantes:
- Connectez les accessoires sans l au panneau de commande.
- Une basse tension peut inuencer la distance de transmission.
- N’appuyez pas sur le bouton SOS de la télécommande si ce n’est pas
nécessaire pour éviter de déranger vos voisins.
- Inspectez régulièrement le système pour vérier s’il fonctionne correctement.
- Le panneau de commande n’étant étanche ni à l’eau, ni à l’humidité, installez-
le dans un endroit sec, frais et à l’abri de la lumière.
- Le boîter du panneau de commande se compose de plastique ABS. Évitez de
l’exposer à une source lumineuse puissante pour prolonger sa durée de vie.
- Le panneau de commande n’est pas antidéagrant. Tenez-le à l’écart du feu et
des ammes.
- Installez le panneau de commande à l’écart d’objets comme un radiateur,
un climatiseur ou un four à micro-ondes, qui génèrent de la chaleur ou des
champs électromagnétiques.
- Éliminez les piles conformément aux réglementations locales.
- Le démontage de ce produit doit être coné à des professionnels uniquement.
Les photos, illustrations et textes sont non contractuels. eTIGER et le
logo eTIGER sont des marques déposées et appartiennent à eTIGER.
Copyright © 2019 eTIGER. Tous droits réservés.

Normes
Ce produit porte le symbole du tri sélectif pour les équipements électriques
et électroniques (DEEE). Cela signie qu’il doit être traité conformément à la
Directive européenne 2012/19/EU an d’être recyclé ou démantelé pour minimiser son impact sur l‘environnement. Pour de plus amples informations,
veuillez contacter les autorités locales ou régionales. Les produits électroniques qui ne font pas l’objet d’un tri sélectif sont potentiellement dangereux pour l’environnement et la santé humaine en raison de la présence de
substances dangereuses.
En conformité avec la réglementation européenne. Ce produit satisfait aux
exigences fondamentales et autres conditions pertinentes de la Directive
2014/53/EU.
Ce produit a été conçu et fabriqué en conformité avec la Directive 2011/65/
EU du Parlement européen et du Conseil relative à la limitation de l’utilisation de certaines substances dangereuses dans les équipements électriques
et électroniques (Directive RoHS) et est déclaré satisfaisant aux valeurs de
concentration maximum dénies par le Comité technique d’adaptation
européen (European Technical Adaptation Committee – TAC).
Fabriqué en Chine
Photos, illustrations et textes non contractuels. eTIGER et le logo eTIGER sont
les marques déposées d’eTIGER
Copyright © 2019 eTIGER. Tous droits réservés.

NL

Inhoud
- S5 bedieningspaneel x1
- ES-D2A (huisdier-immune bewegingssensor)
x1
- ES-D3D (deur-/raamcontact) x2
- ES-RC1N (afstandsbediening) x2
- ES-T1A (RFID-badge) x2
Paneelontwerp
- AC-adapter x1
- Schroeven en ankers
- SIM-adapter
- Documentatie
GSM-netwerk zoeken: Knippert één keer per seconde
GSM-signaal is normaal: Signaal is constant aan
LED
SIM-KAARTSLEUF
GSM-signaalindicator
Luidspreker
Knoeibevei-
liging
RFID-lezer
Inschakelen
Uitschakelen
Thuismodus inscha-
kelen
Knopgeluiden
Wi-Fi-verbinding
BinnengaanBellenSOS
12 V DC INVOER
AAN-/UIT-SCHAKELAAR

Specicaties
NL
Productnaam
S5 SIM Wi-Fi Secual
Voedingsbron
Invoer: AC 110-240 V/50-60 Hz
Uitvoer: DC 12 V/1 A
Wi-Fi
2,4 GHz 802,11 b/g/n
GSM-frequentie
GSM:850/900/1800/1900 MHz
Radiofrequentie
433 + 868 MHz
Transmissieafstand
<80 miljoen in open ruimte
Back-upbatterijen
Lithiumbatterijen: 7,4 V/600 mAh
Interne sirene
95 dB
Materiaal behuizing
ABS-kunststof
Bedrijfsomstandigheden
Temperatuur: -10 °C~55 °C
Vochtig: 80% (niet-condenserend)
Afmetingen bedieningspaneel (L x B
x H)
205 x 135 x 28 mm
Transmission power
Max. radio transmit power : 10 dBm
antenna gain : 2 dBi
Opmerking
Dit is geen volledige handleiding, maar een snelstartgids. Download de handleiding op www.etiger.com voor meer functionaliteiten en SMS- of app-instellingen

Ledsignalen paneel
UIT : Er is geen alarm geactiveerd
LED ‘A’ knippert: Het alarm
van de normale zonesensor is geactiveerd
LED ‘B’ knippert : Het alarm
Alarmstatus
Witte LED
GSM-status
Witte LED
van de thuiszonesensor is geactiveerd
LED ‘C’ knippert: Het alarm
van vertragingszonesensor is geactiveerd
LED ‘D’ knippert: Het alarm
van de 24u zonesensor is geactiveerd
LED ‘ABCD’ knippert : Het alarm is
geactiveerd door SOS of sabotage van paneel
UIT : Er is geen SIM-kaart of GSM-functie uitgeschakeld
AAN: GSM-netwerk is gereed
Knipperen: GSM-netwerk zoeken
Wi-Fi-status
Witte LED
Systeem
Status
Blauwe LED
Instellingen
Status
Witte LED
Aan/uit
Status
Groene LED
UIT : WI-FI is uitgeschakeld
AAN: Verbinding maken met de servers
Knipperen: Tijdens Wi-Fi-instelmodus
AAN—Systeem ingeschakeld
UIT—Systeem uitgeschakeld
Knipperen— Systeem ingeschakeld in thuismodus
AAN--RF-verbindingsmodus
Continu knipperen--modus Systeeminstellingen
UIT--Er is geen signaal gedetecteerd
AAN—Gelijkstroom is aangesloten
Knipperen—DC-voeding is uitgeschakeld

Deze stap is alleen van toepassing
als u uw systeem met een SIM-kaart gebruikt.
1
Control panel’s SIM
card
Plaats een SIM-kaart in het bedieningspaneel
U hebt een SIM-kaart nodig als u via SMS en telefoongesprekken met uw
alarm wilt communiceren.
Belangrijk
- Controleer of de SIM-kaart niet is beveiligd met een pincode.
- We adviseren u om een abonnement te kiezen met onbeperkt SMS’en en
1 of 2 uur beltegoed. De SIM-kaart moet compatibel zijn met een 2G GSMnetwerk. Neem voor meer informatie contact op met uw leverancier.
- Plaats de SIM-kaart voordat u uw systeem inschakelt.
- Download de handleiding op www.etiger.com voor meer SMS-opties

2
OFF
ON
Het bedieningspaneel inschakelen
Steek de uitgangsconnector van de netadapter in de adapterinterface in
het batterijcompartiment aan de achterkant van het bedieningspaneel.
Steek de stroomadapter in het stopcontact. Zet de stroomschakelaar op ‘
AAN ‘ en plaats het deksel van het batterijcompartiment terug. Het bedi-
eningspaneel wordt ingeschakeld.
Opgelet
Zorg ervoor dat u een SIM-kaart in het bedieningspaneel hebt geplaatst voordat u dit inschakelt. Als u een SIM-kaart plaatst na de eerste
verbinding moet u het bedieningspaneel altijd op ‘UIT‘ zetten voordat u
de SIM-kaart plaatst.

3NL4
Uw app klaarmaken
1. Download de ‘eTIGER Home’ app op uw smartphone (in App Store en
Google Play).
2. Open de ‘eTIGER Home’ app op uw smartphone.
3. Registreer met uw mobiele nummer en/of e-mailadres.
4. Meld u aan en maak een locatie (of thuis) voor uw alarm. Zorg dat u bent
verbonden met uw thuisnetwerk.
Gebruik van ‘SIM-kaart alleen’
Indien u dit alarm met een SIM-kaart gebruikt en de iOS- en Android-apps
niet kunt gebruiken, lees dan de volledige handleiding om meer te weten
te komen over de interactie via SMS en telefoongesprekken. De volledige
handleiding in beschikbaar op etiger.com

Het alarm met uw app (EZ-modus) verbinden
Stap 1: Activeer de Wi-Fi-verbindingsmodus op uw alarm: Toets de admin-code in
123456 +
Opgelet
Zorg ervoor dat het systeem is uitgeschakeld, de blauwe LED is UIT. Nadat de
Wi-Fi-verbindingsmodus is geactiveerd, begint de witte Wi-Fi-LED snel te knipperen. nu is uw alarm gereed om verbinding te maken met uw thuisnetwerk.
Stap 2: Kies in uw app het apparaat dat u wilt toevoegen: kies ‘Apparaat toevoe-
gen’ of ‘+‘ en ‘Smart Alarm‘. De app vraagt of de LED snel knippert. Bevestig of dit
het geval is.
Opmerking
Zorg ervoor dat u uw alarmsysteem aansluit op een 2,4 GHz-netwerk. eTIGER
alarmsystemen werken niet met 5.0 Ghz netwerk. Neem contact op met uw
netwerkprovider als u problemen ondervindt.
NL
Smart Alarm
Your Wi-Fi
SSID
Your Password
XXXXXXXXX
CONFIRM
Stap 3: Stel het wi-netwerk in waarmee uw alarm verbinding moet maken. Als u
al bent verbonden met uw thuisnetwerk, gebruikt de app dit netwerk automatisch.
Vul het wi-wachtwoord van de router in, bevestig en wacht ongeveer 20 seconden op antwoord (totdat de %-cirkel in de app 100% heeft bereikt)
Stap 4: Nadat de verbindingsprocedure is voltooid, kunt u de alarmnaam instel-
len om de verbinding te voltooien.
Opmerking
U kunt het alarm op twee manieren met uw app verbinden: EZ- en AP-modus.
gebruik de AP-modus wanneer u uw alarm niet kunt verbinden zoals hierboven
beschreven. De volledige handleiding in beschikbaar op etiger.com

Uw systeem is gereed.
Wat gebeurt er als het alarm wordt geactiveerd?
Meldingen via Wi-Fi
1. De sirene van het bedieningspaneel klinkt.
2. U ontvangt een melding via Wi-Fi of 4G dat het alarm is geactiveerd.
Bij gebruik van een SIM-kaart*
3. Als er een SIM-kaart in het bedieningspaneel zit, ontvangt u ook een SMS
met de melding dat het alarm is geactiveerd.
4. U ontvangt een oproep. Neem de oproep aan: u hoort een gesproken
melding met een lijst met opties (stop de sirene, schakel het systeem uit,
start audiobewaking enz.)
APP interface
INSCHAKELEN
UITSCHAKELEN
THUISMODUS IN-
SCHAKELEN
Instellingen
Toebehoren
Bestanden

NL
Accessories
Bewegingsdetector
We raden aan de detector op een hoogte
van 2,2 meter en in een hoek van 90° te
installeren. De detector detecteert geen
huisdieren lichter dan 25 kg. Monteer
de detectors niet op plaatsen met een
grote hoeveelheid metalen of elektrische
toestellen.
De stand-by modus begrijpen
Als de detector meer dan twee keer binnen 3 minuten wordt geactiveerd, schakelt deze over op de stand-by modus om energie
te besparen. Tijdens de stand-by modus is de detector inactief.
Indien binnen de volgende 3 minuten een nieuwe beweging
wordt gedetecteerd, wordt de stand-by modus verlengd met 3
minuten. Indien binnen de volgende 3 minuten geen beweging
wordt gedetecteerd, wordt de sensor opnieuw geactiveerd.
90°
2.2m
<25kg
Deurcontacten
Monteer de magneet met dubbelzijdige
plakband eerst op de deur en vervolgens
op het deurkozijn.

Geavanceerde instellingen
Raadpleeg de volledige handleiding van www.etiger.com voor de installatie van
uw toebehoren.
Meer toebehoren aansluiten
Typ uw admin-code op het bedieningspaneel (standaardcode: 123456*) gevolgd
door de code : uw bedieningspaneel staat nu in verbindingsmodus.
Activeer binnen de volgende 15 seconden het toebehoren dat u wilt aansluiten
(swipe het naar voren voor een RFID-tag voor de RFID-lezer van het bedieningspaneel). U hoort één piep: het toebehoren is geregistreerd.
Tip
Alle eTIGER toebehoren in de doos zijn al voorgecongureerd voor uw bedieningspaneel. U hoeft ze niet opnieuw toe te voegen.
De toegangscode wijzigen
Vergeet niet uw toegangscode te wijzigen. Om uw toegangscode te wijzigen, stuurt u per SMS ‘13’ naar het bedieningspaneel of wijzig uw code via
de app in het instellingenmenu van uw apparaat.
Volledige handleiding
Voor meer instellingen kunt u de gebruikershandleiding van het bedieningspaneel raadplegen die u kunt downloaden op
www.etiger.com

NL
Voorzorgsmaatregelen
Voor een veiliger gebruik van het product en om de levensduur van het product
te optimaliseren, raden we u aan de onderstaande voorzorgsmaatregelen te
volgen:
- De draadloze toebehoren moeten op het bedieningspaneel worden
aangesloten.
- Lage voedingsspanning kan de transmissieafstand beïnvloeden.
- Druk niet op de SOS-toets op de afstandsbediening als dit niet nodig is om
een storende omgeving te voorkomen.
- Controleer het systeem regelmatig om te controleren of het systeem correct
werkt.
- Het bedieningspaneel is niet waterdicht of vochtbestendig, installeer het op
een schaduwrijke, koele en droge plaats.
- De behuizing van het bedieningspaneel is gemaakt van ABS-kunststof. Blijf uit
de buurt van fel licht voor een langere levensduur.
- Het bedieningspaneel is niet explosieveilig. Uit de buurt van vuur en vlammen
houden.
- Installeer het bedieningspaneel uit de buurt van objecten zoals verwarming,
airconditioning, magnetron enz. die hitte of elektromagnetische velden
genereren.
- Gooi de batterijen weg volgens de lokale voorschriften.
- Dit product mag alleen worden gedemonteerd door professioneel personeel.
Afbeeldingen, illustraties en tekst zijn niet-contractueel. eTIGER en het eTIGER-logo zijn geregistreerde handelsmerken en eigendom van eTIGER. Copyright ©
2019 eTIGER. Alle rechten voorbehouden.

Normen
Dit product is voorzien van het afvalscheidingssymbool voor elektrische en elektronische apparatuur (WEEE-logo). Dit betekent dat dit product moet worden verwijderd volgens de Europese richtlijn 2012/19/EU. Zo kan het worden gerecycled
of worden gedemonteerd om de schadelijke gevolgen voor het milieu zoveel
mogelijk te beperken. Neem voor meer informatie contact op met uw gemeente.
Elektronische producten die niet gescheiden worden verwijderd zijn schadelijk
voor het milieu en de gezondheid omdat ze gevaarlijke stoen bevatten.
Conform de Europese regelgeving. Dit product voldoet aan de belangrijkste
eisen en andere relevante bepalingen van de Richtlijn 2014/53/EU.
Dit product is ontworpen en vervaardigd volgens de richtlijn 2011/65/EU van
het Europees Parlement en de Raad ten aanzien van het gebruik van bepaalde
gevaarlijke stoen in elektrische en elektronische apparatuur (RoHS-richtlijn - RoHS). Er wordt vanuit gegaan dat het product voldoet aan de maximum
concentratievoorschriften die zijn vastgesteld door het Europese technische
aanpassingscomité (TAC).
Gemaakt in China.
Aan de foto’s, afbeeldingen en tekst kunnen geen rechten worden ontleend.
eTIGER en het eTIGER-logo zijn geregistreerde handelsmerken en het eigendom
van eTIGER. Copyright © 2019 eTIGER. Alle rechten voorbehouden.

ES

Índice
- 1 panel de control S5
- 1 ES-D2A (sensor de movimiento inmune a
mascotas)
- 2 ES-D3D (contacto puerta/ventana)
- 2 ES-RC1N (controles remotos)
- 2 ES-T1A (mando RFID)
Diseño del panel
La señal GSM es normal: Señal está constantemente encendida
Buscando red GSM: Parpadea cada segundo
Indicador de señal GSM
LED
- 1 adaptador AC
- Tornillos y anclajes
- Adaptador SIM
- Documentos
IntroducirLlamadaSOS
SabotajeAltavoz
Lector RFID
Armar
Desarmar
Armar sistema en
Modo doméstico
Sonidos de los botones
Conexión wi
RANURA DE
TARJETA SIM
ENTRADA 12 VDC
INTERRUPTOR ON/OFF

Especicaciones
ES
Nombre del producto
S5 SIM Wi-Fi Secual
Alimentación
Entrada: AC 110-240 V / 50-60 Hz
Salida: DC 12V / 1A
Wi
2,4 GHz 802.11 b/g/n
Frecuencia GSM
GSM: 850 / 900 / 1800 / 1900 MHz
Radiofrecuencia
433 + 868 MHz
Distancia de transmisión
< 80 m en espacios abiertos
Baterías de reserva
Pilas de litio: 7,4 V / 600mAh
Sirena interna
95 dB
Material de la carcasa
Plástico ABS
Condiciones de funcionamiento
Temperatura: -10 °C~55 °C
Humedad: 80 % (sin condensación)
Dimensiones del panel de control
(largo x ancho x alto)
205x135x28 mm
Transmission power
Max. radio transmit power : 10 dBm
antenna gain : 2 dBi
Nota
Esto no es un manual completo, sino una guía de inicio rápido. Para más funcionalidades y la instalación de SMS y de la aplicación, descárguese el manual en
www.etiger.com

Señales del panel LED
OFF : No se activa la alarma
Parpadeo LED “A: Cuando se activa la alarma
del sensor de la Zona normal
Parpadeo LED “B”: Cuando se activa la alarma
Estado de la
alarma
LED blanca
Estado del
GSM
LED blanca
del sensor de la Zona doméstica
Parpadeo LED “C”: Cuando se activa la alarma
del sensor de la Zona de retardo
Parpadeo LED “D”: Cuando se activa la alarma
del sensor de la Zona 24 h
Parpadeo LED “ABCD”: Cuando se activa la
alarma
por SOS o sabotaje del panel
OFF: No hay tarjeta SIM o la función GSM está
desactivada
ON: La red GSM está preparada
Parpadeo: Buscar red GSM
Estado del
wi
LED blanca
Estado
del sistema
LED azul
Estado
de la conguración
LED blanca
Estado
de la alimentación
LED verde
OFF: Wi no activado
ON: Conectarse a los servidores
Parpadeo: Durante el modo de conguración
del wi
ON—Sistema armado
OFF—Sistema desarmado
Parpadeo—Sistema armado en modo doméstico
ON--Modo de conexión RF
Parpadeo continuo--Modo de conguración del
sistema
OFF--No se detecta señal
ON—Alimentación conectada
Parpadeo—Alimentación no conectada

Este paso solo se aplica
si utiliza su sistema con tarjeta SIM.
1
Control panel’s SIM
card
Inserte una tarjeta SIM en el panel de control
Necesitará una tarjeta SIM si desea interactuar con su alarma mediante SMS y
llamadas telefónicas.
IMPORTANTE
- Asegúrese de que la tarjeta SIM no esté protegida por un código PIN.
- Le aconsejamos que escoja un plan sin límite de mensajes y con 1 o 2 horas
de llamadas. La tarjeta SIM debe ser compatible con la red GSM 2G. Póngase
en contacto con su operador para obtener más información.
- Inserte la tarjeta SIM antes de encender su sistema.
- Para conocer más opciones con SMS descargue el manual en
www.etiger.com

2
OFF
ON
Encienda el panel de control
Conecte el conector de salida del adaptador CA en la interfaz del adaptador en el compartimento de las pilas detrás del panel de control. Conecte
el adaptador CA a una toma de CA. Ponga el interruptor en «ON» y vuelva
a poner la tapa del compartimento de las pilas. El panel de control está
encendiéndose.
Aviso
Asegúrese de haber insertado una tarjeta SIM en el panel de control antes
de encenderlo. Si inserta la tarjeta SIM tras la primera conexión, asegúrese
de poner el panel de control en «OFF» antes de insertar la tarjeta SIM.

3ES4
Prepare su aplicación
1. Descargue la app eTIGER Home en su smartphone (en App Store y
Google Play).
2. Abra la app «eTIGER Home» en su smartphone.
3. Regístrese con su número de teléfono y/o su dirección de correo
electrónico.
4. Inicie sesión y cree una localización (o casa) para su alarma. Asegúrese
de estar conectado a su red doméstica.
Usuarios de «tarjeta SIM exclusivamente»
Si está usando esta alarma con una tarjeta SIM y no puede usar las aplicaciones de iOS y Android, lea el manual completo para descubrir más sobre la
interacción por SMS y llamadas telefónicas. El manual completo está disponible en etiger.com

Conecte la alarma a su app (modo EZ)
Paso 1: Ponga el modo conexión wi en su alarma: Introduzca el código de
administrador 123456 +
Aviso
Asegúrese de que el sistema está desarmado, la LED azul está OFF. Tras poner el
modo de conexión wi, la LED blanca del wi empieza a parpadear rápido: ahora
su alarma está lista para conectarse a la red doméstica.
Paso 2: Elija en la app el dispositivo que quiere añadir: elija «Añadir dispositivo»
o «+» y «Alarma inteligente». La app preguntará si la LED está parpadeando
rápido. Conrme si es así.
Nota
Asegúrese de conectar su sistema de alarma a una red 2.4 GHz. Los sistemas de
alarma eTIGER alarmsystems no funcionan con redes 5.0 GHz. Si experimenta
algún problema, primero póngase en contacto con tu proveedor de red.

ES
Smart Alarm
Your Wi-Fi
SSID
Your Password
XXXXXXXXX
CONFIRM
Paso 3: Congure la red wi con la que conectará su alarma. Si ya se ha conecta-
do a la red doméstica, la app utilizará automáticamente esta red.
Introduzca la contraseña del wi, conrme y espere unos 20 segundos para
obtener respuesta (hasta que el círculo-% de la app alcance el 100 %).
Paso 4: Cuando se complete el proceso de conexión, puede congurar el nom-
bre de la alarma para completar la conexión.
Nota
Hay dos formas de conectar la alarma a su app: Modo EZ y modo AP.
Utilice el modo AP si no puede conectar su alarma de la forma descrita anteriormente. El manual completo está disponible en www.etiger.com

Su sistema está preparado.
¿Qué ocurre si se activa la alarma?
Noticaciones por wi
1. El panel de control emite sonido.
2. Recibirá una noticación por wi o 4G de que la alarma se ha activado.
Cuando utilice tarjeta SIM*
3. Si hay una tarjeta SIM en su panel de control, recibirá un SMS que le
noticará que se ha activado la alarma.
4. Recibe una llamada telefónica. Coja la llamada: escuche el aviso de voz
que le dará una lista de opciones (parar la alarma, desarmar el sistema,
comenzar la audiovigilancia, etc.)
APP interface
ARMAR
ARMAR SISTEMA EN MODO
DESARMAR
DOMÉSTICO
Conguración
Accesorios
Registro

ES
Accesorios
Sensor de movimiento
Recomendamos montar el sensor a 2,2
m de altura y ángulo de 90°. El sensor
no detecta animales de menos de 25 kg.
Evite montar los sensores en zonas con
gran cantidad de dispositivos eléctricos
o metal.
Cómo entender el modo de espera (standby)
Si el sensor se activa más de dos veces en 3 minutos, pasa al
modo de espera para ahorrar energía. Durante el modo de
espera, el sensor está inactivo. Si, en los 3 minutos siguientes, se
detecta un nuevo movimiento, el modo de espera se prolonga 3
minutos. Si no se detecta ningún movimiento en los 3 minutos
siguientes, el sensor se activa de nuevo.
90°
2.2m
<25kg
Contactos de la puerta
Monte el imán con cinta de doble cara
en la puerta y el marco de la puerta,
respectivamente.

Ajustes avanzados
Para la instalación de sus accesorios, consulte el manual completo de
www.etiger.com.
Conectar más accesorios
En el panel de control, introduzca su código de administración (código predeterminado: 123456*) seguido de la tecla : su panel de control está ahora en Modo
conexión.
Durante los próximos 15 segundos, active el accesorio que desea conectar (si
es una etiqueta RFID, pásela frente al lector RFID en el panel de control). Oirá un
pitido: el accesorio está registrado.
Consejo
Todos los accesorios eTIGER en la caja ya están precongurados con su panel de
control. No necesita volver a añadirlos.
Cambie el código de acceso
No olvide cambiar el código de acceso. Para cambiar su código de acceso,
envíe «13» por SMS al panel de control o cambie su código por aplicación
en el menú de conguración de su dispositivo.
Manual completo
Si desea conocer más detalles de la conguración, consulte el manual de instrucciones en el panel de control, disponible para descargar en www.etiger.com

ES
Precauciones
Para conseguir un uso más seguro del producto y optimizar la vida útil del mismo, le recomendamos que tome las precauciones mostradas a continuación:
- Los accesorios inalámbricos deben estar conectados al panel de control.
- El voltaje de baja potencia puede afectar a la distancia de transmisión.
- No presione la tecla SOS en el control remoto salvo que sea necesario para
evitar molestar al vecindario.
- Revise el sistema de forma regular para asegurarse de que funciona
correctamente.
- El panel de control no es resistente al agua ni a la humedad, instálelo en un
lugar fresco, seco y a la sombra.
- La carcasa del panel de control es de plástico ABS. Manténgalo alejado de la
luz intensa para que tenga una mayor vida útil.
- El panel de control no está a prueba de explosiones. Manténgalo alejado de
fuego y llamas.
- Instale el panel de control lejos de objetos que generen calor o campos
electromagnéticos como calentadores, aires acondicionados, microondas, etc.
- Deseche las pilas de acuerdo con la normativa local.
- El desmontaje de este producto debe realizarlo un profesional.
Imágenes, ilustraciones y textos no contractuales. eTIGER y el logotipo de eTIGER
son marcas comerciales registradas propiedad de eTIGER. Copyright © 2019
eTIGER. Todos los derechos reservados.

Normas
Este producto cuenta con el símbolo de separación selectiva de residuos de
aparatos eléctricos y electrónicos (WEEE). Esto signica que el producto debe ser
tratado conforme a la Directiva europea 2012/19/EU con objeto de ser reciclado
o desmontado y minimizar así su impacto en el medio ambiente. Para más información, póngase en contacto con las autoridades locales o regionales. Los aparatos electrónicos que no sigan en este proceso de separación selectiva pueden
representar un peligro para el medio ambiente y la salud humana debido a que
contienen sustancias peligrosas.
De conformidad con la normativa europea. Este producto cumple con los requisitos fundamentales y otras condiciones relevantes de la Directiva 2014/53/EU.
Este producto ha sido diseñado y fabricado cumpliendo la Directiva 2011/65/EU
del Parlamento Europeo y del Consejo sobre la restricción de uso de determinadas sustancias peligrosas en equipos eléctricos y electrónicos (Directiva RoHS), y
se considera que cumple con los valores de concentración máximos publicados
por el Comité Europeo de Adaptaciones Técnicas (TAC).
Fabricado en China.
Imágenes, ilustraciones y texto no contractuales. eTIGER y el logotipo eTIGER son
marcas comerciales registradas propiedad de eTIGER. Copyright © 2019 eTIGER.
Reservados todos los derechos.

IT

Índice
- Pannello di controllo S5 x1
- ES-D2A (sensore di movimento immune agli
animali domestici) x1
- ES-D3D (contatto porta/nestra) x2
- ES-RC1N (telecomandi) x2
- ES-T1A (badge RFID) x2
Struttura del pannello
- Adattatore CA x1
- Viti e ssaggi
- Adattatore SIM
- Documentazione
Ricerca rete GSM: Lampeggia una volta al secondo
Segnale GSM normale: Il segnale è costantemente acceso
VANO SCHEDA
Indicatore del segnale GSM
LED
SIM
Altoparlante
Manomis-
sione
Lettore RFID
Arma
Disarma
Arma casa
Suoni dei pulsanti
Collegamento wi-
InvioChiamataSOS
INGRESSO 12 VCC
INTERRUTTORE ON/
OFF

Speciche
IT
Nome del prodotto
S5 SIM Wi-Fi Secual
Alimentazione
Ingresso: CA 110-240 V / 50-60 Hz
Uscita: CC 12 V / 1 A
Wi-
2.4 GHz 802.11 b/g/n
Frequenza GSM
GSM: 850 / 900 / 1800 / 1900 MHz
Radiofrequenza
433 + 868 MHz
Distanza di trasmissione
< 80 m in spazi aperti
Batterie di riserva
Batterie al litio 7.4 V / 600 mAh
Sirena interna
95 dB
Materiale dell’alloggiamento
Plastica ABS
Condizioni di funzionamento
Temperatura: -10°C~55°C
Umidità: 80% (senza condensazione)
Dimensioni del pannello di controllo
(Lungh x Largh x A)
205 x 135 x 28 mm
Transmission power
Max. radio transmit power : 10 dBm
antenna gain : 2 dBi
Nota
Il presente documento non è un manuale completo, bensì una guida di collegamento rapido. Per maggiori funzionalità e la congurazione di SMS o dell’app,
scaricare il manuale su www.etiger.com

Indicazioni LED del pannello
OFF: Allarme non scattato
LED “A” lampeggiante: Allarme fatto scattare
dal sensore Zona Normale
LED “B” lampeggiante: Allarme fatto scattare
Stato dell'allarme
LED bianco
dal sensore Zona Casa
LED “C” lampeggiante: Allarme fatto scattare
dal sensore Zona Delay
LED “D” lampeggiante: Allarme fatto scattare
dal sensore Zona 24h
LED “ABCD” lampeggianti: Allarme fatto scattare
dall’SOS o dalla manomissione del pannello
Stato GSM
LED bianco
Stato del
wi-
LED bianco
Sistema
Stato
LED blu
Impostazioni
Stato
LED bianco
Alimentazione
Stato
LED verde
OFF: Nessuna carta SIM o funzione GSM disa-
bilitata
ON: Rete GSM pronta
Lampeggiante: Ricerca rete GSM
OFF: Wi- disabilitato
ON: Connessione ai server
Lampeggiante: In modalità di impostazione del
wi-
ON - Sistema armato
OFF - Sistema non armato
Lampeggiante - Sistema armato in modalità
Casa
ON- Modalità di collegamento RF
Lampeggiamento continuo - Modalità di im-
postazione del sistema
OFF - Nessun segnale rilevato
ON - L’alimentazione CC è collegata
Lampeggiante - L’alimentazione CC è scollegata

Questo passaggio è valido solo se
il sistema viene utilizzato con una scheda SIM.
1
Control panel’s SIM
card
Inserire una scheda SIM nel pannello di controllo
Se si desidera interagire con l’allarme via SMS e telefonate è necessaria una
scheda SIM.
Importante
- Accertarsi che la scheda SIM non sia protetta da un codice PIN.
- Si consiglia di scegliere un piano con messaggi illimitati e 1 o 2 ore di
chiamate. La scheda SIM deve essere compatibile con una rete GSM 2G.
Contattare il proprio operatore per maggiori informazioni.
- Inserire la scheda SIM prima di accendere il sistema.
- Per maggiori opzioni SMS, scaricare il manuale su www.etiger.com

2
OFF
ON
Accendere il pannello di controllo
Inserire il connettore di uscita dell’adattatore CA nella sua apposita interfaccia situata nel vano batterie, sul retro del pannello di controllo. Collegare l’adattatore CA a una presa di corrente CA. Impostare l’interruttore di
accensione su “ON” e rimontare il coperchio del vano batterie. Il pannello
di controllo si accende.
Attenzione
Assicurarsi di aver inserito la scheda SIM nel pannello di controllo prima
di accenderlo. Se la si inserisce dopo la prima connessione, assicurarsi
sempre di impostare il pannello di controllo sulla posizione “OFF” prima di
inserire la SIM.

3IT4
Preparare l’app
1. Scaricare l’app ”eTIGER Home” sullo smartphone (dall’App Store e da
Google Play).
2. Aprire l’app ”eTIGER Home” sullo smartphone.
3. Registrarsi con il proprio numero di cellulare e/o indirizzo e-mail.
4. Accedere e creare una posizione (o casa) per l’allarme. Accertarsi di
essere connessi alla rete domestica.
Utenti “solo SIM”
Se si utilizza l’allarme con una scheda SIM e non è possibile utilizzare le applicazioni iOS e Android, leggere il manuale completo per ulteriori informazioni
sull’interazione via SMS e telefonata. Il manuale completo è disponibile su
etiger.com

Collegare l’allarme alla propria applicazione (modalità
EZ)
Passaggio 1: Inserire la modalità di connessione wi- sull’allarme: Digitare il
codice di amministrazione 123456 +
Attenzione
Assicurarsi che il sistema sia disarmato, ovvero che il LED blu sia spento. Una
volta entrati in modalità di connessione wi-, il LED bianco del wi- inizia a
lampeggiare rapidamente: l’allarme è pronto per connettersi alla rete domestica.
Passaggio 2: Dall’app, scegliere il dispositivo che si desidera aggiungere:
selezionare “Aggiungi dispositivo” o “+” e “ Allarme smart” . L’app chiede se il LED
lampeggia velocemente. Confermare come applicabile.
Nota
Assicurarsi di collegare il sistema di allarme a una rete a 2.4 GHz. I sistemi di
allarme eTIGER non funzionano con le reti a 5.0 GHz. In caso di problemi, contat-

IT
Smart Alarm
Your Wi-Fi
SSID
Your Password
XXXXXXXXX
CONFIRM
tare innanzitutto il gestore della propria rete.
Passaggio 3: Impostare la rete wi- a cui si desidera collegare l’allarme. Se si è già
connessi alla rete domestica, l’app la utilizzerà automaticamente.
Inserire la password wi- del router, confermare e attendere per circa 20 secondi
no a ottenere risposta (no a quando il cerchio % dell’app non arriva al 100%).
Passaggio 4: Completata la procedura di connessione, è possibile impostare il
nome dell’allarme per nalizzare il collegamento.
Nota
L’allarme può essere collegato all’app in due modi: in modalità EZ e in modalità
A P.
Se non è possibile collegare l’allarme come illustrato qui sopra, utilizzare la modalità AP. Il manuale completo è disponibile su etiger.com

Il sistema è pronto.
A questo punto, cosa succede se scatta l’allarme?
Notiche via wi-
1. La sirena del pannello di controllo suona.
2. Si riceve una notica via wi- o 4G che l’allarme è scattato.
In caso di utilizzo della scheda SIM*
3. Se il pannello di controllo contiene una scheda SIM, si riceverà anche un
SMS di notica dell’attivazione dell’allarme.
4. Si riceverà inoltre una telefonata. Rispondere alla chiamata: un messaggio
vocale fornirà una serie di opzioni (spegnere la sirena, disarmare il sistema,
avviare la sorveglianza audio, ecc.).
Interfaccia dell’App
ARMA
DISARMA
ARMA CASA
Impostazioni
Accessori
Registrati

IT
Accessori
Rilevatore di movimento
Si consiglia di montare il rilevatore a un’altezza di 2,2 m e angolo di 90°. Il rilevatore
non rileva animali di peso inferiore a 25
kg. Evitare di montare i rilevatori in aree
con una grande quantità di metallo o
dispositivi elettrici.
Comprensione della modalità standby
Se il rilevatore viene attivato più di due volte in 3 minuti, passa
alla modalità standby per risparmiare energia. Durante la
modalità standby, è inattivo. Se entro i 3 minuti successivi viene
rilevato un nuovo movimento, la modalità standby si prolunga
di 3 minuti. Se non viene rilevato alcun movimento nei 3 minuti
successivi, il sensore si riattiva.
90°
2.2m
<25kg
Sensori porta
Montare la calamita con nastro biadesivo
rispettivamente sulla porta e sul telaio
della porta.

Impostazioni avanzate
Per l’installazione degli accessori, consultare il manuale completo su www.etiger.
com.
Collegamento di altri accessori
Dal pannello di controllo, digitare il codice di amministrazione (codice predenito: 123456*), seguito dal tasto : il pannello di controllo è in modalità Connessione.Nei successivi 15 secondi, attivare l’accessorio che si desidera collegare (nel
caso del tag RFID, farlo scorrere sulla parte frontale del lettore RFID sul pannello
di controllo). Viene emesso un segnale acustico: l’accessorio è salvato.
Suggerimento
Tutti gli accessori eTIGER presenti nella confezione sono già precongurati sul
pannello di controllo. Non è necessario aggiungerli di nuovo.
Modicare il codice di accesso
Non dimenticare di modicare il codice di accesso. Per farlo, inviare il
numero “13”, via SMS, al pannello di controllo o modica il codice tramite
l’app nel menu delle impostazioni del tuo dispositivo.
Manuale completo
Per maggiori impostazioni, fare riferimento al manuale d’uso del pannello di
controllo, scaricabile dal sito
www.etiger.com

IT
Precauzioni
Per un uso più sicuro del prodotto e per ottimizzarne la durata, si raccomanda di
seguire le precauzioni illustrate qui di seguito.
- Gli accessori wireless devono essere collegati al pannello di controllo.
- Una bassa tensione di alimentazione può condizionare la distanza di
trasmissione.
- Non premere il tasto SOS sul telecomando se non è necessario, per evitare di
disturbare il vicinato.
- Controllare regolarmente il sistema per assicurarsi che funzioni correttamente.
- Il pannello di controllo non è né impermeabile né a prova di umidità:
installarlo in un luogo ombreggiato, fresco e asciutto.
- L’involucro del pannello di controllo è fabbricato in plastica ABS. Tenere il
dispositivo lontano da luce intensa per garantirne una durata di vita più
estesa.
- Il pannello di controllo non è a prova di esplosione. Tenere lontano da fuochi e
amme.
- Installare il pannello di controllo lontano da oggetti che generano calore o
campi elettromagnetici, come radiatori, aria condizionata, forni a microonde,
ecc.
- Smaltire le batterie nel rispetto delle normative locali.
- Lo smontaggio del dispositivo deve essere eettuato esclusivamente da
personale specializzato.
Immagini, illustrazioni e testi non sono contrattualmente vincolanti. eTIGER e il
logo eTIGER sono marchi registrati e di proprietà di eTIGER. Copyright © 2019
eTIGER. Tutti i diritti riservati.

Norme
Questo prodotto è contrassegnato dal simbolo per la cernita selettiva per i riuti
di apparecchiature elettriche ed elettroniche (RAEE). Ciò signica che deve essere
gestito in conformità alla direttiva europea 2012/19/EU per un riciclo e uno
smantellamento che abbiano il minimo impatto possibile sull’ambiente. Per ulteriori informazioni, contattare le autorità locali o regionali. I prodotti elettronici
non inclusi nel processo di cernita selettiva sono potenzialmente pericolosi per
l’ambiente e per la salute umana a causa della presenza di sostanze nocive.
In conformità alle leggi europee. Questo prodotto è conforme ai requisiti essenziali ed alle altre disposizioni applicabili stabilite dalla direttiva 2014/53/
EU.
Questo prodotto è stato progettato e fabbricato in conformità alla direttiva
2011/65/EU del Parlamento europeo e del Consiglio sulla restrizione all’uso di
determinate sostanze pericolose nelle apparecchiature elettriche ed elettroniche
(direttiva RoHS) ed è sono considerato conforme ai valori di concentrazione
massimi stabiliti dal comitato europeo per l’adeguamento tecnico (TAC).
Fabbricato in Cina.
Immagini, illustrazioni e testi non contrattuali. eTIGER e il logo eTIGER sono
marchi registrati di proprietà di eTIGER.
Copyright © 2019 eTIGER. Tutti i diritti riservati.

PT

Índice
- Painel de controlo S5 x1
- ES-D2A (Sensor de movimento imune a
animais de estimação) x1
- ES-D3D (Contacto para porta/janela) x2
- ES-RC1N (Controlos remotos) x2
- ES-T1A (Cartão RFID) x2
Design do painel
Procura de rede GSM: Pisca uma vez por segundo
O sinal GSM está normal:
Indicador de sinal GSM
O sinal está constantemente ligado
LED
Altifalante
- Adaptador CA x1
- Parafusos e ancoragens
- Adaptador SIM
- Documentação
EnterChamadaSOS
Proteção contra
vandalismo
Leitor de RFID
Armar
Desarmar
Armar residência
Sons dos botões
Ligação Wi-Fi
RANHURA PARA
CARTÃO SIM
ENTRADA 12 VCC
INTERRUPTOR LIGAR/
DESLIGAR

Especicações
PT
Nome do produto
S5 SIM Wi-Fi Secual
Alimentação
Entrada: CA 110-240 V/50-60 Hz
Saída: CC 12 V/1 A
Wi-Fi
2,4 GHz 802,11 b/g/n
Frequência GSM
GSM: 850/900/1800/1900 MHz
Radiofrequência
433 + 868 MHz
Distância de transmissão
< 80 M em espaços abertos
Pilhas de reserva
Pilhas de lítio: 7,4 V/600 mAh
Sirene interna
95 dB
Material da estrutura
Plástico ABS
Condições de funcionamento
Temperatura: -10 °C~55 °C
Humidade: 80% (sem condensação)
Dimensões do painel de controlo (C x
L x A)
205 x 135 x 28 mm
Transmission power
Max. radio transmit power : 10 dBm
antenna gain : 2 dBi
Nota
Isto não é um manual completo, mas sim um guia de ligação rápida. Para mais
funcionalidade e conguração de SMS ou da aplicação, transra o manual em
www.etiger.com

Sinais LED do painel
DESLIGADO: Não há um alarme acionado
LED "A" a piscar: Quando o alarme é acionado
a partir do sensor de Zona Normal
LED "B" a piscar: Quando o alarme é acionado
Estado do
alarme
LED branco
a partir do sensor de Zona de Residência
LED "C" a piscar: Quando o alarme é acionado
a partir do sensor de Zona de Atraso
LED "D" a piscar: Quando o alarme é acionado
a partir do sensor de Zona de 24H
LED "ABCD" a piscar: Quando o alarme é
acionado a partir de SOS ou alerta de vandalismo do Painel
Estado de
GSM
LED branco
Estado do
Wi-Fi
LED branco
Estado do
Sistema
LED azul
Estado das
Denições
LED branco
Estado da
Alimentação
LED verde
DESLIGADO: Sem cartão SIM ou função GSM
desativada
LIGADO: A rede GSM está pronta
A piscar: Procura de rede GSM
DESLIGADO: O Wi-Fi está desativado
LIGADO: Ligar aos servidores
A piscar: Durante o modo de denição do Wi-Fi
LIGADO—Sistema armado
DESLIGADO—Sistema desarmado
A piscar—Sistema armado no modo residência
LIGADO--Modo de ligação RF
Piscar contínuo--Modo de denições do sistema
DESLIGADO--Sem deteção de sinal
ON—Alimentação CC ligada
A piscar—Alimentação CC desligada

Este passo é apenas aplicável
se estiver a utilizar o seu sistema com um cartão SIM.
1
Control panel’s SIM
card
Inserir um cartão SIM no painel de controlo
É necessário um cartão SIM se pretender interagir com o seu alarme através de
SMS e chamadas telefónicas.
Importante
- Certique-se de que o cartão SIM não está protegido com um código PIN.
- É recomendável que escolha um plano com texto ilimitado e 1 ou 2 horas
de chamada. O cartão SIM tem de ser compatível com uma rede GSM 2G.
Contacte a sua operadora para obter mais informações.
- Insira o cartão SIM antes de ligar o sistema.
- Para mais opções de SMS, transra o manual em www.etiger.com

2
OFF
ON
Ligar o painel de controlo
Ligue o conector de saída do adaptador de CA à interface do adaptador
no compartimento das pilhas na parte posterior do painel de controlo.
Ligue o adaptador de CA a uma tomada de CA. Coloque o interruptor
de alimentação na posição “LIGAR” e volte a colocar a tampa do compartimento das pilhas. O painel de controlo vai ligar.
Atenção
Certique-se de que inseriu um cartão SIM no painel de controlo antes de
ligá-lo. Se inserir um cartão SIM após a primeira ligação, certique-se sempre de que “DESLIGA” o painel de controlo antes de inserir o cartão SIM.

3PT4
Preparar a sua aplicação
1. Transra a aplicação “eTIGER Home” para o seu smartphone (App Store e
Google Play).
2. Abra a aplicação “eTIGER Home” no seu smartphone.
3. Registe-se com o seu número de telemóvel e/ou endereço de e-mail.
4. Inicie sessão e crie uma localização (ou residência) para o seu alarme.
Certique-se de que está ligado à rede da sua residência.
Utilizadores “apenas cartão SIM”
Se estiver a utilizar este alarme com um cartão SIM e não for possível utilizar
as aplicações iOS e Android, leia o manual completo para saber mais sobre
a interação através de SMS e chamada telefónica. O manual completo está
disponível em etiger.com

Ligar o alarme à sua aplicação (modo EZ)
Passo 1: Introduza o Modo de Ligação Wi-Fi no seu alarme: Pressione o código
de Administrador 123456 +
Atenção
Certique-se de que o sistema está desarmado; o LED azul está DESLIGADO.
Depois de introduzir o modo de ligação Wi-Fi, o LED branco do Wi-Fi começa a
piscar depressa. O seu alarme está pronto para ligar-se à rede da sua residência.
Passo 2: Na sua aplicação, escolha o dispositivo que pretende adicionar: escolha
“Adicionar dispositivo” ou “+” e “Alarme inteligente”. A aplicação perguntar-lhe-á
se o LED está a piscar depressa. Conrme se for esse o caso.
Nota
Certique-se de que liga o seu sistema de alarme a uma rede de 2,4 GHz. Os sistemas de alarme eTIGER não funcionam com redes de 5,0 GHz. Se ocorrer algum
problema, contacte em primeiro lugar o seu fornecedor de rede.

PT
Smart Alarm
Your Wi-Fi
SSID
Your Password
XXXXXXXXX
CONFIRM
Passo 3: Dena a rede de Wi-Fi à qual pretende ligar o seu alarme. Se já estiver
ligada à rede da sua residência, a aplicação utilizará esta rede automaticamente.
Introduza a palavra-passe do Wi-Fi do router, conrme e aguarde cerca de 20
segundos para obter uma resposta (até a %-círculo na aplicação chegarem aos
100%)
Passo 4: No nal do procedimento de ligação, pode denir o nome do alarme
para concluir a ligação.
Nota
Pode ligar o alarme à sua aplicação de duas formas: Modo EZ e modo AP.
Utilize o modo AP se não for possível ligar o seu alarme conforme acima descrito.
O manual completo está disponível em etiger.com

O seu sistema está pronto.
O que acontece se o alarme for acionado?
Noticações através do Wi-Fi
1. A sirene do painel de controlo toca.
2. Receberá uma noticação através do Wi-Fi ou da rede 4G com a indicação
de que o alarme foi acionado.
Se utilizar um cartão SIM*
3. Se existir um cartão SIM no seu painel de controlo, também receberá uma
noticação por SMS com a indicação de que o alarme foi acionado.
4. Receberá uma chamada telefónica. Atenda a chamada: escutará um
comando de voz com uma lista de opções (parar a sirene, desarmar o
sistema, iniciar a vigilância áudio, etc.)
Interface da aplicação
ARMAR
DESARMAR
ARMAR RESIDÊNCIA
Denições
Acessórios
Gravações

Acessórios
PT
Detetor de movimento
Recomendados que instale o detetor a
uma altura de 2,2 m e ângulo de 90°. O
detetor não deteta animais com menos
de 25 kg. Evite instalar os detetores
em áreas com grandes quantidades de
dispositivos metálicos ou elétricos.
90°
2.2m
<25kg
Como funciona o modo de espera
Se o detetor for acionado mais de duas vezes no espaço de 3
minutos, passa para o modo de espera para poupar energia. Durante o modo de espera, o detetor ca inativo. Se, nos próximos
3 minutos, for detetado um novo movimento, o modo de espera
é prolongado em 3 minutos. Se não forem detetados movimentos nos próximos 3 minutos, o sensor é novamente ativado.
Contactos para porta
Coloque o íman com ta adesiva de dupla
face na porta e na ombreira da porta,
respetivamente.

Denições avançadas
Para a instalação dos seus acessórios, consulte o manual completo em www.
etiger.com.
Ligar mais acessórios
No painel de controlo, insira o código de administrador (código predenido:
123456*), seguindo-se a tecla : o seu painel de controlo está agora no Modo de
ligação.
Nos 15 segundos seguintes, acione o acessório que pretende ligar (para um
cartão RFID, passe-o em frente ao leitor de RFID do painel de controlo). Escutará
um sinal sonoro: o acessório está registado.
Informação
Todos os acessórios eTIGER na embalagem já estão pré-congurados para o seu
painel de controlo.
Alterar o código de acesso
Não se esqueça de alterar o seu código de acesso. Para alterar o seu código
de acesso, envie “13” por SMS para o painel de controlo ou altere seu código por aplicativo no menu de congurações do seu dispositivo.
Não é necessário adicioná-los novamente.
Manual completo
Para mais denições, consulte o manual do utilizador do painel de controlo, que
pode transferir em www.etiger.com

PT
Precauções
Para uma utilização mais segura do produto e para otimizar a sua vida útil, é
recomendável que siga as precauções abaixo indicadas:
- Os acessórios sem os têm de ser ligados ao painel de controlo.
- Uma baixa tensão pode afetar a distância de transmissão.
- Não pressione a tecla SOS no controlo remoto se não for necessário, para
evitar incomodar os vizinhos.
- Verique o sistema regularmente para garantir que está a funcionar
devidamente.
- O painel de controlo não é à prova de água nem à prova de humidade;
instale-o num local fresco, seco e protegido do sol.
- A caixa do painel de controlo é fabricada em plástico ABS. Mantenha-a
afastada de luz intensa para uma vida útil mais longa.
- O painel de controlo não é à prova de explosão. Mantenha-o afastado de fogo
e chamas.
- Instale o painel de controlo afastado de objetos como aquecedores,
aparelhos de ar condicionado, micro-ondas, etc., que geram calor ou campos
eletromagnéticos.
- Elimine as pilhas de acordo com os regulamentos locais.
- A desmontagem deste produto deve ser apenas realizada por prossionais.
As imagens, as ilustrações e o texto são não contratuais. eTIGER e o logótipo
eTIGER são marcas comerciais registadas e propriedade da eTIGER. Copyright ©
2019 eTIGER. Todos os direitos reservados.

conformidade com os padrões
Este produto possui o símbolo de classicação seletiva para resíduos de equipamentos elétricos e eletrônicos (WEEE). Isso signica que este produto deve ser
manuseado de acordo com a Diretiva Europeia 2012/19 / UE para ser reciclado
ou desmontado para minimizar seu impacto no meio ambiente.
Para mais informações, entre em contato com as autoridades locais ou regionais.
Os produtos eletrônicos não incluídos no processo de triagem seletiva são
potencialmente perigosos para o meio ambiente e para a saúde humana devido
à presença de substâncias perigosas.
Em conformidade com as leis europeias. Este produto está em conformidade
com os requisitos essenciais e outras disposições relevantes da Diretiva 2014/53
/ UE.
Este produto foi projetado e fabricado em conformidade com a Diretiva 2011/65
/ UE do Parlamento Europeu e do Conselho sobre a restrição do uso de certas
substâncias perigosas em equipamentos elétricos e eletrônicos (Diretiva RoHS
- RoHS) e é considerado em conformidade com a valores máximos de concentração estabelecidos pelo Comitê Europeu de Adaptação Técnica (TAC).
Fabricado na China.
As imagens, as ilustrações e o texto são não contratuais. eTIGER e o logótipo
eTIGER são marcas comerciais registadas e propriedade da eTIGER. Copyright ©
2019 eTIGER. Todos os direitos reservados.
 Loading...