

Page 1
www.etiger.com
EN
ES-S7AU
Outdoor Siren
Page 2

Features
- Wireless connection for an easy installation
- Radio-frequency security of the accessories:
more than one million of codes combinations
- EEPROM information protection, power failure
will not damage data
- Simplied accessory expansion by easy
connection
- Compatible with eTIGER Security Kits
- Silent at night
Box Content
1 x ES-S7AU
1 x 12V Adaptor
1 x Backup Battery (built-in)
1 x User Manual
Page 3
General information
The signal of the ES-S7AU is transmitted by radiofrequency, which makes its installation easier.
Several ES-S7AU can be installed in dierent indoor
locations to deter illegal intrusions. Several ESS7AU can be registered in the control panel of your
alarm system. When your alarm system detects an
intrusion, the ES-S7AU rings out and its strobe lights
turn on.
The ES-S7AU can also be used as a standalone alarm
system by registering wireless accessories in the
siren.
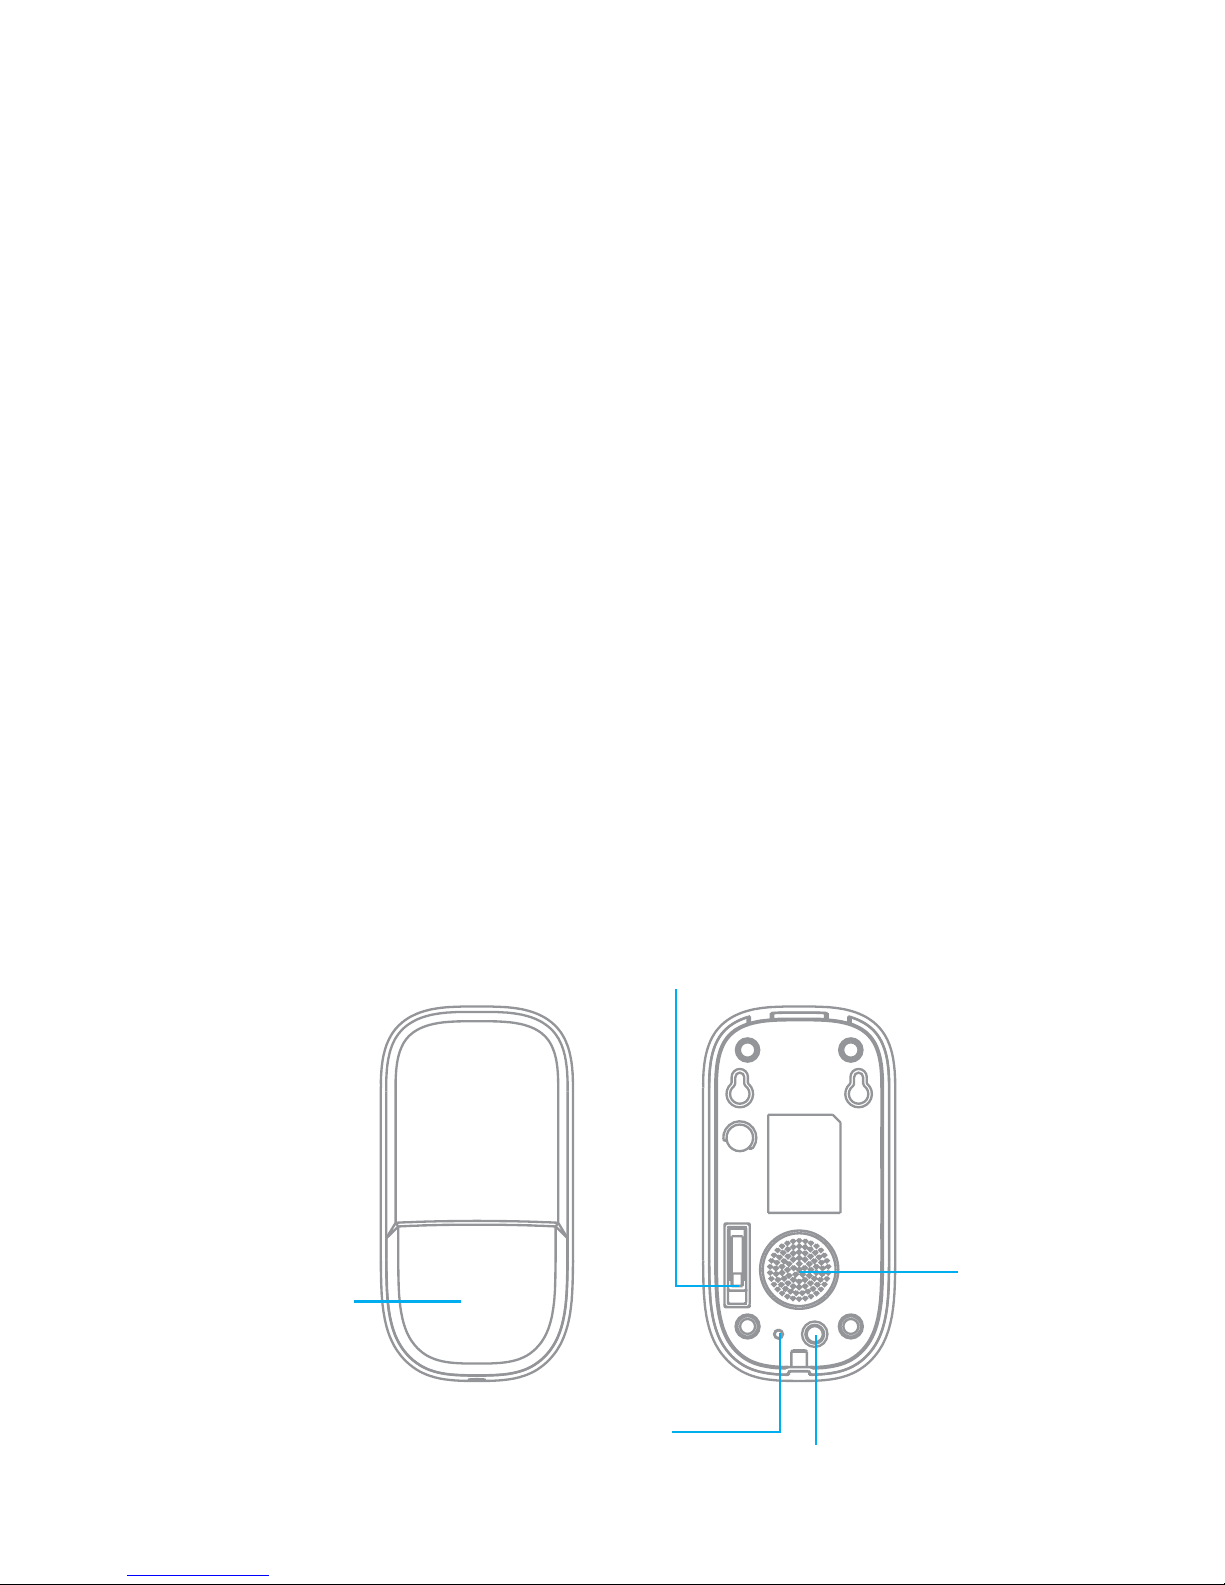
Layout
Tamper switch
Siren
Power switch
Connect button
Strobe light
Page 4

Use as an additional siren
If the siren is used as an additional siren, it must be
registered to your alarm’s control panel. If the alarm
is triggered, the ES-S7AU will ring out and its LED
lights will turn on.
Register the ES-S7AU in the control panel
Regardless the system is armed or disarmed,
press the Connect button to switch to Connection
mode. The LED indicator turns on: you are now in
connection mode for 20 seconds. Press any of the
“SOS”, “ Disarm” or “Arm” buttons on the control
panel of your alarm system. You hear short beeps:
the siren has been registered in the control panel
successfully.
Note
Do not trigger any sensor when registering the
siren in the control panel.
Test
Press the “Arm” button on the control panel. The
built-in speaker of the control panel beeps and
the LEDs of the ES-S7AU turn on for 4 seconds: the
connection is successful. If not, the connection has
failed, try registering the siren again.
Page 5

Use as a standalone alarm system
The ES-S7AU can be connected to wireless
accessories to be used as an independent alarm
system.
When the system is armed, if a sensor is triggered,
the siren will ring out and the strobe lights will turn
on.
Connect a wireless sensor
Wireless sensors must be registered in the siren
before being used with it. Press the Connect button
to switch to connection mode. The LED indicators
turn on: you are now in connection mode for 20
seconds. Trigger the accessory (e.g. press any button
on the remote if you want to connect a remote
control). You hear short beeps: the accessory has
been connected to the siren successfully.
The siren supports up to 20 wireless accessories.
Test
Press the “Arm” button of the remote control. The
LEDs of the ES-S7AU turn on for 4 seconds: the
connection is successful. Trigger a sensor that is
already connected to the siren, the siren will ring
out. If not, the connection has failed, try registering
the siren again.
Page 6

Clear all accessories
It is recommended to clear every accessory from
the siren if you were to lose one of them, especially
if you have lost your remote control.
Regardless the system is armed or disarmed, press
and hold the Connect button until you hear 3
beeps (7 seconds): all accessories or contol panels
connected have been cleared from the siren. To use
the siren again, register wireless accessories in the
siren again.
Specications
Power supply
Input: AC 110V
~ 220V/50-60Hz
Output: DC 12V/800mA
Static current
< 2mA
Alarm current
< 300mA
Volume
100dB
Radio frequency
315MHz (±75KHz)
Housing material
ABS plastic
Operating conditions
Temperature:
14 °F ~ +131 °C
Relative Humidity: ≤80%
(non-condensing)
Dimensions
5.71” x 2.93” x 1.5”
Page 7
Standards
This product bears the selective sorting symbol for
waste electrical and electronic equipment (WEEE).
This means that this product must be handled
pursuant to European Directive 2002/96/EC in
order to be recycled or dismantled to minimize
its impact on the environment. For further
information, please contact your local or regional
authorities. Electronic products not included in the
selective sorting process are potentially dangerous
for the environment and human health due to the
presence of hazardous substances.
In compliance with European laws.
This product was designed and manufactured
in compliance with Directive 2002/95/EC of the
European Parliament and of the Council on the
restriction of use of certain hazardous substances in
electrical and electronic equipment (RoHS Directive
- RoHS) and is deemed to comply with the maximum
concentration values set by the European Technical
Adaptation Committee (TAC).
Manufactured in China.
Page 8

FCC Statement
This device complies with Part 15 of the FCC rules. Operation is
subject to the following two conditions: (1) This device may not
cause harmful interference, and (2) This device must accept any
interference received, including interference that may cause
undesired operation. Any change or modication not expressly
approved by eTIGER may void the user’s authority to operate
the equipment.
This equipment has been tested and found to comply
with the limits for a Class B digital device, pursuant to Part
15 of the FCC Rules. These limits are designed to provide
reasonable protection against harmful interference in a
residential installation. This equipment generates, uses and
can radiate radio frequency energy and, if not installed and
used in accordance with the instructions, may cause harmful
interference to radio communications. However, there is
no guarantee that interference will not occur in a particular
installation.
If this equipment does cause harmful interference to radio or
television reception, which can be determined by turning the
equipment o and on, the user is encouraged to try to correct
the interference by one or more of the following measures:
- Reorient or relocate the receiving antenna.
- Increase the separation between the equipment and receiver.
- Connect the equipment into an outlet on a circuit dierent from
that to which the receiver is connected.
- Consult the dealer or an experienced radio/TV technician for
help.
Images, illustrations and text are non-contractual. ETIGER and
the ETIGER logo are registered trademarks and the property of
ETIGER. Copyright © 2015 ETIGER. All rights reserved.
ES-S7AU–UM-EN20150310-1.0-W
Page 9
ETIGER USA
1500 Fashion Island Blvd. Suite 102, San Mateo, CA 94404, USA
This user manual is available in other languages at
www.etiger.com/us/support
 Loading...