

Page 1
In-Servicing Guide
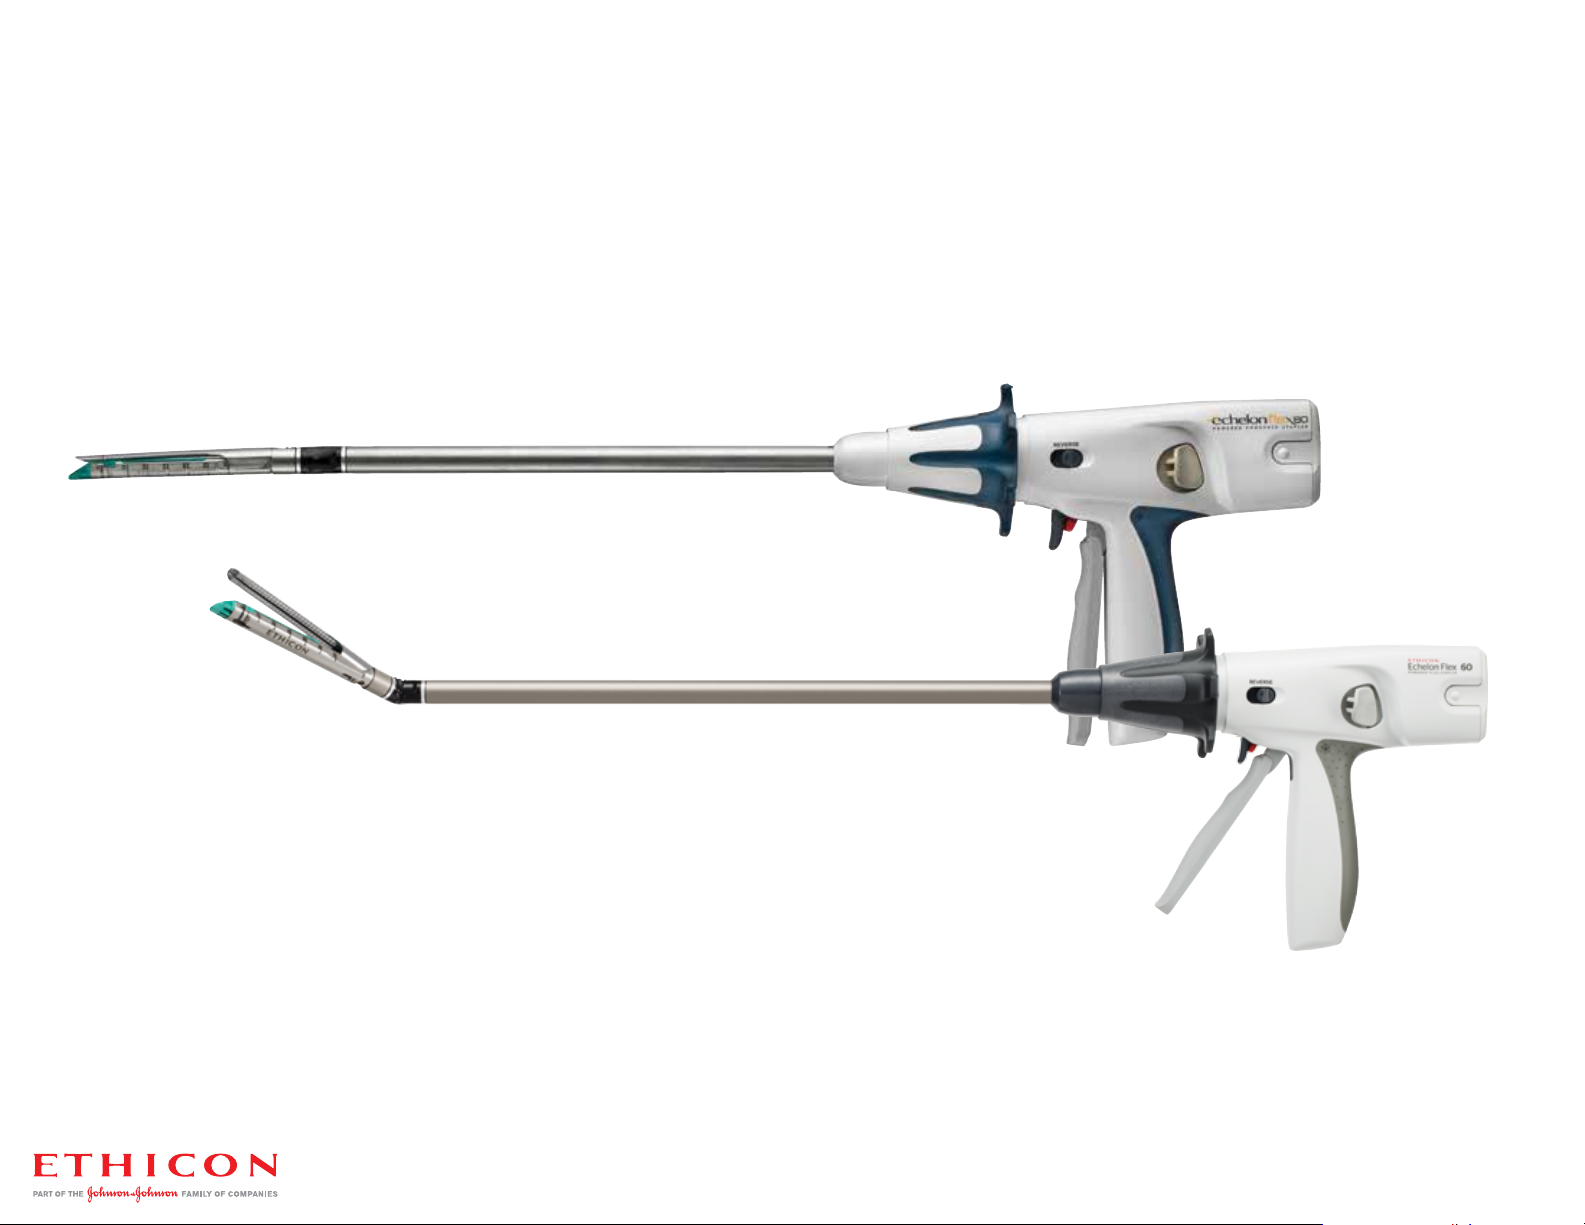
ECHELON FLEX™ Powered
Powered Plus Staplers
and
Page 2
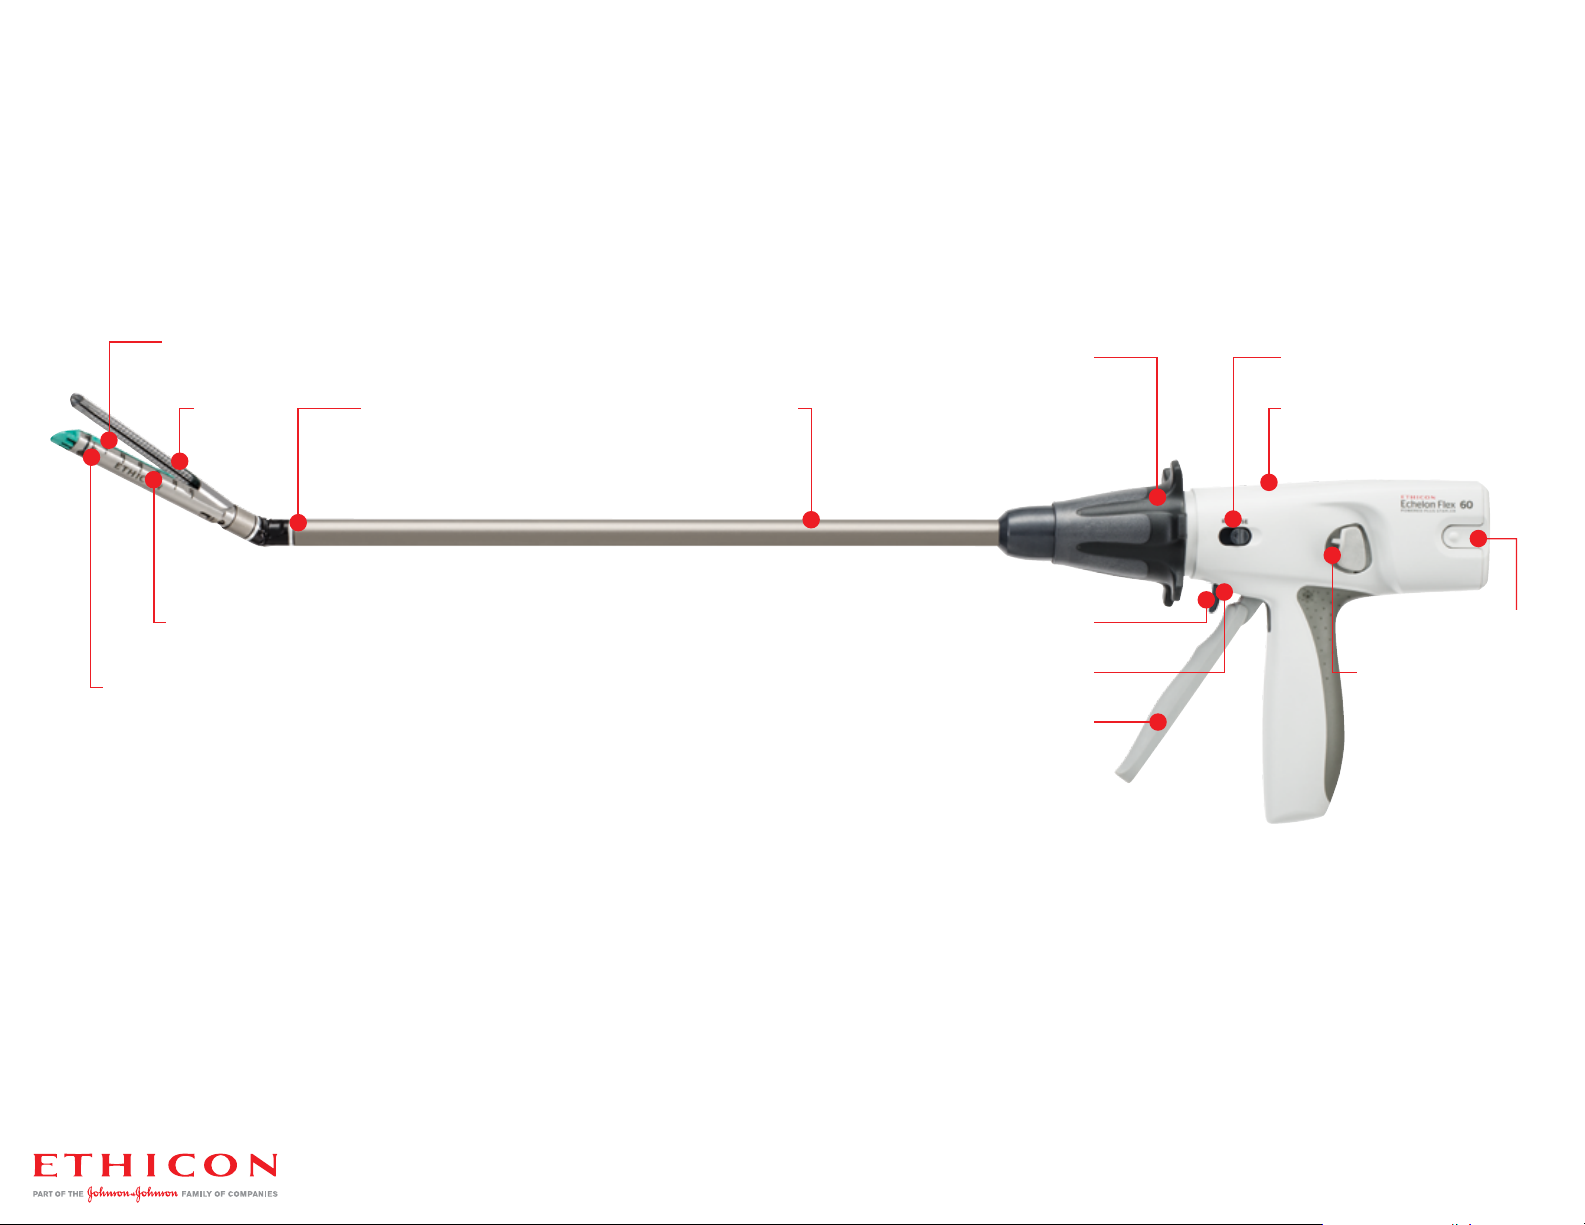
Nomenclature
Reload Alignment Slot
Anvil Jaw
Reload/Cartridge Jaw
Knife Blade Indicator
Articulation Joint Shaft
Articulation Fin and Rotating Knob
Firing Trigger
Red Firing Trigger Lock
Closing Trigger
Knife Reverse Switch
Manual Override
Battery Pack
Anvil Release Button
Page 3
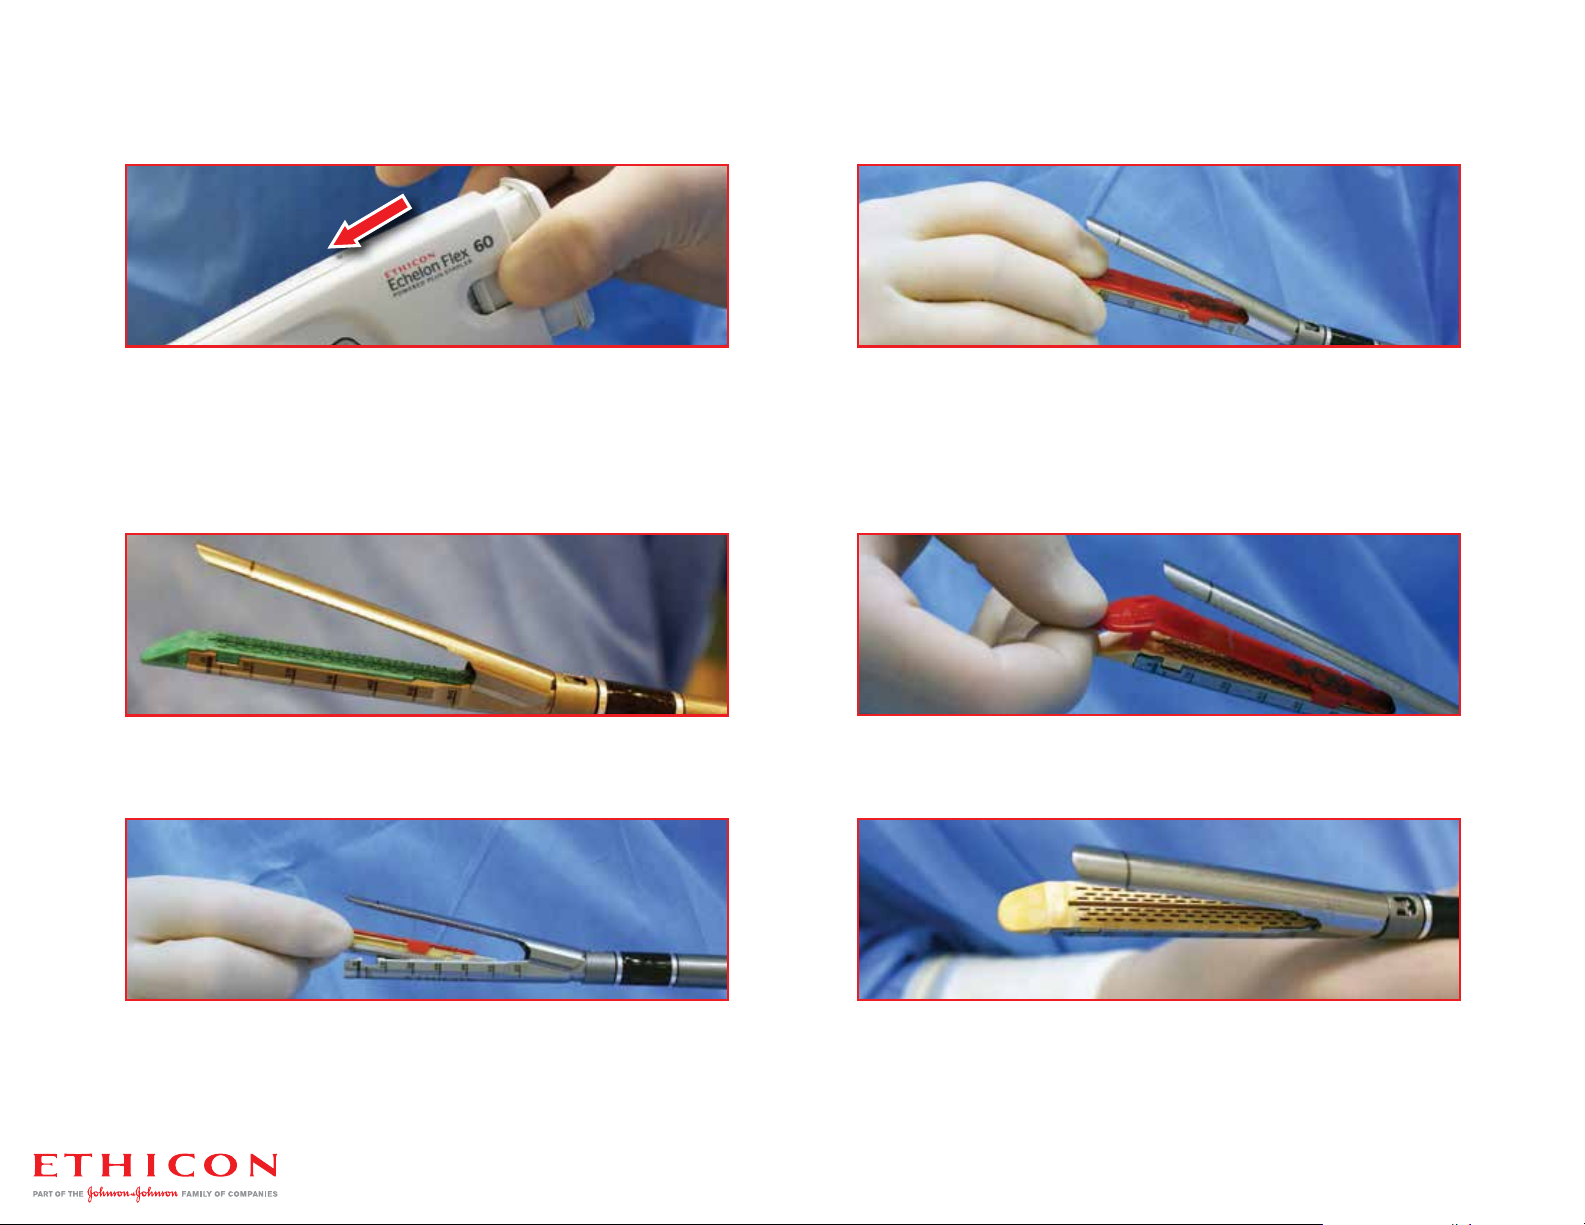
Loading the Device
1. Install the battery pack. An audible click will be heard when the
battery pack is fully inserted. It can be inserted in either orientation;
there is no up or down.
Note: Tissue thickness should be carefully evaluated prior to using
the instrument. Refer to the Reload Product Codes Chart for proper
reload selection.
2. Verify that the reload size matches the instrument size to be used
(e.g., use 60mm reload with 60mm stapler).
4. Snap the reload securely in place.
5. Remove the staple-retaining cap by lifting it straight up and discard.
3. Ensure that the staple retaining cap is present. Insert the reload
by sliding it against the bottom of the reload jaw until the stapler
alignment tab stops in the reload alignment slot of the jaw.
6. Observe the surface of the new reload to ensure no colored drivers
are visible and that the reload lies lat in the jaw channel.
Page 4

Opening and Closing the Jaws Articulation
1. Close the jaws of the instrument by squeezing the closing trigger
until a click is heard. The audible click indicates that the closing
trigger and the jaws are locked.
2. To open the jaws, squeeze the closing trigger, and then
simultaneously push the anvil release button on the side of the
device. Maintain pressure on the anvil release button and slowly
release the closing trigger.
Ensure that the jaws are in the open position.
1. Pull back and hold the articulation in to activate the articulation joint.
2. Apply lateral pressure to the jaws to articulate the device.
3. Release articulation in to lock jaws into articulated position.
4. Clamp, staple, cut, return, release.
Four Ways to Articulate
1. Against the body wall 3. Against a grasper
2. Against tissue in the body
4. Hand assisted
Page 5

Firing the Device
1. Ensure that the tissue lies lat and is positioned properly between the
jaws and that no obstructions (e.g., clips, stents) are within the jaws.
Any “bunching” of tissue along the reload may result in an incomplete
staple line.
2. Fully close the closing trigger until it clicks (audible click will occur).
Note: Holding the jaws in place for 15 seconds after closing and prior
to iring may result in better compression and staple formation.
3. Pull back the red iring trigger lock.
4. Pull the exposed trigger to ire (motor will be audible).
Note: Alternately, for enhanced tissue compression when using the
ECHELON FLEX™ Powered Plus Stapler, the user may pulse the iring
trigger throughout the iring cycle until the transection is completed.
5. When the motor stops, release the iring trigger to automatically return
the knife to the home position.
Page 6

Opening the Jaws
1. Ensure the knife is in the home position by doing a visual check
on the underside of the reload jaw. The jaws will not open if the knife
is not in the home position.
2. Squeeze the closing trigger, and then simultaneously push the anvil
release button on the side of the device. Maintain pressure on the
anvil release button and slowly release the closing trigger.
Stapler Lockout
Under certain circumstances the stapler will lockout. These include
instances when no cartridge or an incorrect or used cartridge are
present. At any time, if the knife reverse switch does not return the knife
to the home position and the jaws will not open:
1. Reverse: Slide the knife reverse switch forward.
2. Battery: Remove and re-install the battery to check that it is securely
installed and that the device has power.
3. Reverse: See Step 1.
4. Override: If the knife does not return, use the manual override (remove
the access panel labeled “Manual Override” on the top of the handle).
Note: After the manual override is used, the device becomes
nonfunctional.
Page 7

Manual Override System
Reloading the Device
ONLY to be used if the reverse switch does not return the knife blade.
1. To use the manual override, remove the access panel labeled “Manual
Override” on the top of the instrument handle. The manual override
lever will be exposed.
2. Apply force to move the lever forward and backward until it can no
longer be moved.
1. Push upward (toward the anvil) to unsnap the reload from the reload jaw.
2. Prior to reloading the instrument, hold the instrument in a vertical position,
with anvil and reload jaw completely submerged in sterile solution. Swish
vigorously and then wipe the inside and outside surfaces to clean any
unused staples from the instrument.
3. Follow the same steps outlined earlier in the “Loading the Device” section.
Page 8

Battery Pack Disposal
Because of the built-in battery drain, it is safe to discard the battery
pack in the normal medical waste stream. If your local regulations
require lithium batteries to be recycled, the battery pack must irst be
decontaminated according to the instructions below.
1. Disconnect the battery pack.*
IMPORTANT: Do NOT incinerate/autoclave battery pack in
the hospital.
• Per the manufacturer, the batteries are not to be exposed to
temperatures above 100 degrees Celsius.
• The batteries are not reusable and do not need to be sterilized.
• Do not use Ethylene Oxide (EtO) process for battery pack.
* NOTE: In the event that the battery pack needs to be
decontaminated before disposal, follow this process between
Steps 1 and 2:
• Use a soft bristle brush to clean the battery pack surface with
a neutral pH detergent or neutral pH enzymatic detergent
(e.g., Simple Green D Pro 3,† 10% bleach, 70% isopropyl alcohol),
prepared according to the manufacturer’s instructions.
• Thoroughly scrub areas that contain crevices.
• Thoroughly wipe o detergent with lukewarm tap water (DO NOT
SUBMERGE IN WATER OR DETERGENTS).
• Visually inspect to ensure the debris is removed. Repeat cleaning
if necessary to obtain a visually clean battery pack.
†
Simple Green D Pro 3 is a registered trademark of Sunshine Makers, Inc.
2. Discard pack in the normal medical waste stream.
Page 9

For complete product details, see Instructions for Use.
©2014 Ethicon US, LLC. All rights reserved. 019927140814
 Loading...